How to cut craft foam shapes on iCraft LLiS
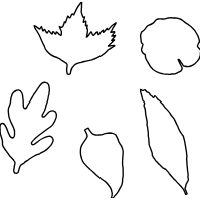
I have hand drawn these little leaves to cut out on 1.8-2mm craft foam, to make ink stamps to use on paper or fabric. The settings were a bit tricky to get right but I kept testing and ended up with a usable result.
There are also no automatic settings for cutting craft foam in the pre-set material library.
Material: cheap craft foam A5 pack, approximately 1.8-2mm thick
Blade: deep point
Machine: iCraft 2.0
Mat: standard grip, with painters tape to secure sides
to get started, I only done test cuts, little squares first then I changed to use my leaves as test cuts because the shapes varied and the blade dragged and made overcuts, so this was the best way to finalise my test.
change the fine point blade to the deep point blade.
When you don’t know what cut settings to use, start with anything
1st test cut
force 8.5
speed 1
passes 1
thickness 0.00
deep force off
test shape: little squares
this setting was a fail! It chewed up the craft foam
5 tests failed, It cut better but overcut the inside curves at the pivot points, here’s how I stopped/minimised the overcuts
4th test low and slow
force 4.5
speed 1
passes 4
check the box “deep cut” cuts the material multiple times with gradually increased force.
this setting worked! Clean cuts and rounded areas as good as it were going to get.
after pass 4 it didn’t look like it cut all the way though, but I was able to pull the cut leaves out of the craft foam easily.
Finishing: add veins on the leaves
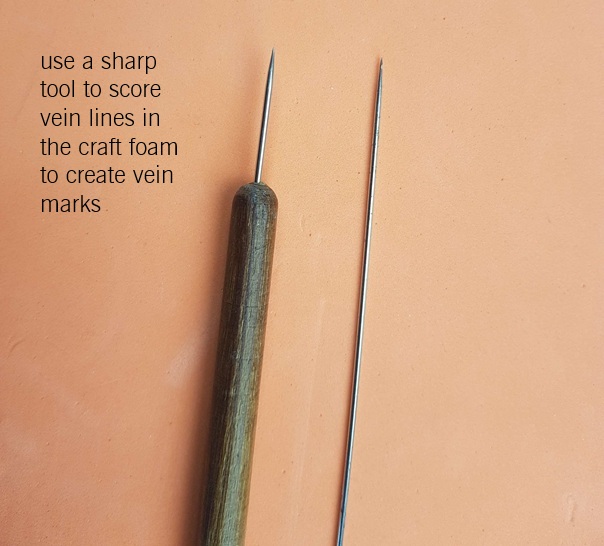
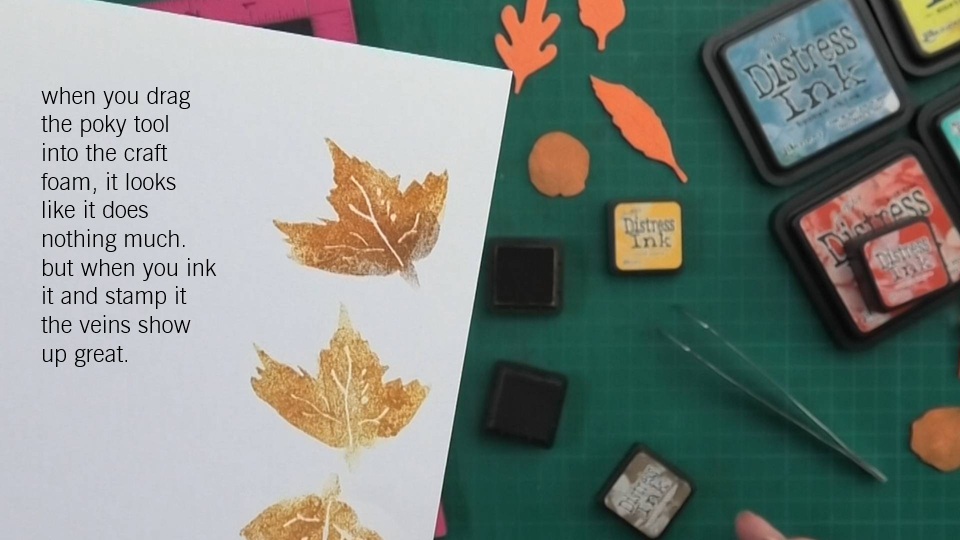
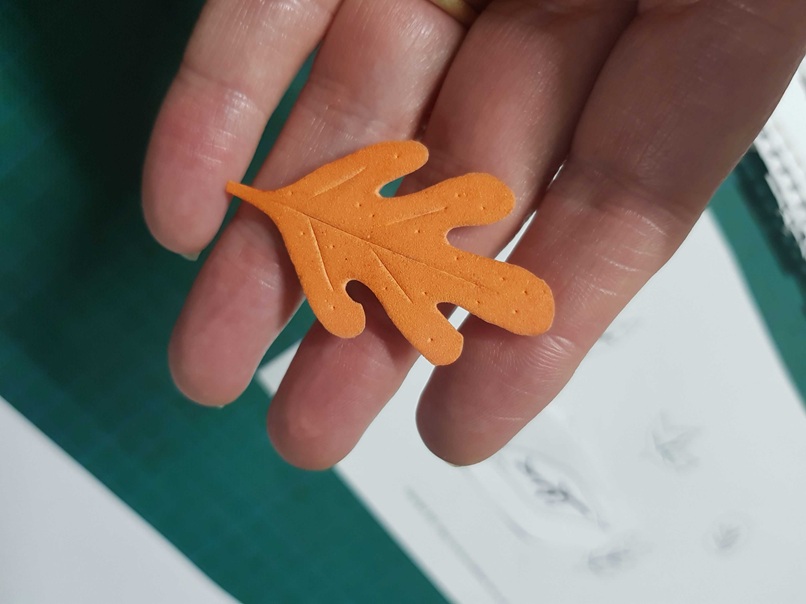
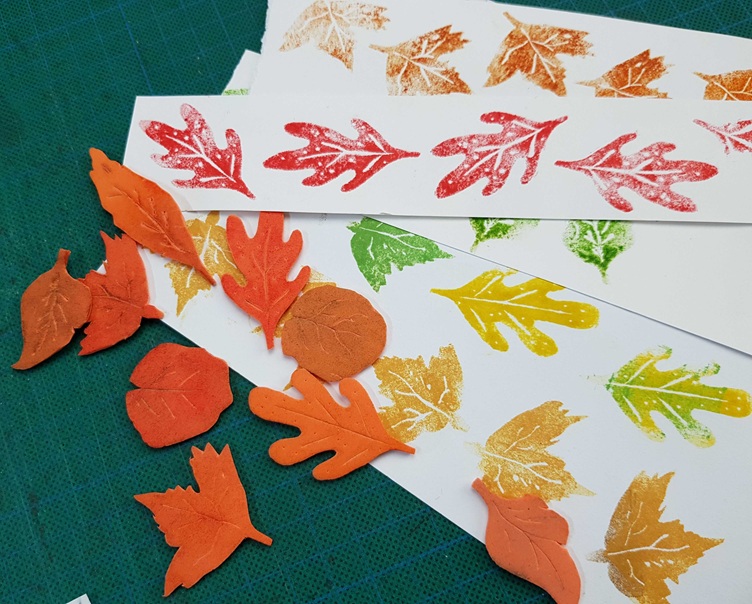
Once you have cut out the leaf shapes you can drag a sharp poky tool or a thick needle over the leaf shapes where you would normally see veins. you can add random dots as well, it makes the most adorable little leaves, you can add random dots as well, it makes the most adorable little leaves, and you can use fall colours to stamp them on anything you like.
full process step by step How to VIDEO coming soon