
A300 Auto Hat Press- Part 3 Review
For the next phase of testing, I moved on to sublimation on a hat, which is always a great way to truly test heat consistency, pressure, and alignment. I set the A300 to 365°F for 15 seconds, a setting I’m comfortable with for sublimation on this type of substrate.
The setup process was straightforward and very controlled. I placed the hat onto the bottom bar and tightened it securely using the adjustment bar, making sure the surface area was smooth and evenly stretched. This step is crucial for sublimation, and the A300 made it easy to get the hat snug without over-tightening or distorting the shape.

Once the hat was positioned, I prepared my sublimation print from my printer and carefully aligned it on the hat. I used heat tape to secure the transfer, taking extra care to tape all edges to prevent ghosting or shifting during the press. Having the hat firmly held in place made this part much easier and eliminated the usual struggle of everything moving at once.

Before pressing, you should place butcher paper over the design to protect both the hat and the press, which is a must when working with sublimation (i actually forgot with this press). With everything layered and secured, I slid the press into position over the heat area and started the cycle.

The press heated quickly and maintained a consistent temperature throughout. The auto-press action was smooth and even, which is especially important for sublimation since uneven pressure can affect ink transfer. When the cycle finished and I lifted the press, the process felt clean, controlled, and stress-free. The hat did have just a bit of ghosting, but that was due to the tape on the right lifting slightly.


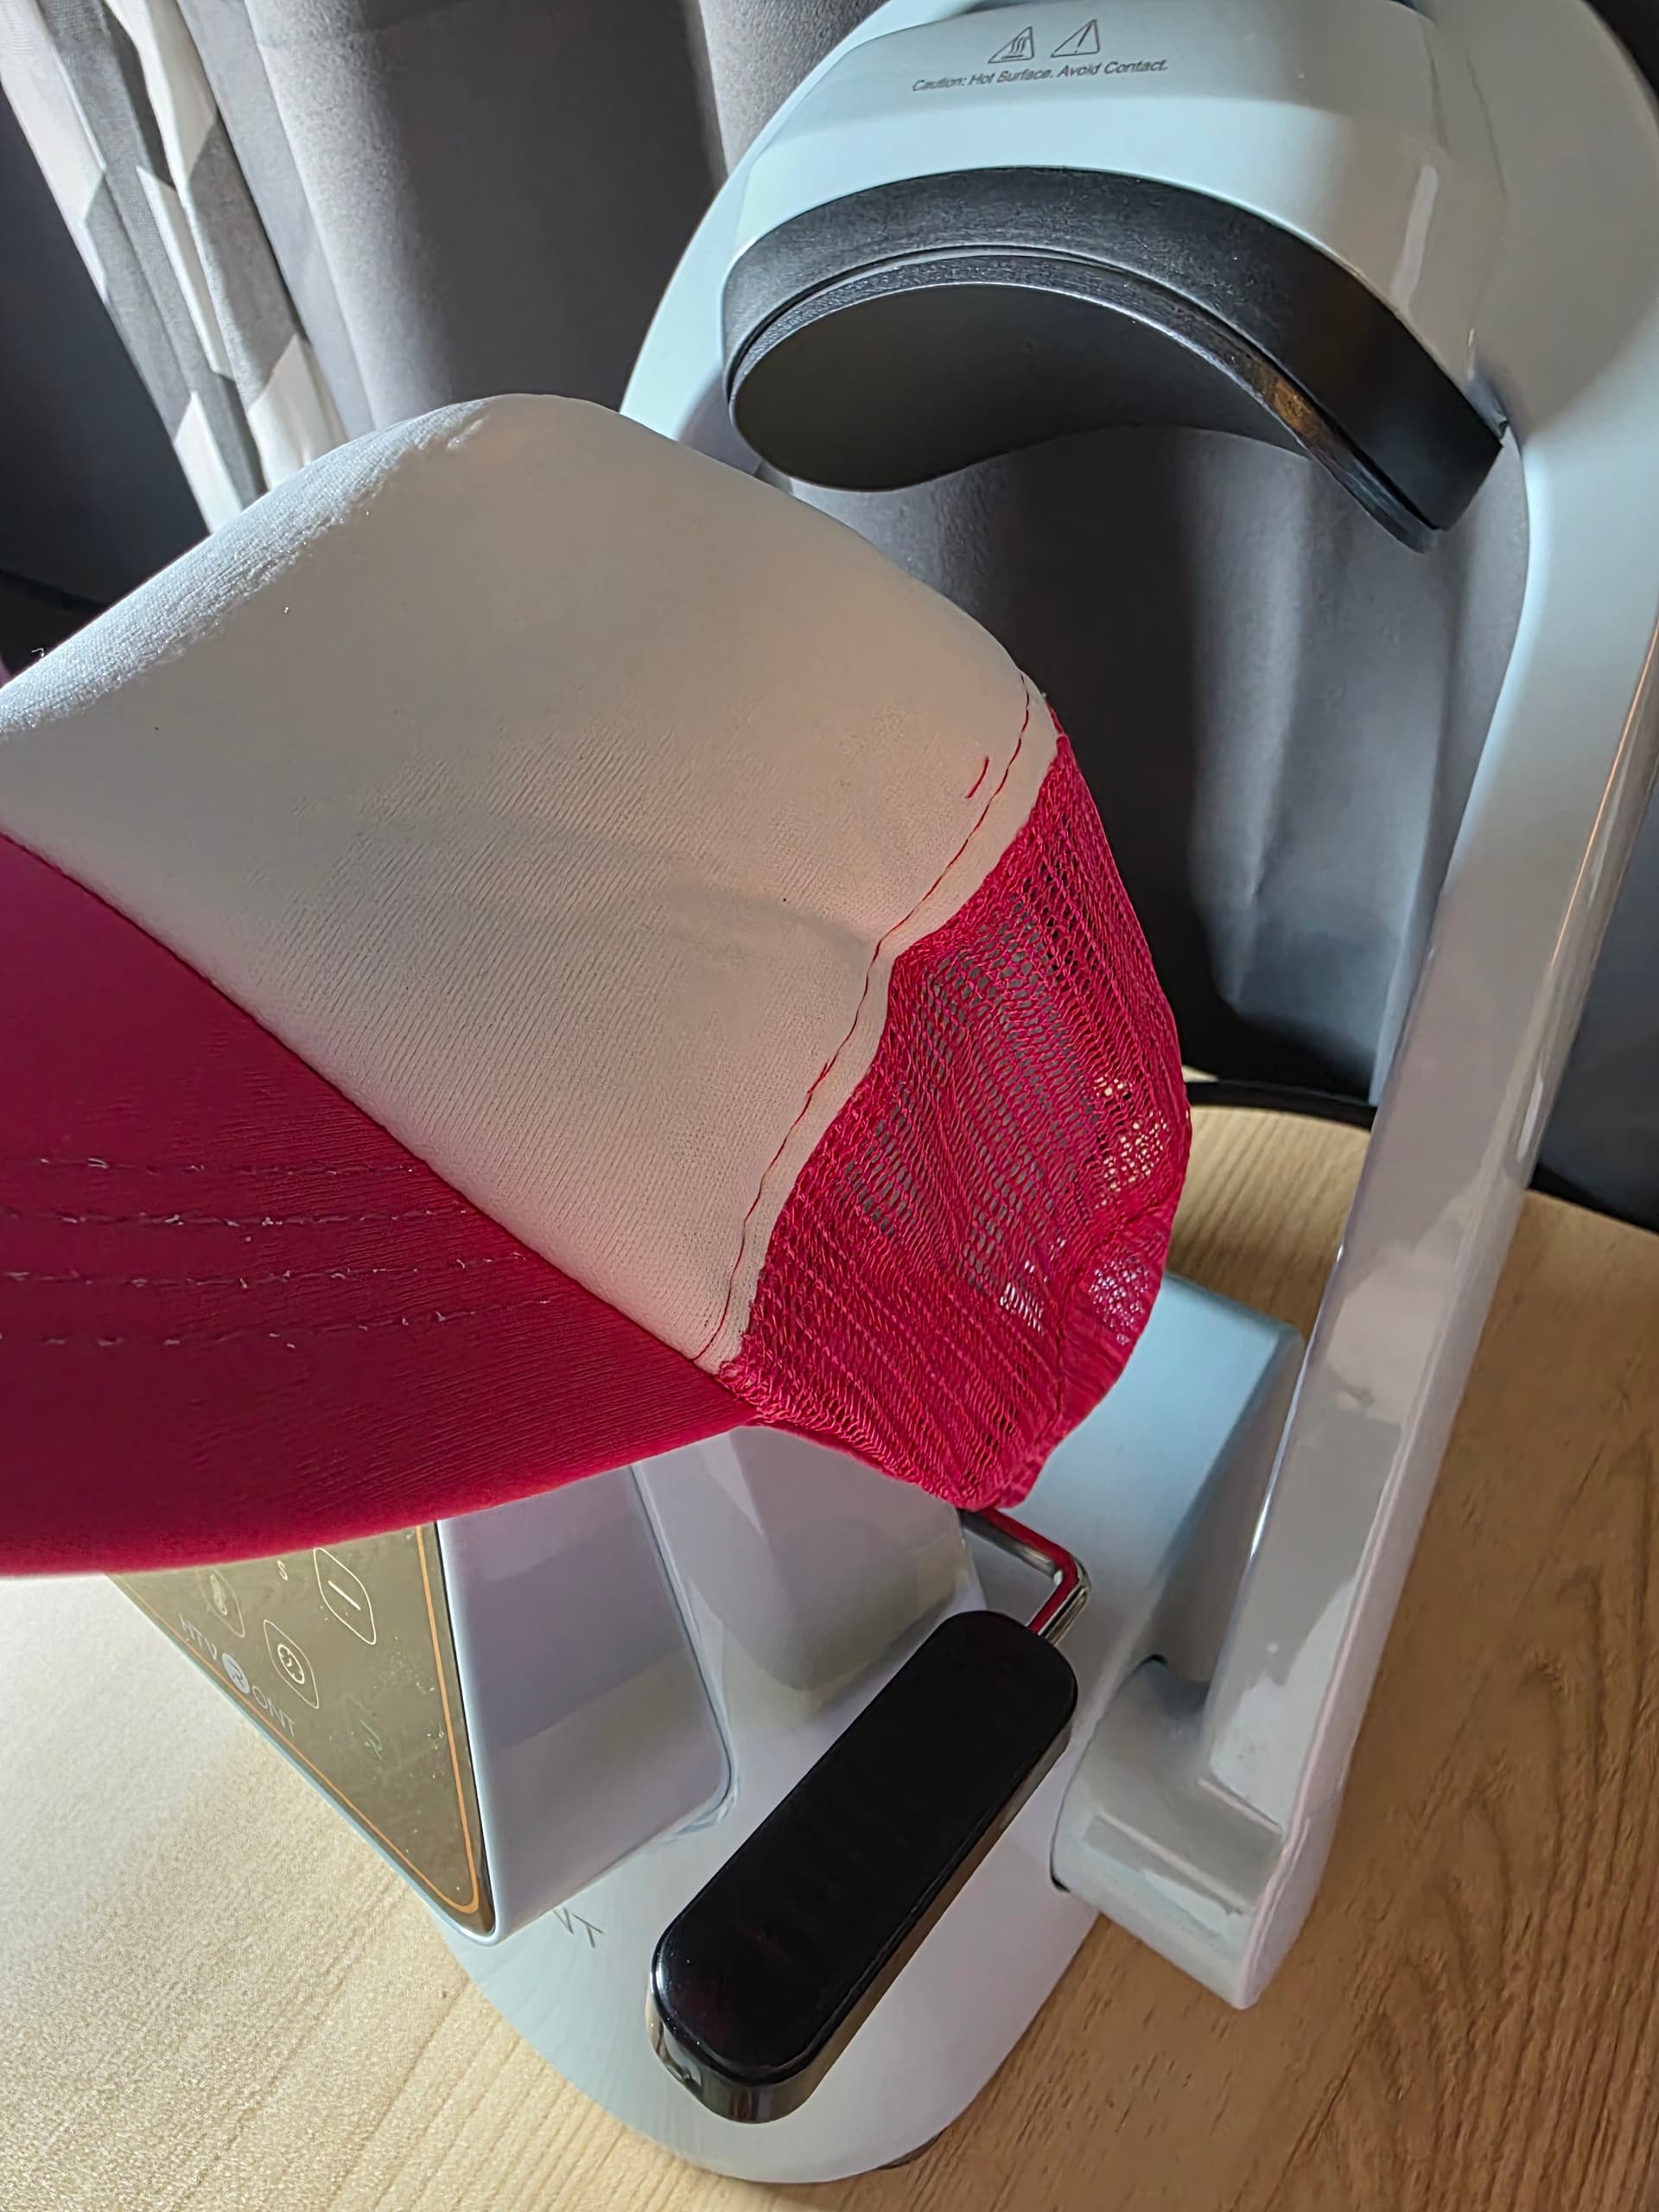
Sublimation Headband
After completing the sublimation hat, I moved on to a sublimation headband, which is a great test for even heat coverage, especially around seams and curved surfaces. To start, I secured the headband onto the press, paying close attention to placement. I made sure the seam sat slightly over the edge of the press, which helps prevent uneven heating and avoids pressure buildup along the stitched area.

Once the headband was positioned correctly, I placed my sublimation print onto the fabric, carefully centering the design for balanced coverage. I used heat tape to secure the print in place, making sure it was fully taped down to prevent shifting or ghosting during the press cycle.

Before pressing, I placed butcher paper over the entire design to protect the press and ensure a clean transfer.

I then slid the press into position and set the machine to 385°F for 50 seconds.
Throughout the press, the A300 maintained steady heat, which is especially important for fabric sublimation. When the cycle finished and I lifted the press, the results were immediately noticeable, the colors came out vibrant, crisp, and well-saturated, with no fading or uneven spots. Even around the seam area, the transfer was clean and consistent.
This test really highlighted how well the press handles non-flat and fabric-based substrates. From controlled setup to consistent heat output, the process felt smooth and reliable, and the finished headband looked professionally done right off the press.

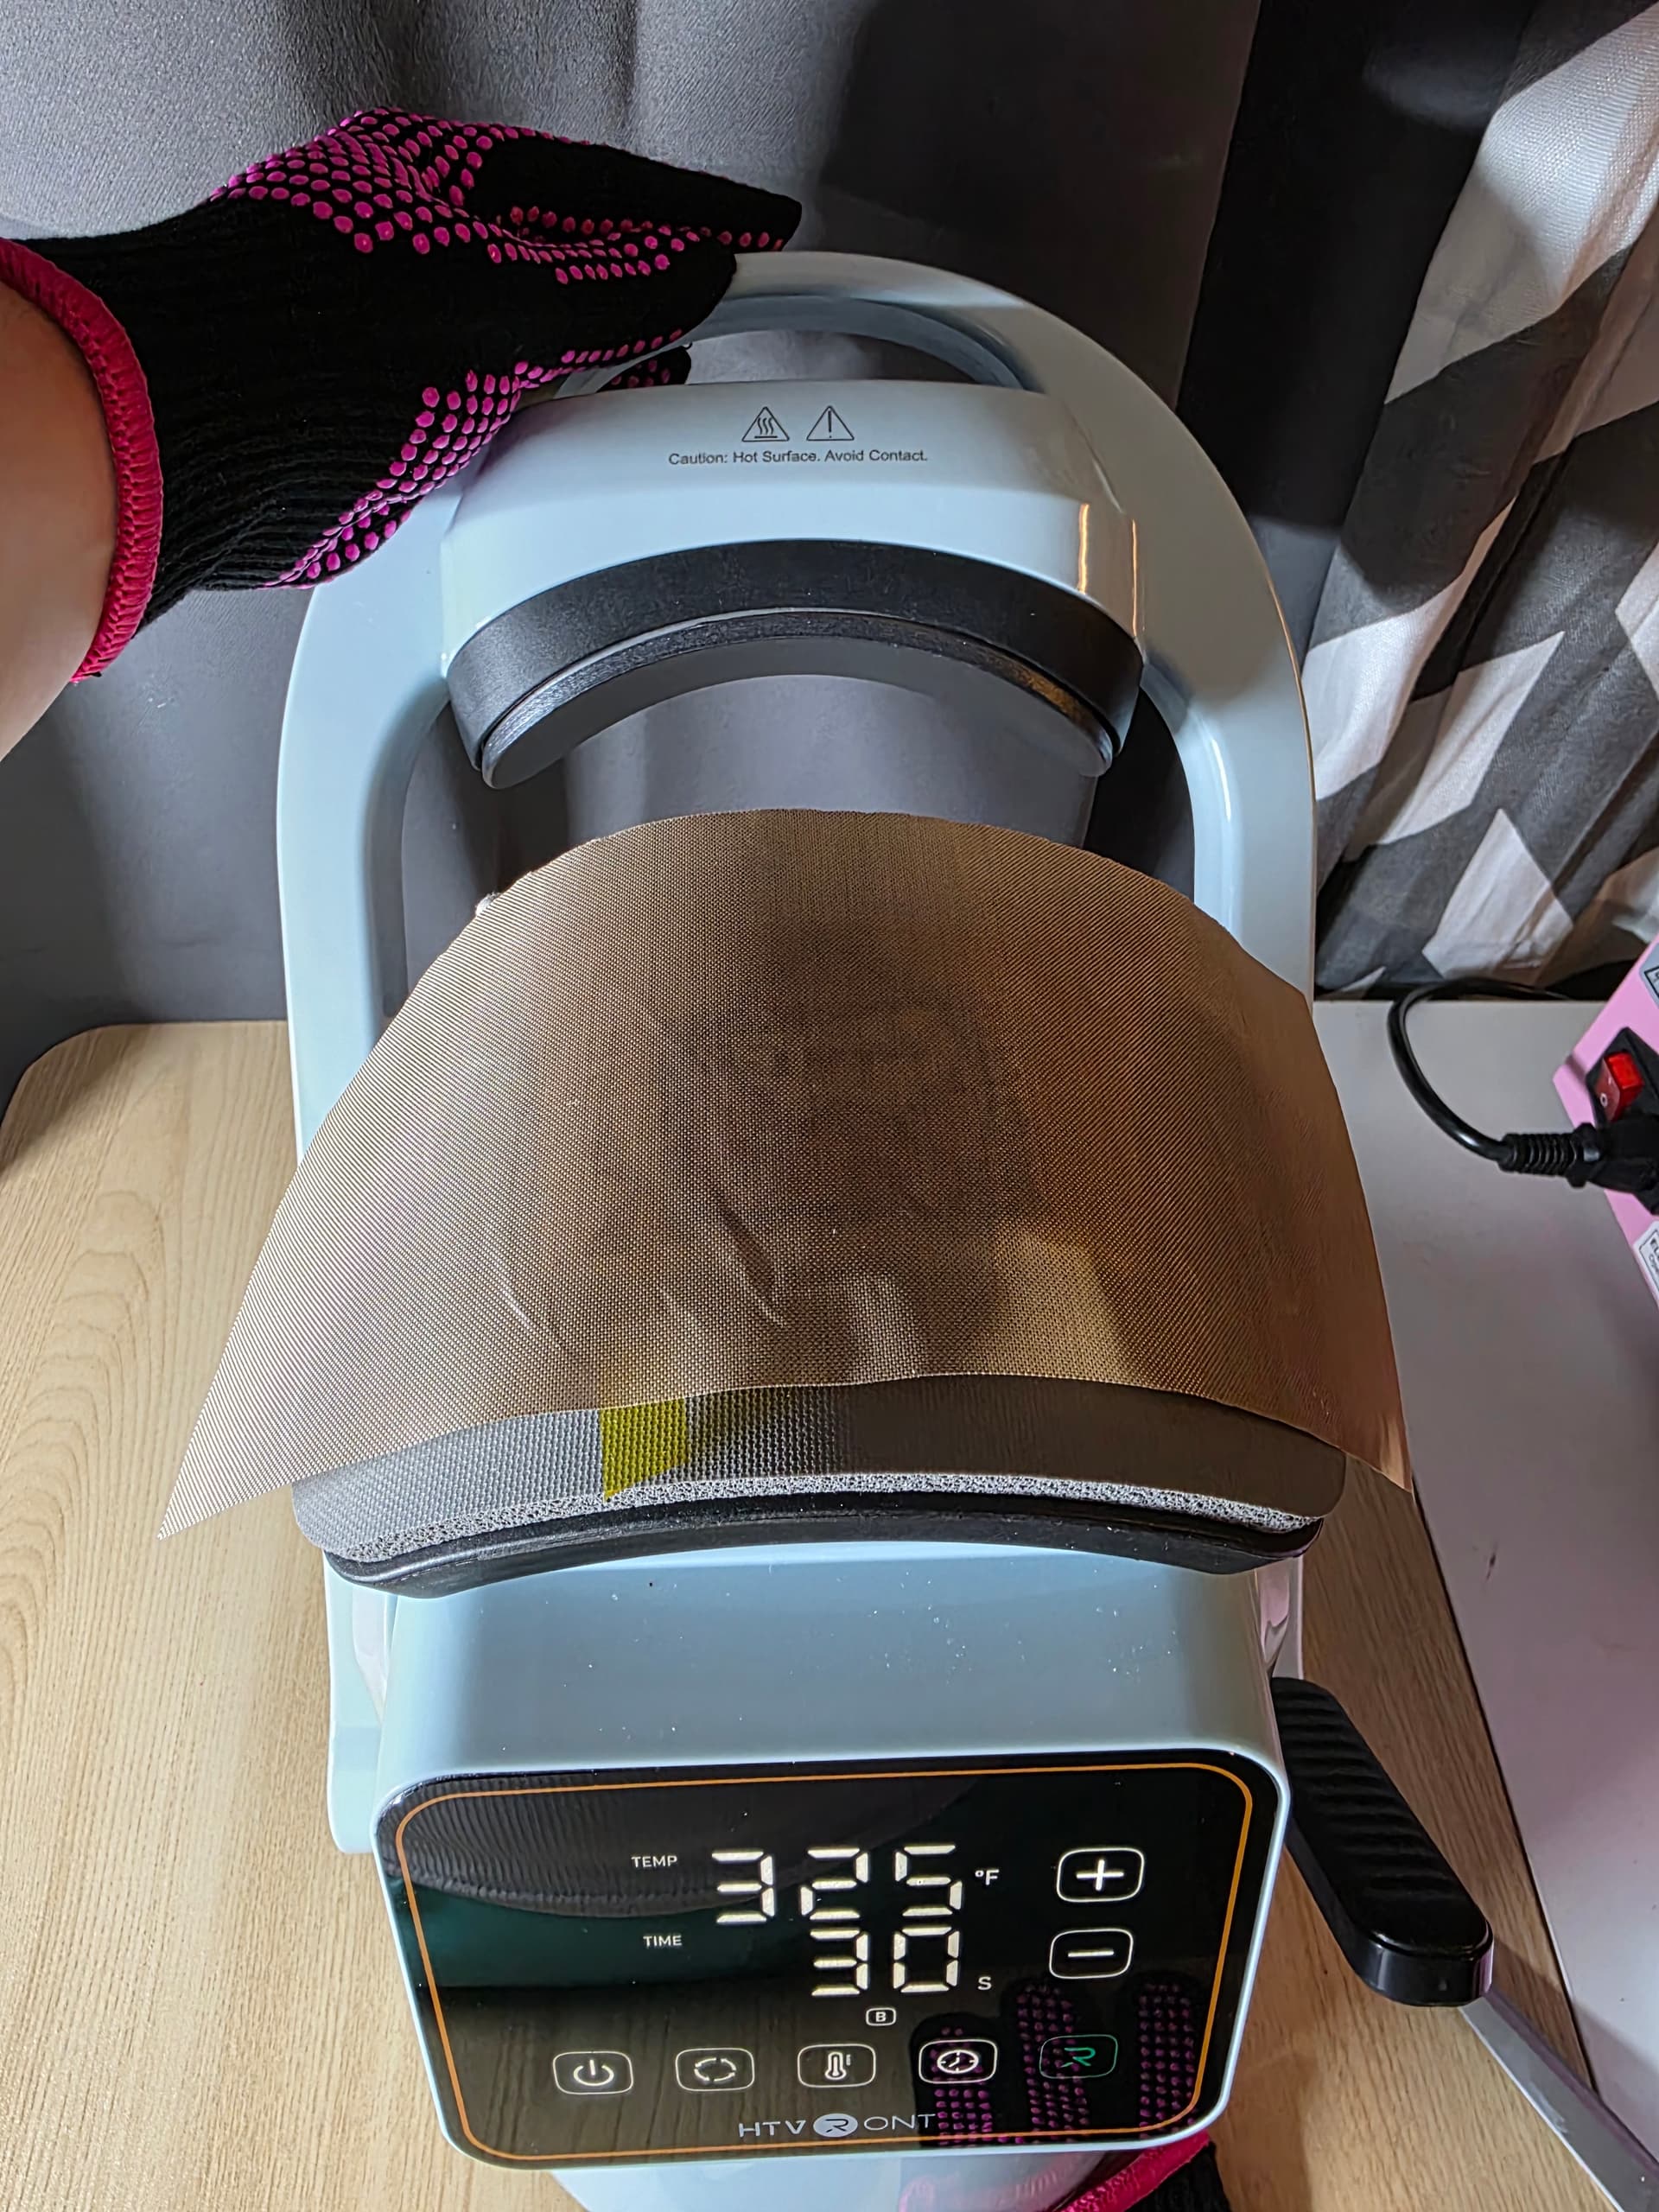
DTF on a Small Doll Shirt
For the last test in this round of my review, I wanted to try a completely different substrate and method, so I chose DTF on a small doll shirt.

I set the press to 325°F for 30 seconds, and one feature I really appreciated here was the ability to save and reuse settings. Using the button directly to the right of the power button, you can store your preferred temperatures and times and simply select which one you need based on what you’re pressing. I kept Preset B dedicated to DTF, which made switching between projects fast and seamless without having to reprogram the machine every time.


To prep the garment, I placed the small shirt onto the press, making sure the seams sat slightly off the edge to avoid pressure buildup and ensure even heat. I then positioned the DTF design and secured it with heat tape, which is especially helpful on smaller items where movement can easily affect placement.

Before pressing, I laid a Teflon sheet over the design to protect both the transfer and the press. Once everything was layered and aligned, I started the press cycle.
When it came time to peel, the transfer released perfectly clean edges, no lifting, and excellent adhesion. The press handled the small size effortlessly, and the entire process felt controlled and consistent from start to finish.

This final test really showcased how versatile the A300 is across multiple methods and substrates. From hats to headbands to DTF apparel, the press delivered reliable results every time, making it a powerful tool for both hobby crafters and small business owners alike.

If you’re a crafter or small business owner who wants professional results without complicated setups or bulky equipment, this press truly checks every box. It handles multiple methods such as sublimation, DTF, vinyl, patches and more…with consistent heat, reliable pressure, and a workflow that actually makes sense. The compact design is perfect for smaller craft spaces, yet the performance rivals much larger machines. From beginner-friendly features to time-saving presets and stress-free alignment, this press removes the guesswork and lets you focus on creating with confidence. Whether you’re testing new products, fulfilling custom orders, or growing a handmade business, this is the kind of tool that supports your creativity instead of slowing it down.


