
My daughter and I love to draw. So, we go through a lot of notebooks. I’m in a very big monogram era so I’m monograming everything. I downloaded a monogram SVG and use it to make this for my daughters’ notebook.
![]() Materials Used
Materials Used ![]()
- LOKLiK iCraft / Crafter
- HTV
- Standard Cutting Mat
- Weeding Tool
- Lint roller or rubbing alcohol and microfibre cloth
- Teflon Sheet
- Heat Mat
- LOKLiK Impress Mini 3 or heat source. You could use an Iron without the steam on.
![]() Step 1: Designing
Step 1: Designing ![]()
I downloaded the monogram and uploaded it to LOKLiK Idea Studio. I choose standard cut in the design panel and then resized it to fit my notebook. I pressed make and used the HTVRONT HTV cut setting. Don’t forget to mirror your design when you are working with HTV. Also place HTV shiny side down on the standard mat to cut. Load your mat into your machine and start the cut.
![]() Step 2: Weeding out our design
Step 2: Weeding out our design ![]()
After my monogram was finished cutting, I unloaded the mat. Then flipped the mat over and peeled the HTV away from the mat. With your weeding tool start weeding out the design from the corner. Go slowly and monitor your design to make sure you weed everything out. Anything stuck still on your carrier sheet will transfer to your blank and after that it’s very hard and messy to get it off. So, make sure you have weeded out your whole design.

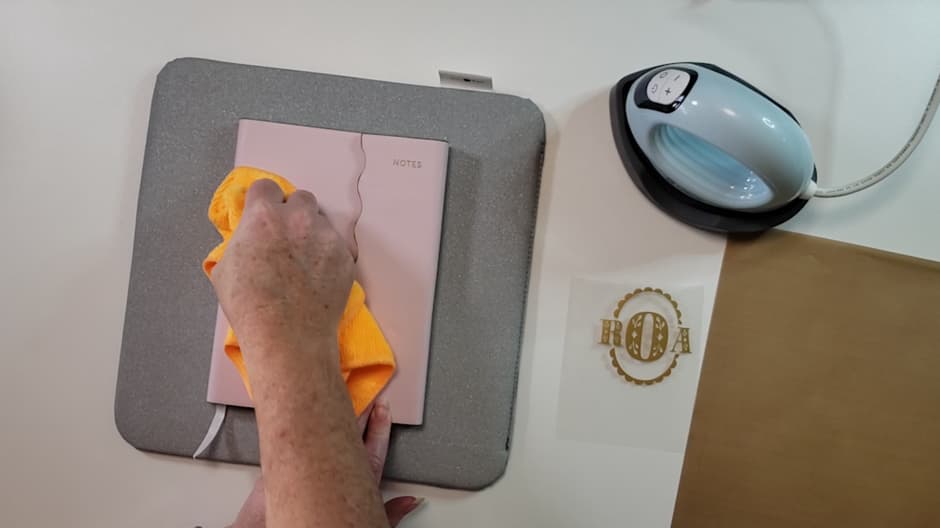
![]() Step 3: Prepare your blank
Step 3: Prepare your blank ![]()
Clean your blank with a lint roller or rubbing alcohol and a micro fibre cloth. My blank is a faux leather notebook and has been in my craft room for a long while with some stains and residue on it, so I’m going to use rubbing alcohol with the micro fibre cloth. Make sure you dry it completely before you start to apply your HTV. If you are doing a more fabric blank like a t-shirt use a lint roller.
I set my heat press to 150 C / 302F for 15 seconds. I placed my blank on a heat mat. Then placed a Teflon sheet over my blank to protect it. I then preheated my blank for about 5 – 10 seconds.

Now position your design on your blank.

Then long press the power button to start the timer and start pressing, moving the heat press around your design. If you are using a normal house iron, put it on cotton setting with no steam. You may have to press a little longer with your iron compared to a heat press.

My HTVRont HTV is cool peel so I cool it down on my glass mat. Slowly peel away the carrier sheet monitoring your design. If any of your design lifts up press again for another 5 seconds and try again.

My design stuck beautifully. I placed the Teflon sheet back over my design and pressed for another 5 seconds as per instructions.

I’m super happy with how this Notebook turned out. I like how the gold monogram matches with the other accents of the notebook. It almost looks like it was supposed to be there.

I hope you enjoyed this tutorial; I loved making it for you. If you have any questions please ask them in the comments below, I’m always happy to answer them. If you would like to craft along with me, check out my YouTube video below.

