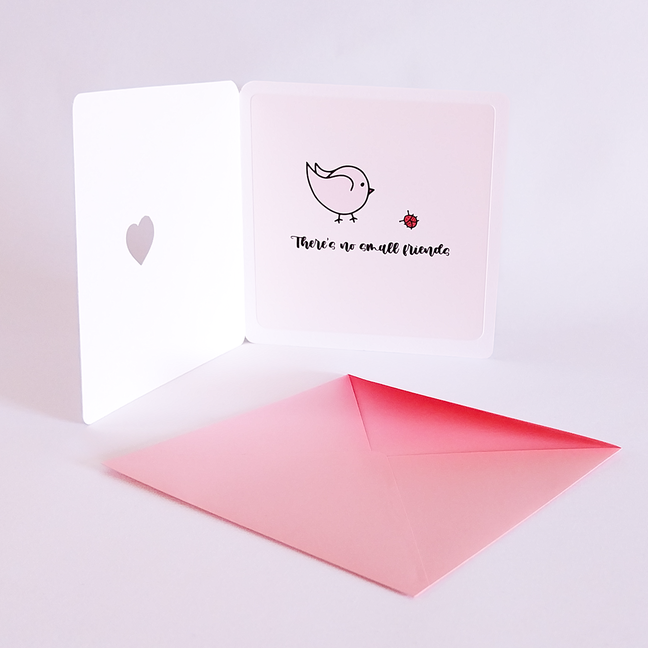
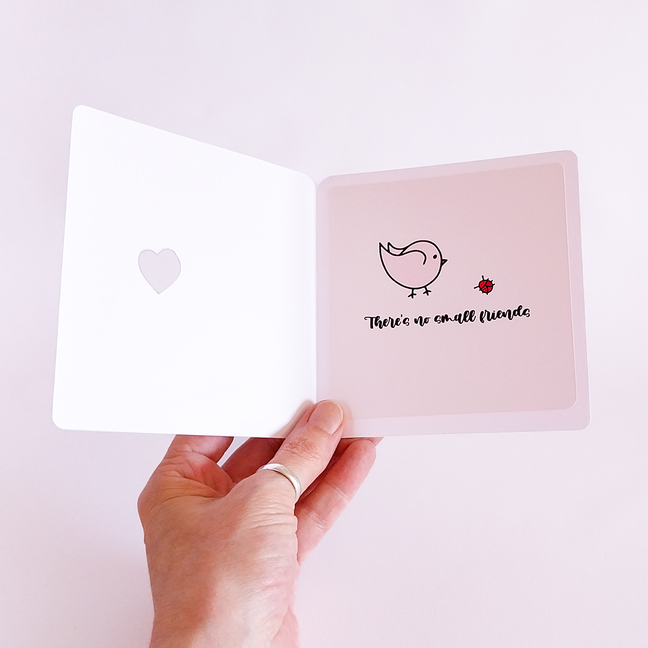
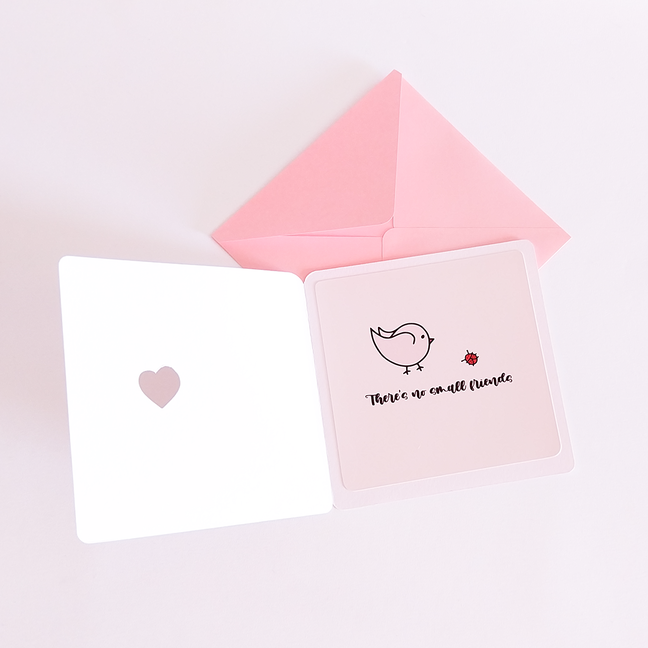
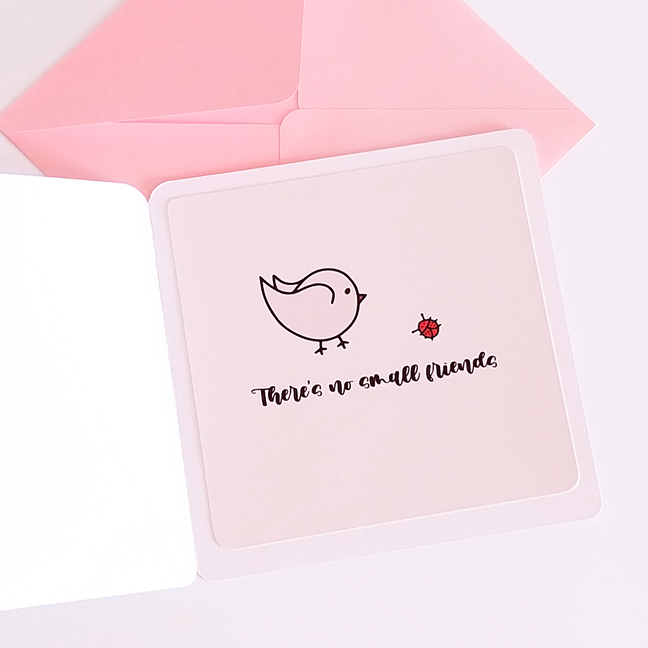
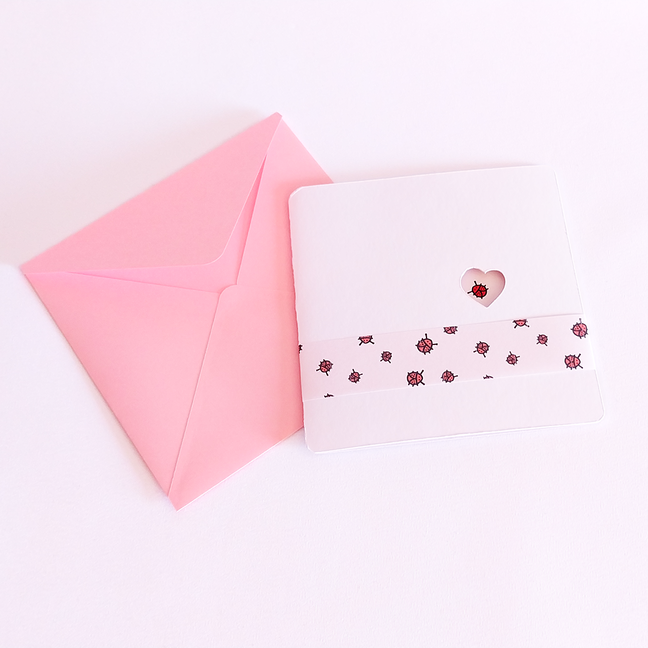
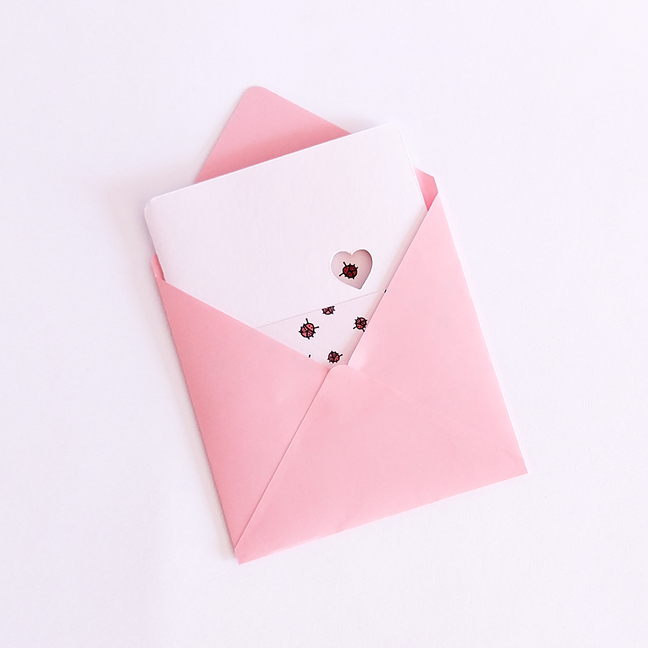
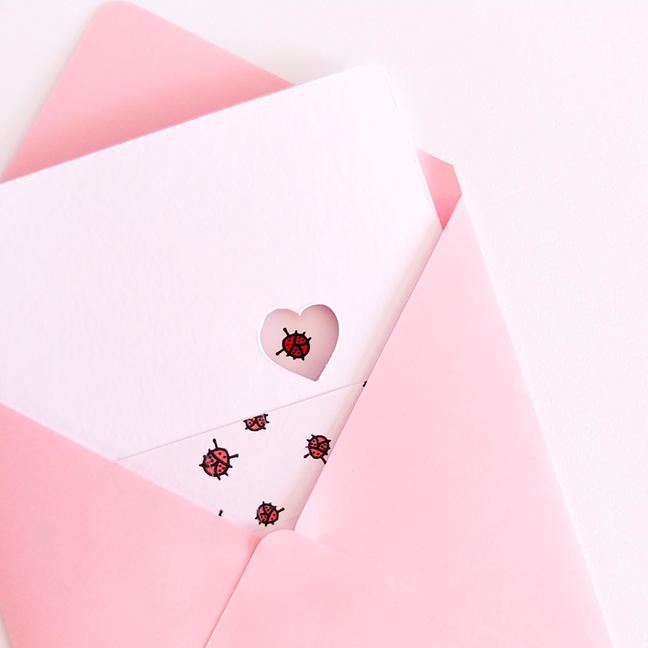
This 12x12 cm greeting card is made with high-quality high-grammage white cardstock, featuring a minimal and clean design that hides a sweet surprise inside. A small cutout on the front reveals a tiny ladybug, a glimpse of the illustration waiting within.
Inside, printed on glossy photo paper and mounted with care, there’s a soft pastel doodle of a warm pink chick gazing down at a tiny red ladybug. Beneath them, the hand-lettered phrase “There’s no small friends” brings meaning to the scene: a gentle reminder that even the smallest connections, every being, matter.
The card includes a matching square envelope in a coordinated color. For the photo setup, I added a ribbon with a seamless ladybug pattern to echo the focus element, while I couldn’t include the pattern SVG due to upload size limits, I hope to share it in a future project, so that we can even use it for the envelope or the envelope interior. I was looking forward to sharing a small illustration as part of the beta testing, and I really loved how it turned out.
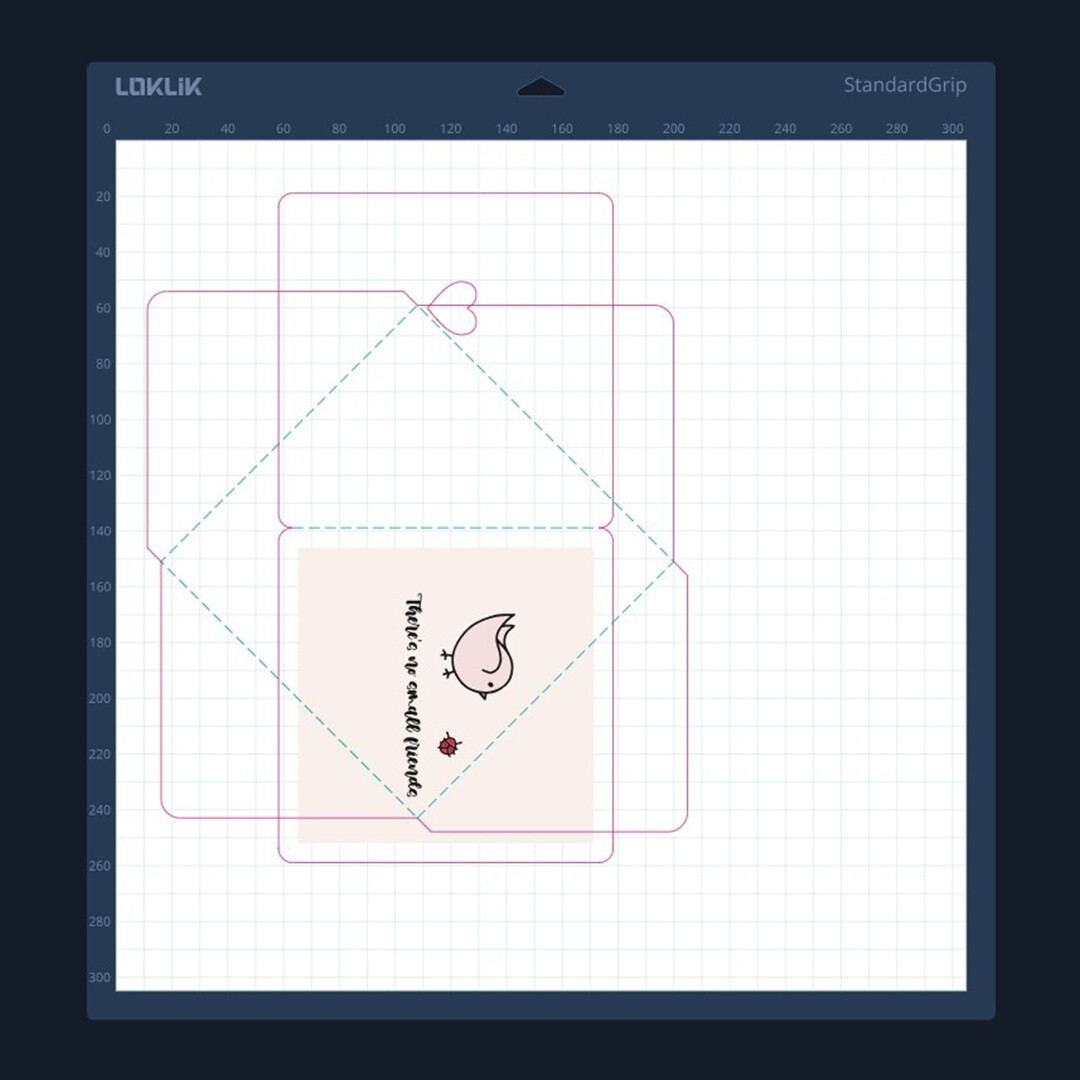
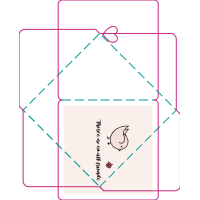
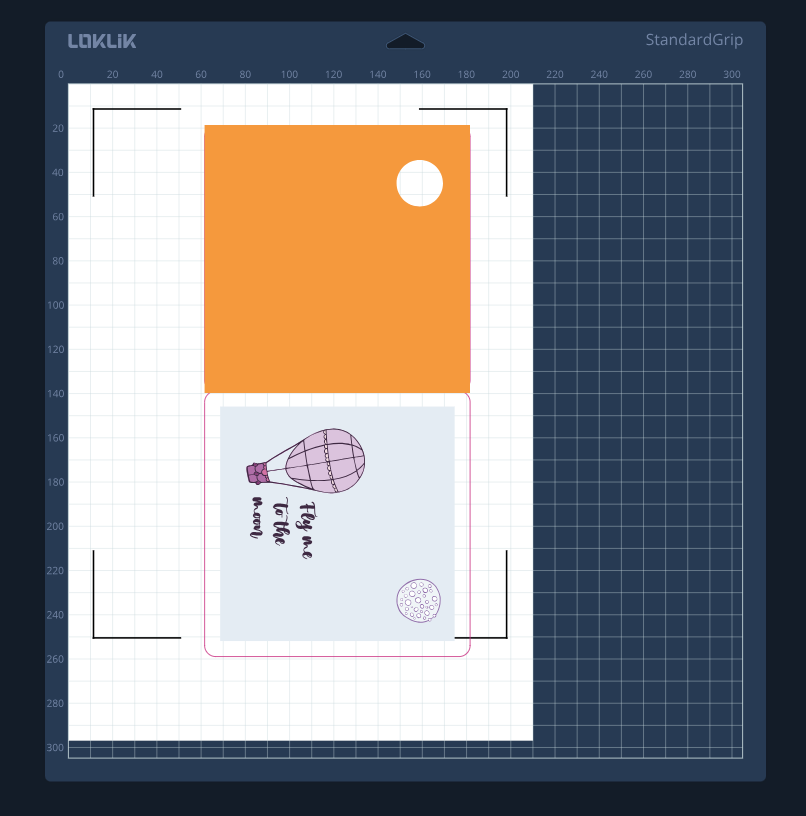
Using a blank 6x6 card and cutting out a heart, in this example the rose would be visible through the cut out heart.
There does not seem a way to do the whole process in iCraft.
I would have to first print on the card, then place it inside face down on the mat before cutting the heart.
Printing the image separately and gluing it into the card after cutting out the heart seems the only viable way.
Unfortunately I cannot see a way to print the library image or copy an image to another program.
Print and cut is geared to stickers and labels not this kind of project.
I will persevere - I am thinking I need a transparent guide or grid to place over the image on the inside of the card, to measure where to place the heart for cutting.
If you have a precise printer and two sided printable photo paper, you can perfectly calculate where the cut is going to be (maybe perform some tests). Duplicate and mirror it to help you place it on the other face of the sheet. Like you said, put the outer face touching the mat (maybe with something to protect the printed area).
To do this, you still have to calculate where it goes, or play with the margins you¡re going to have to cut. So once you have calculated, you don´t need to glue. I did so because I wanted that paper for the cover and photo paper for the illustration, but you can perfectly do it xdd
And yes, you can get the libarry image and whatever you need from IS, printing to pdf, it prints an editable pdf you can open with any vector program xdd
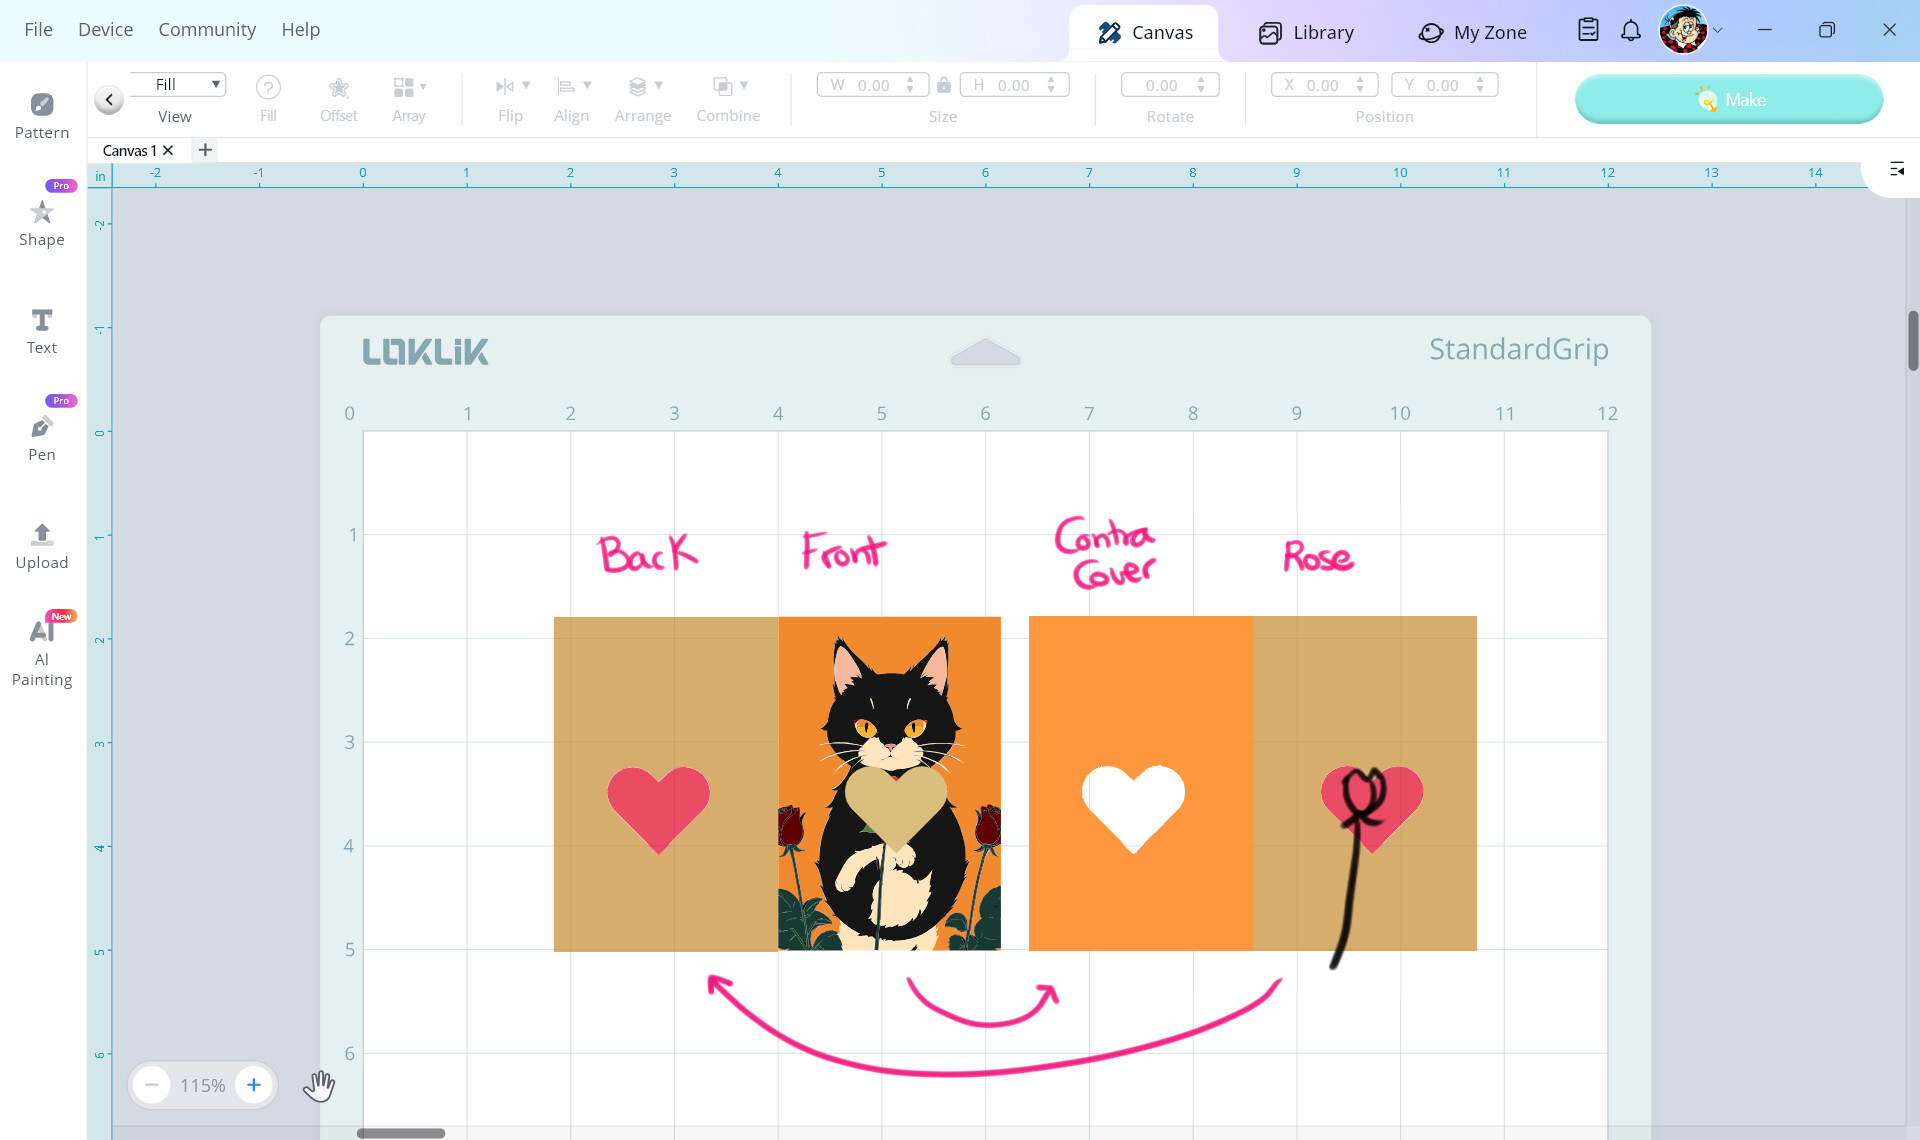
Print boths sides making them match (A4 100% scale). You only need the reading marks in the rose face. Put that face looking up on the mat., make iCraft cut the exterior (with a print then cut task where you tell her you`ve already printed or print in IS, I print outside but matches what you print in IS when you control the printer) of the card and the heart of the contra cover, boilá. Test with regular paper.
Please let us see it when you finally do it. Yes, the easiest way is a separate paper, it gives you some flexibility.
I have recently purchased a wonderful tank Cannon printer which I have in a separate room from my desktop computer, it’s in the same room with the crafter. I love that printer!