Doypack Minnie Mouse(summer time)
I Design the bag from scratch in IdealStudio (Loklik).
Lately I’ve been seeing this design in the last few days in craft shops in Central America and I liked it. I wanted to buy it because I had no idea how to make it, but I saw one that I have here at home where candy and gummies sometimes come from, and I said, let me try it. It doesn’t look difficult, and if it wasn’t, it wasn’t difficult. So here what I make ![]()
Material
Photo paper(170 gm)
Glue
Scissors
Loklik cutting machine
Ideal Studio
Important
I used the photo paper and I print the desing on but you can do it plain or if you have paper with desing to.
Design Creation
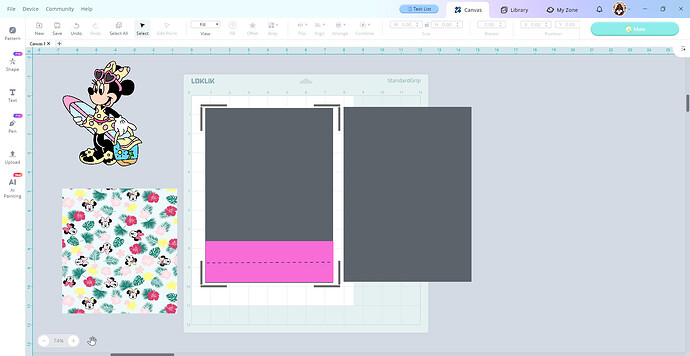
I made two squares that would be the front and back of the bag and I made another smaller square with double lines that would be the background.
The wallpaper I download from pinterest.
Cut
For the cut, I used standard cut, because I already had the sheet with the design, so it was not necessary to do print and cut.
For all cuts parameters I use
Type: Photo paper
Size:8.5x11 in
Force
Force: 9
Speed: 10
Passe: 1
For the Scoring lines parameters I used
Force: 10.9
Speed: 10
Passes: 1
The photo says I only made one pass, but I actually made two.
** Assembling**
I put glue on the bottom part and glued it first with one part and then glued the other part and joined everything.
And this was the final result, a beautiful bag to put coloring sheets for children, or simply sweets for their pool day or beach day.


