Easter is a time for renewal and joy. Every day offers a new beginning , so embrace the hope and light this season brings. Let love bloom in your heart and share kindness with those Beautiful People around you. As you celebrate, may your home be filled with peace and happiness. There’s so much more to explore about the beauty of Easter, so I decided to share this beautiful design to you, Beautiful People and fellow Crafters!
MATERIALS USED:
![]() HTVRONT/LokLik or any cutting machine
HTVRONT/LokLik or any cutting machine
![]() Standard Cutting Mat (Green - slightly used), Brayer, Spatula, Scissors, Tweezer
Standard Cutting Mat (Green - slightly used), Brayer, Spatula, Scissors, Tweezer
![]() Laptop
Laptop
![]() 12" x 12" Cardstocks (Patterned/Solid color - 65#, 85#, 92# wt.)
12" x 12" Cardstocks (Patterned/Solid color - 65#, 85#, 92# wt.)
![]() Elmer’s Glue or any glue you trusted
Elmer’s Glue or any glue you trusted
![]() Foam squares (double sided)
Foam squares (double sided)
![]() Fairy light
Fairy light
![]() Paper weights
Paper weights
![]() Wet wipes (optional)
Wet wipes (optional)
![]() Your Design
Your Design ![]()
FINISHED SIZE: Approximately 8" x 11"
Cutting Machine Setting: Medium Cardstock or whatever settings you already tested for specific weight of cardstocks

DIRECTIONS:
STEP 1: UPLOAD YOUR DESIGN. Upload your design to your Editing Software with your cutting machine. Edit or resize to your desired shape (I didn’t resize mine just changed the colors for cardstocks). Send it to your cutting machine and let it do the job for you.

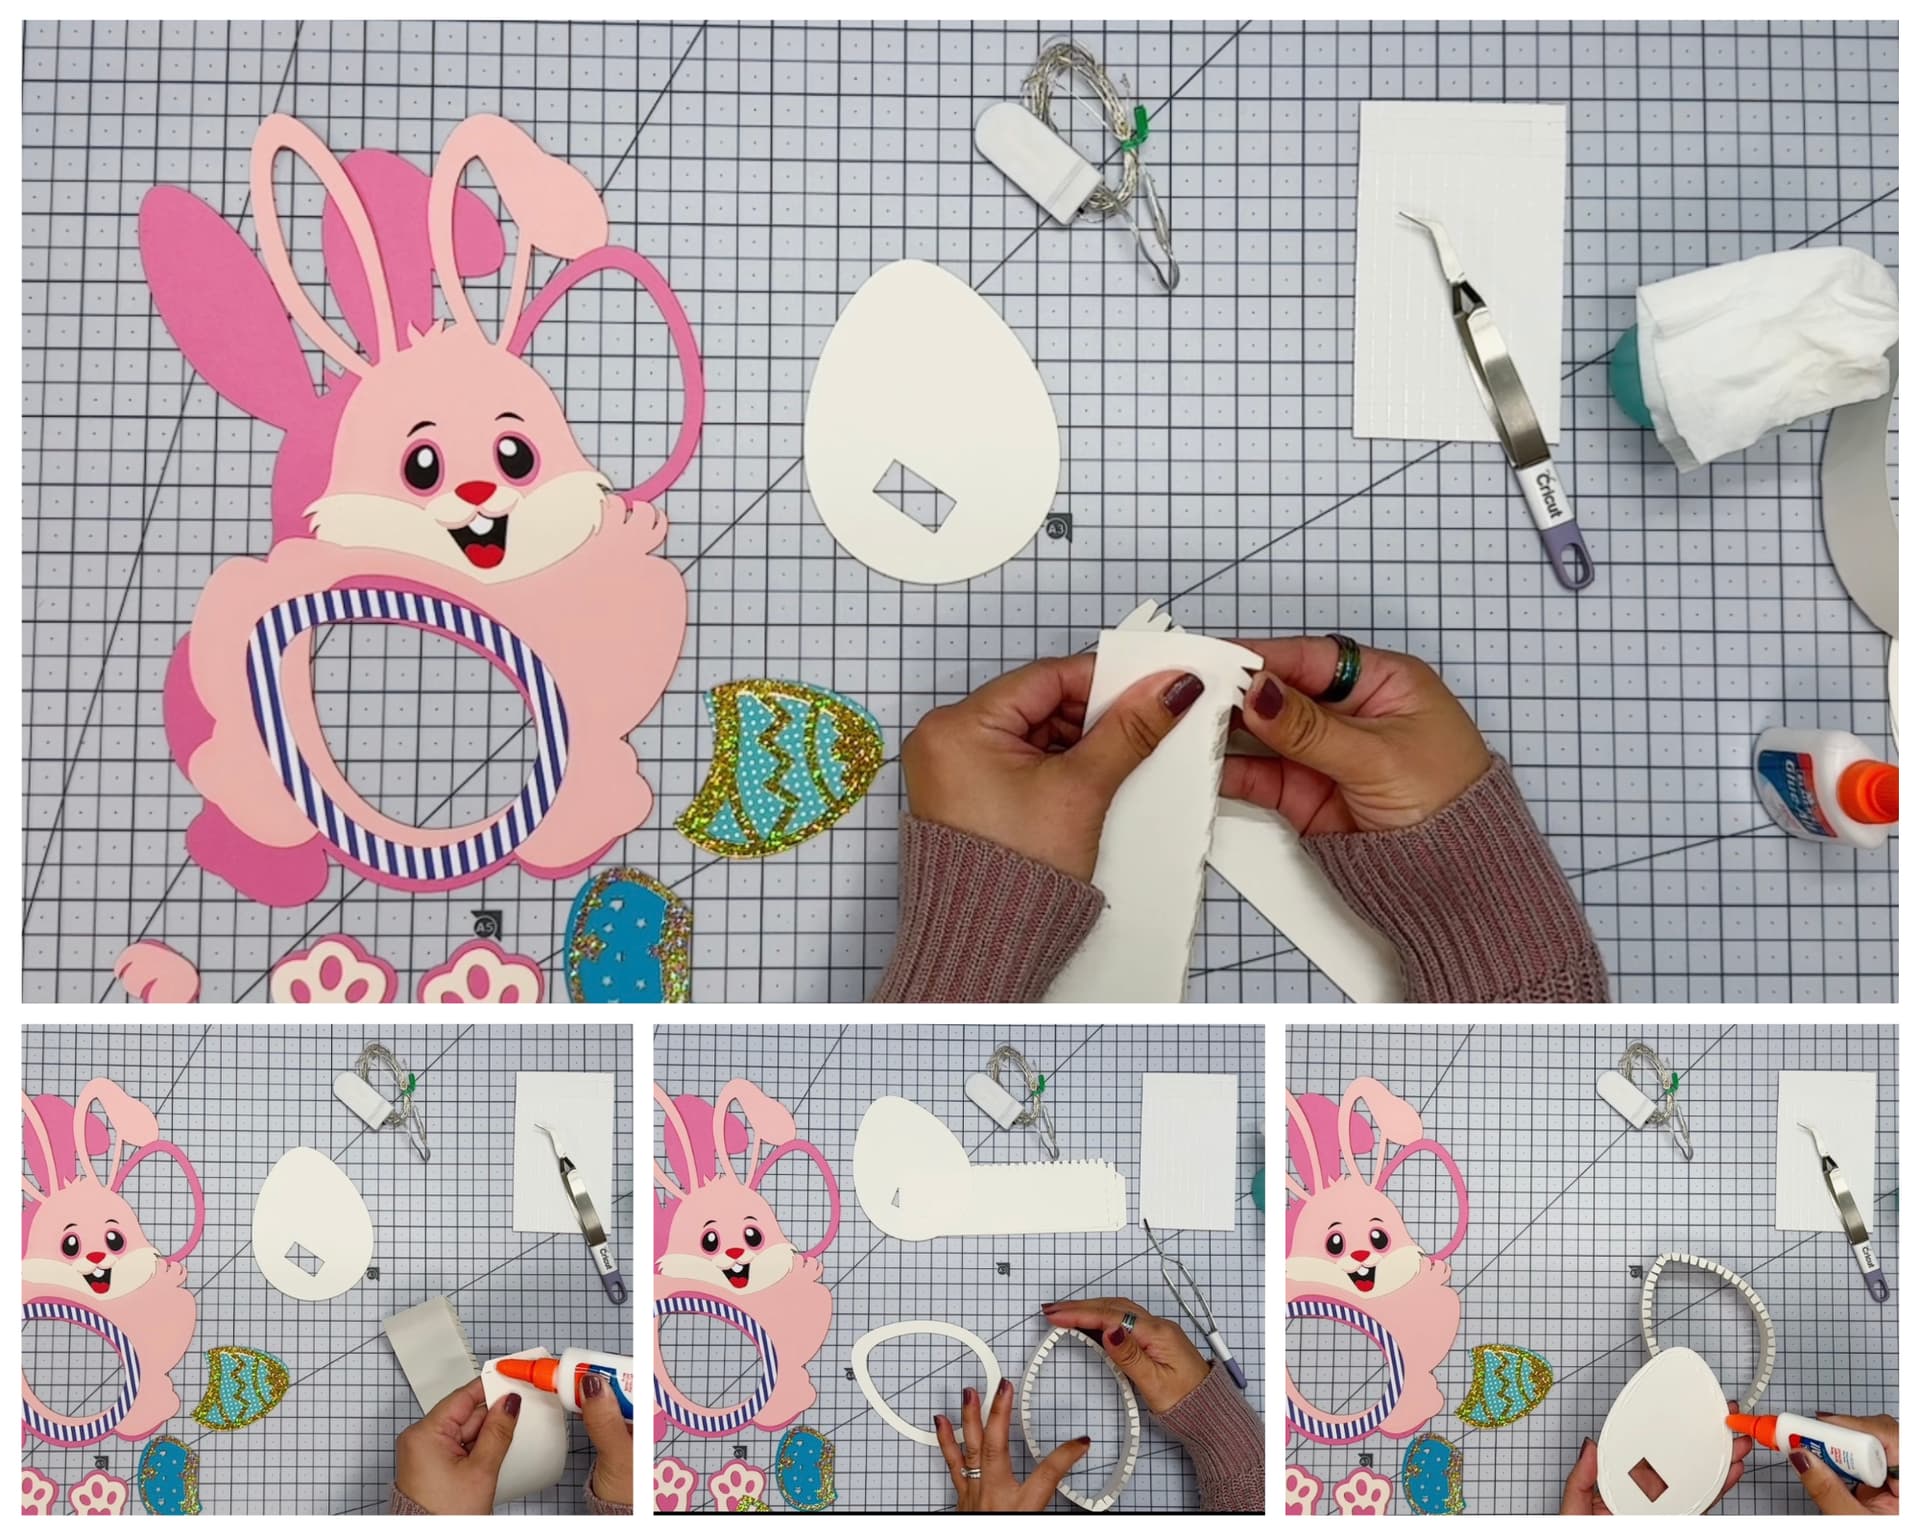
STEP 2: ASSEMBLING THE SHADOW BOX. Grab the two pieces of the shadow base and fold the cardstock inward as shown in the first picture. Glue them together. Do this with the other two pieces of cardstock. (NOTE: The cut file will show you which one for the front and back of the shadow box).
STEP 3: ASSEMBLING THE FACE. Grab the mouth area and set aside. Work carefully with the eyes and glue all the pieces together (NOTE: Do this when you are happy with the placements of the eyes & eyebrows). Now, glue the mouth area and complete the facial expression.

STEP 4: ASSEMBLING THE BACKGROUND LAYER. Grab your front bunny layer and run a generous amount of glue at the back and adhere it to the outer layer (with photo frame) as shown in the picture.

STEP 5: ASSEMBLING THE TWO PIECES OF EGGS. While gluing the pieces together, grab some paper weights to put on top of the bunny’s face. Doing this, will help your glue set evenly in your cardstock and to avoid wrinkles.

STEP 6: ASSEMBLING THE CENTER EGG. Grab your middle piece frame egg and run glue all the way around as shown in the picture. Trace your picture around the photo egg frame and cut.

STEP 7: ASSEMBLING THE PHOTO. Glue your photo to the photo egg frame and work with the remaining pieces. Set aside and put paper weights on top of your layers to help cure the glue evenly.

STEP 8: ASSEMBLING THE LAYERS FOR SHADOW BOX. Grab your square foam tape and install four (4) pieces from left to right and top to bottom. (TIPS: Double stack your foam tapes each layer so it will give you more depth for 3D Shadow effects).

STEP 9: INSTALLING LIGHT. Grab the back of your shadow box and install your fairy light by securing a piece of foam tape.

STEP 10: ASSEMBLING THE FRONT SHADOW BOX. Don’t forget the other piece of shadow box and glue this at the back of the bunny. Make sure you aligned them perfectly. Dry completely. Grab the backside of the shadow box and put the layers inside as shown in the picture then snap it together with the whole bunny.
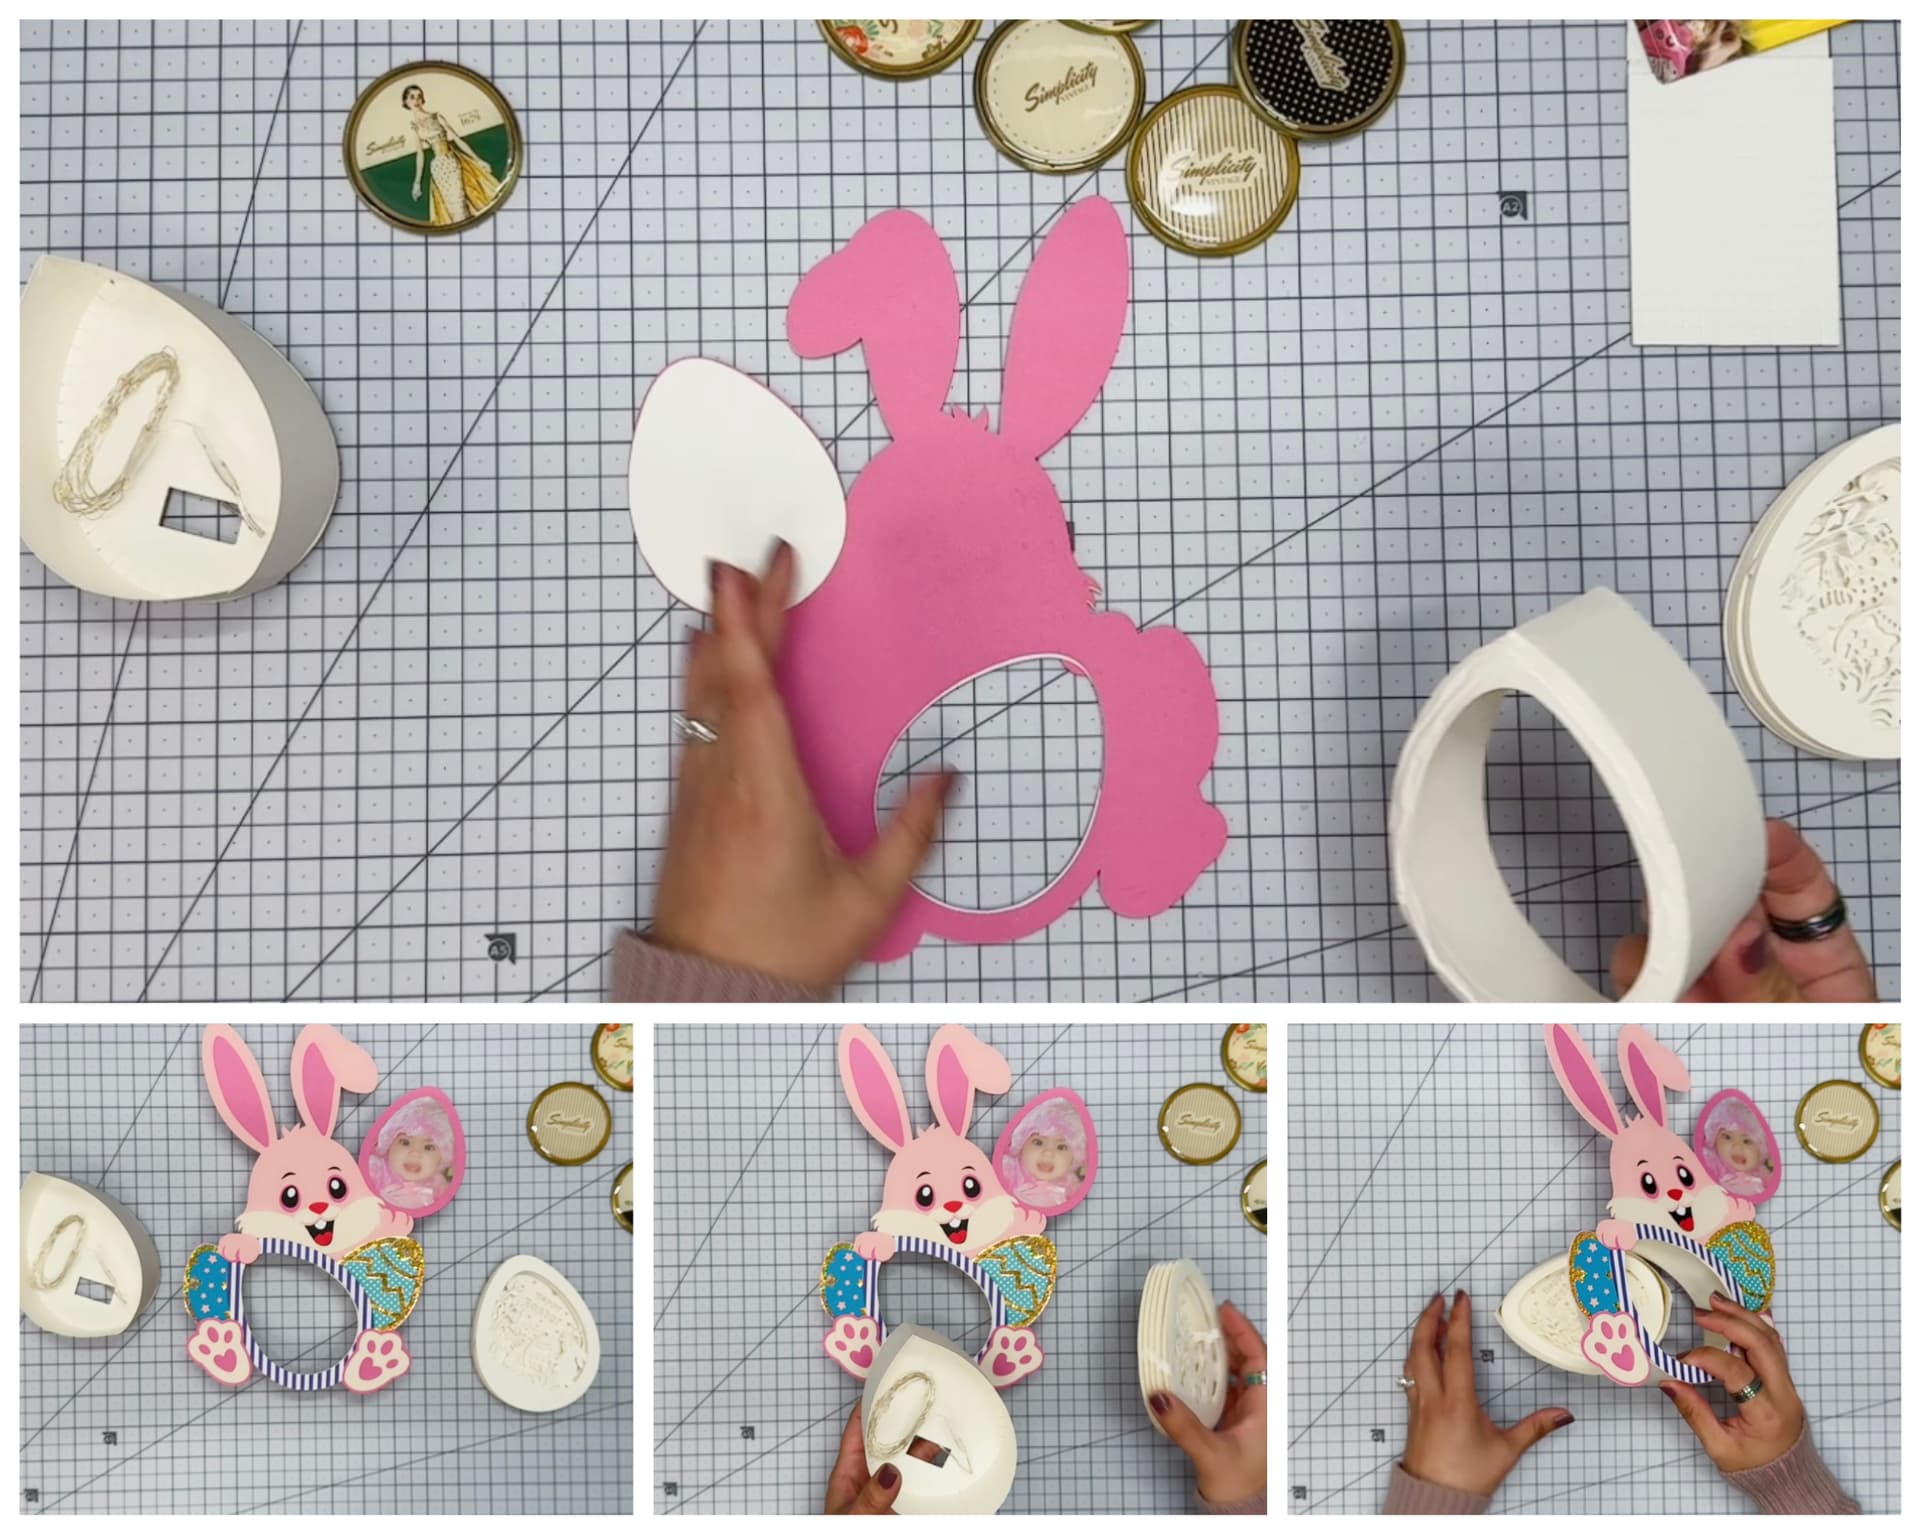
STEP 11: FIXING LAYERS IN PLACE & SHOW IT OFF! Make sure that all the layers are in place by moving each layer. When done, turn on the light and show it off! Now, you have a cute Easter Bunny 3D Shadow Lantern Box with your favorite Photo ![]() for your Easter Decoration. Enjoy!
for your Easter Decoration. Enjoy!


NOTE: Actual video tutorial will be available as soon as I uploaded in my Youtube Channel. It is so much fun to see the 3D Shadow Lantern Box in motion.
May the risen Christ bring peace, love, faith, hope, joy and blessings to your life this Easter and always.