Welcome back to the craft room and today’s HTVRont Phone Case Heat Press Demonstration post. I’ve been really curious to see how the HTVRont Phone Case Heat Press actually works, so I decided to try it out for the very first time. In this post, I’ll walk you through the whole process—starting in the LOKLik IdeaStudio, moving on to printing with sublimation film, and finishing with pressing onto an iPhone 16 phone case. HTVRont kindly sent me the cases I’m using for this project, but as always, all opinions are my own. If you’ve been wondering whether this little press is worth adding to your craft room, read on to see how it performs and what I thought of the results.
LOKLik Idea Studio Software
Let’s start in the LOKLik IdeaStudio software. While you can use almost any design or printing program to prepare images for the phone cases, I think it’s easiest to use the one provided by HTVRont. As you’ll see, it takes much of the guesswork out of the process. If you don’t already have it, you can download LOKLik IdeaStudio here: LOKLik IdeaStudio, available as a free desktop or mobile app. Create an account, and you’re ready to go.
Once inside IdeaStudio, look to the right side of the screen to choose your device. Click the drop-down menu, and under My Device select the HTVRont Phone Case Heat Press.
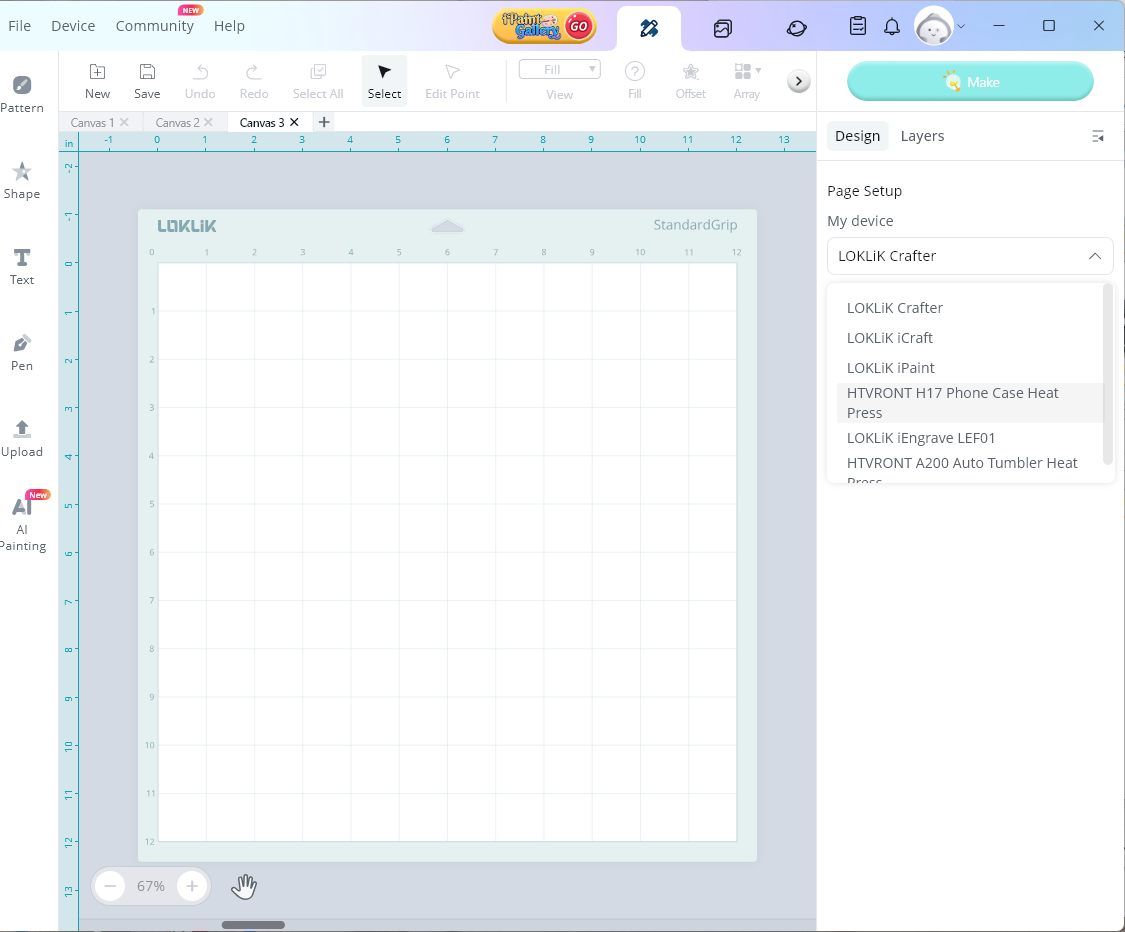
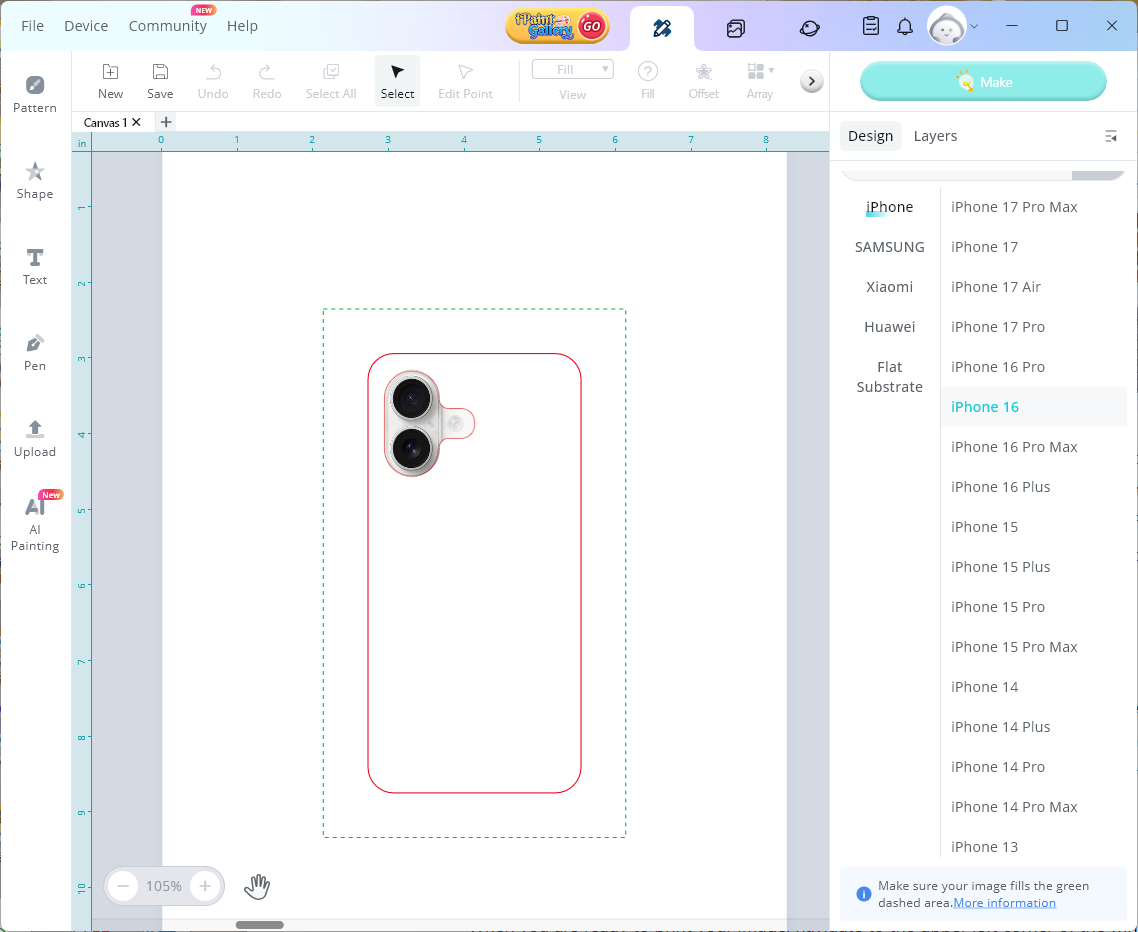
A new menu will appear where you can pick your phone type—iPhone, Samsung, or one of two other phone case options, as well as Flat Substrate. For today’s project, I’ll be sublimating onto an iPhone 16 case. Once you make your selection, an outline of the phone will appear on screen. This image includes the location of the camera lens, a solid red line marking the back of the phone case, and a dashed green line showing the sides of the case.
If you don’t already have an image ready, IdeaStudio provides a variety to choose from. In the upper right corner, click the Library tab, then go to the Images section. On the left, under Operation Type, choose Phone Case. You’ll be able to browse a wide selection of free images.

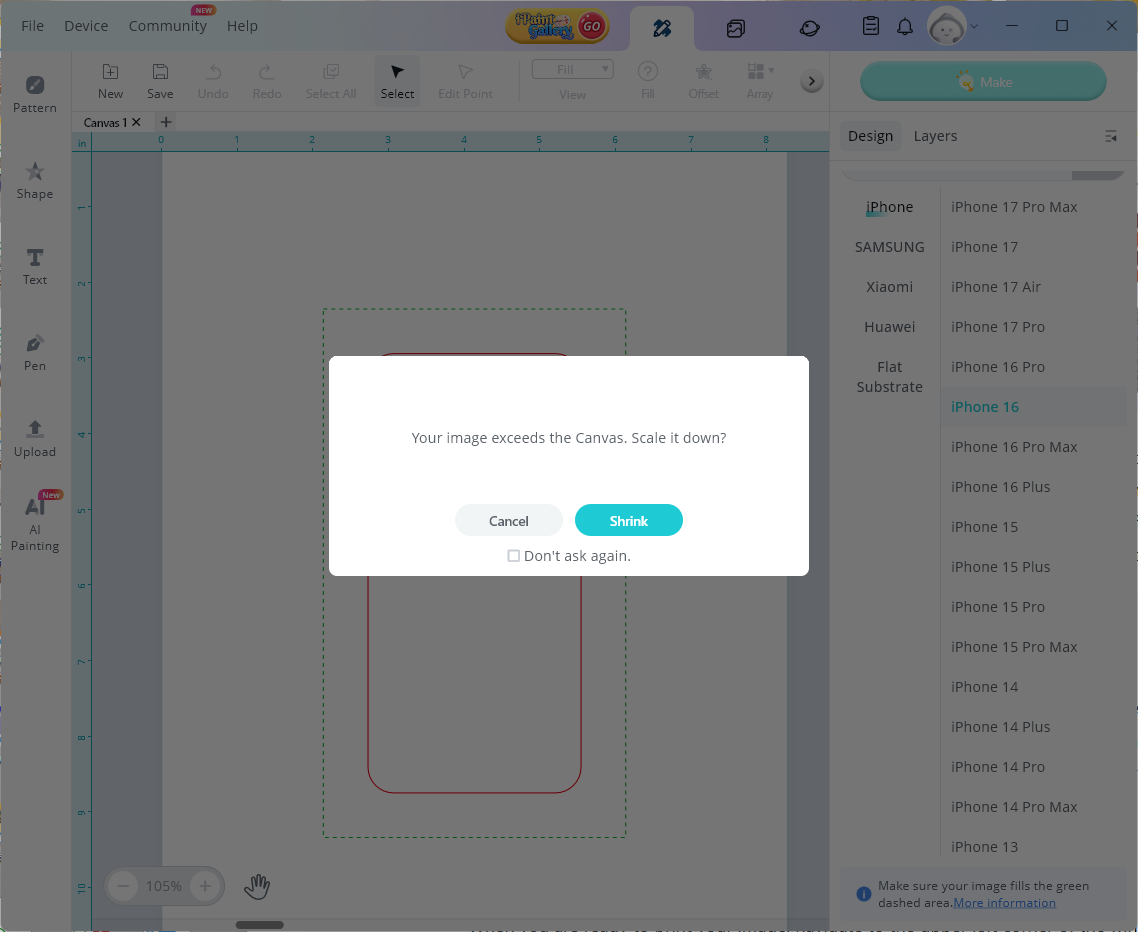
For this project, I used an image from Creative Fabrica, so I went back to the upper right and clicked the Canvas tab. One important note: uploaded images must be under 5 MB. My original design was larger, so I resized it in Affinity Designer before uploading. Even then, the file was big enough that IdeaStudio offered to size it down automatically.
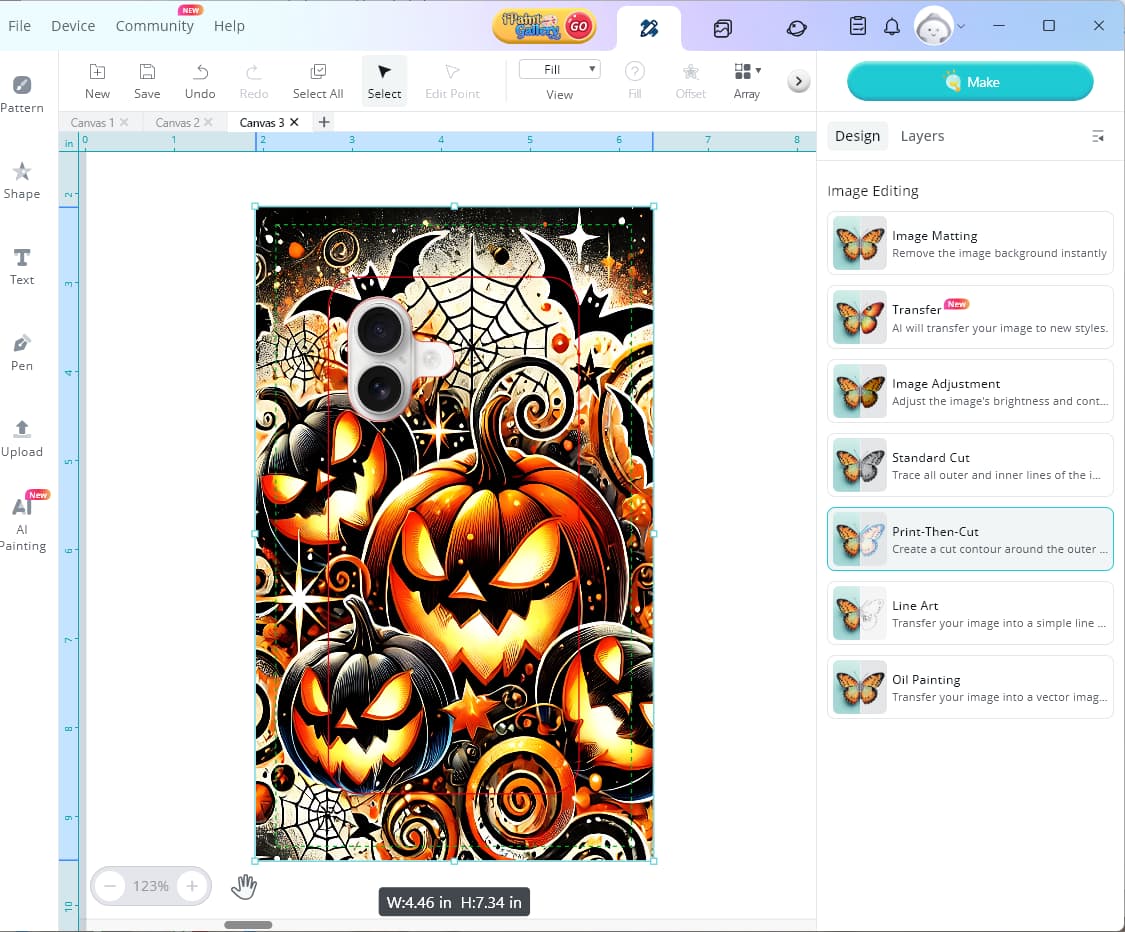
After that adjustment, I still needed to tweak the design to fully cover the dashed green line. Since this was my first time sublimating a phone case, I went slightly beyond the line to ensure full coverage. Once your design looks the way you want, it’s time to print.
The Sublimation Film
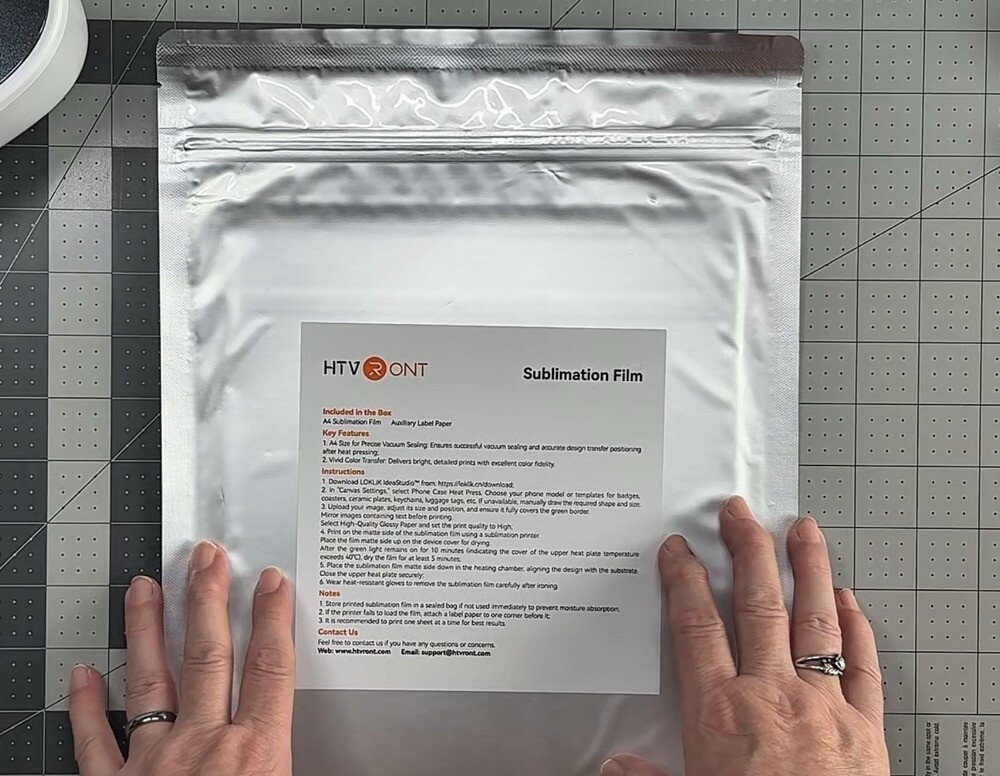
HTVRont Sublimation Film comes in a sealed package. After removing the sheet you’ll be using, be sure to place the remaining sheets back into the original packaging to protect them from dust and moisture.
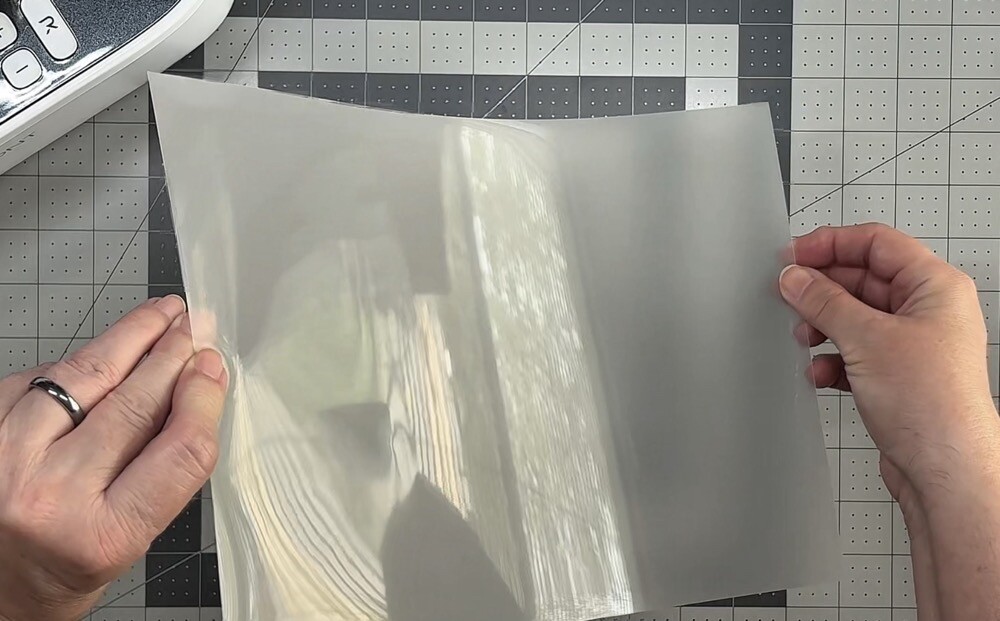
The film has a shiny side and a matte side—the matte side is where your image will be printed. It also feels relatively thick and sturdy.

Printing the sublimation Film
When you’re ready to print, go to the upper left corner of IdeaStudio and choose File > Print. A Print Preview window will open, reminding you to mirror your image if needed. Once ready, select Print, and the standard Print Setup window will appear. Choose your sublimation printer and confirm the paper size. HTVRont Sublimation Film uses the A4 (8.2 x 11.7) setting.

For this project, I used the Epson SureColor F170 sublimation printer. Before printing, I always select Properties to make final adjustments. In this Printer Properties window, I can choose paper type (Rigid or Textile), change print quality from Standard to High, and under the More Options tab, turn off Bidirectional Printing and double-check that Mirror Image is enabled.

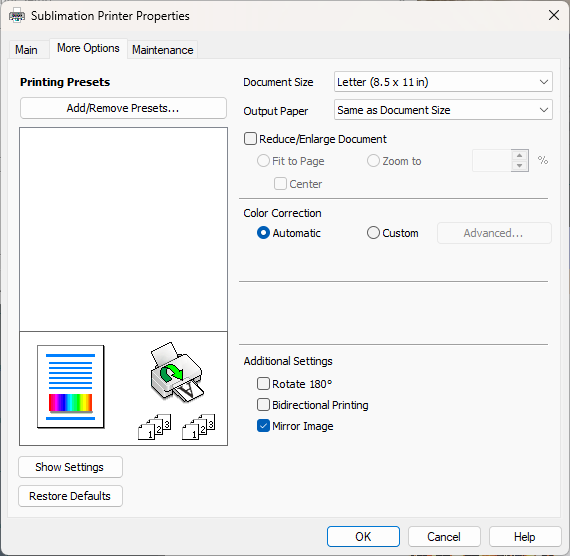
The Epson SureColor F170 doesn’t provide specific paper type options, so I prepared a backup plan just in case. I’d heard that some printers struggle to feed HTVRont Sublimation Film, so I kept a piece of copy paper and some Frog Tape handy. Before loading the film into the bottom paper cassette (matte side down), I removed my usual A-Sub sublimation paper—and crossed my fingers!
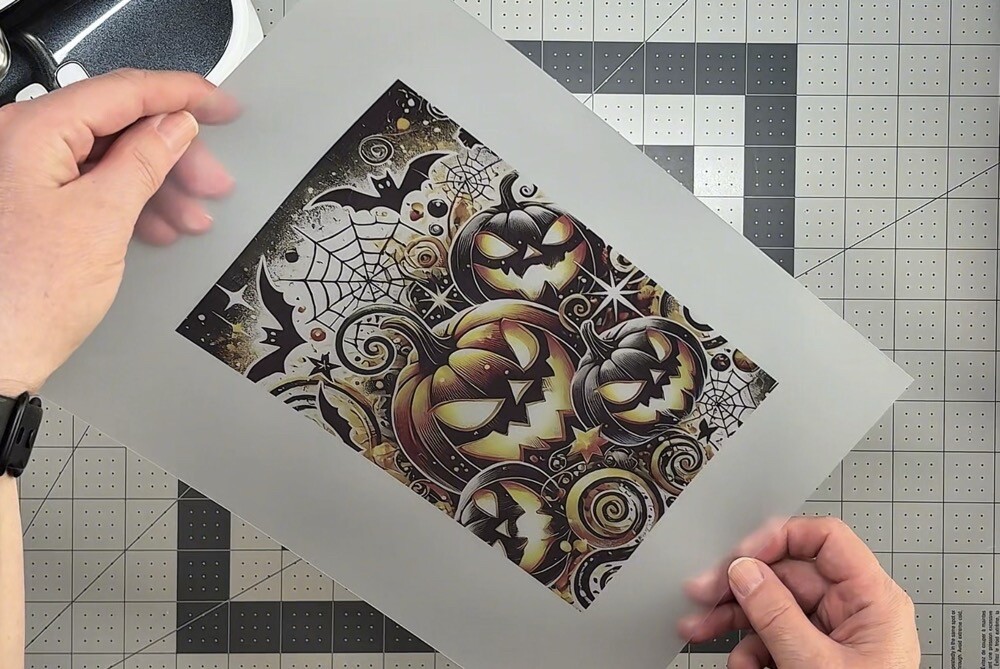
Happily, my printer had no issues feeding the film. With the image printed, we can set it aside and move on to the HTVRont Phone Case Heat Press setup.
The HTVRont Phone Case Heat Press
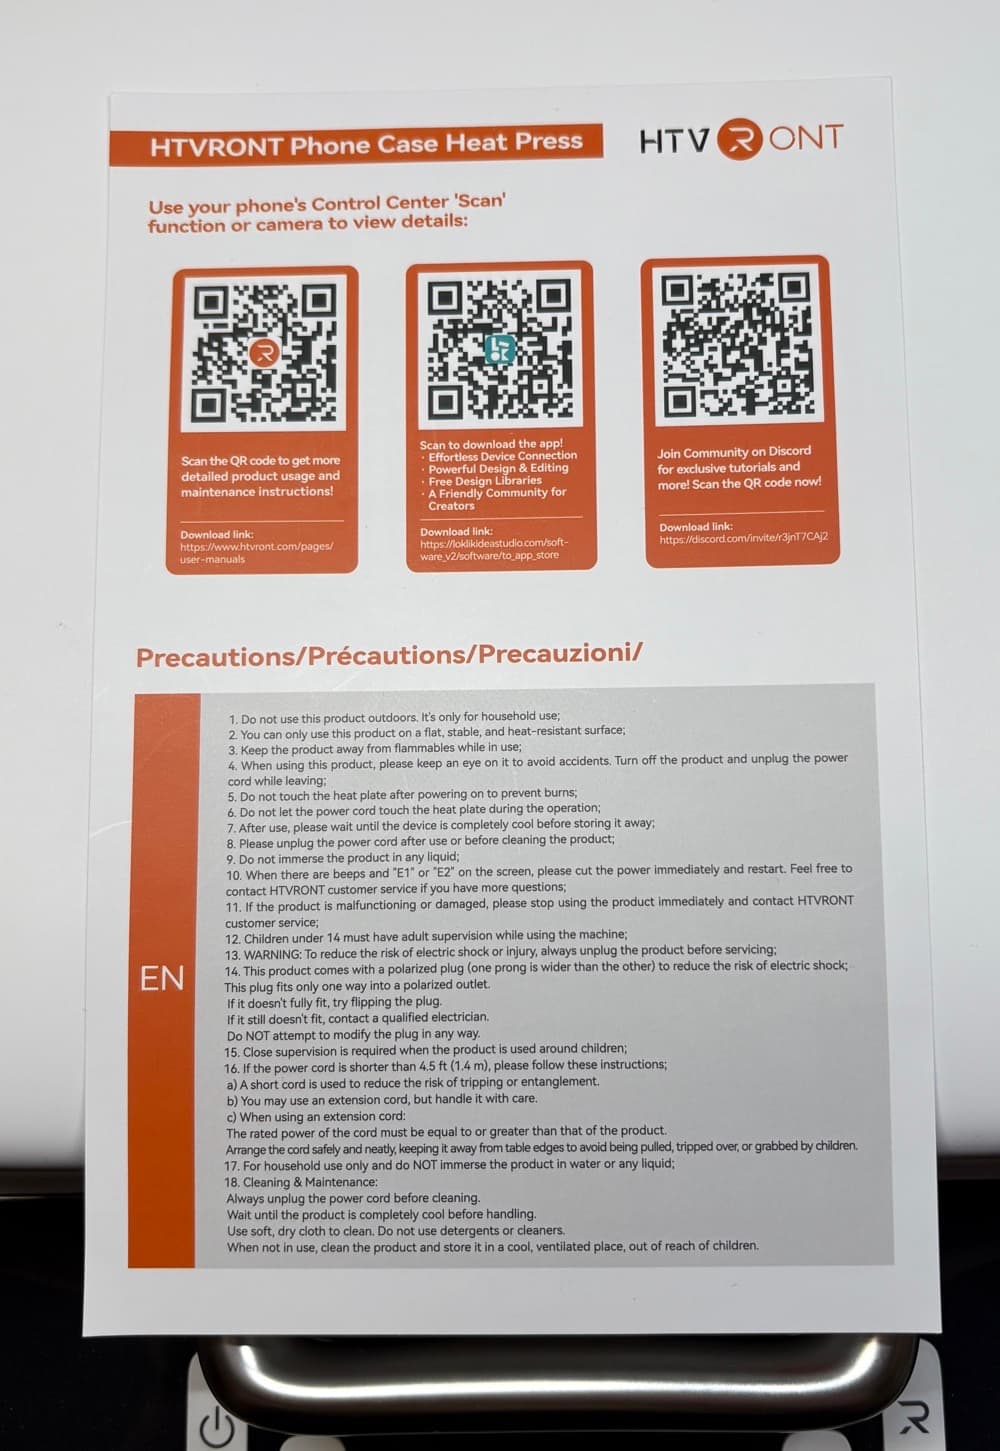
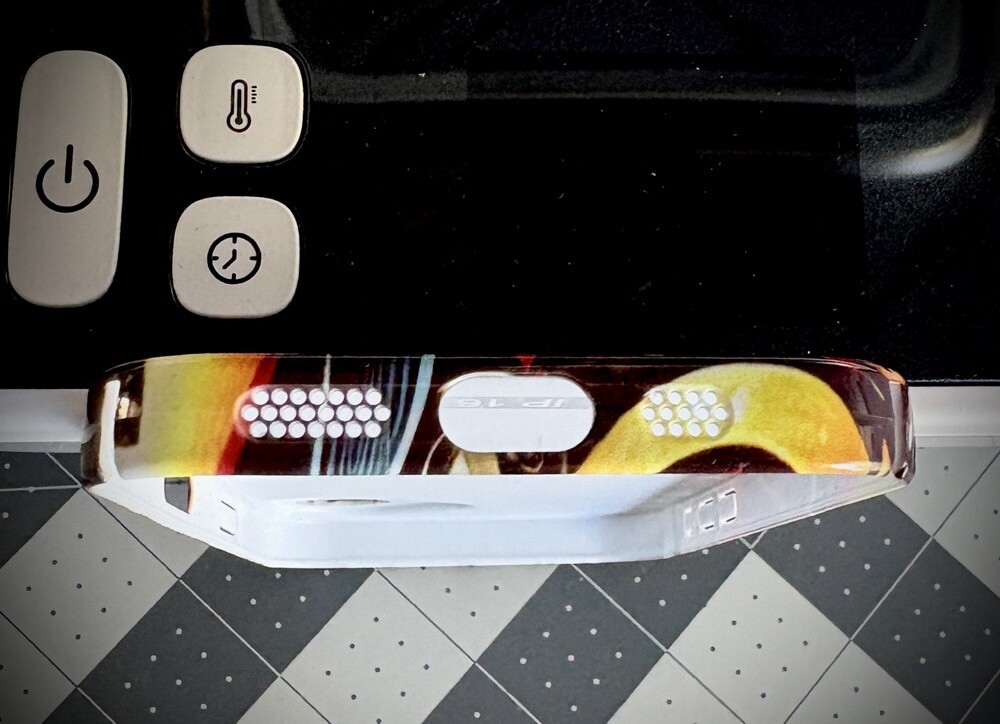
Now that the image is printed, let’s set up the HTVRont Phone Case Heat Press. Inside the box, you’ll find a sheet with three QR codes. Scan the first one to download the user manual. Among other details, the manual includes a chart with recommended time and temperature settings for the different substrates the press can handle.
After plugging in the machine, you’ll notice the white power button flashing. This simply means the press is connected to power. To turn it on, press the power button once. The light will then turn solid white.
Each control button has two functions, indicated by color: yellow or red.
- On the Time button, yellow sets the preheat time, while red sets the sublimation time.
- On the Temperature button, yellow adjusts the top heat plate, and red adjusts the bottom plate.
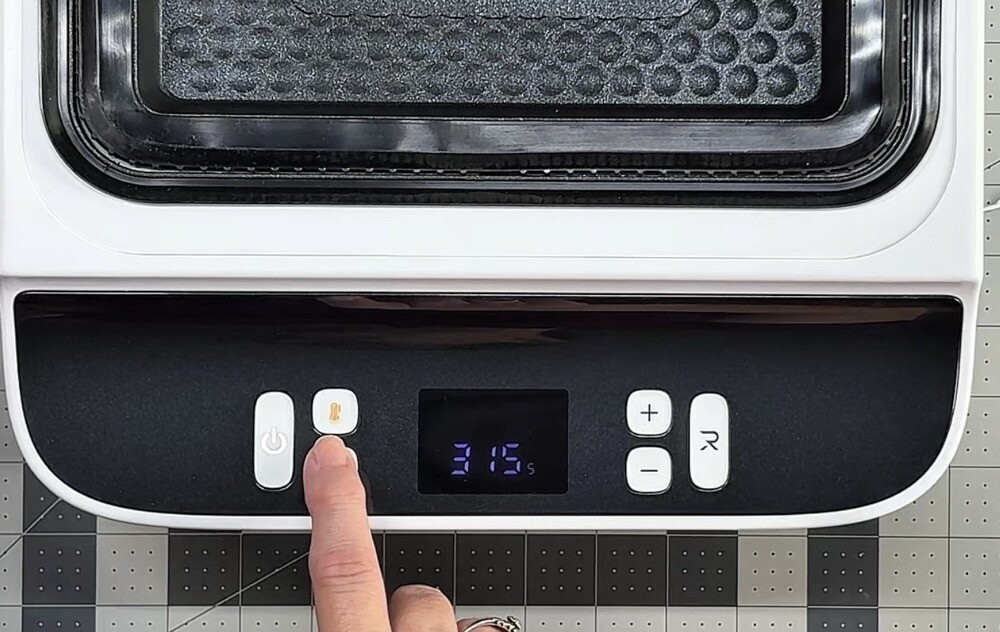
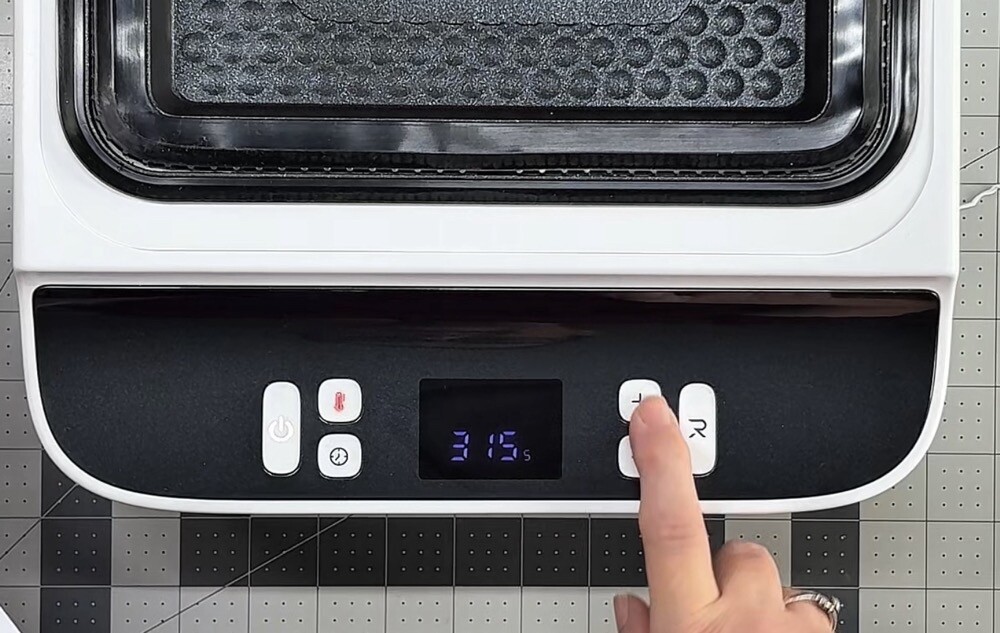
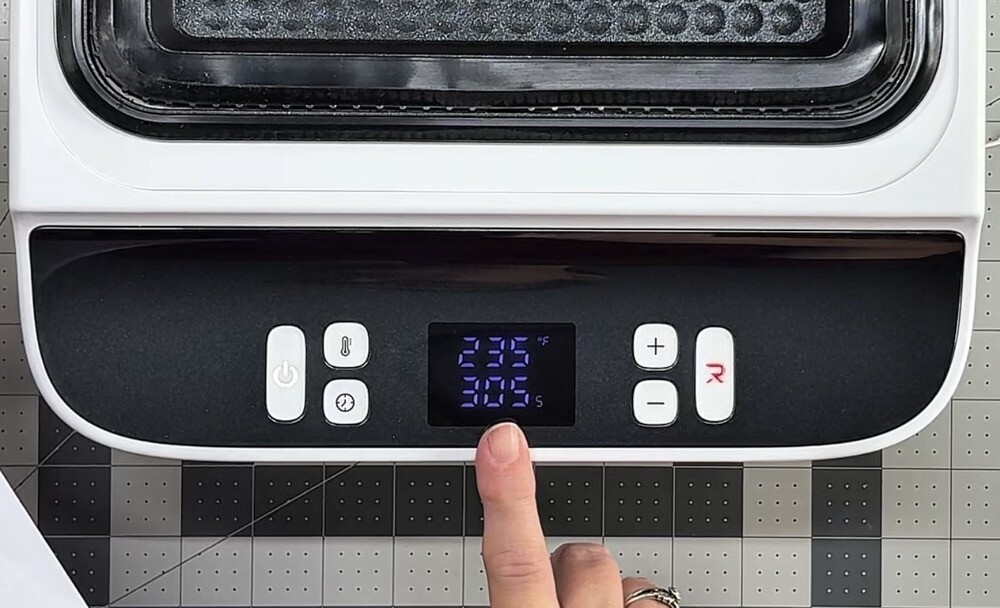
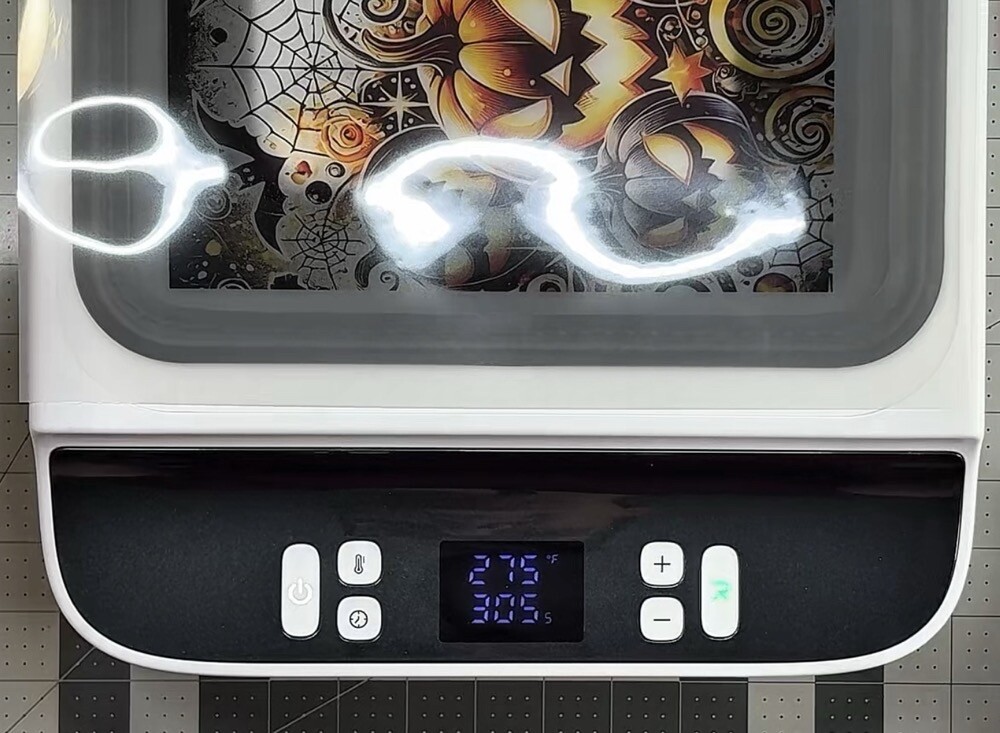
For phone case sublimation, both plates should be set to 275°F. Preheat time ranges from 2–10 seconds, and sublimation takes 300–350 seconds. For my first case, I chose 5 seconds of preheating and 300 seconds to transfer the image. Once settings are confirmed, the display shows the current plate temperature and the total time. In this example, my total was 305 seconds: 5 for preheating and 300 for sublimation.
Sublimating the Phone Case
Preparing the Case and Press
Once time and temperature are set, place the universal phone case fixture into the press. Add the filler pieces as needed for your model. For the iPhone 16, you’ll need blocks 3 and 5. Close the top of the press and let it preheat for at least 5 minutes.
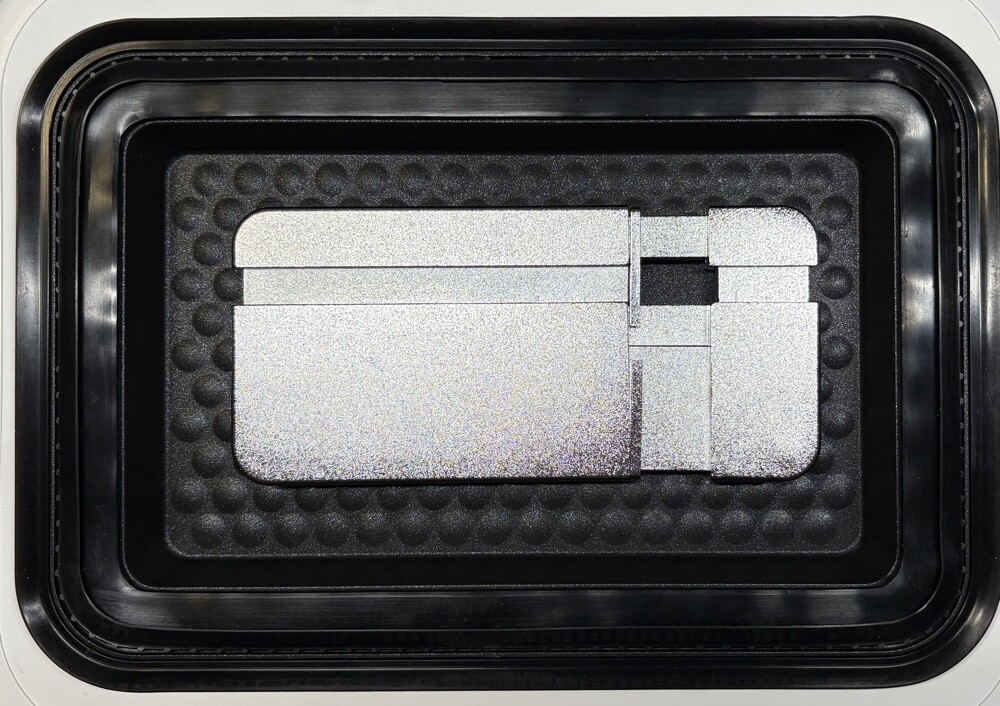
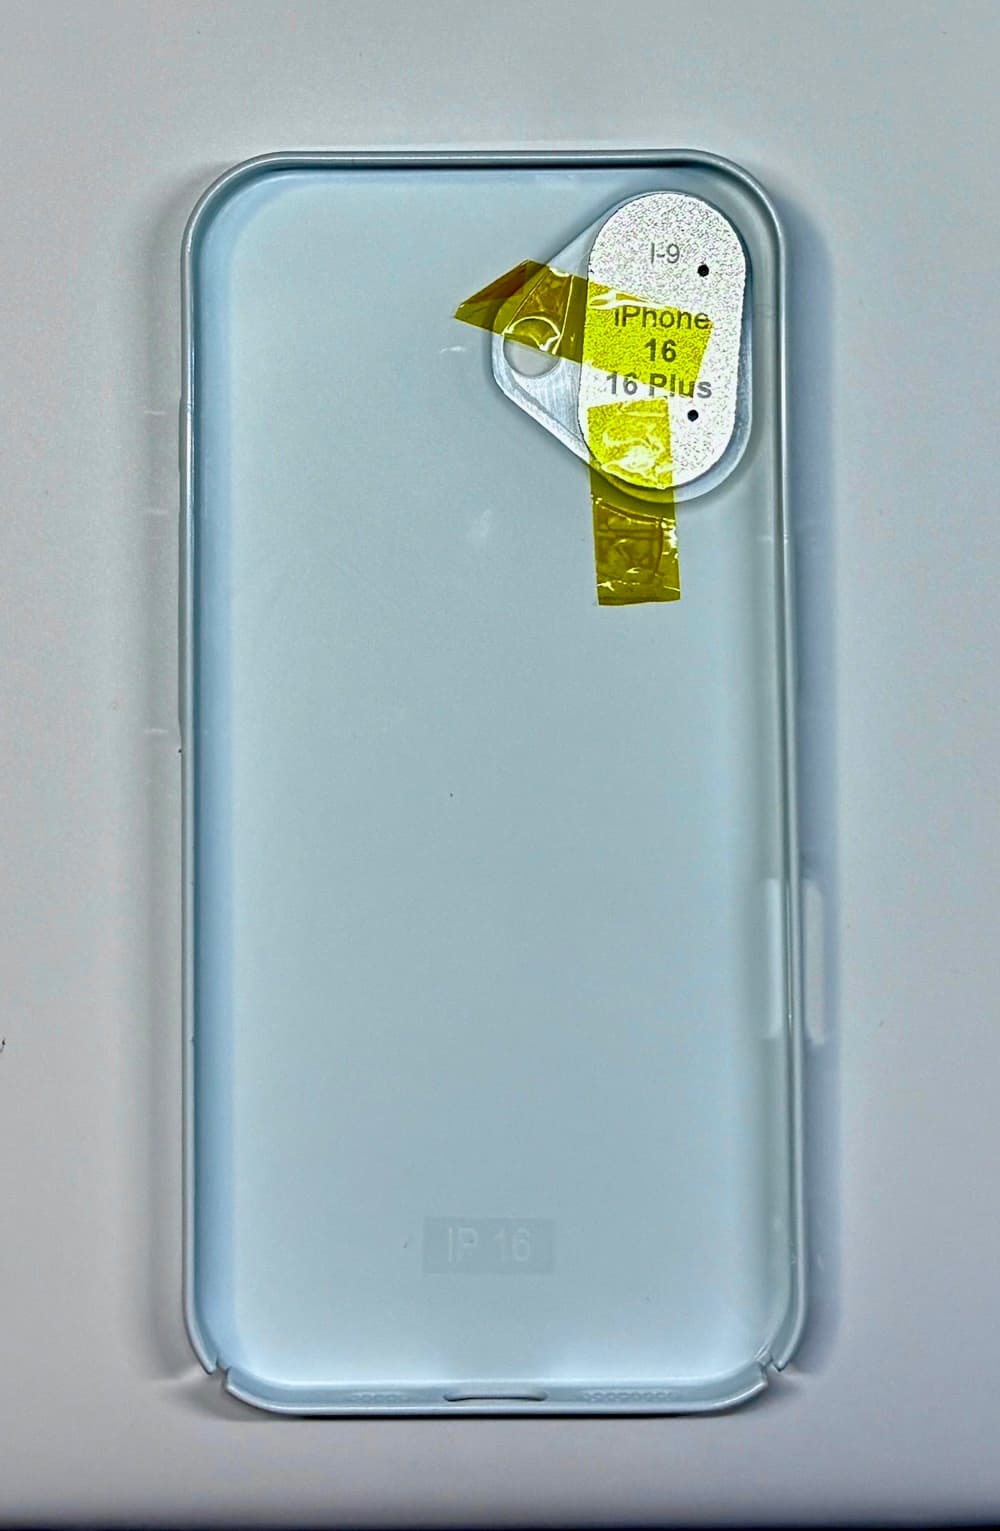
While the fixture is heating, prepare the lens pad for your phone case. For this project, I used the I-9 pad. Insert it from the inside of the case and secure it with heat-resistant tape, making sure not to cover the small pin holes.
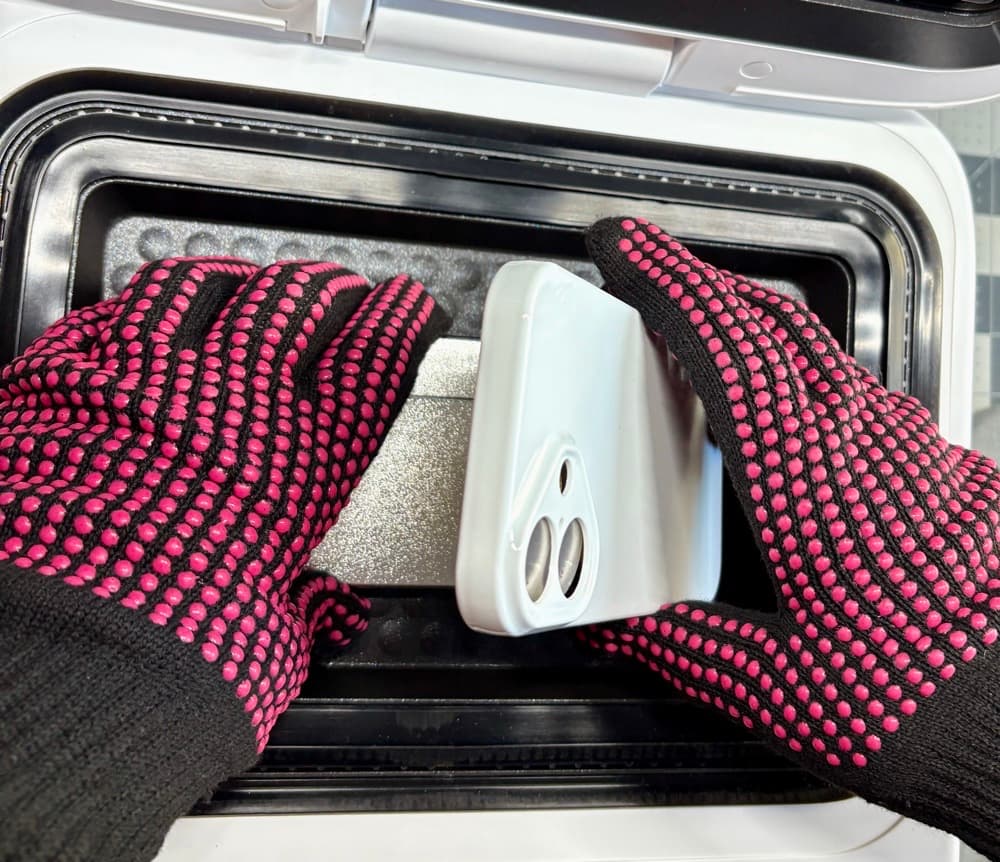
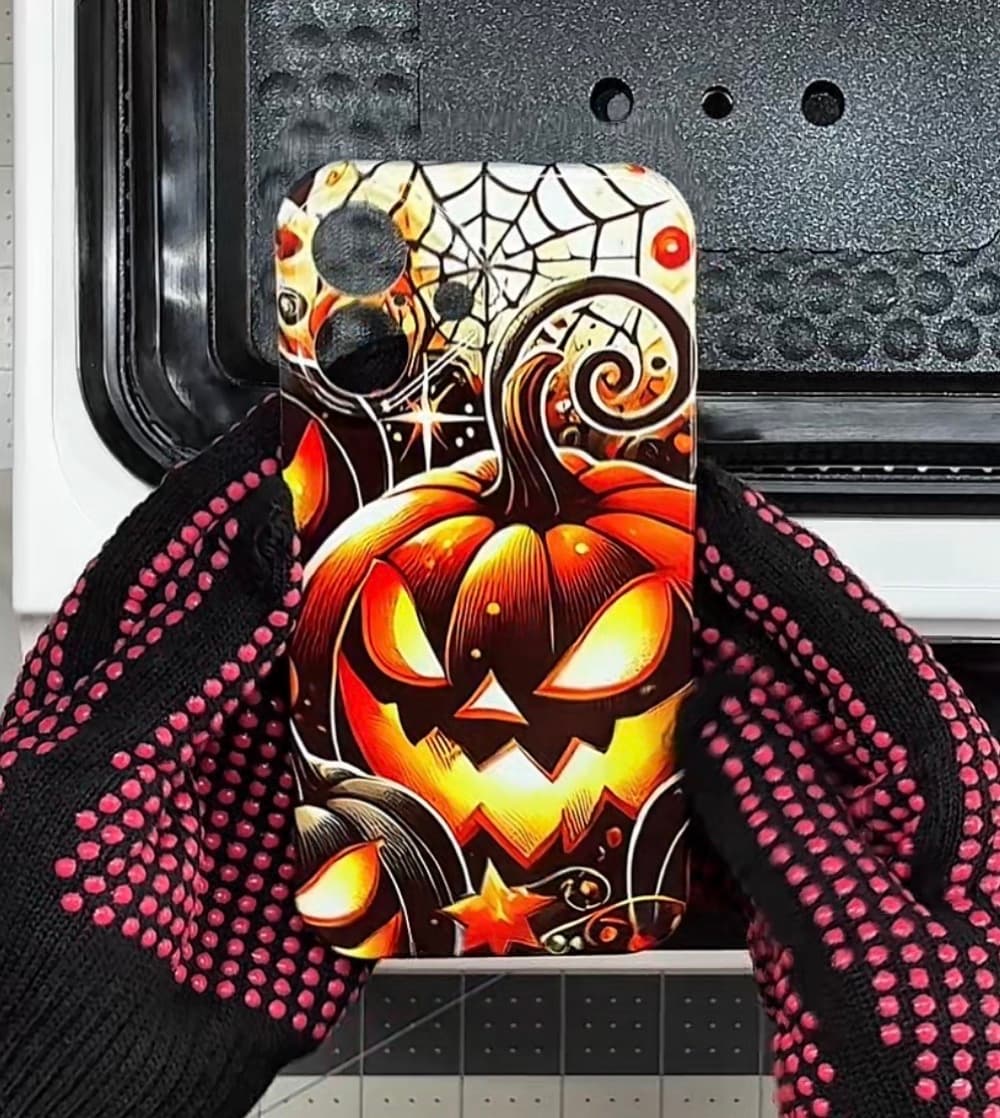
Next, clean the phone case with isopropyl alcohol and a lint-free cloth. Wearing heat-resistant gloves, place the case onto the fixture. After testing, I found the easiest method was to hold the sides of the fixture closed, hook the base of the case onto the bottom, and then press the shorter end up against the fixture base. This kept everything aligned and secure.


Placing the Film and Starting Sublimation
With the case in place, close the lid and let the press continue heating. After the green light has been on for 10 minutes, place your printed sublimation sheet (matte side up) on top of the press lid for 5 minutes. The lid gets warm—not hot—but just enough to help the ink dry.
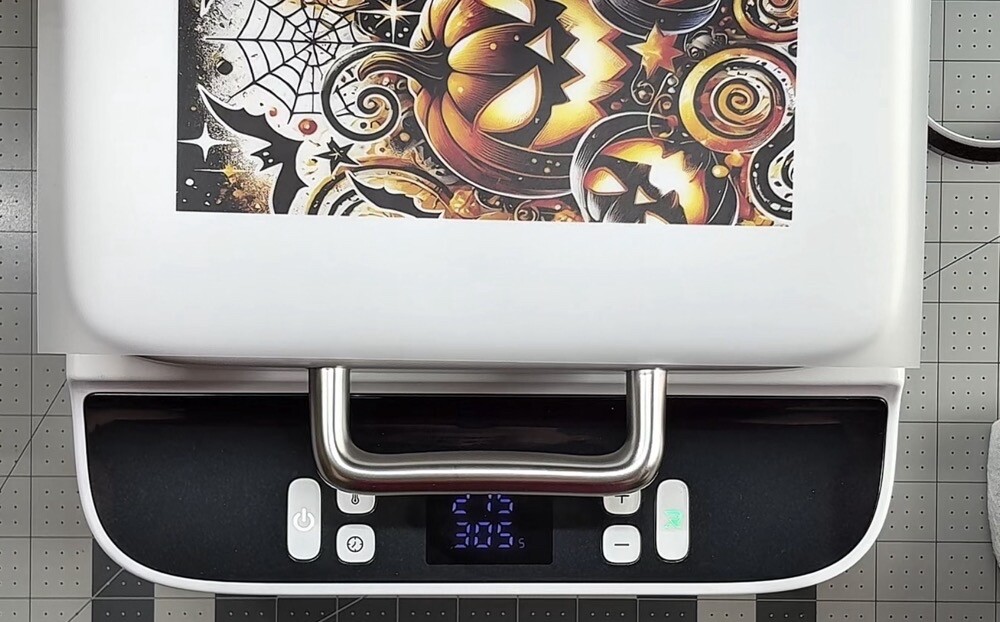
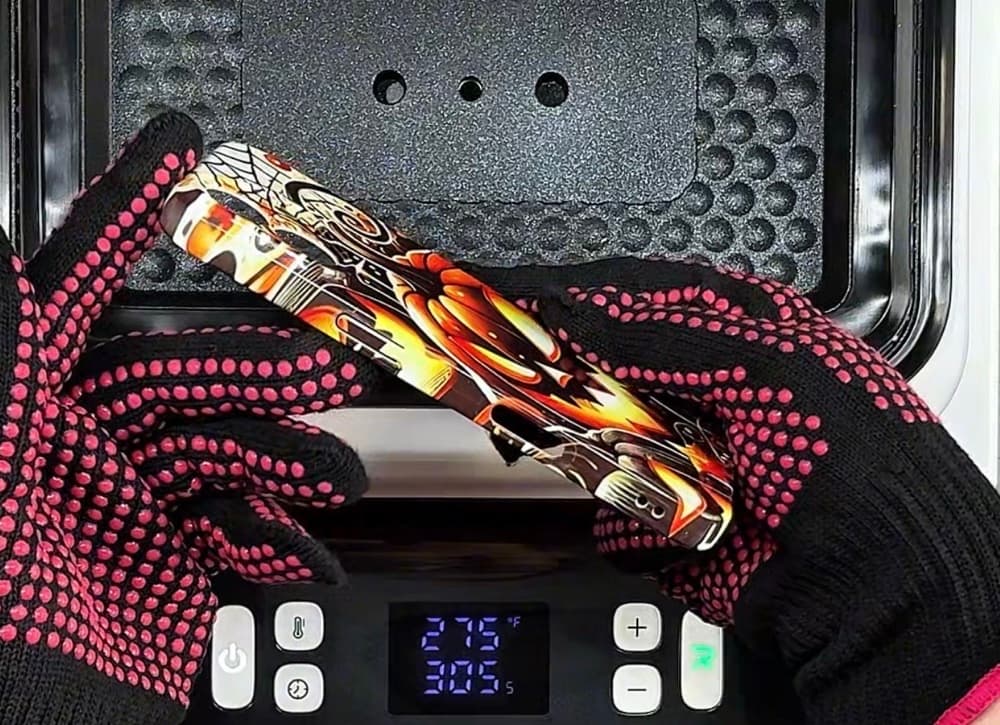
When the 5 minutes are up, it’s time to press. Position the film matte side down, making sure it fully covers the silicone seal. If the seal isn’t completely covered, the press won’t be able to form the vacuum needed for sublimation. Close the lid, then double-check that the temperature is back at 275°F. If it has dropped, wait until it returns to the correct setting before pressing the green start button.
During the sublimation cycle, the press is surprisingly quiet. At first it sounds similar to a food saver vacuum sealer, and then it settles into a soft purring sound. I didn’t notice any strange odors either, at least when pressing a phone case. Depending on the substrate, your experience may differ, but with this project, there was no unpleasant smell at all.
The Finished Phone Case
Once the 305 seconds are up, open the lid and remove the film immediately. Your finished case may come off with the film, but if not, remove the case and fixture together. Be extra careful—both will be very hot.

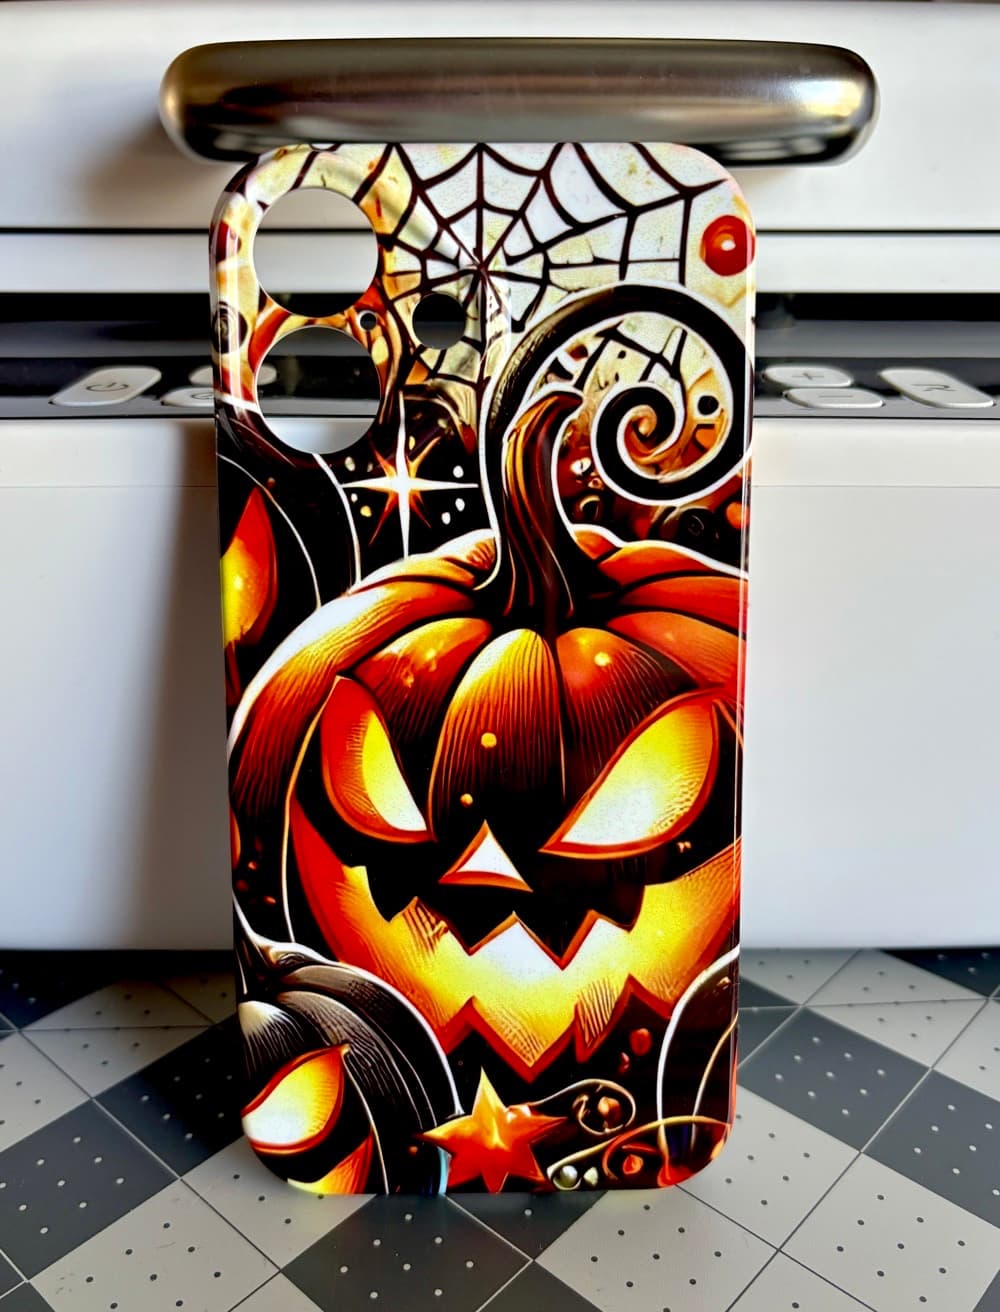
Now, take a moment to admire your edge-to-edge sublimated phone case! I absolutely love how bright and vibrant the colors turned out on this design, along with the seamless wraparound effect.
Some Final Thoughts
I’ll be honest—I was a little nervous about trying the HTVRont Phone Case Heat Press for the first time. The heating process is a bit confusing at first since there’s a waiting period before placing the image. But now that I’ve gone through it, I know I can streamline my workflow by letting the press heat up while I’m preparing my print. I also learned that it isn’t necessary to extend the design beyond the green dashed line in IdeaStudio. Much of the excess image never reached the case and ended up wasting ink—definitely something I’ll tweak for next time.
The press itself actually surprised me. It heats up quickly and runs quietly. At first it reminded me of a food saver machine, then settled into a steady purr. I also didn’t notice any odd odors, which can sometimes happen with sublimation projects. That might vary depending on the blanks you’re using, but with this case there was no issue.
I’ll admit I fumbled through parts of the setup, but that’s the reality of trying something new. The more I use the press, the more natural it will feel—and hopefully sharing my first-time mistakes helps make your first attempt even smoother.
Looking back at the finished case, I’m really happy with the results. The colors are bold and vibrant, the image transferred edge to edge, and overall it turned out to be a fun project. The only thing to note is that the case itself feels fairly basic and a little slippery, so keep that in mind if you plan to use it daily.
Thank you for joining me for today’s HTVRont Phone Case Heat Press Demonstration post and my first experience with the press. I had fun learning the process and love how the design turned out. Would you be interested in using this press to sublimate your own phone cases? Share your thoughts in the comments below!
Curious what comes with the HTVRont Phone Case Heat Press? You can see my full unboxing and review here: Unboxing the HTVRont Phone Case Heat Press. And if you’d like to explore more of my sublimation projects, check out the full sublimation category here: Sublimation Crafts.