Smart arranging = less waste, more projects.
One of the biggest beginner mistakes in cutting software isn’t the cutting itself — it’s how designs are arranged before cutting. A lot of wasted vinyl, HTV, and cardstock comes from leaving huge empty spaces, cutting designs in the center of a sheet, or keeping elements spaced exactly as they appear on the canvas.
Here’s how to make your materials last way longer while still getting perfect results.
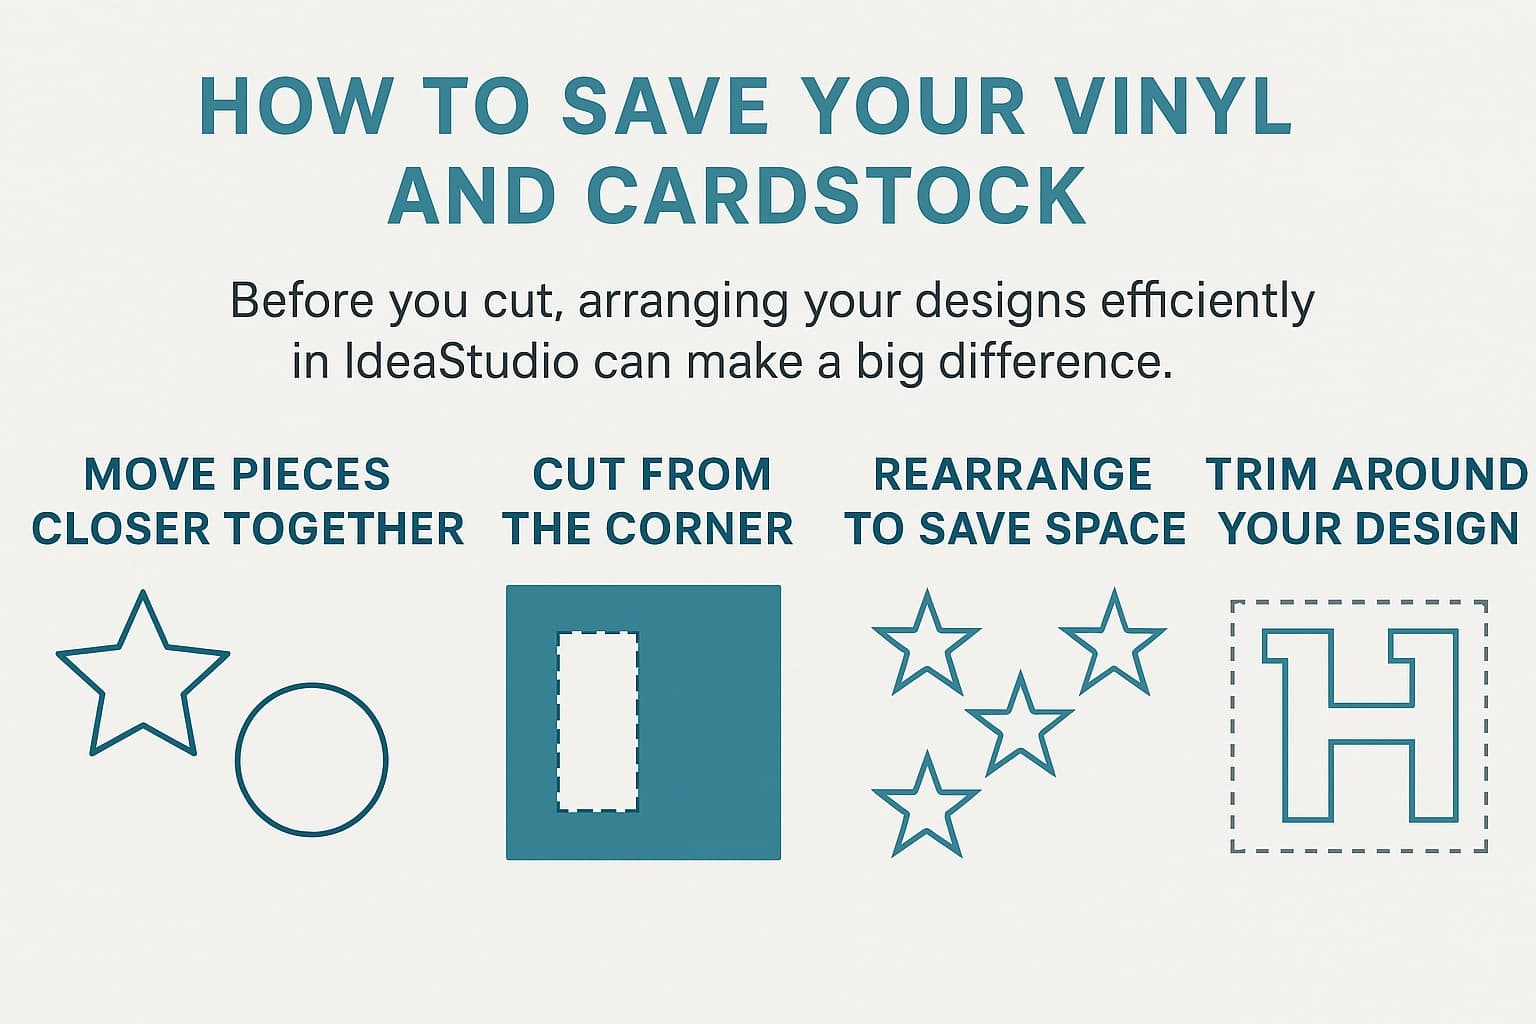
1. Bring Your Designs Together Before Cutting
Just because elements are spaced out on the canvas doesn’t mean they need to be spaced out on your material.
If you’re going to manually place pieces on your project anyway, you can:
- Move all pieces into the top-left corner
- Push shapes closer together
- Rotate pieces to fit tighter
- Stack small shapes around larger ones
This alone can save inches of vinyl every time.
Example:
Imagine you’re making a handmade greeting card that uses five cardstock stars:
- 2 light‑blue stars
- 2 dark‑blue stars
- 1 silver star
On the canvas, these stars are arranged exactly where they’ll appear on the finished card — spaced out across the whole design area, just like the final layout.
A beginner might hit “Make It” without rearranging anything. The machine would then cut:
- one light‑blue star near the top
- another light‑blue star in the middle
- the dark‑blue stars spaced far apart
- the silver star floating somewhere else entirely
Because the stars are scattered, the machine ends up punching holes all over the center of each sheet of cardstock. The leftover cardstock becomes awkward, full of random cutouts, and hard to reuse.
But here’s the smarter, material‑saving approach:
- Pull all the light‑blue stars together into a tight cluster
- Do the same for the dark‑blue stars
- Tuck the silver star into an empty corner
- Cut each color from the smallest possible area of cardstock
You’re going to manually place each star onto the card base anyway, so there’s no reason to cut them in their “final layout” spacing.
This simple rearrangement lets you cut all five stars from small corners of your cardstock instead of sacrificing the entire center of each sheet.
2. Cut Close to the Design — Don’t Cut Out the Whole Sheet
A lot of people cut a giant square around their whole design, weed it, and accidentally throw away tons of usable vinyl.
Instead:
- Trim right around the design with scissors or a rotary cutter
- Save the rest of the sheet for future projects
- Keep your offcuts organized by size or color
You’ll be shocked how many small projects come from scraps.
3. Rearrange Small Elements to Reduce Waste
If your design has tiny dots, splatters, accents, or floating pieces, you don’t have to cut them exactly where they appear in the artwork.
You can:
- Separate those elements
- Move them closer to the main shape
- Fit them into empty spaces
- Place them manually during application
This is especially helpful for designs like splatters, confetti, stars, or scattered shapes.
My bear t-shirt design is a perfect example: Project | “Cute, but Complicated” T‑Shirt
I pulled the splatter dots closer together before cutting, then placed them individually. That’s smart, efficient, and saves a ton of vinyl.
4. Use the “Tetris Mindset” When Arranging
Think of your mat like a puzzle board.
Ask yourself:
- Can I rotate this 90° to fit better?
- Can I tuck small shapes into the gaps of larger ones?
- Can I cut everything from a 3×3 corner instead of the whole sheet?
The tighter your layout, the less you waste.
5. Don’t Cut in the Center Unless You Need To
Cutting in the center of a full sheet is one of the biggest sources of waste.
Unless your project requires centered placement (like Print Then Cut), always:
- Move your design to the top-left corner
- Cut from the smallest area possible
- Save the rest of the sheet for later
This is especially important for cardstock, patterned vinyl, and specialty materials.
6. Break Apart Multi‑Color Designs Before Cutting
If your project uses multiple colors, don’t leave the spacing as if it’s already assembled.
Instead:
- Separate each color
- Group each color’s shapes tightly
- Cut each color from the smallest scrap possible
You’re going to assemble it manually anyway — so let the software layout work for you, not against you.
7. Keep a Scrap Bin or Binder — and Actually Use It
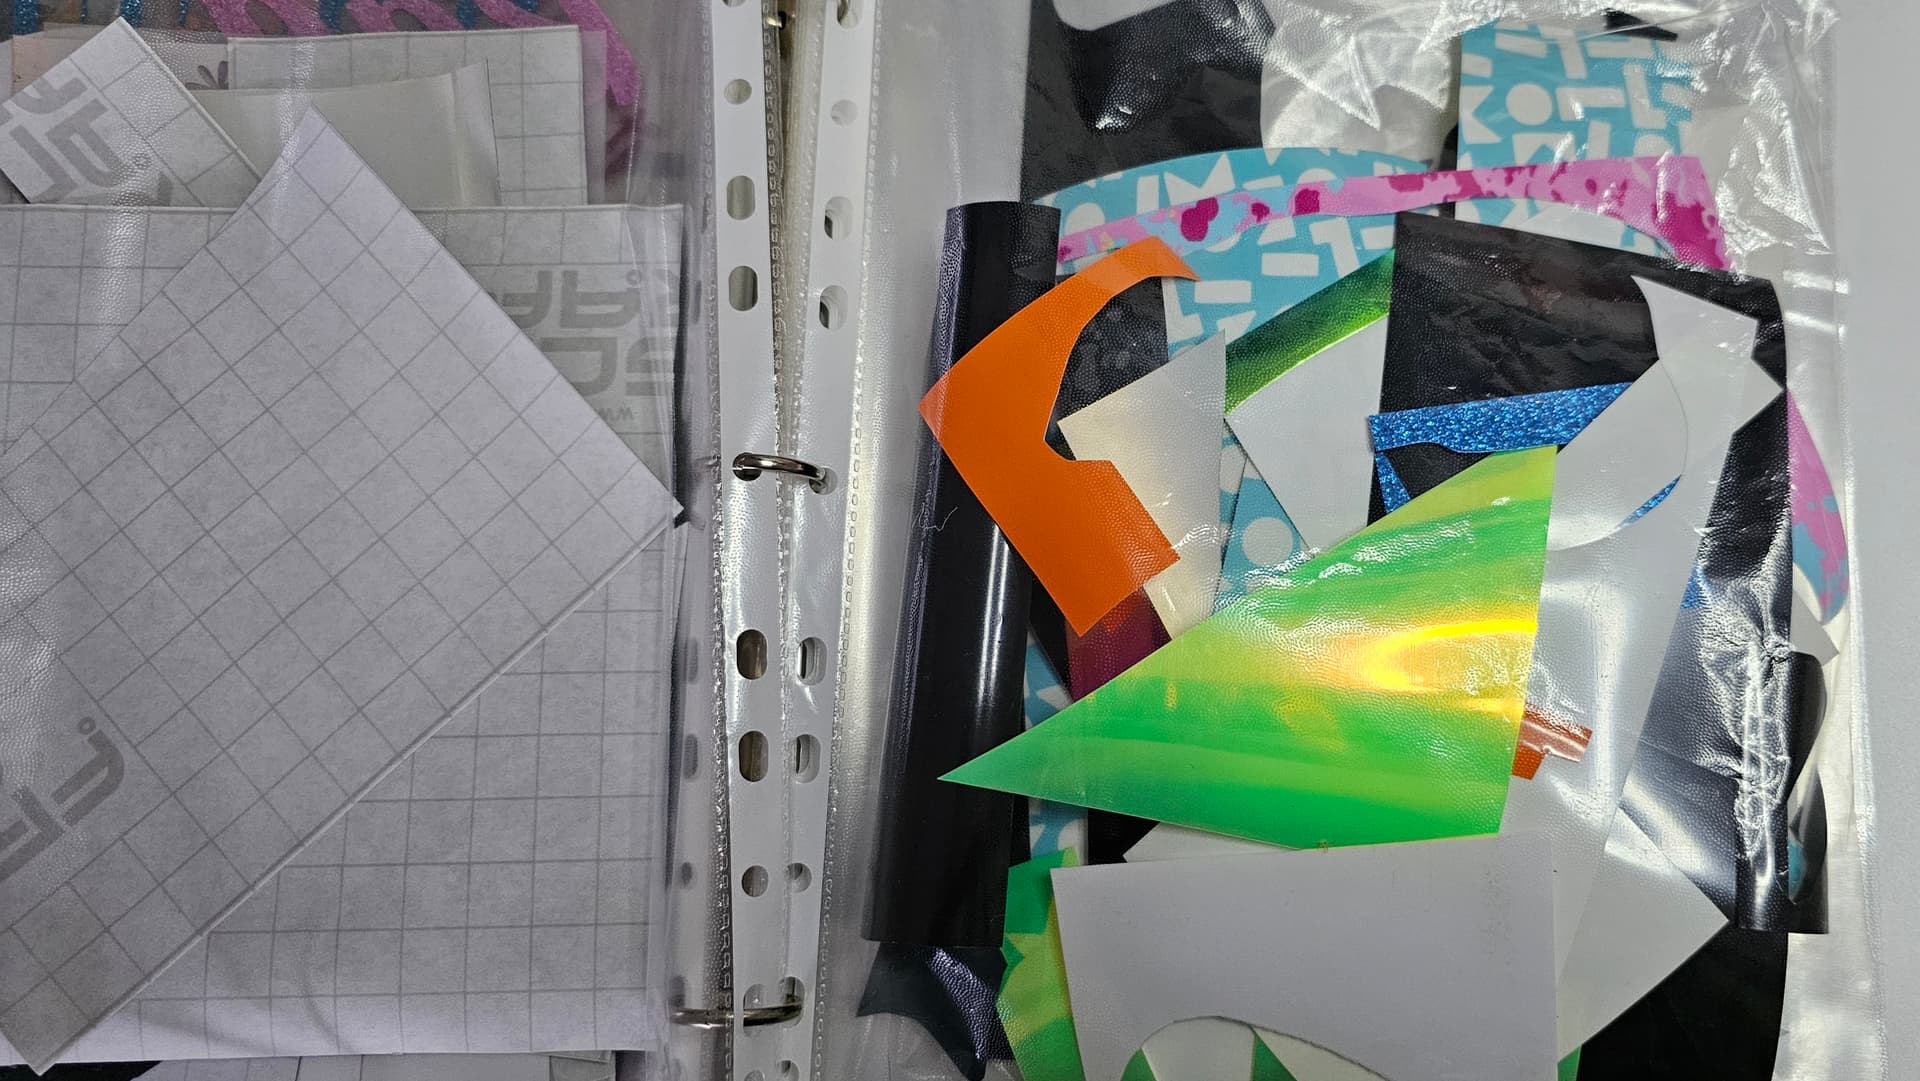
Your offcuts are perfect for:
- Small decals
- Test cuts
- Tiny accents
- Layering practice
- Labeling projects
A 2×2 inch scrap can save you from cutting into a brand‑new sheet.
8. Remember: Efficient Layout = More Projects for the Same Cost
Saving vinyl isn’t about being cheap — it’s about being smart.
When you:
- Arrange tightly
- Cut close
- Use scraps
- Break apart designs
- Avoid cutting in the center
…you stretch your materials, reduce frustration, and get more creative freedom.
Bonus Tip: Don’t Throw Away Those Hollow‑Font or Sliced Out Letters!
If you’re using a hollow font — the kind that cuts only the outline of each letter — you end up weeding out the solid inner letters. Maybe you used text and sliced it out of another element, now you have those letters cut. Most people toss those pieces without realizing they’re actually perfect, usable letters.
Instead of throwing them away:
- Weed the inside of each hollow letter — or sliced element — carefully
- Save those solid letters
- Stick them onto an old, used carrier sheet (the backing from previous vinyl projects works great)
- Store them for future projects (I stick mine inside of a binder sleeve)

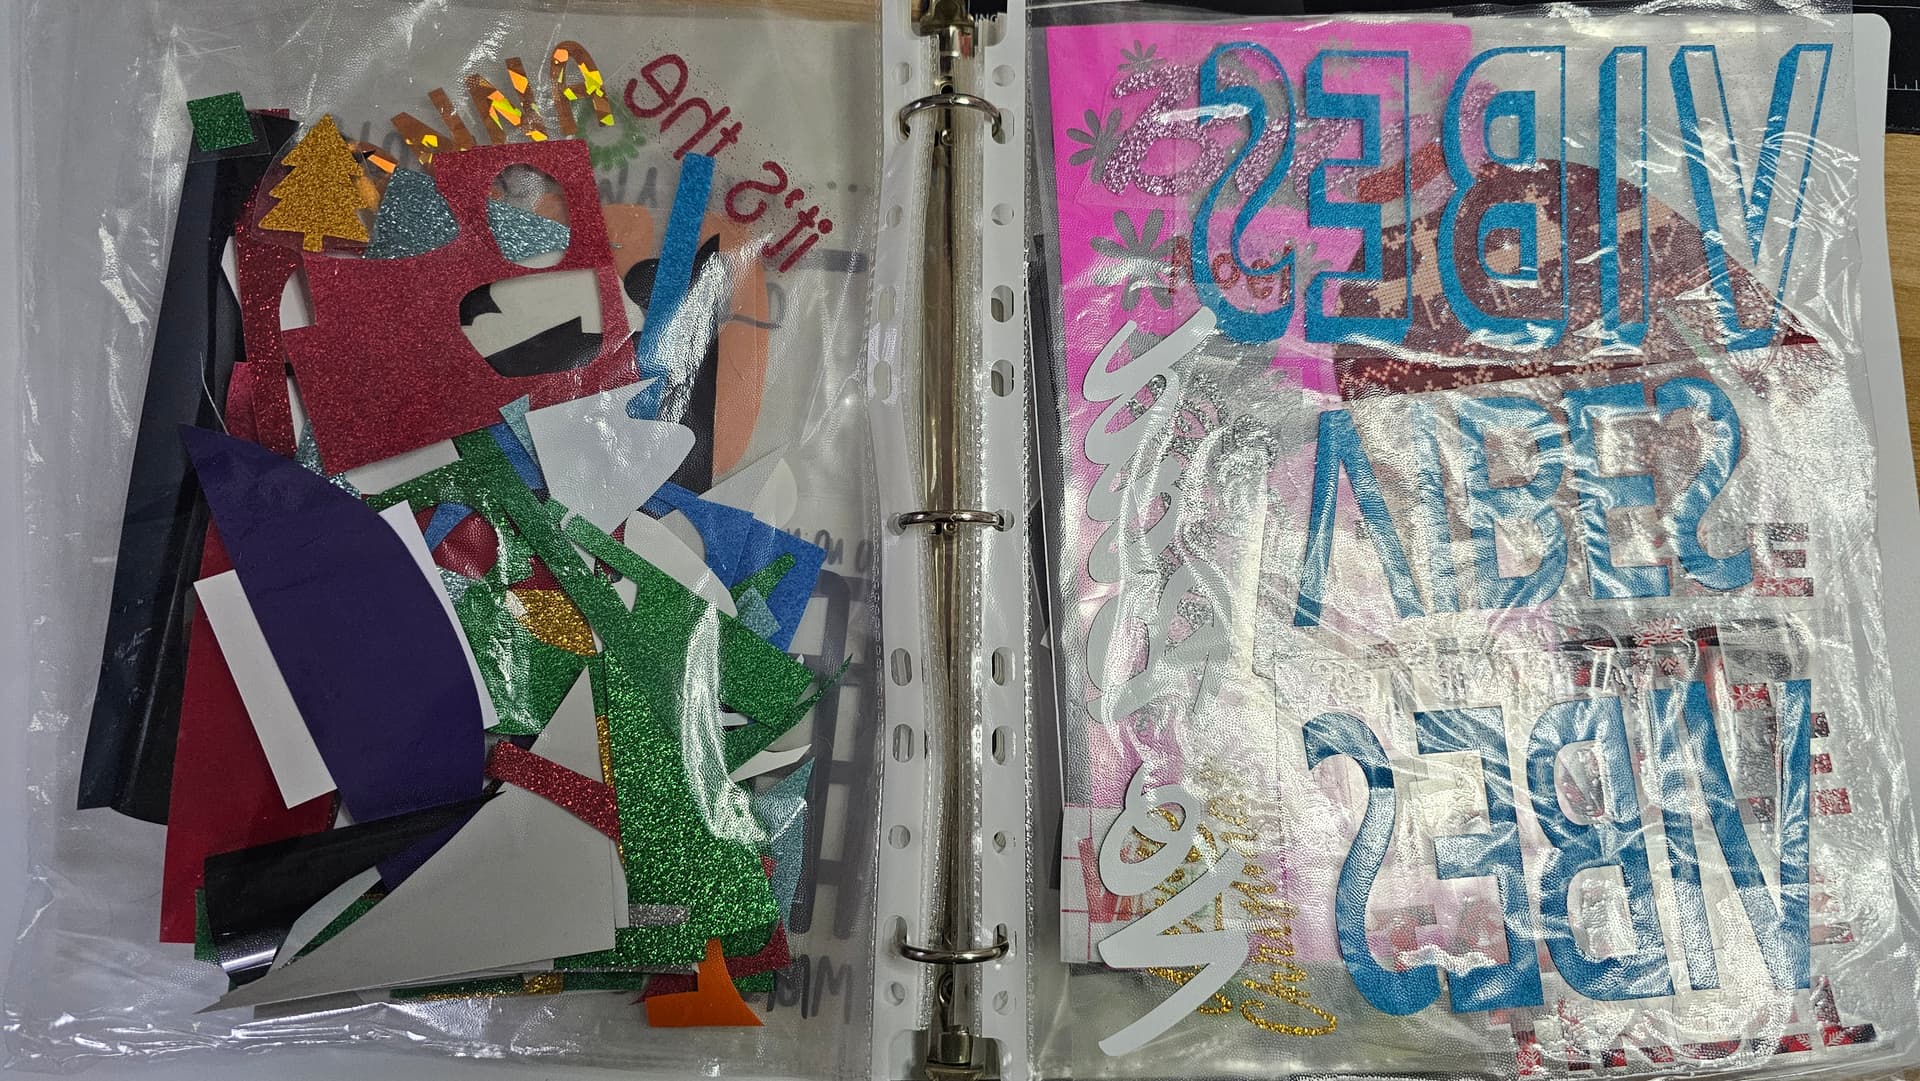
You’ve just created a set of clean, ready‑to‑use letters for future use.
These leftover letters are perfect for:
- Labels
- Mini signs
- Gift tags
- Scrap projects
- Kids’ crafts
- Accent words in larger designs
It’s one of the easiest ways to stretch your vinyl and get bonus designs from something most people throw away.
Now that you know these tips, you’re ready to turn every scrap into possibility. Save your vinyl, save your cardstock, and let your creativity run wild — nothing goes to waste in a smart crafter’s studio. A little planning goes a long way, and your materials — and your budget — will thank you. Happy creating!
If you have a tip to add, feel free to add it in the comments.