One of the problems I faced when I bought my first plotter, the Loklik Crafter, was the broken lines, or as we commonly call them, the ant path. These lines help us create folds in 3D shapes like boxes, 3D cake toppers, 3D letters, and other items we create with our plotter.
This problem has been solved with the iCraft plotter, as it has an essential folding tool, an embossing piece that we also use to apply foil. However, those of us who still own and love our Crafter plotter didn’t have this great help creating our broken lines.
Currently, Idea Studio already has a process that allows us to recreate the broken line, and that’s what we’ll cover in this essential tip.
Follow the steps below and you will be able to achieve the desired effect according to your needs.
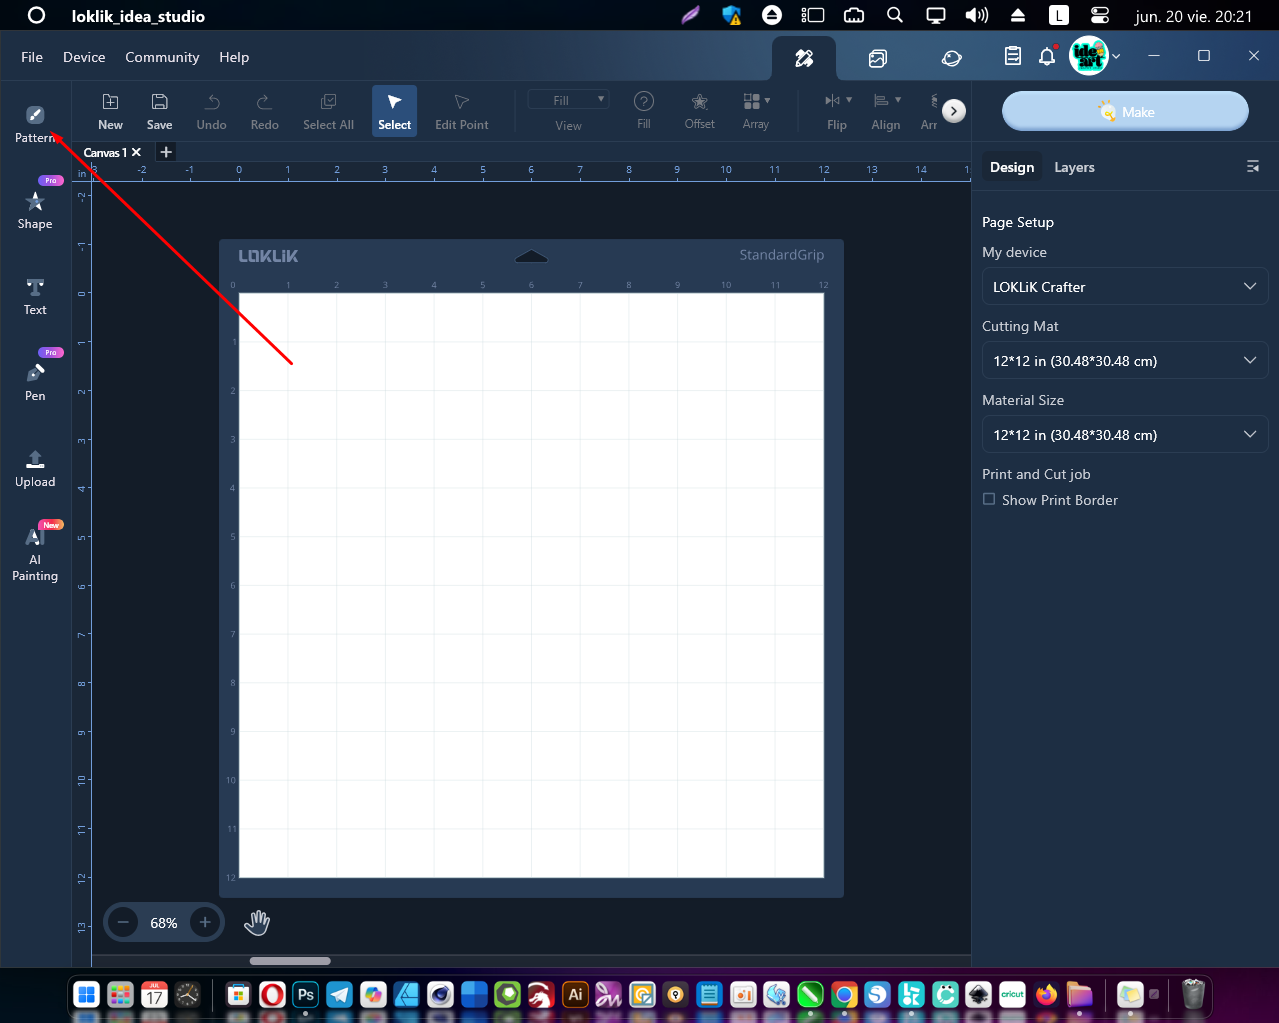
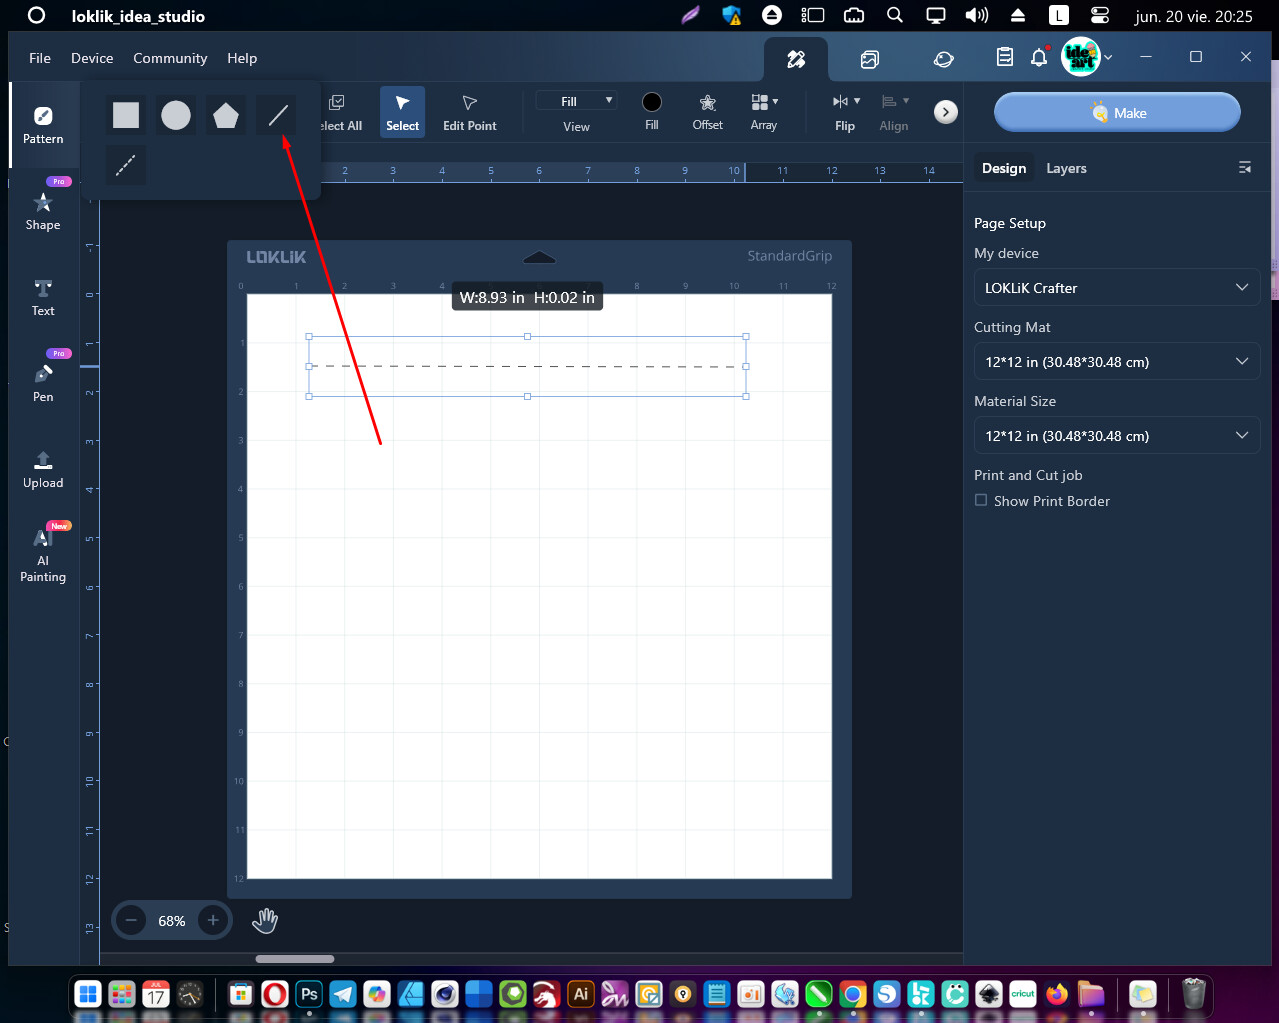
-First we open the pattern panel
-We will see two types of lines: the broken line and the straight line.
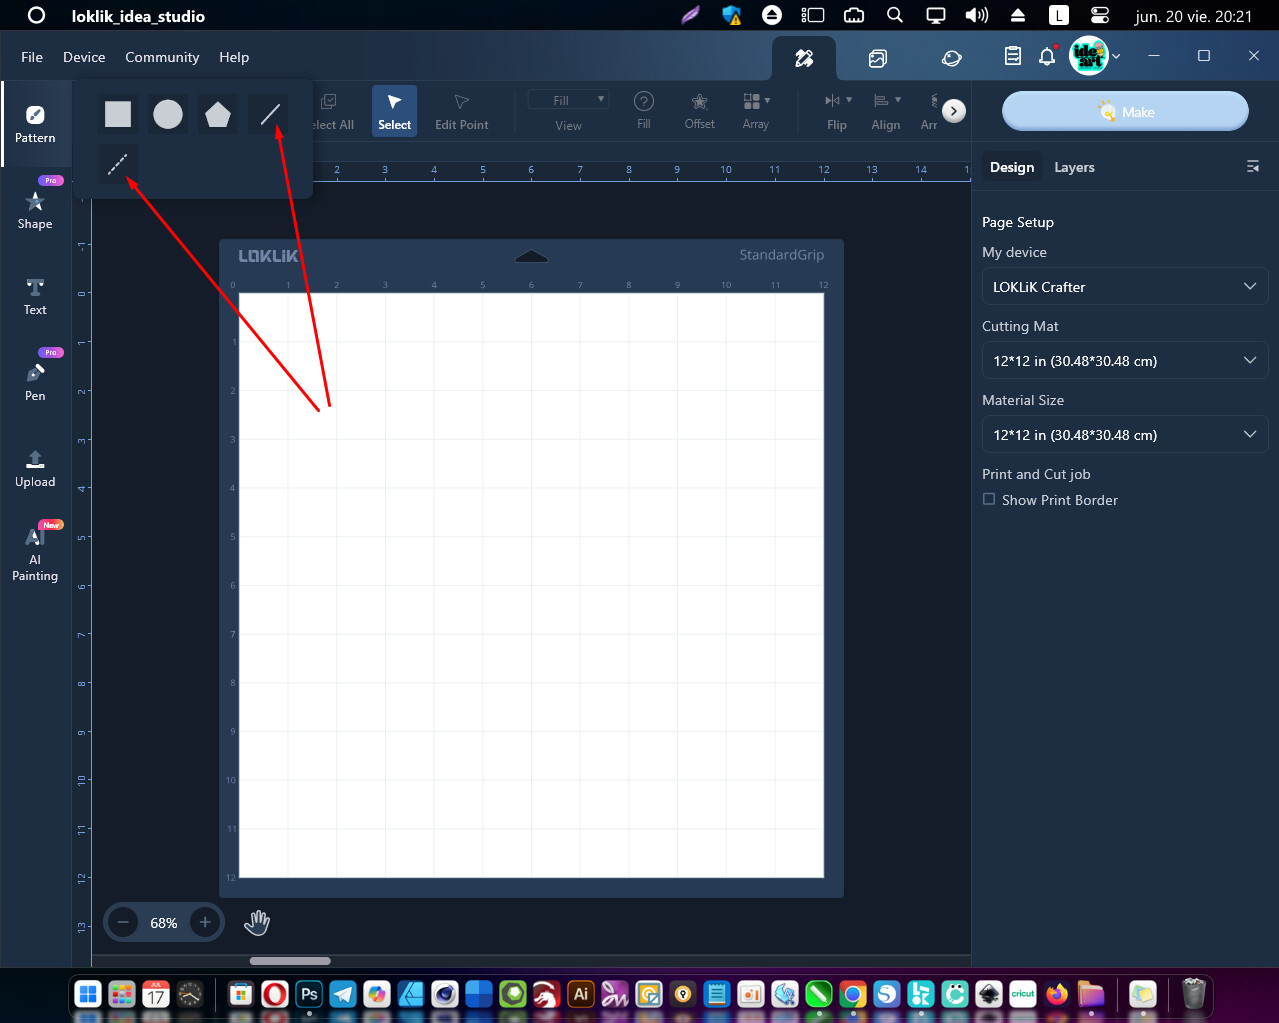
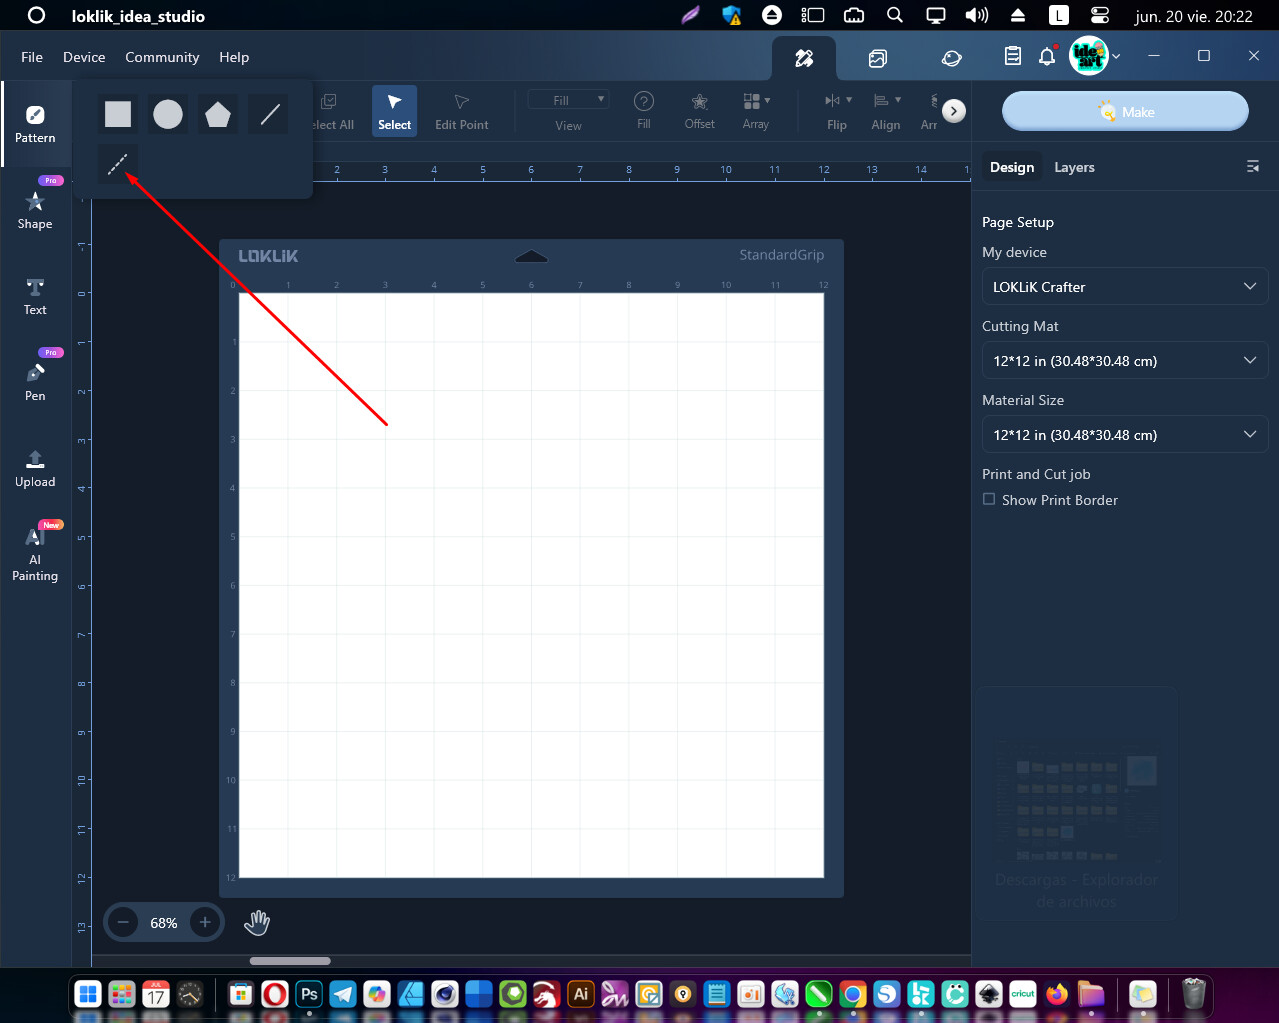
-We select the dashed line to run a test. Remember that this line is only for iCrafter plotters.
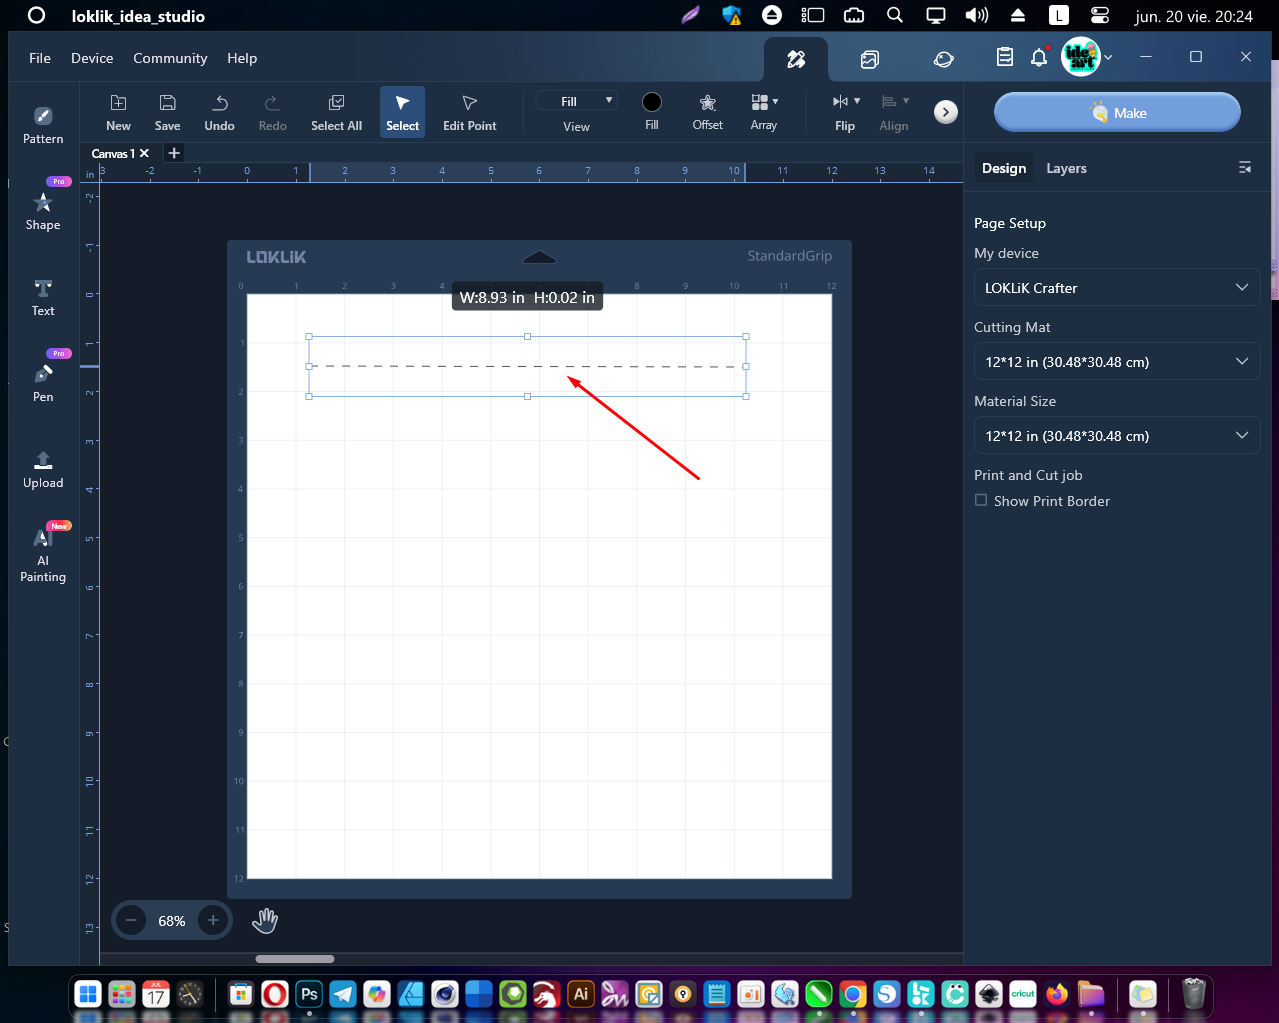
-If we apply the second line, which is the straight line, our plotter will cut that straight line, just as if we select the discontinuous line in the Crafter plotter.
Now I present to you the trick of how to make dashed lines for your projects.
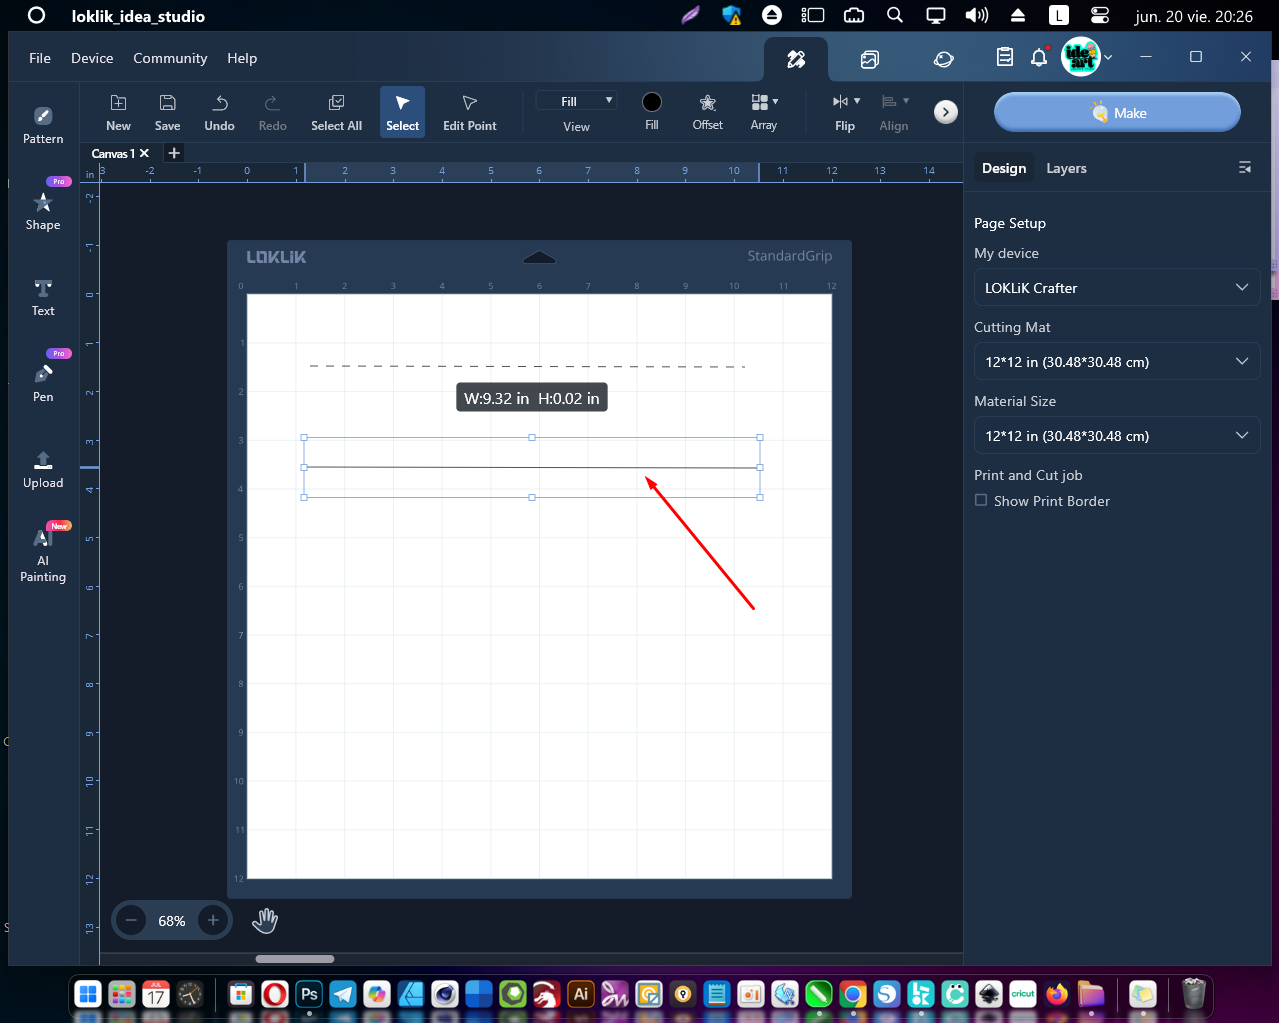
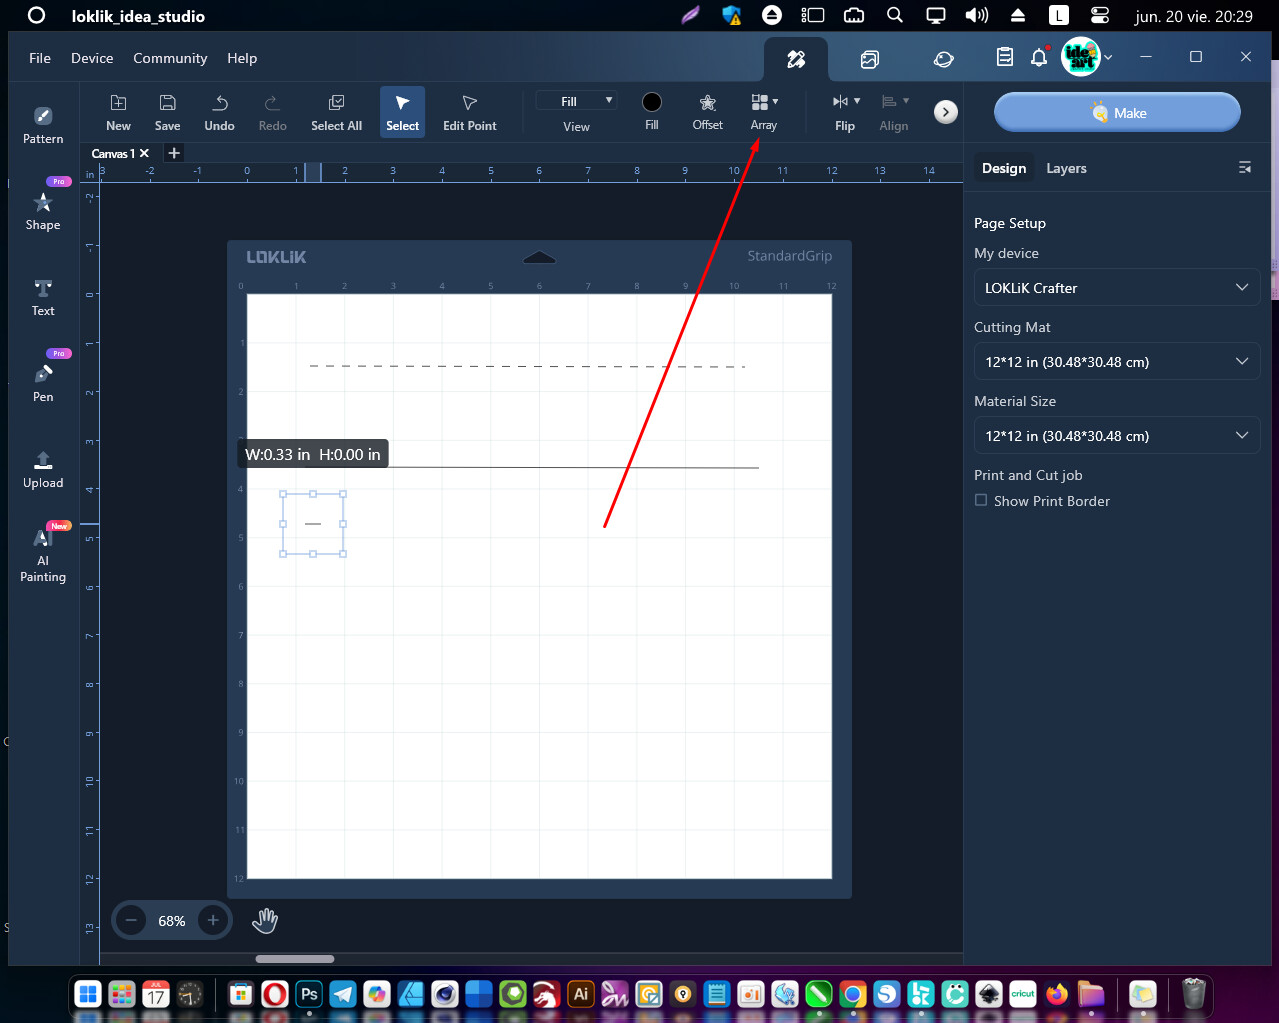
-First make a cake line of a few millimeters.
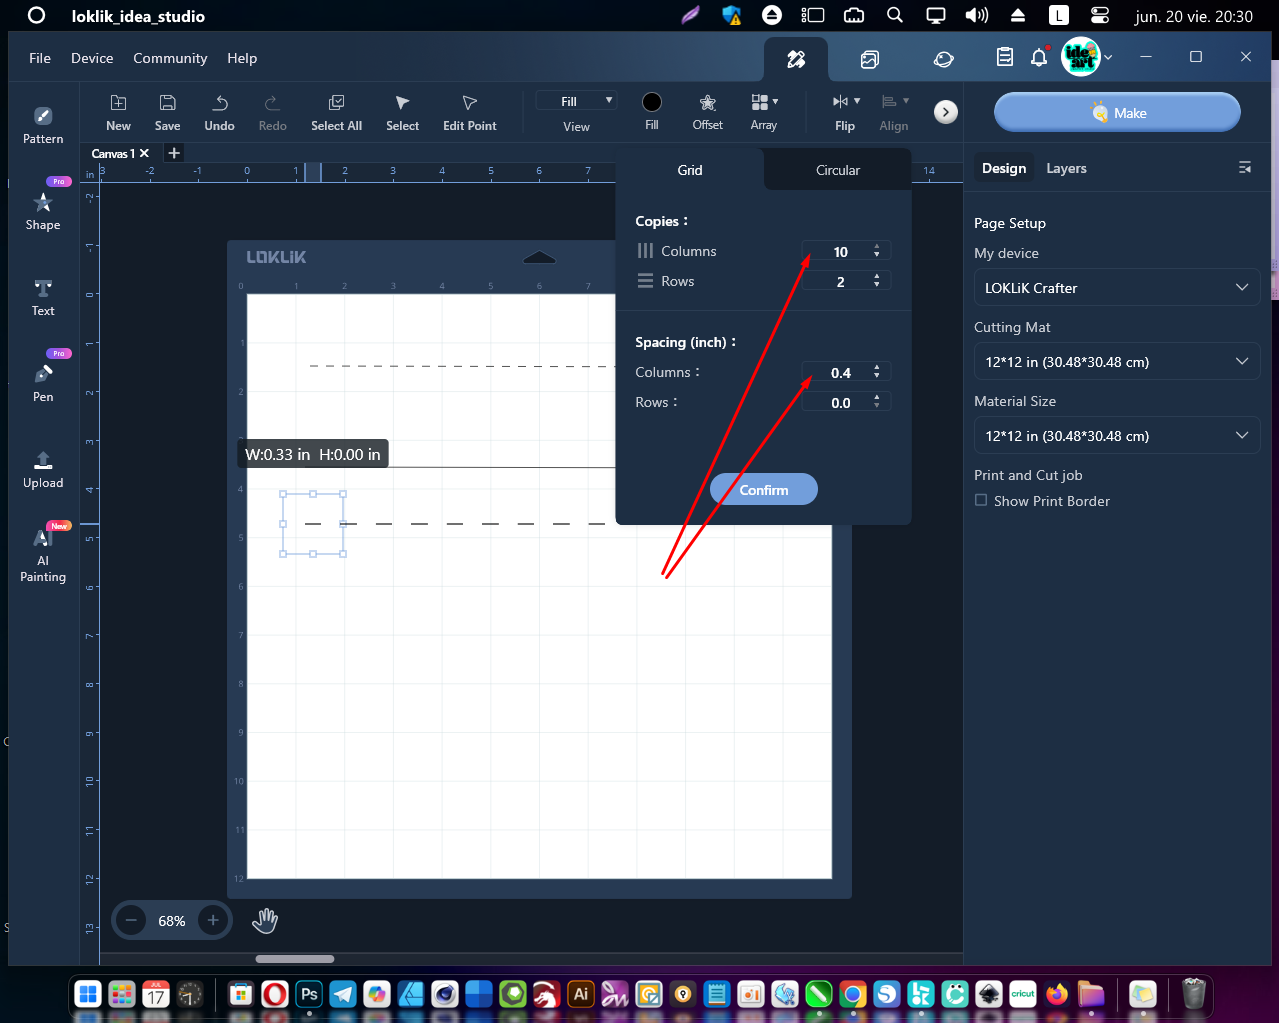
-Then with that small line selected you go to the option called Array.
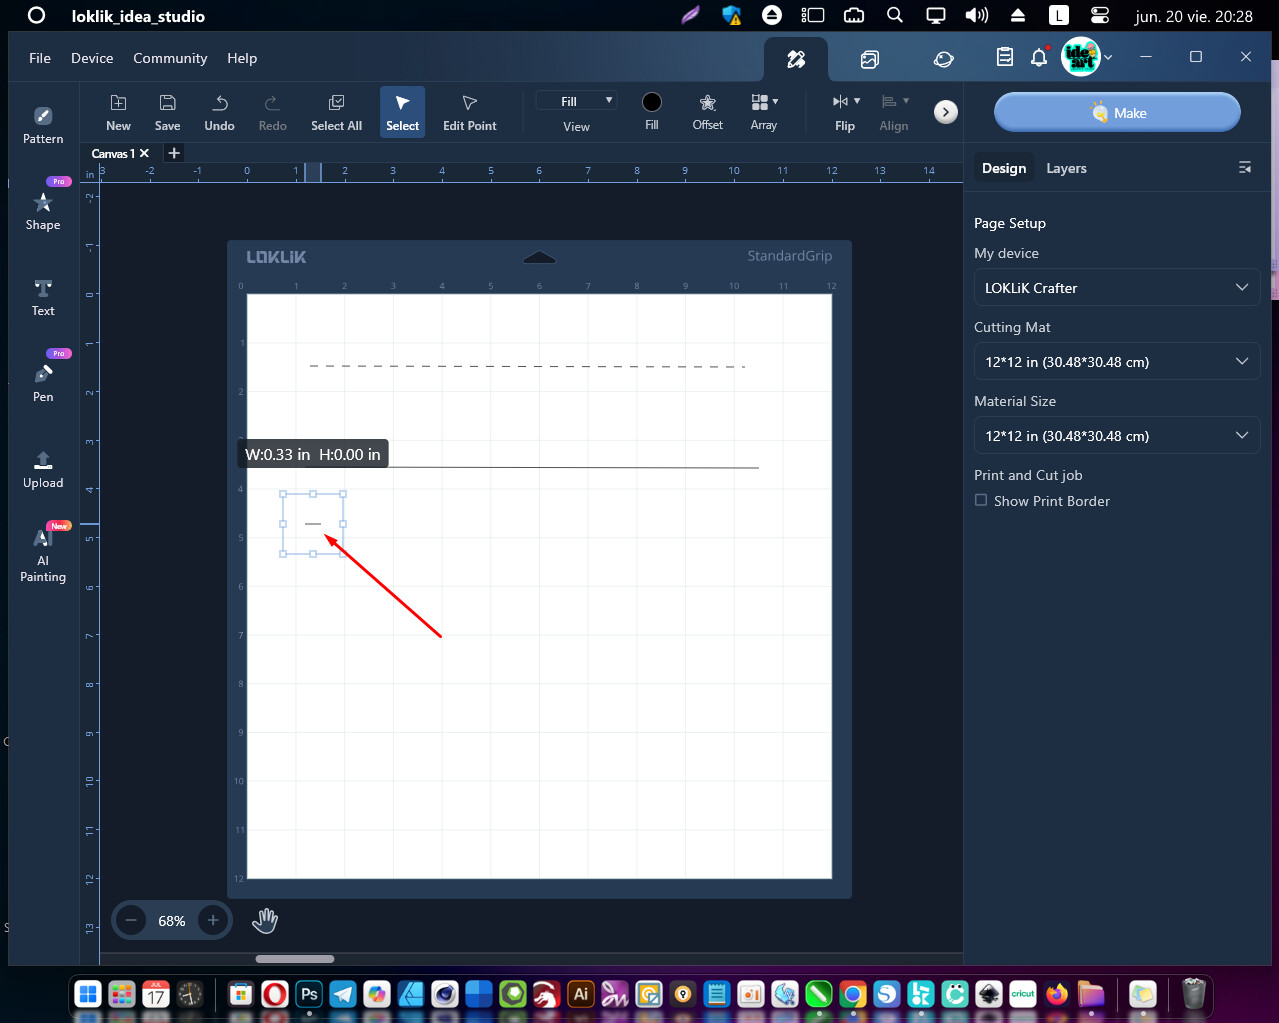
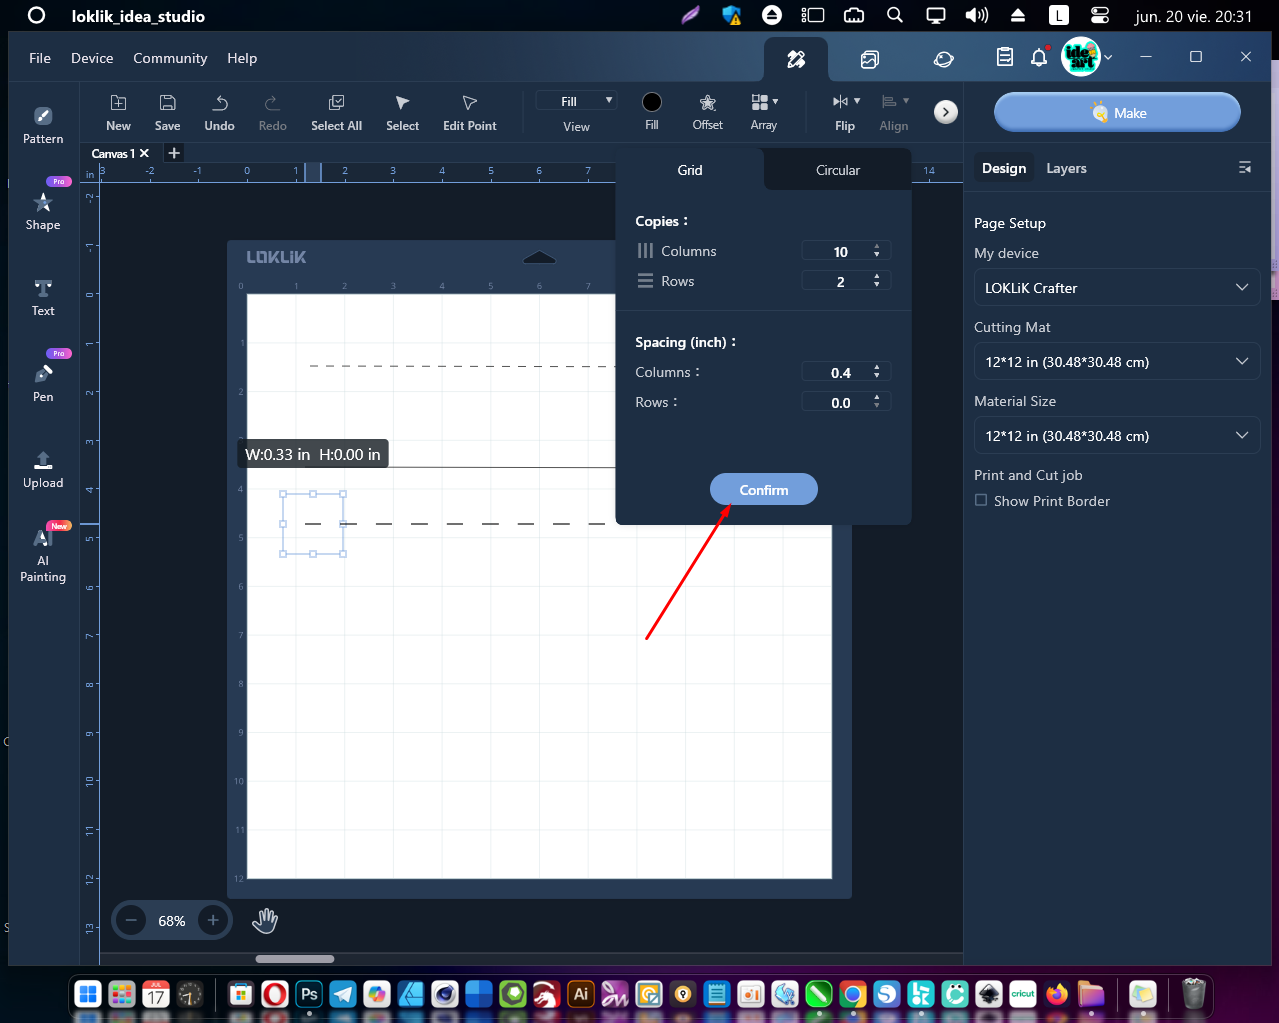
-Here in the column section you will enter the number of steps you want your dashed line to have, and in the column distance you can enter a number of your choice. In my case I chose 0.4 and then click confirm.
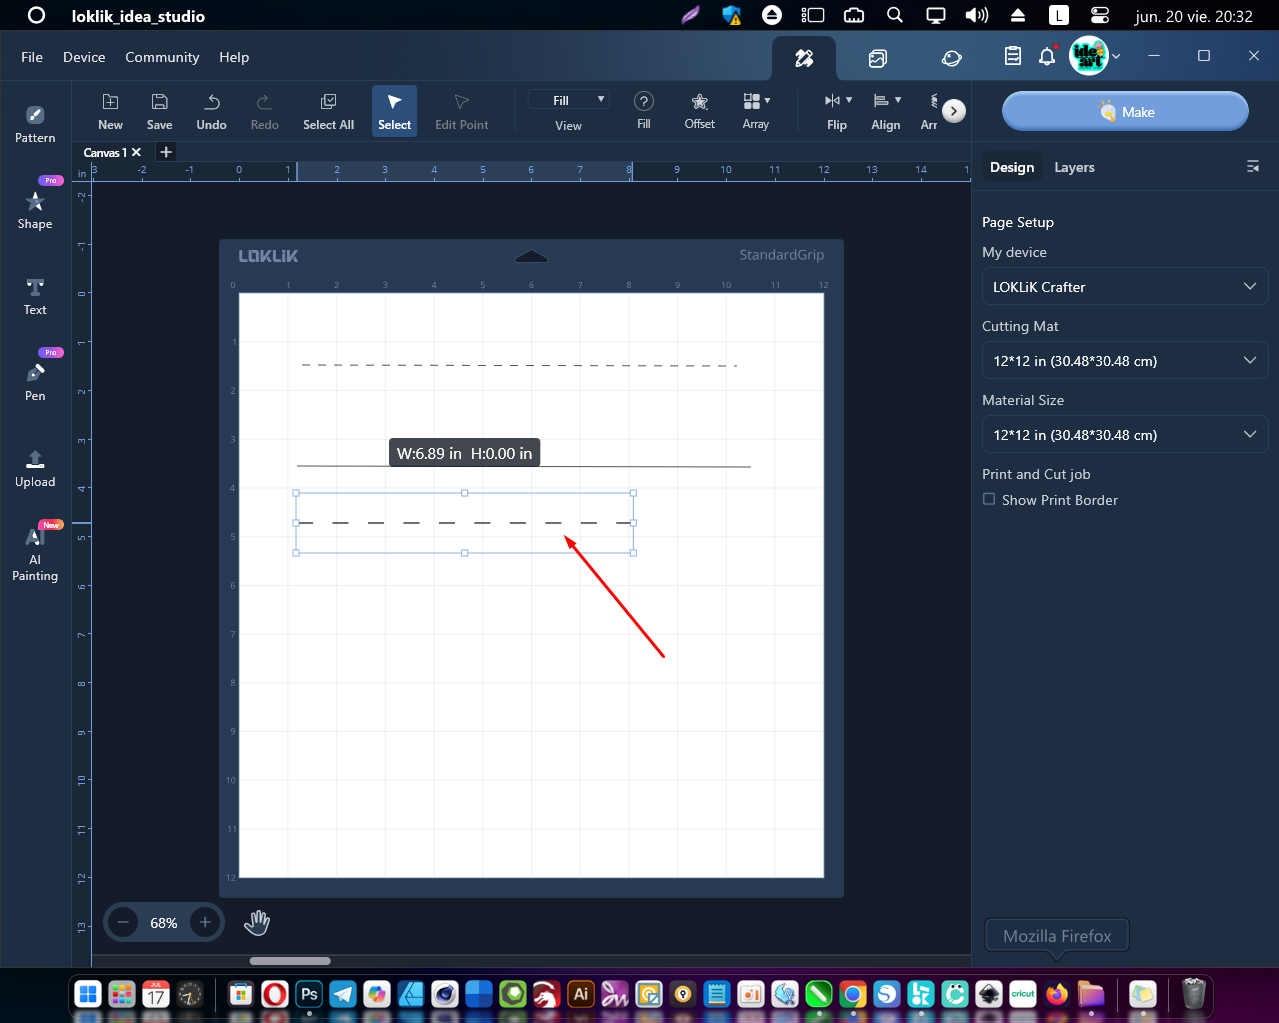
-And with this you have a perfect line which you can apply to your projects that need folding, 3D objects or cards.
Good Luck!!!