New cutting machine help

So I see I have to print using the Loklik software… that’s my first oops. It prints lines on the paper for guides. Well there goes one piece of sticker paper wasted.

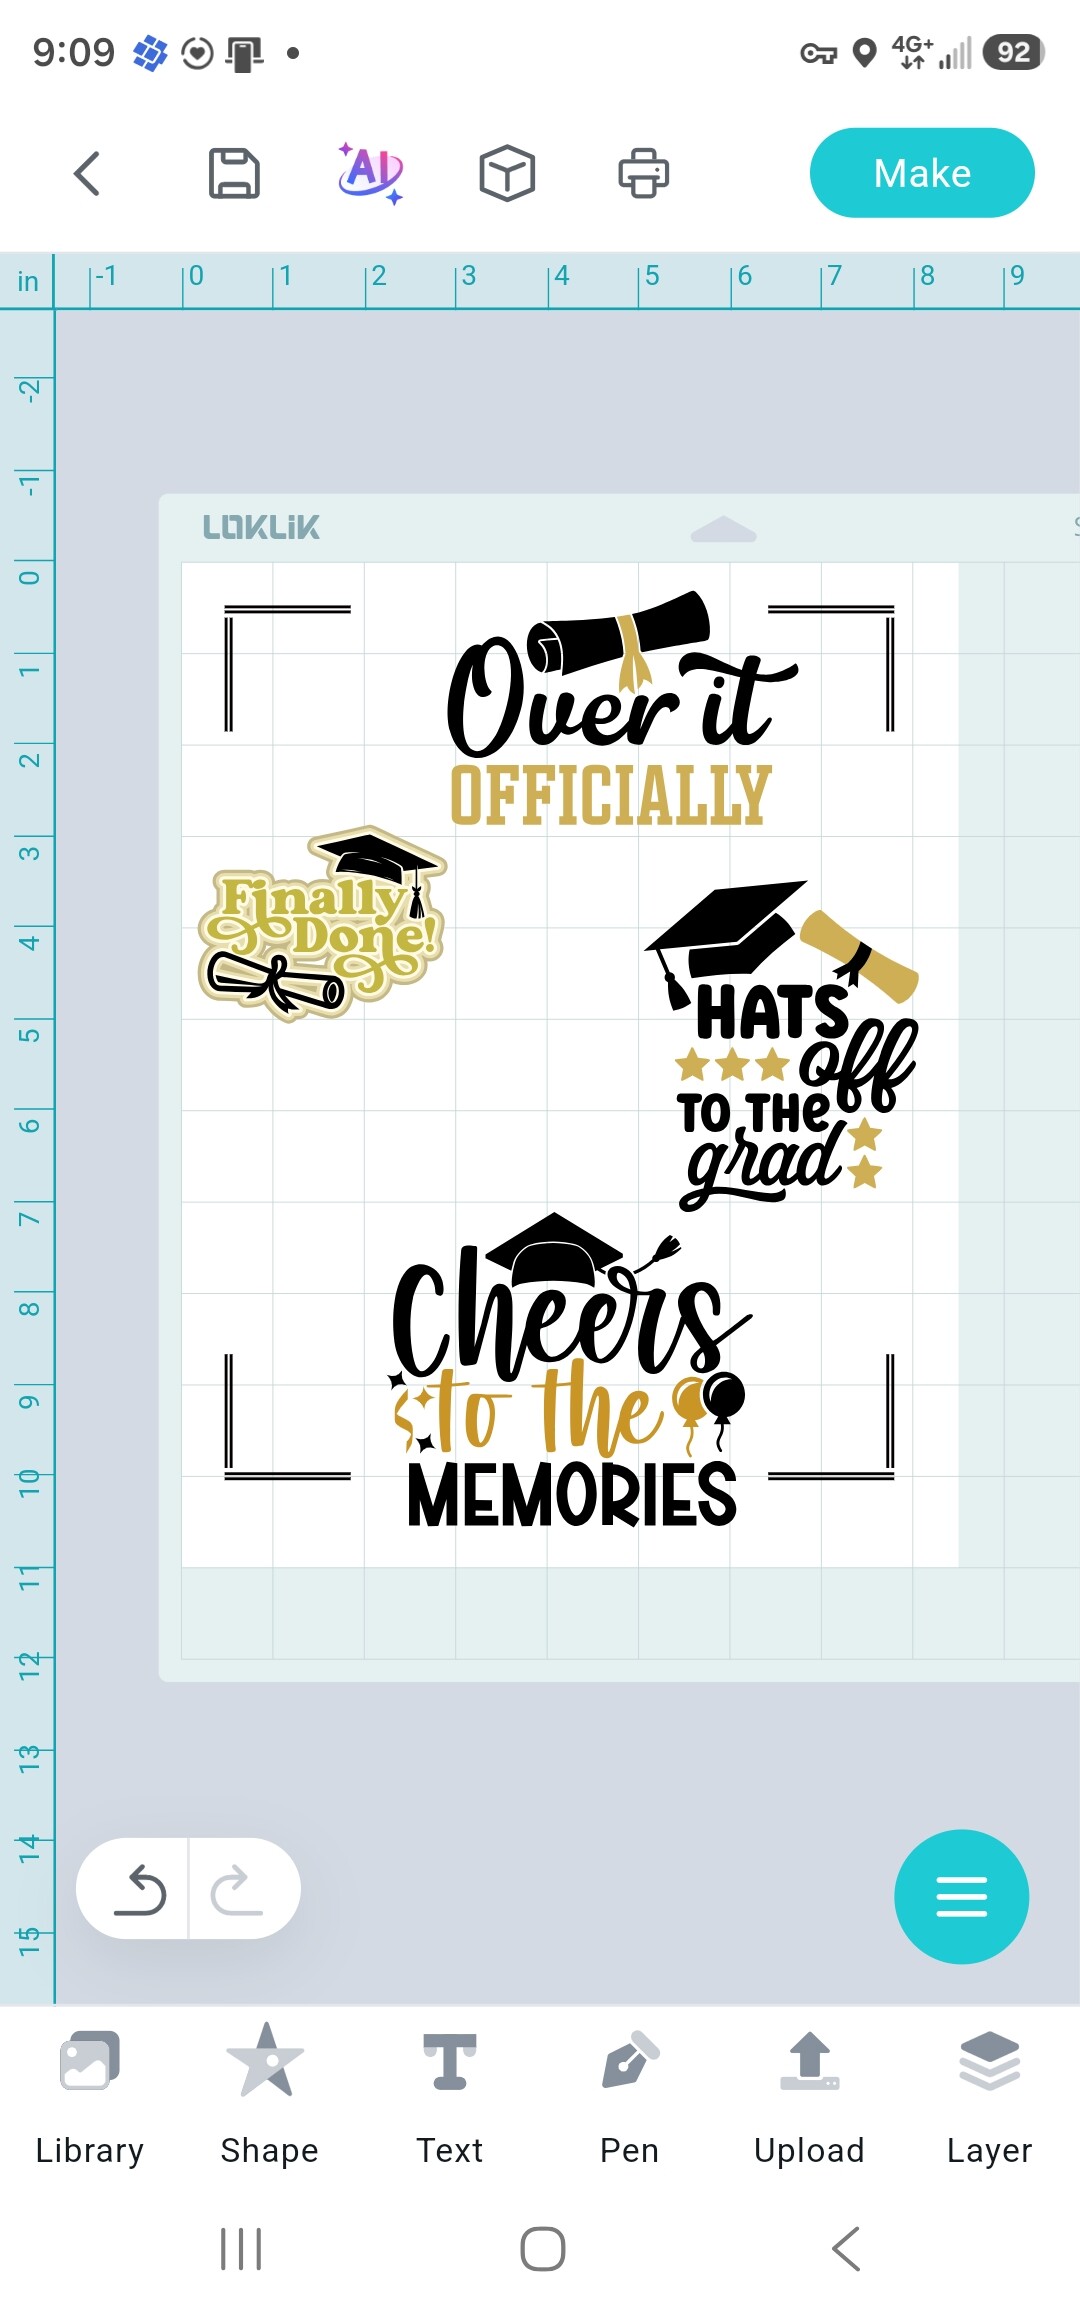
1 - So anyway, I’m importing my images to print inside the software. How do I get it so they move freely? They keep getting locked to other objects and won’t move.

2 - I imported one image that is just white and black… it has words up top and an image below it… the software sees this as two layers, even though my original image isn’t. It’s supposed to be one layer and cut around the text and then around the image all as one sticker. I can’t group them together?

3 - Can’t I have the software default to 8.5x11 paper size?

4 - When I import an image into Loklik why does it turn it into a blob of black? For example, if I print one of my designs from Photoshop on my Epson ET8500, it’ll come out like I made it. Example, it’ll look like a sheep made out of yarn unraveling. When I import it into LokLik it turns the sheep into just a black ball. It also made the logo above the sheep one black, and the sheep itself another black when in Photoshop they’re the exact same.

5 - Why the heck when you flip vertically does it also do horizontally? I didn’t realize and printed crap backwards.

6 - What’s a tip for sticking my paper to the cutting mat? I put it on and it’s a little crooked. Took it off and have bubbles / it’s ruined.

2 Likes

Hi @yuppicide0138. Welcome to the community.

  1. That’s the new snapping tool, and I hate it too. I’ve already sent in a request and asked them to allow us to turn it off. It’s driven me crazy for 2 days.
  2. If it was uploaded as a standard cut image, it will count each color as a layer. If you choose the print then cut, it should keep your image together, but add a white offset layer behind it, which will be used for the cut layer. So, it’ll print the image, then it’ll use the white offset layer as the cut operation.
  3. You can use the canvas setup option to set the material size to US Letter, and it should stay until you change it.
  4. I’m not sure why it’s turning it to a black blob. This may be something you need to report to support. Click the Help option then Feedback and Errors. Send a message and toggle the Log Files option. This will send them a diagnostic report, which will help them pinpoint the issue.
  5. When you click the flip vertical it certainly should only flip it vertically. You may want to report that also.
  6. For paper/cardstock, it’s best to use a light grip mat. If you use a standard grip, it will definitely be difficult to put on and take off. However, a brand new light grip mat can be just as sticky as a standard grip mat. So, you can stick a t-shirt to the mat a few times to lessen the stickiness. Then, you may have to tape down the sides with masking tape.

I hope this helps. Good luck. If you need more help, don’t hesitate to ask.

2 Likes

Thanks for the help. They had a light grip mat at Walmart for $8. I ended up getting one of those and a roller so I can smooth out air bubbles if I have to with my cold lamination sheets. I’m eventually going to buy a cold lamination rolling machine. I’m actually still at Walmart parking lot I’m going to pick up some blue painters tape as well just to have.

When I create a new project it never defaults to letter size it always defaults to A4 in the settings.

The issue with the sheep turning into a black blob I’m not sure why that happened however I deleted it and re-uploaded it and it looks fine.

I’ll pick up some standard paper tonight before I go home this way I can print something out that won’t ruin my sticker sheets. Then I can practice cutting something. So far I’ve created six or seven designs. I have uploaded six stickers into the workspace and they just show up as a layer on a white background. I used make and then print and cut. It shows me a blue line around my sticker I assume where it’s going to cut.

3 Likes

You’re very welcome. The light grip mat will surely help. I do recommend using plain paper to test and practice before using real sticker paper. Just be aware that if you’re using glossy sticker paper, you will have to calibrate for that material using glossy paper. I was able to do this without wasting a sheet of glossy sticker paper by printing on regular paper, then laminating it in my laminating machine, but you could also use adhesive laminate. Or you could print the calibration sheet on regular glossy photo paper.

As for the default A4, yes, if you’re selecting you material size for print then cut, you definitely have to tell it every time what size the paper is, however, I don’t think it really makes a difference as it still prints the registration marks in the same place. Just a tip, you can place your images outside of the registration marks, just make sure you don’t place your images on top of the marks. Just be sure to leave room between the image and the edges so it can cut. Here is an example of what I’m talking about:

I’m happy a reupload gave you your actual sheep. Sometimes, the app will just glitch and a reupload or a reboot will help.

And, yes, I forgot, it’s a white offset layer. I have edited my original comment to fix that in case others read this post. And you are correct, the blue lines are where it will cut.

It sounds like you’re doing great so far. If you have anymore questions, ever, just ask. We’re always happy to help. We’re glad you’ve joined us here. If you’d like to join in on our activities and earn cheers points that can be redeemed for gift cards or products, you can learn more about that here: Mini Awards Store | A New Way to Celebrate Creativity and Engagement. There’s the latest version of the store along with the link that explains how to earn cheers.

We also have weekly events in which you can win materials, gift cards, and cheers. Tonight, we finish up our :soccer: Game On! #SportyCraft Challenge | Bring Sports to Your Crafts event. You can come check out the entries and get an idea of what goes on. There will be a new event posted in the next few days, I’m sure.

We’d also love for you to join us in the 🎁 Daily Check in#5 | 30 Days of Little Joys Challenge. You can get cheers for checking in daily. Hope to see you there.

Happy crafting! Can’t wait to see your projects!

1 Like

So I decided to try and cut one of my reject prints that do not have any laminate on it which I’ve stuck to my standard grip mat. I have 6 layers in the Loklik software (6 images of stickers to cut). One of my images wasn’t PNG, so I used software to get rid of white background. I then said “print and cut” so it makes the vector outline. I did that for all 6 layers. When I select all 6 and select Make, it says something doesn’t have a vector outline. Every time I double click one of the images (layers) it resets itself. So then I have to do the vector outline again or remove the background again.

So far I got it to cut, but it is only cutting one sticker at a time, not all 6. I then attempted again, and only get it to cut one sticker at a time.

PS - I have also logged a complaint with support to be able to turn on and off the lock function.

Hey good news. Support has a new software version coming that will fix the snap to/locking feature! Maybe even today.

Hi, good morning!

Yes, I’m sorry, I thought I mentioned that they were working on it. Upon reading my last replies, I guess, I forgot to finish my statement lol. Idk if it will get fixed today, but certainly this week. I had many discussions with them last week, and gave them plenty of information about all of the issues that are going on with not only that but connection errors that have been happening in both the mobile and PC apps, and also the community website. They seemed to have fixed the mobile app with a new update they did at the end of last week. Their next priority is the PC & community, and are definitely working on that snapping tool.

As for the print then cut, are you selecting all of the images before you click Make? If not, you need to click and drag your cursor over all of the elements so it knows to cut out all of them. As for the vector outline, can you upload a screenshot of the images on your canvas? That will help me to understand what’s going on. You can use the icon with the up arrow to upload the image.

Once I know the kind of image you’re working with, we’ll go from there.

Yes I selected all 6 elements on the screen, it only did the first one and said 100% done. No I’m not going to upload a picture of my current workspace as it has my “original” designs on them, but I’ll create something else later to try and if need be I’ll upload that if I can’t get it working. I bought a pack of plain paper to use as a test.

1 Like

Ok, I understand, no problem. I do know it has a more difficult time doing print then cut with images from other apps. However, I was able to get it working using my Canva designs, before they updated it to this new way of doing Print Then Cut. When you say 6 layers, do you mean 6 “stickers” or is it converting your design/image into different color layers? It shouldn’t be doing that for a Print Then Cut, as that is done when you want to use different colors of vinyl or cardstock, a.k.a Standard Cut. That’s mainly why I wanted to see the image. If you want you can send it to me in a DM. I won’t copy it or steal your idea, I promise. You can click on my name and click the message button to send me a message, but if you don’t want to, I completely understand. If I get a chance tomorrow, I’ll try to record a video to show you the way I do it. It doesn’t involve using the Print Then Cut offset.