Hi, I just got loklik Icraft machine and Im having REALLY hard time learning how to use it. There is so many youtube tutorials but all of them seem outdated because my options/pop ups look different than theirs. There was probably some software update few months ago, because any tutorial older than that dont work for me.
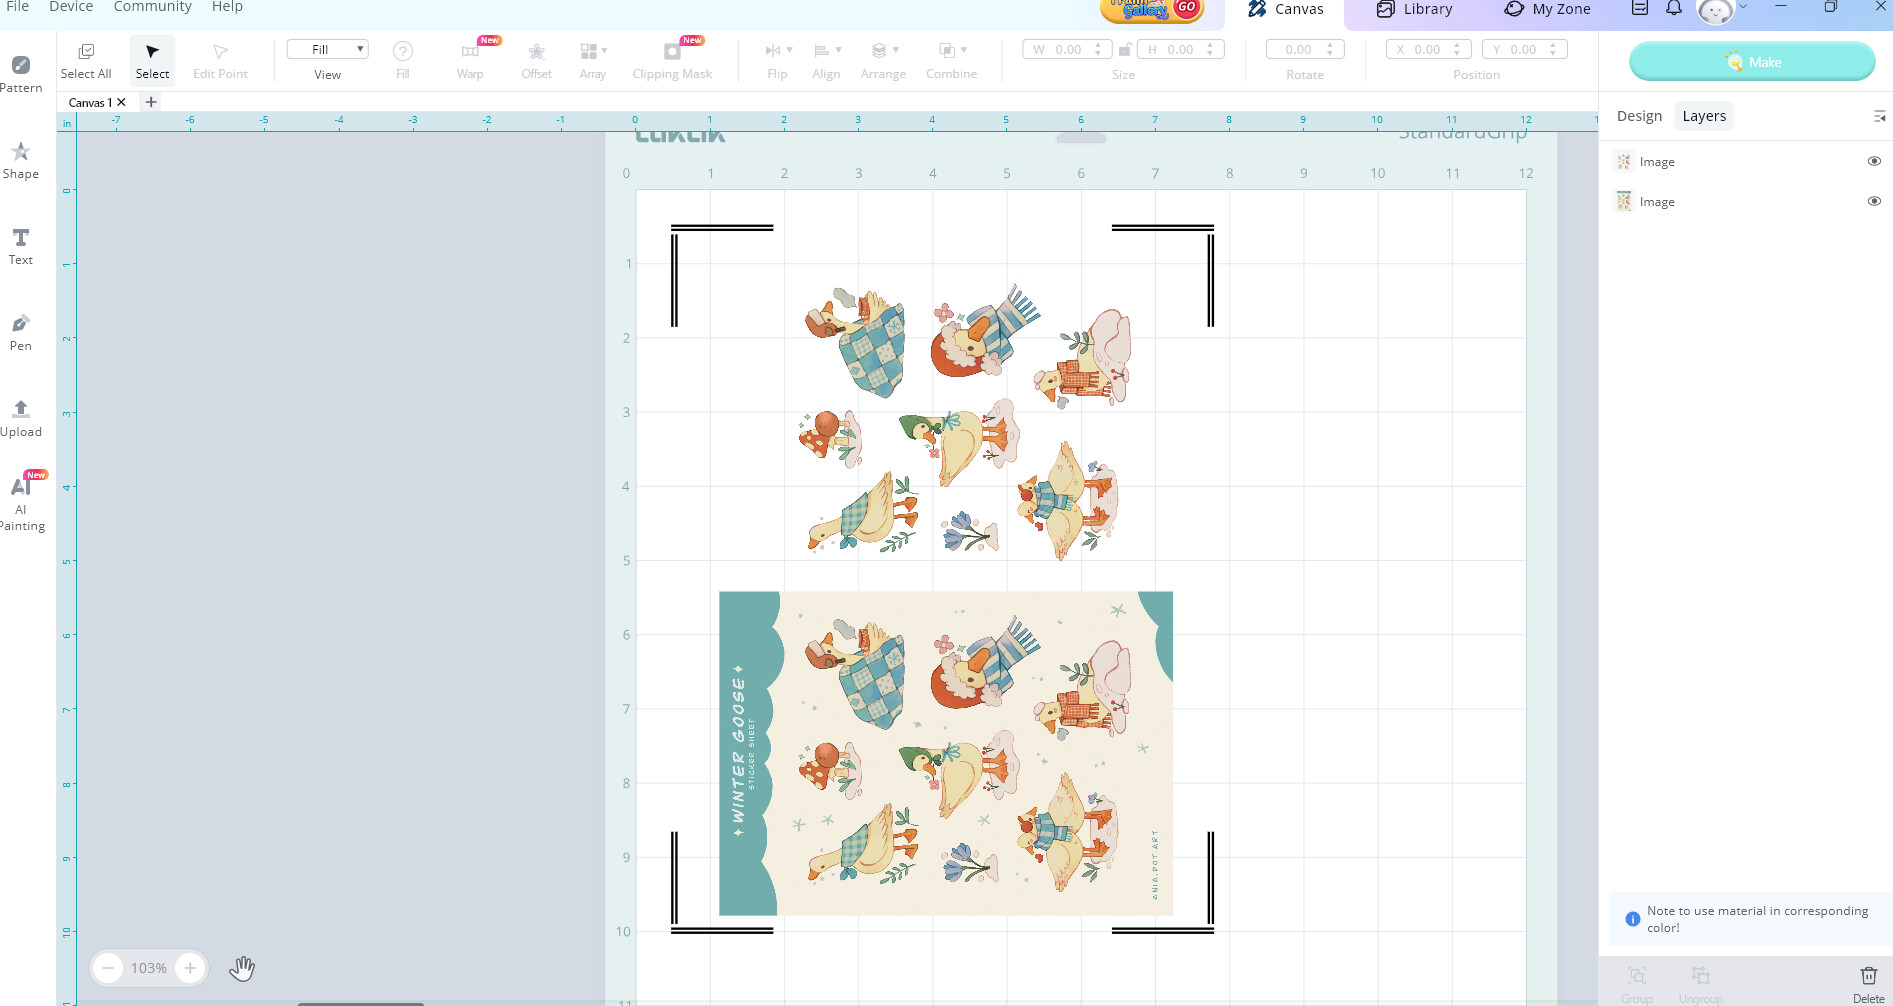
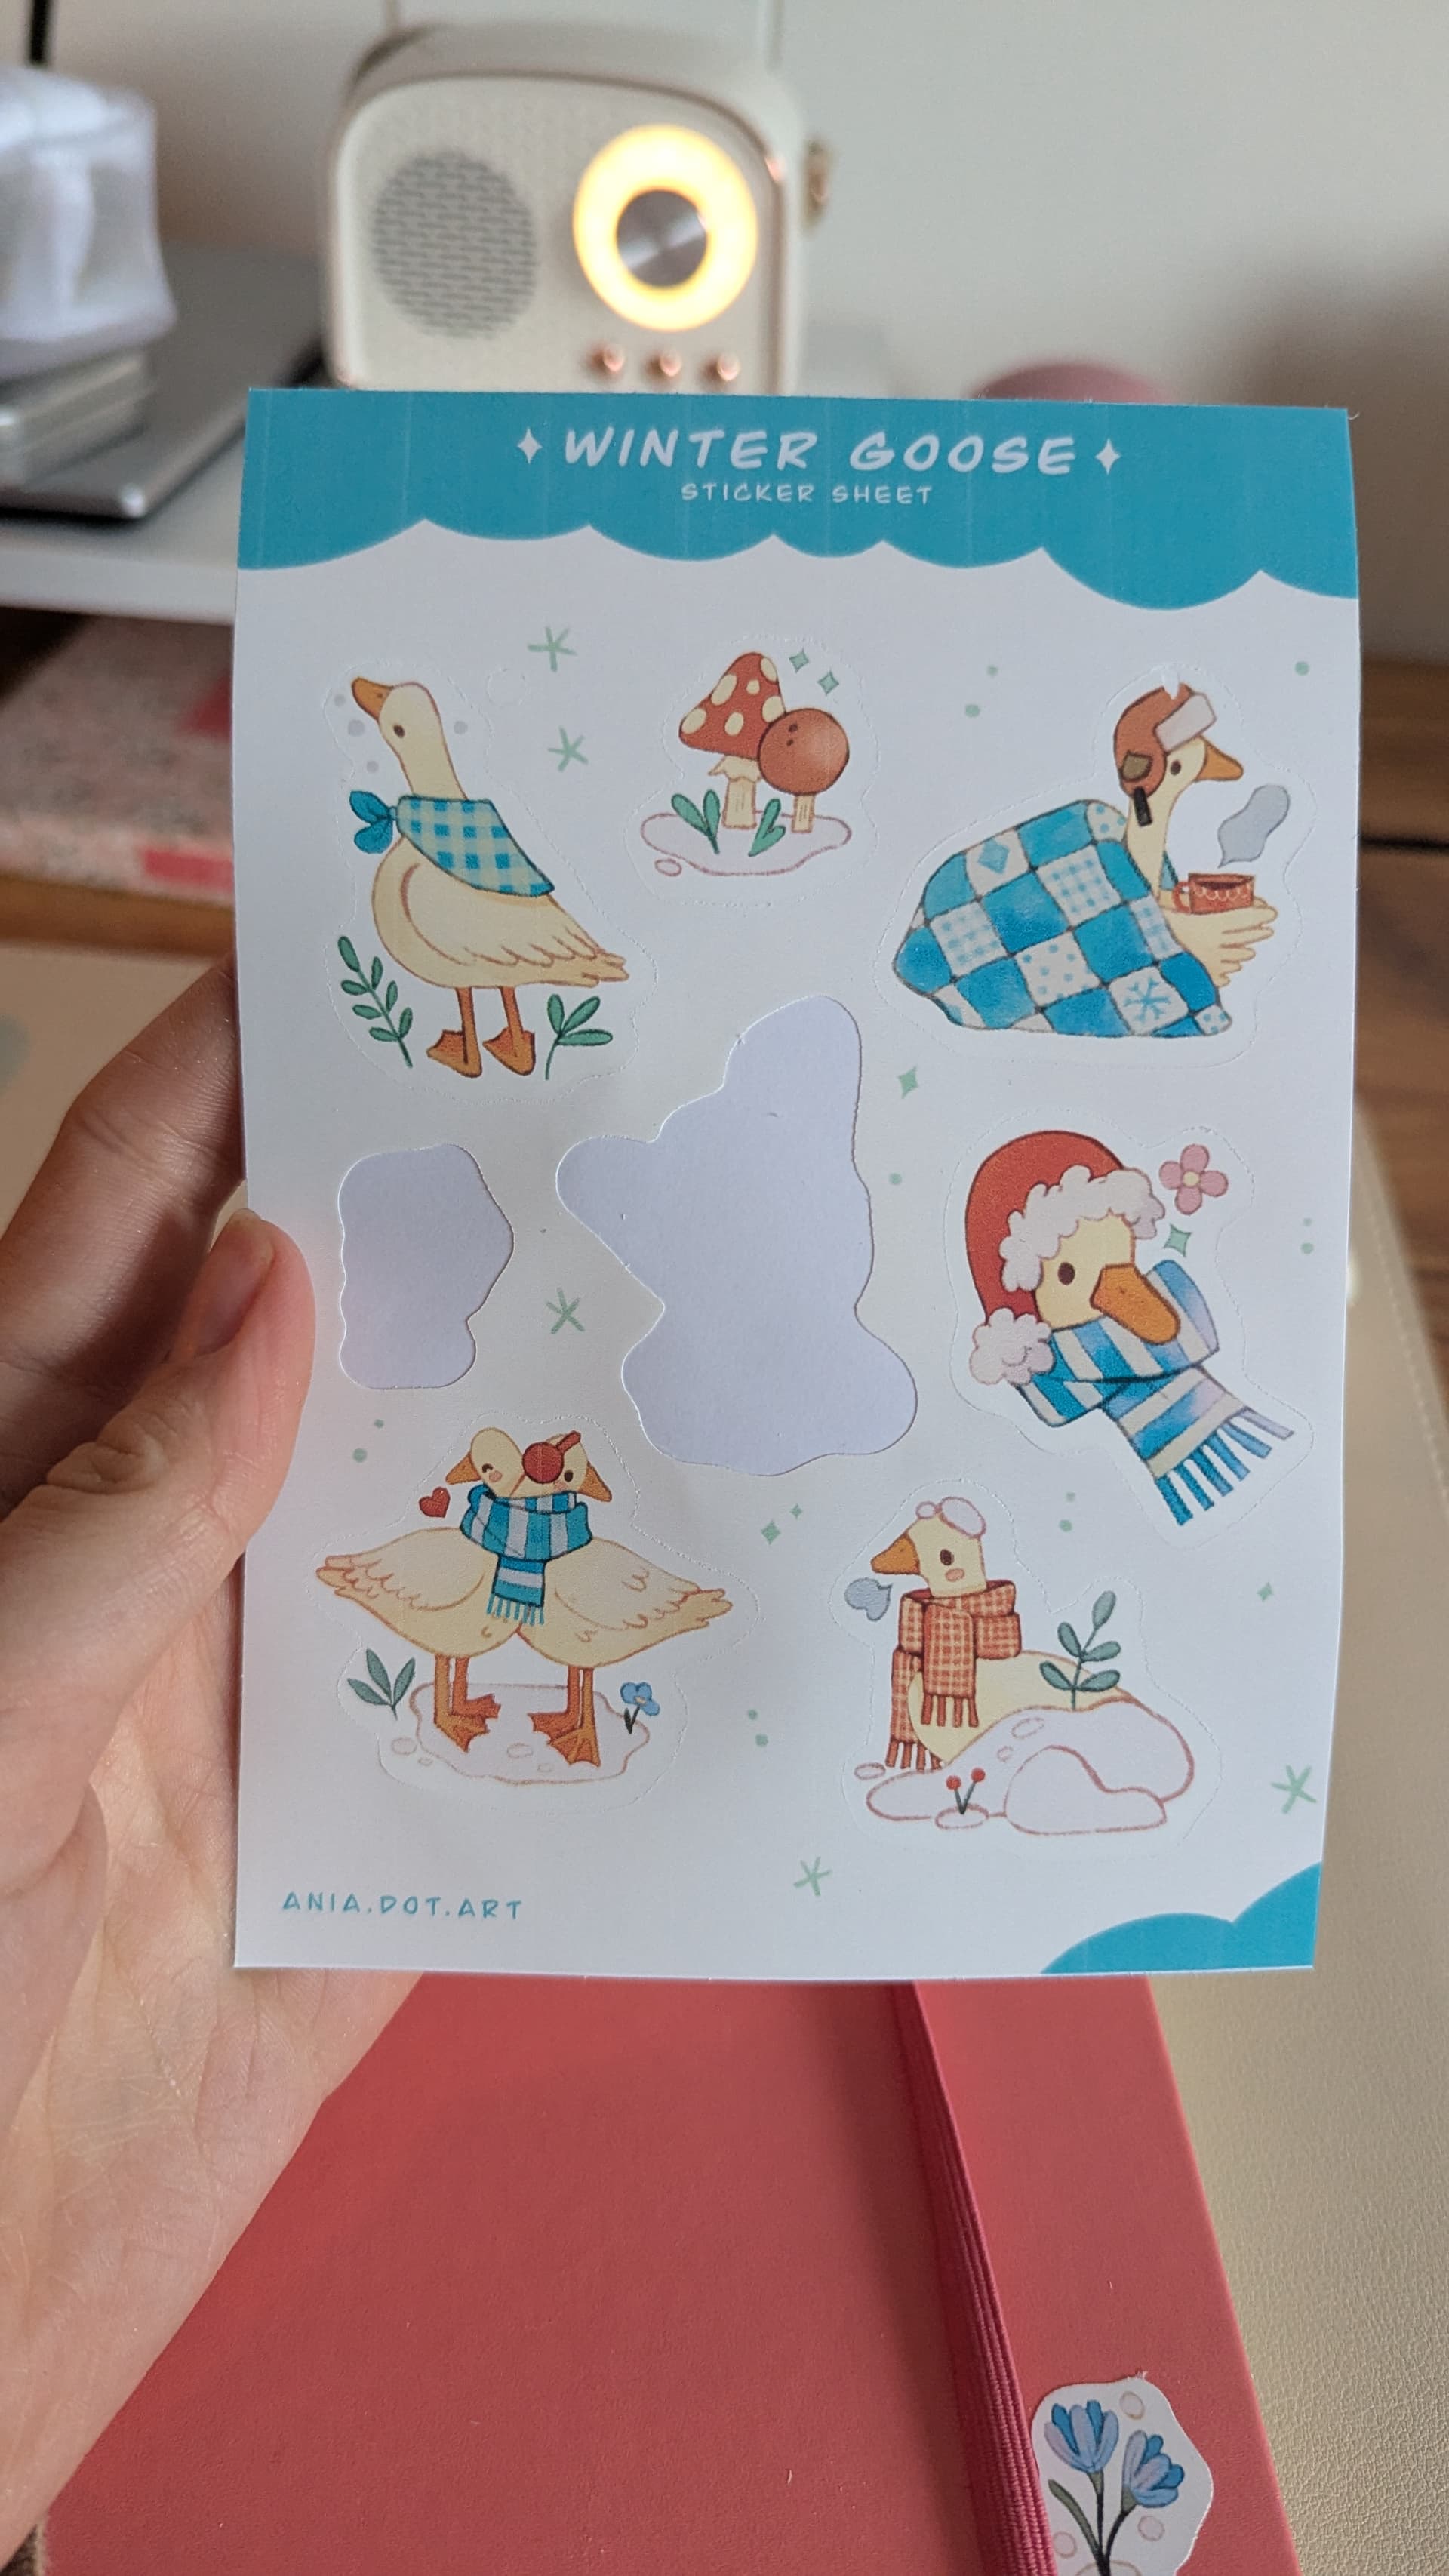
Anyhow, I am trying to cut sticker sheets. I upload two separate files - whole design with background and stickers as one, and stickers alone, as two. Here is how it looks:
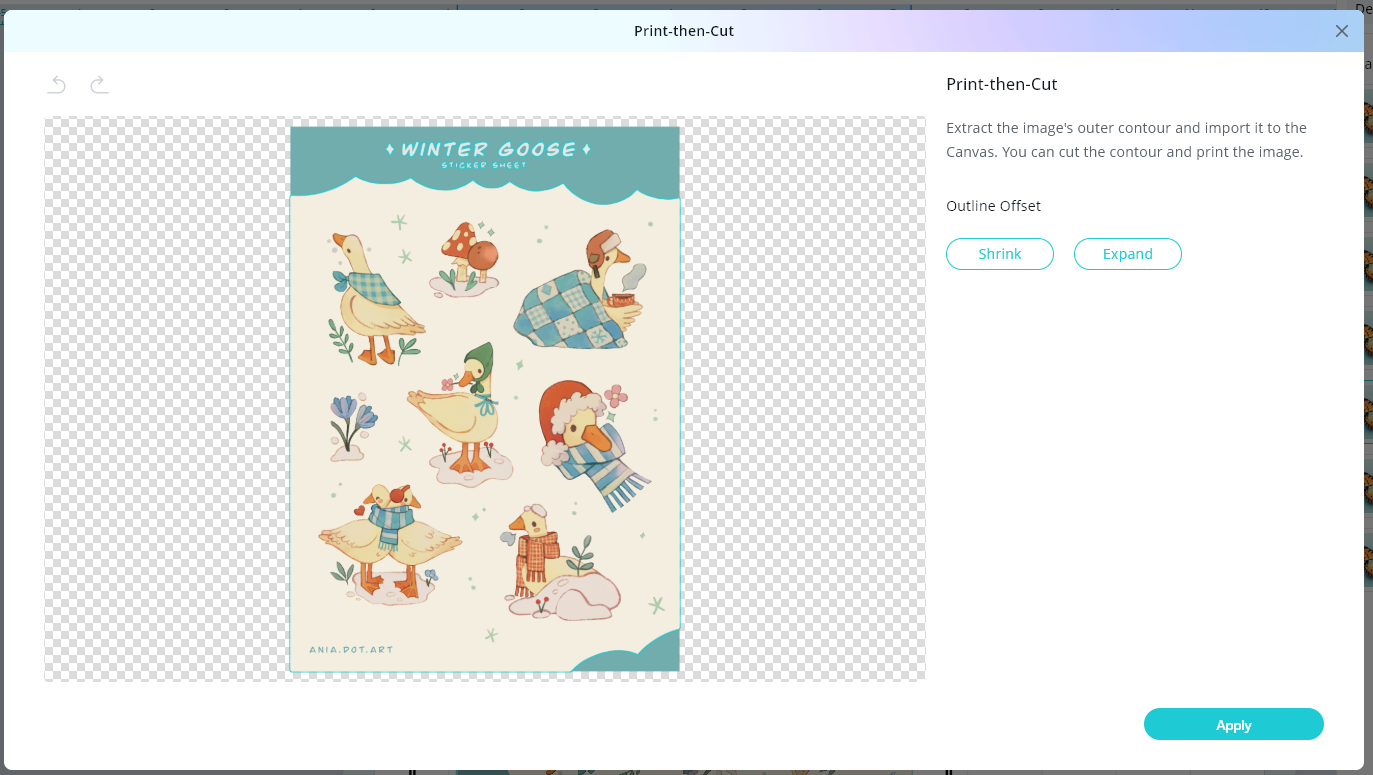
First problem is - I know how to create sticker outline - print then cut - from sticker layer, but I DONT WANT white outline. I want the outline to be the color of the background. When I try to hide the outline, I click “MAKE” - it tells me that selected image has no vector outline - How to I print it without outline?
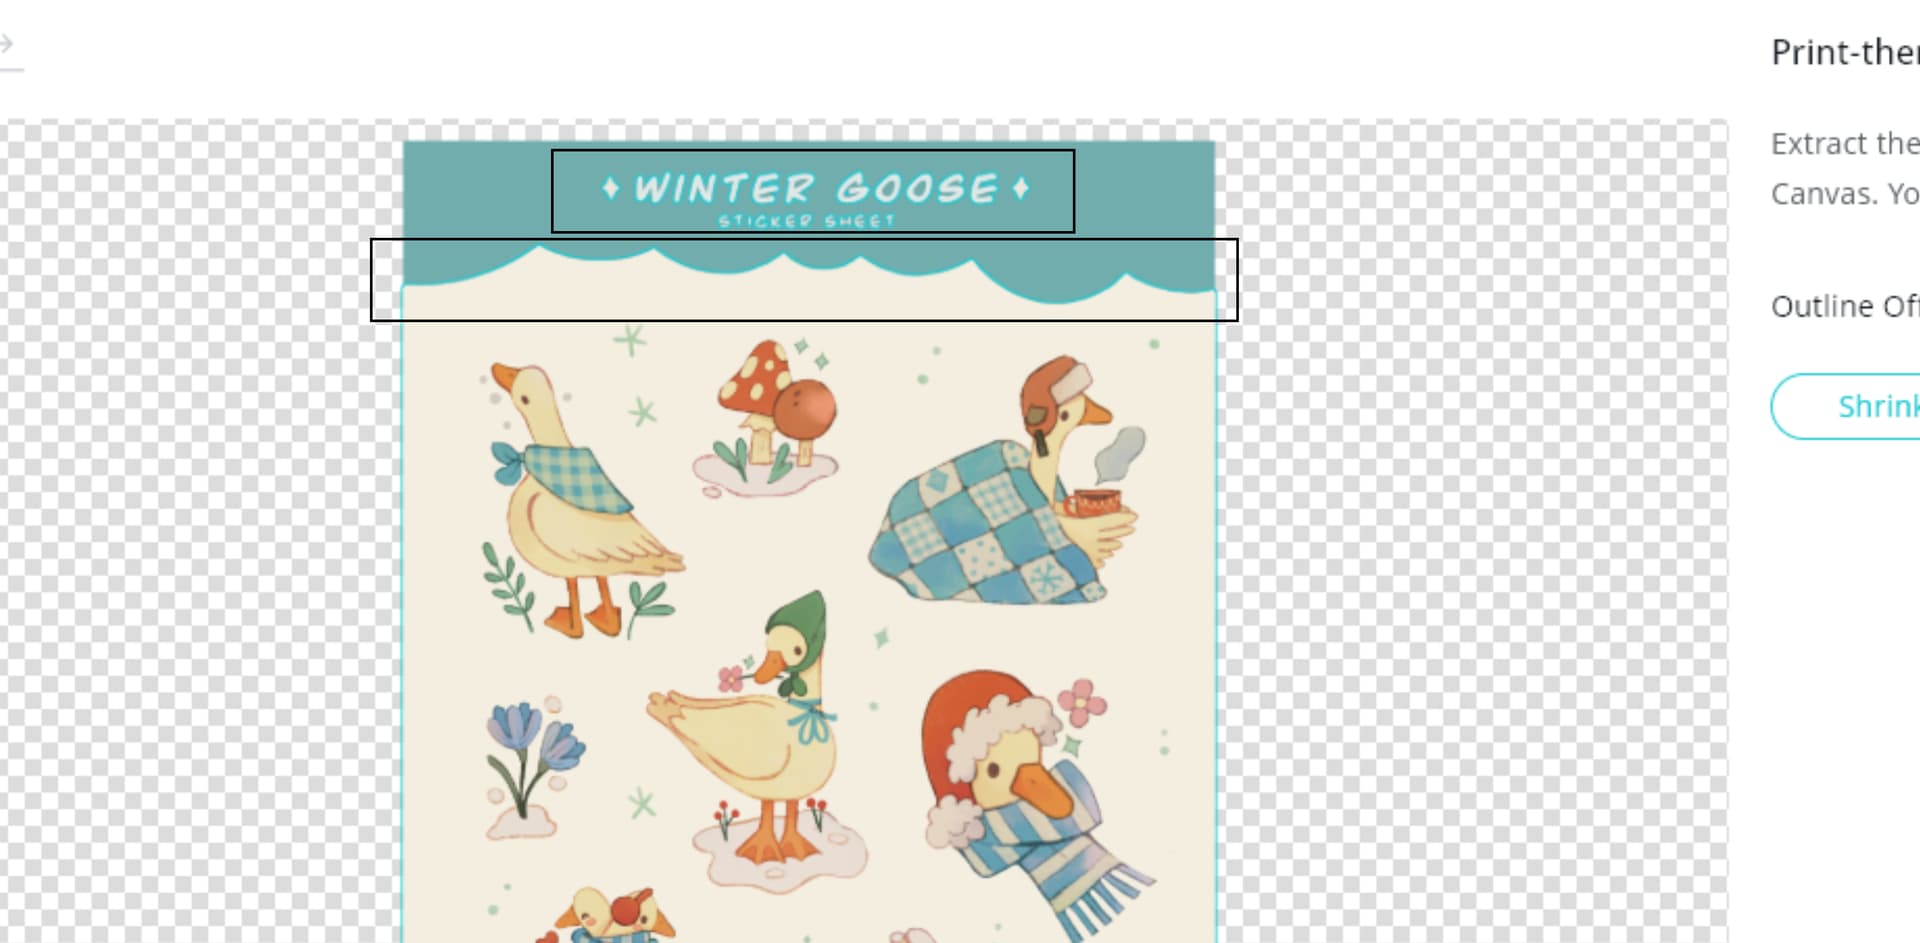
Second question, about how to cut the background… I just want to cut the square shape, but instead, it creates outline of all the text and shapes in the background and there is no way to adjust it.
I did watch tgis video…and bunch of others. Their program just doesnt act like mine when she uploads her picture to loklik studio, she gets a pop up, mine just appears without any pop up and I have to myself click “print then cut option” her picture border appeared without problem too, while in mine, it includes letters inside of the border as part of cutting
To fix them, open a new canvas, re upload your image and go to the Print-then-Cut page under the Outline Offset and click the “Expand” button. This part requires a bit of patience to get right. Wait for the feature to fully apply, then carefully examine the result. Keep clicking Expand until you see a blue outline surrounding the entire sticker sheet. That outline ensures the machine cuts around the square border—not around the individual letters, which was the problem earlier.
You can totally do it @rinsky way. Or you can create another rectangle and place it directly behind your sticker background rectangle. You can change this rectangle to a color that isn’t used in your design or leave it white. You can use this rectangle has your cut layer. Select all your layers apart from the rectangle cut layers. Then proceed normally to do the print then cut. After printing the sticker sheet, you can then cut out your stickers normally. Then you can go back into your canvas layer and select the rectangle cut layer. Select make, say already printed, select the rectangle layer, select your cutting parameters and then press add to task. You can keep your mat loaded this whole time and just press start on the print then cut task. I have all my pressure and cut settings that I use for die cut and kiss cut in this video. In the designing section it goes over what I explained above as well, how I created the offset cuts and the background cuts.
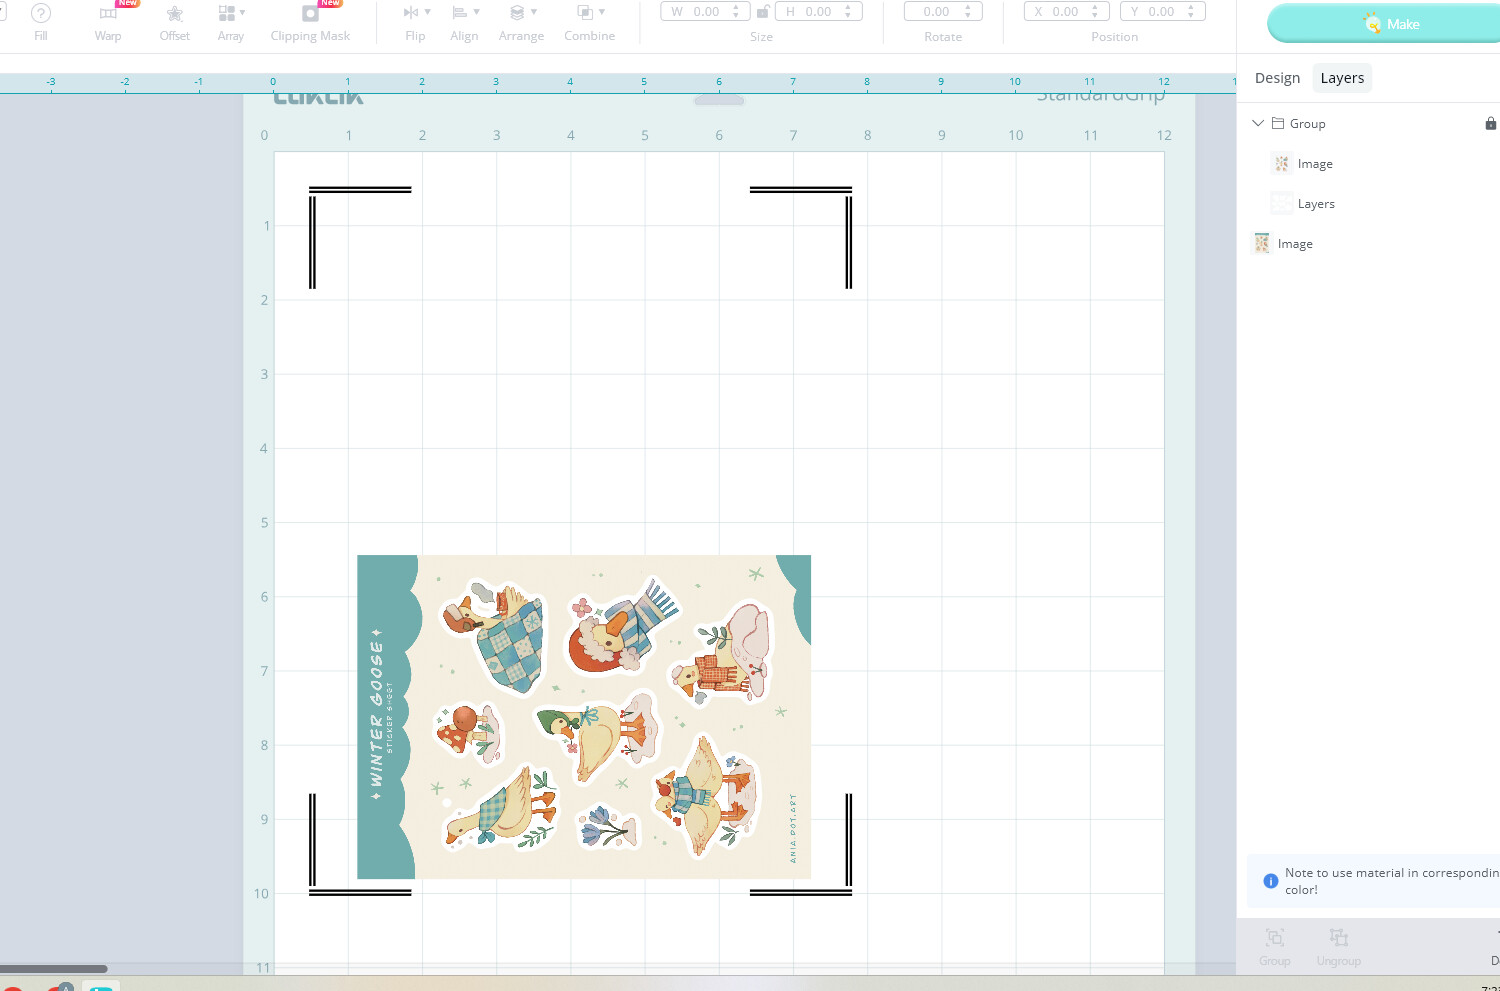
Thank you so much guys, I finally figured it out by making a square in place of background and grouping it my whole problem was that I did not understand I have to group the shapes with pictures, thats why it was giving me problems. Thanks everyone for help
Yay, that’s awesome! So glad you cracked it—and thank you for sharing what worked! Grouping can definitely be one of those sneaky steps that makes all the difference. Now that you’ve got it down, you’re unstoppable! Keep creating and don’t hesitate to drop your next breakthrough—we’re all learning together!