Welcome back to the craft room and today’s Testing the Limits of the HTVRont Phone Case Heat Press post. I’ve been using the HTVRont Phone Case Press for a while now, but only for—well, phone cases. Lately, I started wondering what else this little press might be capable of. So, I decided to run a few experiments and tried sublimating several different blanks: pins, a ceramic ornament, a slate coaster, and even pens—just to see how far I could push it.
Some turned out beautifully; others… not so much. But each test taught me something new about how this compact press handles different materials. Whether you already own this HTVRont press or you’re just curious about what it can do, you’ll definitely want to see these results.
Starting Small: Sublimating Badges
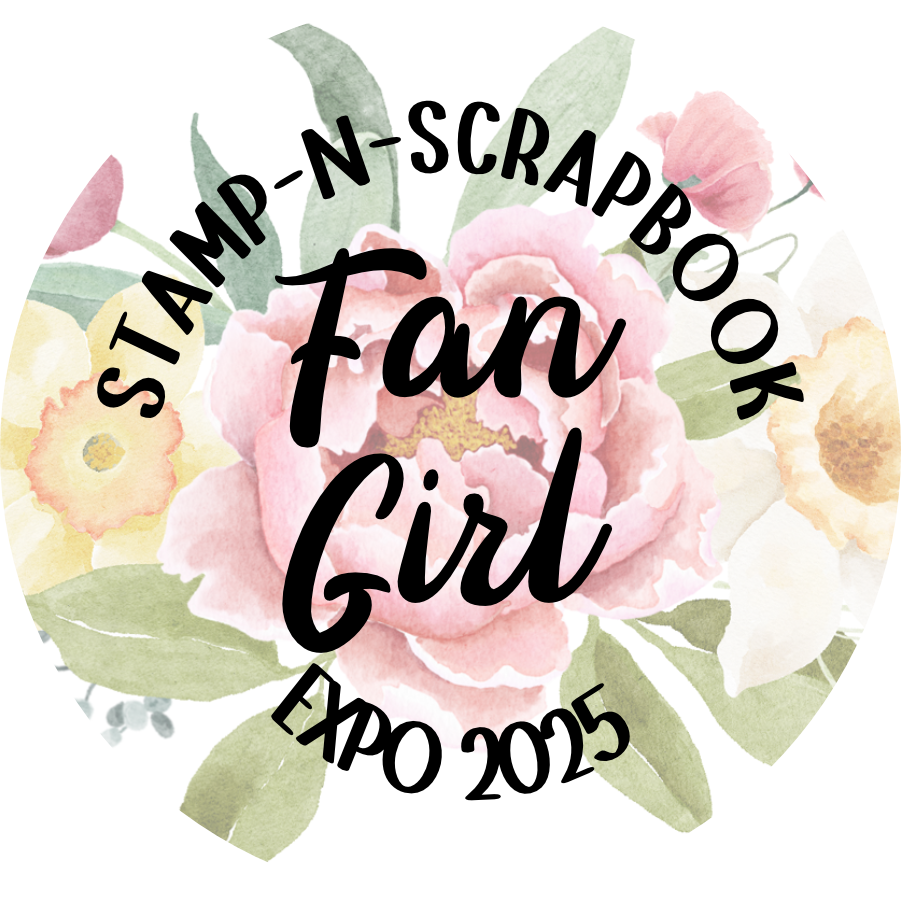
Let’s start with three badges—or pins, depending on what you like to call them. I designed a fun Fan Girl image in Affinity Designer to wear to the Stamp and Scrapbook Expo, sized to fit the 2.28" badges. I also made a little inside joke pin for my husband.
In the LOKLik IdeaStudio software, I chose the Flat Substrate category under the HTVRont Phone Case Heat Press. Once in this menu I am able to choose from a variety of options starting with the badges. On screen we have the option to make 3 badges at a time.
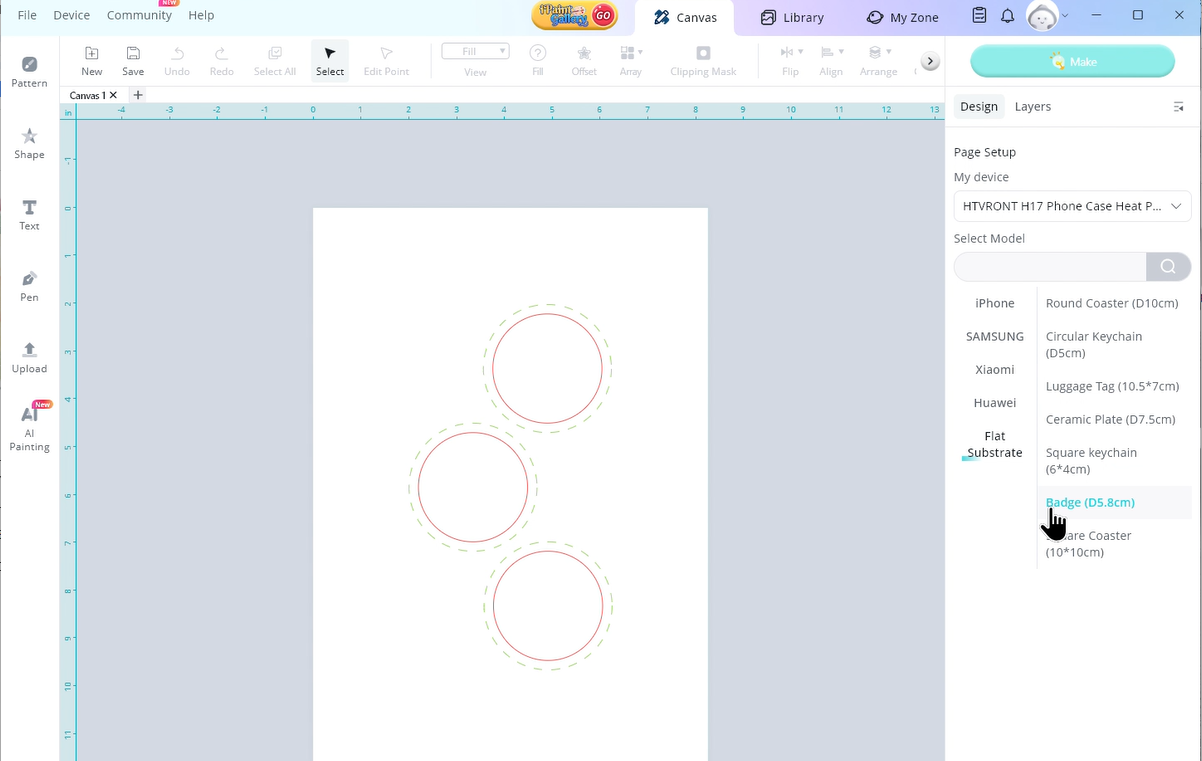
After uploading my images and resizing them to fit the green outer circle, I rotated each one 90 degrees. This is important—the software designs vertically, but once the accessory plate is in the press, it sits horizontally. Rotating your image ensures it reads correctly after pressing.
Printing the Badges
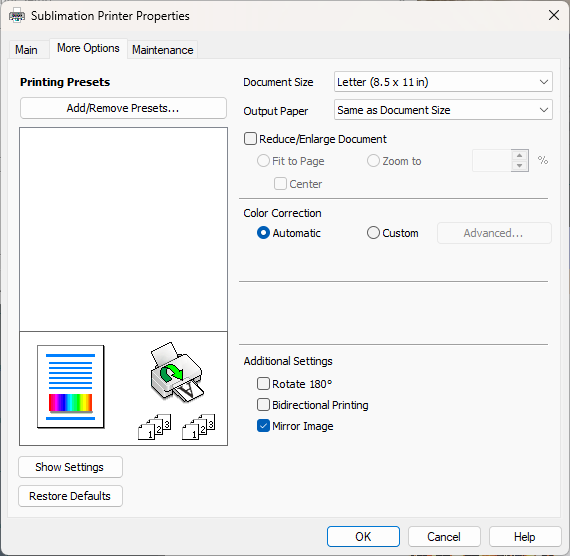
With the designs ready, it’s time to print. I’m using the Epson SureColor F170 sublimation printer, so your setup may vary slightly. In the printer properties, I set the paper type to Rigid, print quality to High, and turned Bidirectional Printing off.

Next, I loaded a single sheet of HTVRont Sublimation Film, shiny side up, and pressed print. As I mentioned in my HTVRont Phone Case Heat Press Demonstration post, my printer feeds this film easily. If yours doesn’t, use the included tabs or tape a sheet of regular copy paper to the back to help it feed smoothly.
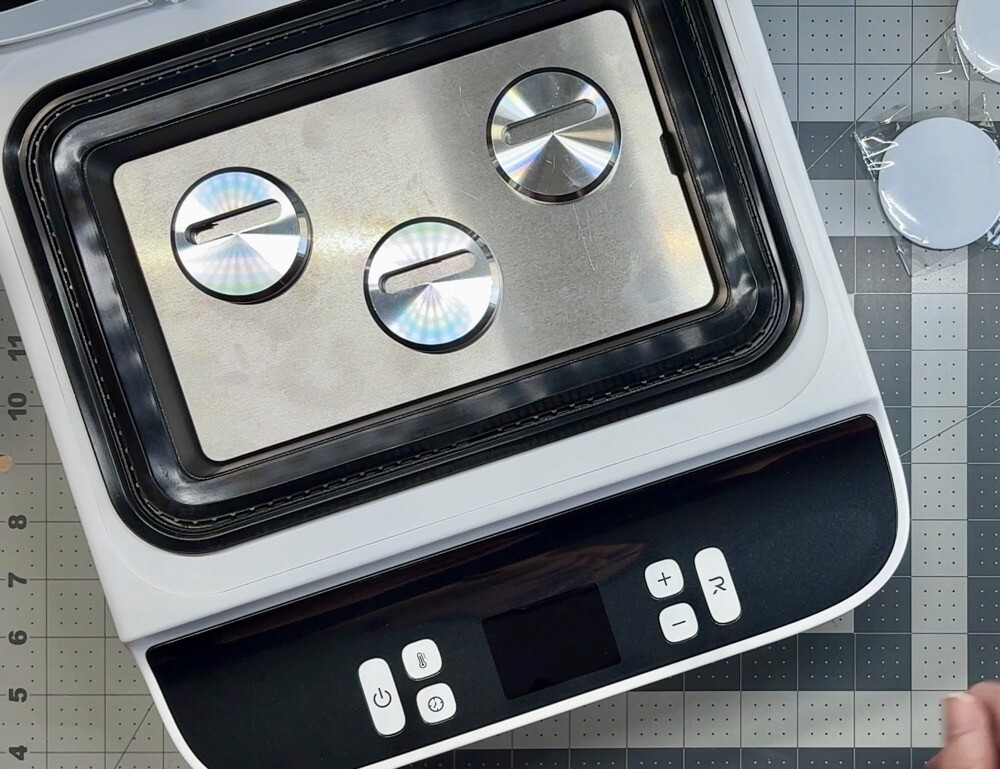
Before placing the accessory plate with the badge fixtures into the press, make sure the center badge faces the front. This aligns with the printed orientation on your sublimation film.
For these badges, both plates should be set to 285°F. I preheated for 5 seconds (the range is 2–10 seconds), then pressed for 330 seconds. The press only takes a few minutes to reach temperature, but I waited a bit longer for the lid to warm up, which helps the printed film dry faster.
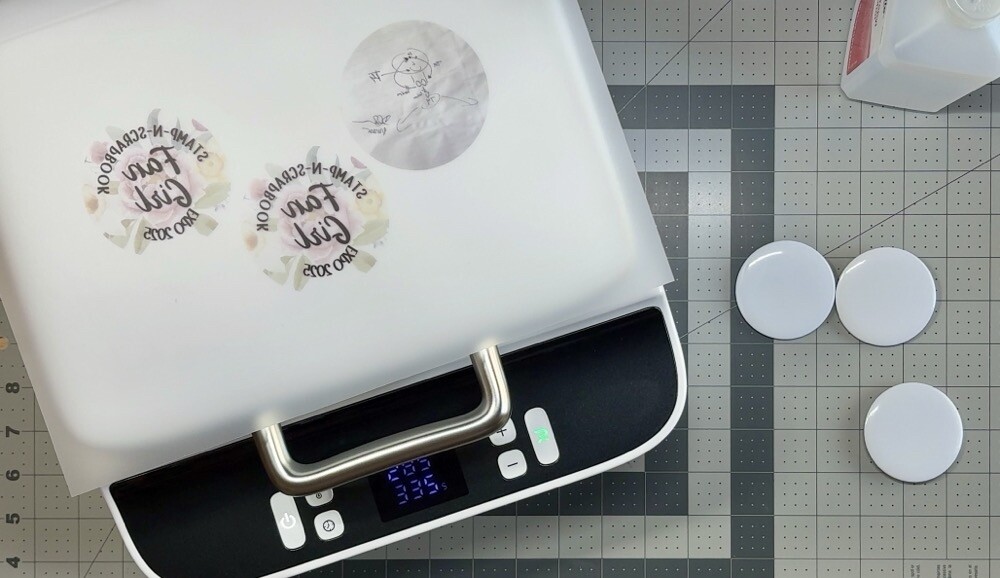
After about five minutes, I positioned the three badges in the press, placed the printed film shiny side up, and made sure it covered the silicone ring completely. Then I closed the lid, hit the Go button, and waited to see the results.
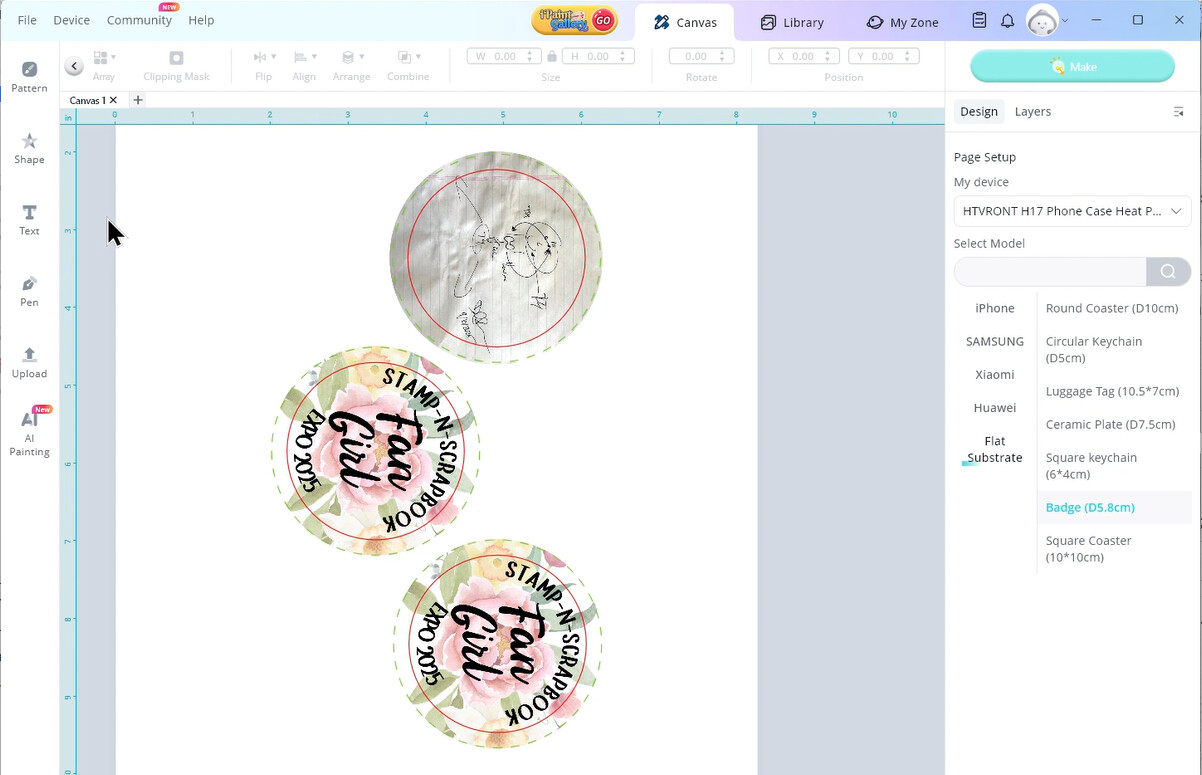
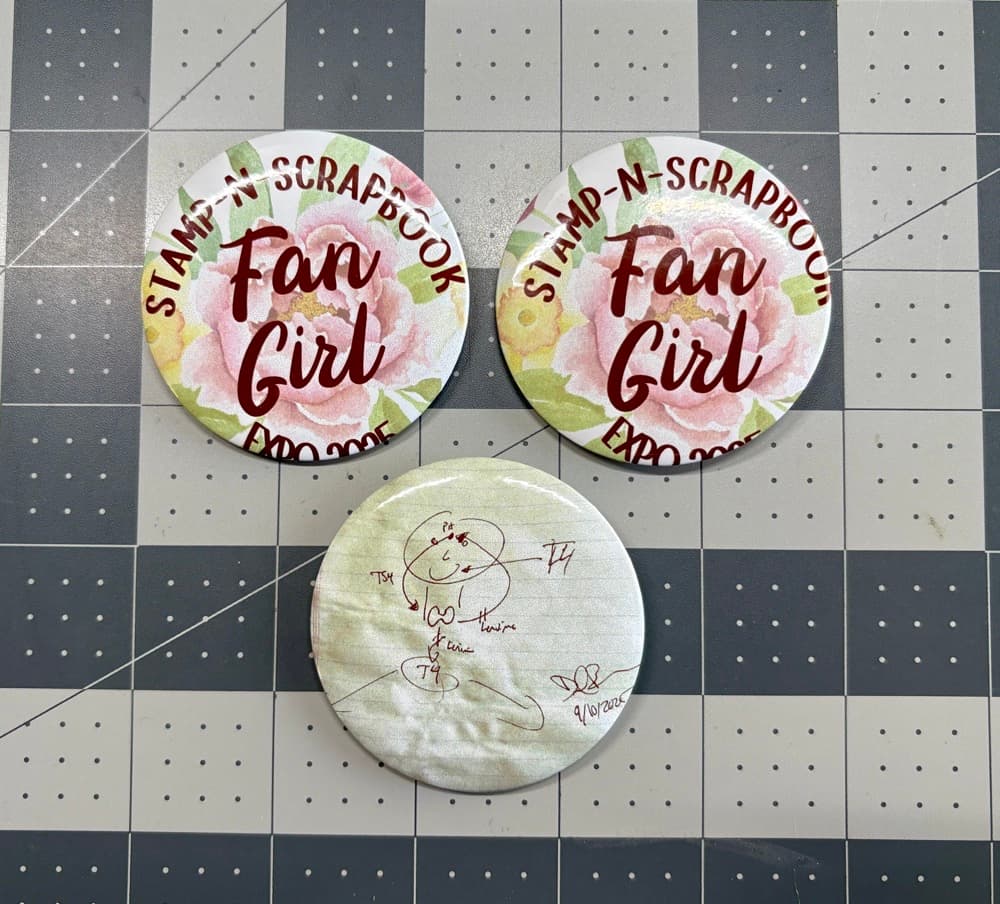
Unfortunately, they weren’t great—totally user error!
As you can see in the image below, two of the three badges are misaligned. I suspect they weren’t seated properly in the fixture and shifted during vacuum sealing. My biggest mistake, though, was skipping the preheat step. I was in a hurry and didn’t pay close attention, which shows! Lots of ink was left on the film, and my husband’s pin has an odd green tint that definitely shouldn’t be there.
Sublimating a Ceramic Ornament
Next up, I wanted to see how the press handled a ceramic Christmas ornament. I picked up a pack of four from Hobby Lobby and couldn’t wait to test them out. I found a gorgeous Stained Glass Blue Christmas Ornament design on Creative Fabrica, which seemed perfect for testing color saturation.
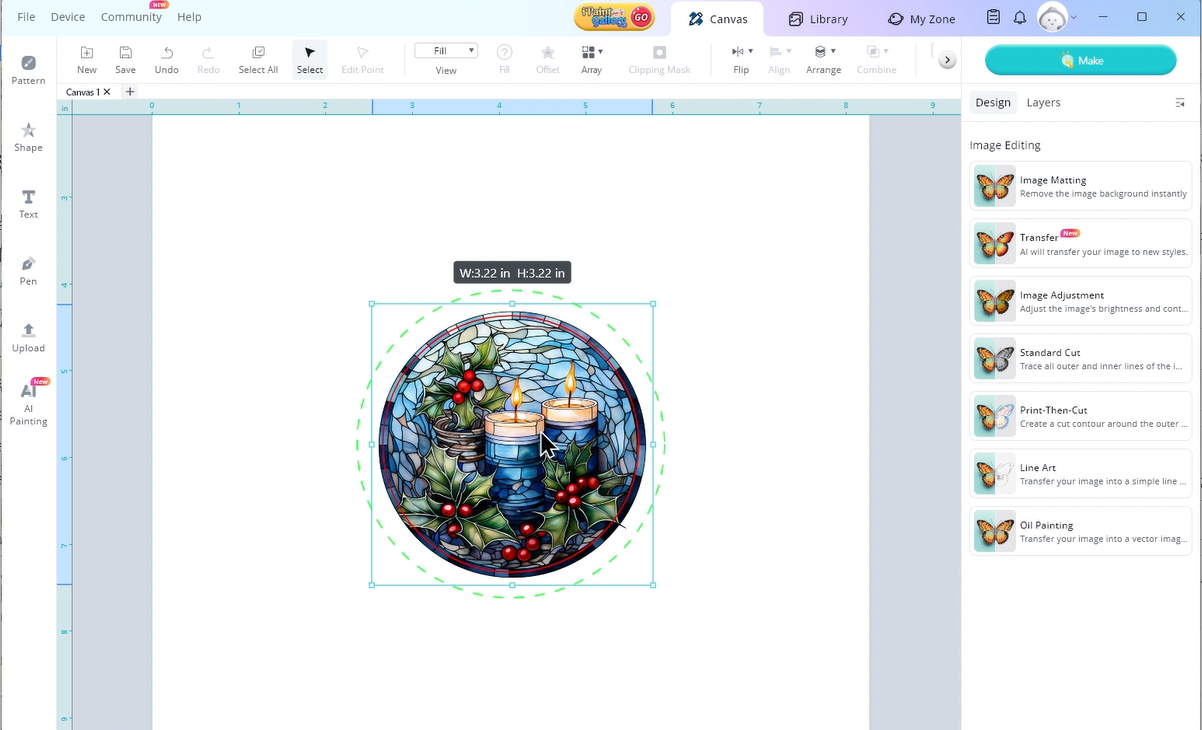
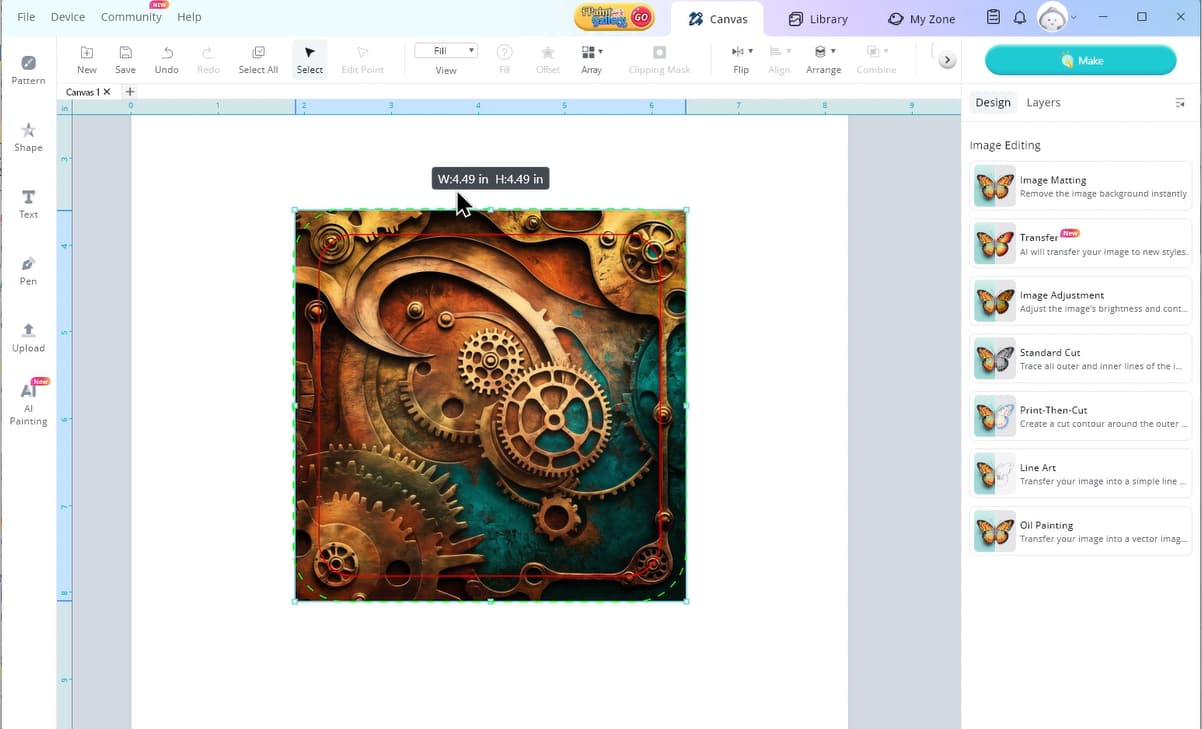
Back in IdeaStudio, I selected Ceramic Plate under Flat Substrate. I was a little concerned about the size difference between the ornament and the printable space in the software. The ornaments measure about 2.75" across, while the printable area is just under 3.5". After uploading the candle image, I resized it to about 3.22"—just enough to cover the ornament nicely for this first run.
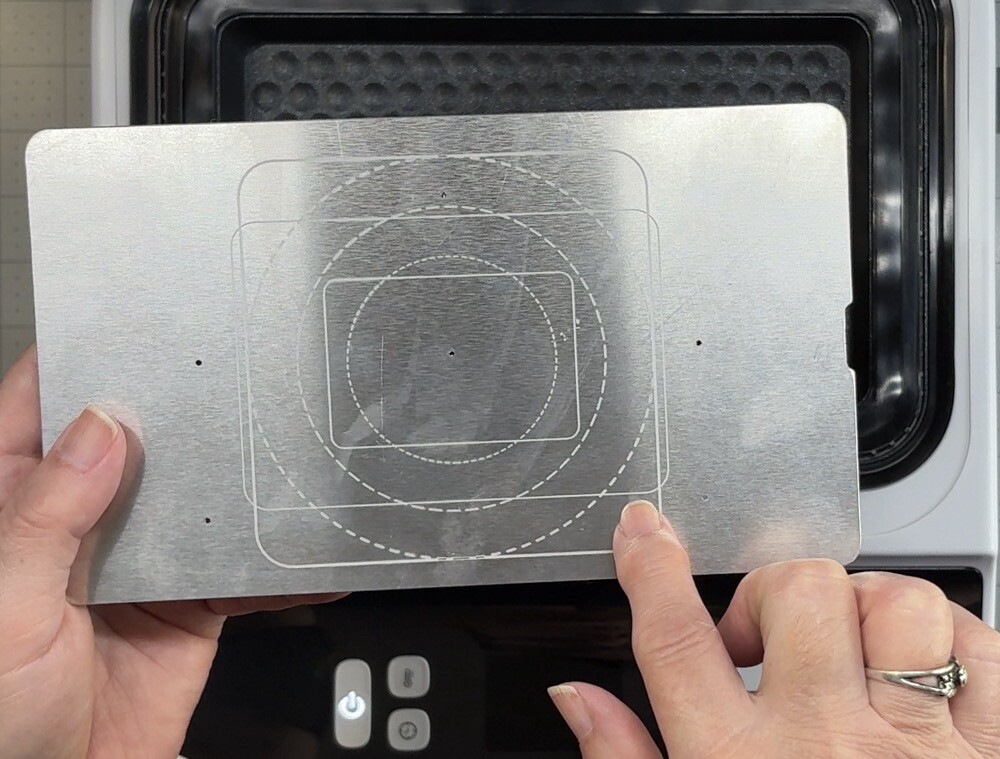
Before setting the time and temperature, make sure to flip your accessory plate over . This side has etched alignment lines to help center your blanks accurately.
According to HTVRont’s table, ceramic plates should be pressed at 285°F for both top and bottom plates, with a 2–10 second preheat and 300-second transfer. I chose an 8-second preheat for this test.
Once the press reached temperature, I centered the ornament, closed the lid, and placed the printed film (shiny side down) on top to dry. Just like with the badges, orientation matters—if your image prints vertically, place the ornament with the hole facing the left side of the press. After about five minutes, I placed the film over the warm ornament and started the press.
The result? I couldn’t be happier! The design sublimated beautifully and even wrapped around the edges perfectly. You can see a bit of the sublimation coating peeking through the top hole, but that will disappear once I thread the included cord to hang it on the tree.

Surprisingly Stunning Results on Slate
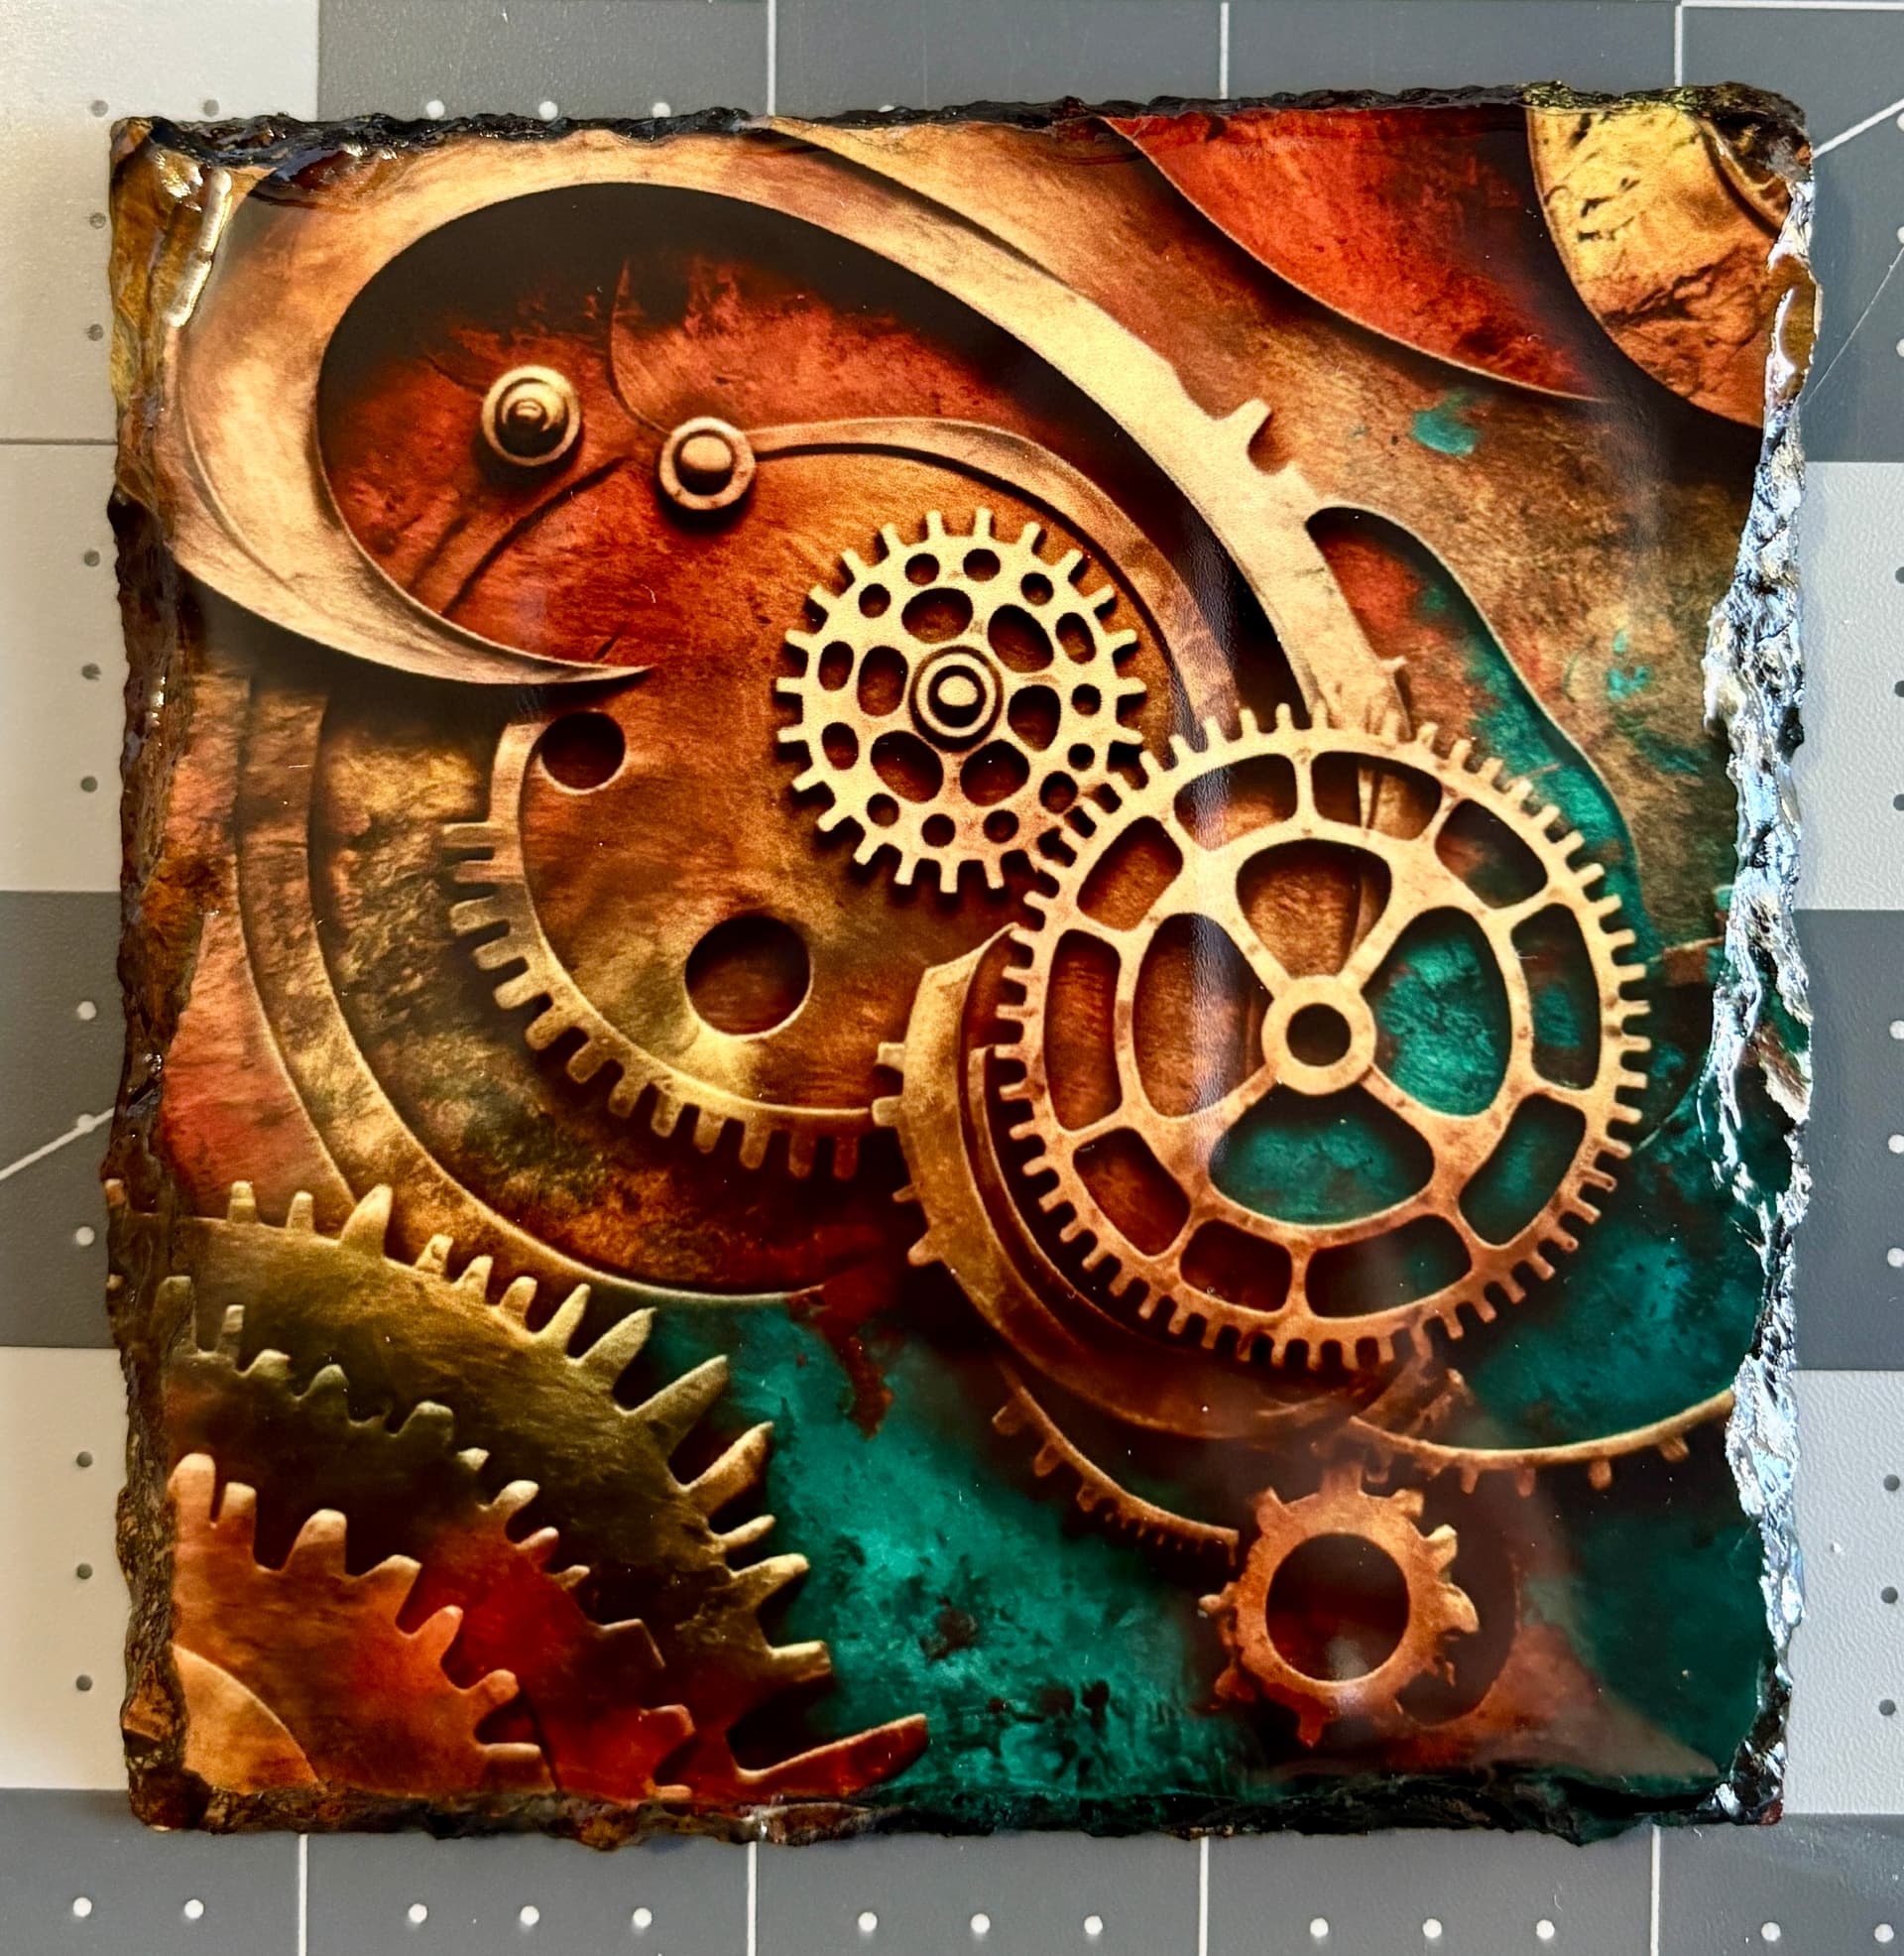
For the next test, I tried a slate coaster. I found a stunning Steampunk Alcohol Ink Texture Background on Creative Fabrica that I just had to use. Since slate has those naturally chipped edges, I wanted to make sure the design fully covered the surface. In IdeaStudio, I stretched the image out to the green dashed line for maximum coverage.
HTVRont’s chart doesn’t include settings for slate, so I checked the Make Market packaging for guidance. Their recommendation was 356°F for 360 seconds. The HTVRont press maxes out at 320°F, so I compensated by increasing the transfer time to 400 seconds and using a 10-second preheat.
Once the press reached temperature, I placed the coaster inside to warm up while the printed film dried. After pressing, I peeled the film back and was absolutely ecstatic—the result was beautiful! The colors were rich, and those chipped edges? They looked amazing.
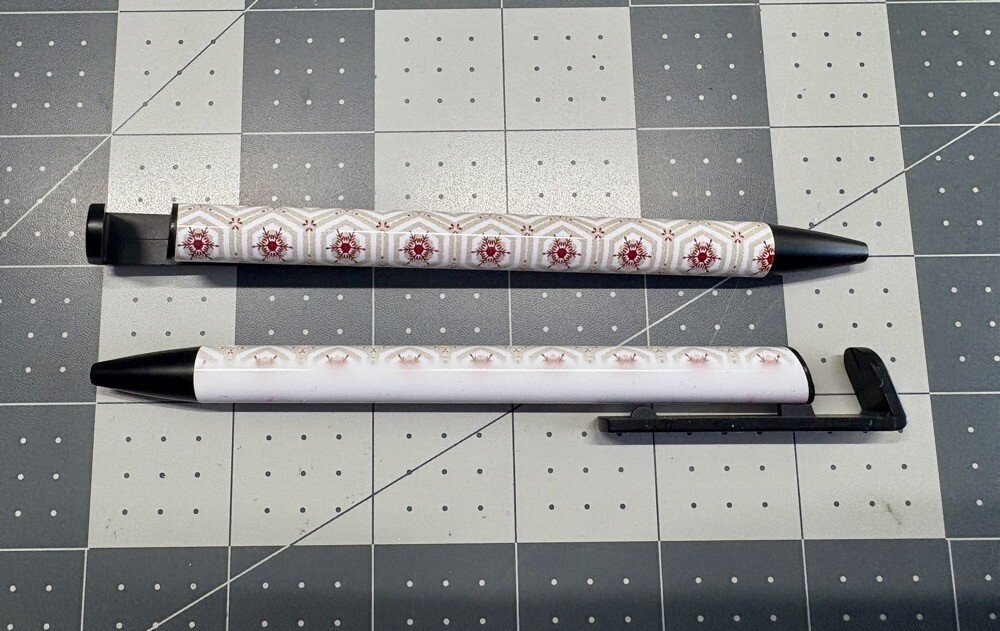
A Risky but Fun Experiment: Sublimation Pens
I had to try something totally different — sublimation pens. In theory, since the HTVRont Phone Case Heat Press uses a vacuum seal and the pen barrels are lightweight aluminum, it seemed possible that the design might wrap all the way around. Only one way to find out!
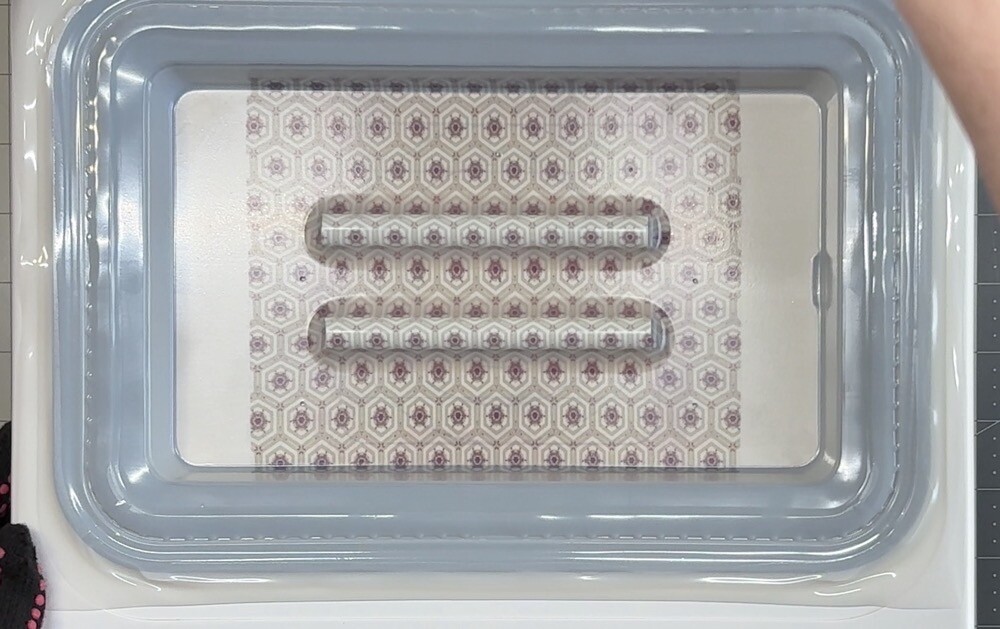
I picked up a pack of Make Market sublimation-ready pens from Michaels. Finding the right pattern took a bit of searching until I came across the Holly Jolly Christmas Printable Papers set from Creative Fabrica. Since there isn’t much surface area on a pen, I went with a small all-over snowflake pattern.
In IdeaStudio, I uploaded the design and sized it to about 4.75" tall. Without thinking it through too much, I followed the manufacturer’s recommended settings printed on the packaging—these were intended for a sublimation oven at 356°F for 150 seconds. Since the HTVRont press maxes out at 320°F, I used that temperature instead, with a 5-second preheat and 160-second transfer.
Because I only had one sheet of sublimation film left, I decided to press two pens at once. After cleaning them with alcohol, I spaced them about an inch apart on the accessory plate and let them warm for around five minutes.
Unfortunately, I could tell as soon as I opened the press—it didn’t work. The design didn’t wrap around the pen barrels nearly as much as I expected, which was a total bummer.
Still, I’m not giving up on this one! My next plan is to print the design on A-Sub sublimation paper instead of film. I’ll wrap the paper around the pen barrels, secure them in the included shrink-wrap sleeves, and then sublimate them inside the phone case heat press. I’ll definitely update you all once I have a chance to test that method!
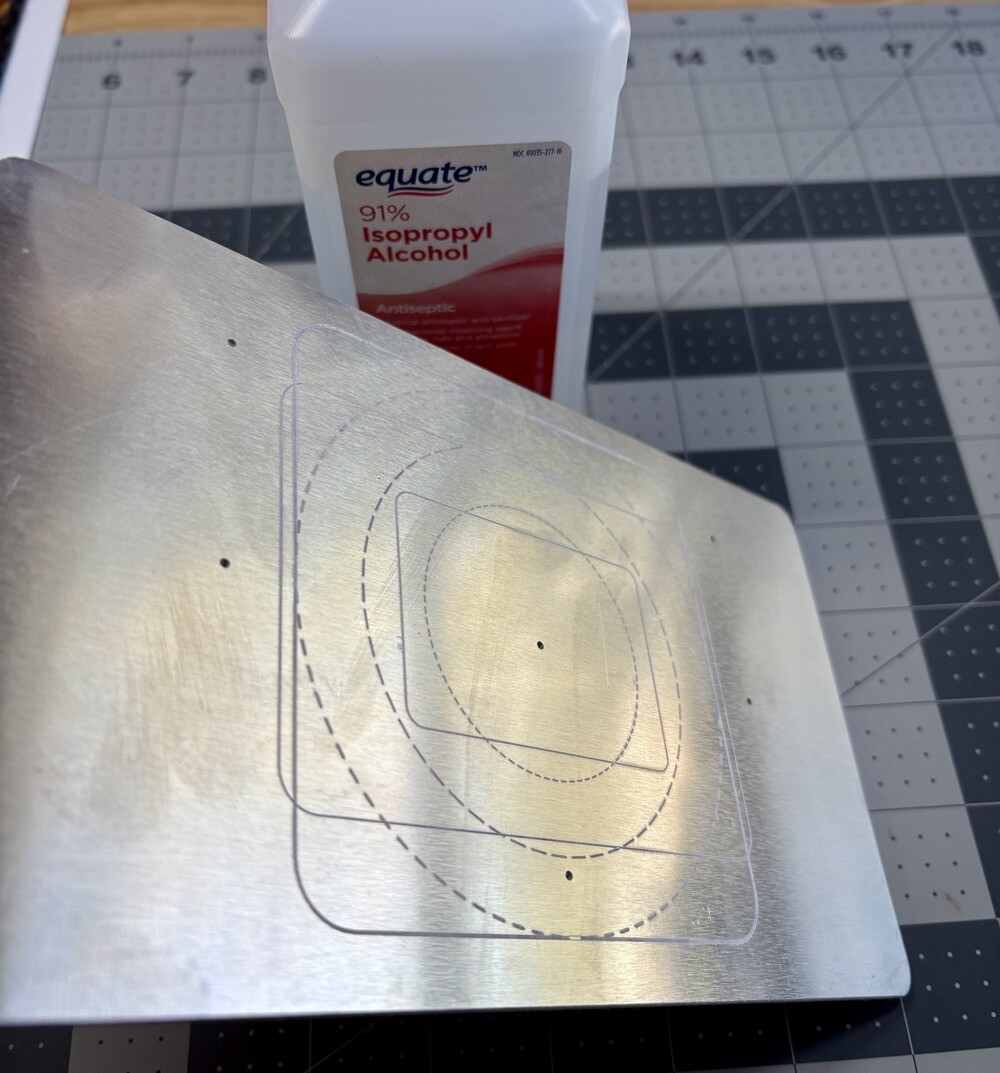
Removing Residual Ink from the Accessory Plate
After all these tests, I noticed some residual sublimation ink left on the accessory plate—a faint pink haze. I remembered reading somewhere that it could be cleaned with alcohol, so of course, I had to try it myself.

Using 91% isopropyl alcohol and a paper towel, I was able to remove most of the ink easily. There’s still a little residue in the etched lines, so I plan to go back with a cotton swab to see if that takes off the rest.
Final Thoughts
Well, that wraps up my little experiment with the HTVRont Phone Case Heat Press beyond phone cases. It was definitely a mix of wins and fails — but every result taught me something new.
The pins were a total bust. I’m confident that was user error rather than a problem with the machine. I was in too much of a hurry and skipped preheating the badges before adding the sublimation film. That showed up right away — the colors didn’t transfer evenly, and one even picked up a strange green tint. On top of that, the pins seemed to shift during the vacuum process, which threw off the alignment. Definitely a good reminder to slow down and follow each step carefully.
On the flip side, the ceramic ornament from Hobby Lobby turned out beautifully! Even after resizing the design to fit the 2.75-inch shape, the colors came out vibrant, and it wrapped perfectly around the edges. I can’t wait to finish it off by adding the year in permanent vinyl on the back.
But the biggest win of the day — hands down — was the slate coaster. I wasn’t sure it would work since the press maxes out at 320°F and the blanks recommended 356°F. But with a little extra press time, the results were stunning. The colors are rich, the image is crisp, and even the chipped edges sublimated perfectly — something I couldn’t achieve with my larger press.
And then there were the pens. I really hoped the vacuum seal would wrap the design further around, but it just didn’t. I may have even overcooked the blanks a bit. If I’d paid closer attention to the chart that came with the press, I could’ve tried a lower-temperature, longer-time option. Live and learn, right?
Overall, I’d say this little machine can definitely handle more than just phone cases. With a bit of trial and error, you can get some surprisingly amazing results.
Thank you so much for joining me for today’s Testing the Limits of the HTVRont Phone Case Heat Press post! Let me know in the comments which project was your favorite. If you’d like to check out more of my sublimation projects, you can find them all here: Sublimation Crafts. Until then, have a fantastic week, and I’ll see you back in the craft room again soon!