Valentines Day Monogram Heart T-shirt

I have been obsessed with monograming everything lately and T-shirts are no exception. This really cool design is a B in a heart shape. I like it because it can be a Valentines Day shirt as well as an everyday shirt because the design is so versatile. This tutorial is very beginner friendly. You can watch the video tutorial here Monogram Valentines Day heart T-shirt Tutorial

Materials Needed
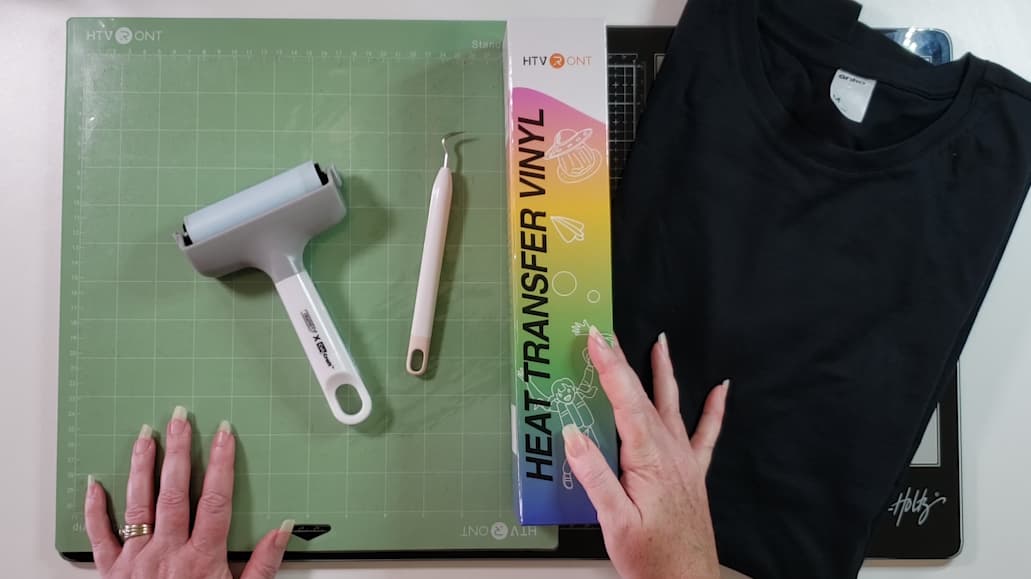
HTV your choice of colour
Weeding Tool
HTV cutter or scissors
Green Cutting Mat
Brayer
Cutting Machine, I’m using the LOKLiK Crafter
Heating Source, I’m using the LOKLiK Impress Auto 2
Teflon Sheet
T-shirt guide
Lint Roller

Monogram valentine design can be downloaded from Creative Fabrica


Heat Press settings
I used 145 C for 15 secs.
Pre-press shirt for 5 secs.
I then pressed for a further 10 secs after I removed the carrier sheet.


Step 1: Design
So, in LOKLiK Idea Studio we can create a text box. Double click in the text box to change the word. Let’s type B, you type the first letter of your name. Now under fonts, lets go to system fonts and look for monogram valentine. Now our B is all pretty. Let’s size it up to fit our shirt. I want the width to be 22 cms.

Step 2: Prepare to cut
With our design ready let’s set it up to cut. Don’t forget to mirror your design. Now add to task.

Step 3: Cutting
Now place the HTV on the mat shiny side down. If you are not sure you can peel away a bit of the corner and you will be able to see the carrier sheet and the HTV. The carrier sheet goes face down on the mat. Brayer the HTV down to the mat. Now lets load the mat into our machine. Make sure to align the mat to the left corner in the machine and hold your finger at the back of the mat applying slight pressure to help your mat load correctly.

After your mat is loaded press start. Let the machine cut our your design.

Step 4: Weeding
After the machine finishes cutting your design. Place the mat face down on to your table and gently fold back the mat while pushing the HTV down. Now using your weeding tool peel back a corner and then slowly start pulling back the HTV from the carrier sheet. You need to pull a bit harder than if you are weeding adhesive vinyl. Go slow and take your time. Make sure to take all the HTV that you don’t want on the shirt off the carrier sheet, as once you press it is hard to remove the HTV from the shirt.

Step 5: Applying your HTV to your shirt.
Heat up your heat press. I always pre press my t-shirt to get any moisture out of the shirt and also any wrinkles. You only need to pre press for 5 to 10 seconds. Now use a lint roller to get rid of any lint and loose thread of your shirt. If you have one use a t-shirt measure to align your design. If you don’t have one I normally do 3 finger widths from the bottom of the collar then place my design there. Once your design is on your shirt you can lift it up and see if you like the placement. Once you are happy, let’s press.

Step 6: Enjoy
Now wear your new shirt proudly and when people stop you and say where did you buy it, say oh I made it.

10 Likes

That’s a versatile design :heart_eyes: but in my part I avoid cutting big designs because I feel sad for the weeded out leftovers, although I do keep those and hoping of finding other projects I can use them on

4 Likes

This is very beautiful I’m interested how other letters look like :heart_eyes:
Thank you for the details and I couldn’t help it not to notice how you wrapped the heat plates on the presses :astonished: very clever :clap:t2::clap:t2::clap:t2:

4 Likes

Yeah the covers are great. I just get them from amazon Heat Press Platen Wrap Cover, Non-Stick High Temperature Resistant Teflon Protector for Protecting Sublimation Heat Pressing Machine Plate from Residue, Inks, Scratches (15x15 Inch) : Amazon.com.au: Home

This is the font as well
Monogram Valentine Font by Happy Letters · Creative Fabrica

3 Likes

That’s great thank you so much :heart::two_hearts::heart:

3 Likes

Girl, you need Really need to tell me how you do your camera set up. I just can’t seem to figure mine out because every time I put one above me I don’t know if it’s got the right angle. Are you connecting it to a laptop so you can see the view? Also another question what are you doing with that heat? Press how have you wrapped the Teflon sheet over? I would love to know.
PS, your T-shirt looks lovely. I love your detailed tutorial. I’m very jealous of your set up too LOL.

3 Likes

Oh thank you so much. I put a lot of hard work in my videos and it’s great when I get compliments :heart_eyes:

So I used over head stands for my top down cameras. Also I have multiple tripods I switch between to get the angle I want. I have a Sony camera and then I use two Samsung phones as cameras as well. Because I have the stands and tripods I can just adjust them to get the shot I want. I just look on the screen on the camera or phone to make sure I’m recording the right thing. A lot of the magic happens in the editing process.

The Teflon heating cover is amazing. Fits so well on both my heat presses. This is what I use. Heat Press Platen Wrap Cover, Non-Stick High Temperature Resistant Teflon Protector for Protecting Sublimation Heat Pressing Machine Plate from Residue, Inks, Scratches (15x15 Inch) : Amazon.com.au: Home

I didn’t start with this setup, it’s taken awhile to get all this stuff. I really appreciate your kind words. Thank you.

3 Likes

I wanted to ask the same thing. Plus the lighting, I need to get more proper lighting since I don’t have much natural light in my area.

4 Likes

@timmytation & @IslaNoor.a I can do a studio tour and go over everything I use and my process. It’s hard trying to explain it all. I want to start doing lives this year so maybe you two can be my guinea pigs and I’ll show you how stuff works as well?

5 Likes

Wow! That would be super nice of you! I don’t mind being a guinea pig :rofl: count me in :smiling_face_with_three_hearts:

4 Likes

I’m all in for the guinea pig LOL that would be amazing thank you for offering that. I wish I could learn how to position my camera when it comes to filming otherwise I would do it too.

4 Likes

It’s great, we’re benefiting from your experience.

4 Likes

Thanks for the links. It’s the direct thing to look at for those who want to use it.

4 Likes

It was a very nice explanation. Thank you.

3 Likes

There are applications called “Using your mobile phone as a computer camera”. I had previously used an application called iriun for another job. I was satisfied. But this alone is not enough because you also need to record it. I was using OBS for this. I am still using OBS now. It is enough to introduce the camera application to OBS. Of course, some settings such as recording location etc. need to be made. Then, by switching between scenes, if you have defined more than one camera, you can also switch between cameras or between the computer screen and cameras. Then, as dear @BellethehowtoGuru said, the most important part is the editing part, which can be a little more detailed. But it is not something that cannot be done. There are simplified programs and applications for this. I think you can easily handle it.

But anyway, I do not want to digress from the subject of this beautiful post. I just wanted to give brief information.

5 Likes

Yes I use Obs and then edit in DaVinci Resolve :grin: I have tutorials for those programs as well.

3 Likes