when trying to print and cut more than 1 group, it wont do the other one
please fix, the other one is another group below the first one where they aren’t overlapping
when trying to print and cut more than 1 group, it wont do the other one
please fix, the other one is another group below the first one where they aren’t overlapping
can you post a screenshot of what you mean here @Anthony_A if i am understanding you right, you can do this
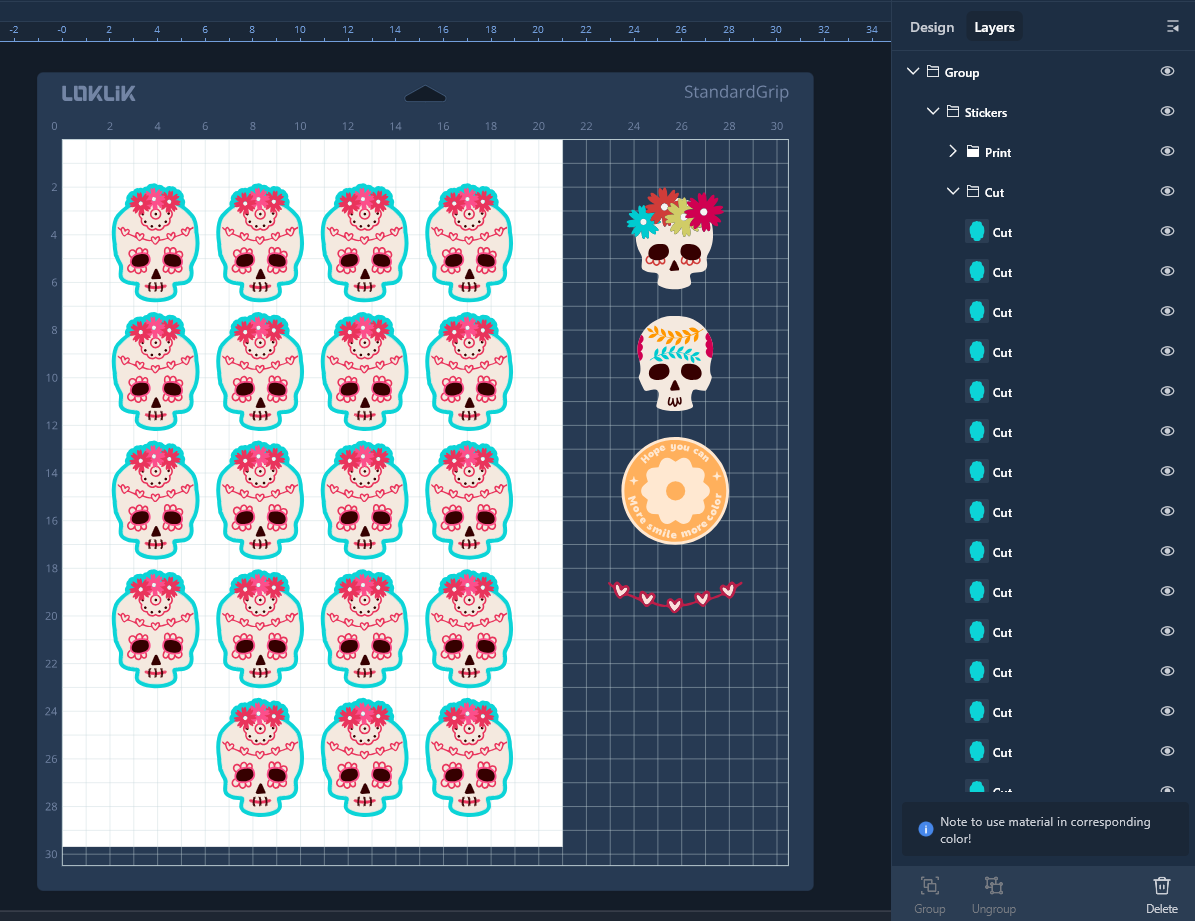
So say you copy more than 1 group to print and cut.
The first one, top one cuts. The second group does not cut.
The workaround is to select the other group by itself and cuts that. Then issue is when it has to do the entire scan mark corner border process again (which takes a lot of time).
The other issue is if you have a lot of groups spread throughout the board. I assume you have to mass group them first, then either undo or separate? but it would be nice to do it as I’ve said where it can cut them all at once.
I deleted my 1st answer i got it totally wrong…
I get what you mean now…test steps to cut sample as your screenshots
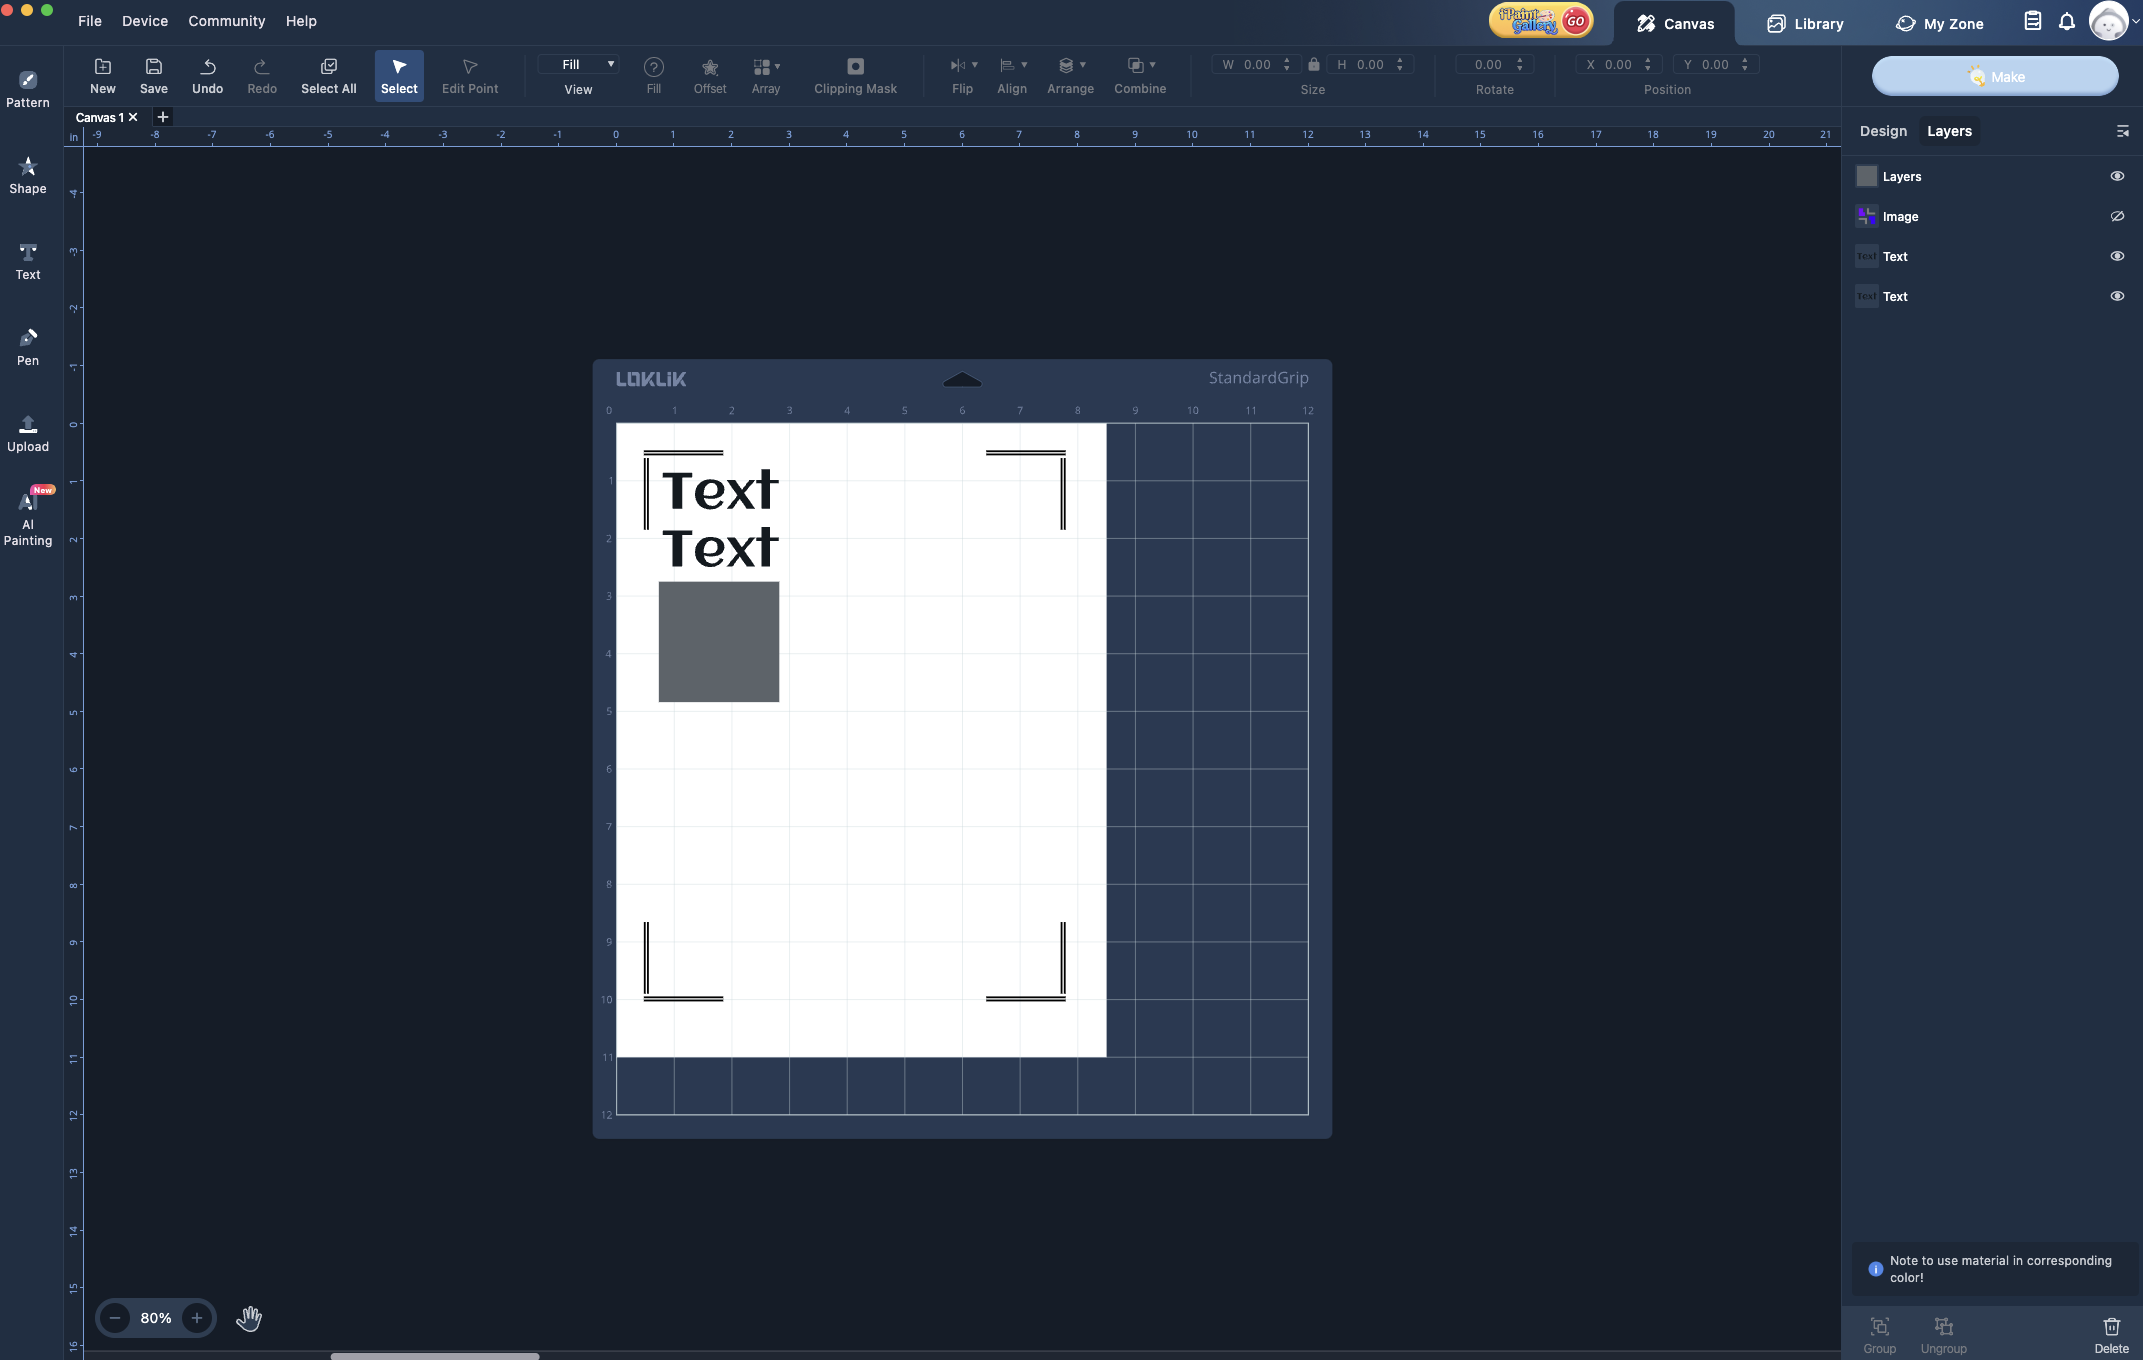
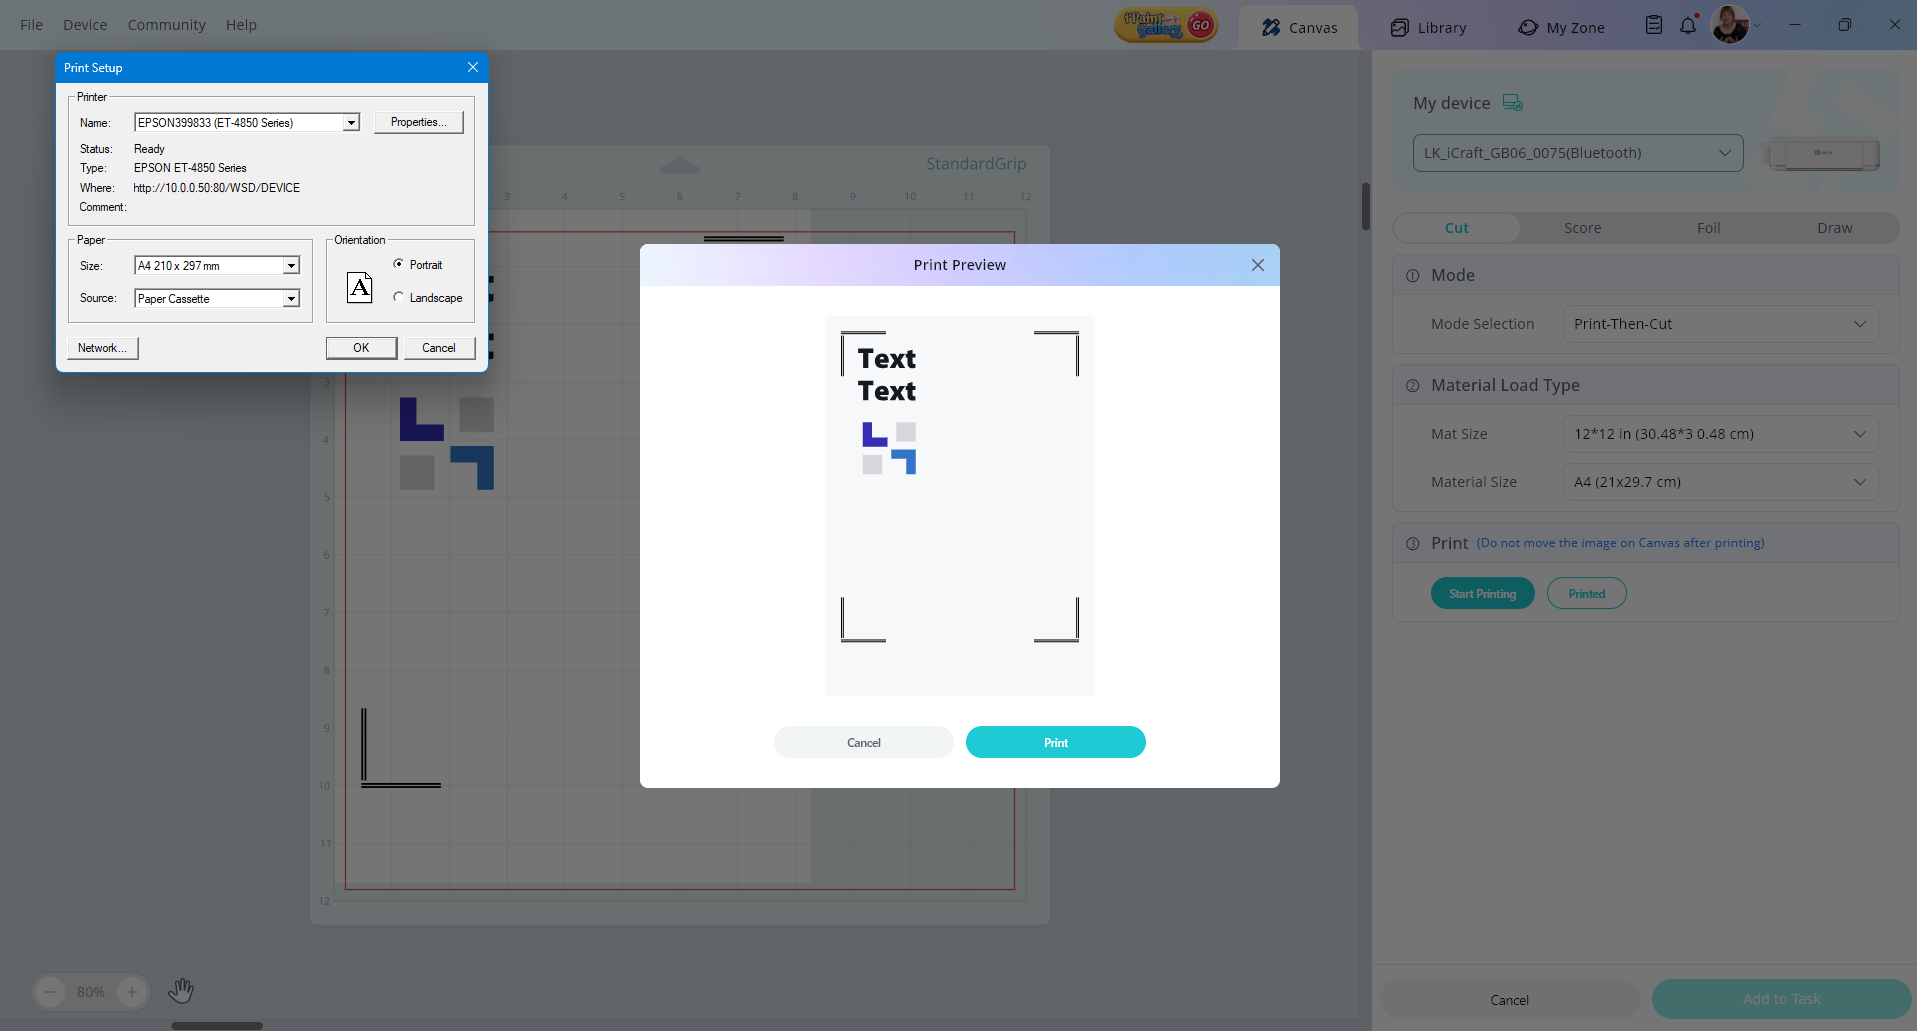
step 1 print text and shapes in colour
A4 sheet printed and placed on the sticky mat, cutting parameters selected, click add to task…
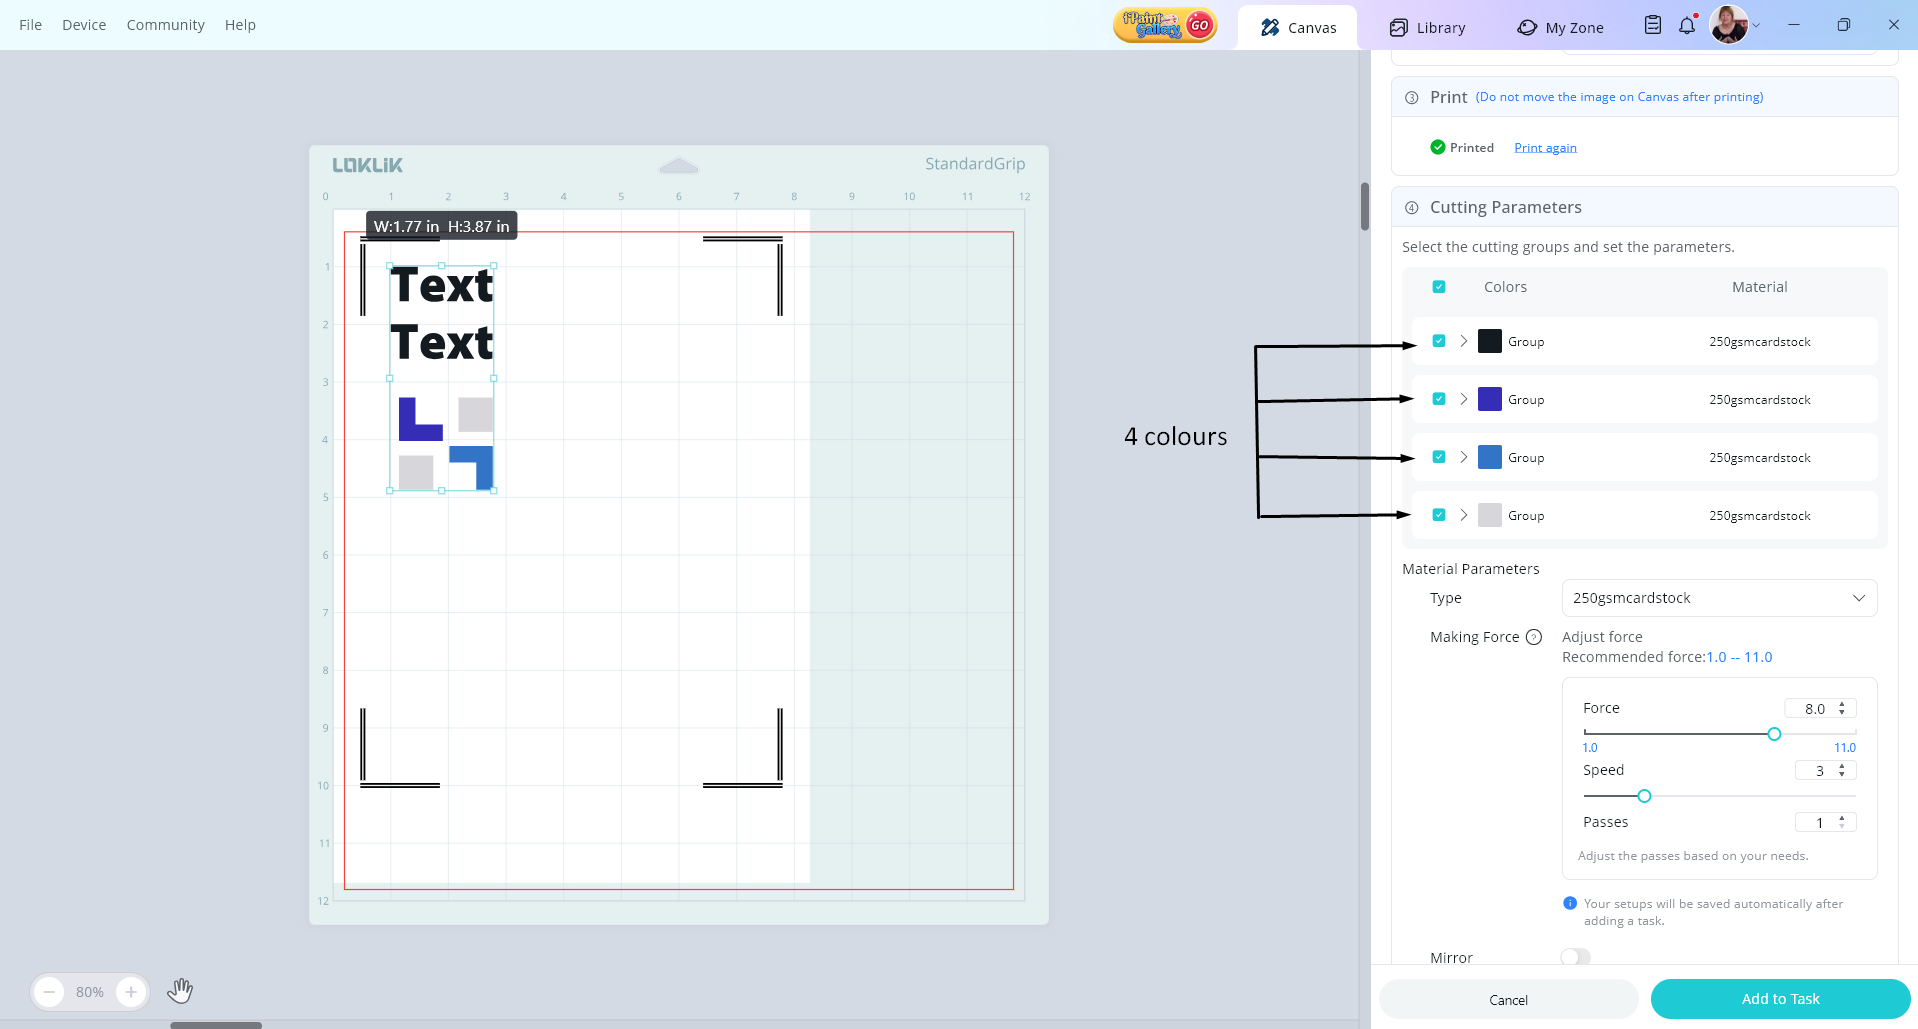
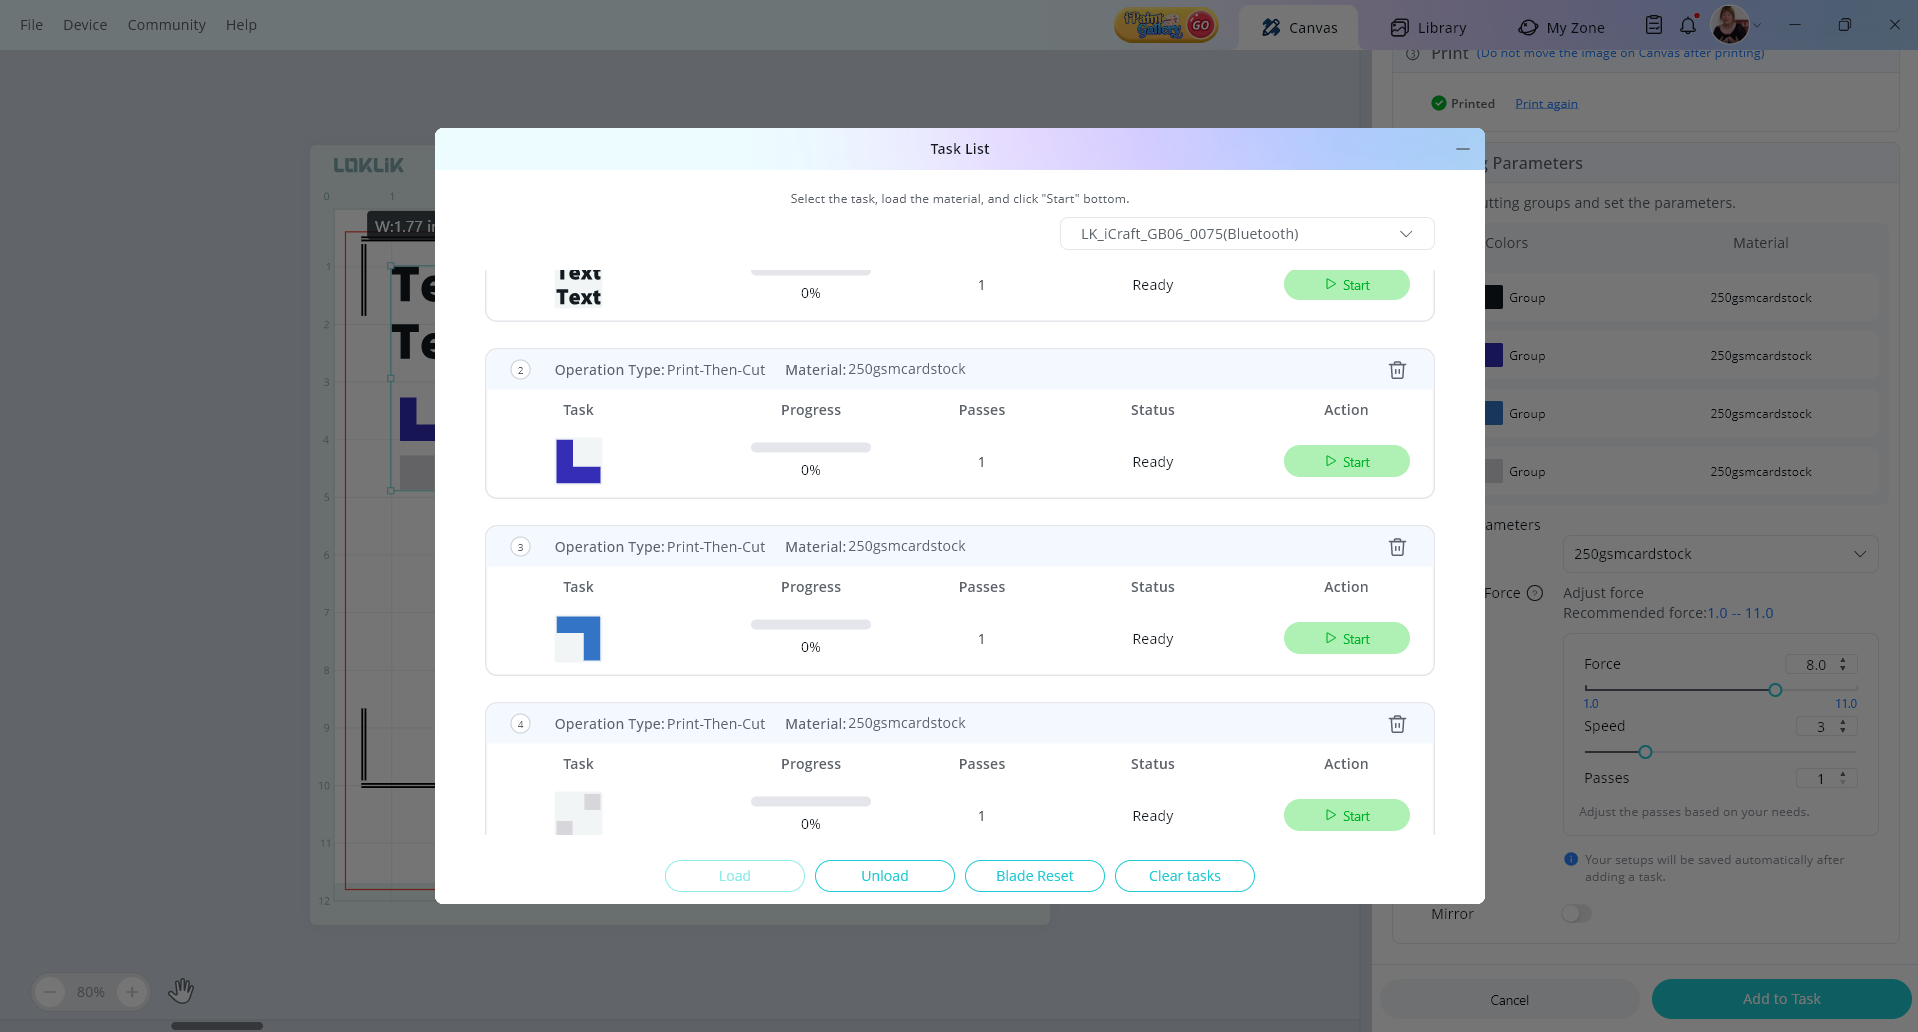
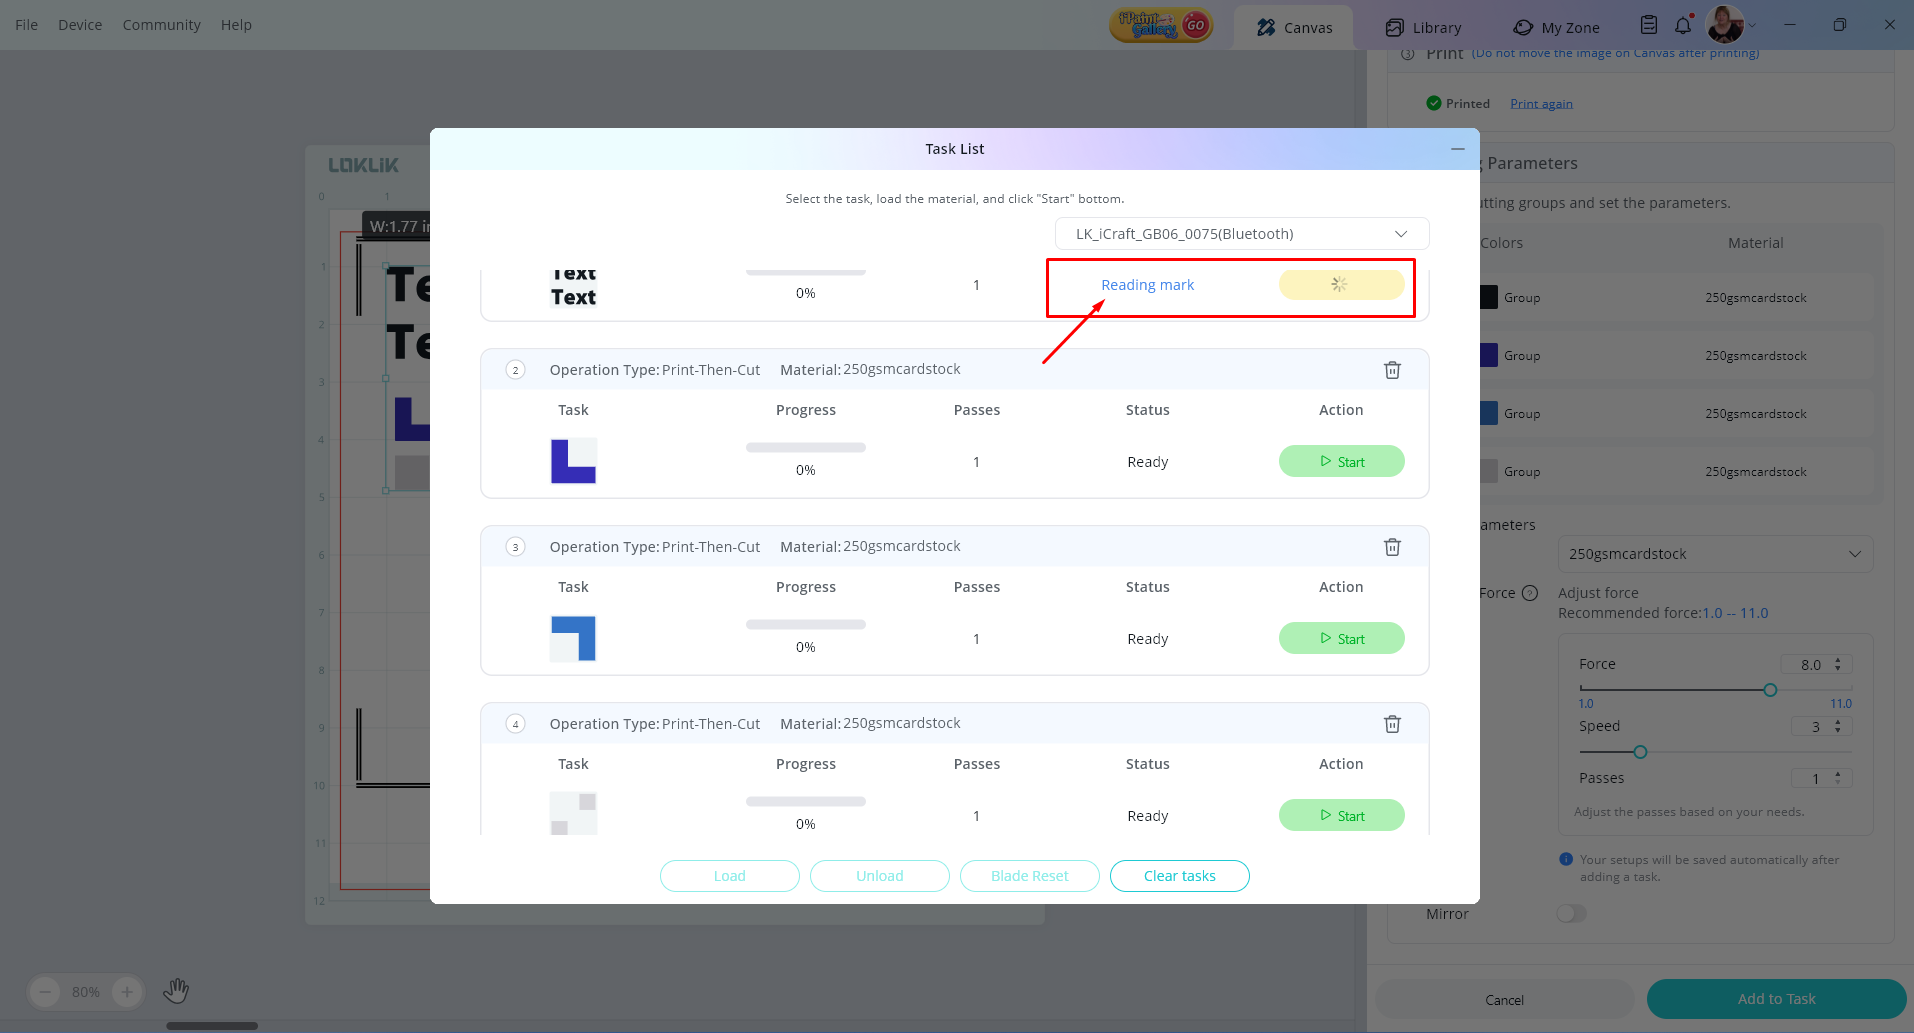
once added to task, the list is created, in this case it’s 4 seperate tasks, 2 lines of text, and 4 seperate shapes as your sample screenshot
the reason it is cutting seperately is because there is nothing holding the design together, so the software can only look at what’s in front of it. 2 lines of text and 4 shapes so it will cut the text seperate from the shapes. the shapes it grouped the colours.
You’re right, It would be nice to have an over-ride button to be able to select all and command the cut in one go, I will suggest this to admin to pass onto the tech department.
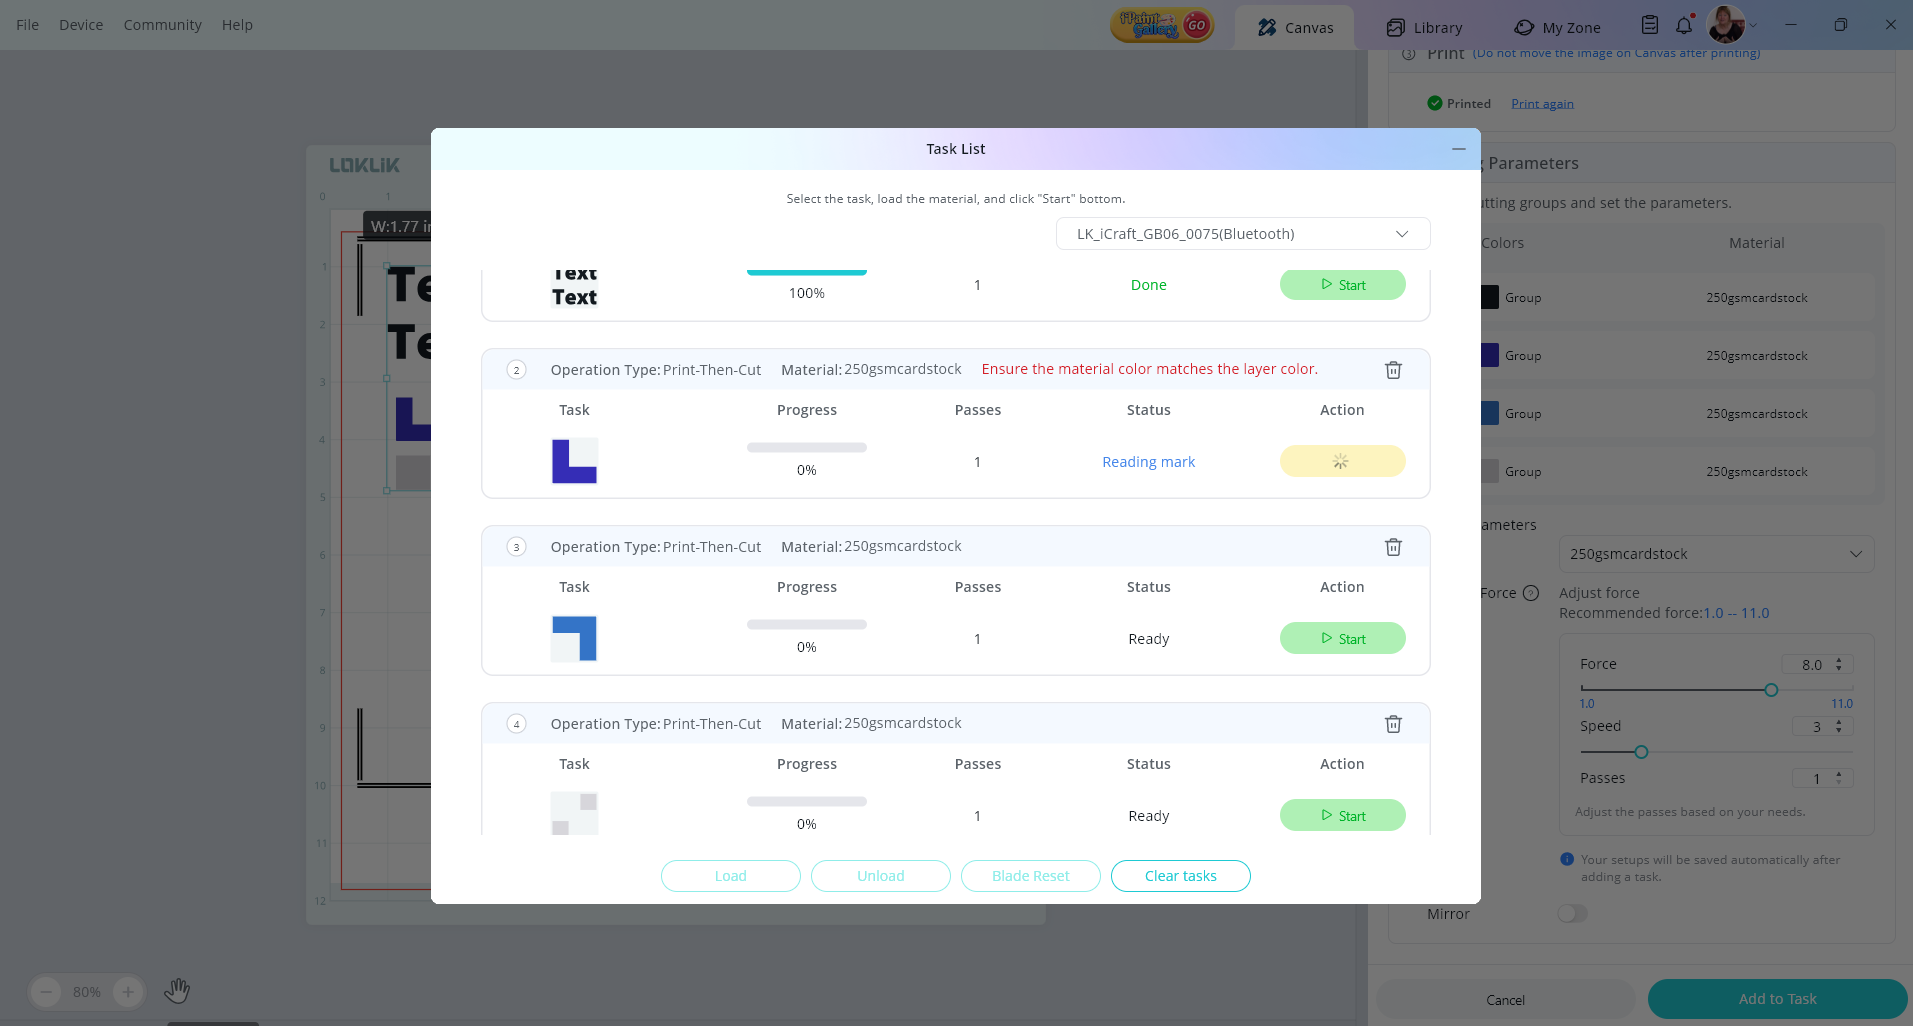
In the meantime, it is usable like this, even though it does read the mark on every task which does increase the time, but for my test it wasnt to painfull. just don’t move your mat from the machine between task cuts, you can quickly move through each task to complete all cuts as each one ends.
Hey, I think you can do it this way, copy a group of identical layers, change the color to transparent and place it on the bottom layer. This copied layer group is used for cutting, because it is the same color, there is no need to read the mark repeatedly;
Hello @liy_shan and welcome to the community forum!
You’re right, you can print the design with its colour and uniform the different colours to perform the cuttting. It doesn’t have to be transparent, in fact it is easier to handle choosing any well visible colour that is not in the actual design. Then it will cut all at once.
@Anthony_A, besides the printed design, you need to place the shape that will be cut around, with just one colour and select only the cutting colour.
I usually choose a well visible magenta to handle all the cuttings and if I want to cut with more than one steps for any reason (tests, different speed parameters…) I give each task a different colour.
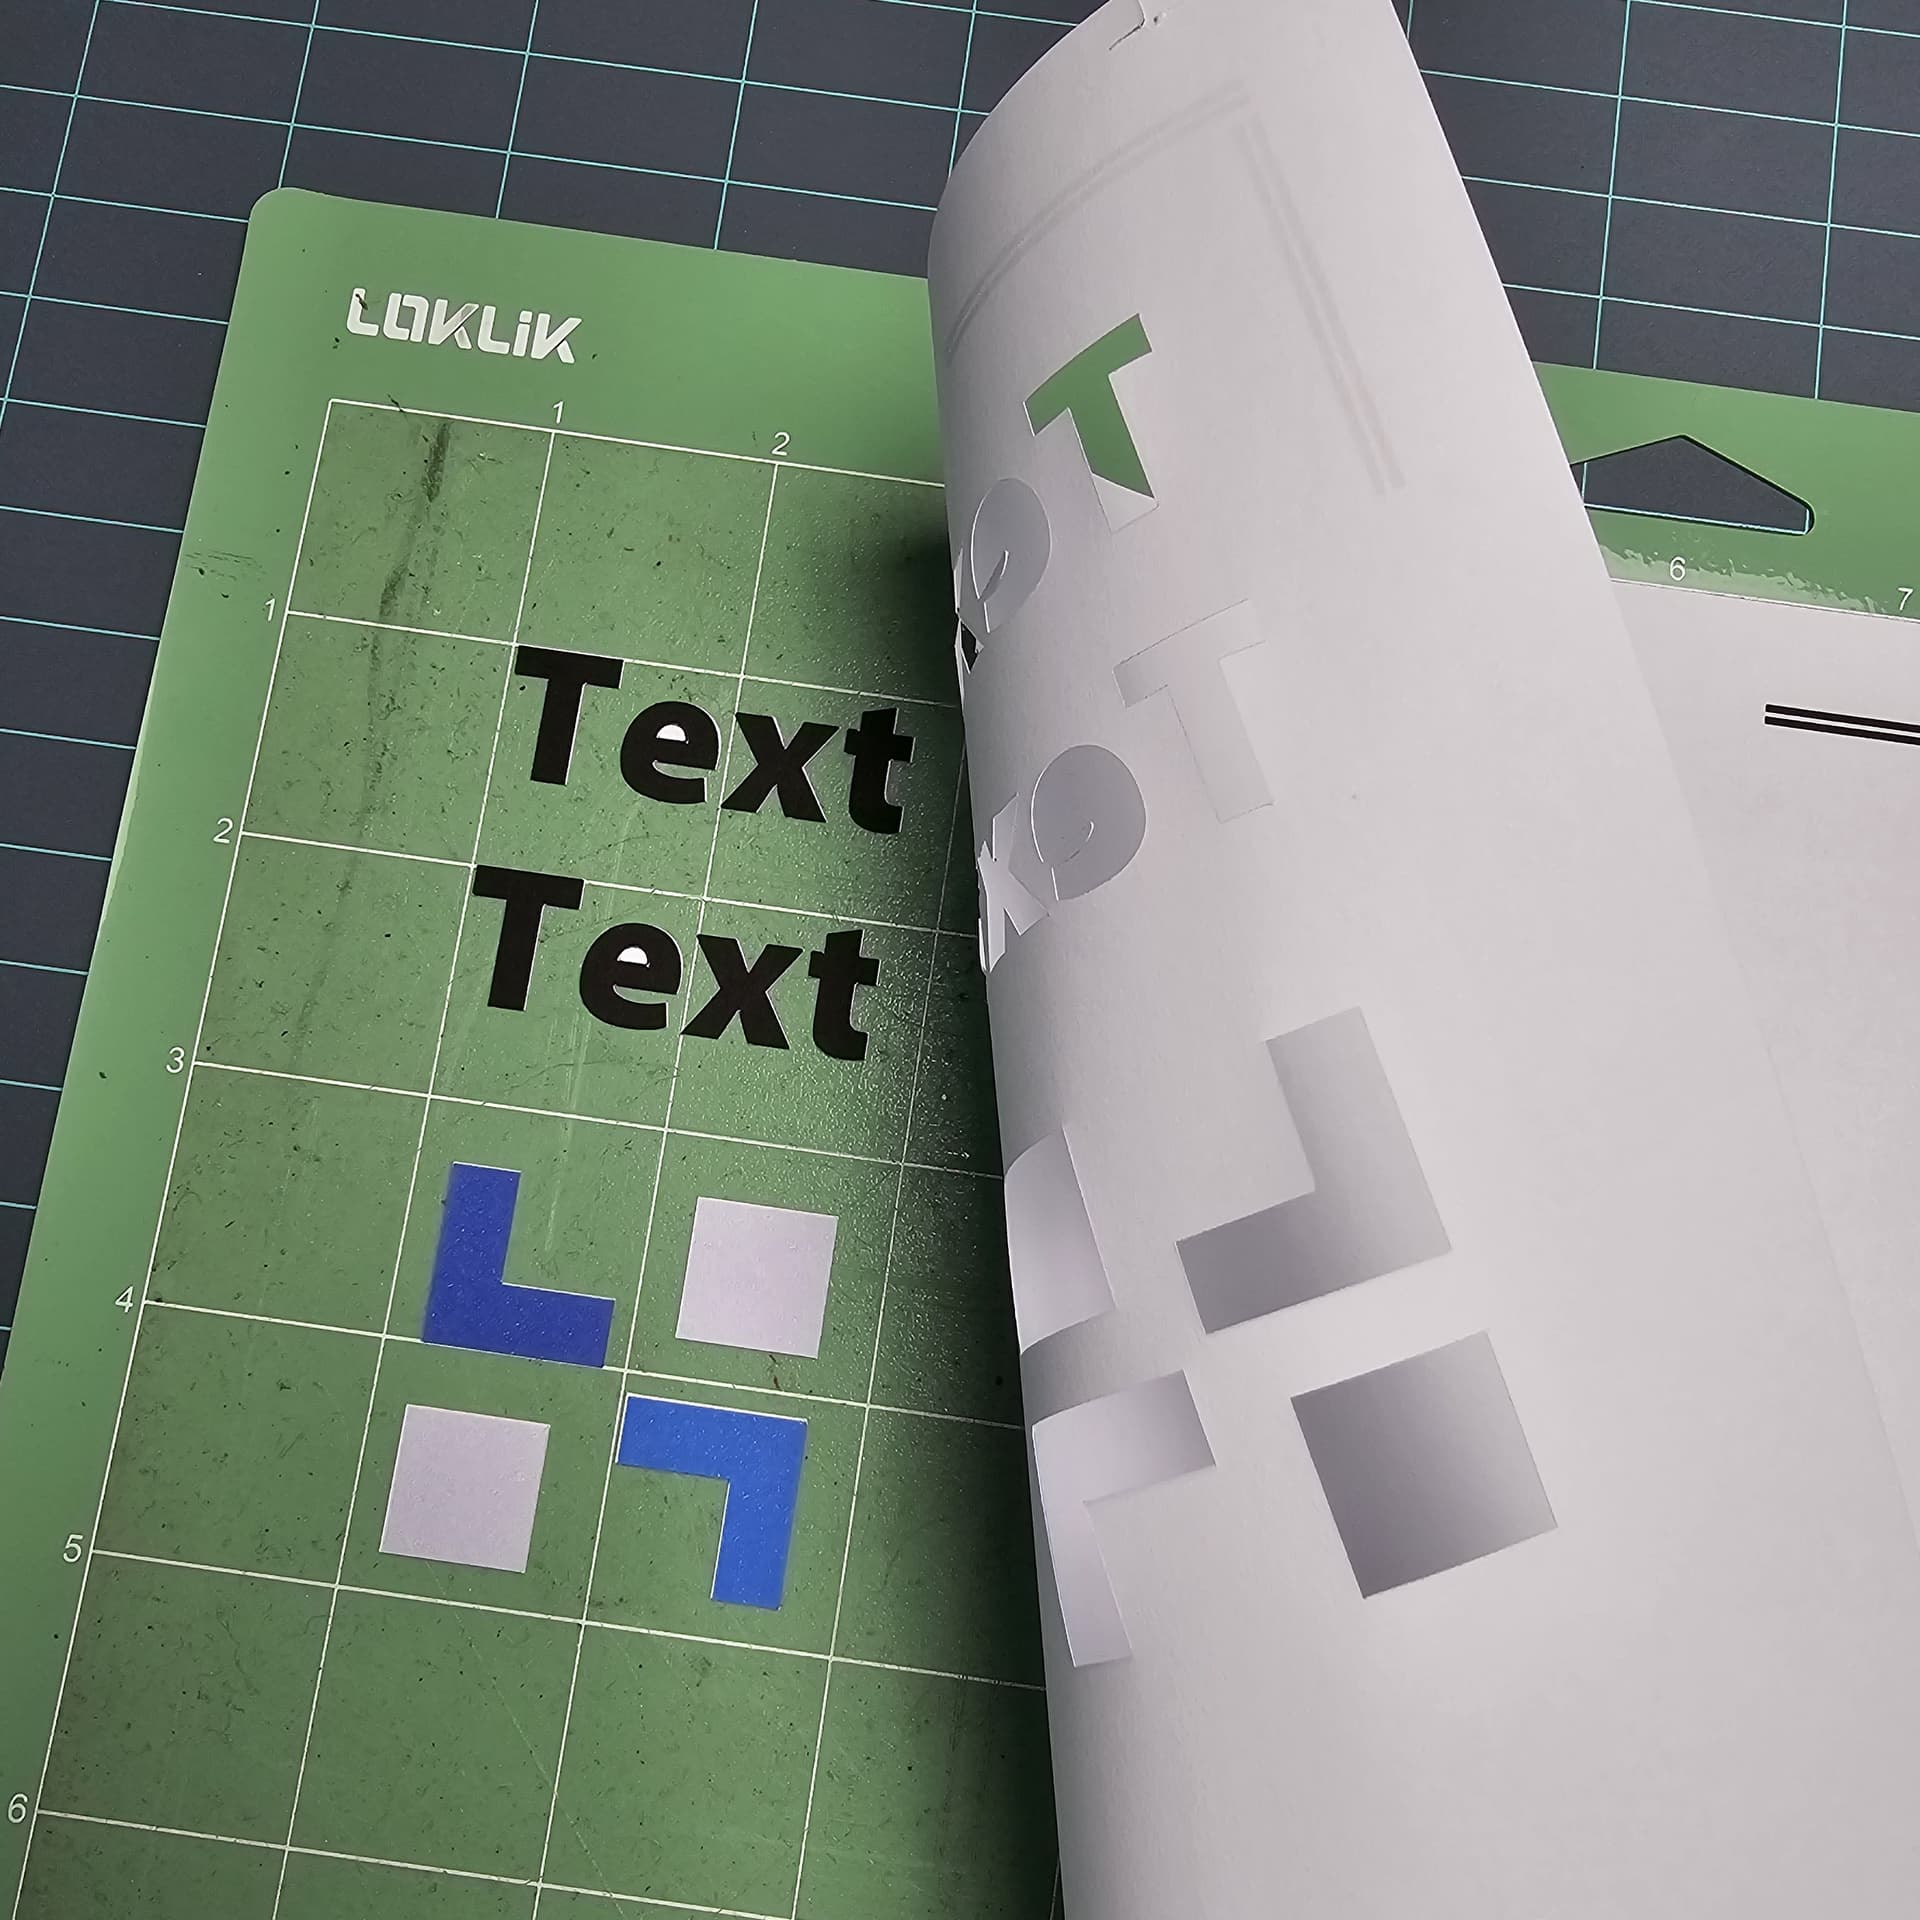
@InkiteeWorkshop you’re answer is amazing, performing the P&C yourself and taking pictures ![]()
yes, that sure does work, thanks @liy_shan another way that works is to make a copy print the colour group and then unite the copied group and send it to cut.
thanks so much @redhada we learn so much from each other, can you please confirm what this means here “It doesn’t have to be transparent, in fact it is easier to handle coising any well visible colour that is not in the actual design”
Choosing, just a typo ![]() . I use magenta as helper colour everywhere. It is inspiring, well visible and usually not in the design. If it is, I switch to lime green. It is a mania, an internal meaning code and a result of my OCD. I still have to join the last talky tuesday about that. I have so many obssesions working, I need to seat and elaborate the answer on the computer
. I use magenta as helper colour everywhere. It is inspiring, well visible and usually not in the design. If it is, I switch to lime green. It is a mania, an internal meaning code and a result of my OCD. I still have to join the last talky tuesday about that. I have so many obssesions working, I need to seat and elaborate the answer on the computer ![]()
ha ha got it!! it’s nice to get a system going that works! ![]()
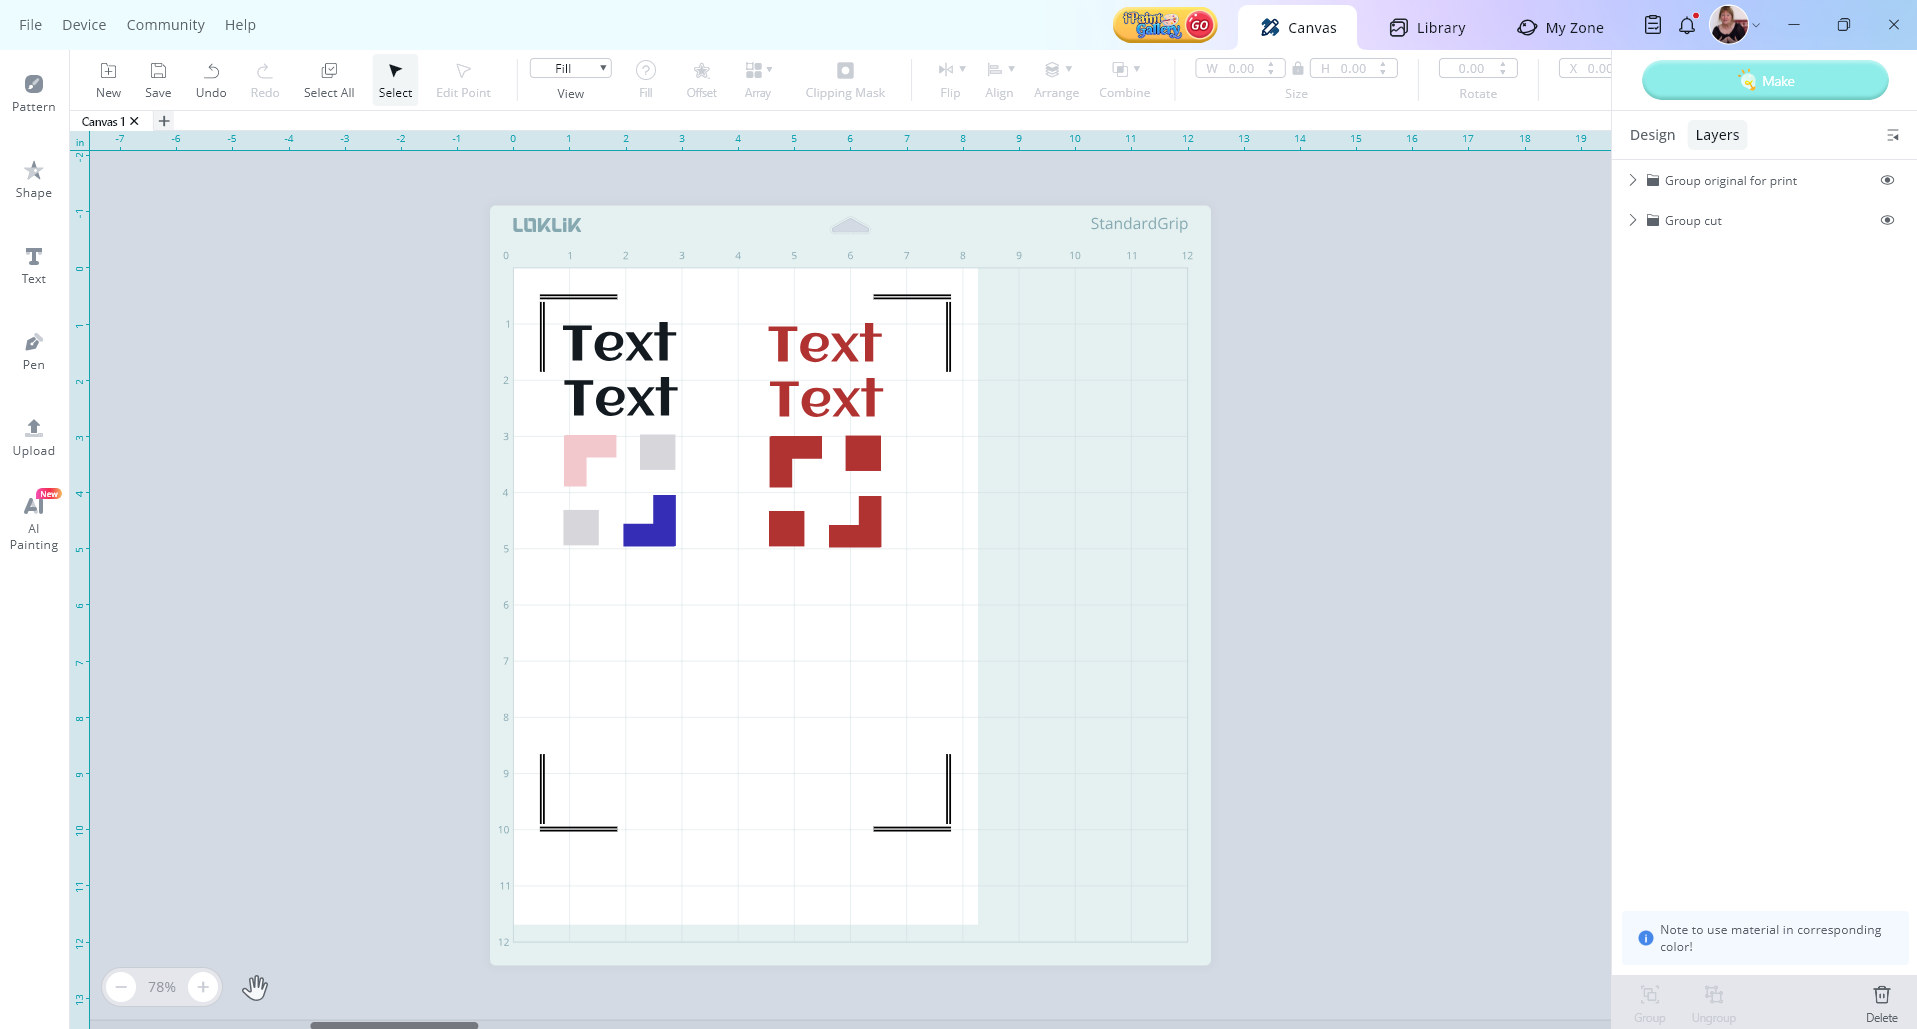
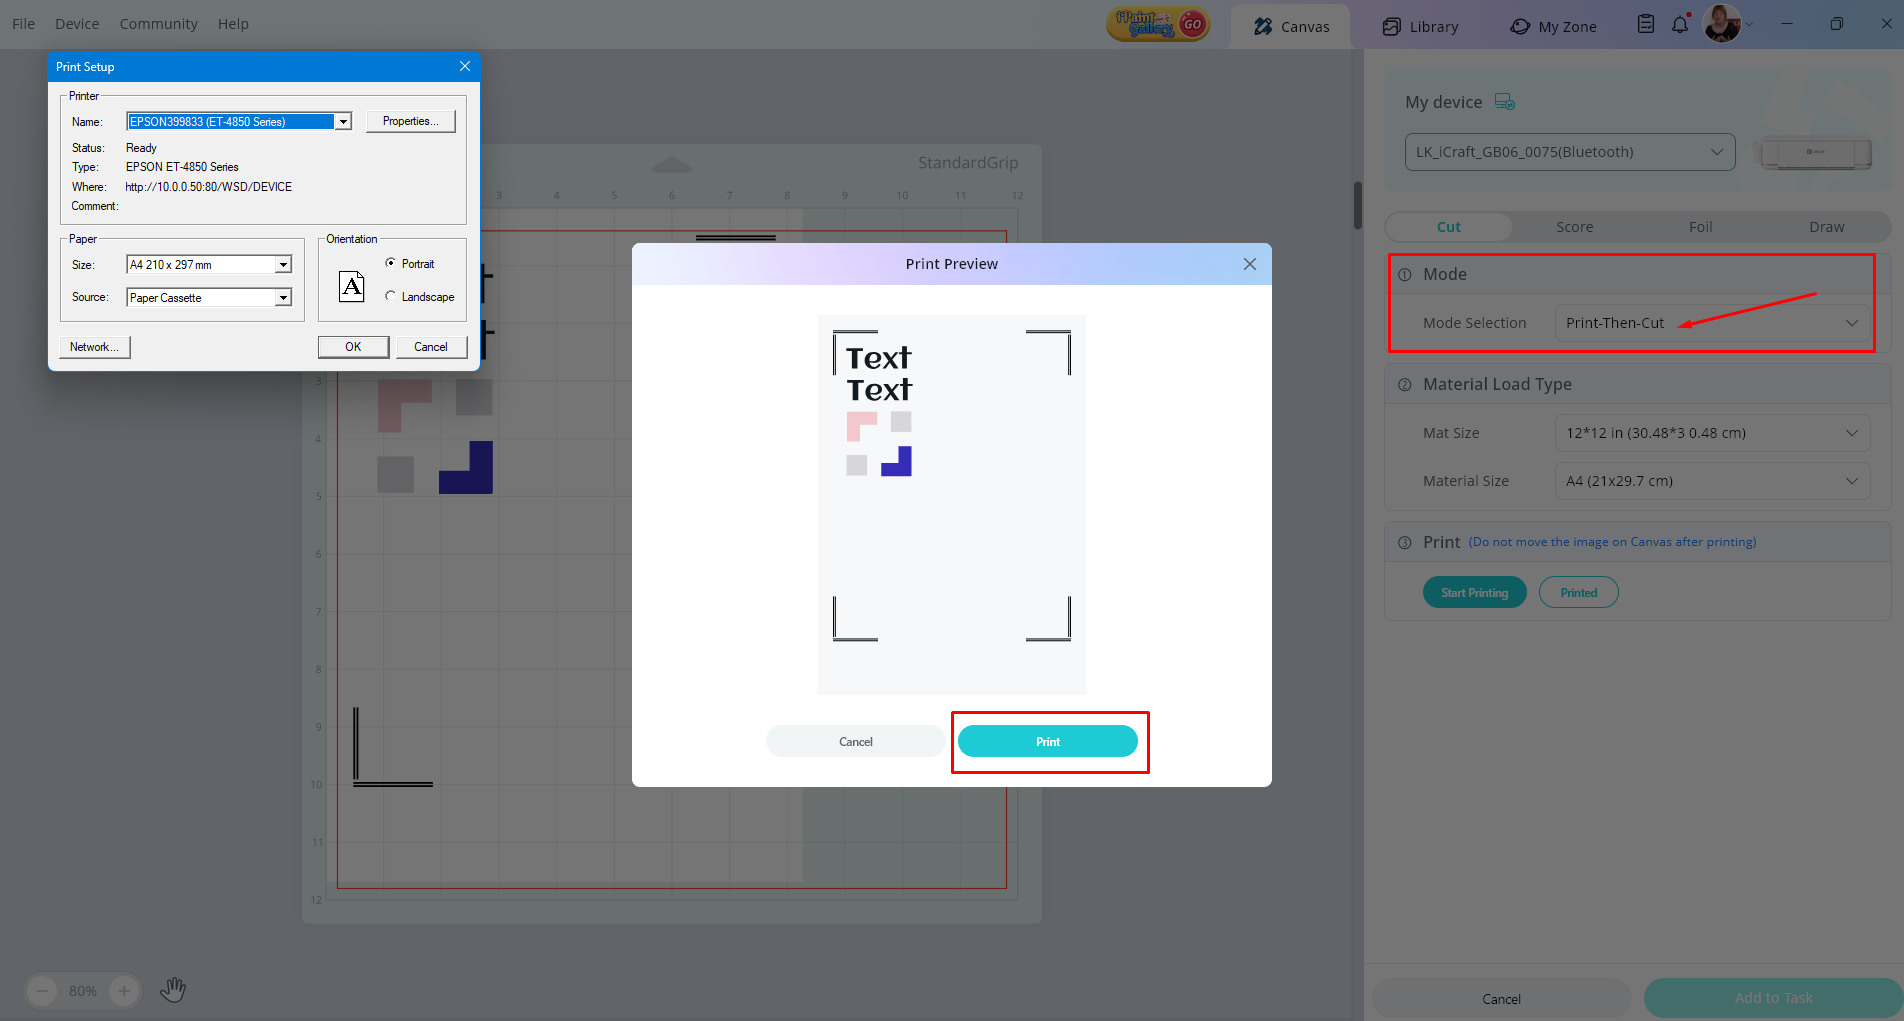
Look, better and image than thousand words
Haha, I forgot I now use Loklik’s blue as second supporting colour
When printing, you just need to hide the blue/cut layer, as it should be just white.
Then, I can hide the print layer, or just not select it, so I can go to the cutting step.
As you can see, keeping it organized also helps understanding the processes and making it easier to handle.
@Anthony_A there are 3 workarounds you can use which ever one suits you best, all achieve 1 cut task.
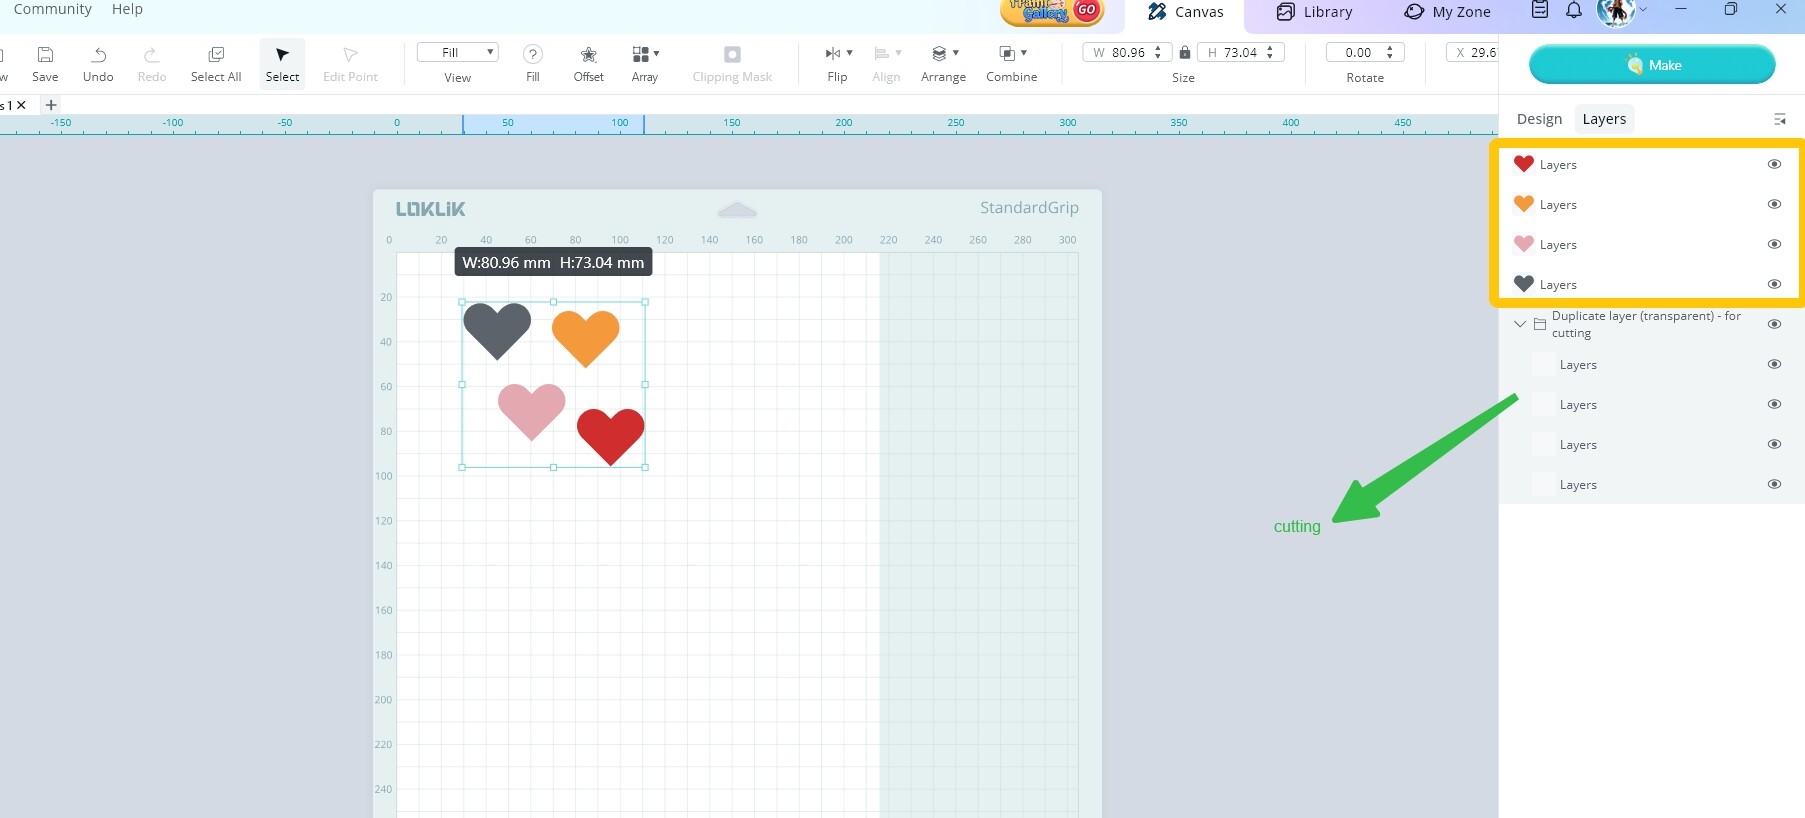
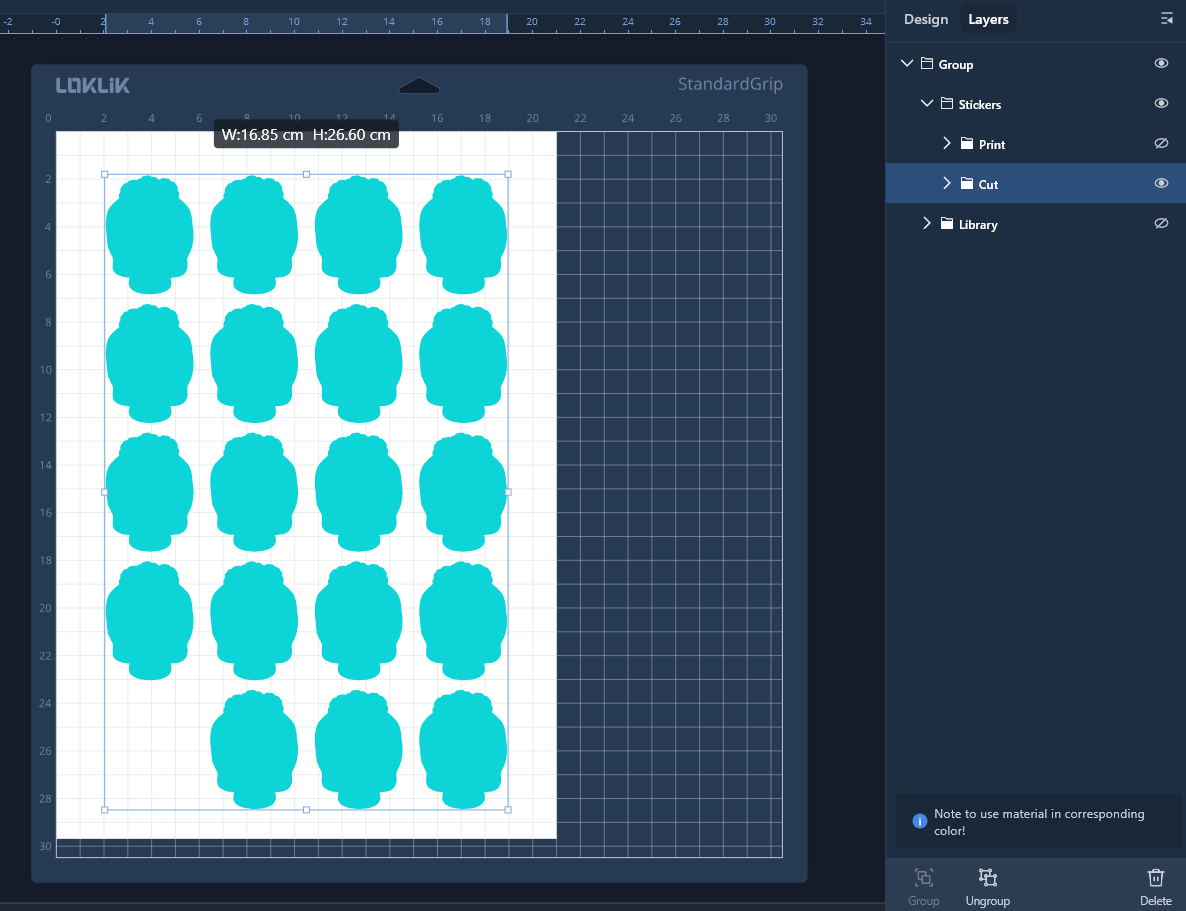
1/ duplicate all layers > group, > select fill colour to transparency (it’s the no colour with the line through it) you end up with 2 layers, 1 print in colour and 1 combined cut task. compliments of @liy_shan
2/ duplicate all layers > group, then unite, you end up with 2 layers, 1 print in colour and 1 combined cut task. compliments of @InkiteeWorkshop
3/ create a tight fit offset > make sure it’s a group > you end up with 2 layers, 1 print in colour and 1 combined cut task. compliments of @redhada
this was a fun brainstorm, thanks for the question
I tried grouping them, but it still shows up as 2 separate groups for the print.
It’s most likely a small bug the devs need to fix?
So much information here nice tips. Thanks@liy_shan @InkiteeWorkshop @Anthony_A @redhada ![]()
![]()
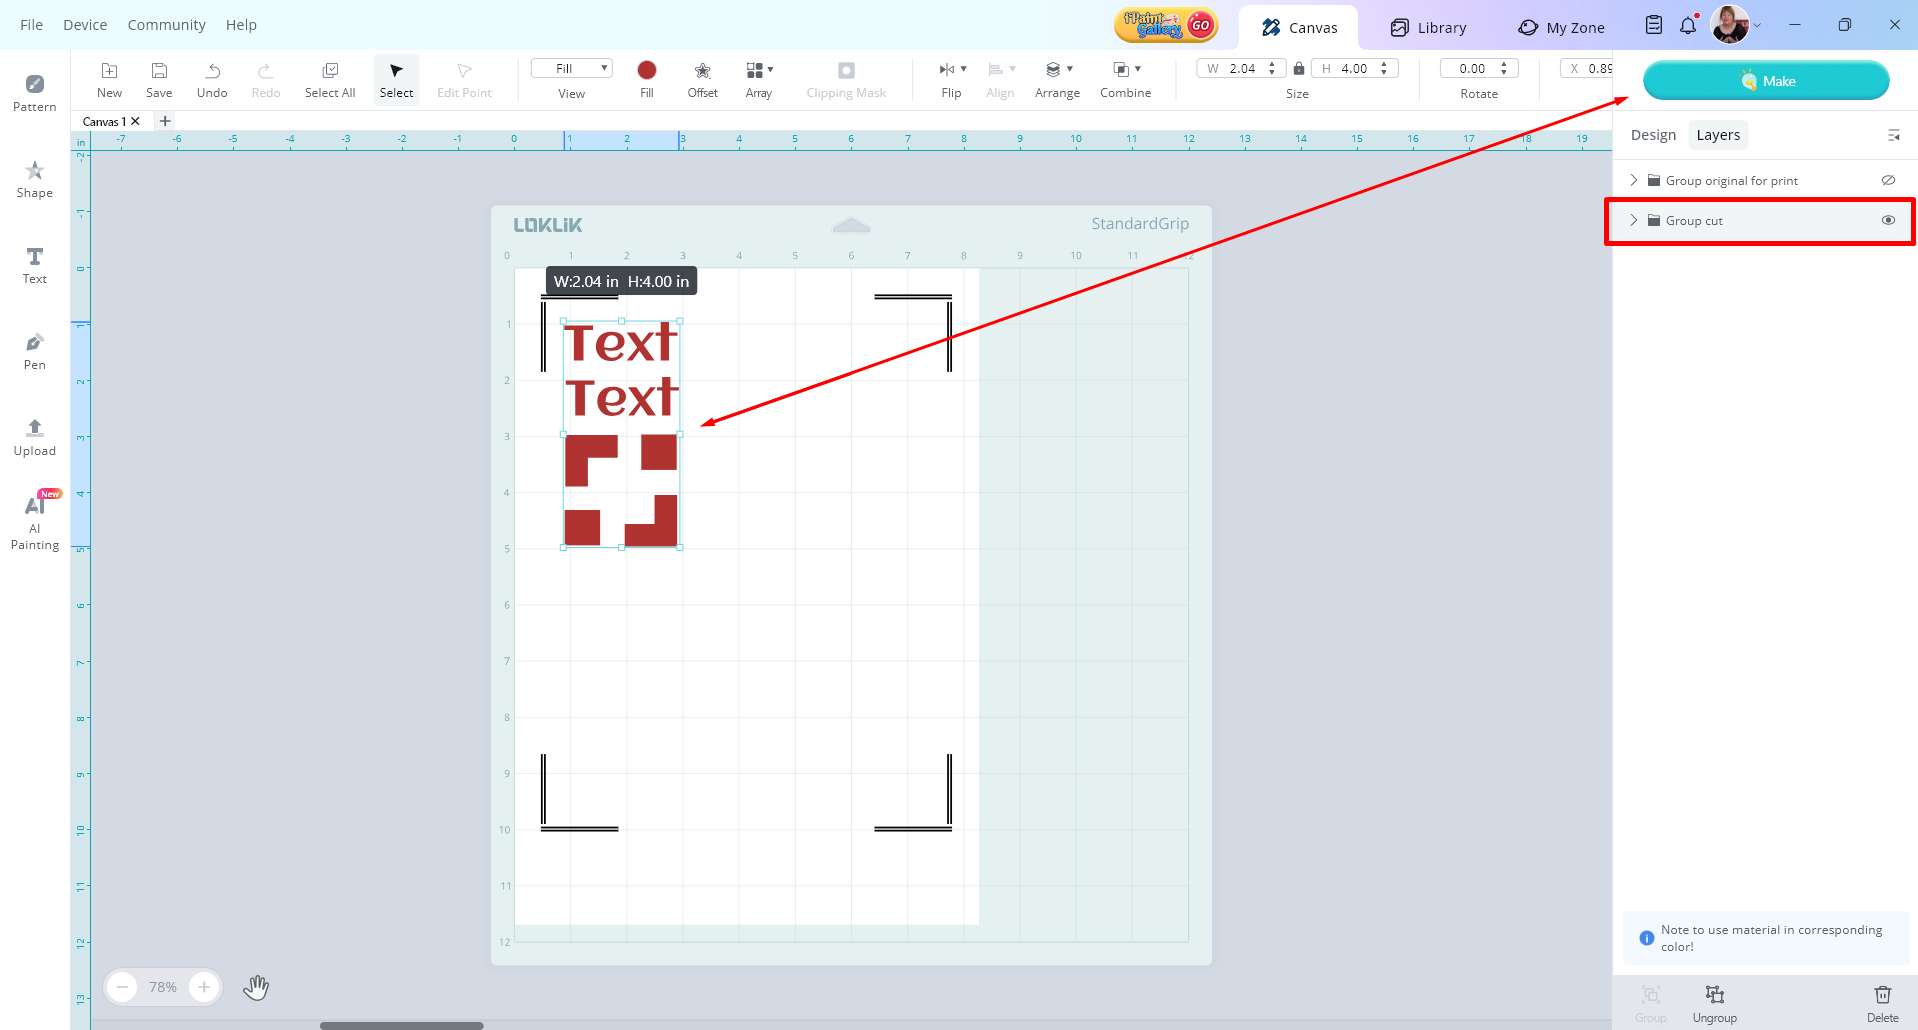
Good morning @Anthony_A it’s not a bug, it’s how the app works at the moment, the task seperates the text from shapes, and the shapes into colours. Grouping alone will not create the cut in one task, however try this > create a print then cut step, creating 2 group layers.
1/ design in colour on the LLiS canvas > group it > rename it to “group test print” > duplicate the design > change all colours to the same colour > re-name it “group test cut”
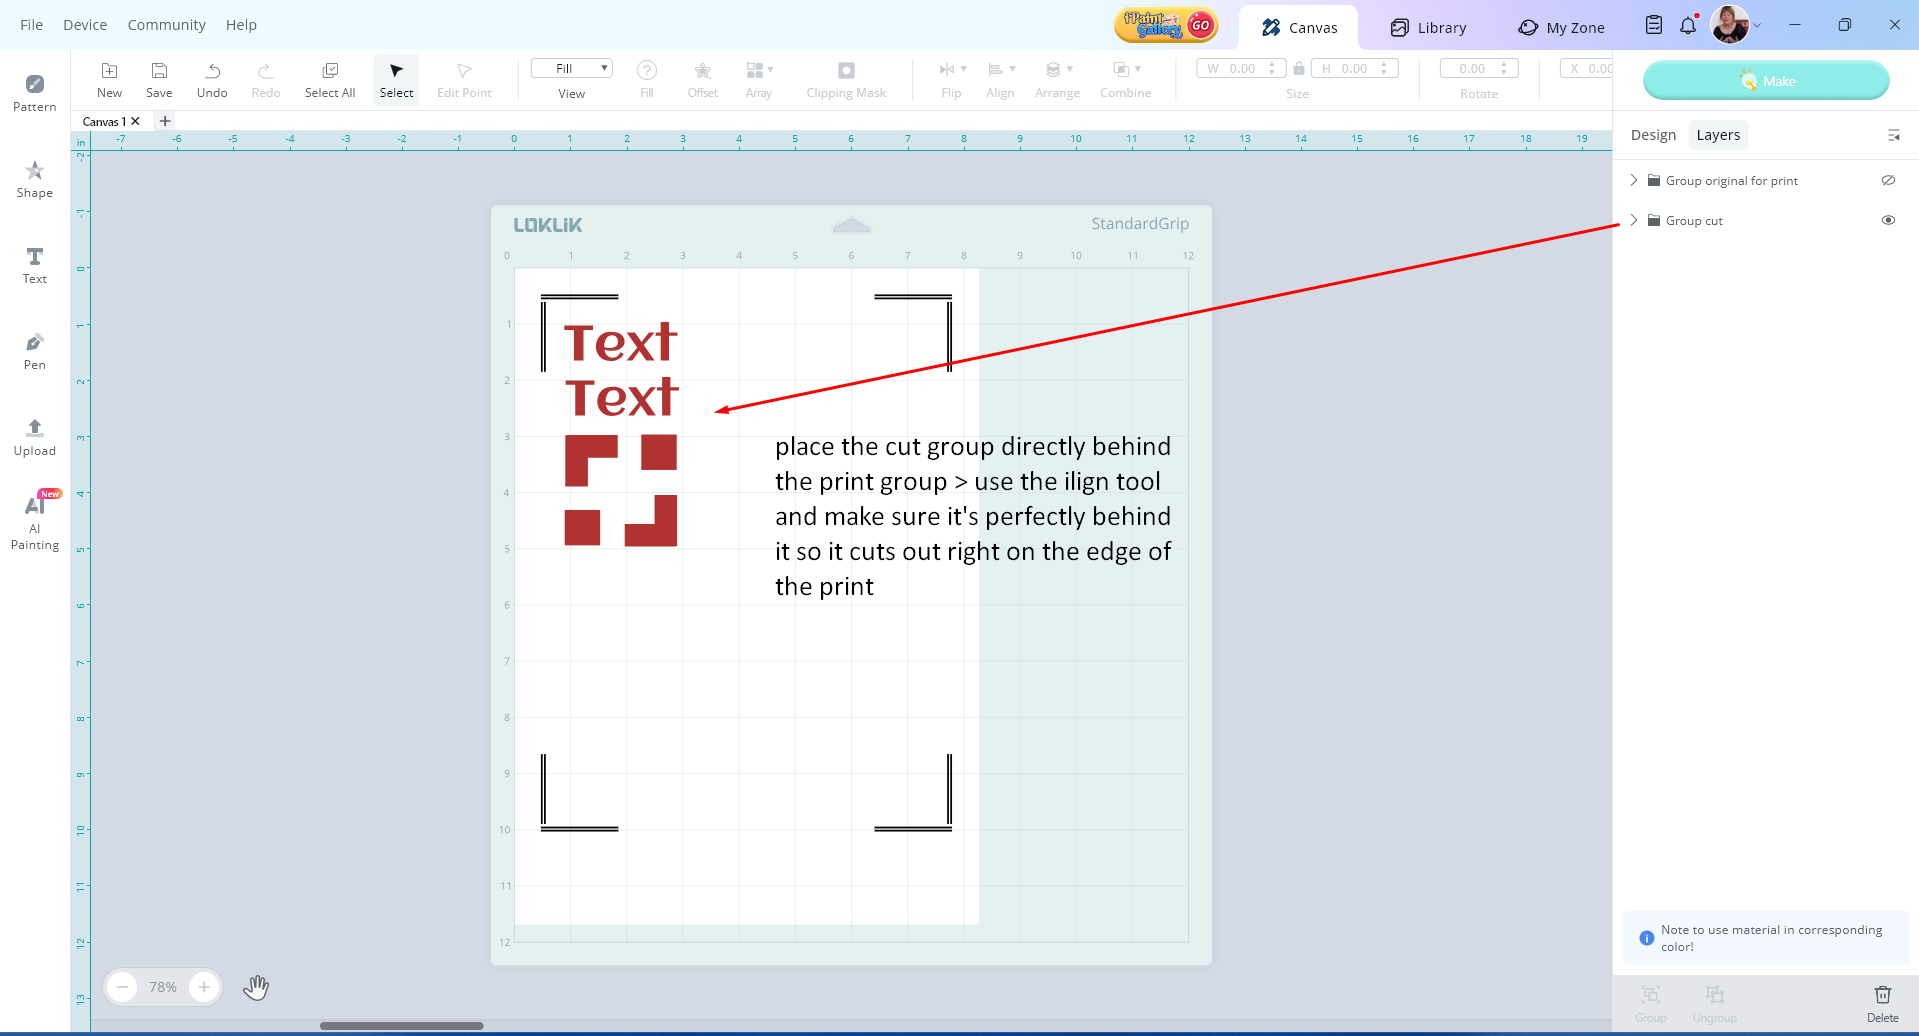
2/ move the cut design behind the print design, for acurate cutting
3/ hide the cut layer > send the print layer > make > and follow the promps > place the print sheet on the sticky mat.
4/ back out of the print instructions > on the layers hide the print layer > show the cut layer > make
5/ check the box 1 colour > choose the cut parameters > all of the design will move as you want it to, to the task window, and cut at once, it will scan the corner marks once also.
my pleasure @LAJUANA_ANTHONY
The best way is to just use adhering transparency on top of the vinyl lettering and then for the matte printed stickers, do them manually.