Part 1 of this series covered all the beginner‑friendly things I wish I had known when I first unboxed my machine—the simple habits, settings, and tools that make those first projects so much easier. But once you get comfortable with the basics, you start running into a whole new set of challenges: thicker materials that don’t behave the way you expect, blades that don’t cut the same across every project, foiling that suddenly misaligns, and tiny details that look perfect on your screen but fall apart on the mat.
Part 2 is all about those next‑level lessons—the advanced tools, specialty materials, and machine quirks that no one warns you about until you’re already frustrated. These are the things I wish I had known before I wasted foam, fabric, foil, and more than a few mats. My goal is to help you skip the trial‑and‑error stage and jump straight into confident, consistent cutting with your Loklik machine.
1. Deep‑Point Blade vs. 60° Blade — They’re Not the Same
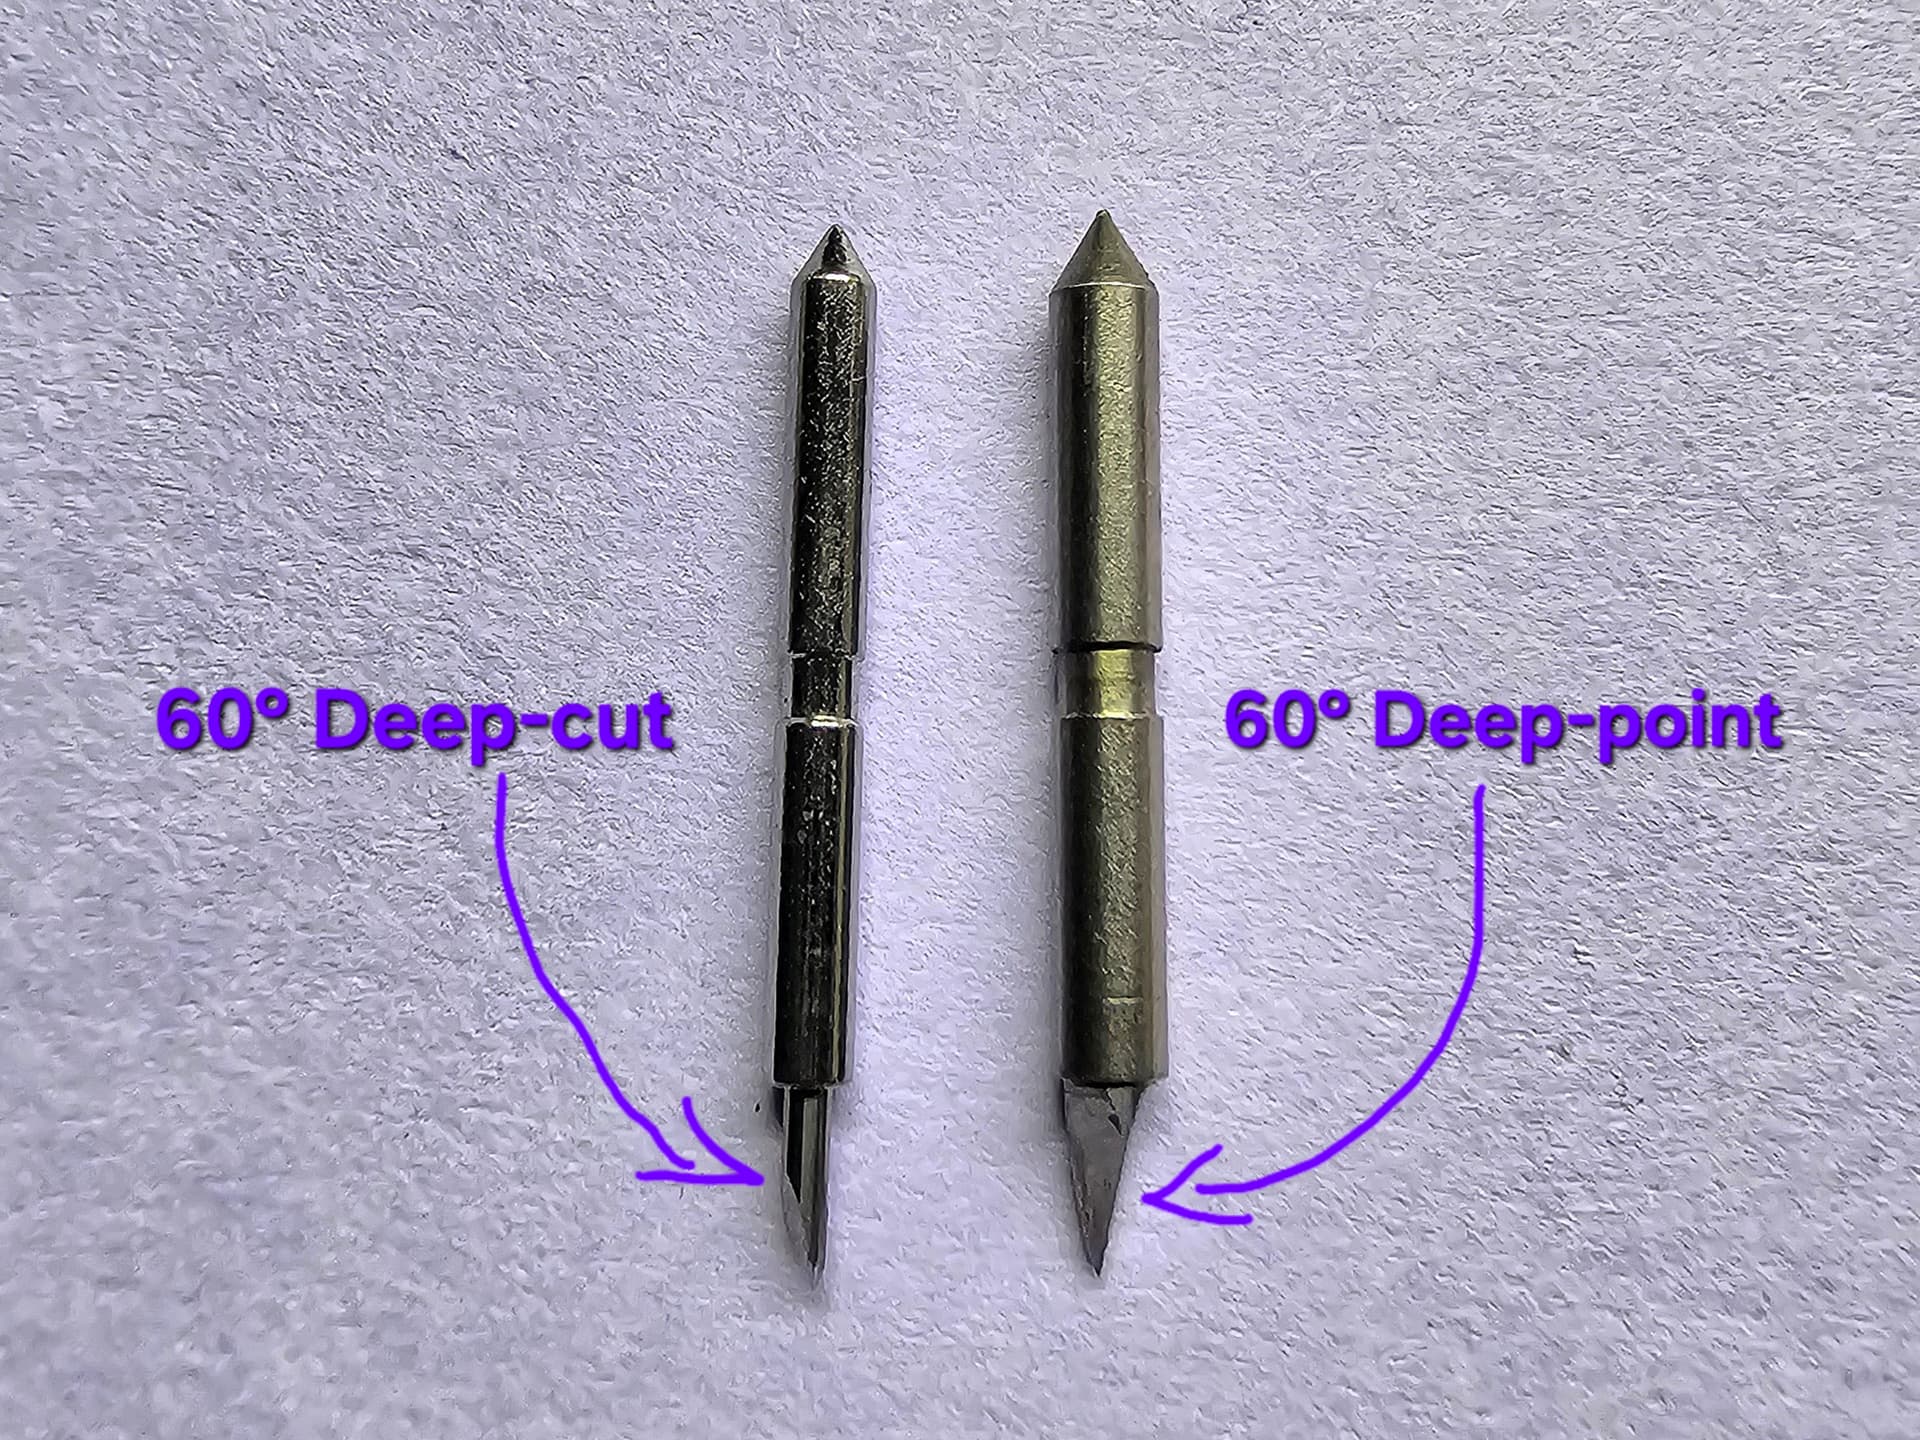
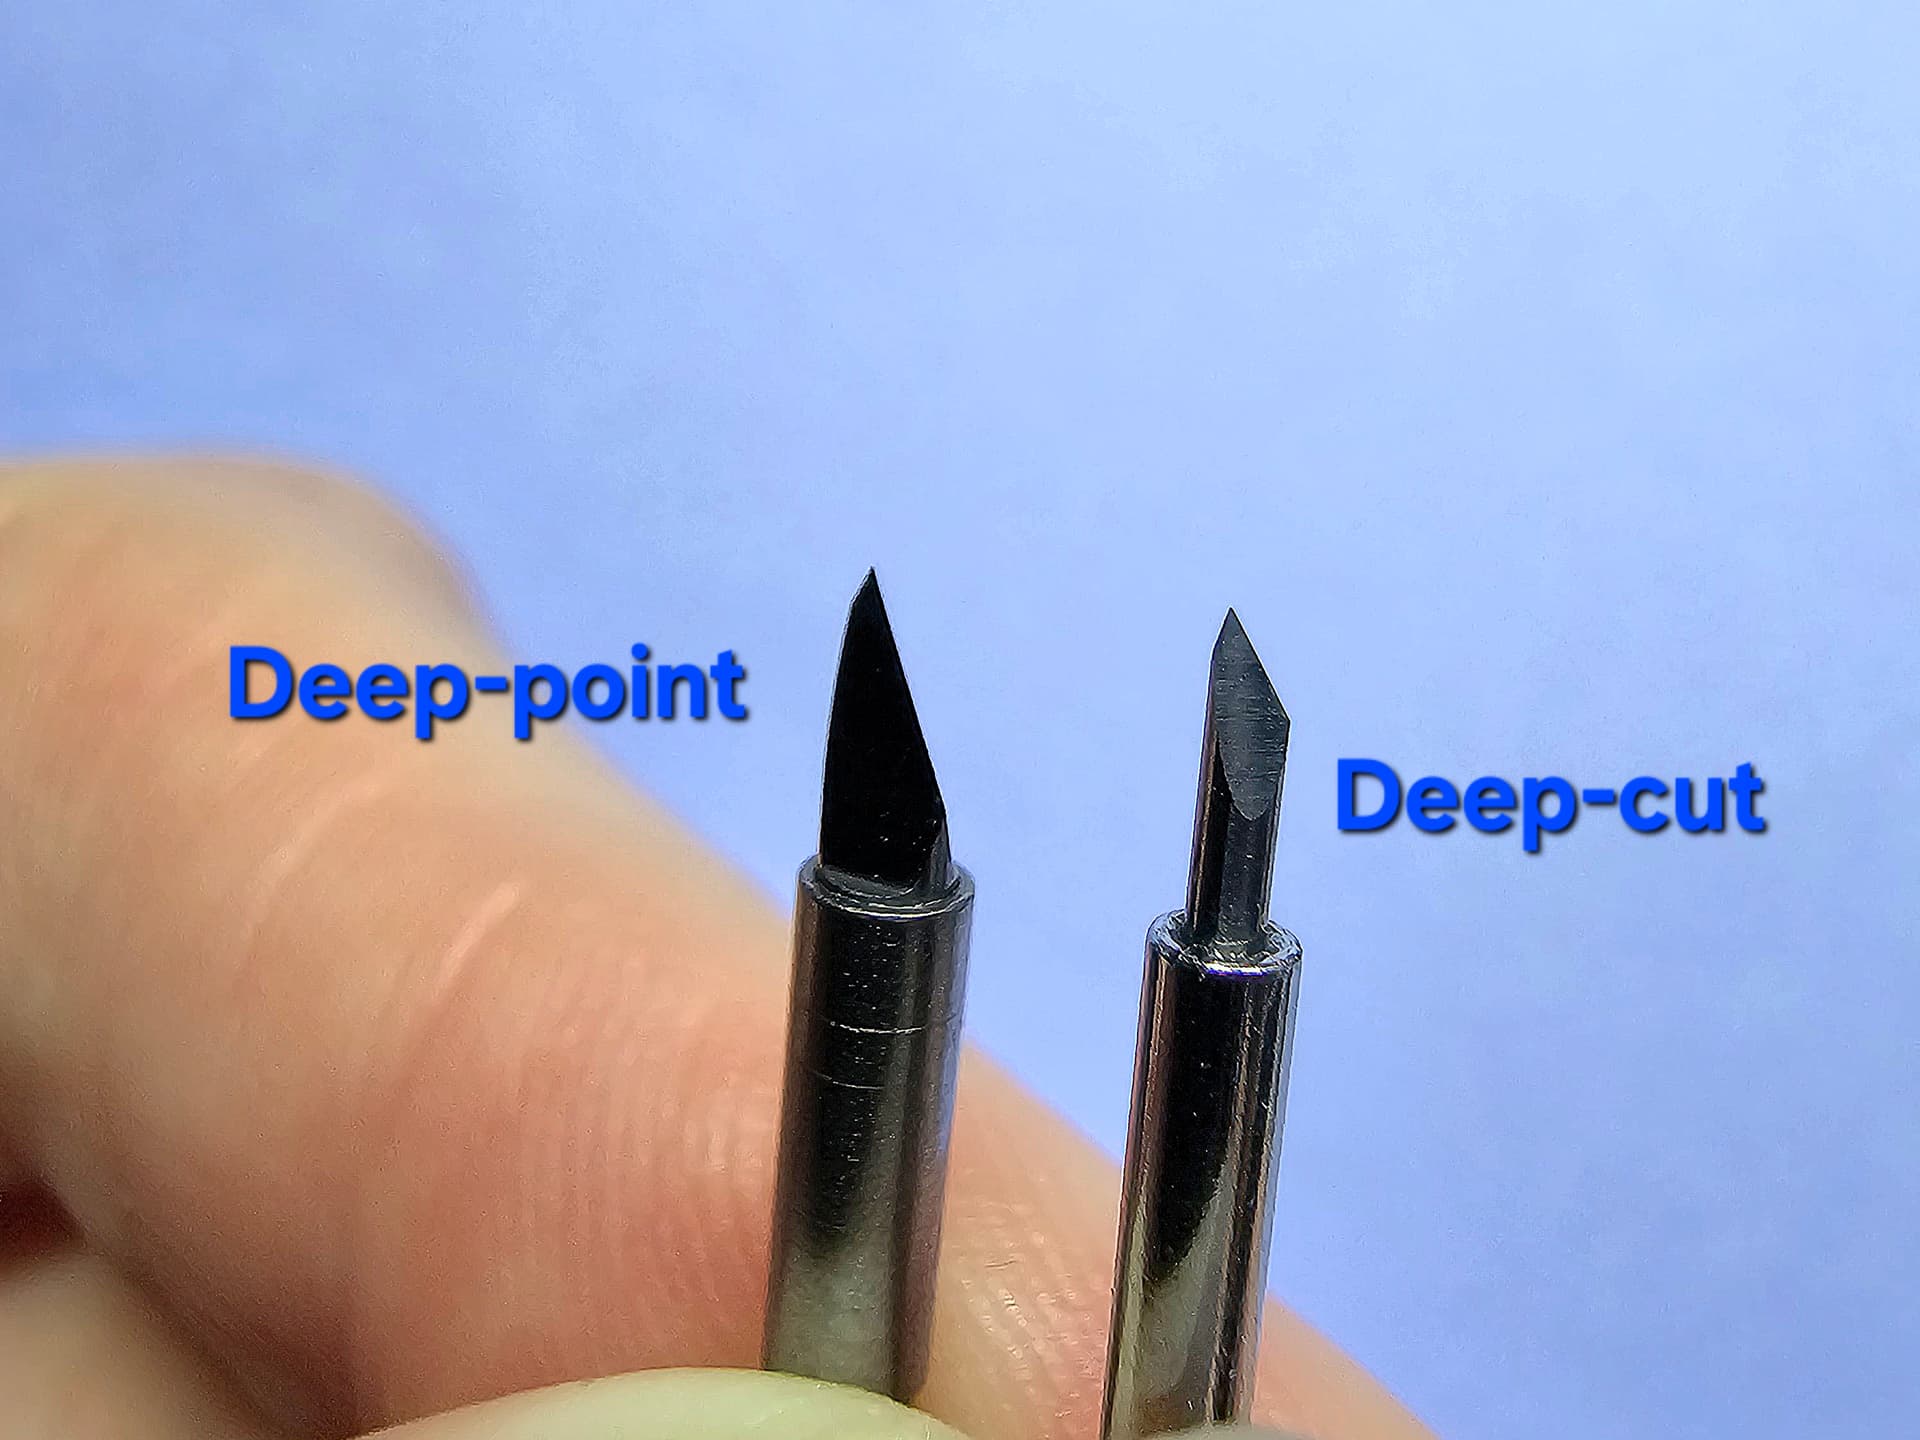
Before I bought the Deep‑Point Blade for my iCraft, I assumed it was just Loklik’s version of a 60° deep‑cut blade. Once it arrived, I realized immediately that it was built for a completely different purpose. The blade is longer, the angle is steeper, and it’s designed for materials that a standard 60° blade simply can’t handle. It’s built for power, not precision, and that difference matters.
What the Deep‑Point Blade is designed for
- Craft foam (EVA foam, 1–2 mm)
- Thin chipboard
- Magnetic sheets
- PVC stencil sheets
- Shrink plastic
- Faux leather (medium to thick)
- Glitter or specialty cardstock
These materials need deeper penetration and more force than a 60° deep-cut blade can provide.
How it differs from a 60° deep‑cut blade
- A 60° blade is still a fine‑point blade — just steeper for detailed cuts.
- The Deep‑Point Blade has a longer cutting edge for reaching into thicker materials.
- It’s designed for thicker, denser, or more resistant materials, not tiny details.
- It handles simple or bold shapes better than intricate designs.
- It gives the machine the leverage and depth needed to cut foam, chipboard, and textured surfaces.
- The 60° Deep-Cut blade focuses on precision, while the Deep‑Point Blade focuses on power.
Why this matters for beginners
- Using a 60° Deep-Cut blade on foam or chipboard leads to tearing, dragging, or incomplete cuts.
- Using the Deep‑Point Blade on tiny, intricate shapes leads to rough edges or lost details.
- Choosing the right blade prevents wasted materials and unnecessary frustration.
The Takeaway
If you thought the Deep‑Point Blade was just a deep‑cut blade, you’re not alone — I thought the same thing until I held it in my hand. Once you understand that it’s built for power, not precision, the cutting results make a lot more sense.
You can purchase the Loklik Deep-Point blade here:
You can also check out my Loklik Blade Guide (UPDATED 3/23/2026) to learn more about different blade types and their uses.
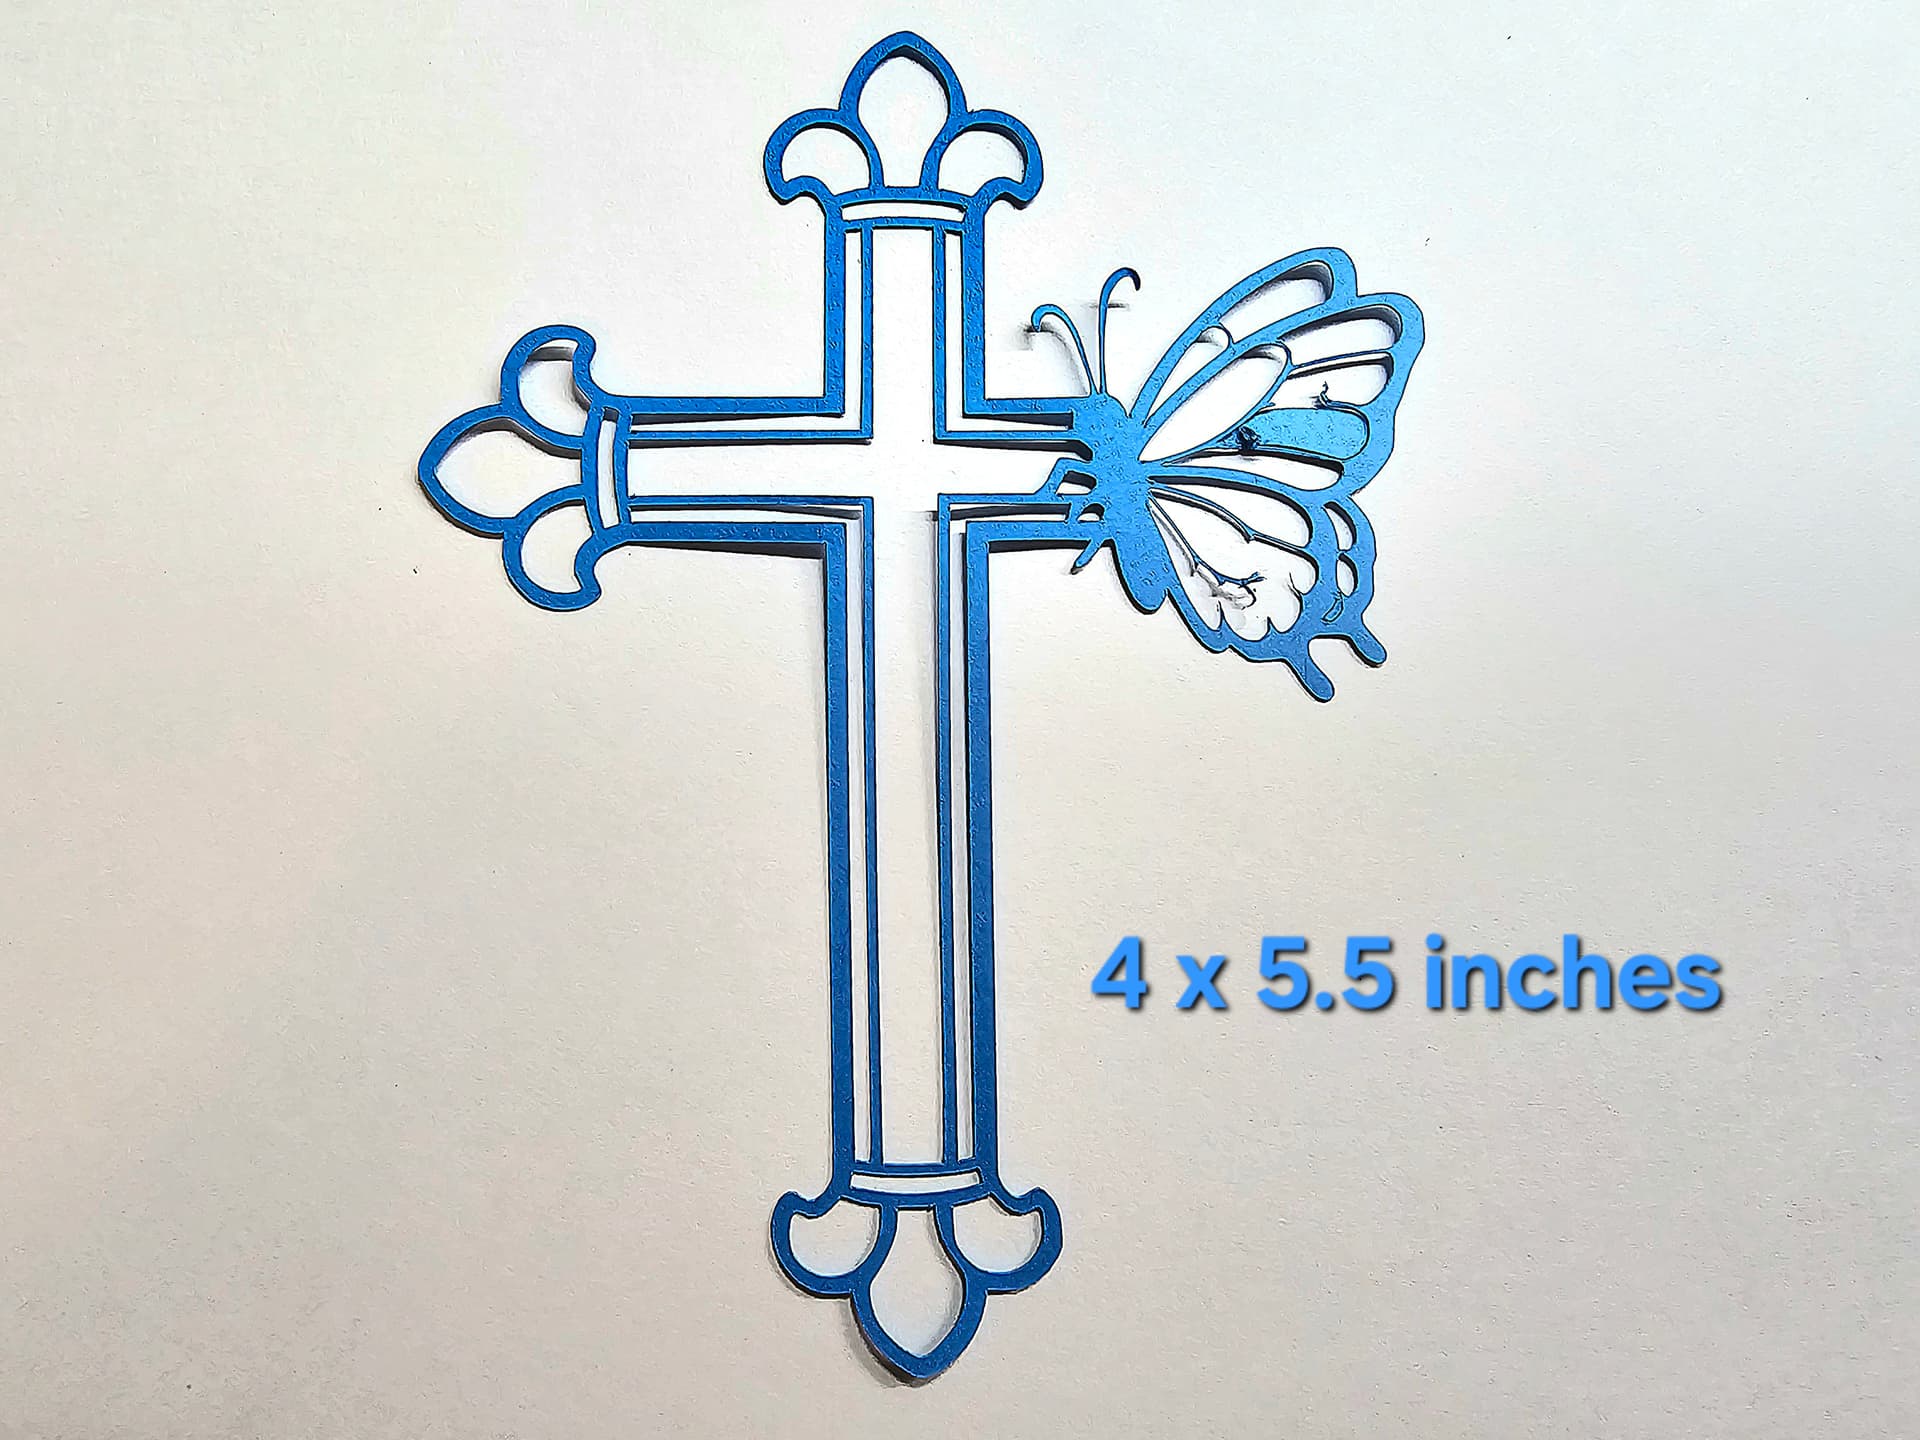
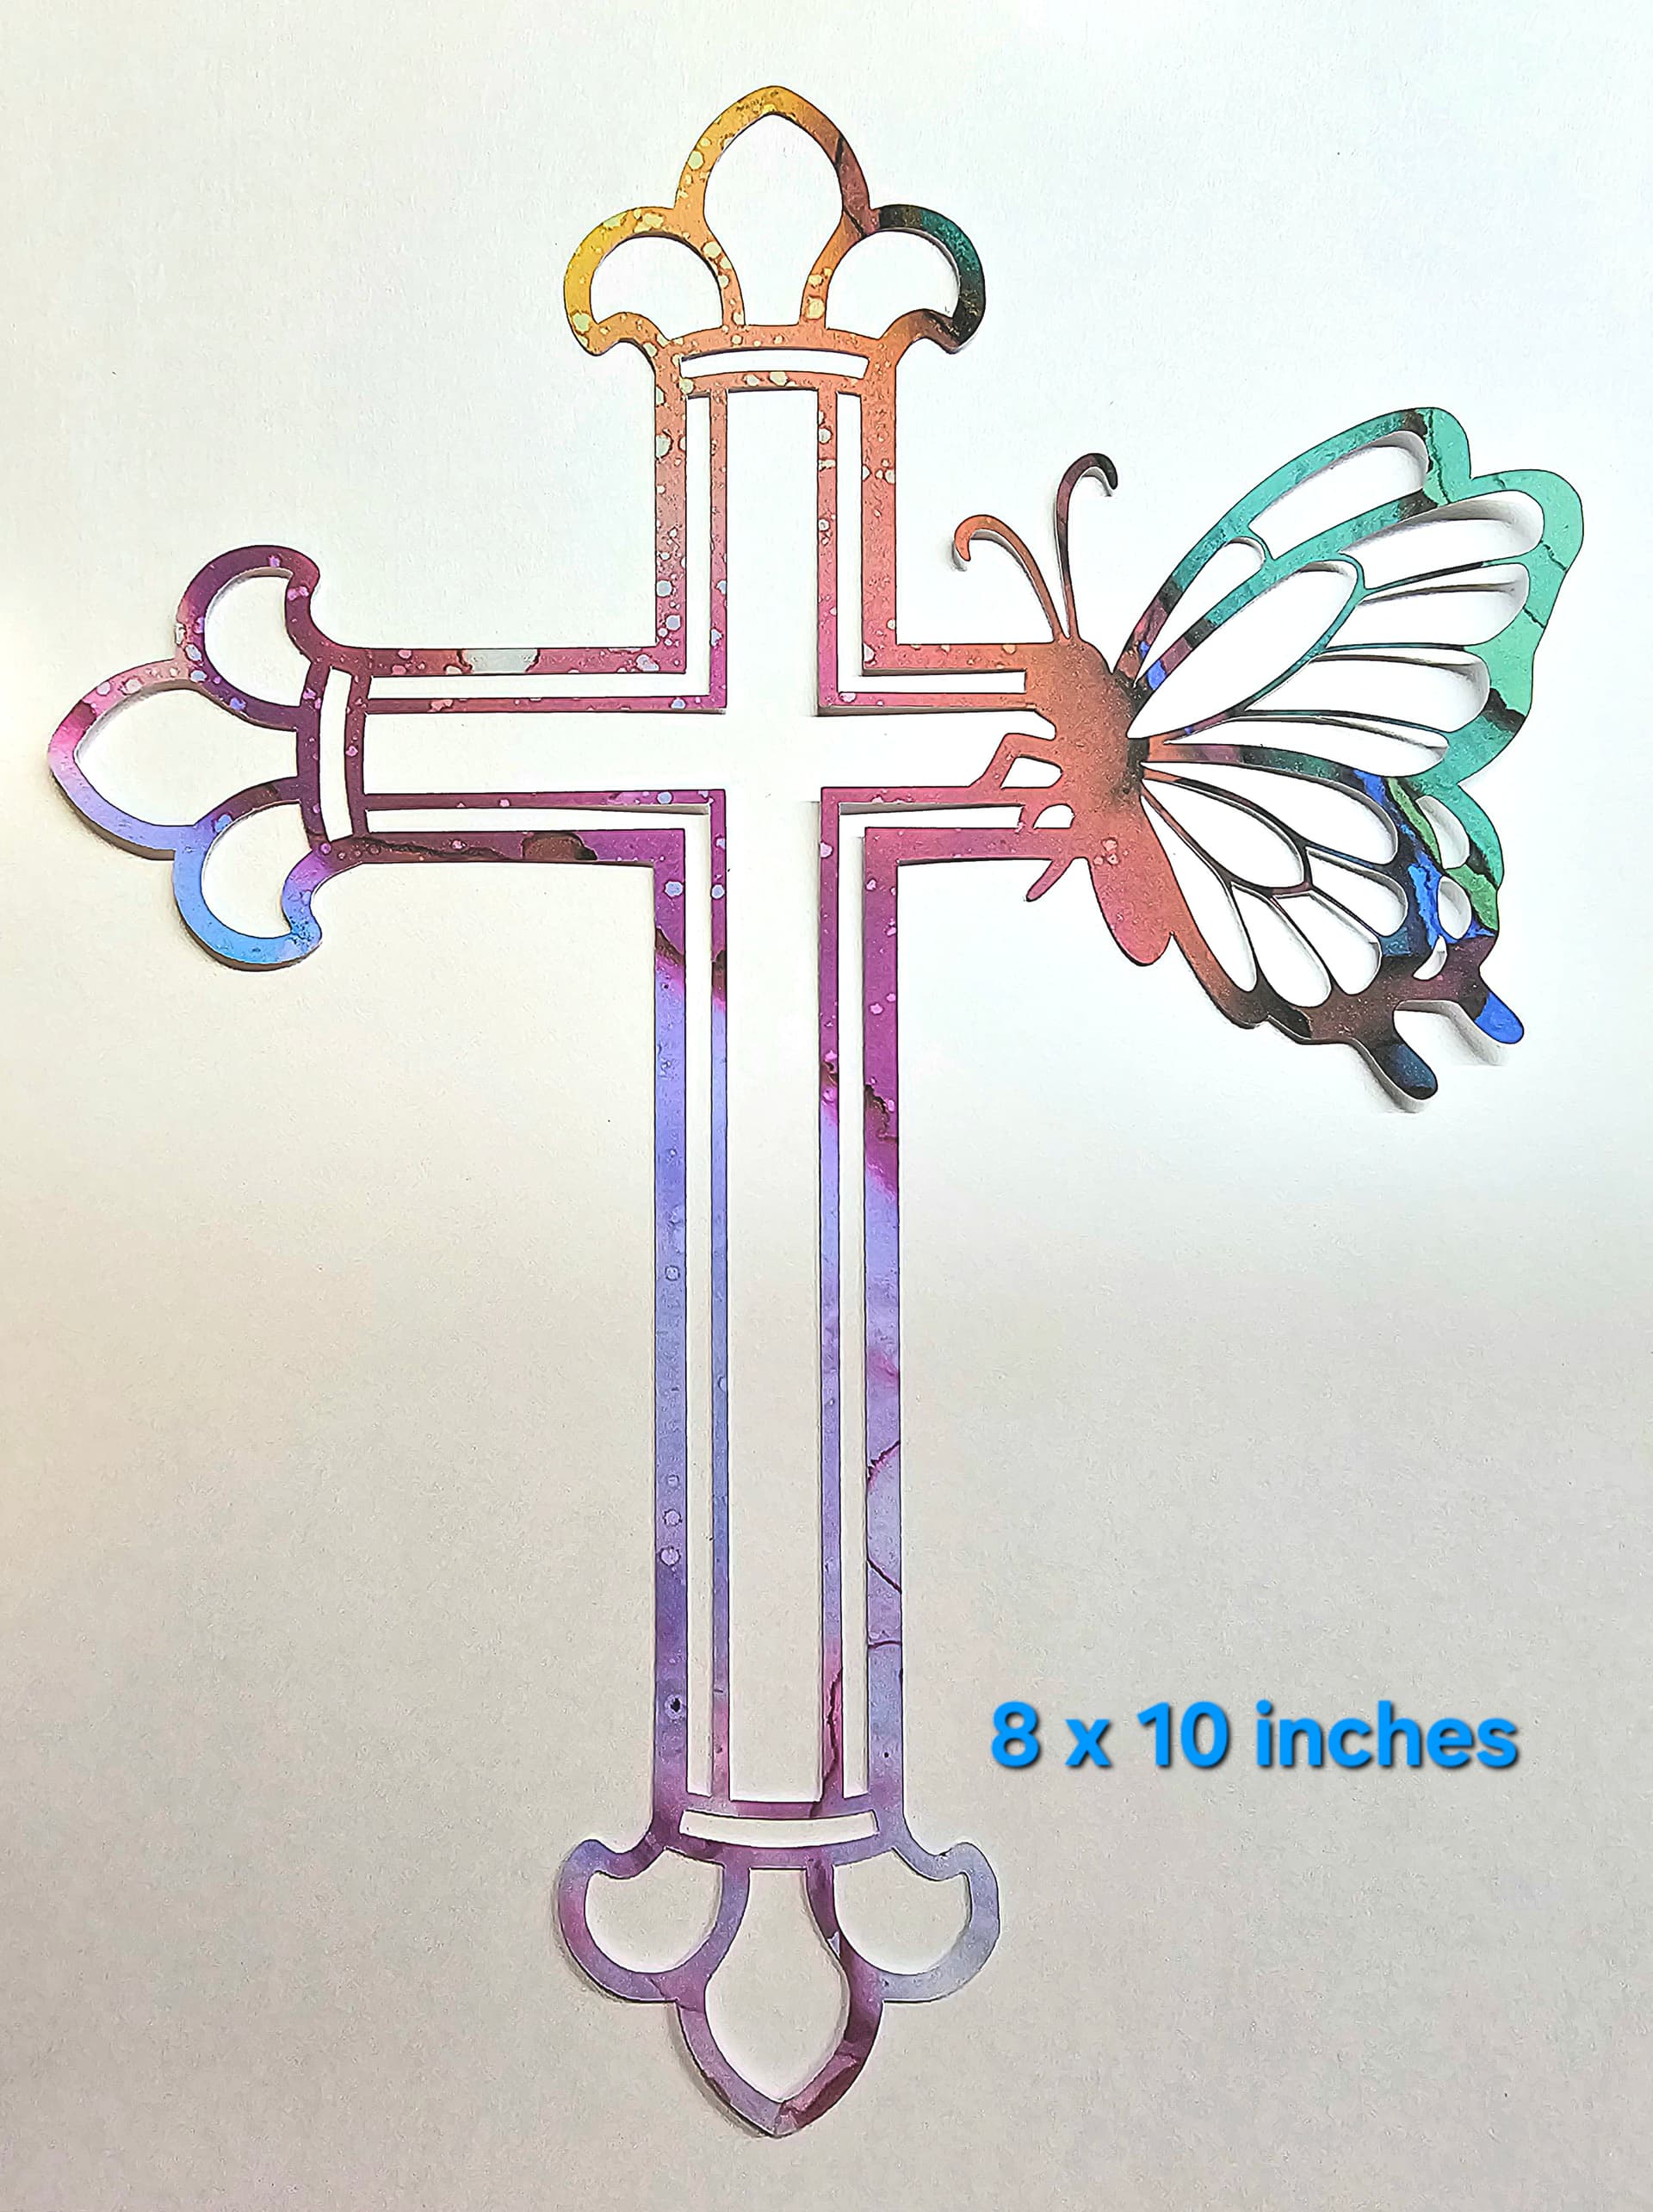
2. Intricate Designs Don’t Always Cut Well at Small Sizes
Some designs look perfect on your screen but fall apart the moment you shrink them down. Tiny curls, thin lines, sharp corners, and delicate details can become too small for the blade to navigate cleanly. Even with the right settings, the machine can only cut what the blade can physically turn into, and extremely small details leave no room for the blade to pivot without tearing or dragging.
Scaling the design up — even a little — often gives the machine enough room to cut those details cleanly. Increasing the size thickens the lines, widens the gaps, and reduces the risk of lifting, tearing, or losing tiny pieces. If a design keeps failing at a small size, it’s not always your settings or your mat; sometimes the design simply needs more space to breathe.
If you truly want to attempt the design at a very small size, the 30° blade can sometimes handle micro‑details better than the 45° or 60° blades. Its sharper angle allows it to turn more tightly, but it still isn’t guaranteed to succeed if the design is simply too delicate. Think of it as a “you can try it, but resizing is still the most reliable fix” option.
3. Bonded Fabric: Choosing the Right Blade for Thin vs. Thick Fabrics

Bonded fabric behaves differently from paper or vinyl because the fibers want to shift while the blade is cutting. The stabilizer or fusible backing helps, but the blade you choose still matters—and the right blade depends entirely on the thickness of the fabric.
Thin Fabrics Cut Best With a 45° Fine‑Point Blade
Lightweight fabrics like quilting cotton, satin, broadcloth, and other thin woven materials cut much cleaner with a sharp 45° fine‑point blade. The finer angle glides through the fibers without dragging, and the blade can turn more easily around curves and corners. When the fabric is properly bonded (Heat‑n‑Bond, Wonder Under, fusible interfacing, etc.), the fine‑point blade gives the cleanest, most accurate results.
Thicker Fabrics (1.5mm+) Need the Deep‑Point Blade
Once you move into thicker or more textured fabrics—fleece, felt, flannel, canvas, denim, or anything with loft—the fine‑point blade struggles. It can’t penetrate the thickness consistently, and it tends to drag or leave uncut spots. This is where the Deep‑Point Blade becomes the better choice. Its steeper angle and stronger cutting profile allow it to push through dense fibers and thicker bonded layers without tearing.
Cut Settings That Improve Fabric Results
Bonded fabric — especially thin fabric — cuts best when the machine has time to work through the fibers cleanly. A few adjustments make a big difference:
- Use High pressure to ensure the blade reaches through the bonded layer.
- Use Slow speed so the blade can turn without pulling the fibers.
- Use Multiple passes when the fabric is dense, tightly woven, or has a thicker fusible backing.
These settings help the fine‑point blade slice cleanly instead of dragging or skipping. Learn more about the settings I used for my Project | Becoming Something Beautiful Dress‑Form Wall Art.
Mat Setup Matters Just as Much as the Blade
Regardless of fabric thickness:
- Place the fabric bonded‑side down on the mat.
- Use a slightly broken‑in StandardGrip mat so the fibers don’t stick too aggressively.
- Tape the edges to prevent shifting.
- Always do a test cut, because every fabric + bonding combo behaves differently.
The Bottom Line
- Thin bonded fabrics → 45° fine‑point blade + high pressure + slow speed + multiple passes
- Thick bonded fabrics (1.5mm+) → Deep‑Point Blade + medium-high pressure + slow speed + multiple passes
4. EVA Foam: Clean Cuts, Stable Edges, and the Setup That Makes All the Difference

EVA foam is one of those materials that looks simple but behaves completely differently once it’s on the mat. It’s soft, flexible, and slightly squishy, which means the blade doesn’t glide across it the way it does with cardstock or vinyl. Instead, the blade has to push through the thickness while the foam tries to flex underneath it. That’s why the right setup matters so much — it’s the difference between clean, crisp edges and ragged cuts that look chewed.
Choosing the Right Blade and Housing
EVA foam needs a blade that can handle depth without dragging. The Deep‑Point Blade is the best match because its steeper angle lets it slice downward through the foam instead of skimming across the surface. A standard 45° blade can work for very thin craft foam, but anything thicker benefits from the Deep‑Point’s strength and stability.
Preparing the Mat for Foam
The mat you choose affects the cut more than most beginners realize. EVA foam doesn’t like overly sticky surfaces — they stretch the foam when you try to remove it and can even cause the edges to tear.
A few setup rules keep everything stable:
- Use a slightly broken‑in StandardGrip mat so the foam stays put without sinking into the adhesive.
- Press the foam down firmly with your hands, not a brayer, so you don’t compress or dent the surface.
- Tape all four edges with painter’s tape or low‑tack tape to prevent shifting during the cut.
- Make sure the foam is lying completely flat; even a small bubble can cause the blade to snag.
This gives the machine a stable surface to cut into without the foam flexing underneath.
Understanding How the Machine Cuts Foam
EVA foam doesn’t always cut cleanly on the first pass. The blade compresses the foam as it cuts, and sometimes the material springs back slightly, leaving a thin uncut layer. That’s why foam often needs:
- One full cut pass
- A second pass using the same settings
The key is to check the cut before unloading the mat. Lift a corner gently; if the foam doesn’t separate cleanly, run another pass while the mat is still locked in place. Once the mat is removed, the machine can’t realign perfectly.
Getting Cleaner Edges and Avoiding Dragging
Because foam is soft, tiny details can drag or tear. A few adjustments help keep the edges smooth:
- Avoid extremely small or delicate shapes — foam doesn’t hold micro‑details well.
- Slow the cut speed so the blade has time to turn without pulling the foam. I like to set my speed to 3.
- Use standard pressure unless the foam is especially dense. I
- Keep your blade clean; foam dust can build up and cause friction.
If a design has tiny curls, thin lines, or sharp corners, consider simplifying it or increasing the size. Foam looks best with bold, clean shapes.
Removing the Foam Without Stretching It
Once the cut is complete, remove the foam gently:
- Peel the foam away from the mat slowly, supporting it with your hand.
- If the foam sticks, slide a scraper under the mat, not under the foam, to lift the mat away from the material.
- Avoid bending or twisting the foam while removing it — this can distort the shape.
Clean removal keeps your edges crisp and your shapes accurate.
When EVA Foam Shines
EVA foam is perfect for:
- cosplay pieces
- dimensional embellishments
- kids’ crafts
- stamps
- ornaments
- lightweight 3D shapes
It’s forgiving, easy to paint, and holds its shape well once cut — as long as the setup is right.
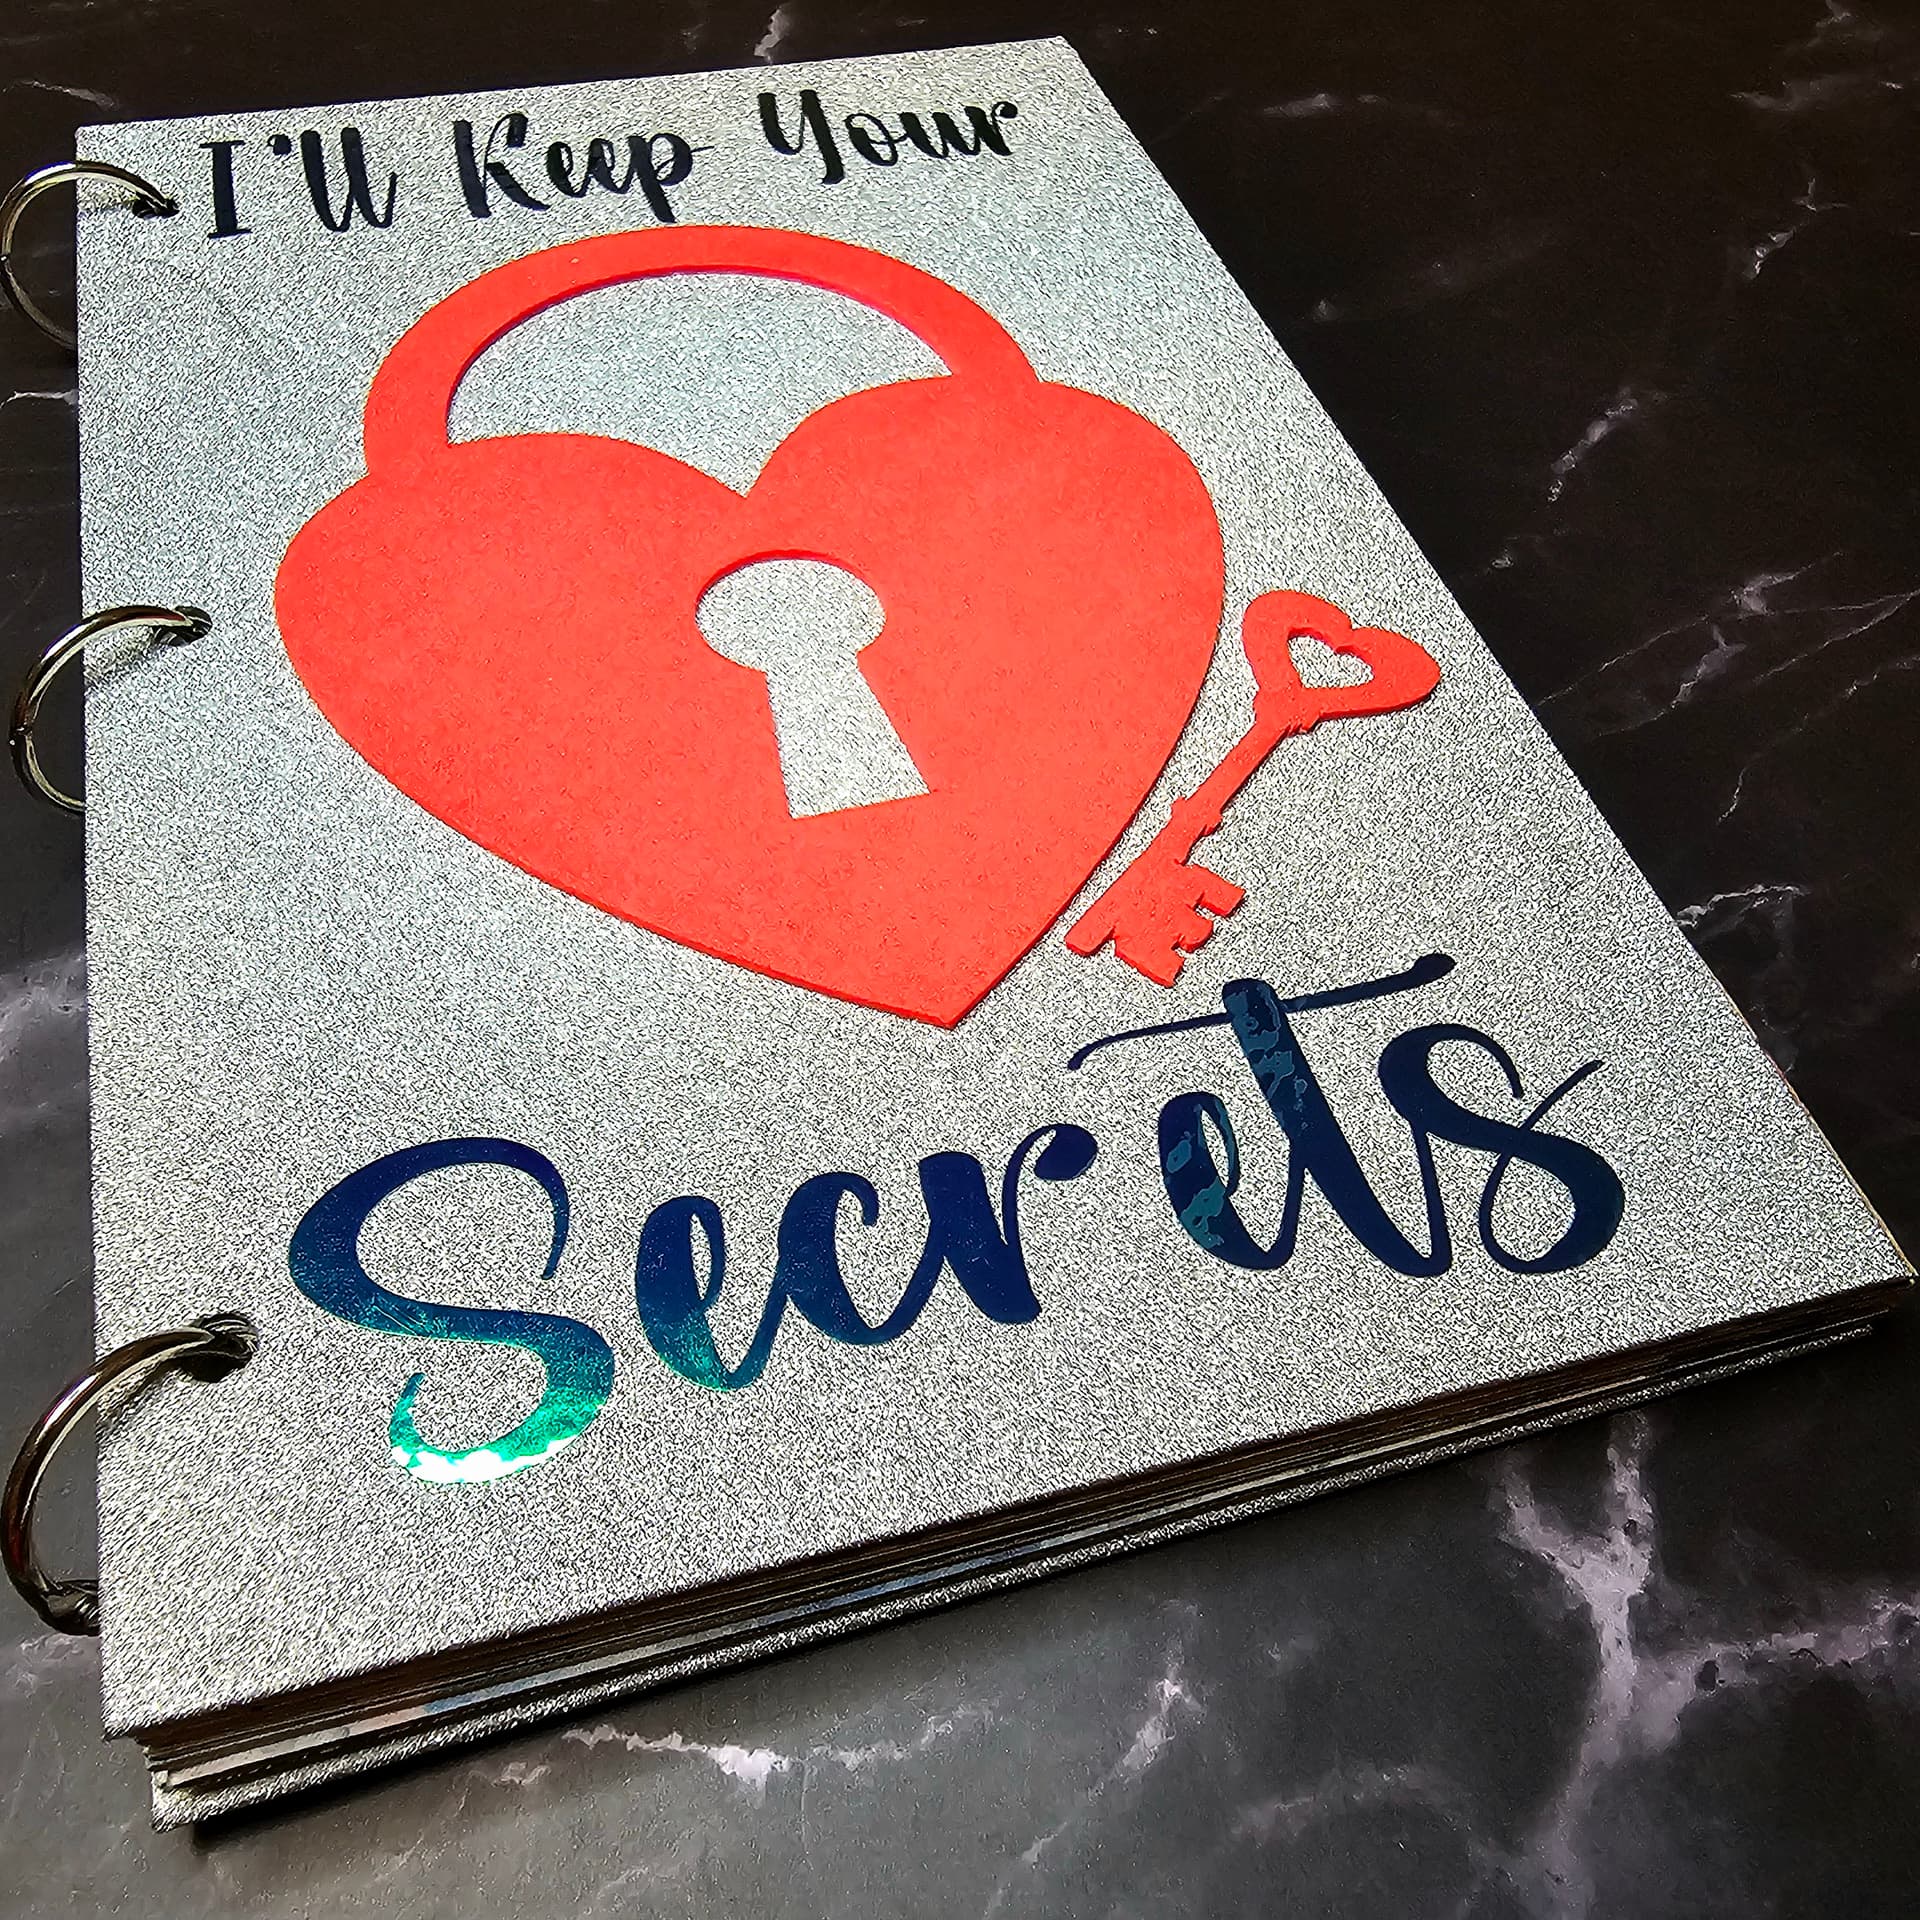
5. Getting Clean, Consistent Results With the Foiling Kit
Foiling is one of those techniques that instantly makes your projects look polished and professional, but it’s also a process where small details matter. Two things make the biggest difference in your results: how you place the foil sheet and how you insert the foiling tips into the housing. Once you get those two steps right, the rest becomes much easier.
Proper Foil Placement Keeps the Lines Crisp
The foil sheet must stay completely still while the machine applies pressure. Any movement—even a tiny shift—can cause doubled lines, patchy transfer, or dull spots. The most reliable setup is:
- Place your material on the mat as usual.
- Lay the foil shiny side up over the area you want to foil.
- Pull the foil flat and tight, smoothing out any wrinkles.
- Tape all four sides with masking tape, keeping the tape off the design area.
- Avoid taping too close to the foiling lines so the tip doesn’t catch on raised edges.
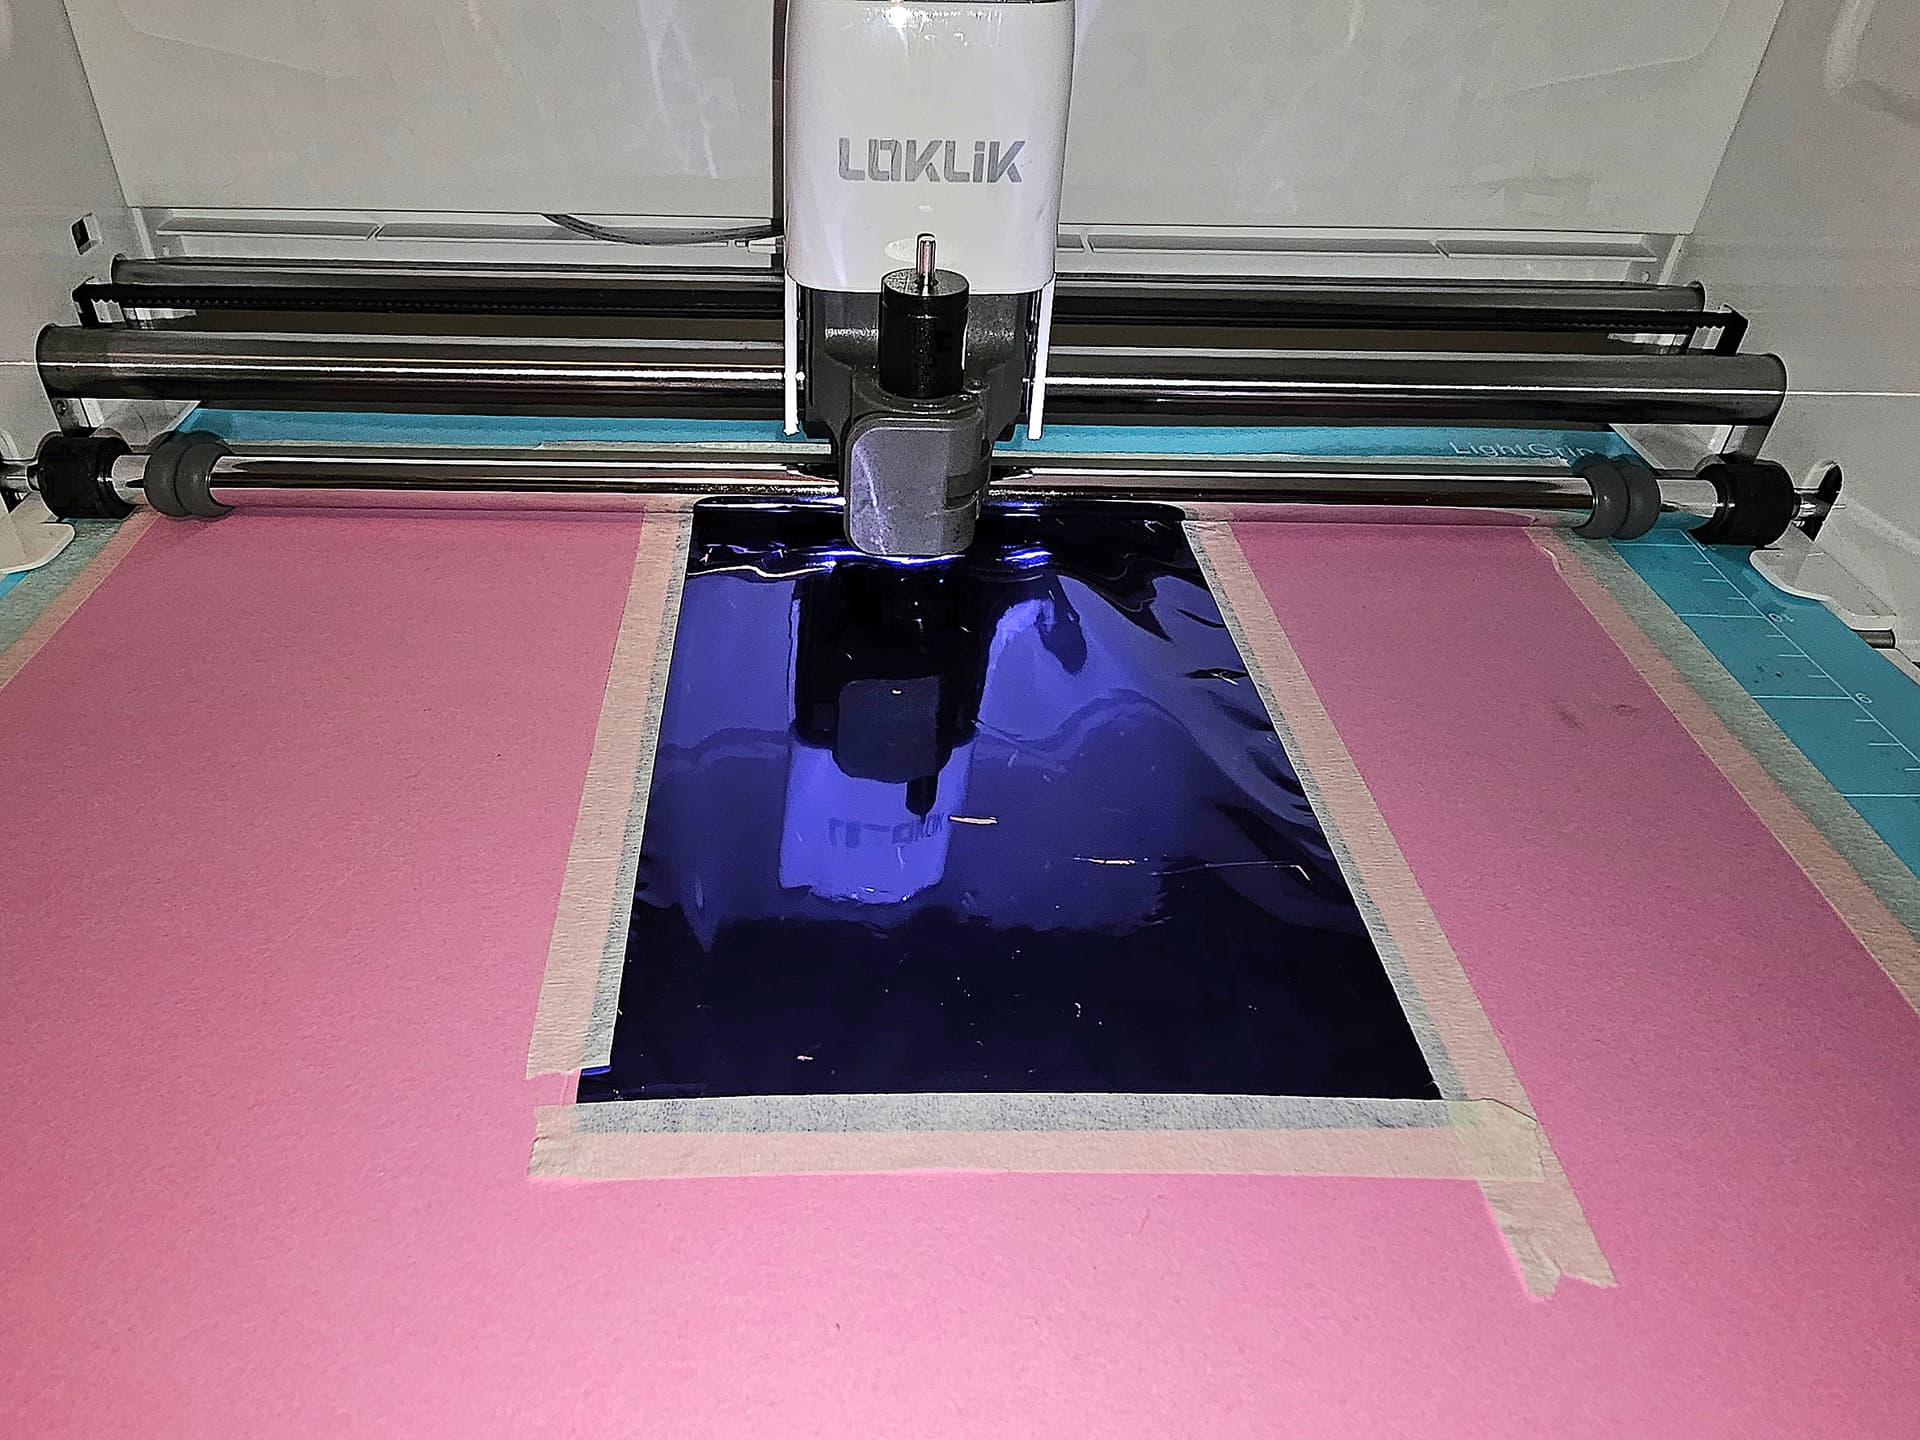
A smooth, tensioned foil surface gives the tip the clean glide it needs to transfer evenly.
Correct Tip Orientation Prevents Scratches and Tears
Each foiling tip has a set of dots — 1 for fine, 2 for medium, 3 for bold — and those dots tell you exactly which end should go into the housing. The dotted end is the side that belongs inside the housing.
When inserting a tip:
- Hold the housing upright.
- Drop the tip in dots‑first.
- Let it settle naturally — no twisting or tightening required.
This orientation ensures the smooth foiling surface is facing outward. If the tip is inserted upside‑down, the sharp, pointy end will be exposed, and that end will drag across the foil sheet and tear it immediately. Placing the dotted end into the housing guarantees the correct side is doing the work.
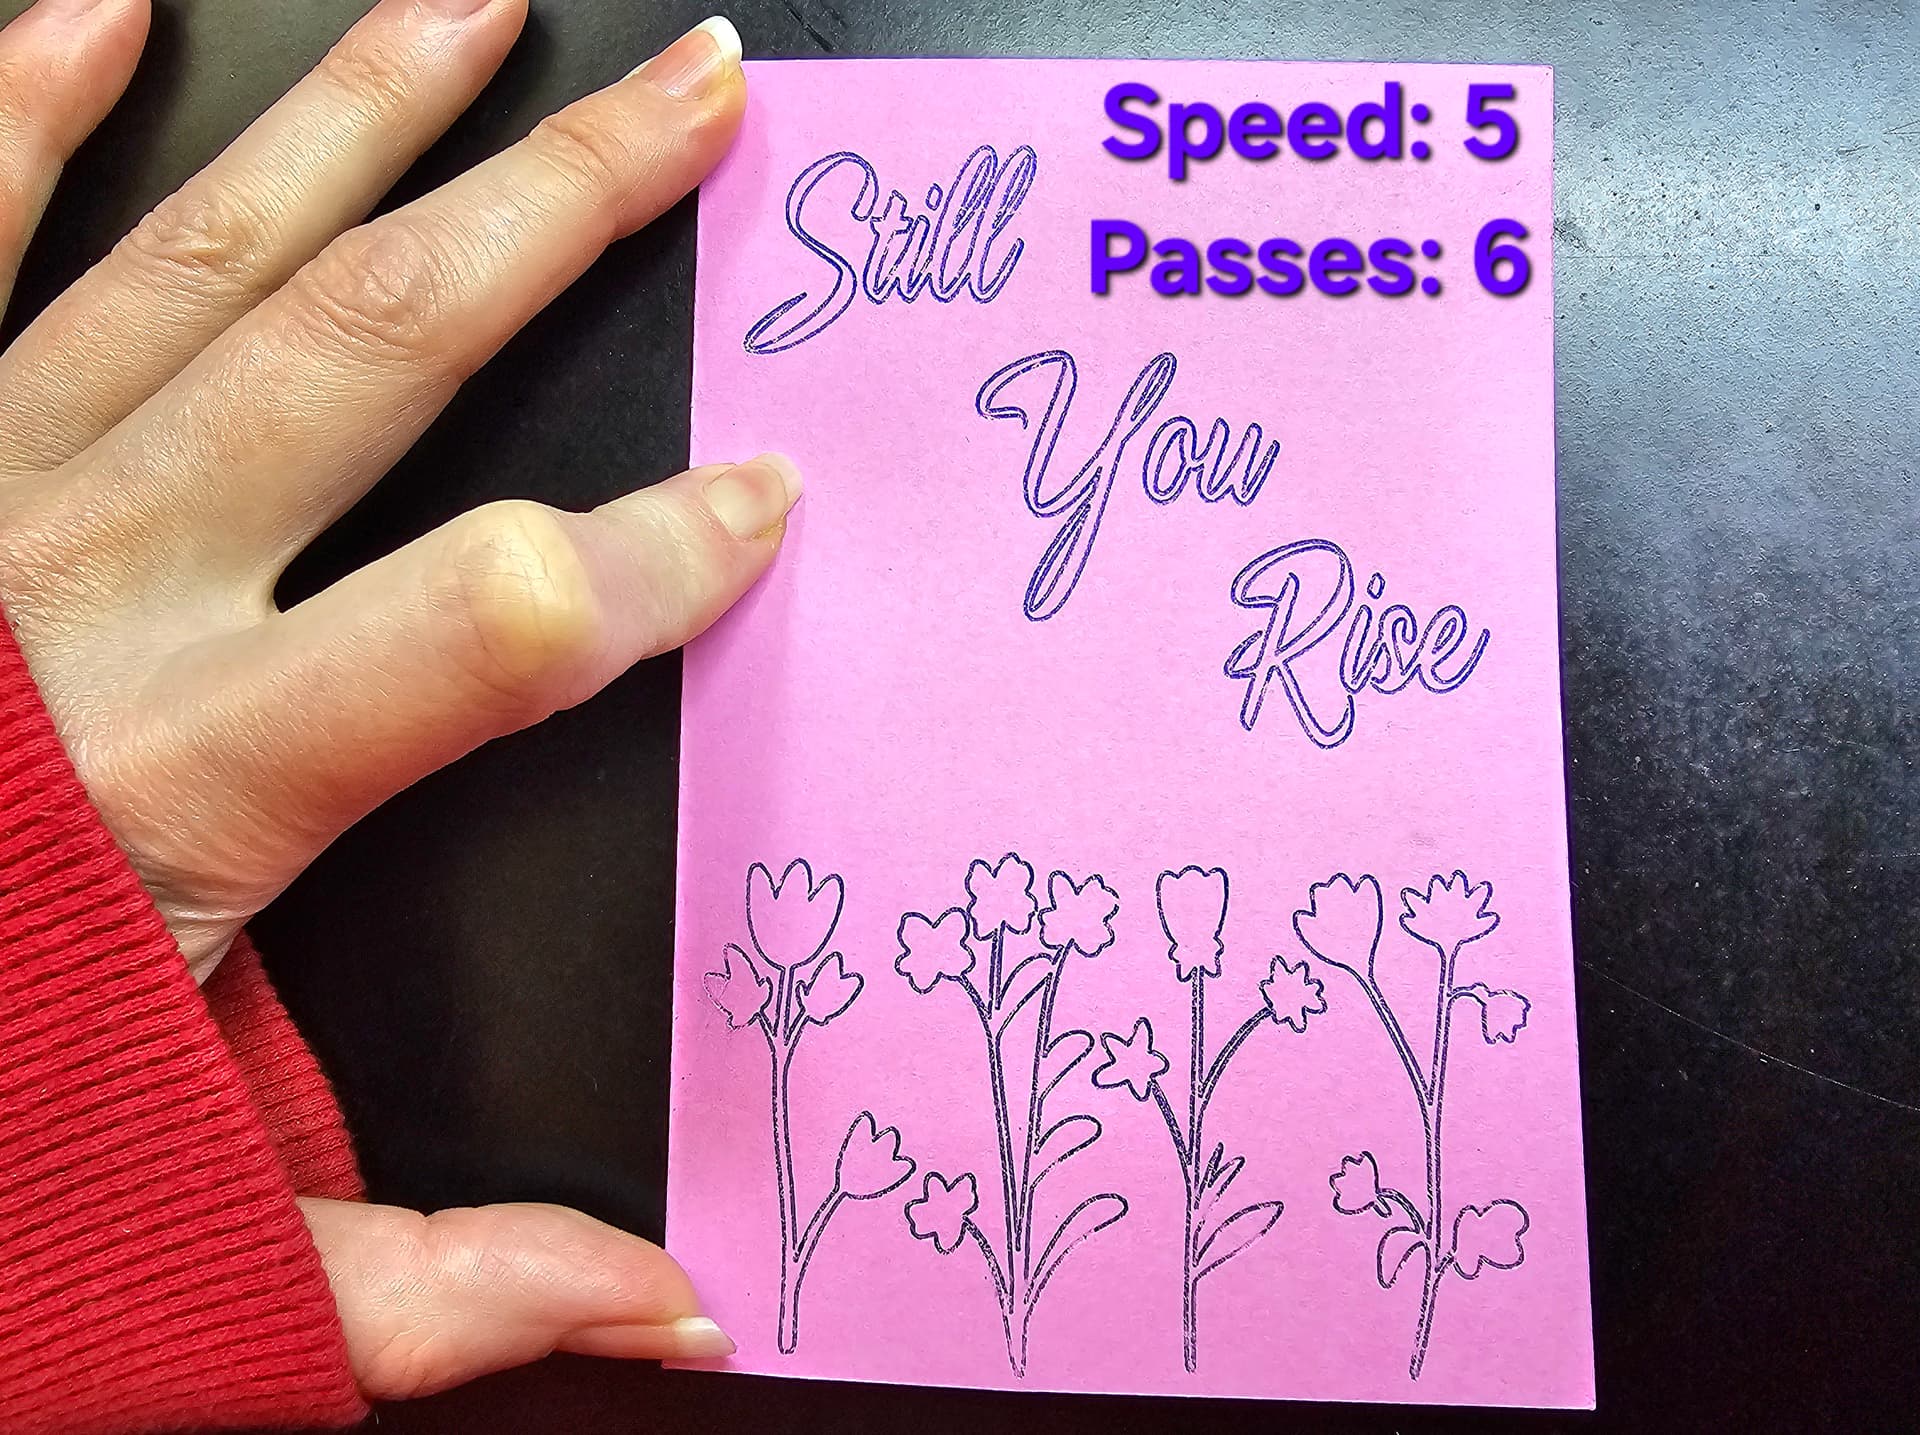
A Few Extra Techniques for Better Foil Transfer
Foiling has its own rhythm, and these small adjustments help you get brighter, cleaner lines:
- Use a newer mat or tape the material itself so nothing shifts.
- Reduce pressure slightly for the foiling pass to avoid tearing.
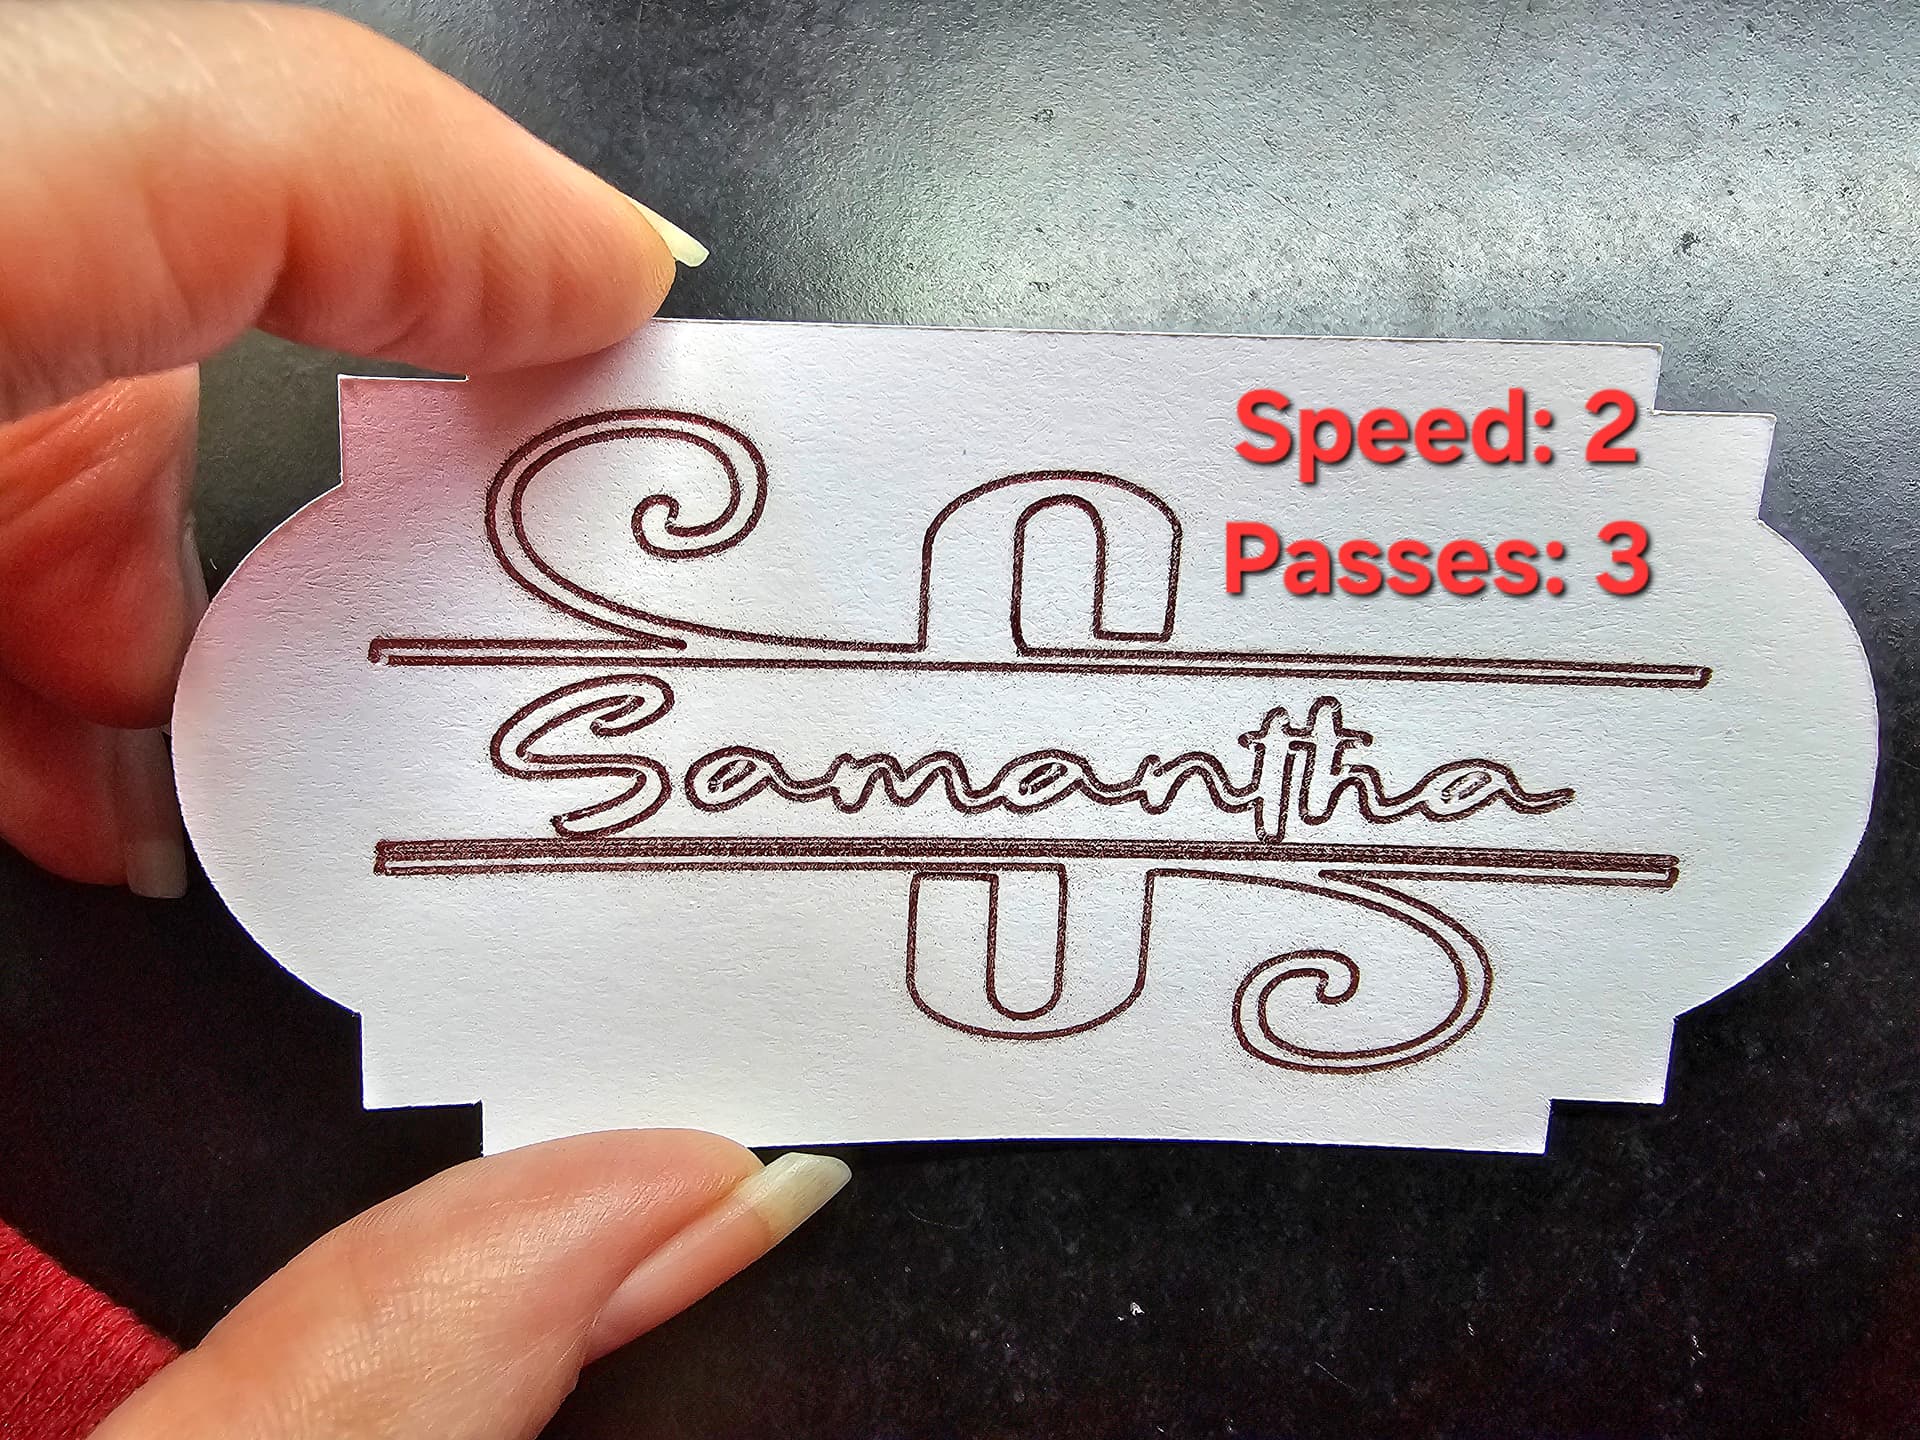
- Set the speed around 2 or 3
- Choose designs with smooth, continuous lines for the best results.
- Run a second foiling pass if you want a deeper, more metallic finish.
Once you understand foil tension and tip orientation, your results become dramatically more consistent—and foiling becomes one of the most fun techniques to add to your toolkit.
6. Getting Crisp, Professional Folds With the Scoring Stylus
The scoring stylus is one of the easiest tools to use, but it makes a dramatic difference in how clean and polished your folds look. Before it can go into the machine, though, it has to be installed into its dedicated stylus housing, and that step is where most beginners get confused. Once the stylus is seated correctly, the machine can apply smooth, even pressure to create perfect crease lines for cards, boxes, envelopes, and 3D projects.
How to Assemble the Scoring Stylus Housing
The stylus has its own special housing with two textured grip areas — one at the top and one at the bottom. These grips are there to help you tighten the stylus securely so it doesn’t slip during scoring.
The correct assembly process is:
- Hold the top textured grip firmly in one hand.
- With your other hand, twist the bottom textured grip to loosen it.
- Insert the scoring stylus into the opening.
- While still holding the top grip steady, twist the bottom grip again to tighten it around the stylus.
- Give the stylus a gentle upward tug to make sure it’s locked in and won’t slide out.
This ensures the stylus is held firmly in place so the machine can press clean, consistent score lines without skipping or lifting.
Installing the Stylus Into the Machine
Once the stylus is secured in its housing:
- Open the clamp on the machine.
- Drop the stylus housing straight down into the holder.
- Make sure it sits all the way at the bottom — no gap at the top.
- Close the clamp securely.
A fully seated stylus allows the machine to apply the correct amount of downward pressure for crisp folds.
Getting the Best Score Lines
Scoring is all about stability and pressure. These small adjustments help you get cleaner, deeper creases:
- Use a LightGrip mat for cardstock so it doesn’t shift.
- Tape the edges of the cardstock to prevent lifting.
- Increase pressure for thicker materials.
- Use double scoring for boxes or heavy cardstock.
- Fold toward the indented line — the stylus creates a valley fold.
- Sharpen the crease with a bone folder or scraper for a professional finish.
Once the stylus is installed correctly and your material is secure, the iCraft can create folds that look clean, intentional, and perfectly aligned with your cut lines.
7. Mat Pressure Behavior With Thick Materials
The iCraft applies more downward pressure than many beginners expect, which is great for clean cuts but can cause problems if the mat is too sticky. Thick materials like EVA foam, faux leather, chipboard, and laminated cardstock can stretch, curl, or tear when they’re pressed too firmly into a brand‑new StandardGrip mat.
A slightly broken‑in mat gives you the perfect balance: enough grip to hold the material steady, but not so much that it sinks into the adhesive. Press the material down with your hands instead of a brayer to avoid denting the surface. For very thick or textured materials, tape the edges with painter’s tape so the machine can cut without shifting the sheet. This setup keeps your cuts clean and prevents damage to both the material and the mat.
8. The “Double Pass” Rule for Dense or Textured Materials
Some materials simply don’t release cleanly after one pass, even when the settings are correct. EVA foam, glitter cardstock, faux leather, and certain coated papers often compress slightly under the blade, leaving a thin uncut layer behind. That’s why the “double pass” rule is so important.
After the first pass finishes, do not unload the mat. Lift a corner of the cut gently to check if the material has separated. If it hasn’t, run the exact same cut again. The machine will follow the same path, deepening the cut without shifting. Once the mat is unloaded, the alignment can’t be recreated perfectly, so checking before unloading saves both time and material.
9. Material Alignment Matters More Than You Think
The iCraft is sensitive to how straight your material is placed on the mat. Even a slight angle can cause drifting cuts, misaligned score lines, or foiling that doesn’t match the design. The machine reads the mat’s grid as a reference point, so your material needs to follow that same structure.
Use the printed grid lines on the mat to line up your material edges. Match those lines to the grid in the software so the design sits exactly where the machine expects it to be. Smooth the material down so there are no bubbles or lifted corners. This small habit prevents a lot of frustration and keeps your cuts accurate from corner to corner.
10. Preventing Dragging on Tiny Cuts
Small shapes — dots, stars, thin curls, confetti‑sized pieces — are the first to drag when the machine is cutting with high pressure or moving too quickly. The blade needs room to pivot, and tiny details don’t give it much space. When the blade can’t turn cleanly, it may pull the material instead of slicing it.
To avoid dragging, slow the cut speed and use standard pressure unless the material truly needs more. A sharp 45° blade handles small details better than a dull one, and keeping the blade clean prevents friction from foam dust or paper fibers. When removing tiny pieces from the mat, use low-tack transfer tape to lift them instead of scraping — this keeps the shapes intact and prevents tearing.
11. Don’t Forget to Mirror Heat‑Transfer Vinyl
Heat‑transfer vinyl behaves differently from adhesive vinyl because it cuts from the back of the material, not the front. The shiny side you see is actually the built‑in carrier sheet, and the vinyl itself is on the underside. That means the machine is cutting the design in reverse so that when you flip it onto your project and press it, the finished image reads correctly.
Because of that, forgetting to turn on Mirror is one of the most common mistakes beginners make. The design looks perfect on the mat preview, the cut looks clean, and everything seems right—until you go to press it and realize the entire design is backward. Once HTV is cut, it can’t be salvaged, so this one small step saves both time and material.
A few habits make mirroring foolproof:
- Always check the preview screen before pressing “Cut.”
- Look for text—if your project includes words, mirroring is non‑negotiable.
- Make it part of your mental checklist: Material loaded? Settings correct? Mirror on?
- If you’re cutting multiple layers, confirm that each layer is mirrored before sending the job.
Mirroring becomes second nature with practice, but in the beginning, it’s worth slowing down for that extra glance. It’s a tiny step that prevents one of the most frustrating beginner mistakes.
Wrapping Up Part 2 and What’s Coming Next
As you start working with more advanced tools, thicker materials, and the unique quirks of the iCraft Cutting Machine 2, having the right setup and expectations makes everything smoother. These tips are meant to help you skip the frustration stage and move straight into confident, consistent cutting—no guesswork, no wasted materials.
The next part of this series is all about clarity. Cutting‑machine tutorials use a lot of specialized terms, and understanding that language makes every project easier. That’s why Part 3 is a complete glossary of the everyday terms you’ll see in crafting, vinyl work, paper projects, and machine‑cutting guides. It’s a simple, beginner‑friendly reference you can return to anytime you need a quick definition or reminder.
Whether you’re troubleshooting a cut, learning a new tool, or following along with a tutorial, the glossary will help everything make more sense. It’s the perfect companion to both Part 1 and Part 3, and it ties the whole series together.