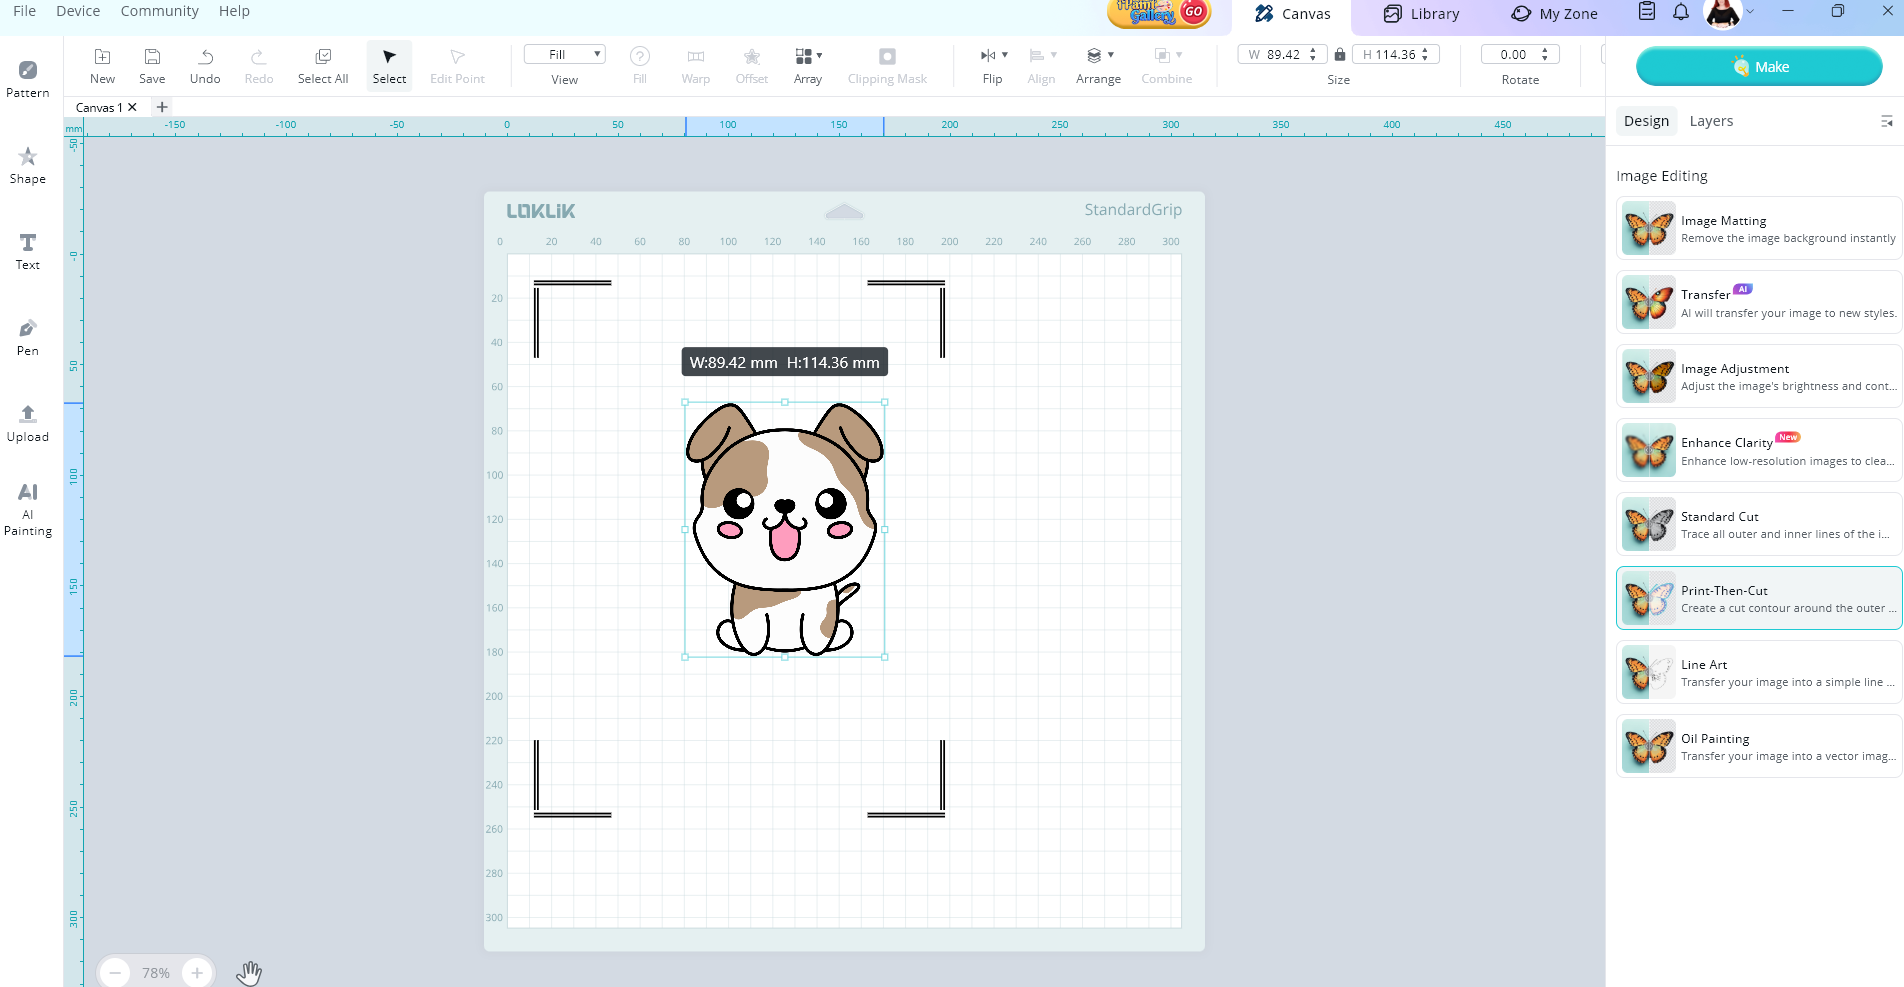
So, I know there has been a number of you facing issues calibrating print then cut after v7. I thought I would share my findings.
All my tests were done using A4 copy paper, A4 paper size selected for print then cut. Print settings were set to 100%. Also had a well-lit room and my machine lid open. My rollers were not moved to be over the registration marks either.
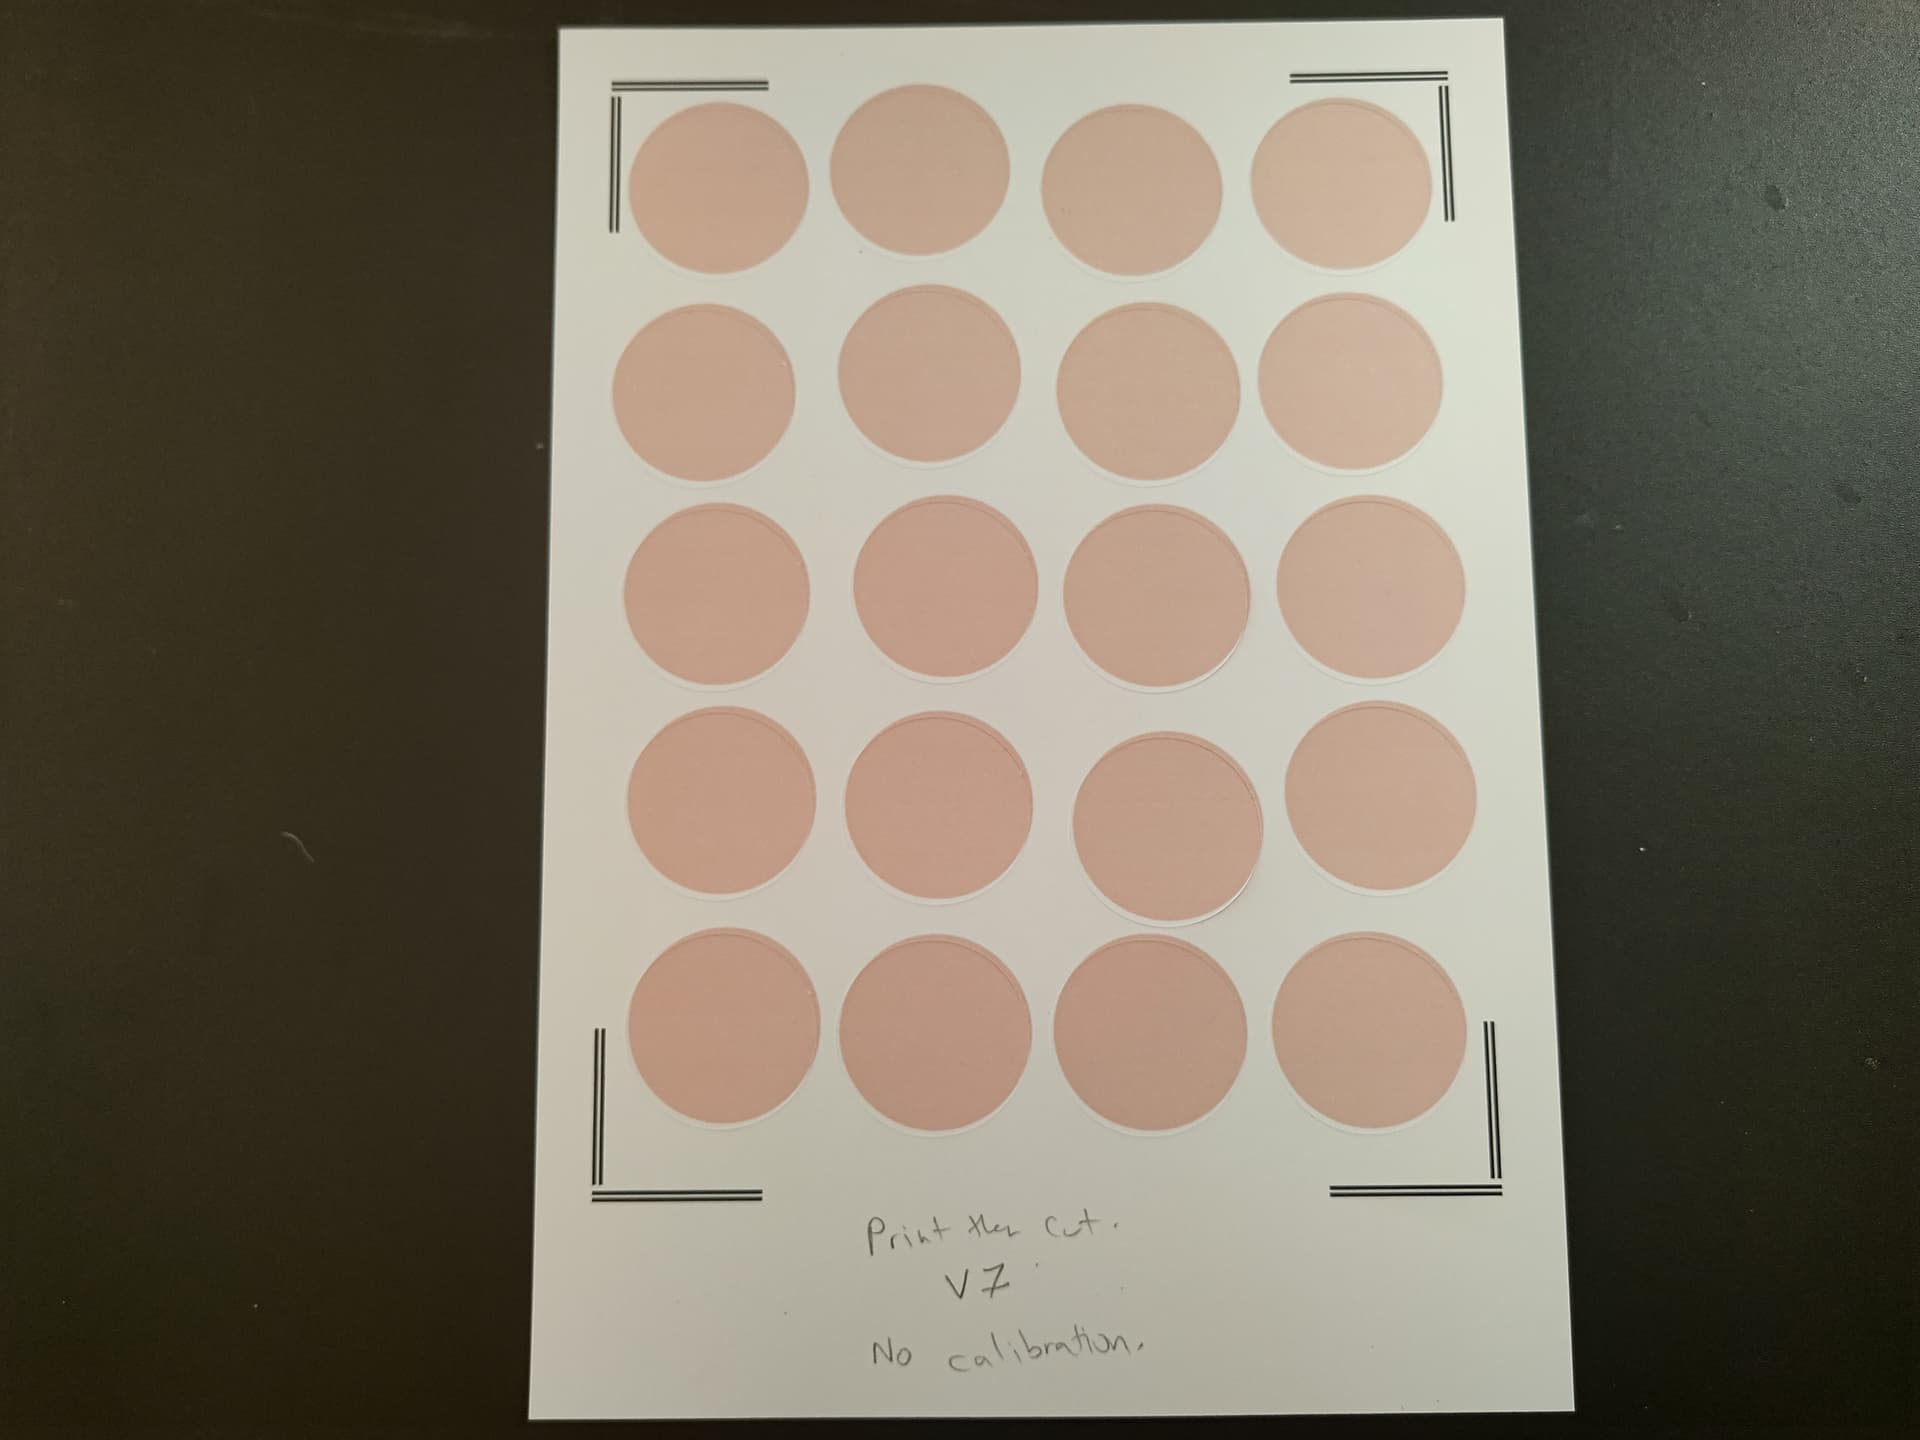
I completed a print then cut project on my machine in v6 before I started testing. These were my results.
V6 Print then cut

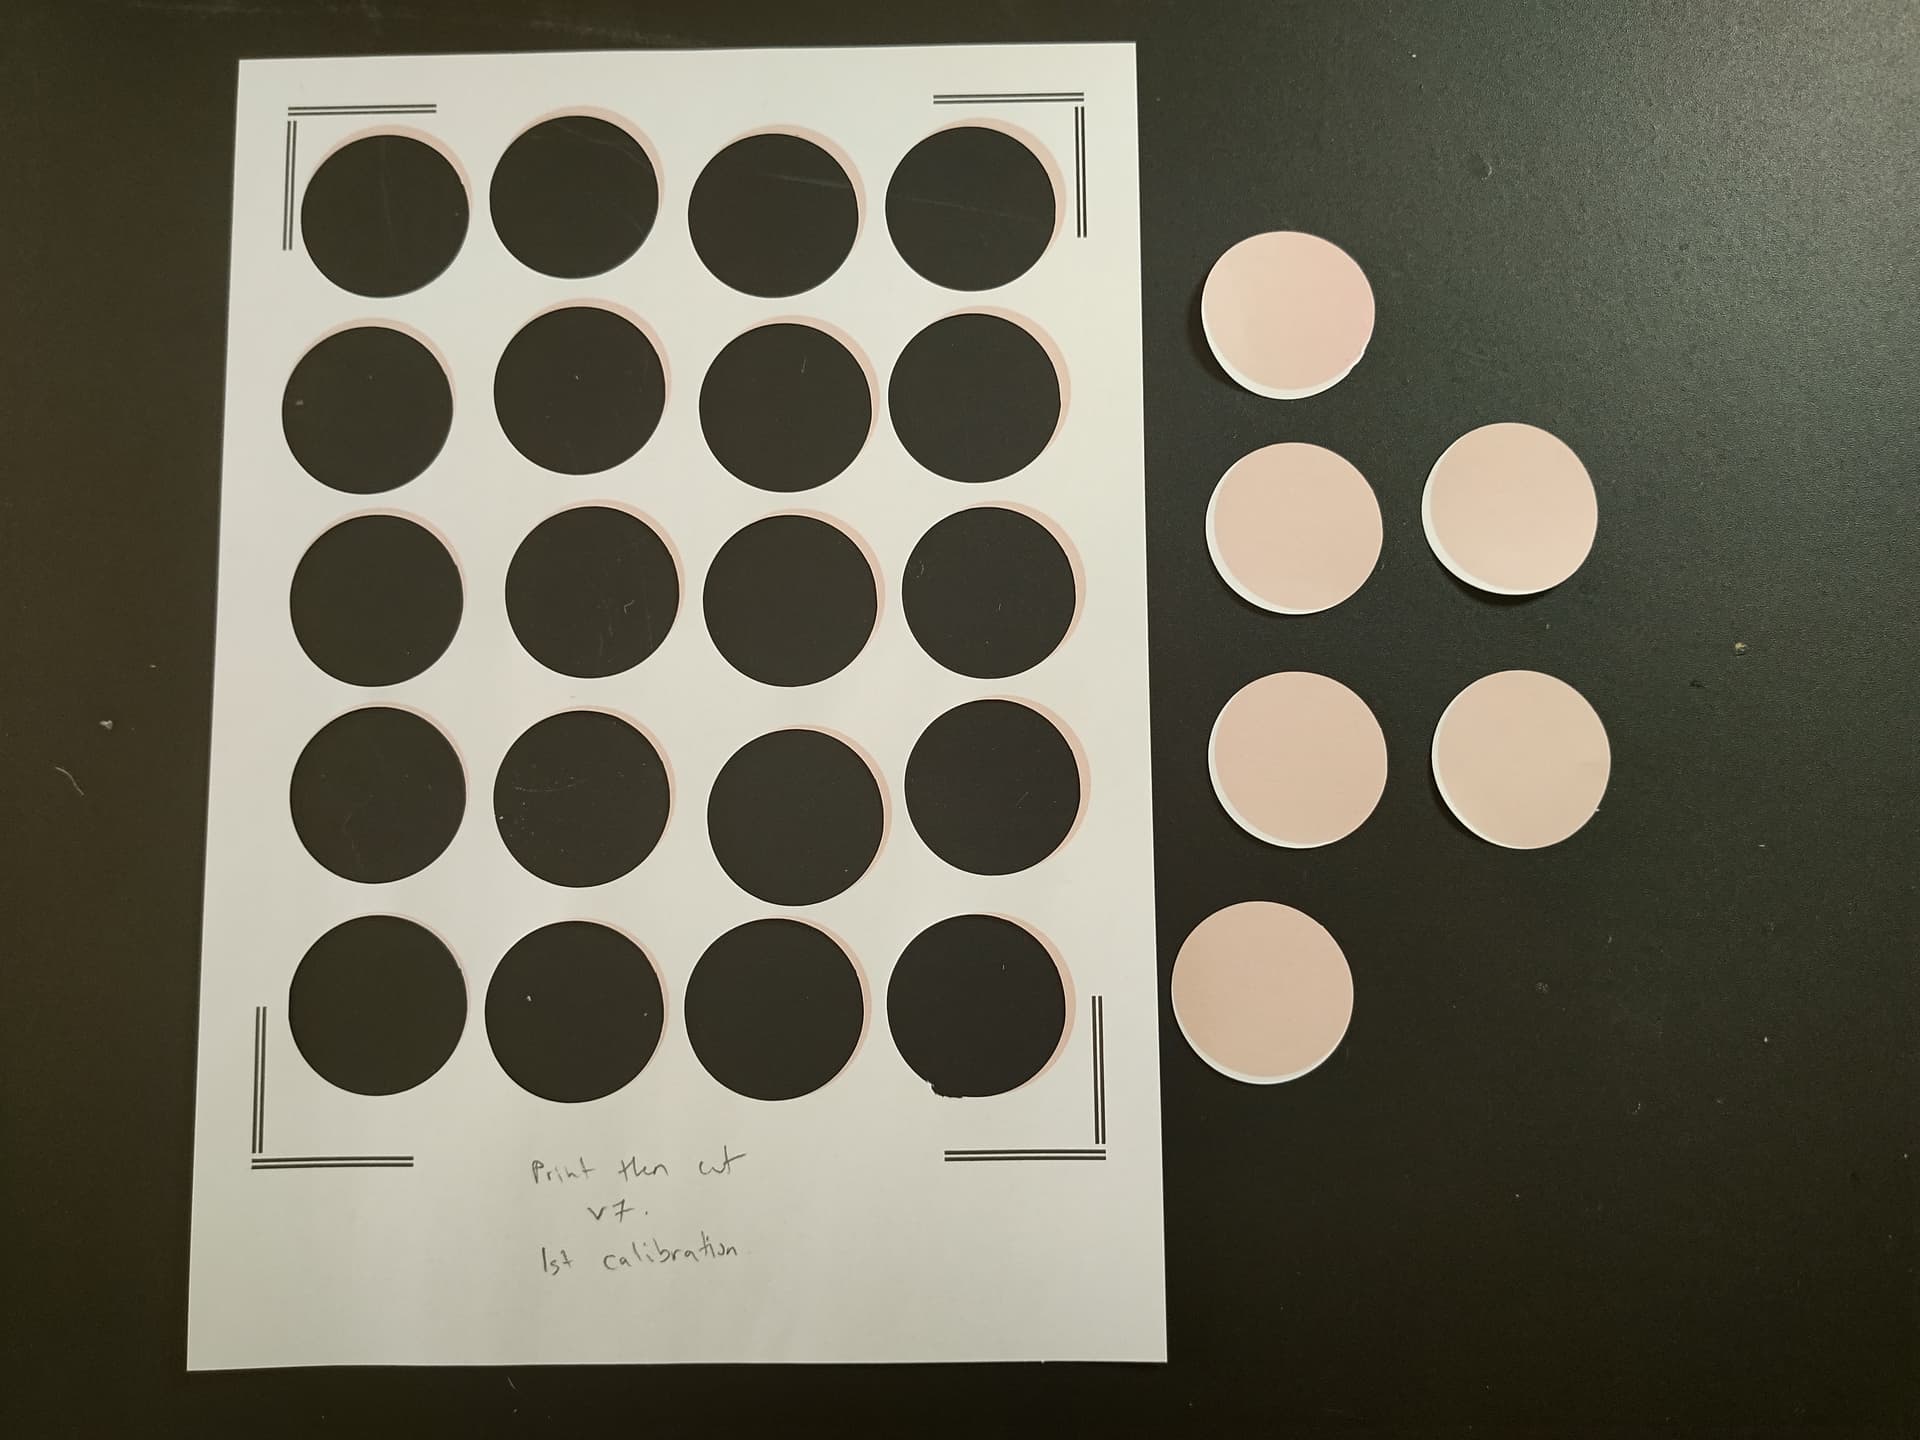
I then updated my firmware using the USB to V7. I tried a simple print then cut test using circles.
V7 - No calibration

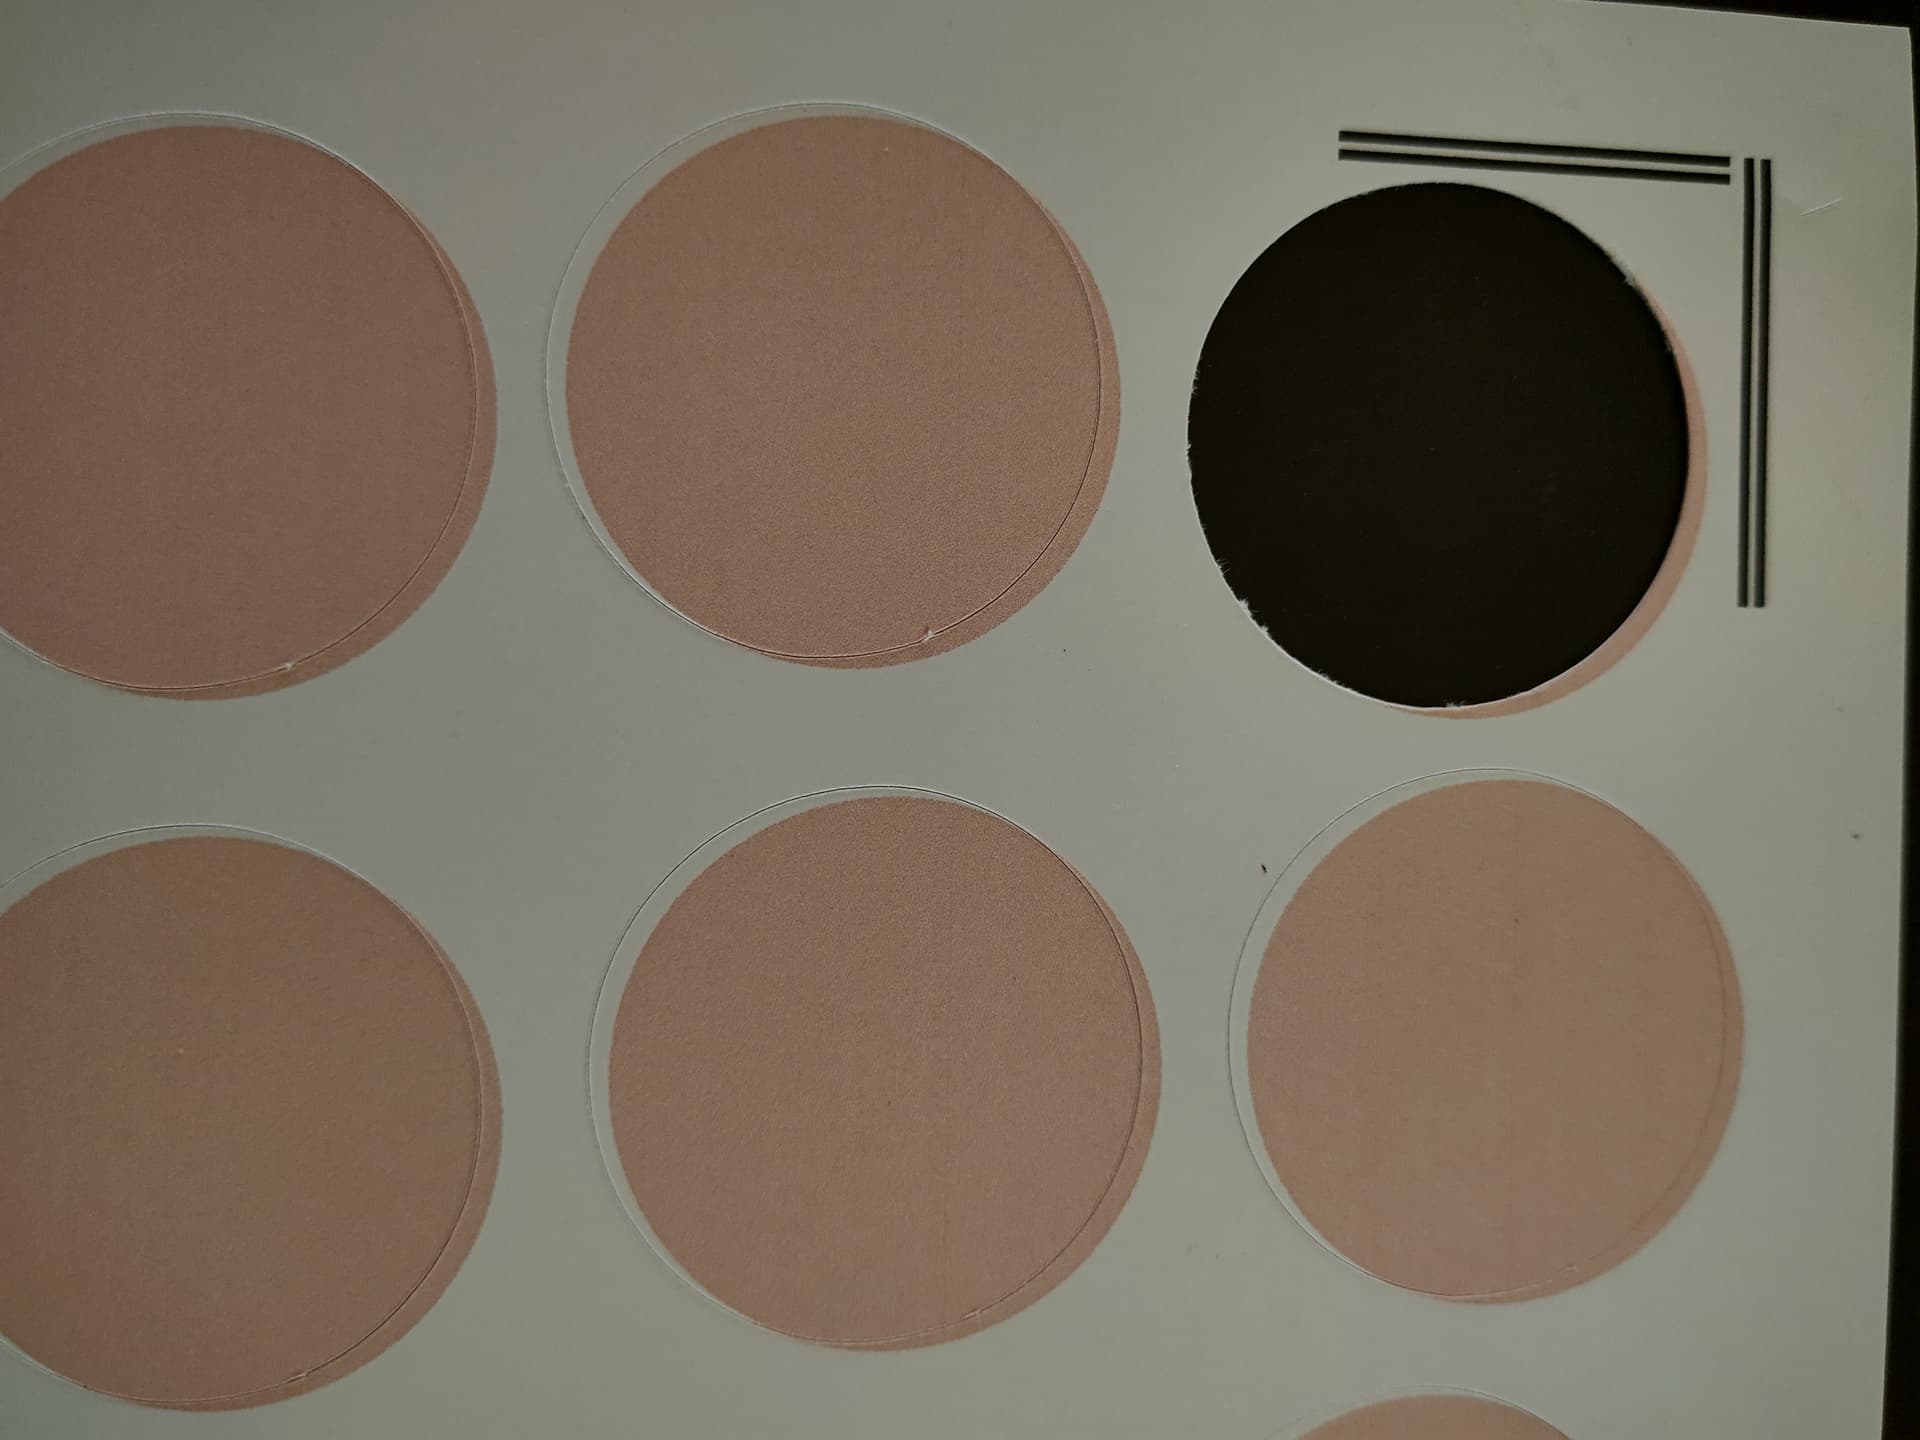
These results were terrible and expected.
I then ran my first calibration. If you haven’t done so, please update your software to v2.6.10. I also recommend using the new calibration sheet to do your calibrations. With this calibration sheet you can run the calibration 3 times using the one sheet. These calibrations are divided by colour Blue - Yellow and Red. The screen shows you which line to check for each calibration.
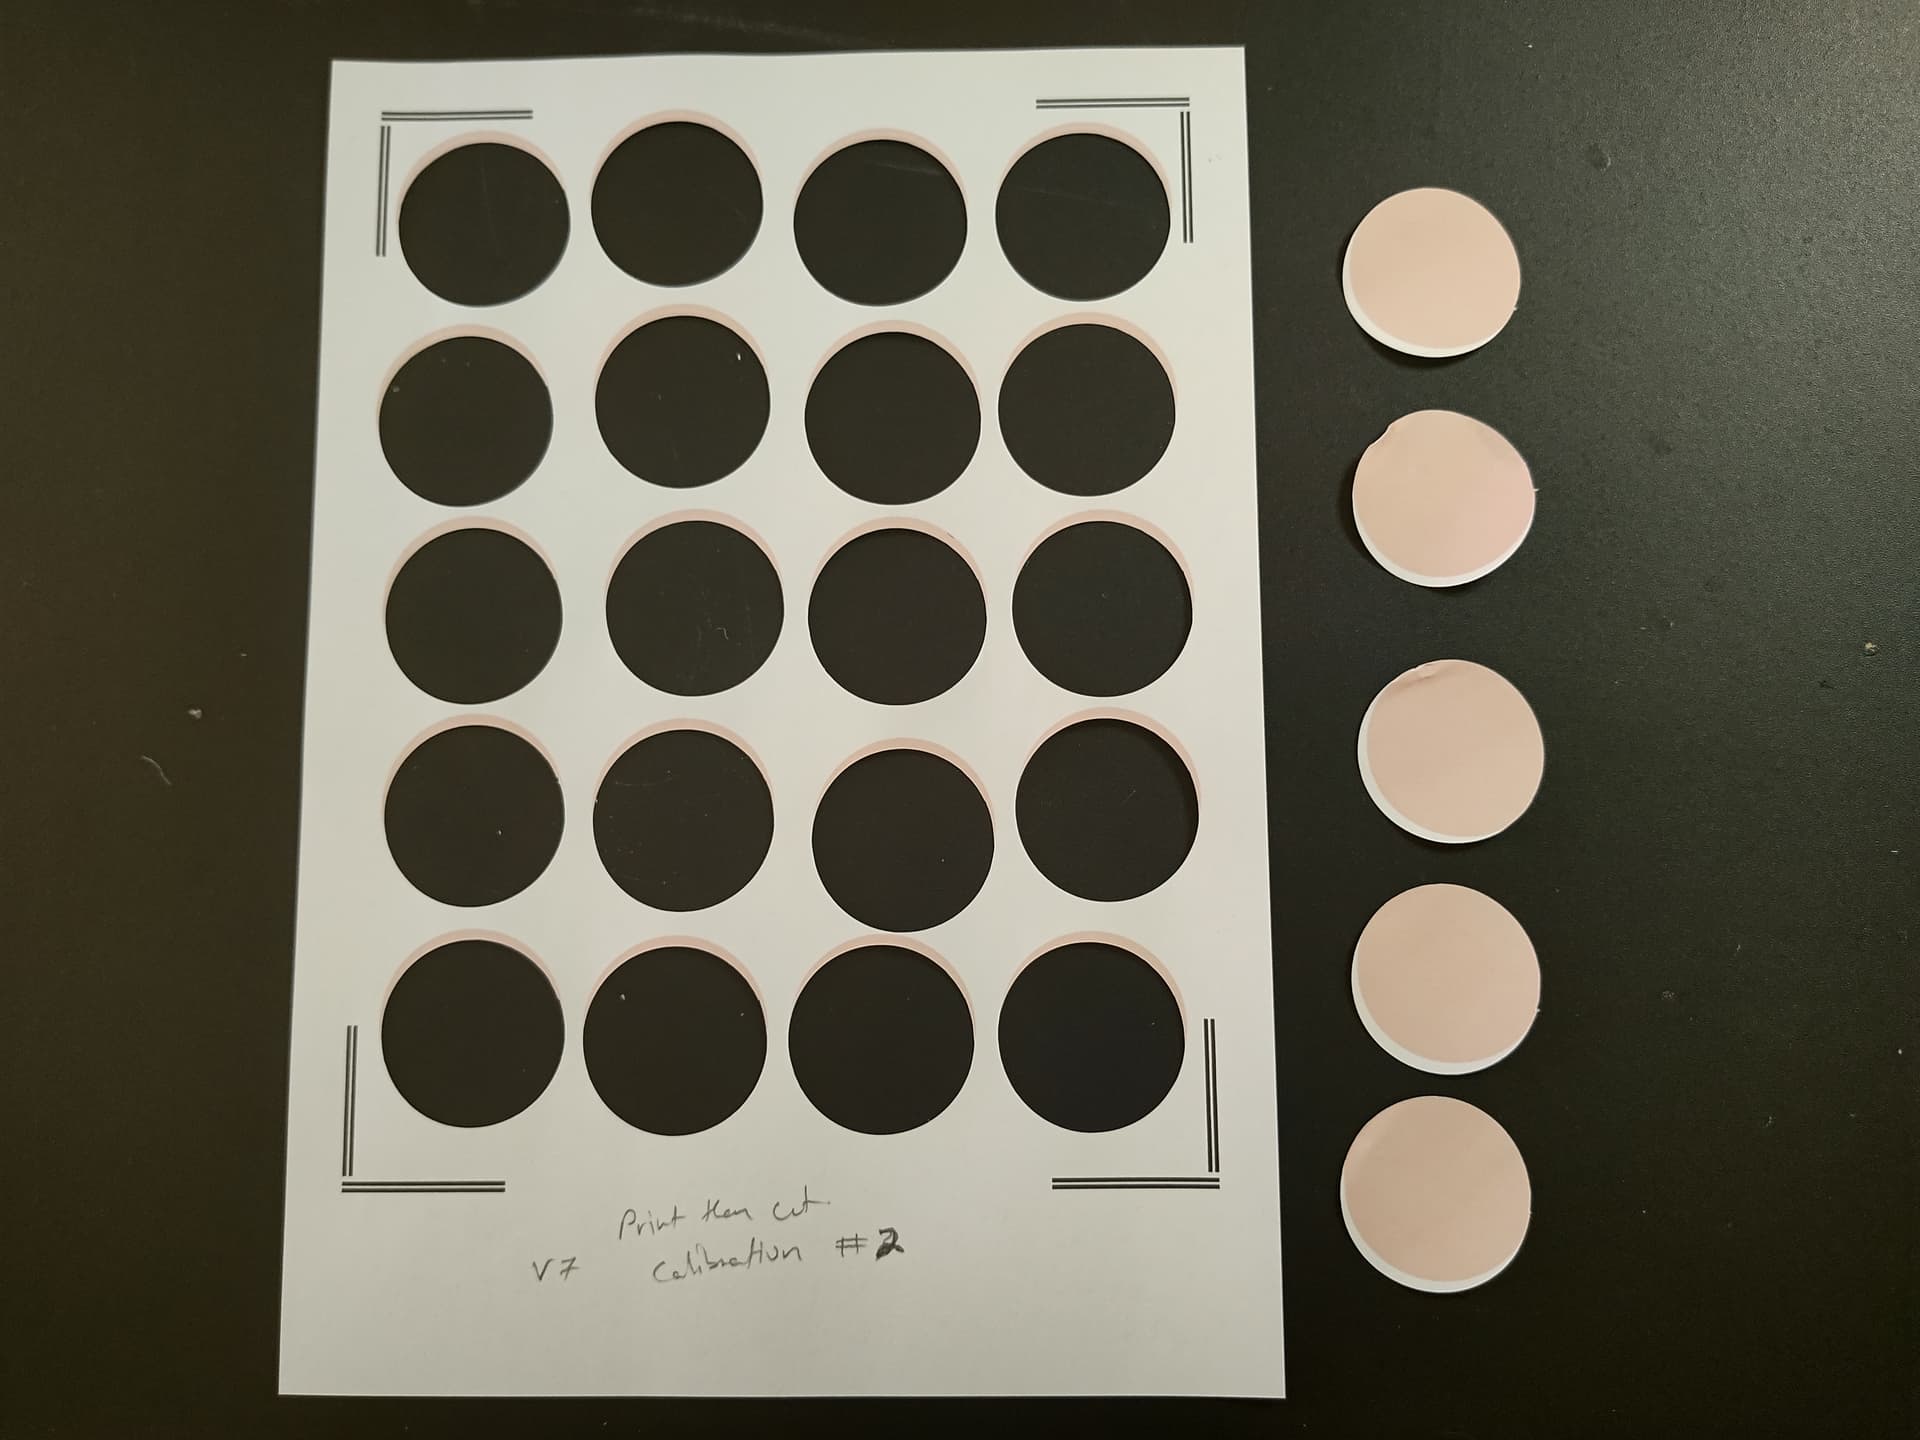
I did my (BLUE) first calibration and received the values of
Top - 4
Bottom - -7
Left - 3
Right - -9
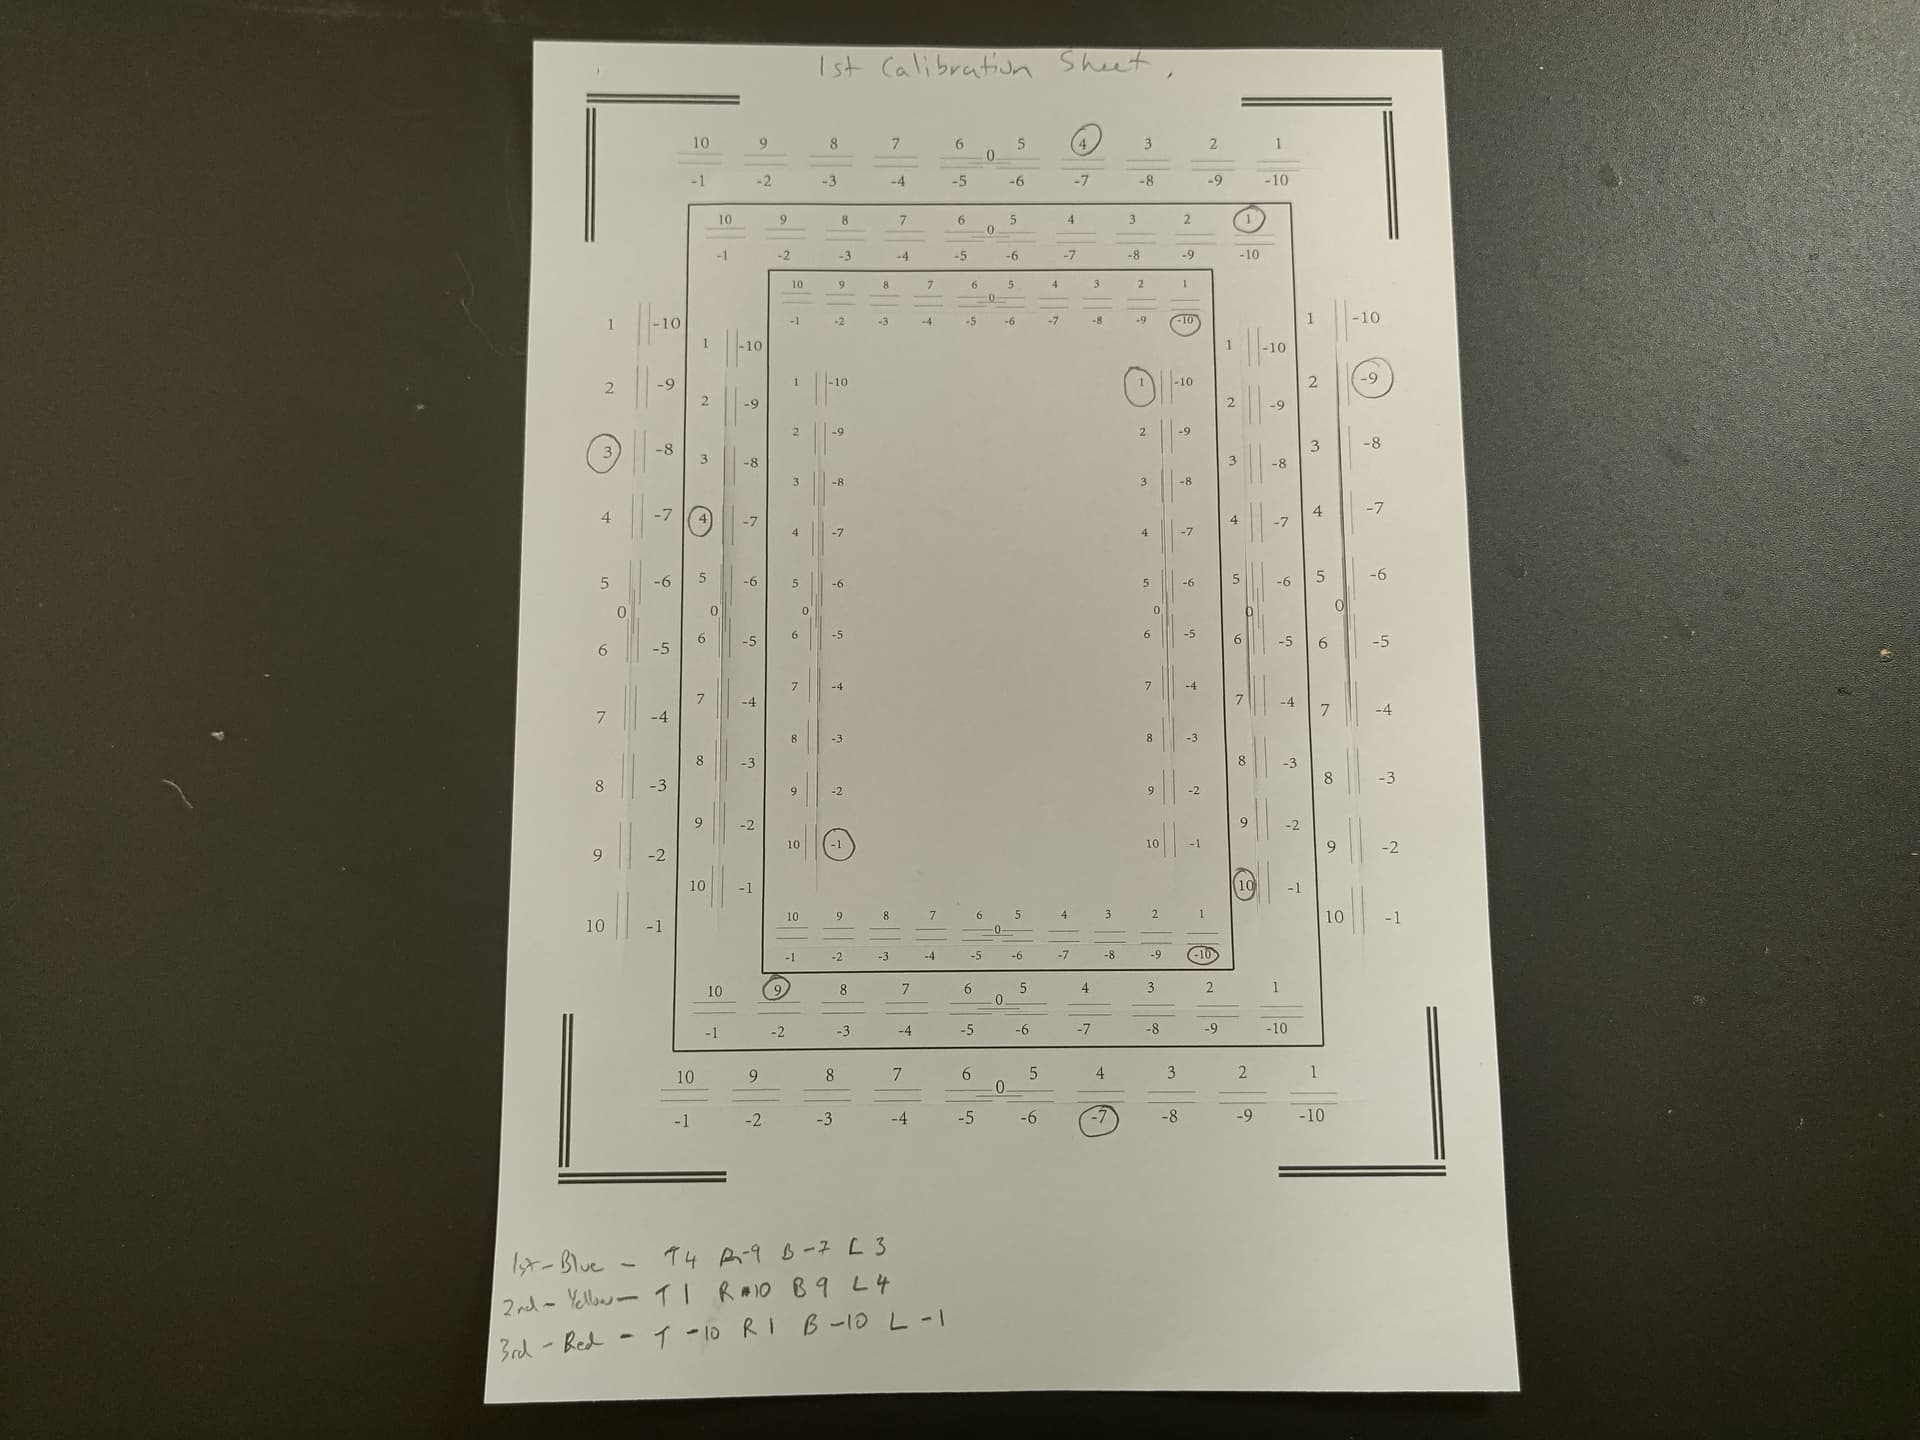
If you have trouble seeing the cut line through the black lines take your calibration sheet off the mat. Now you can see the cut line better. You want to pick the line that has the cut going through the middle of the line as close as possible. If you have a line that is slightly on top of the line and the next value is slightly below the line pick one of them. If you find another value with the same results the cut goes through the top or bottom of the line make sure you pick the same value as you did before. For example if the first cut went through the top on value 3 and bottom on value 4 and you choose 3 which went through the top, then you see on the bottom values that this happens again with value 7 say going through the top and value 8 through the bottom. Pick value 7. So, you keep it the same. Same with left and right.
After the test I did a test cut using the same circle previously used. These results were not great and the cuts were inconsistent as some had big bits of circle cut through while others had less of the circle cut through.
Second calibration results (Yellow)
Top - 1
Bottom - 9
Left - 4
Right - 10
Print then cut results for second calibration
These cuts were more consistent with each circle having a slice cut out on top to the right. For your test cut you don’t need to cut out as many circles has I have. One in each corner should be fine to make sure your cuts are being consistent.
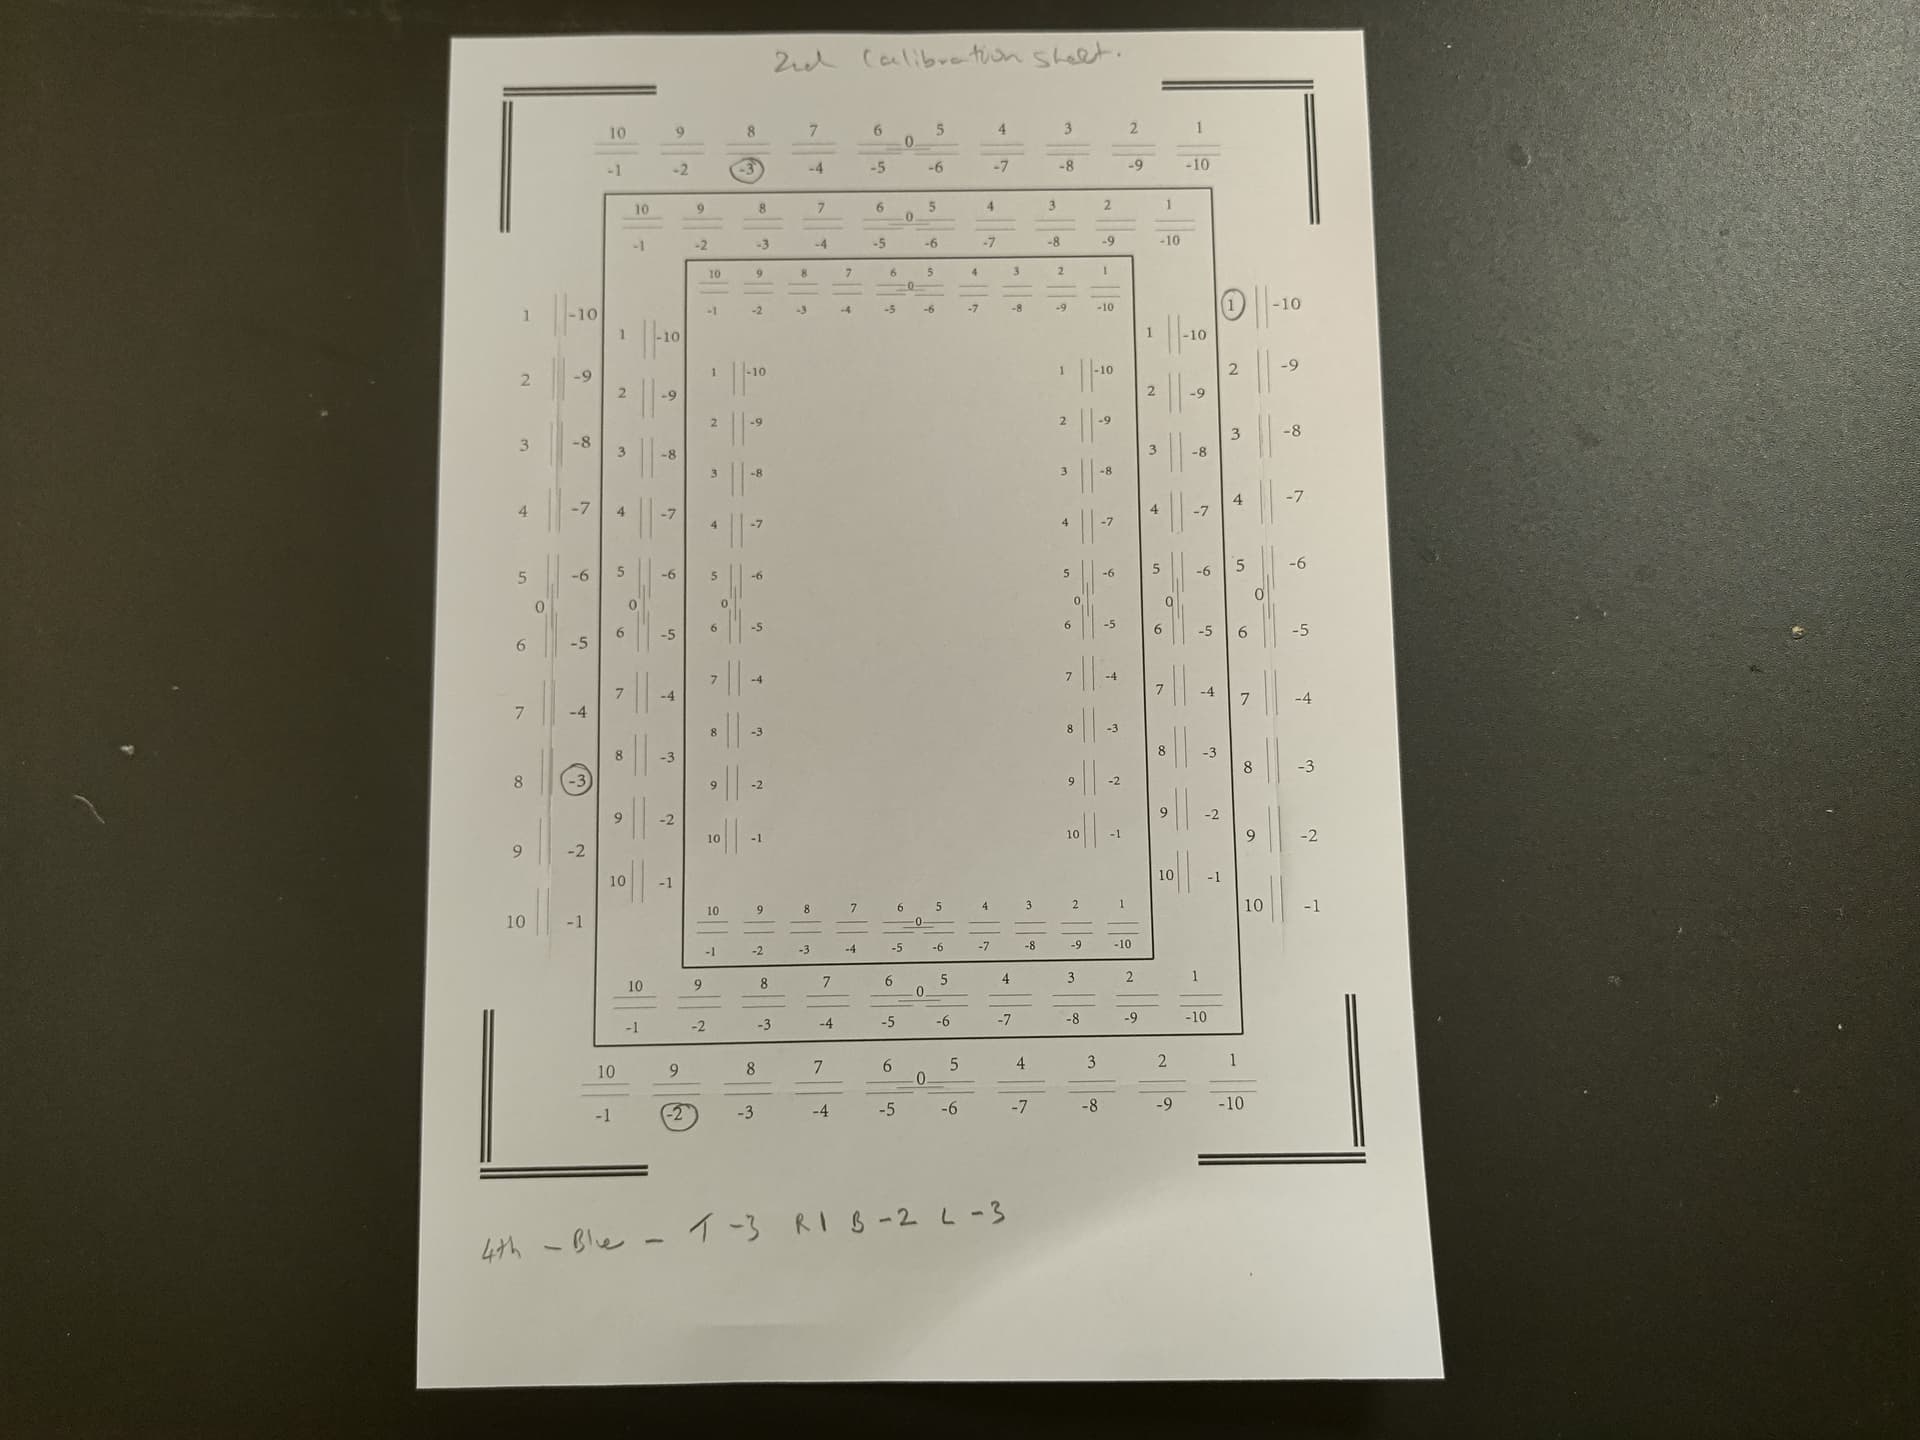
Third calibration (Red)
Top - -10
Bottom - -10
Left - -1
Right - 1
This was the circle test cut

Which is looking a lot better. With these results I decided to do another calibration. I printed out a new calibration sheet and did not reset my calibration. I just ran a new calibration.
Fourth calibration
Values
Top - -3
Bottom - -2
Left - -3
Right - 1
This was my result
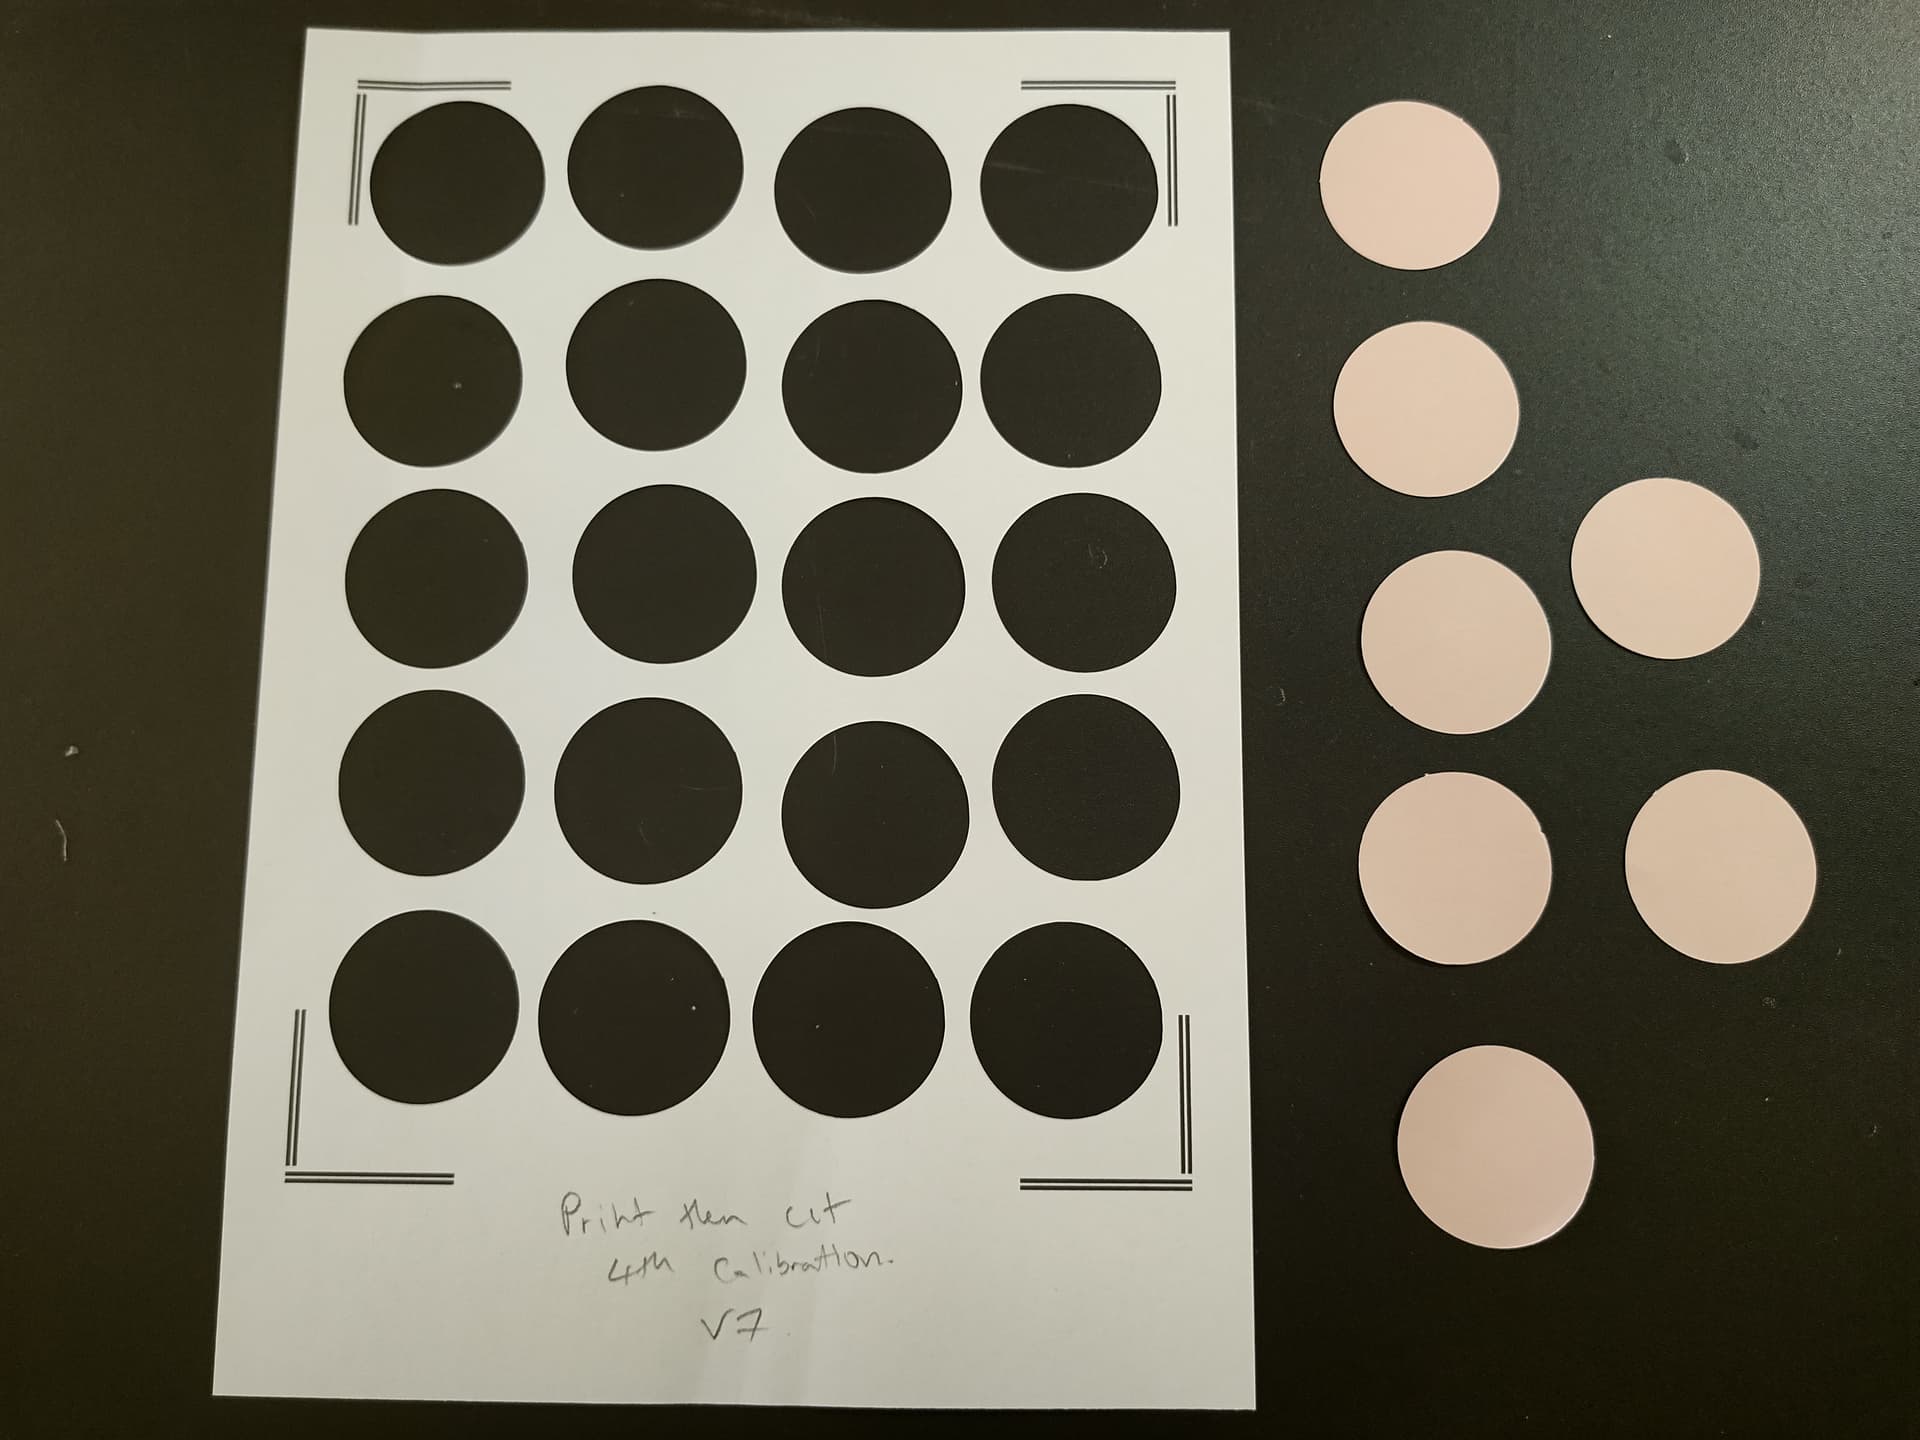

This result is pretty dam perfect.
So, I probably would keep going with your calibration instead of resetting it after a couple tries now. I guess if you get into the teen numbers of calibrating, I would reset the calibration. Also make sure your paper is lined up on your mat. The software also states that if your values fall between -2 to 2 then there should be no need to complete another calibration. My fourth cut was very good but didn’t fall between these values so maybe keep calibrating until your results are around the same values and have no big outliers like top 1 bottom 10 left 3 and right 2. If you have any questions please ask down below.