These lace bunnies are popping up everywhere. They are so elegant and stylish and so easy to make. I’ll show you how to make a lace design out of any SVG you have. Then I will show you how to press that design using Sublimation and our trusty LOKLiK Impress Auto 2.
Materials Needed
- Design software (I’m using Inkscape)
- Sublimation Printer
- Sublimation Ink
- Sublimation Paper
- LOKLiK Impress Auto 2 or a heat press
- Tote Bag (Polyester Blank)
- Heat Resistant Tape
- Heat Gloves
- Butchers Paper
Your choice of SVG, if you want to use the same as me in this tutorial, they are linked in the video description. Note: It has to be an SVG file this won’t work with PNG or JPEG files.
![]() Step 1: Design
Step 1: Design ![]()
Import your SVG, you can click and drag it into the program or press file and then import. Then choose your SVG.
Now with your SVG selected go to Fill and Stroke. Select Stroke Paint then flat colour.
Now select Stroke Style and increase the size of the width of the stroke.
With both the stroke and heart selected select Path, then Stroke to Path
Now you can right click on the heart and press ungroup
Now the stroke and the heart are separate.
Now we can choose one of our lace designs
Bring the lace design and place it on top of the heart and stretch it so it covers the whole heart
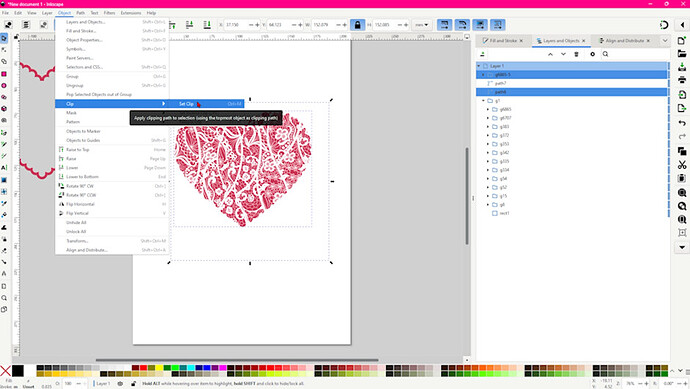
Making sure both the heart and lace layers are selected, select object, clip then set clip
Now our lace and heart are combined
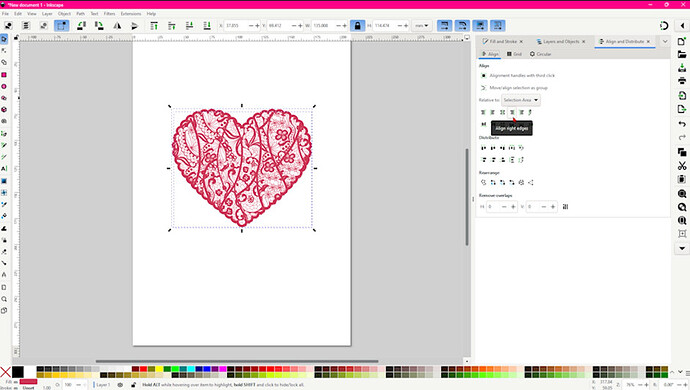
Now we can select our stroke and bring it over to the heart. With both layers selected we can then align vertically and align horizontally
Now you can select both and right click and group
Now you can follow the same steps to make the bunny. I duplicated the hearts and placed them around the bunny.
Now I want to create some words for the tote bag as well. So I used the text tool and wrote Hop. I then duplicated hop so I had 3
Now I arrange them all into the design I want for my Tote bag. Now you can print your design using your sublimation printer. Don’t forget to mirror. If you want to make this with HTV, I would suggest making the lace design a lot bigger so it is easier to weed.
![]() Step 2: Pressing our Design
Step 2: Pressing our Design ![]()
Let’s turn our Heat press on
My Heat Press Settings are
- Temperature: 210C / 410F
- Time: 60 Seconds
- Pressure: 70kg / 150lbs
Prepress the tote bag. I pressed it for the full time as Canvas retains moisture in it.
While the Tote bag is prepressing, cut out your design
Lint roll your tote bag
I placed a heat mat inside my tote bag to help with the thick seams tote bags have. Unfortunately, I think it was a bit to big to fit.
Now place a piece of butchers paper on top of the heat mat
Now arrange your sublimation prints on the tote bag
Now tape down the sublimation prints with heat resistant tape
Now place butchers paper on top
Now press for the full time
With heat resistant gloves you can start removing the sublimation paper.
Now our tote bag is done. It looks really great. Unfortunately, because the heat mat was to big it made a little bulge where the top heart was and it didn’t get enough pressure. But I still love it.
You can also use this same technique and make shirts or hats or anything. Here is a singlet I made earlier.
I hope you enjoyed this tutorial. I had a lot of fun making it. There is so many possibilities to use this design and make different ones using the lace patterns. If you would like to make along with me you can watch the step-by-step video tutorial it’s linked below. If you have any questions please leave a comment down below, I’m always happy to help.


