(upload://qdJLgE5I0RlD5oSTSzQJTehgbaU.png)
Project Overview:
As many of us are anxiously awaiting for the iPaint to be shipped and available to us, here is an alternative option in the meantime. Check it out, I am using the iEngrave™ to create the template on a paint canvas. This project idea is perfect for the next children’s party, ladies’ brunch or church event.


Materials:
- Cutting machine: LOKLiK iEngrave™
- Paint Canvas - purchased at Micheal’s but available in most crafting stores
- Acrylic paint pens (preferred method for me, minimizes mess) or acrylic paint and small paintbrushes.
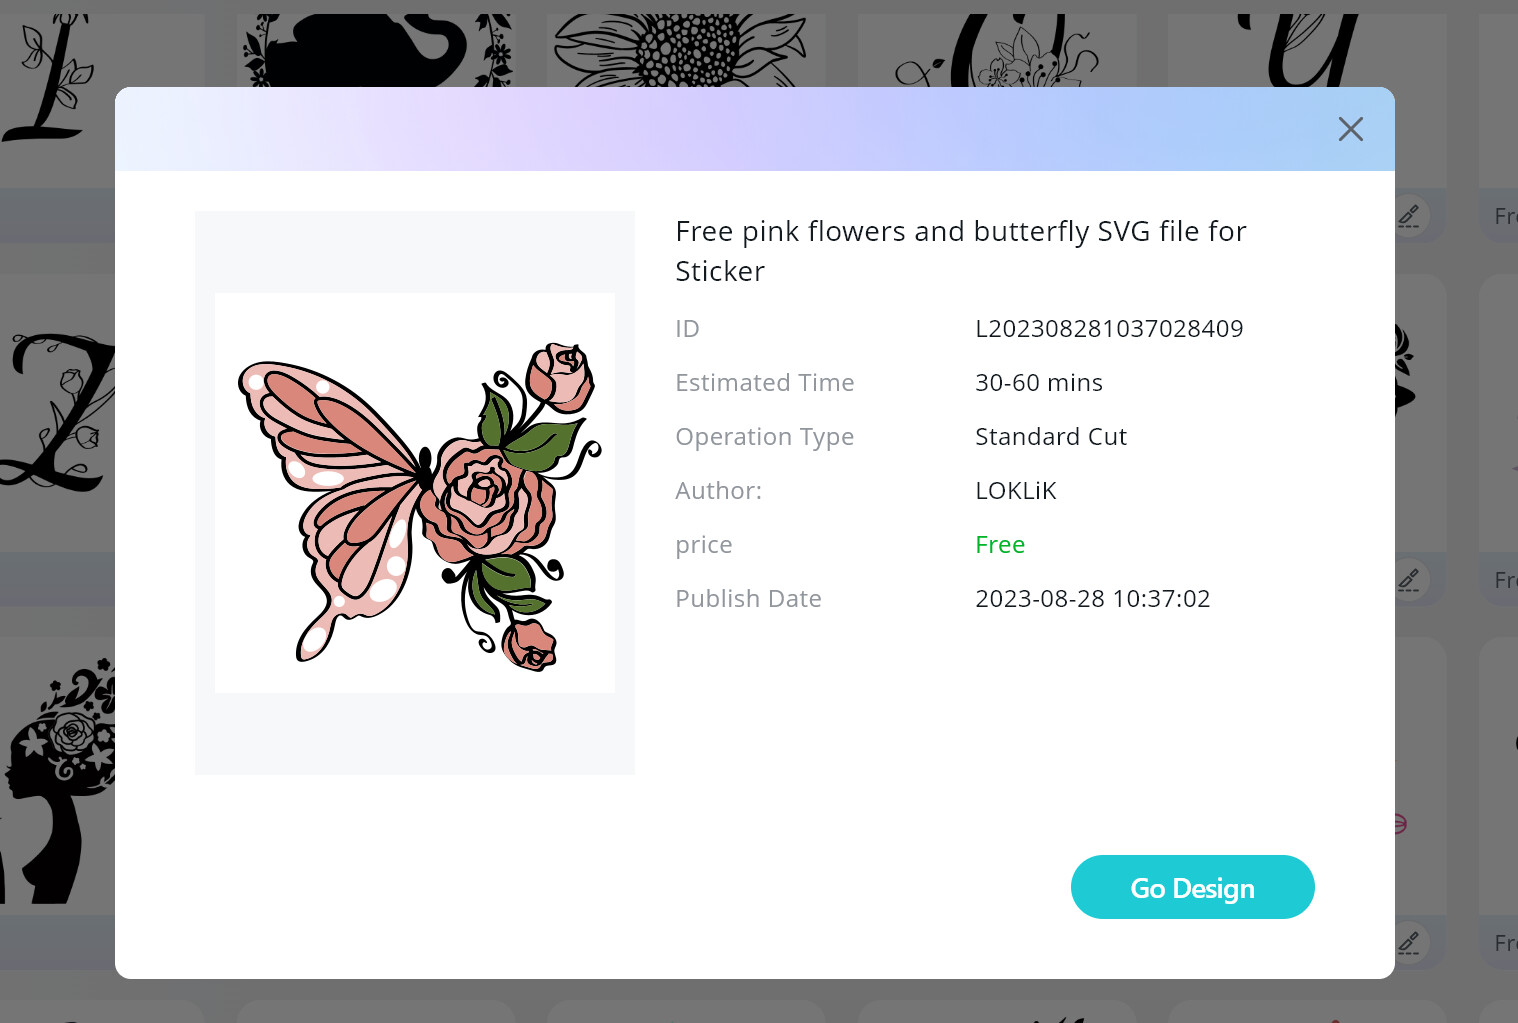
- Template: from LOKLiK Library
**free pink flowers and butterfly SVG file for Sticker
Design and Cutting Process:
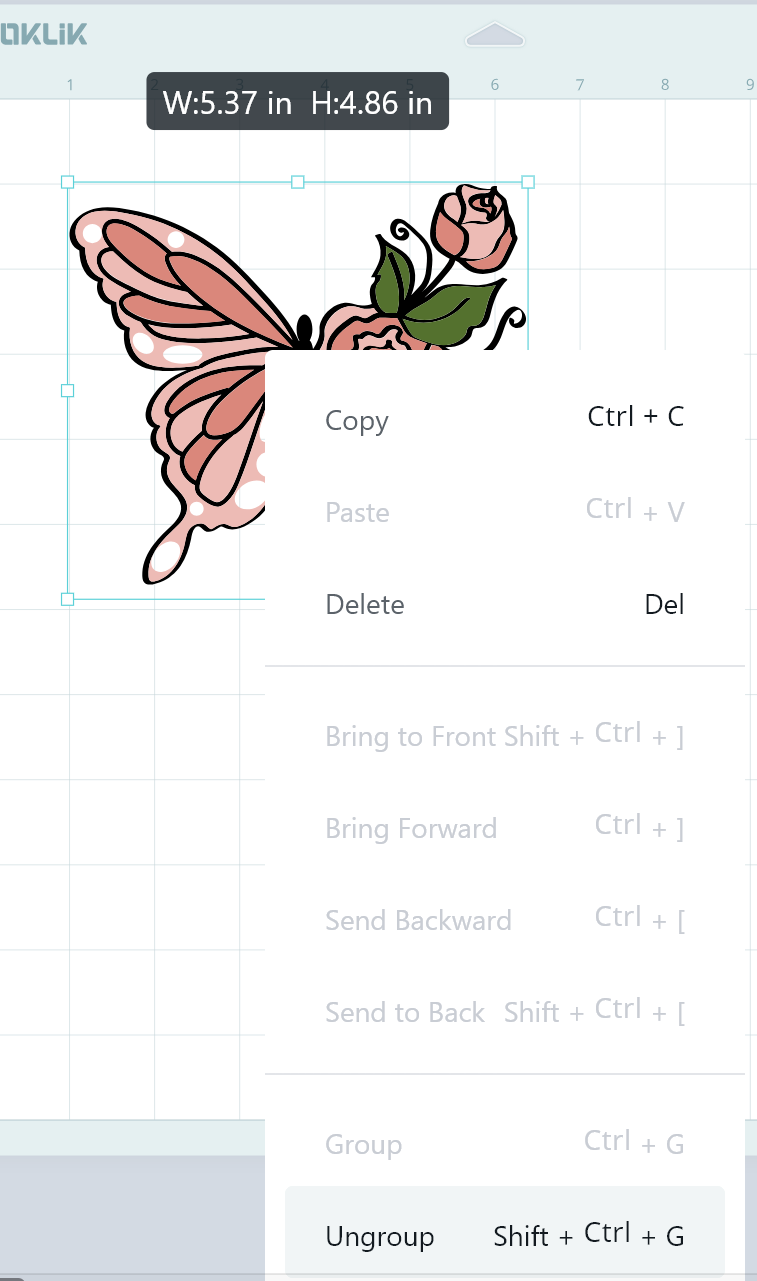
- Using the LOKLiK IdeaStudio Library, search for the template and select the + to add the template to the canvas.
- I adjusted the size to fit inside the canvas being used.
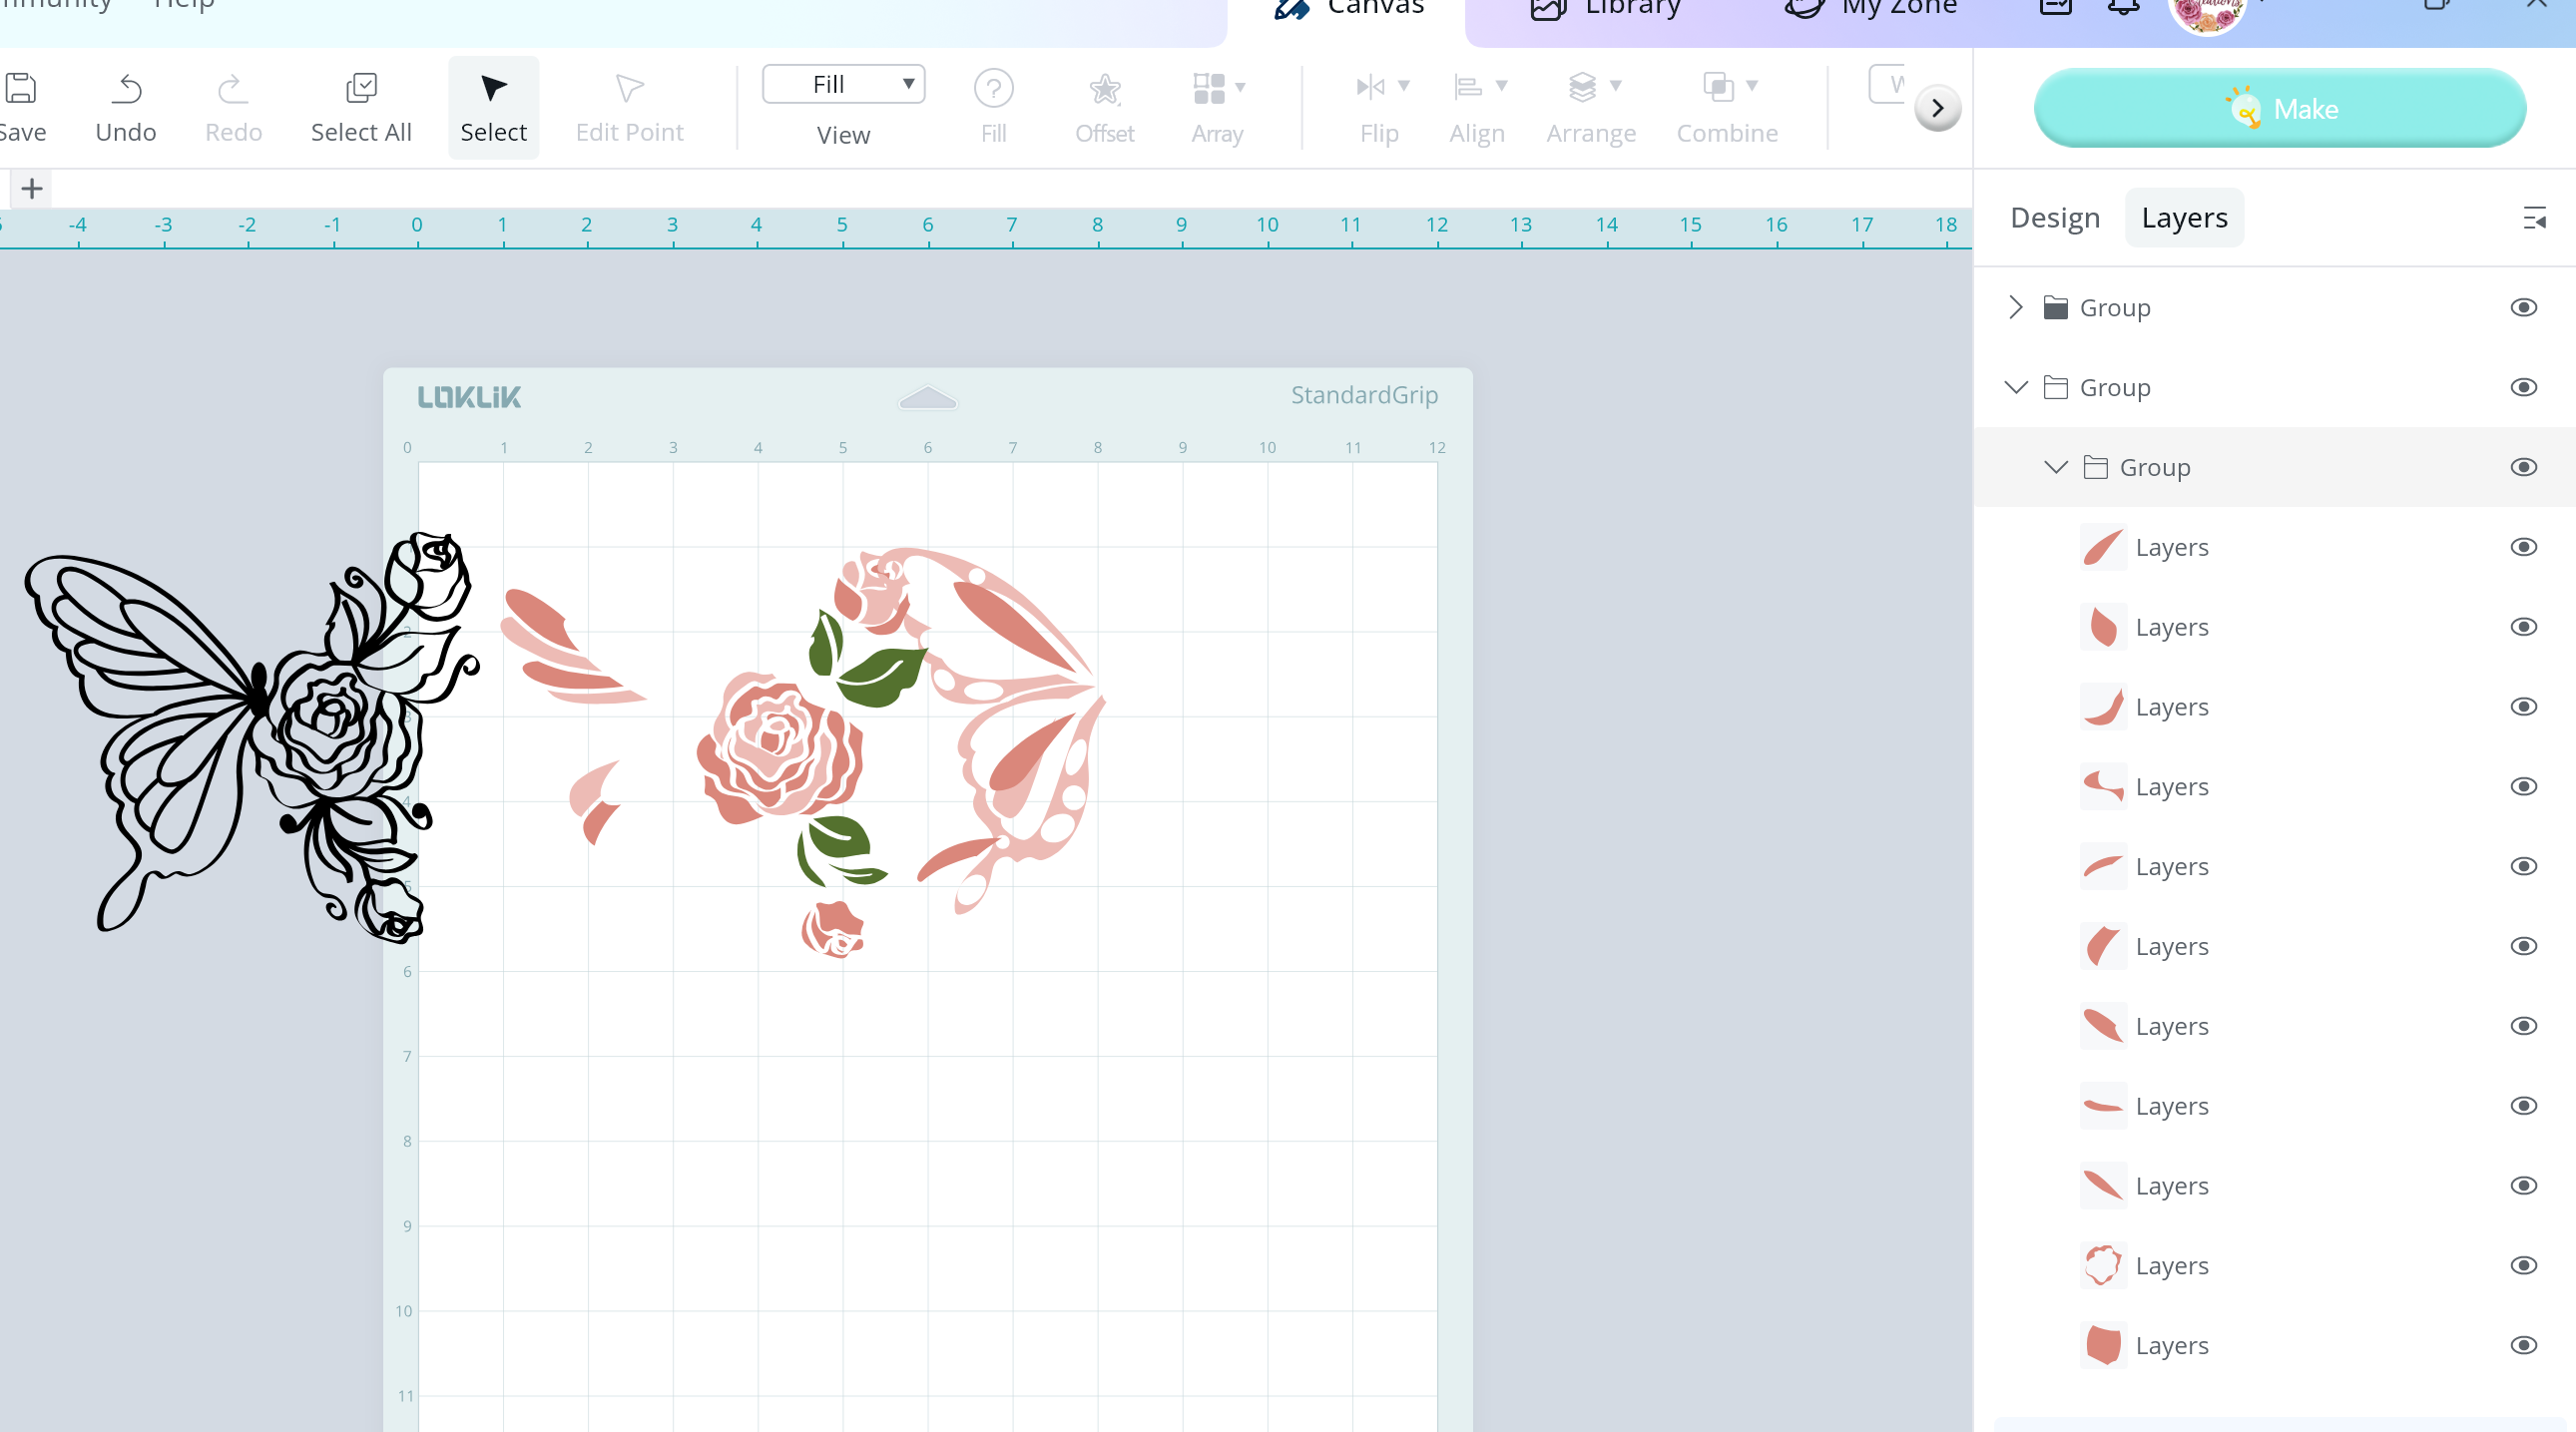
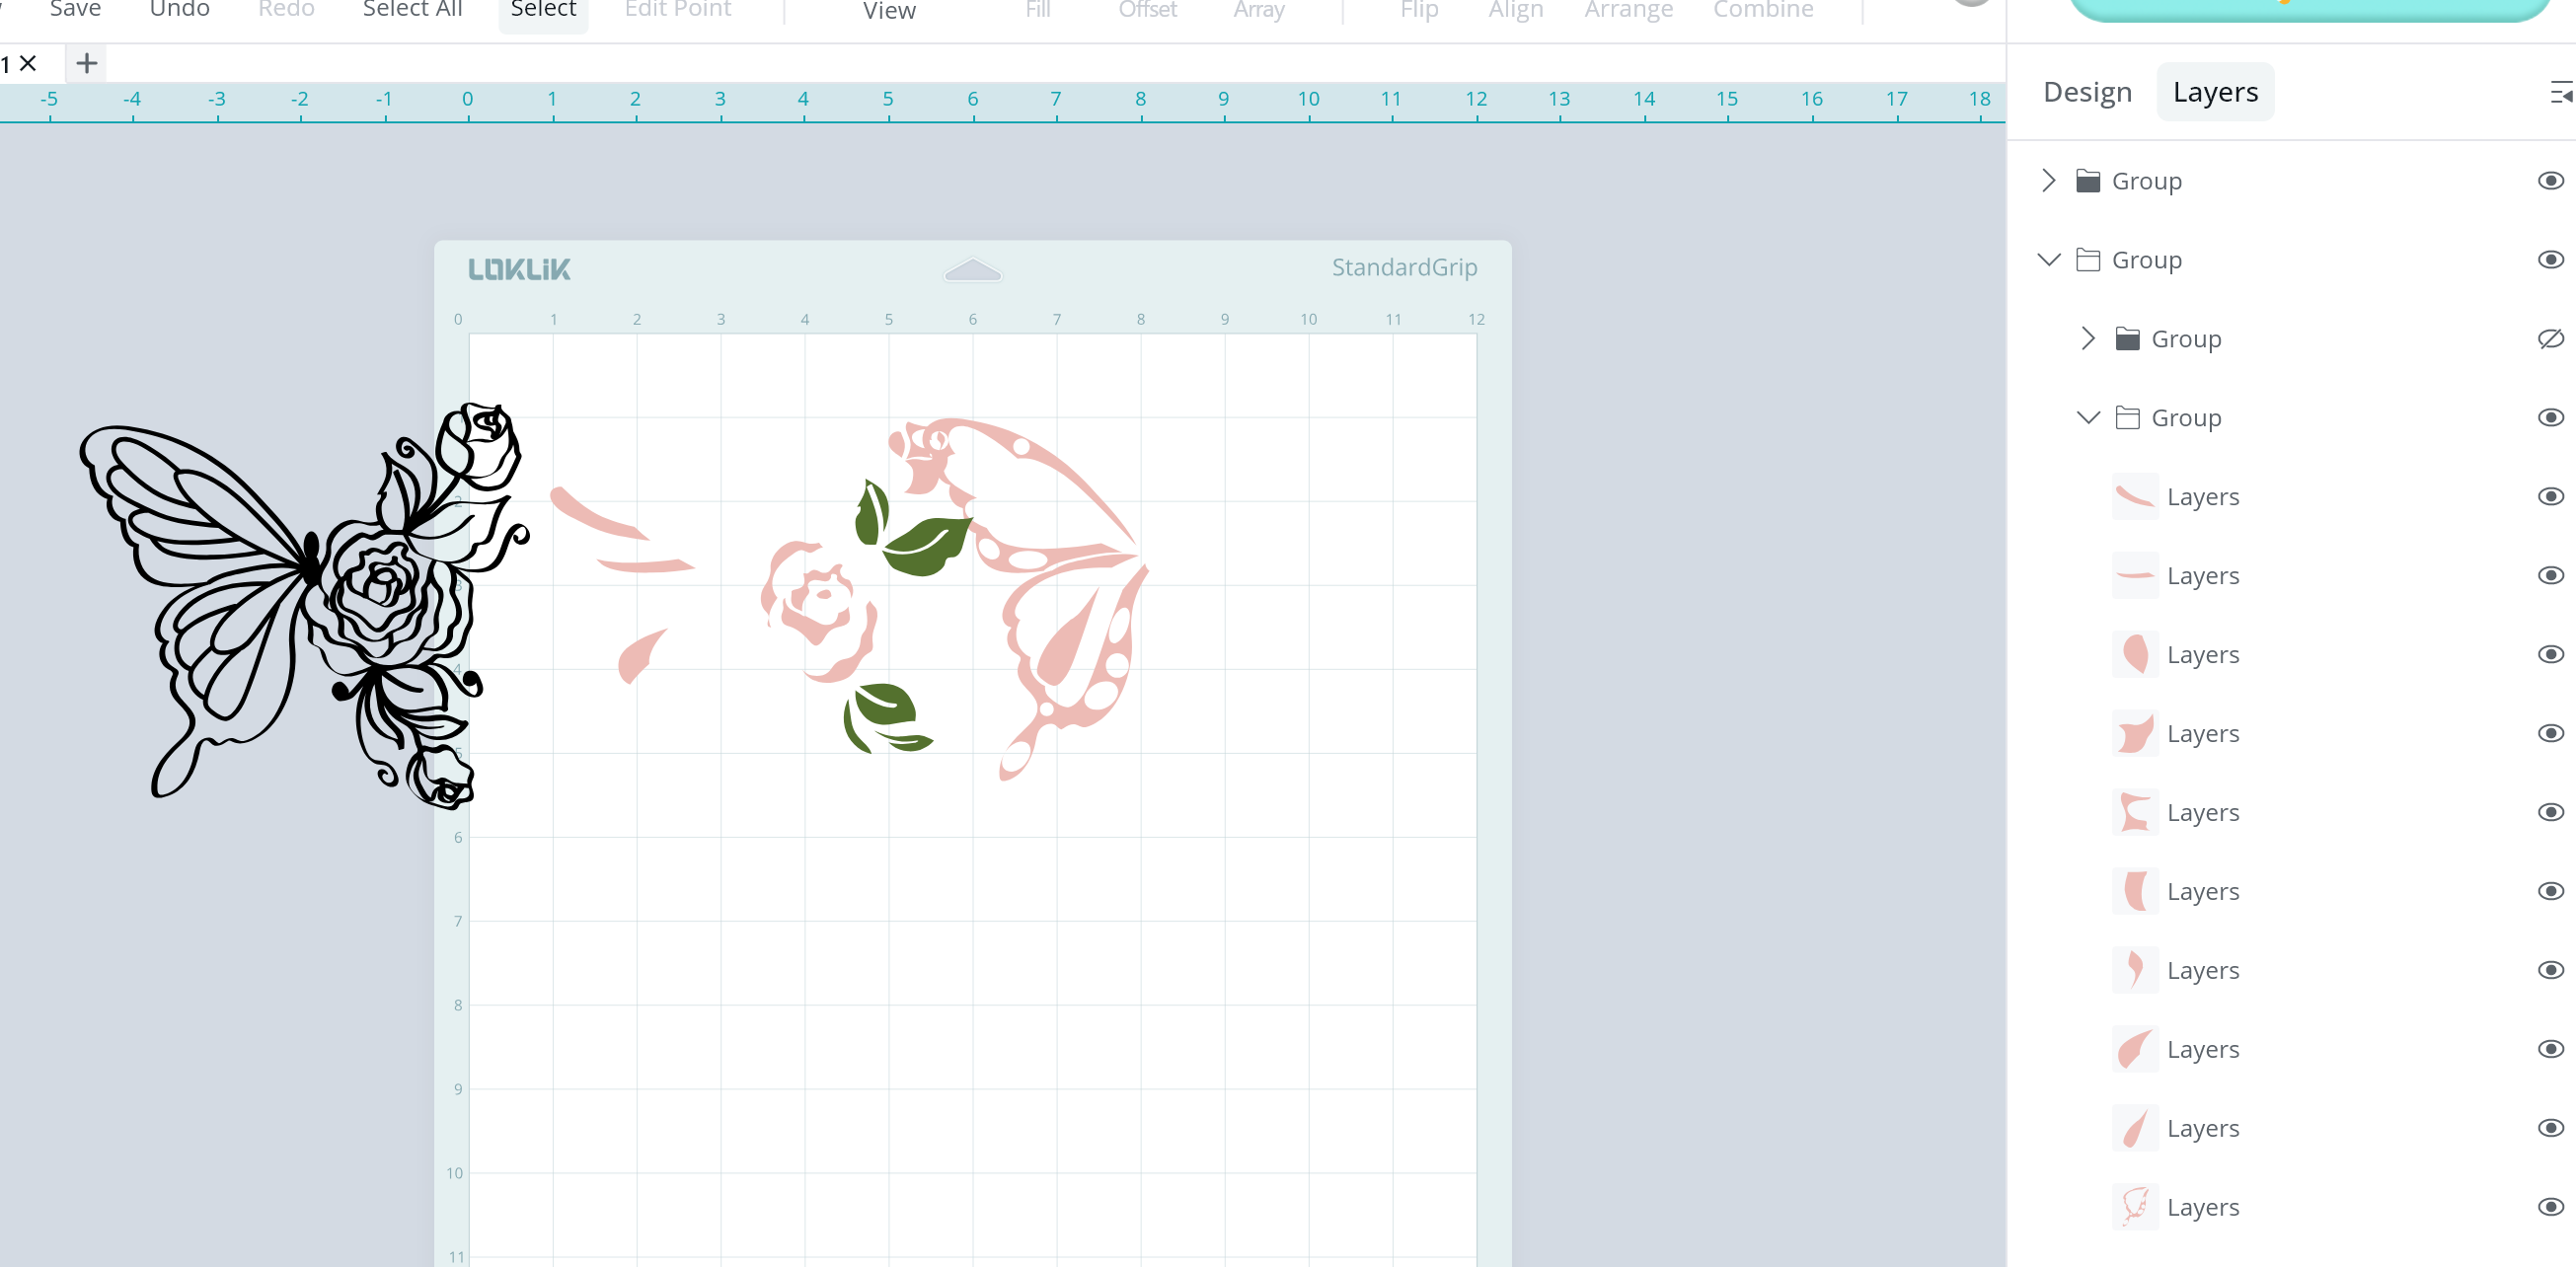
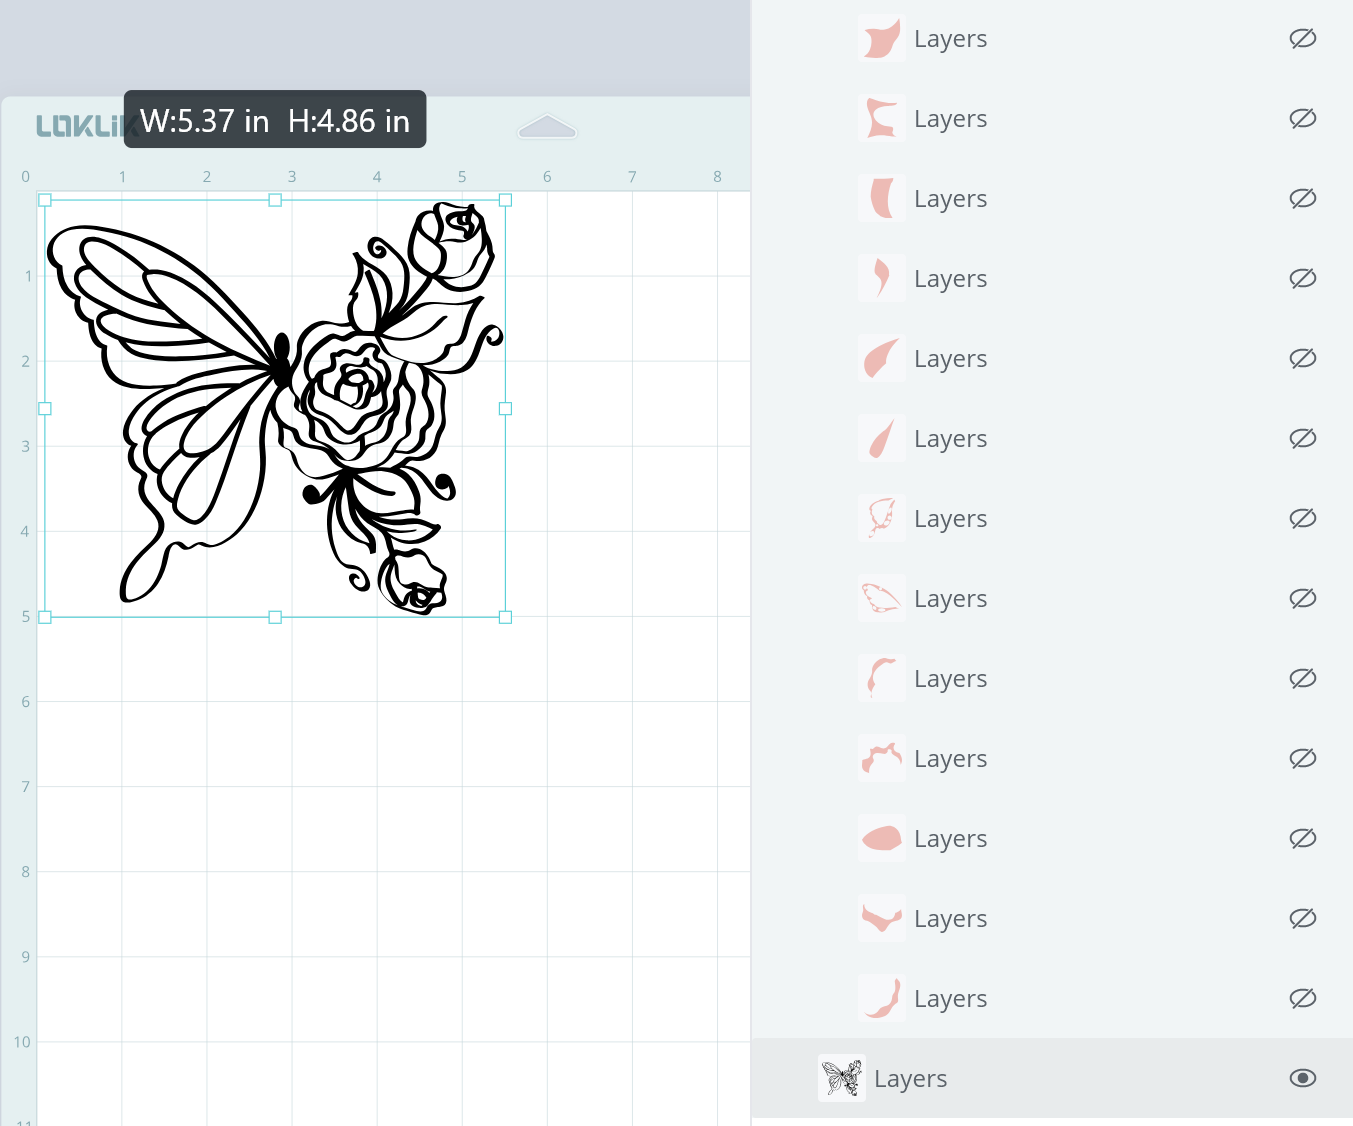
- Right click on the SVG and ungroup the SVG. You will want to remove all of the component and only leave the black outline of the SVG.
- TIP: on the right side of the canvas, select the “layers” panel. This will allow you to make the colored component as “unseen”.
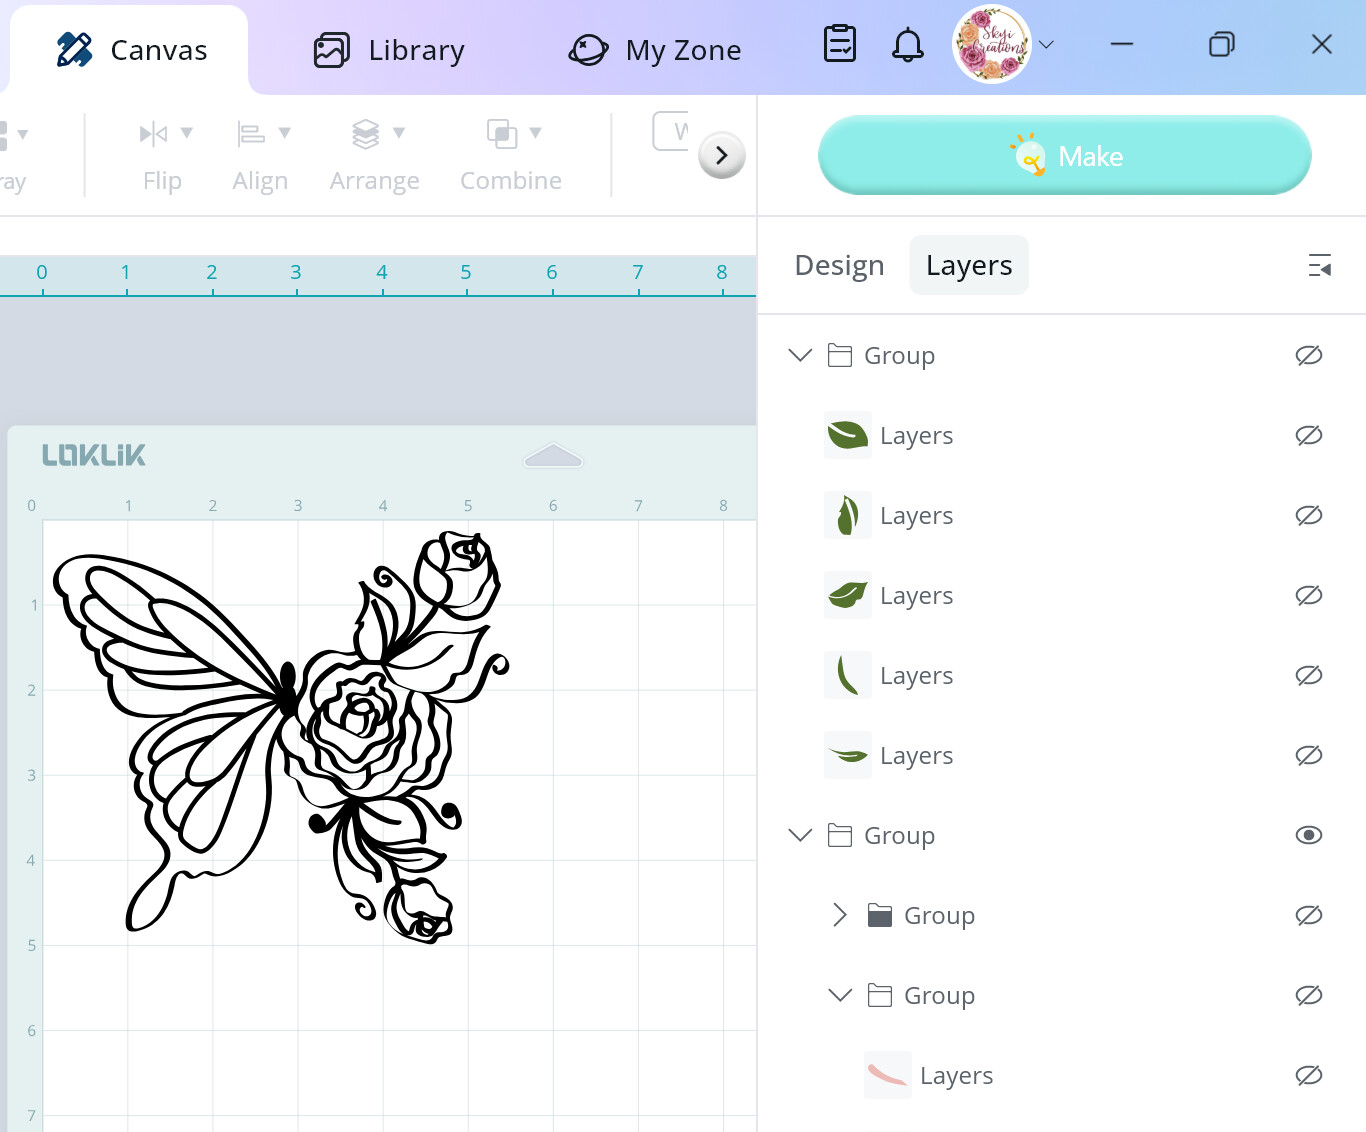
- Save your design to the LOKiK IdeaStudio My Zone.
Engraving the Canvas:
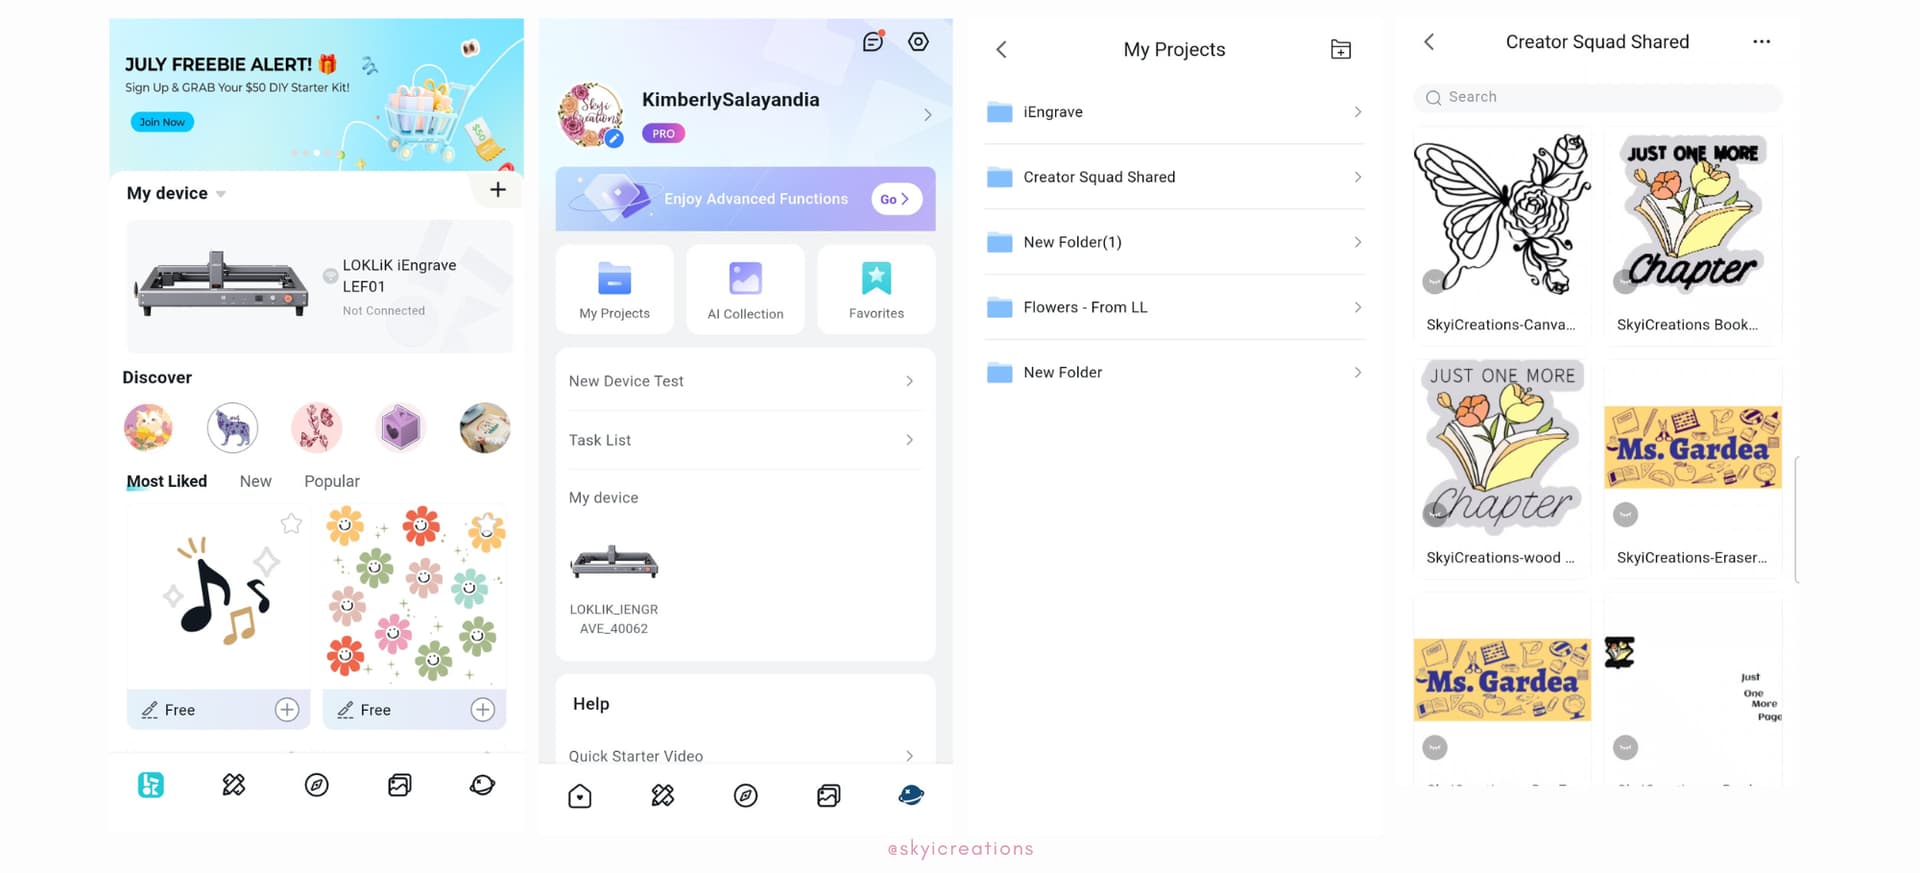
- Follow the prompts on the LOKLiK app to connect to your laser (device).
- On the bottom right corner, you will see an icon that looks like a “world”, click on the icon.
- This will direct you to your account and you will click on “My Projects”.
- The next screen will show you the projects you have saved, click the project, and select “add to canvas”.
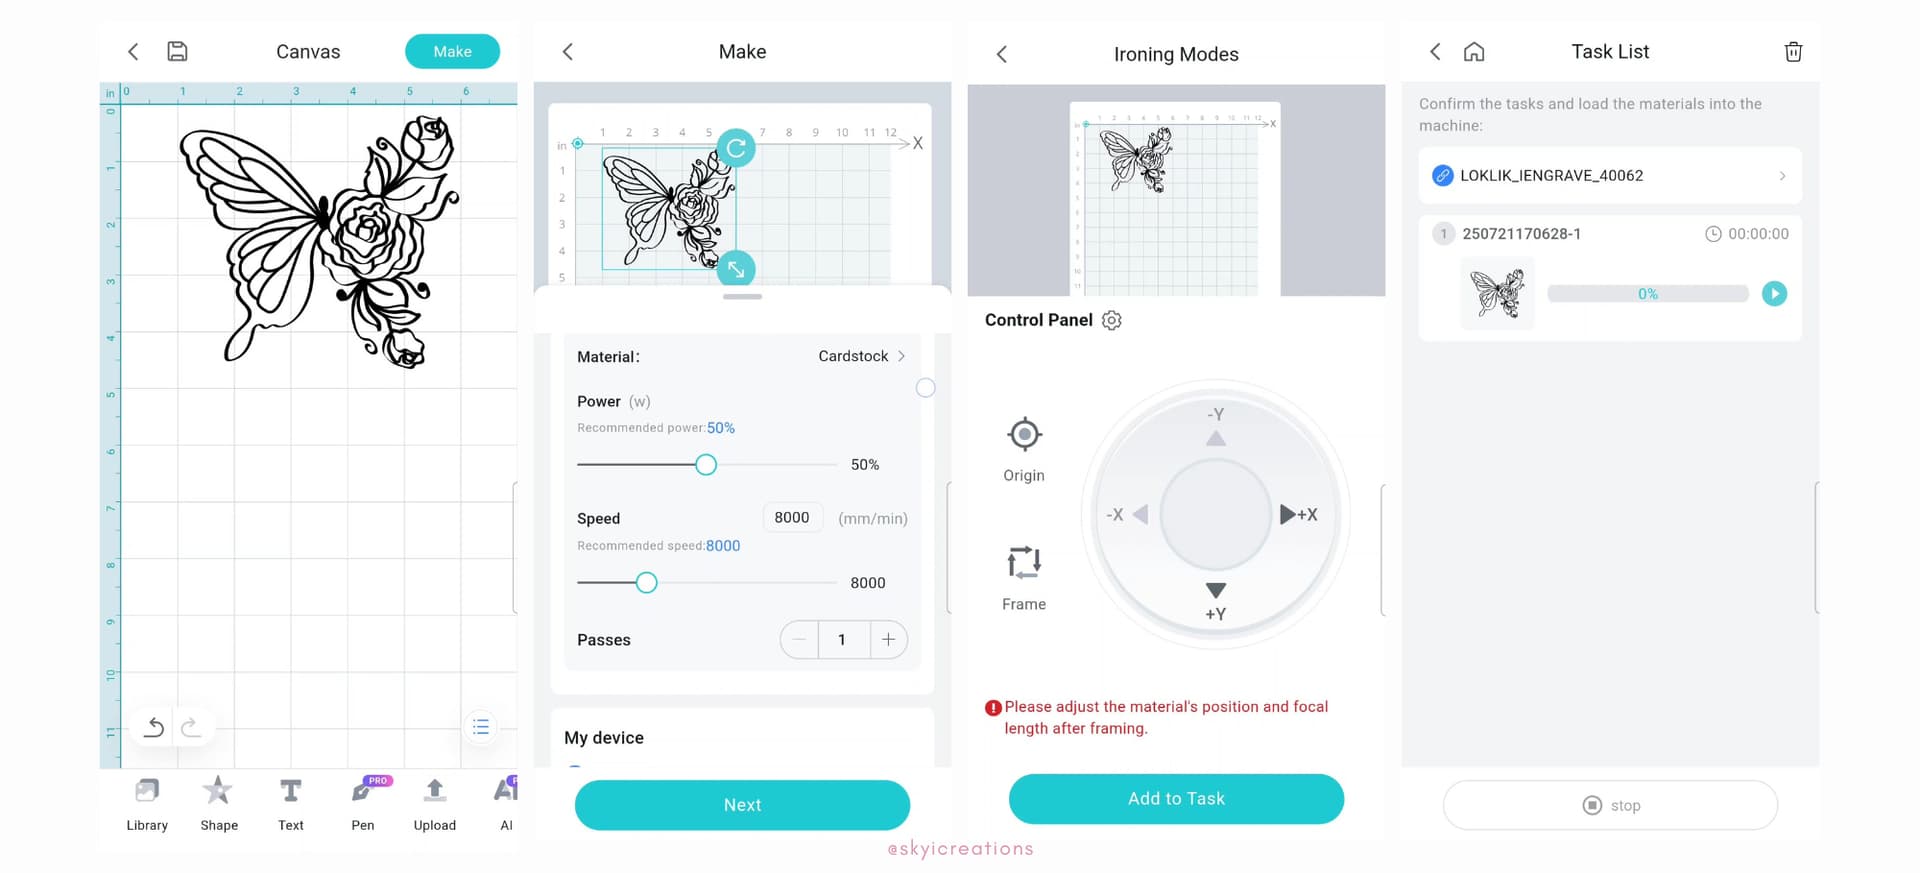
- Select the project on your canvas and under the “action” icon, ungroup the project.
- Select the image and click on “make”. This will prompt you to enter the engraving settings.
- Enter the engrave settings to match the materials. Below are the settings I used for this tutorial.
Engrave Settings - Filling (SVG image)
Material: Cardstock
- Mode: Filling
- Operation Style: Engrave
- Power: 50
- Speed: 8000
- Passes: 1
(After completing the engraving, I realized that the mode could have been “line” which would have reduced the engraving time drastically)
-
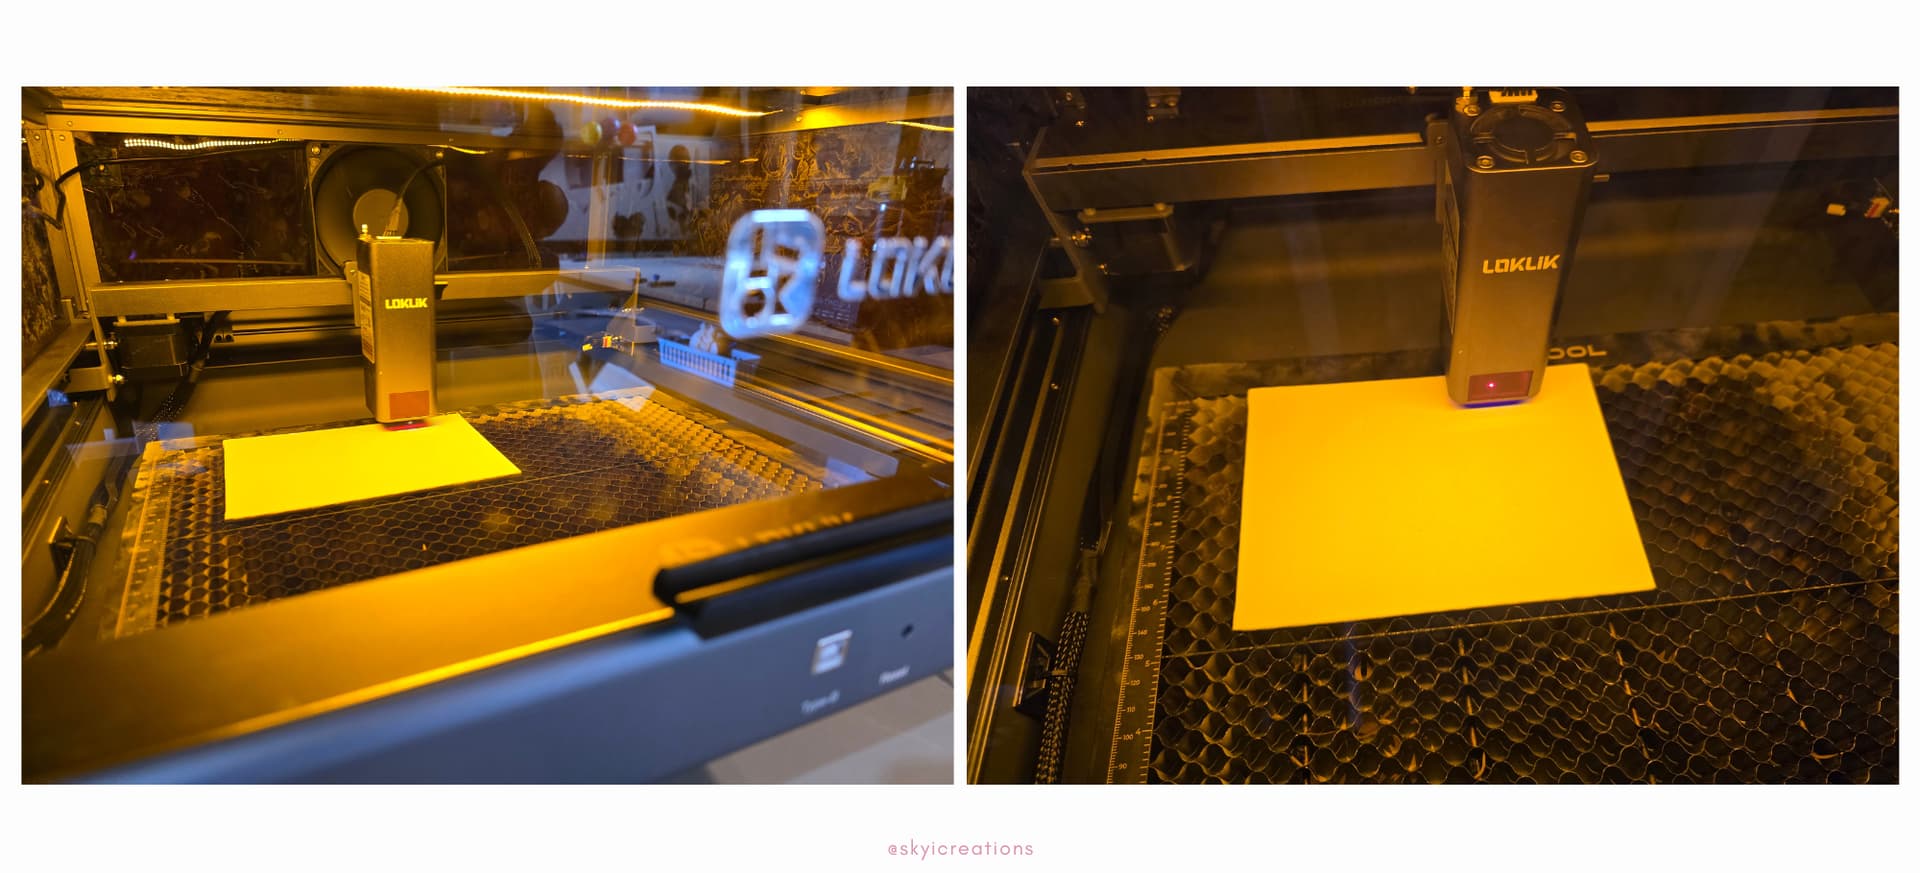
Prior to executing the engrave, make sure you frame the project. After entering the settings, the control panel has a “frame” feature. This is very important to ensure that your material is placed in the correct position.
-
Place your material in the laser and using the focal length pin ensure that the lowered pin touches the material. Adjust the laser head as needed and return the pin to its upward position.
-
Using the Task List, send the project to engrave.
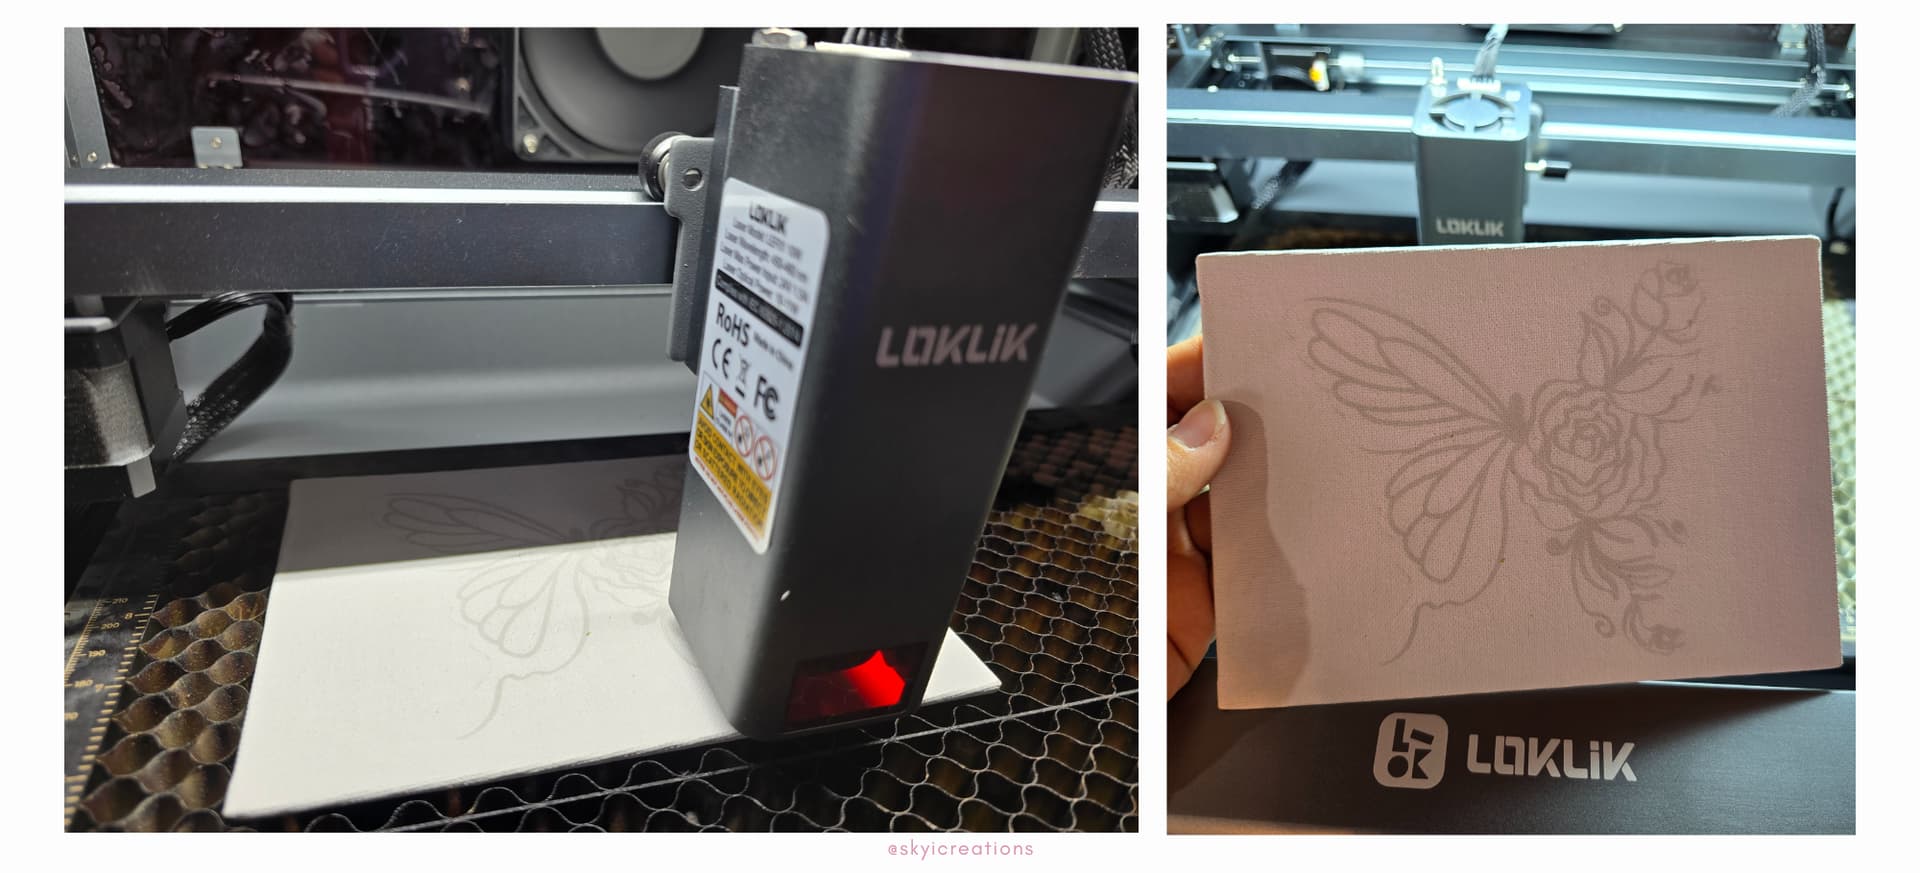
- Here is the engraved canvas which is ready to be painted.
Painting the engraved canvas:
- Using acrylic paint pens, I began to color inside of the engraved lines. You can also use acrylic paint and small brushes, but the pens are much easier for me to use. For this tutorial, I kept the original SVGs colors as inspiration and used 3 shades of pink, and an earthy green.
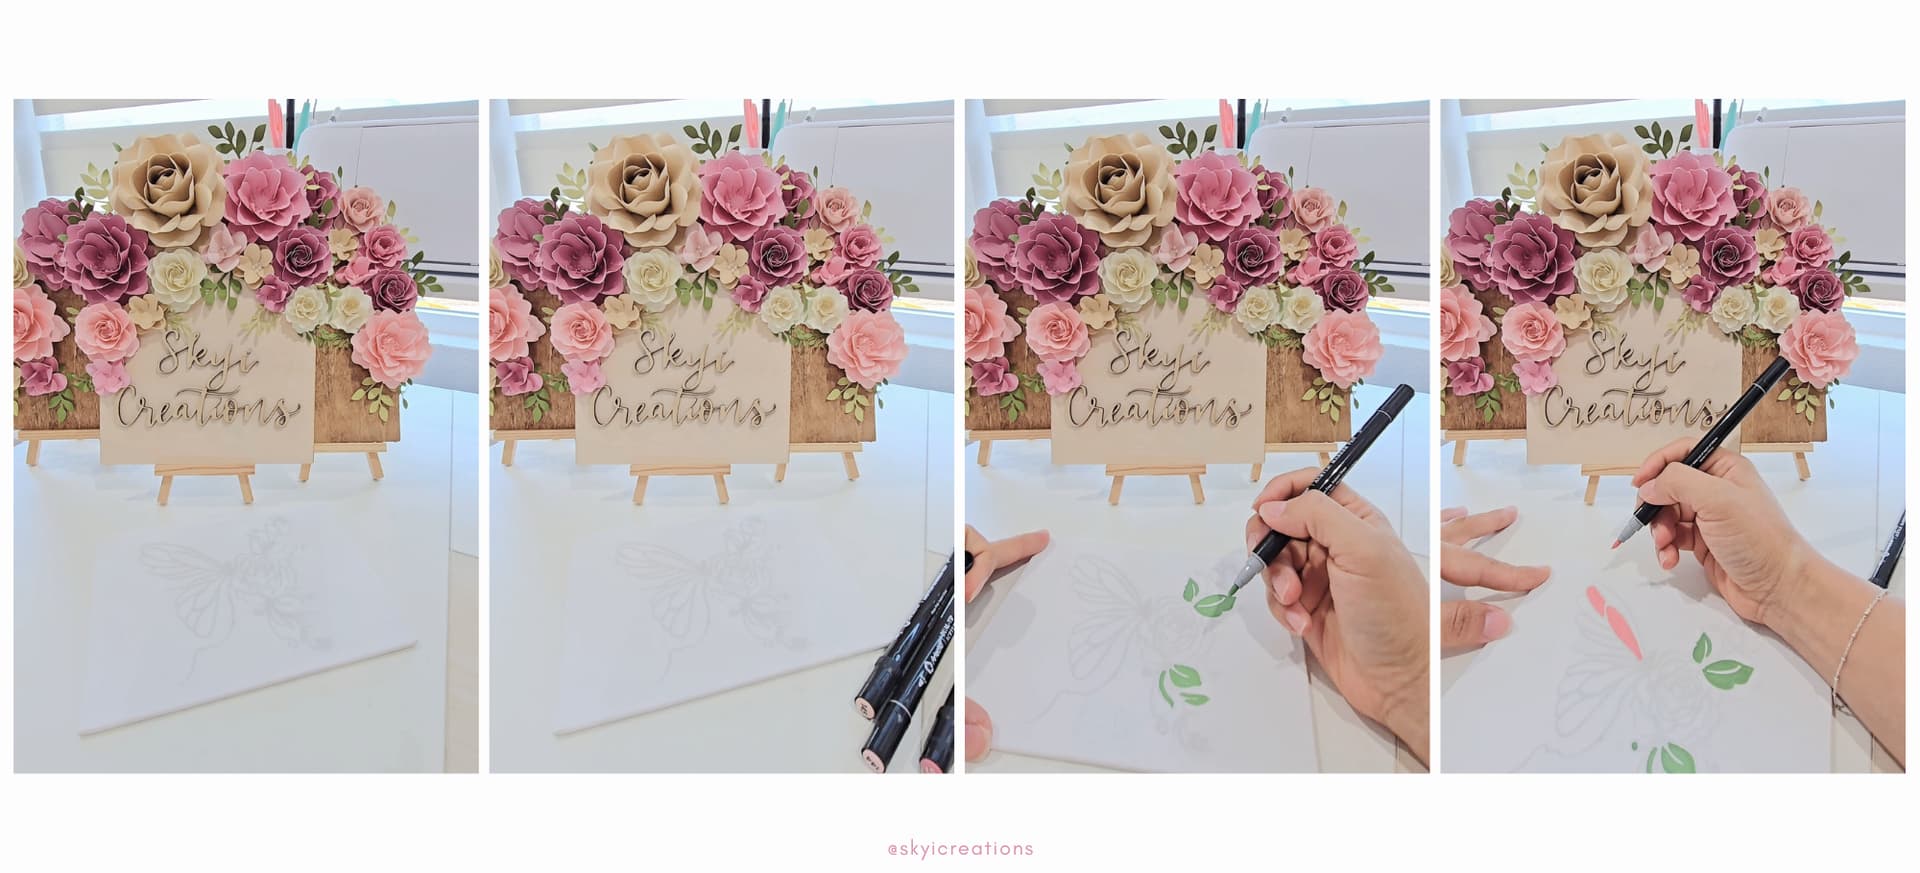
- After painting in the areas, I used a mauve colored pen to trace the engraved lines. For this reason, I would mention that engraving the line rather than the fill would be acceptable for this type of project.

- Carefully fill in any gaps or areas that may need a second coat of paint.
WONDERFUL!!! You have created a canvas ready to be painted, happy crafting and painting!
