Project Overview:
Now that you have the LOKLiK iEngrave™, let’s make large number projects as easily as possible. When you receive an order for multiples, it is most efficient to complete the order using a jig (template to place the item). This helps you be more efficient while maintaining accuracy when engraving/scoring. During this tutorial, I will walk you thru how to use a jig on wooden keychains.


Materials:
- Cutting machine: LOKLiK iEngrave™
- Blank wooden keychains - available on Amazon and craft stores
- Cardstock paper for the jig - I used Kraft Cardstock for this tutorial
- Design: upload your own design or pick from a wide variety from the LOKLik Library
- Template: from LOKLiK Library
**SkyiCreations Keychain jig
Design and Cutting Process:
- Using the LOKLiK IdeaStudio Library, search for the jig template and select the + to add the template to the canvas.

- The template will have the empty keychain shapes arranged to fit within a letter size paper (8.5in by 11in). This will be the base you use to design and setup your keychain design.
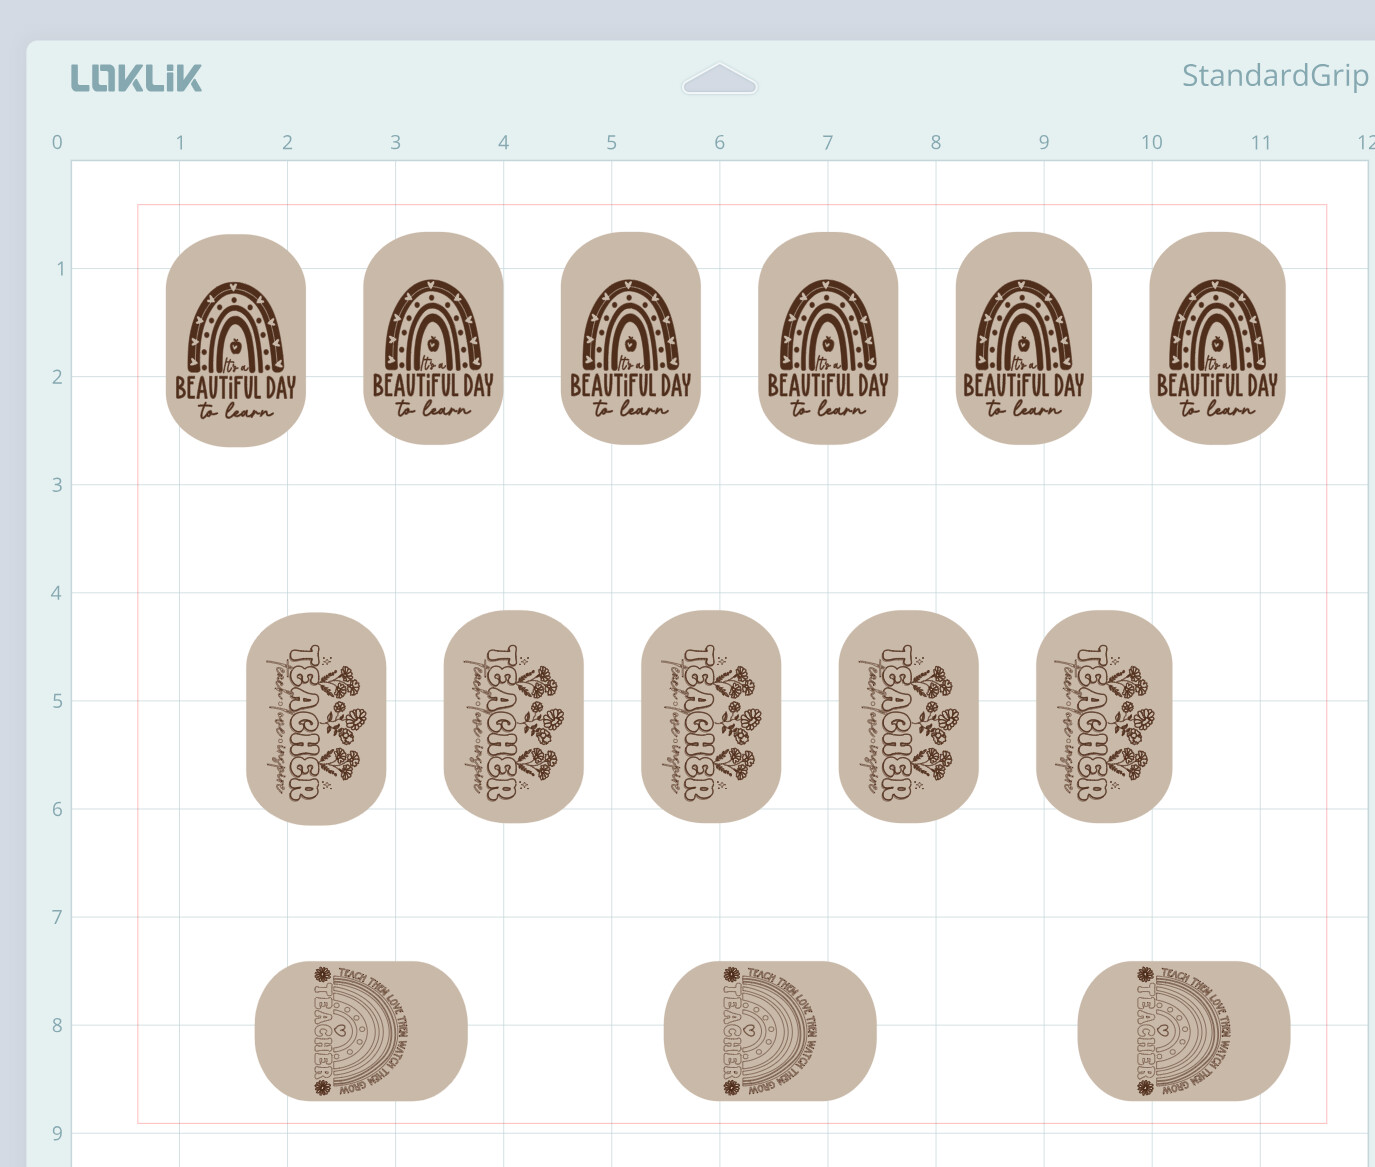
- Add your preferred design, for this tutorial I used a mix of design that were uploaded as SVGs.
TIP: I find the design process easier done using the LOKLiK Idea Studio on my laptop. I use my laptop for the design process, save it on the LOKLiK Idea Studio and then open the project on the LOKLiK app to send to execute the project on the iEngrave™.
- Save your design to the LOKiK IdeaStudio My Zone.
Cutting the Jig and engraving the keychains:
- Follow the prompts on the LOKLiK app to connect to your laser (device).
- On the bottom right corner, you will see an icon that looks like a “world”, click on the icon.
- This will direct you to your account and you will click on “My Projects”.
- The next screen will show you the projects you have saved, click the project, and select “add to canvas”.
- Select the project on your canvas and under the “action” icon, ungroup the project.
TIP: Using the “layers” icon, you want to group the keychain bases as 1 group and the keychain designs as 1 group. This will allow you to process all of the items that should be the same engraving/cut settings.

- Select the keychain base group and click on “make”. This will prompt you to enter the engraving settings.
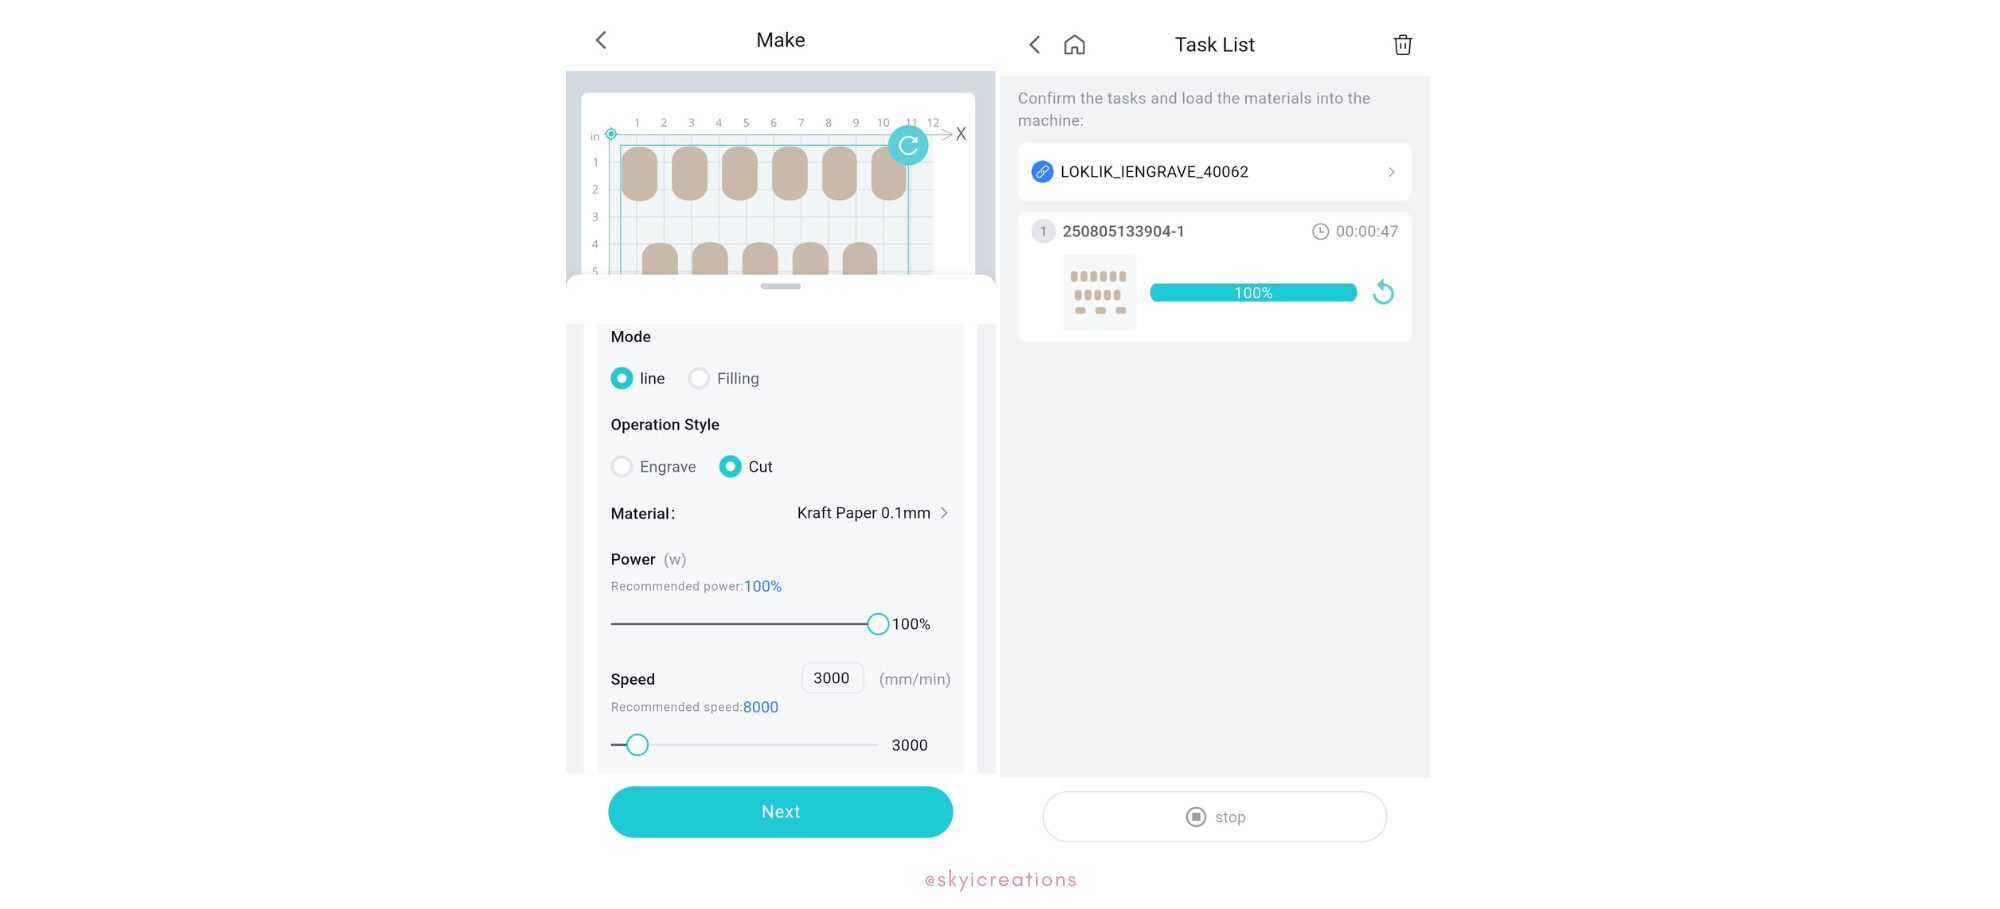
- Enter the cut settings to match the materials. Below are the settings I used for this tutorial.
Cut Settings - Keychain Jig
Material: Kraft Paper 0.1mm
- Mode: Line
- Operation Style: Cut
- Power: 100
- Speed: 3000
- Passes: 1
-
Prior to executing the engrave, make sure you frame the project. After entering the settings, the control panel has a “frame” feature. This is very important to ensure that your material is placed in the correct position.
-
Place your kraft paper in the laser and using the focal length pin ensure that the lowered pin touches the material. Adjust the laser head as needed and return the pin to its upward position.
-
Using the Task List, send the project to cut.
*** DO NOT MOVE THE DESIGN ON THE CANVAS OR THE KRAFT PAPER AFTER IT CUTS. THIS MUST REMAIN IN THE SAME LOCATION IN ORDER TO ENSURE THAT THE DESIGN IS ENGRAVED WITHIN THE KEYCHAINS.**

Engraving the keychain design
- Place the blank keychains within the cuts made on the kraft paper. It is important to place the keychains in the right direction, so the design is not upside down.
- Return to your canvas and select the keychain design group and click on “make”. This will prompt you to enter the engraving settings.
- Enter the engrave settings to match the materials. Below are the settings I used for this tutorial.
Engrave Settings - Keychain Design
Material: Bamboo
- Mode: Line
- Operation Style: Cut
- Power: 100
- Speed: 3000
- Passes: 1

- Using the Task List, send the project to engrave.

WONDERFUL!!! You have created a wooden keychains in bulk using a jig! This is even more special for me as these keychains were made for a We Love Teachers community event where I gifted over 70 keychains to local teachers as a token of appreciation for their efforts.
