Hello friends today I come to share my first project with the iEngrave loklik, this is the first of a series of projects that I hope to share with you using the machine and creating great things, I hope you enjoy it.
To make this domino box I made some steps and guidelines that I would like to let you know to get to the final result and that can work as a tutorial for some of the pieces.
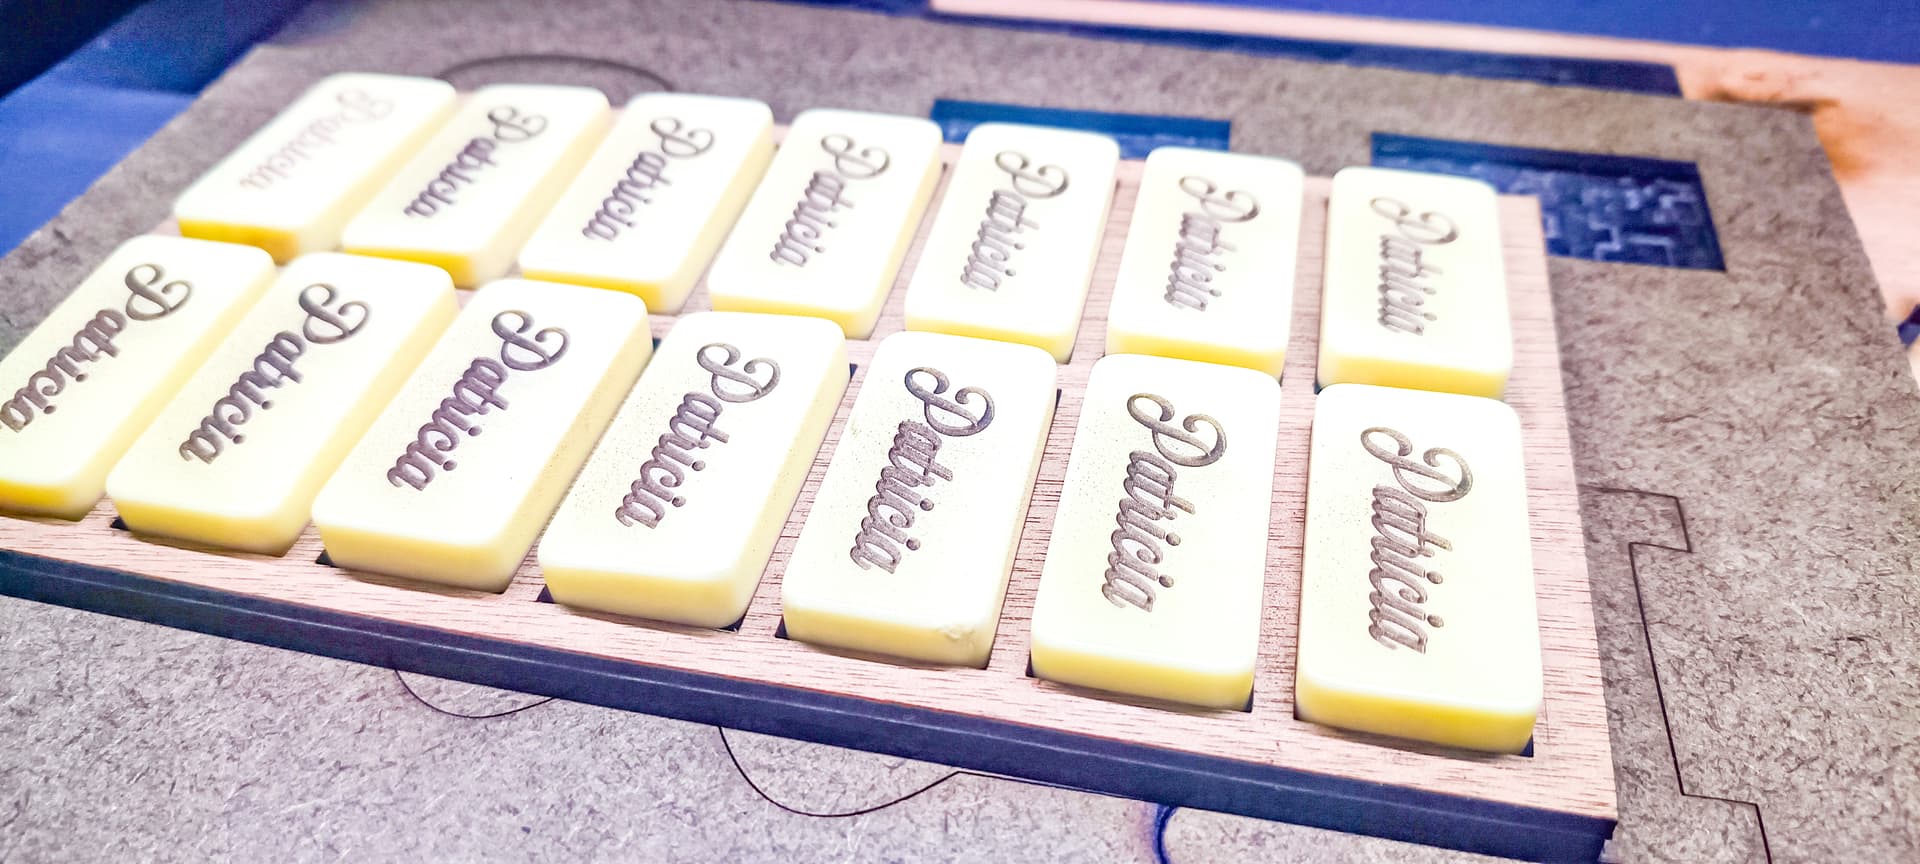
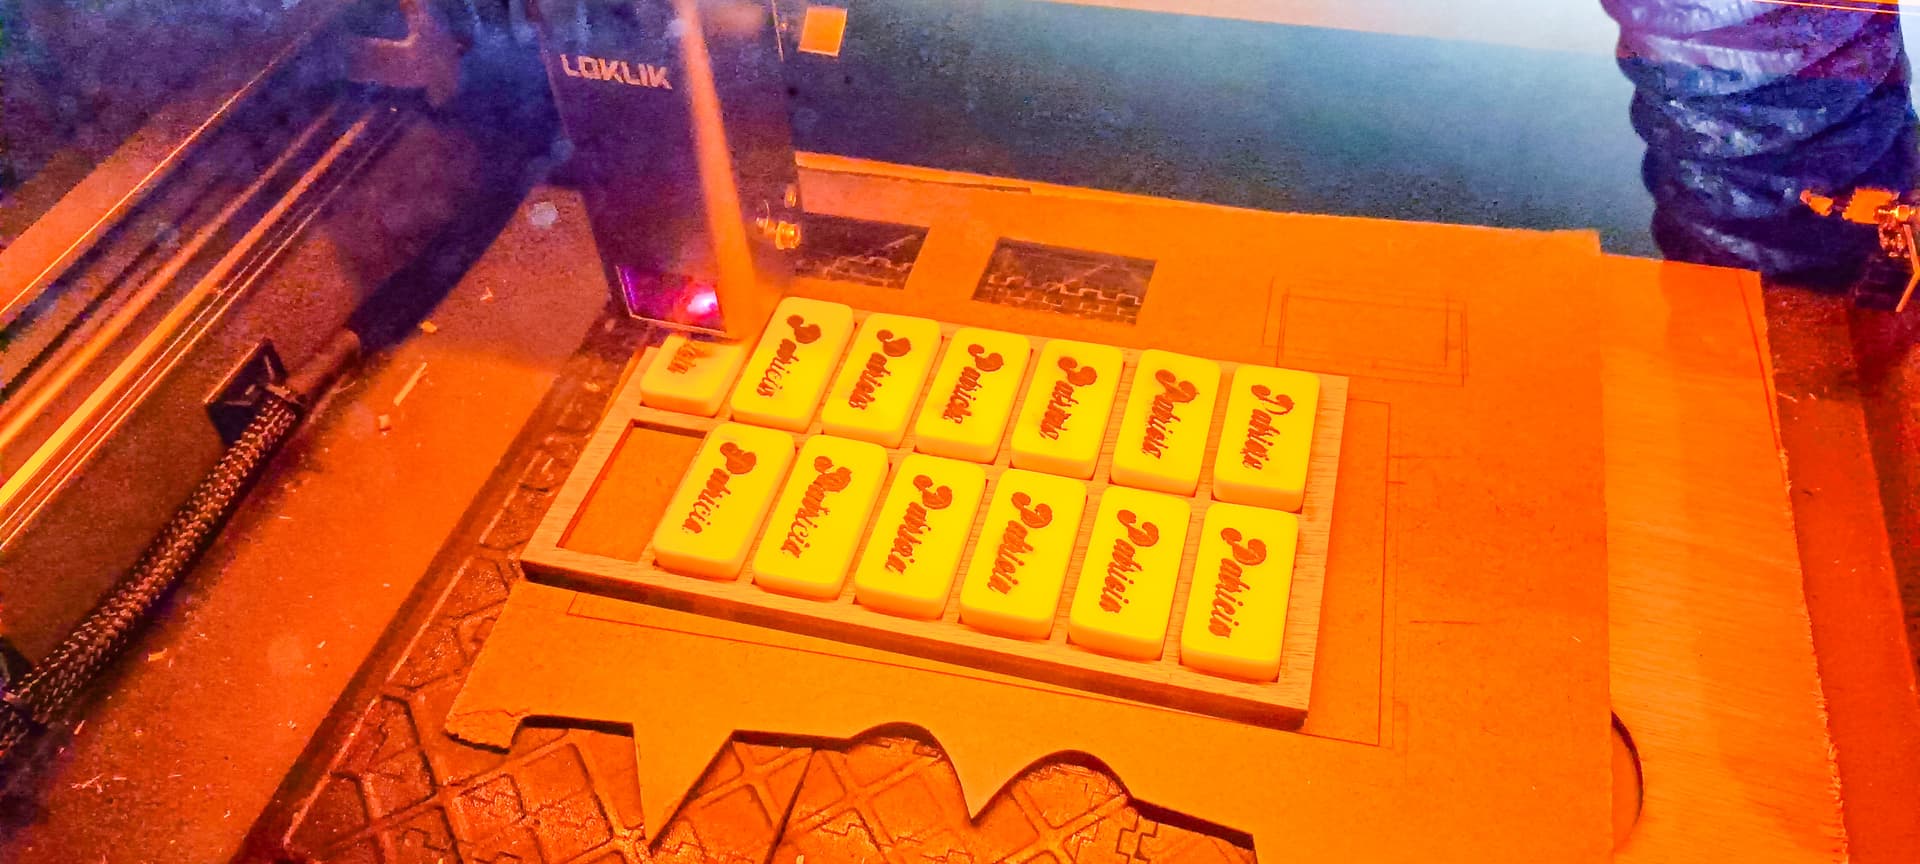
- First I created a template, in which I placed the 28 dominoes in two sections of 14 each to engrave them, I used the Lightburn program to cut and engrave all the pieces, then in the program I marked the initial position where the laser head was and from there I marked on the base wood that I put on the tray the box outside of my model where I placed the 14 dice.
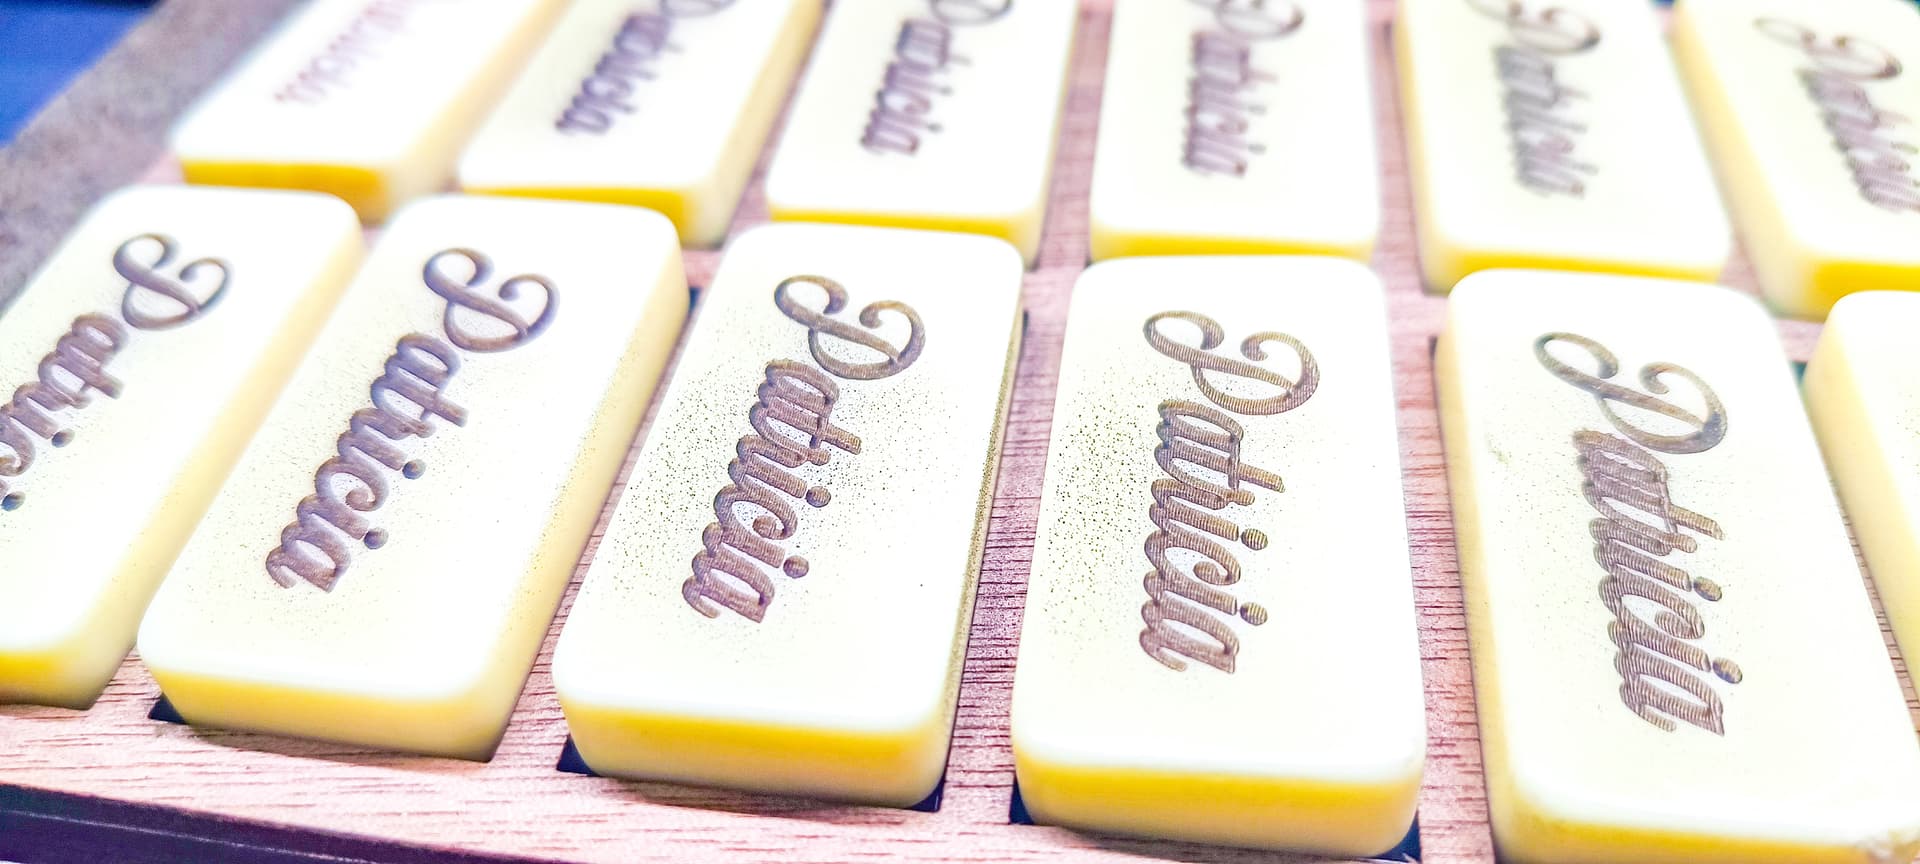
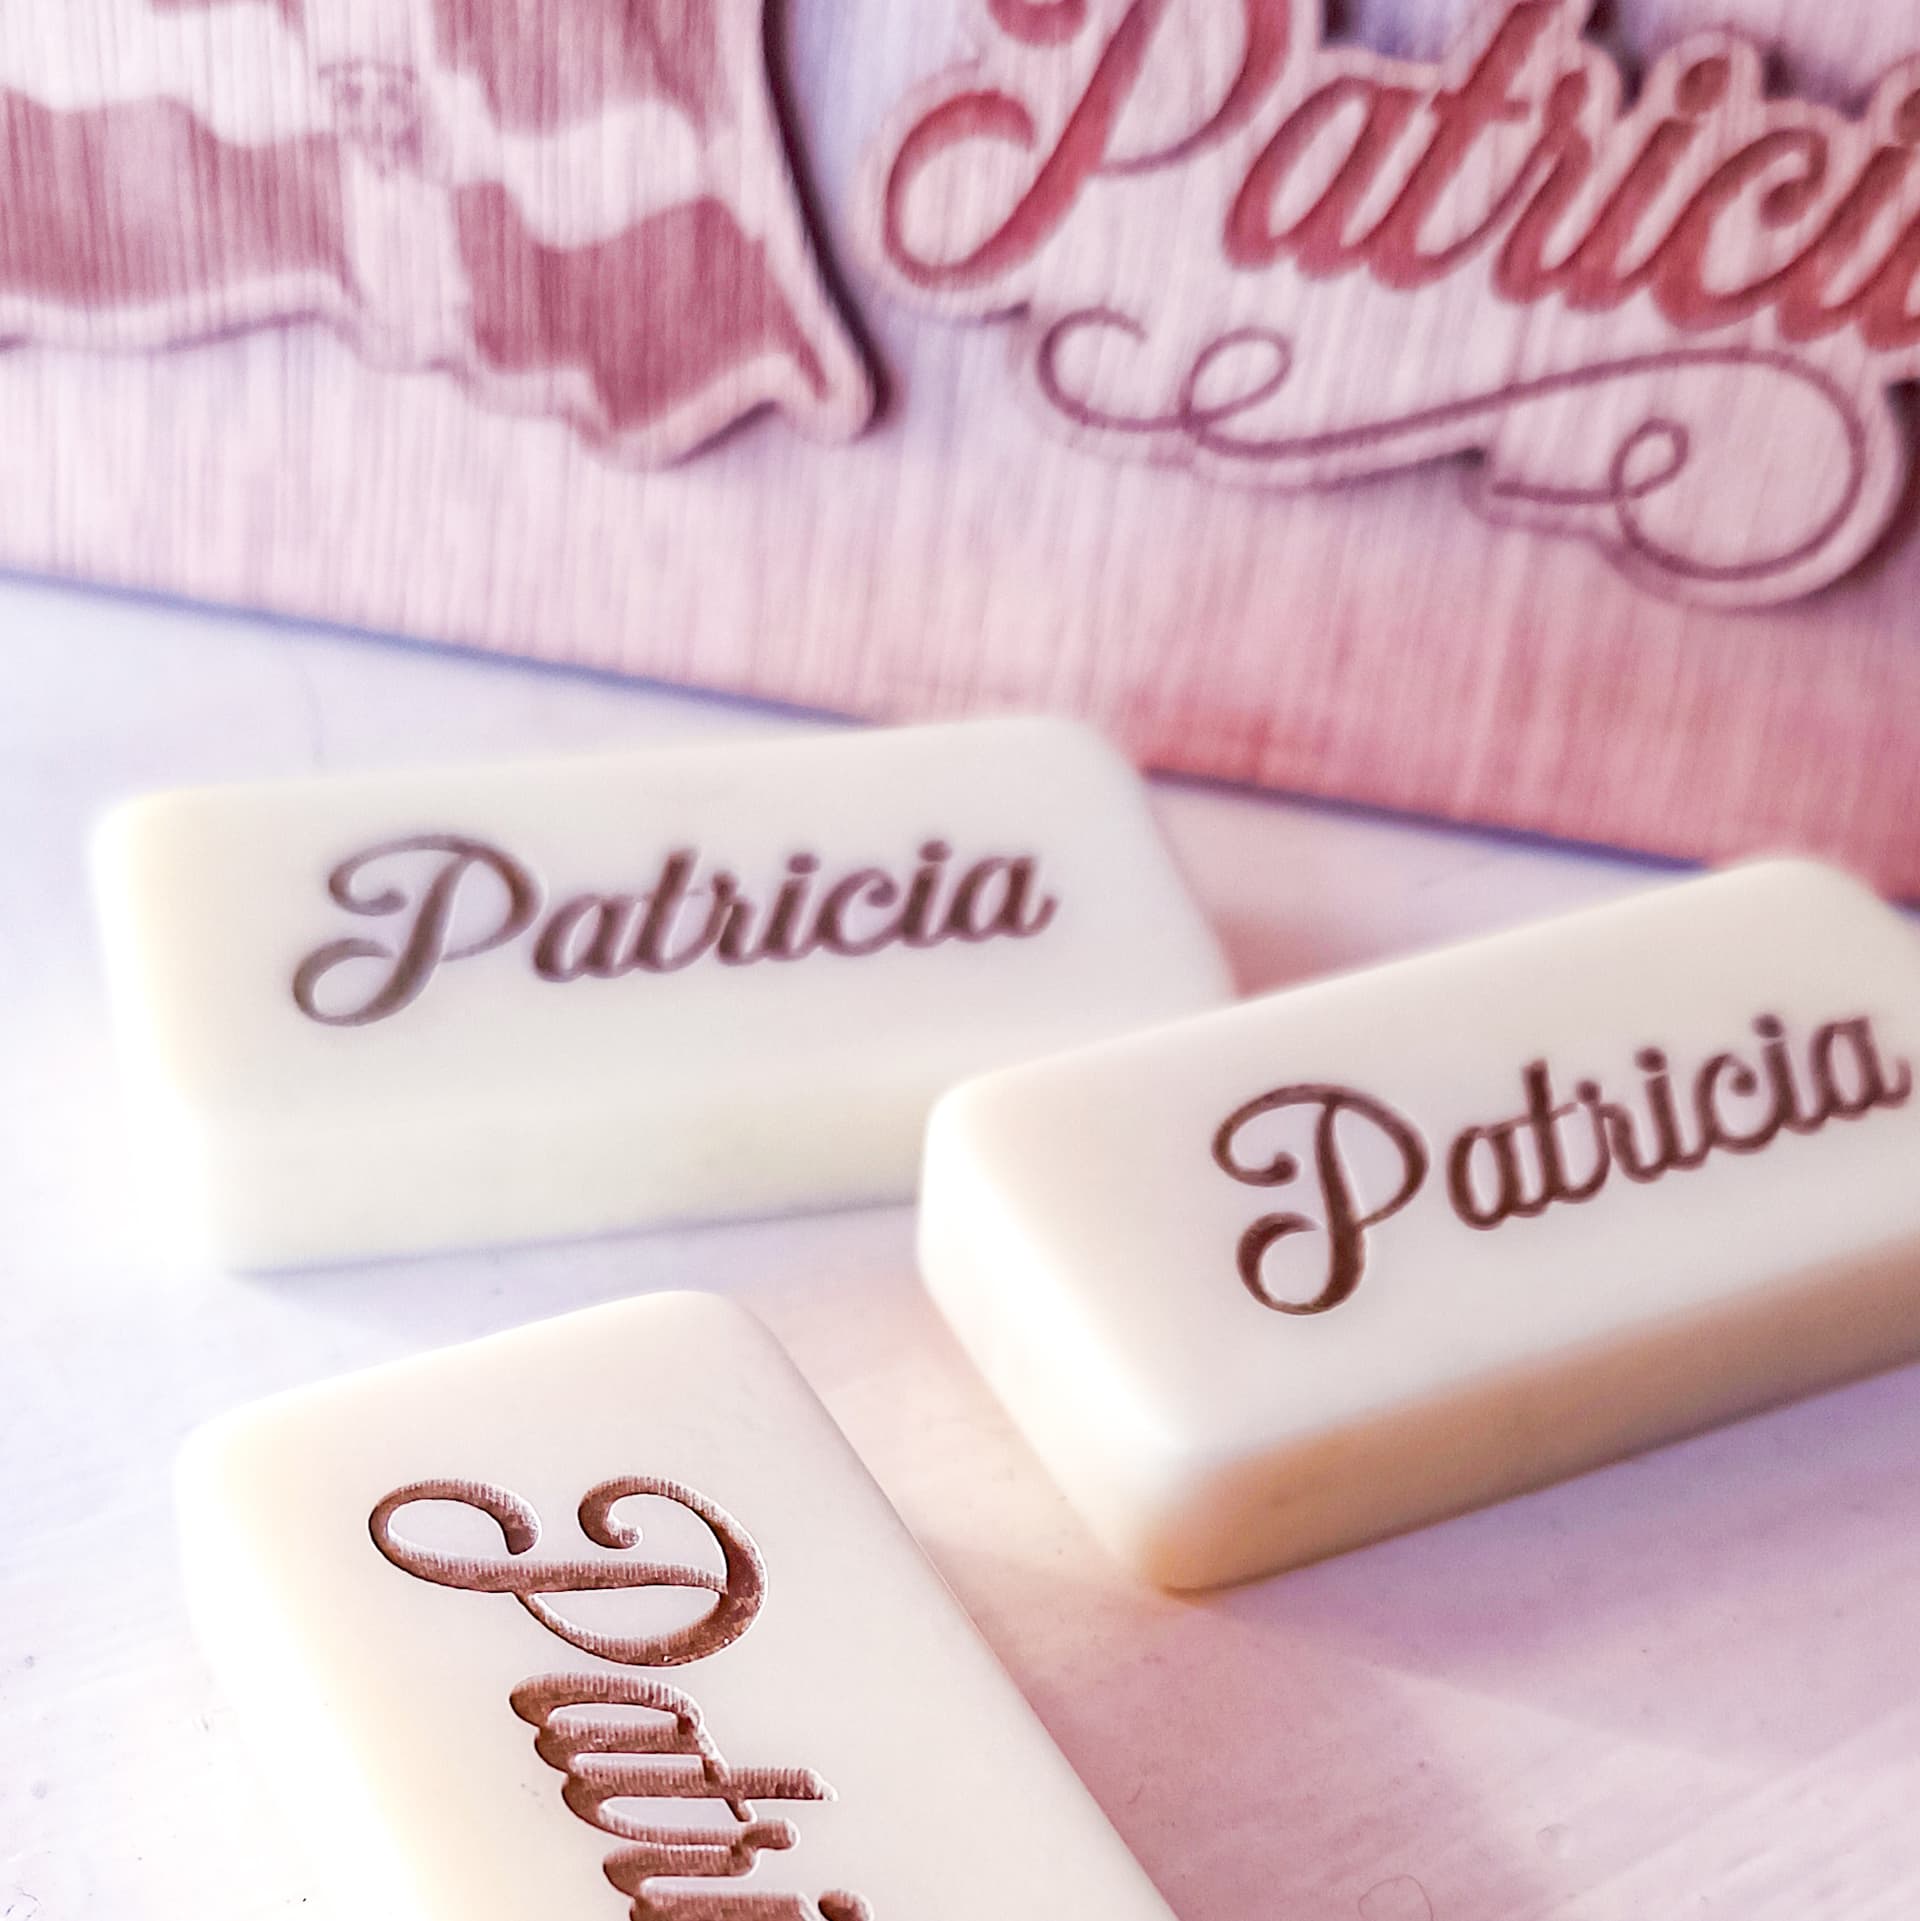
I loved the result that was achieved with the dies, and I thought it would not work as it is a clear material, I had heard that lasers do not cut or engrave on white or clear materials and I thought that this would be the case but I saw that I was wrong iEngrabe is more powerful.
One problem I did have is that I tried to follow a tutorial to make the groove black, in the tutorial you had to put a paper transfer on the dominoes and cover them with everything and the base, then engrave them and as the laser would pass through the transfer and the domino the groove would be ready for spray painting, I did it but it did not work very well, the laser did not engrave very well through the two surfaces, and the engraving was very shallow and the stippling ruined my work in that part after applying it and letting it dry, but I was able to solve it by placing the dominos in the model again and engraving them again without anything but this time with the laser closer to the dominos, closer than allowed according to the bar that we lowered to distance the laser from the material, so I used 1200 speed, 100 power and one pass in raster or vertical and horizontal that would be two passes for each die.
[
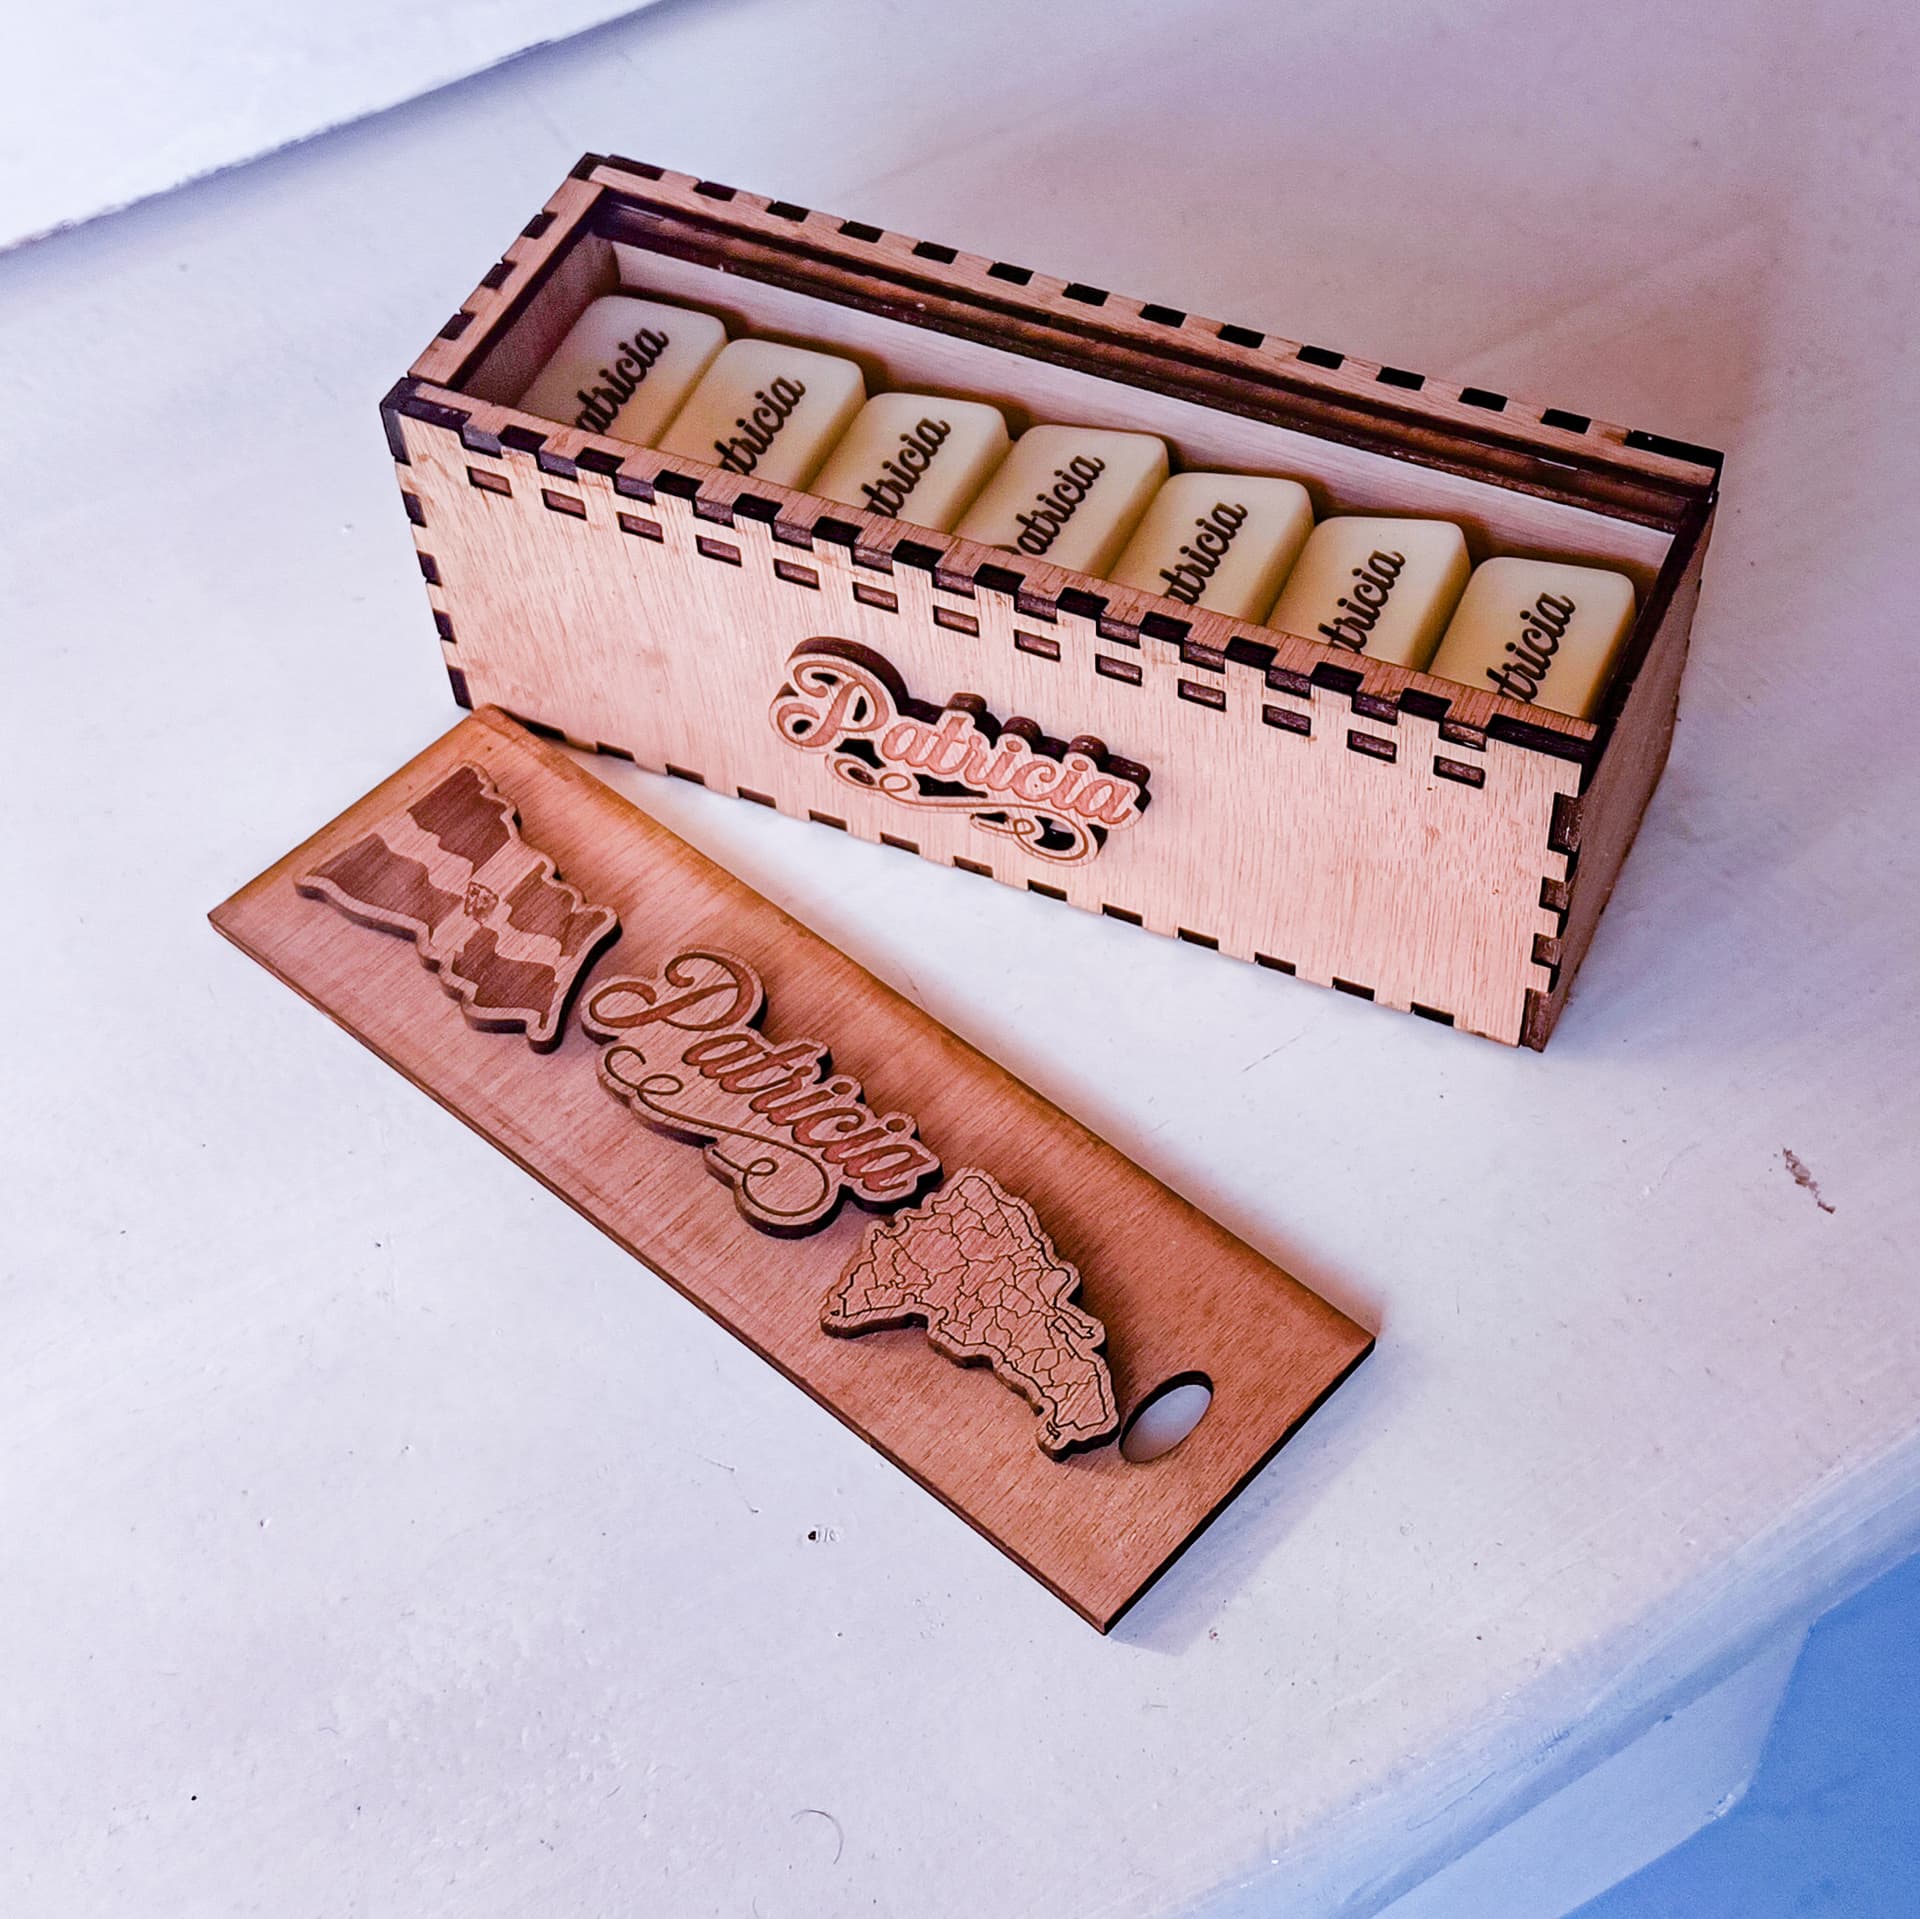
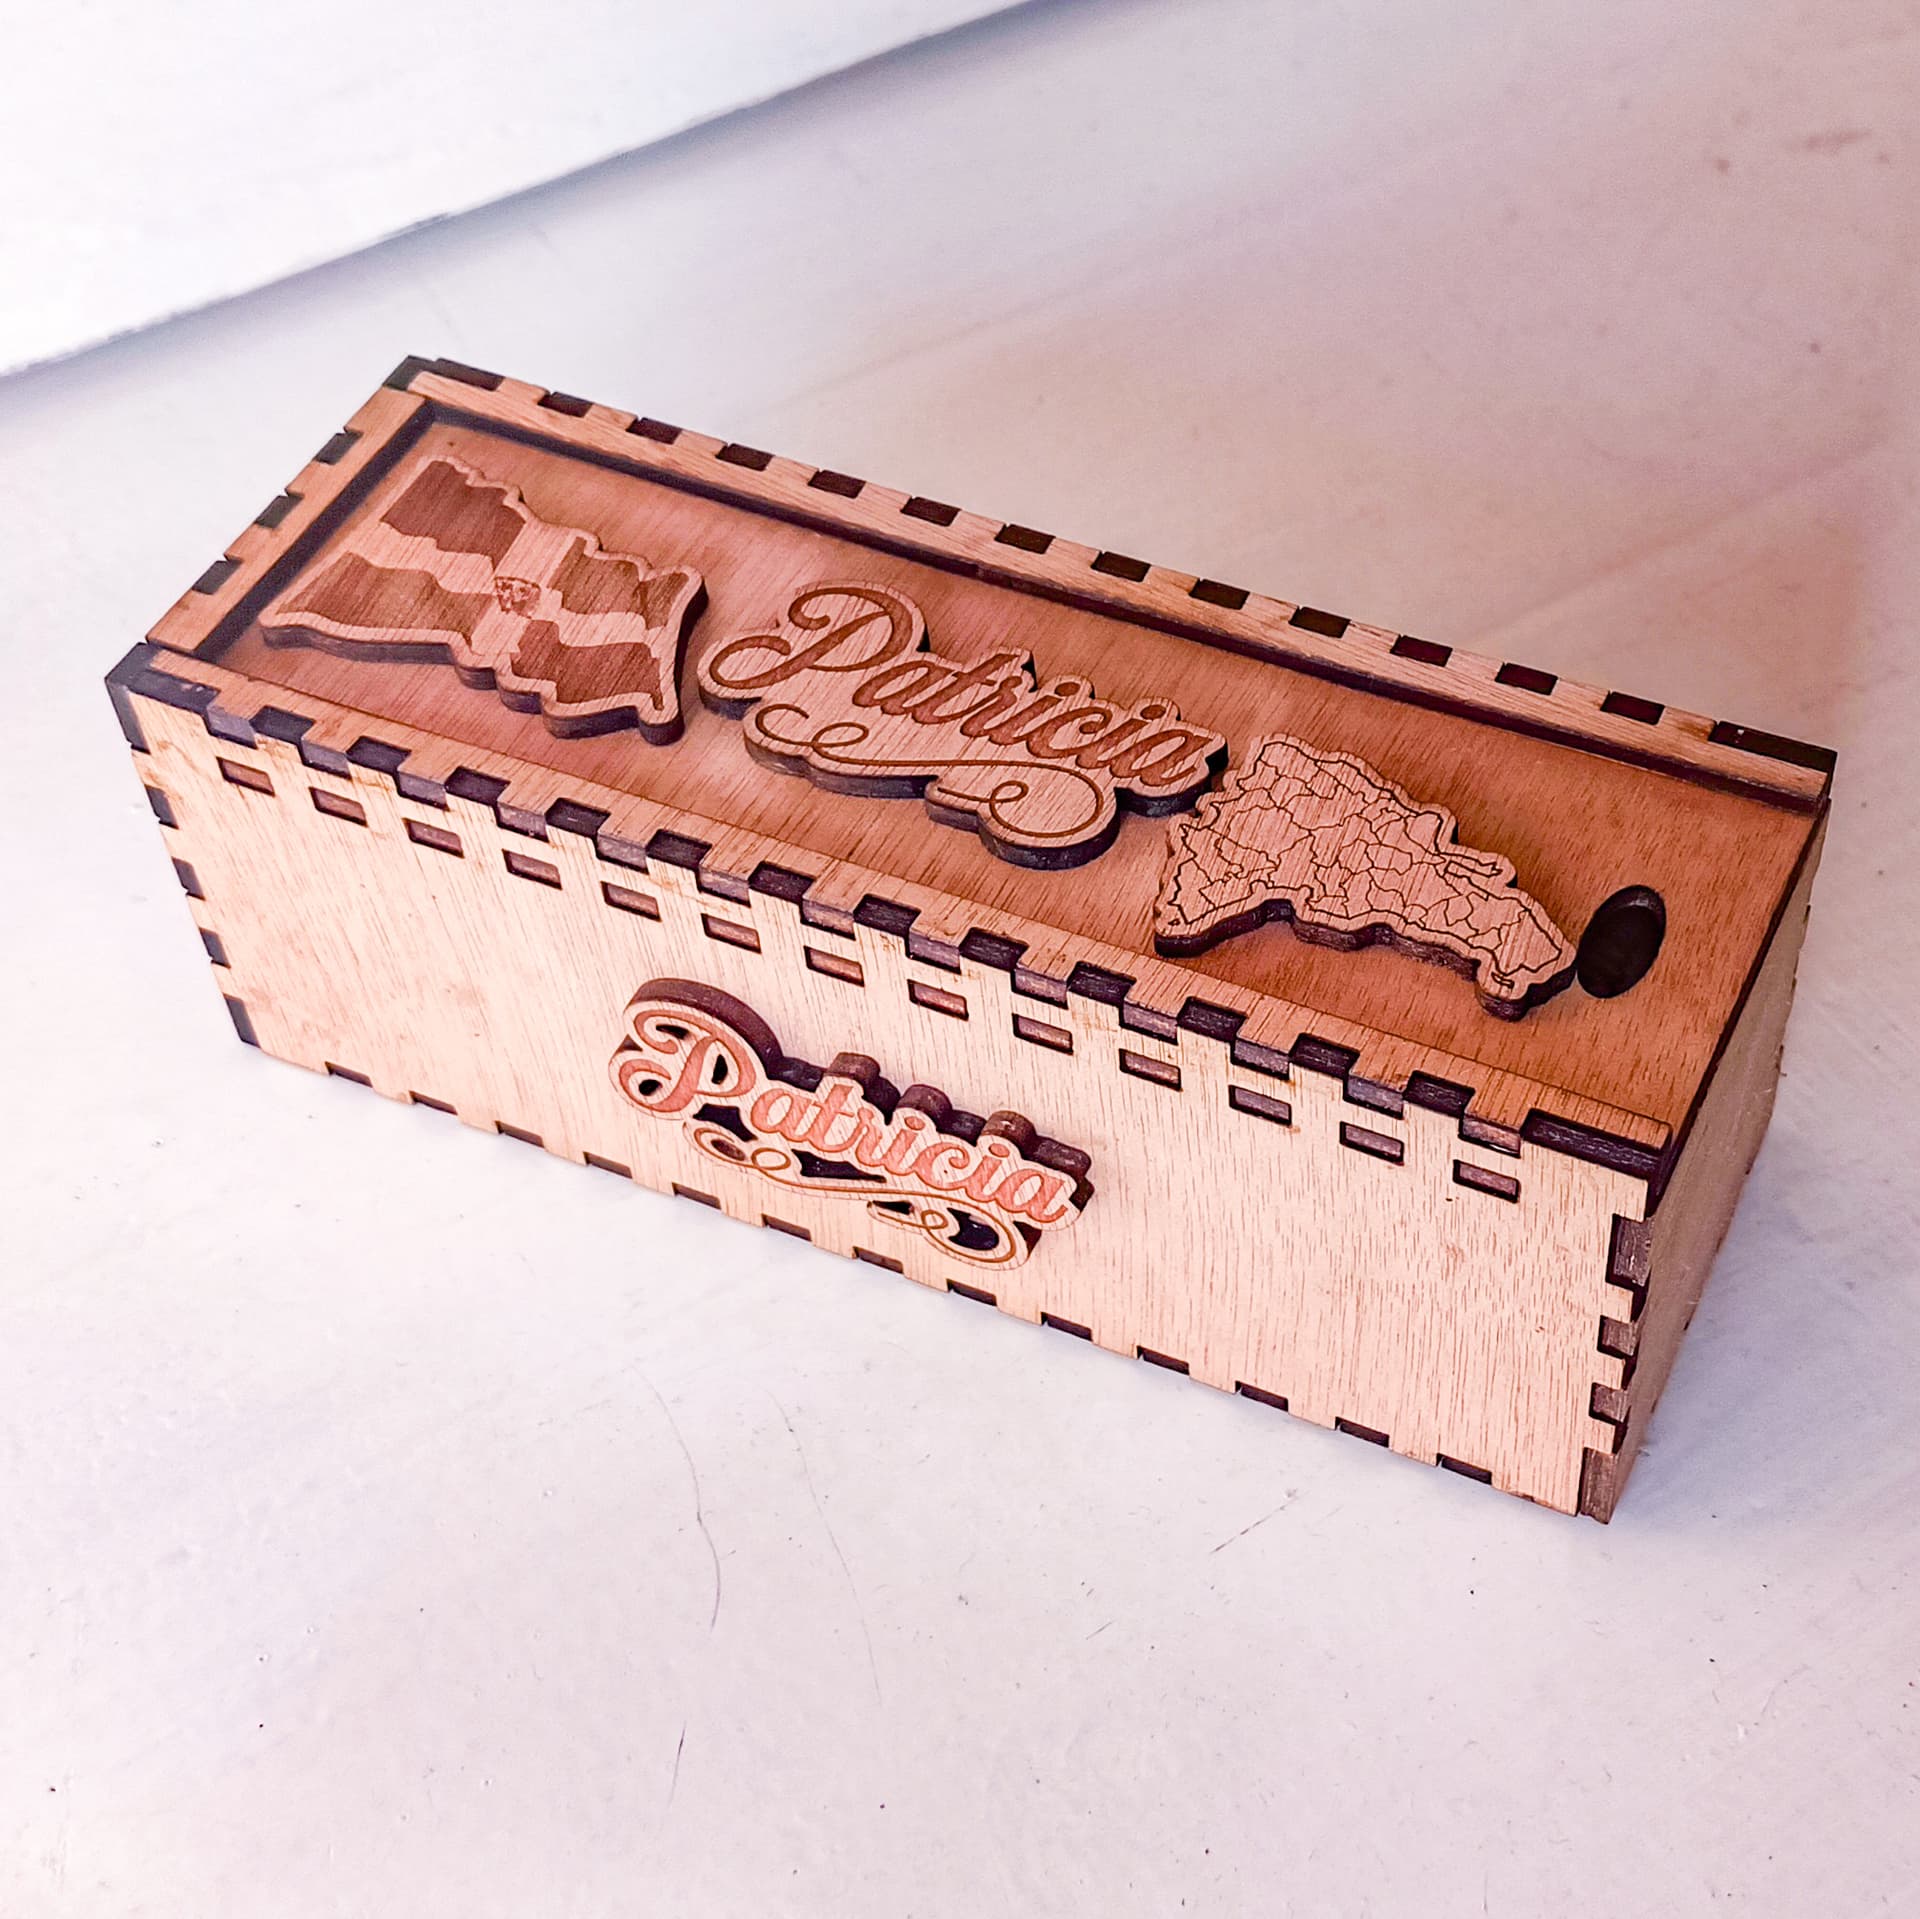
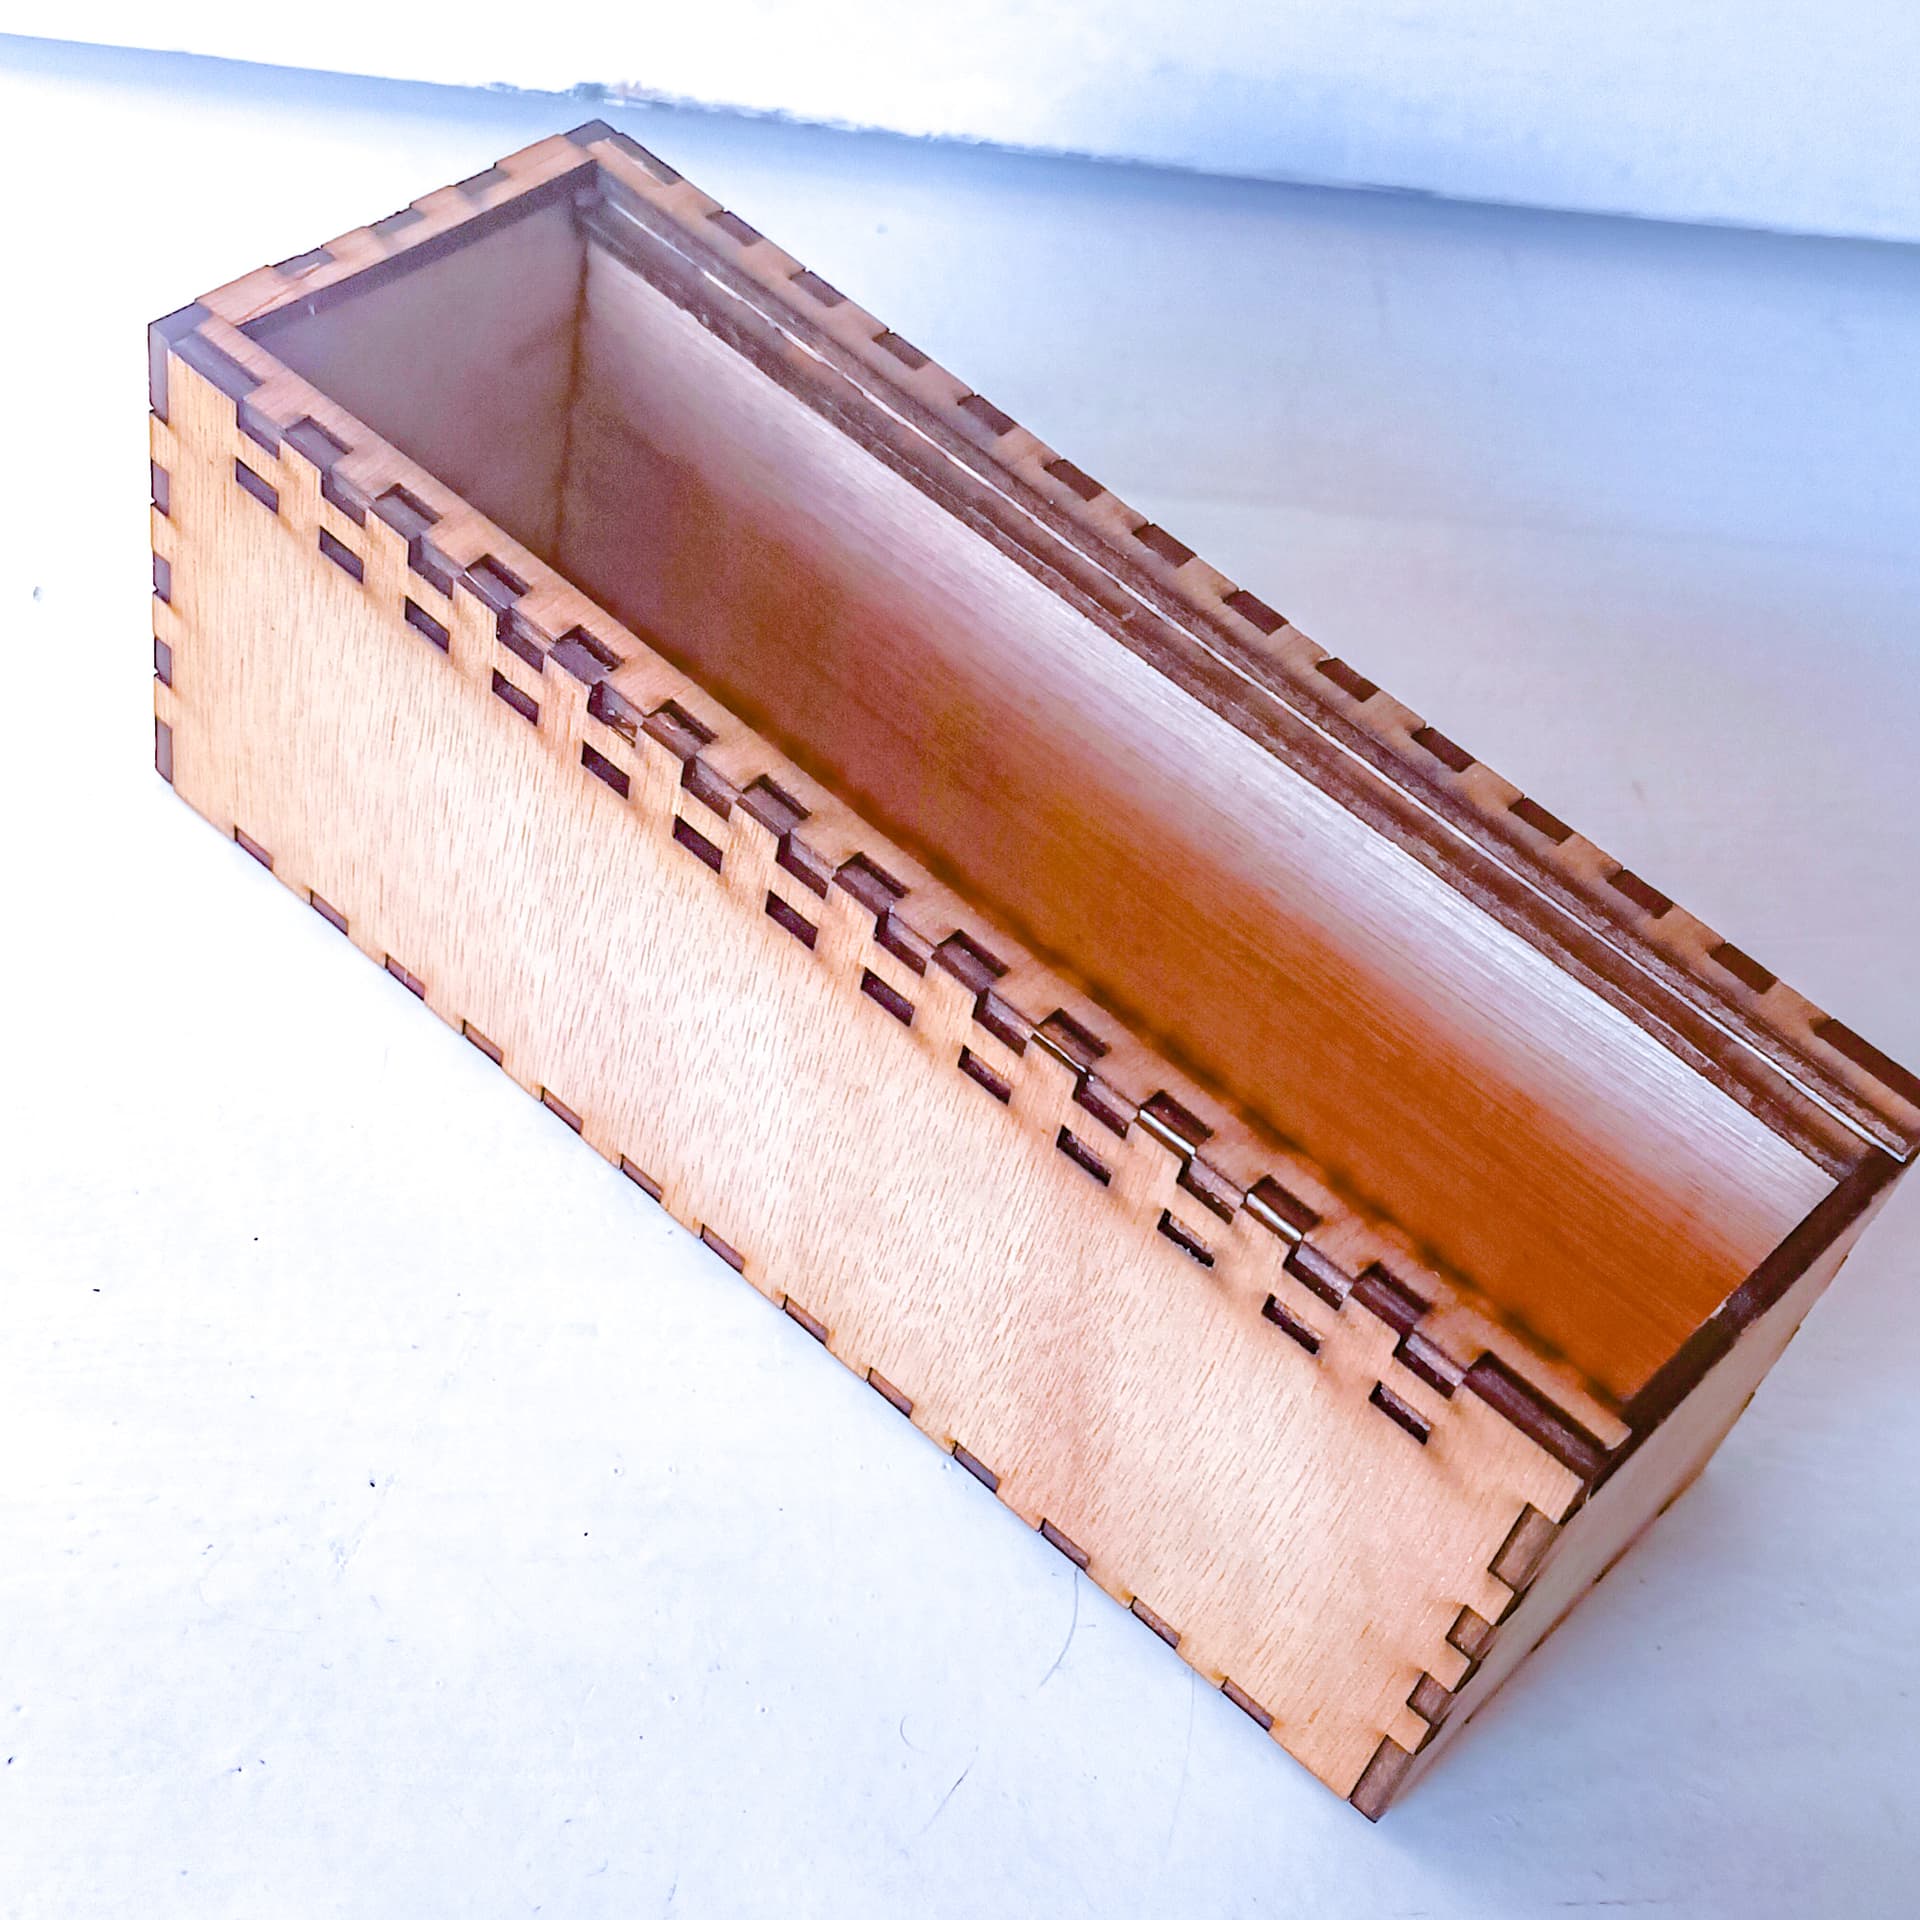
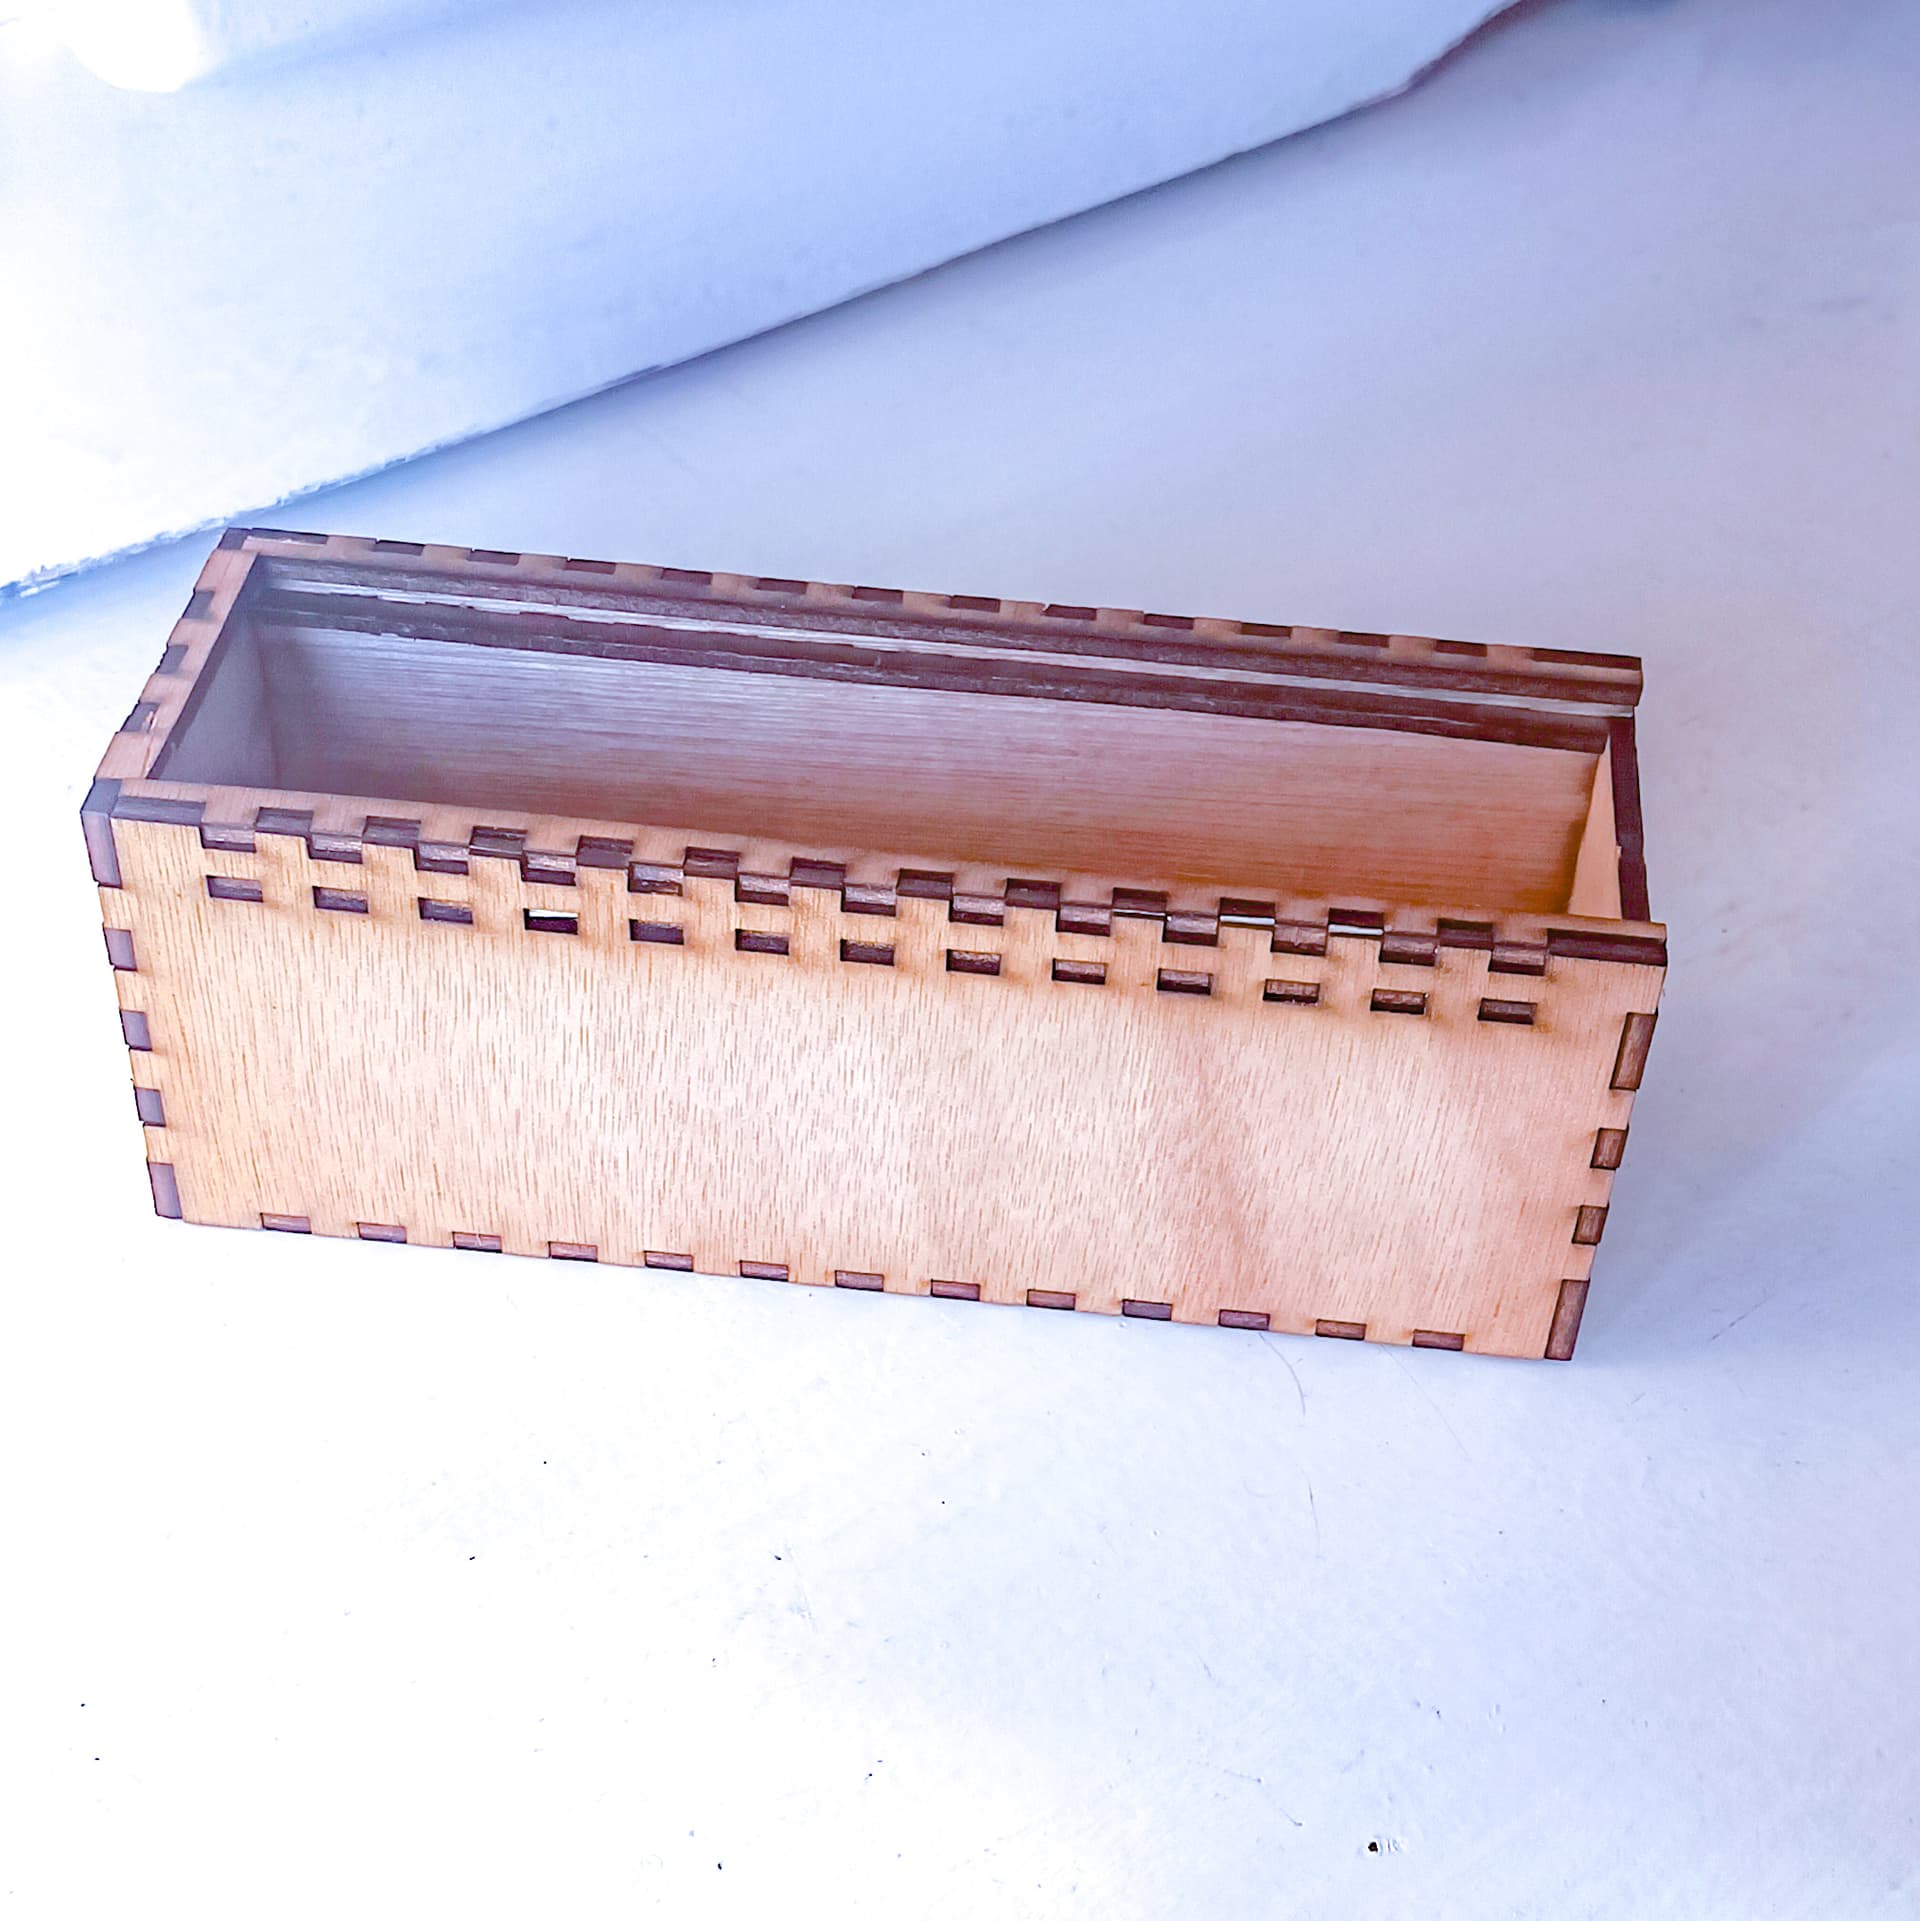
For the box use the Box page
here I had some frustrations that do not have to do with the engraving or cutting, but with the way I set the box, as the page lets you change parameters of height, width, thickness of the gears etc, and my problem is that being a box that widens without glue the pieces were very tight, and gave me a little work to fit them, I solved this by taking my design to Corel Draw and giving a minimum displacement to the holes where the gears fit and so I could get the perfect gear get.
After I was able to assemble my box I proceeded to engrave and cut the pieces that I placed on the lid, for these I used a speed of 2500 and a power of 20% for the engraving and a speed of 400 and power of 85% for the cutting of the three pieces that I placed on the box and the one I placed on the front with the name.
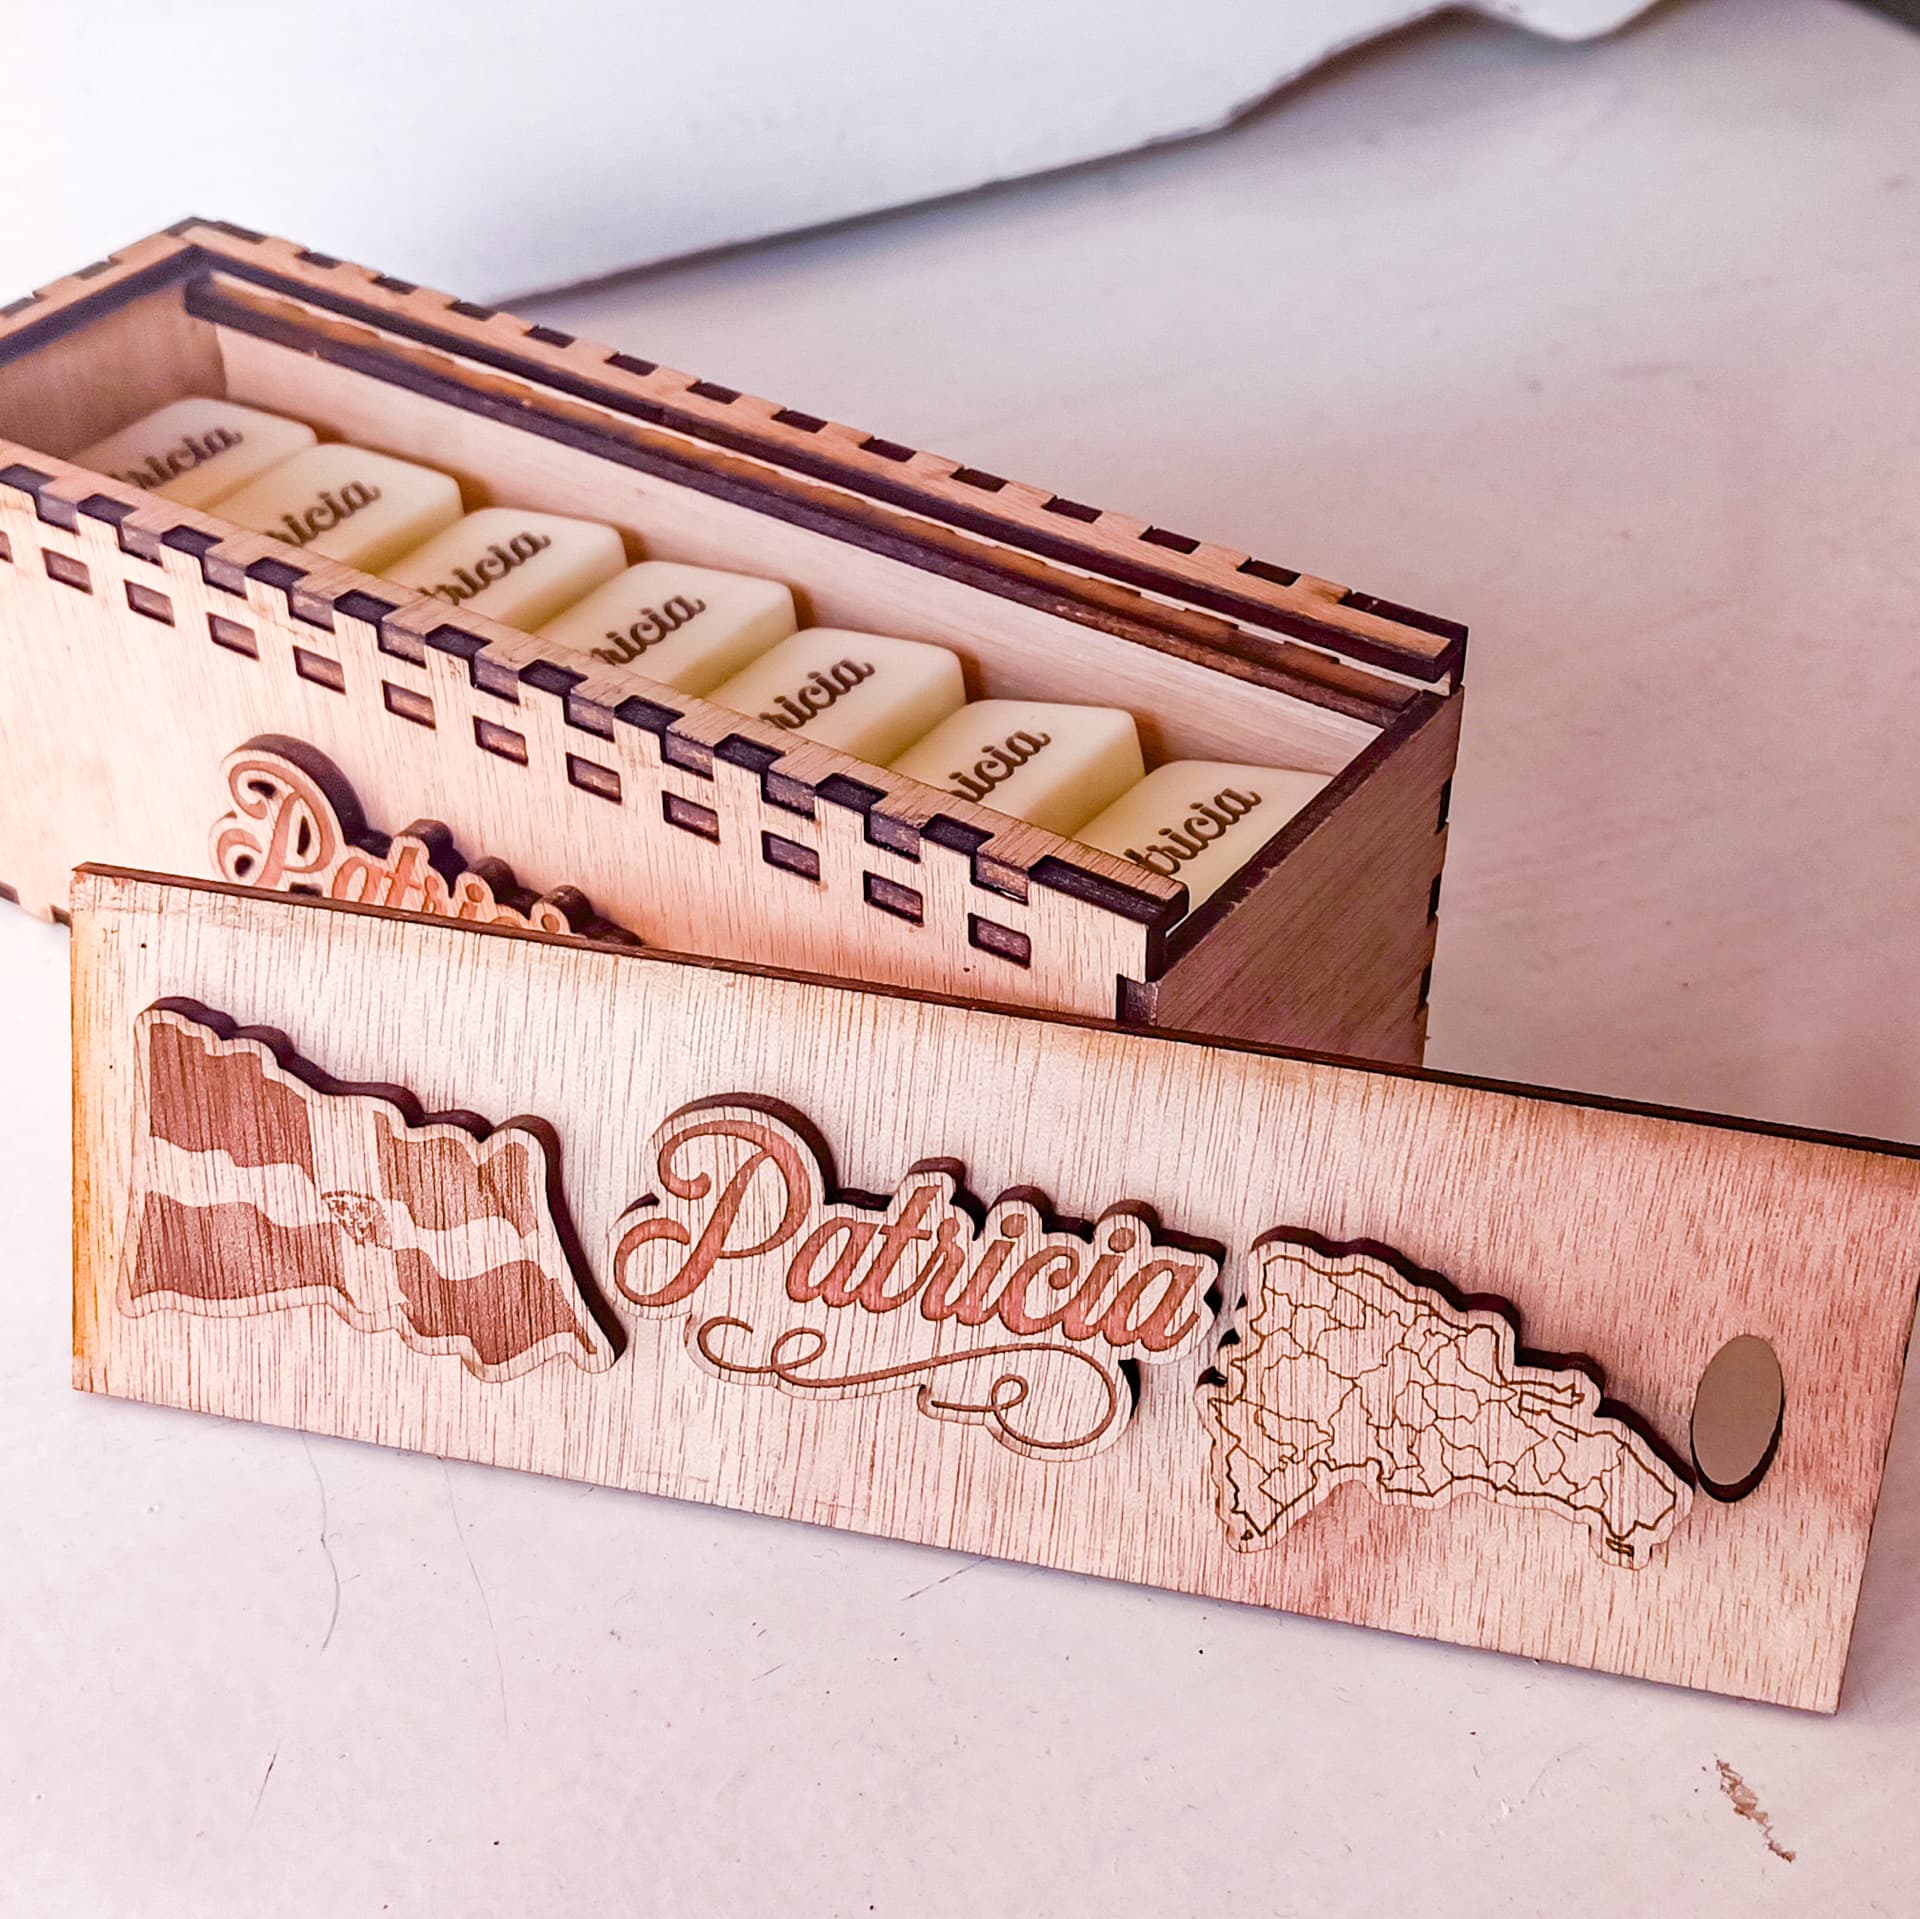
Glue the pieces together with quick-drying glue for strength and durability in the box.
This was my final result, I hope you like it.