Hello crafties, this is Kimberly with SkyiCreations
Now that we have the iEngrave™ setup and ready, let’s put it into action. I have used the LOKLiK App on my phone to connect the software and machine to the laser. This process was swift which allowed me to start on the projects quickly.
Ease of Use
Time is precious, especially as a small business owner and mommy. Thankfully the iEngrave™ allowed for me to setup and begin projects with ease.
-
Software setup: I opted to use the LOKLiK application to operate the iEngrave™ as I have been using their IdeaStudio software on my computer to create designs. I appreciate that I am able to use the IdeaStudio software on my computer to upload purchased SVG designs and create my own designs using their library. Once the design is finalized, I save the project on My Zone and just like that, the design is ready to be sent to the laser.
-
Machine setup: In order to connect the software to the machine, you will follow the prompts on the LOKLiK application to connect a new device. Tip: as part of the setup process, you will need to turn on the laser. Make sure that the emergency stop button is not pressed and that the mini-SD card is inserted into the front of the laser.
Engraving/Cutting Performance
My first impression for engraving lines/fills was one of surprise, the laser was able to complete those tasks quickly and with minimal burn marks. The iEngrave™ was able to cut the 3mm basswood I had in stock, but it did have some burn marks along the top. I used a honeycomb base and that improved the burn marks on the bottom of the wood. I hope to continue to adjust the settings to have a cleaner cut on 3mm wood. Possible solutions would include using an air-assist or masking to reduce the burn marks. As soon as I am able to have cleaner cuts, I will post the settings and photos.
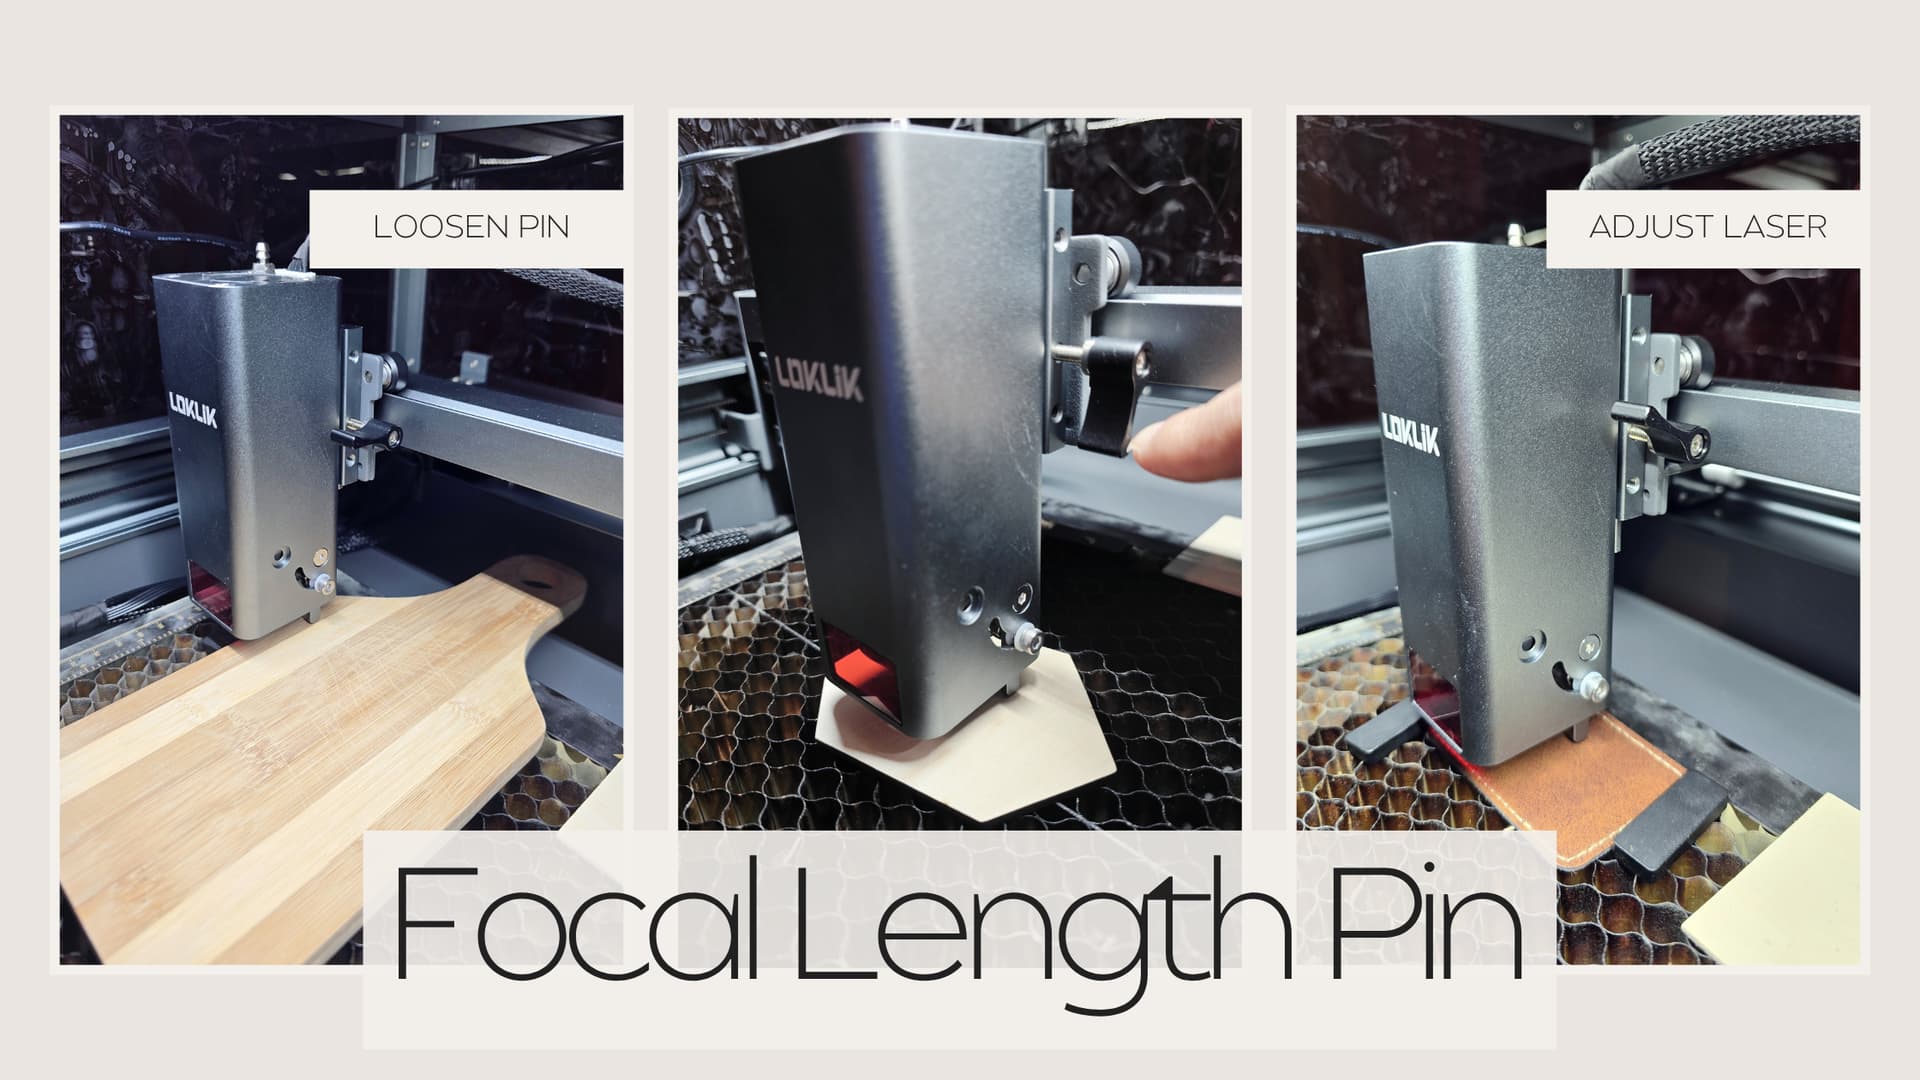
- Focal length setting pin: To ensure that your laser is properly engraving and cutting, make sure that you check the focal length setting pin before each project. You will adjust the laser head accordingly. As some material is not tall enough to reach the setting pin, you may need to add height by placing the material on a riser or extra material to reach the height. During my first attempt at engraving, I had not completed this step, and the image engraved was not clear. After completing this step, the engraving was clear and crisp.
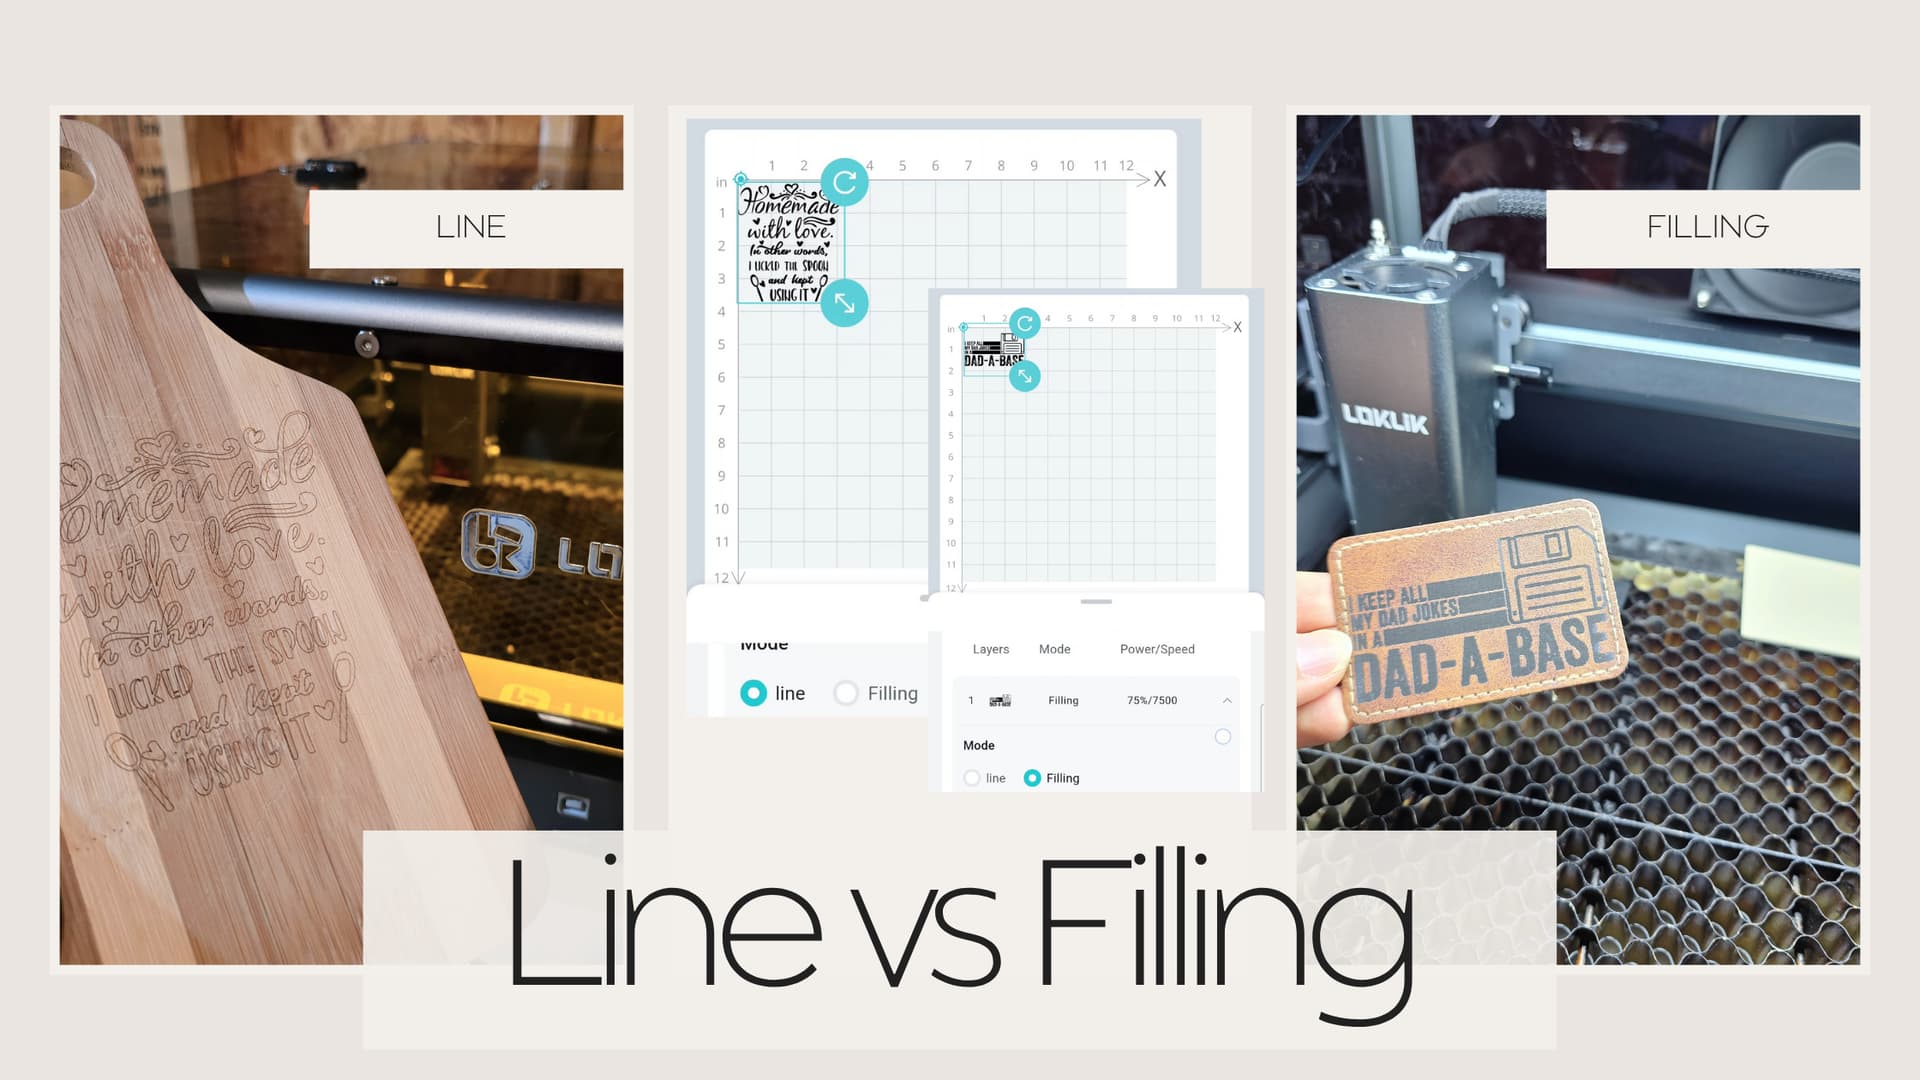
- Engraving line vs filling: If you are a new user to lasers, keep in mind that you will have the option of either selecting line or filling for an engraving task. Think about it like this, if you are selecting the “line” option, the laser will be scoring the design on your material along the lines. If you select the “filling” option, the laser will be engraving the inside of the lines. Depending on your design, you may want to select some of the components to line and others to fill. I have found that small text is best set as line to minimize any burn marks that may happen compared to selecting fill. The fill option is great for a component that is a focal point. Keep in mind that designs that are send to line engrave would take less time than fill engrave.
- Suggested Settings: Using the LOKLiK app, you are given suggested settings for engraving and cutting depending on the material selected. Ensure that you select the correct material from the drop down menu. As materials vary and not all material is the same, you may have to tweak the settings to best suite your needs. I found that the engraving settings worked well for me but I am tweaking the cut settings to minimize the burn marks on my projects. Certain wood may have pockets of glue within the wood that would affect the cut and will need adjustments.
- Framing feature: In order to spare you from ruined material, make sure you FRAME. It is better to frame multiple times than having to redo the project entirely. Using the LOKLiK app, you can adjust the laser head after framing to ensure the design is within the material or you can open the cover and adjust the material.
Safety & Noise
As a mommy of four, safety is a top priority for me. I am glad to say that the iEngrave™ was designed with safety in mind.

- Smoke: During the testing process, I observed that the smoke from the laser cutting the wood was contained within the laser box cover. This is especially important to ensure that the smoke/fumes do not get released into the room.
- Built-in fan with exhaust hose: The iEngrave™ has a built-in fan that would extract the smoke/fumes from the laser while it was in operation. This feature allows you to place the exhaust hose out a window or wall to allow the smoke/fumes to be released outside. In my experience, I attached the exhaust hose to an air filter to further protect my work area.
- Cover protection: The cover on the laser unit is especially well built and designed. It helped protect me from direct sight of the laser while it is in use as well as keeping any smoke/fumes inside the unit instead of the work area.
- Power switch: The iEngrave™ has a double safety feature on powering the laser. A key is required to be turned in addition to the on/off switch. This is a helpful feature as it is an additional safety step to ensure the laser is not accidently turn on.
- Noise: I am pleased to say that the fan inside of the laser unit is very quiet compared to other lasers I have used before.
Project Examples
The possibilities are endless with the iEngrave™ and I was excited to be able to create these beautiful projects. As with new materials and crafts, there are some testing and adjustments needed but thankfully, I was able find the right settings for me and hope they are helpful to you.
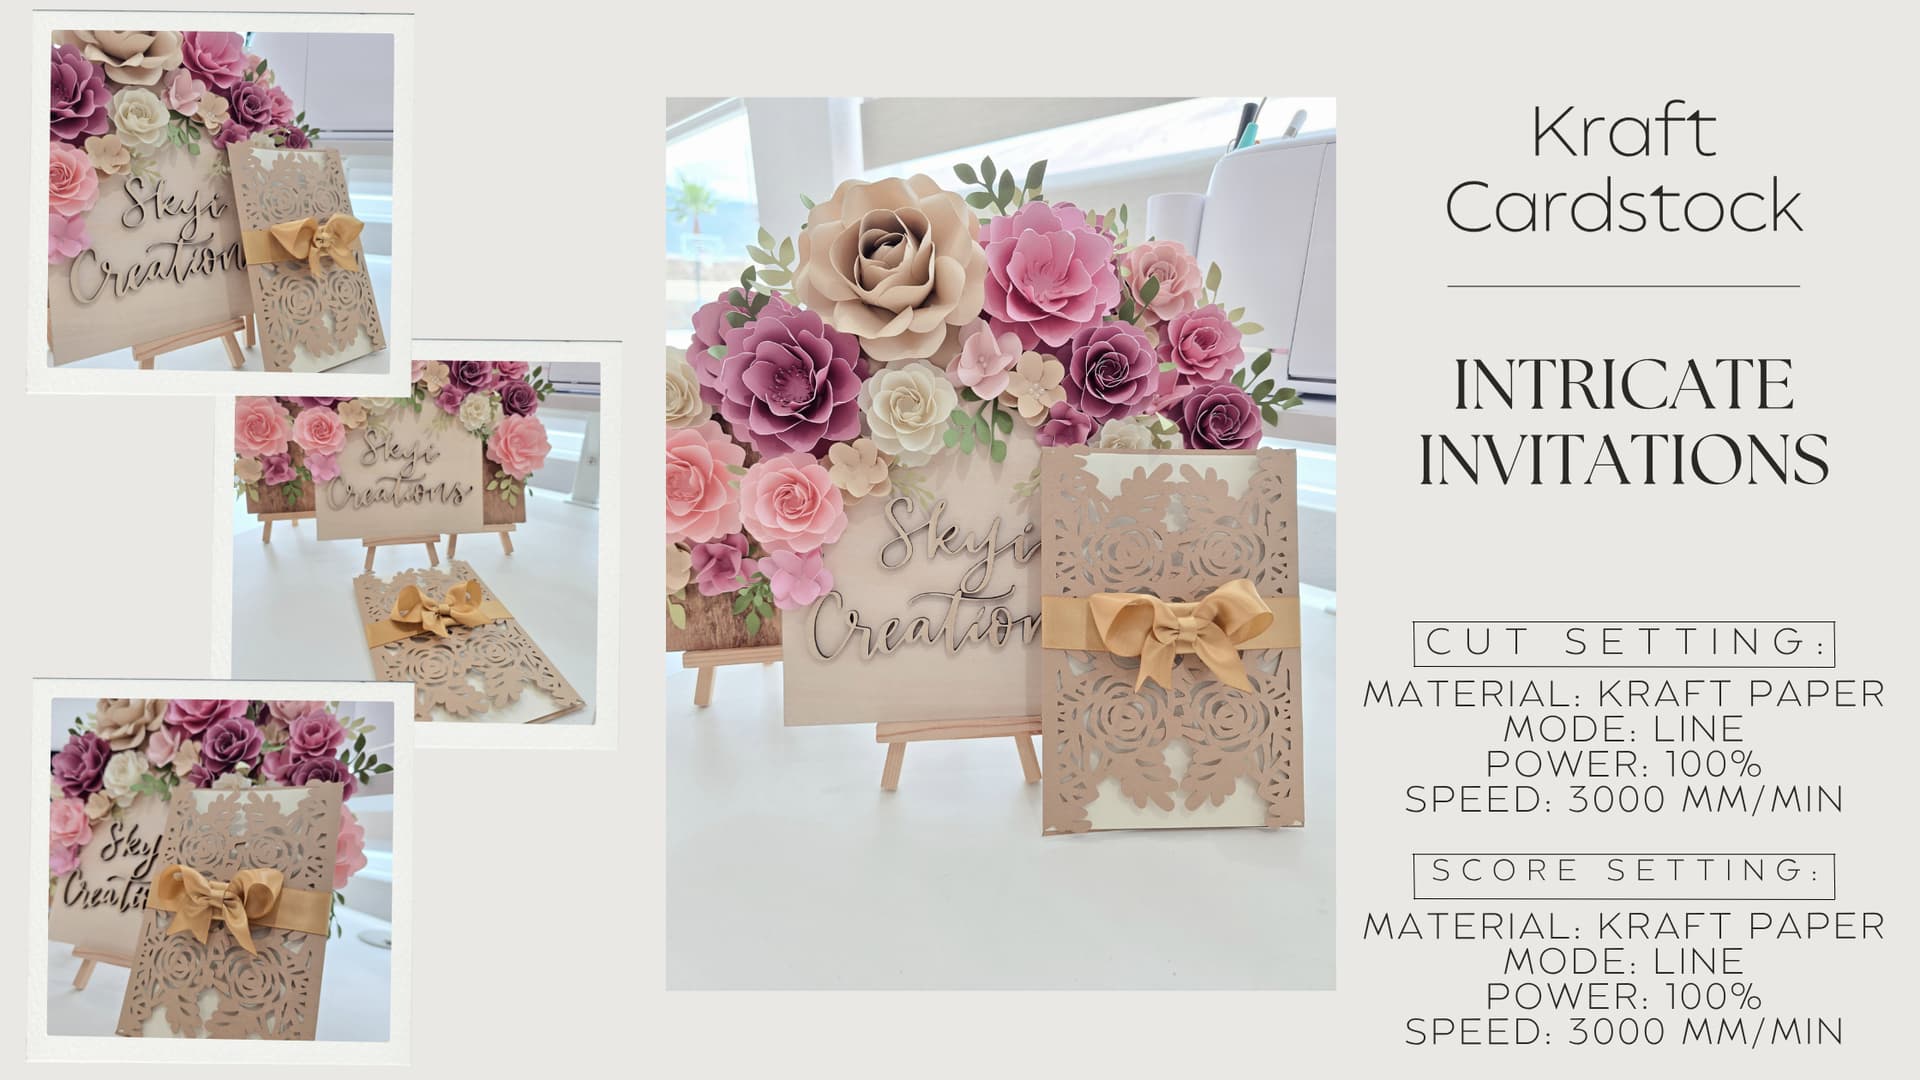
- Intricate Invitations: Made with kraft cardstock and the perfect use of a laser. The iEngrave™ was able to cut the kraft cardstock with such ease and clean cuts.
- Branding merchandise: Needing a way to brand your business, these wooden keychains are a great idea. I simply uploaded my logo to the LOKLiK IdeaStudio and the software feature converted into line art. A few minutes later, the logo was the focal point on the keychain. As you see below, you can adjust the settings depending on your logo details and preference, I preferred a darker presentation and increased the power setting.

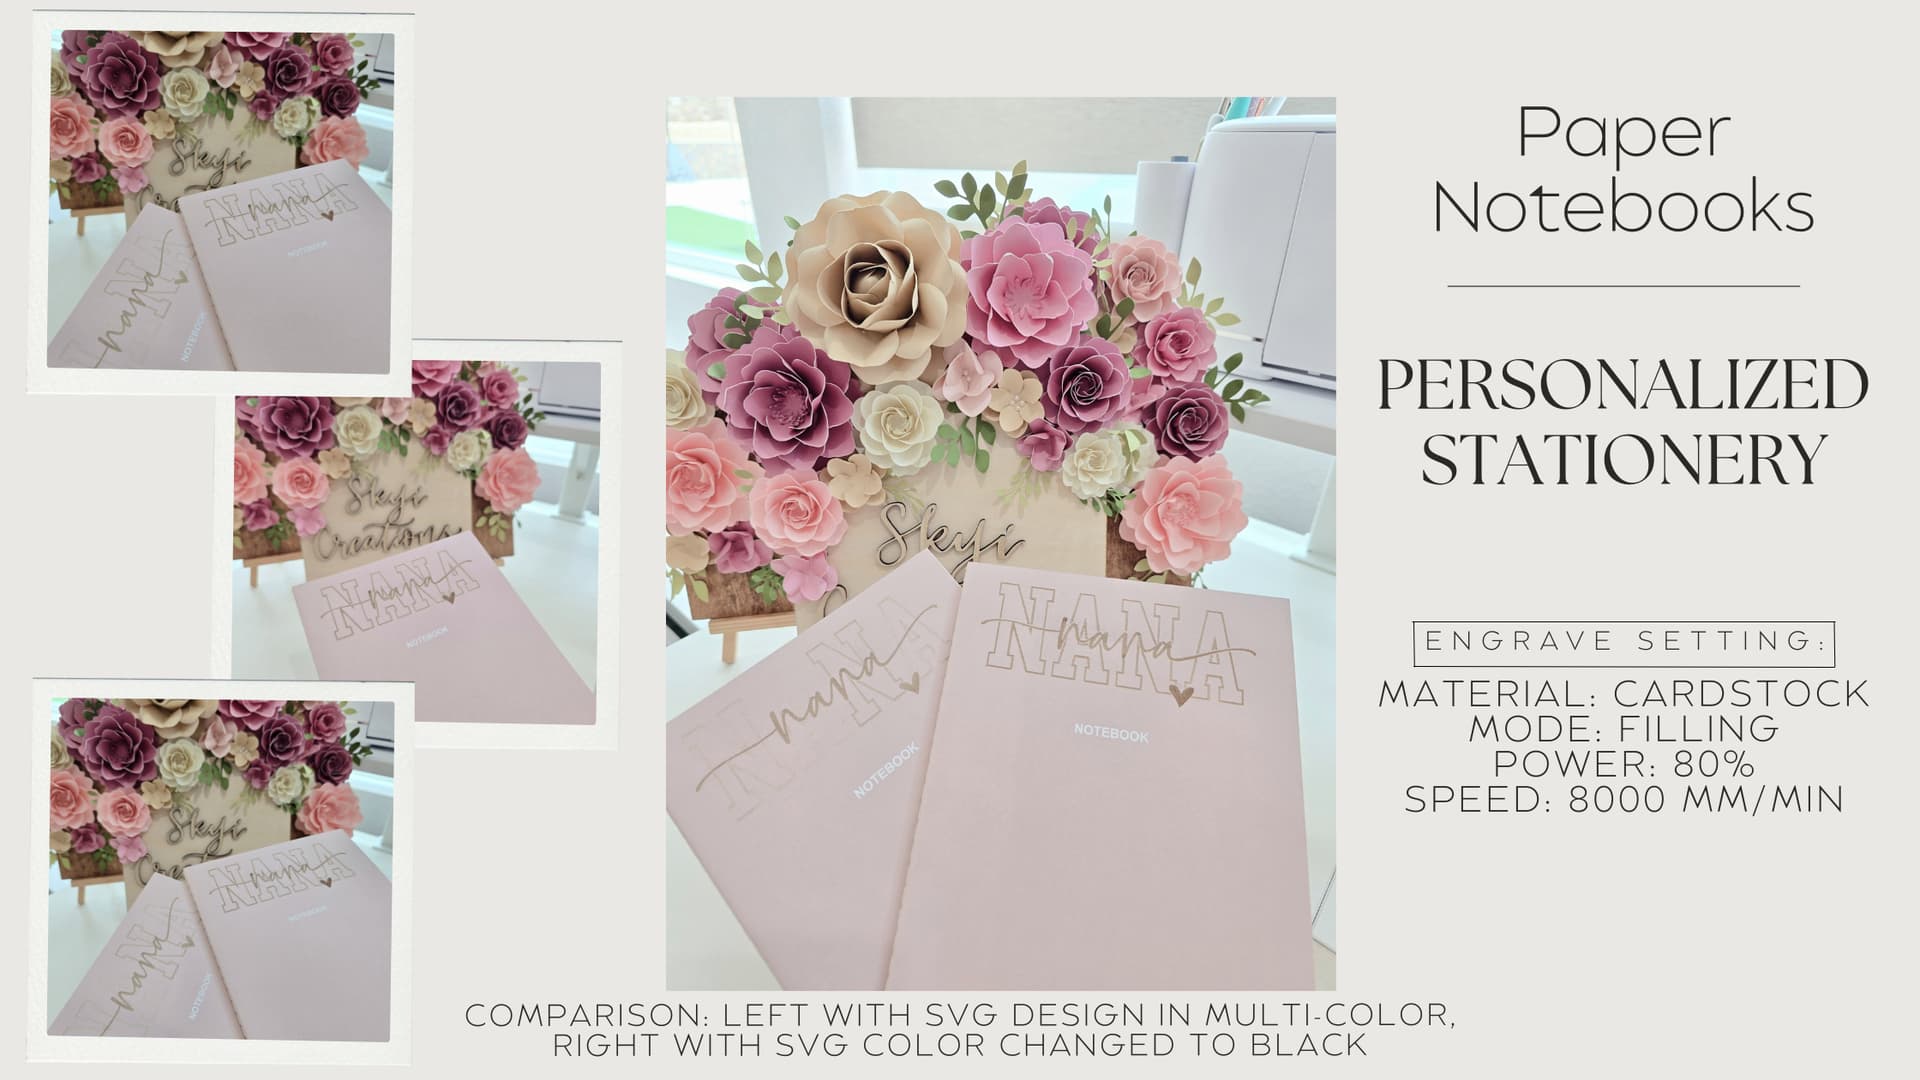
- Personalized Stationery: Paper notebooks can be taken to another level by personalizing them or adding a design to them. These are perfect for teacher gifts, family members or party favors. As I was working with this project, I noticed that the SVG color affected the engraving of the project. The notebook with the lighter design was in a variety of colors (which explains the variety of engraving) and the notebook with the consistent engraving had the SVG colored black.
- Home Decor and Gifts: I know I am not the only one who walks into a store and says, “this would be nice if I can personalize it”. Cutting boards are a great a medium to use for your home decor, home welcoming gift, or wedding gift. I uploaded this funny and cute design onto the LOKLiK app, resized the design and quickly had a one-of-a-kind cutting board. Please note: this cutting board has not been treated to be food-safe, it is used as home decor.

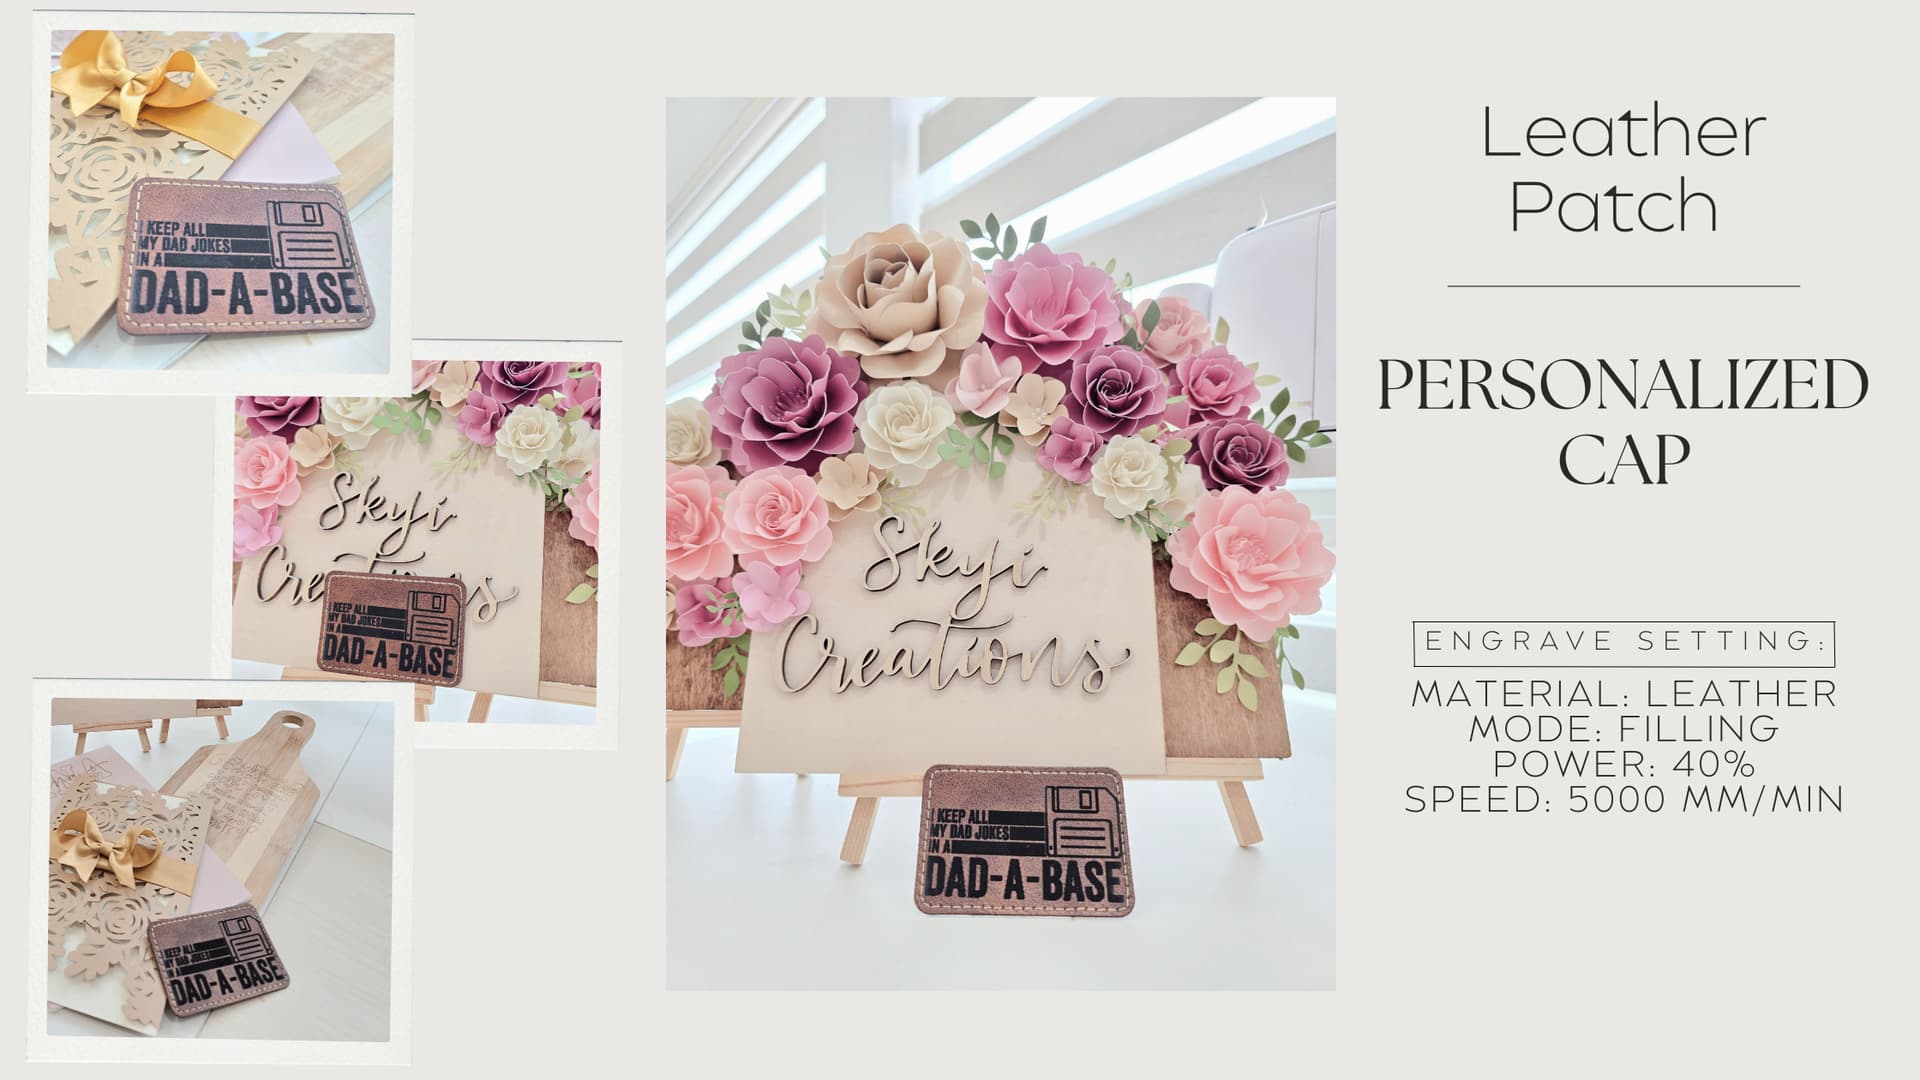
- Personalized Cap: Leather patches are a great option to add a design or message to caps, pants, anything that can have a patch pressed on it. Here is an example of the iEngrave™ ability to engrave filling which add a deeper and fuller design on your project.
Overall Thoughts
I am overall very happy with the iEngrave™ and impressed with the speed of the laser engraved projects I have made so far. As with most new machines and equipment, there is a learning curve. I am thankful that the iEngrave™ was designed in a way to keep the learning curve to a minimum. Now onto testing out more materials and projects.
