Hi @lora_rowe and Beautiful People of this community! I would be happy to help you on how you rotate your design for your Phone Case Heat press.
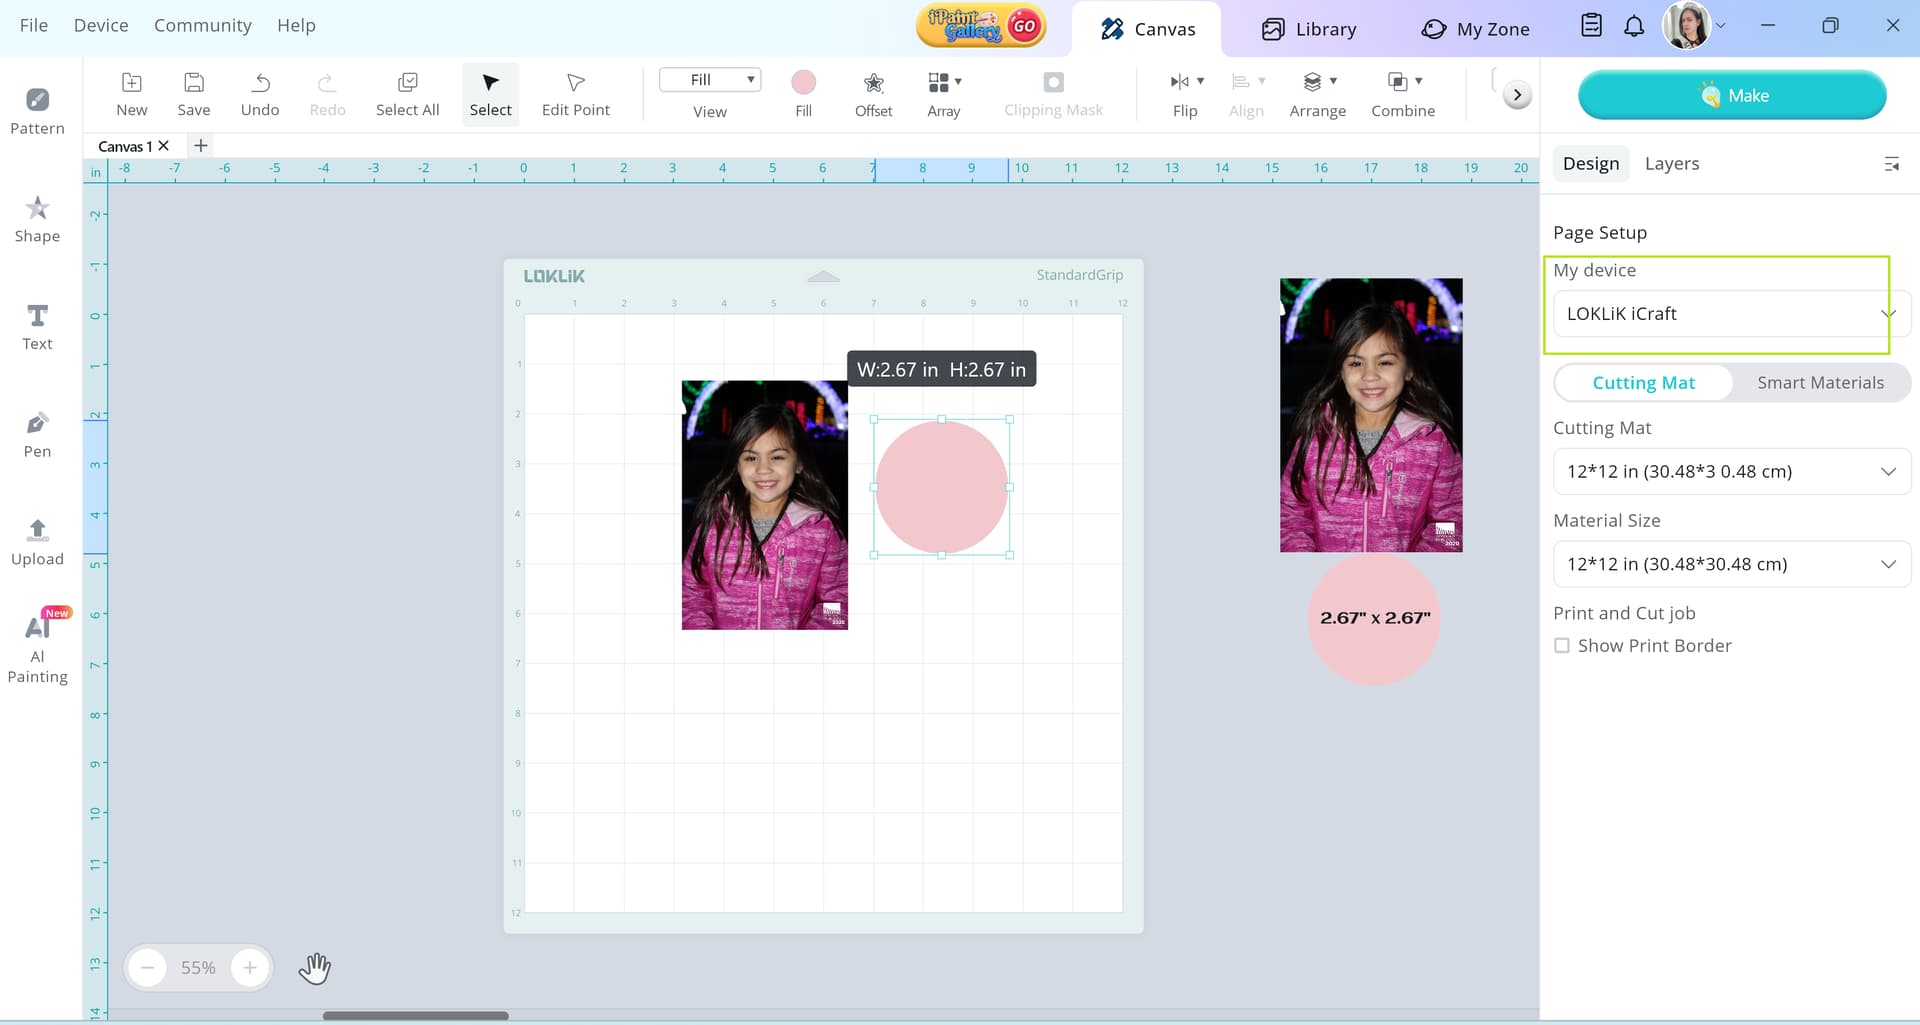
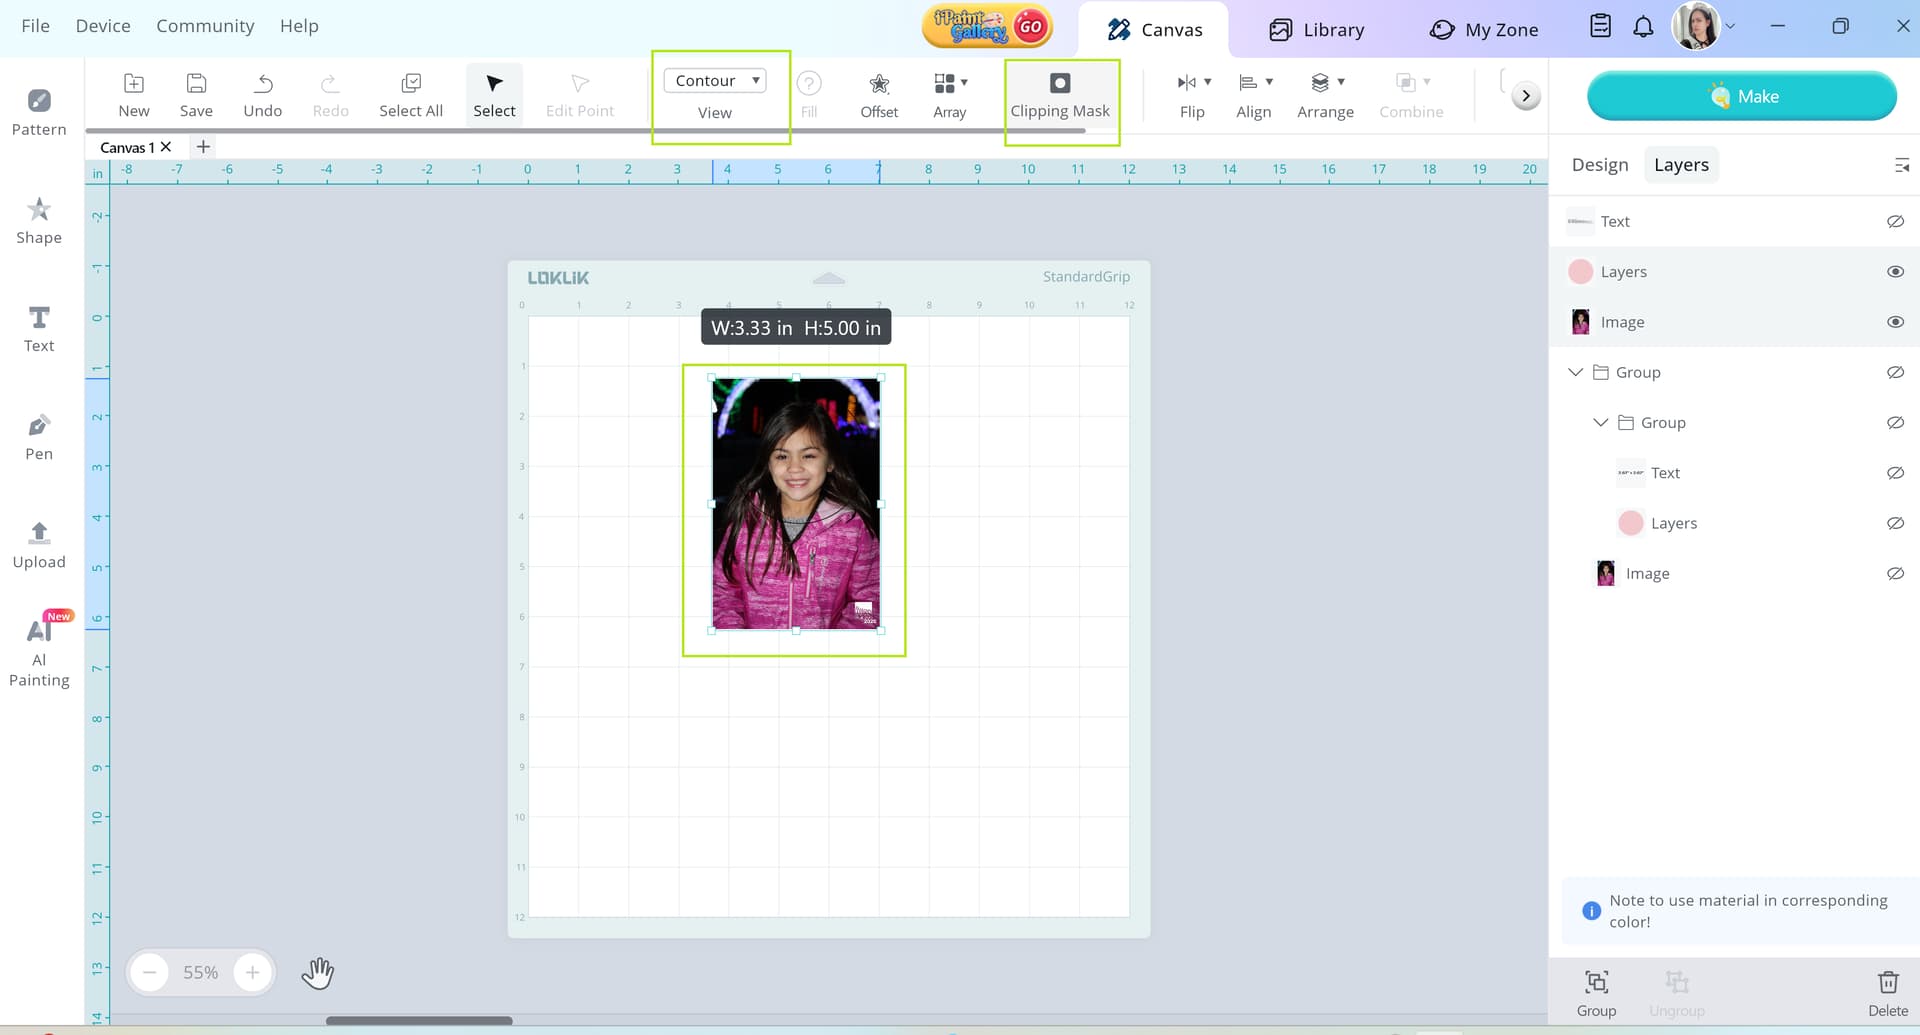
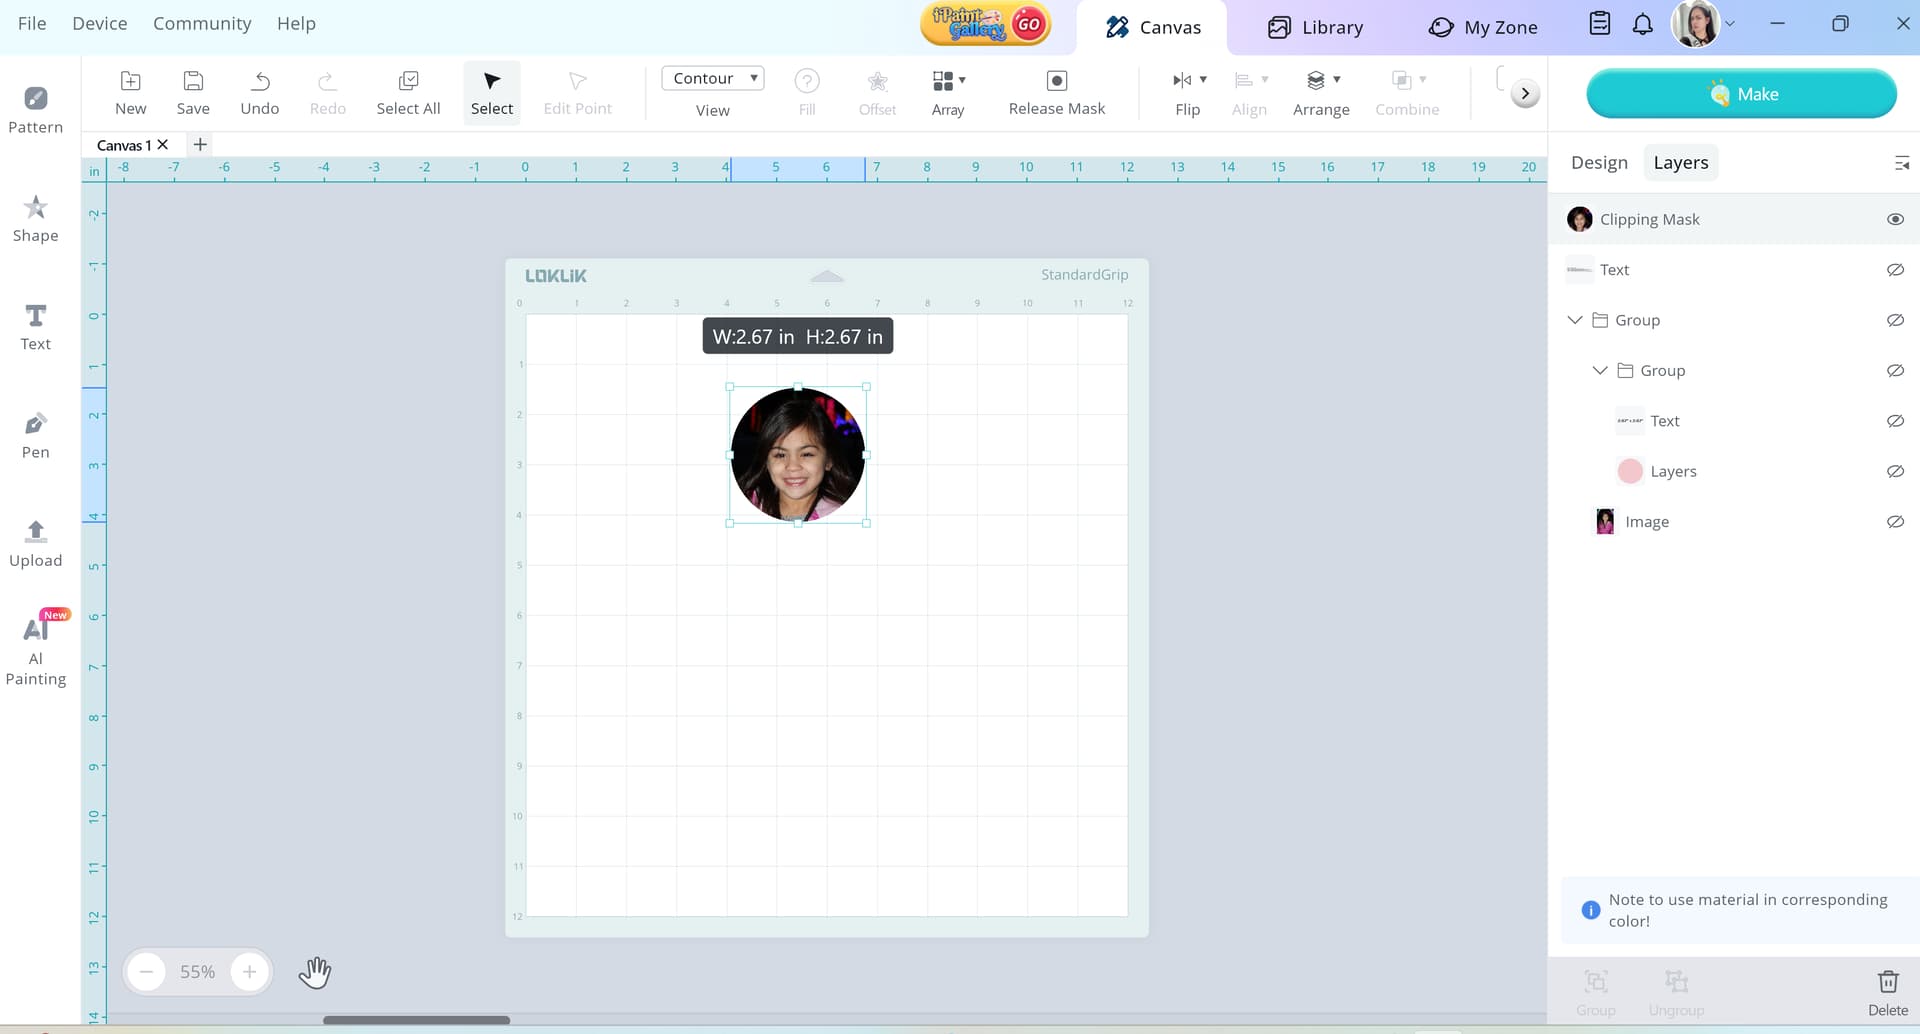
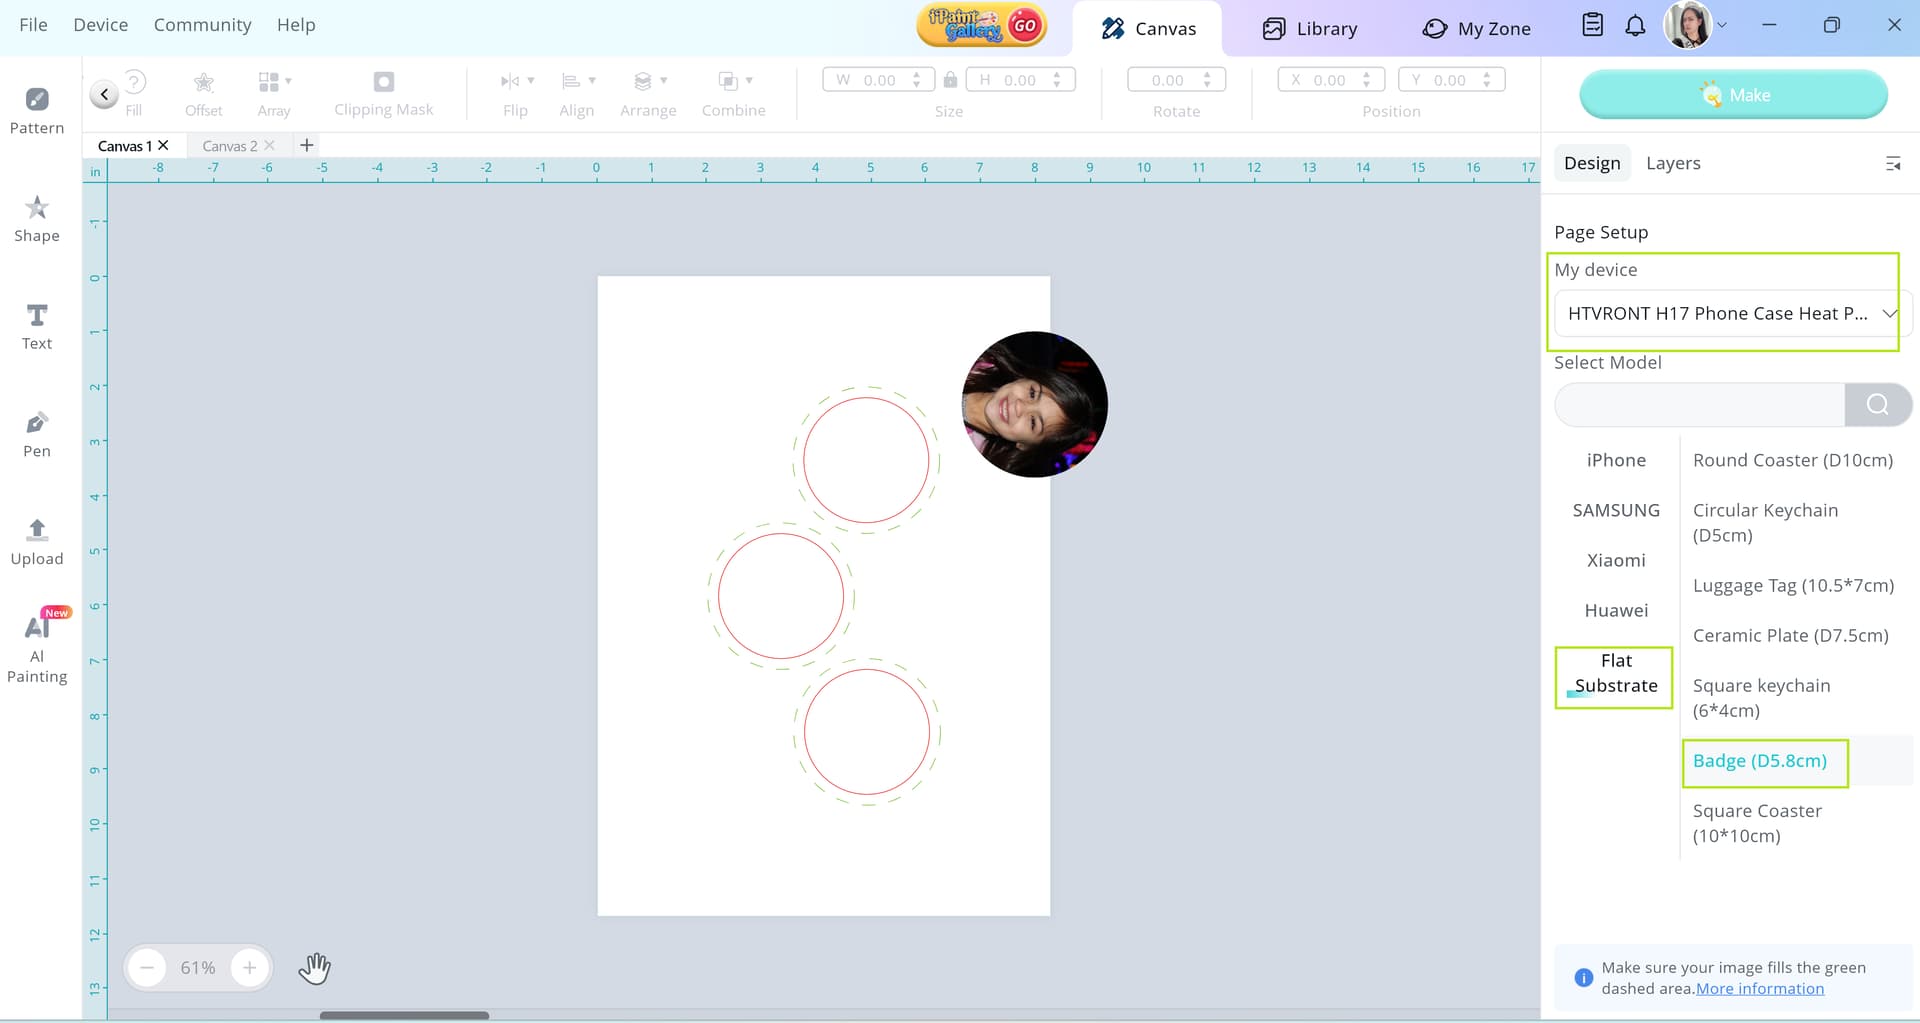
STEP 1 - Open your Canvas and set your device to LOKLik iCraft. Upload your image, resize to your desired measurement. Click shape and add circle (2.67" x 2.67"). While still selected, change the view to contour (see below) in order to see the placement of your circle within the image.
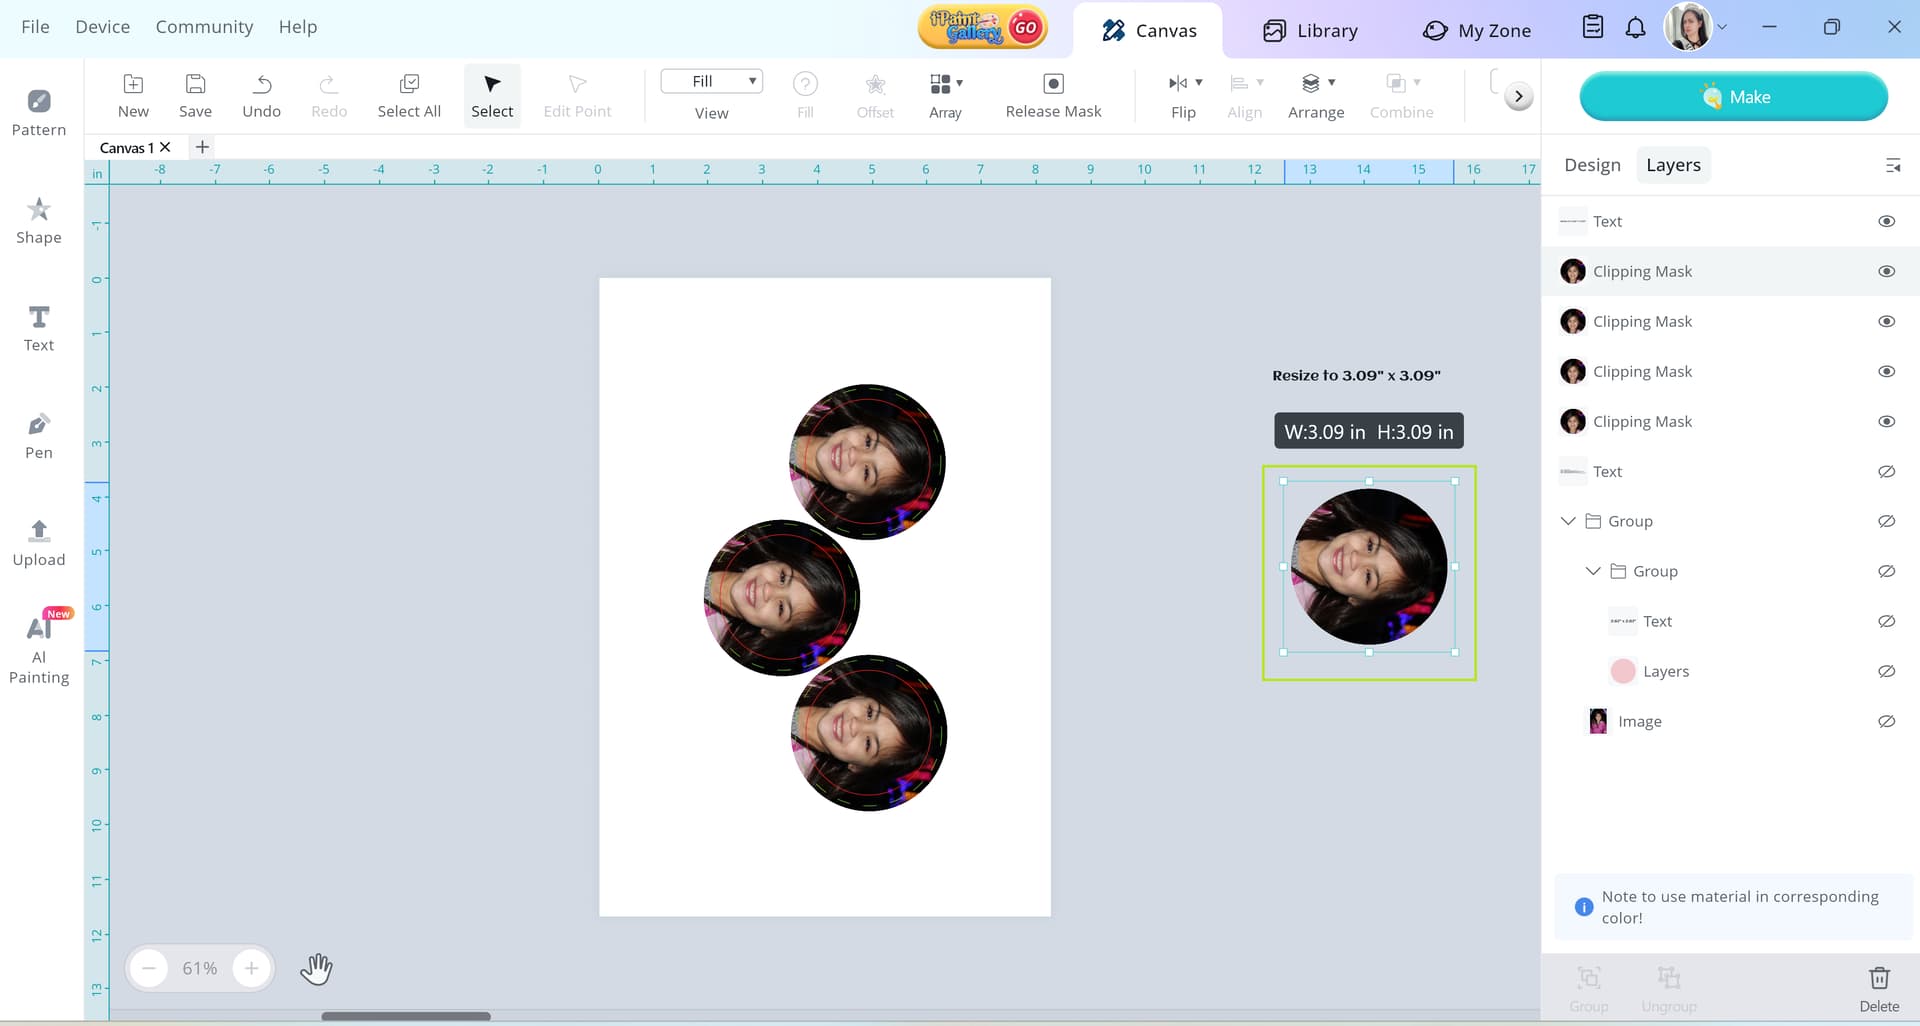
STEP 6 - Resize your image to 3.09" x 3.09" and drag them in place accordingly. (NOTE: If you have a text with your image you need to flip or mirror them). DO NOT FORGET to save your work.
Step 7 - Print your design to your sublimation film using sublimation printer & ink. Enjoy!
Hello, Can I have some advice for using badges on the cell phone heat press? The plate has pre-set holes for the circular fixtures. And when its printed the picture is not coming out “on the right side up” the buttons/badge is sideways from the pin clip located behind so you can wear it. I hope you understand what I’m trying to describe. Bottom line my button/badge is not correct: Please help
Hi there! Thanks for reaching out—and yes, I totally get what you’re describing. It sounds like the image is printing correctly on the badge surface, but when you go to wear it, the design ends up sideways because of how the pin clip is positioned on the back. That can definitely be frustrating!
Here are a few tips that might help:
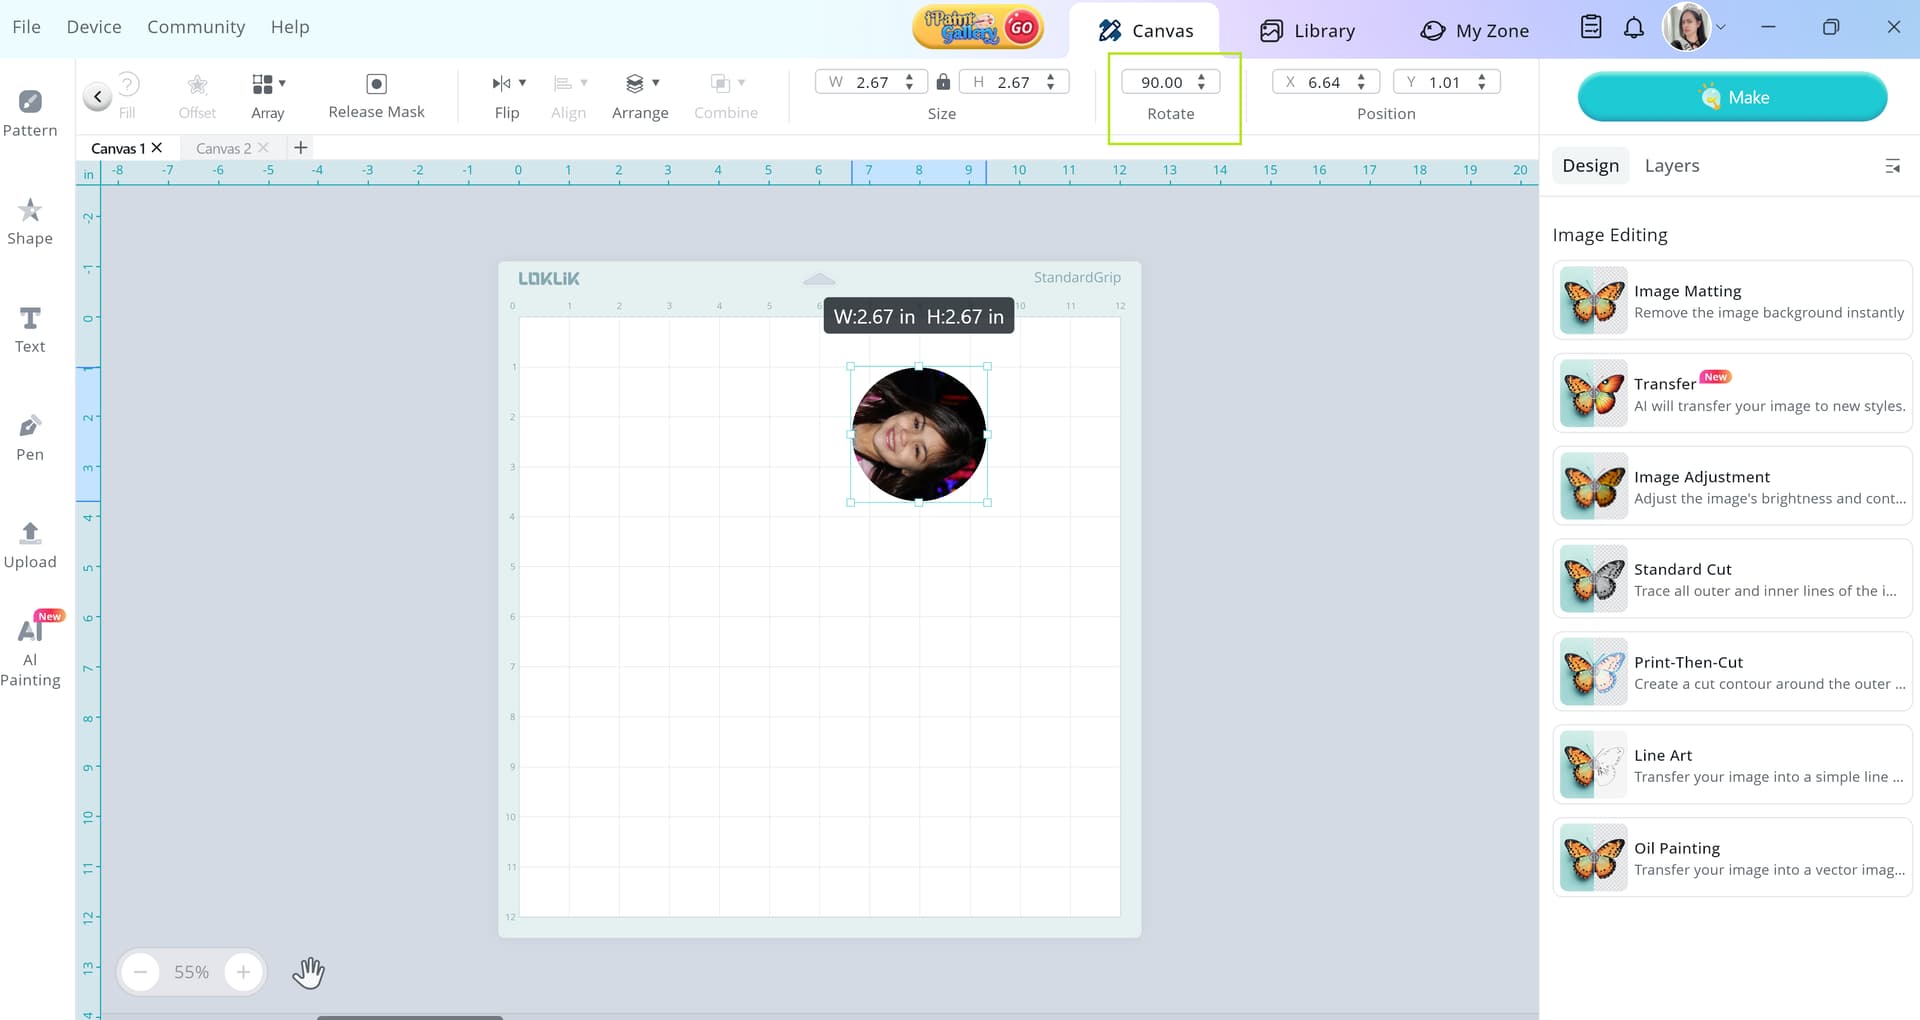
Rotate Your Design Before Printing Try rotating your image 90° in your design software before printing. That way, when the badge is assembled with the pin clip in its standard position, the image will appear upright when worn.
Check Fixture Orientation If your heat press plate has pre-set holes for circular fixtures, double-check how the badge sits in those fixtures. Sometimes the alignment can shift slightly depending on how the backing is placed.
Test with a Blank First If you have a spare badge blank, do a quick test press with a rotated design to confirm the orientation before committing to your final print.
Mark the Clip Position Some makers like to mark the top of the badge (where the clip will go) with a tiny dot or tape before pressing, just to keep visual alignment clear during setup.
Let me know if you want help rotating your design or setting up a quick template—I’d be happy to walk you through it!
Hi and welcome to the community, @Evan_Sifuentes! The H17 Phone Case Heat Press requires sublimation film — not sublimation paper. Do you have a photo of your finished product? That’ll help us see what’s going on and offer better support!
Hi @Evan_Sifuentes like @rinsky has said, you need sublimation Film not paper, please confirm if you used the genuine Film that come with the H17? also are you aware that there is a right and wrong side to prnt on, and just checking that you used a sublimation printer
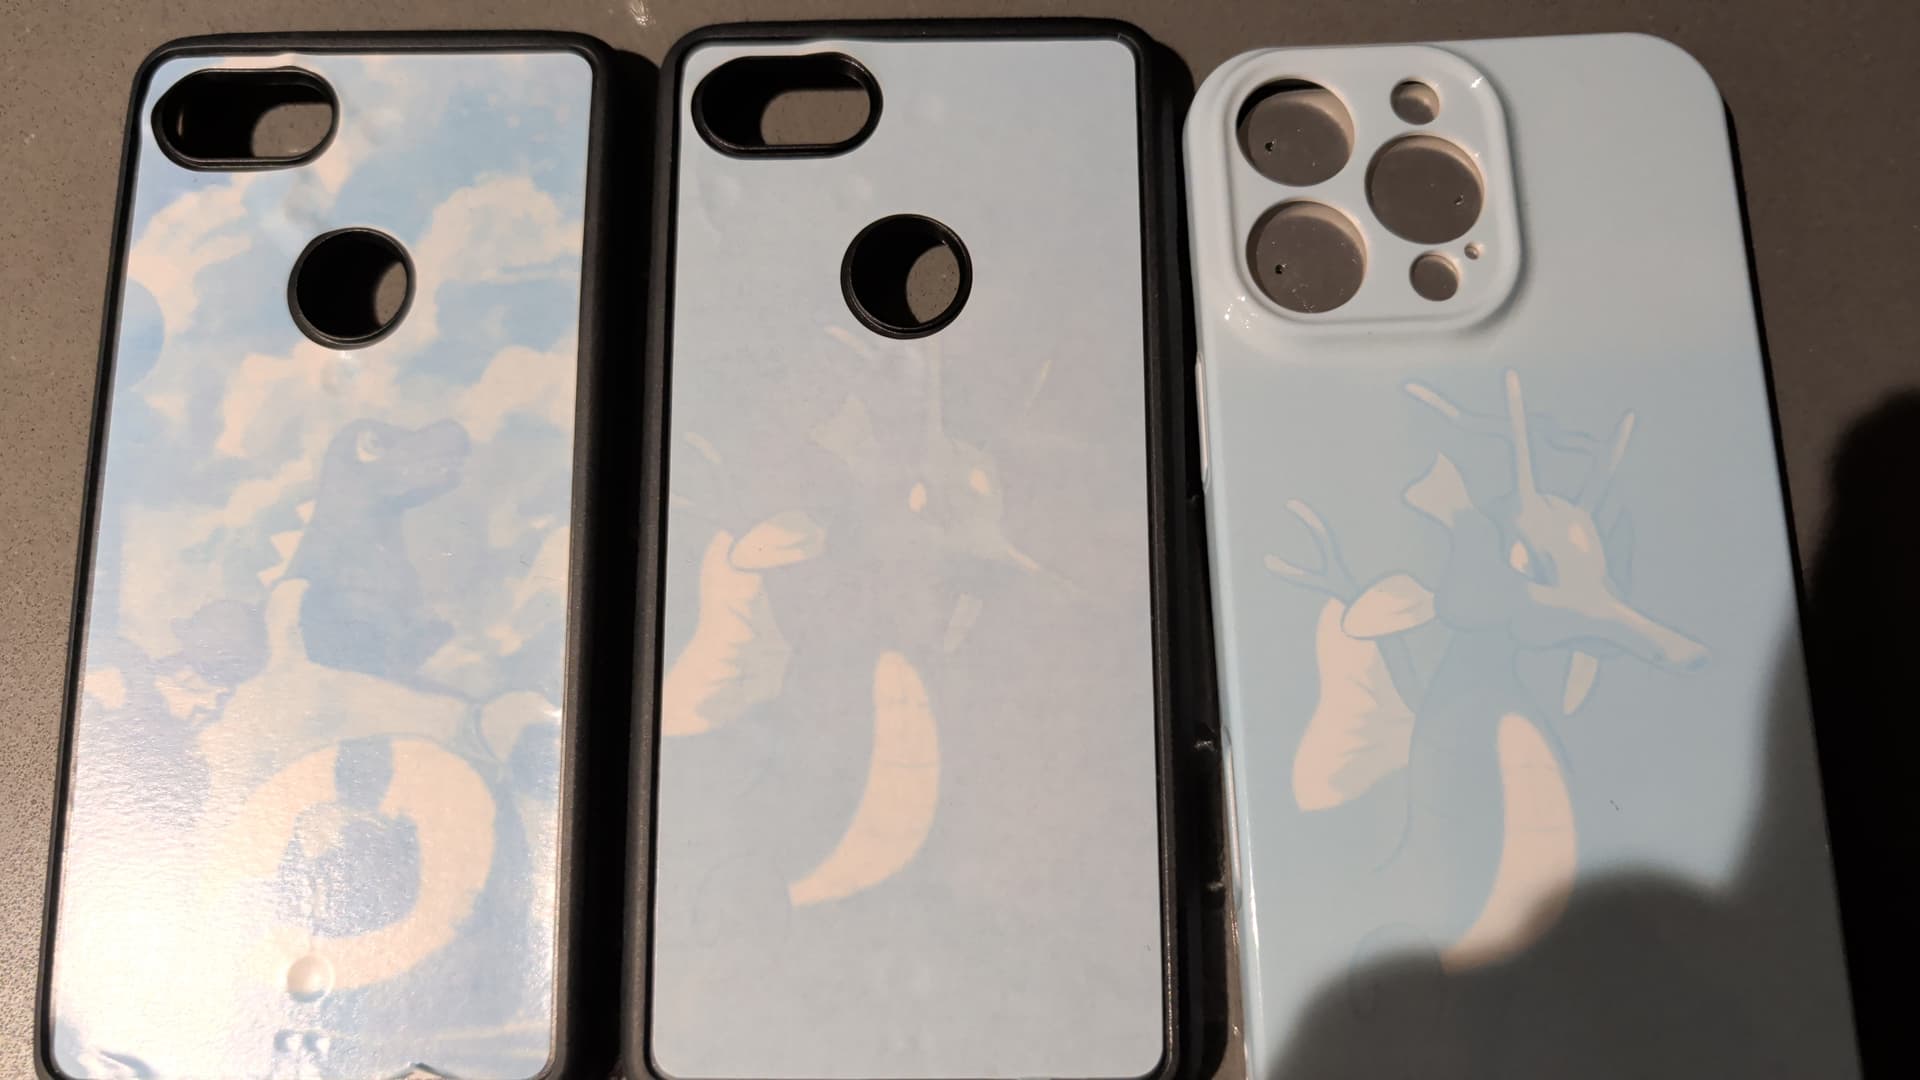
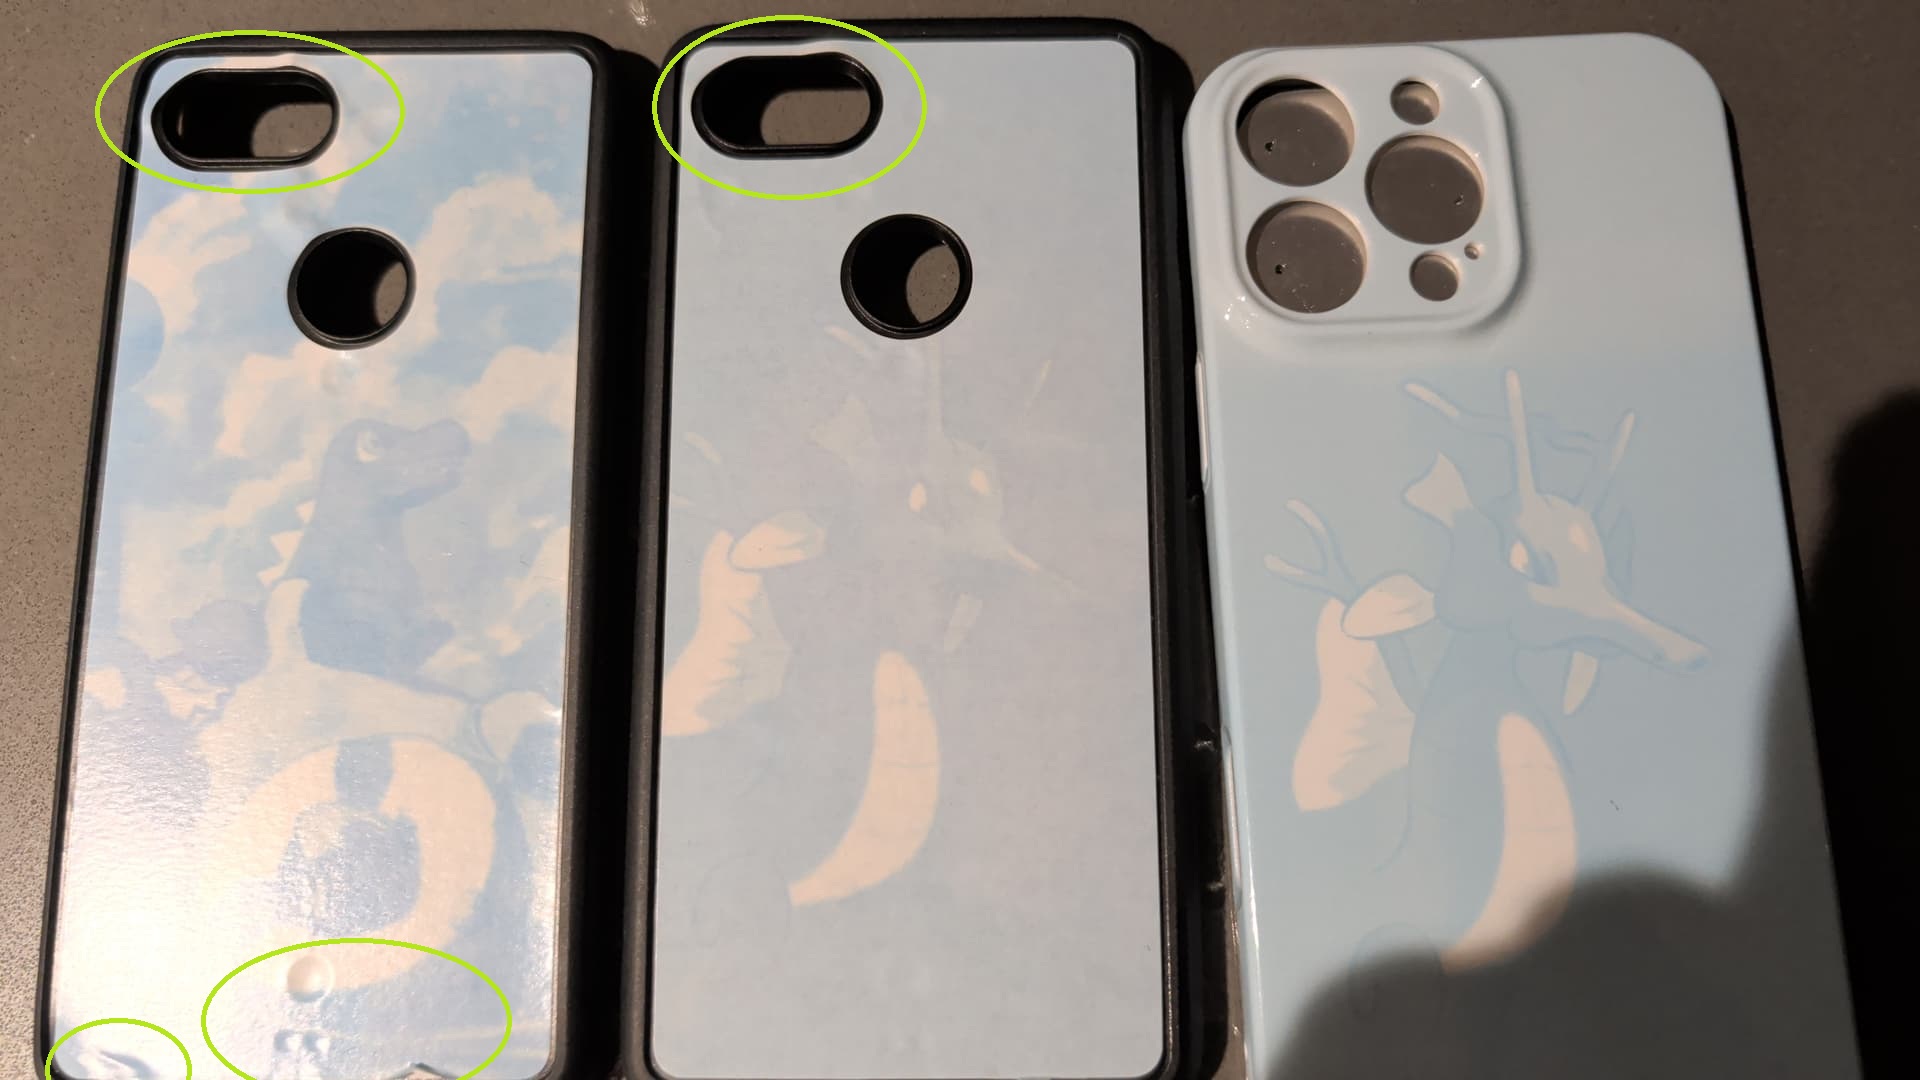
Hi @Evan_Sifuentes! I noticed the first two phone cases on the left appear to be third-party blanks. Please double-check the manufacturer’s recommended heat settings and time for those. Also, most sublimation phone blanks come with a protective film — make sure to peel that off before pressing, as it can affect the final result.
As for the phone case on the right, it looks like it may have been pressed either too long or not long enough compared to the recommended settings. Could you share your current heat and time settings so we can help troubleshoot further?
Thanks for your feedback. The first two are in fact third party. Unfortunately, no directions were included. But for the third, I pressed at 270°F for 315 seconds. I also tried at 240° for the same amount of time.
I’m wondering if I should let the film dry longer?
Just wondering how long did you dry your film? It recommends at least 5 minutes or more. Also, try to bump up your temperature to 275 °F for 350 seconds.
I dried for at least 5 minutes and placed it on top of the heat press. I haven’t tried bumping up the heat or time. I thought that would make it come out more faded. I can try that next.
I’ll review the links you provided a well. Thank you!
@Evan_Sifuentes, before you proceed, I just want to check in about the settings you’re using on your sublimation printer. Make sure it’s set to ‘High’ or ‘Premium Presentation Photo Matte,’ and that you’re using a high-resolution image.
Hello @rinsky you are the greatest with your explanations. You make asking for help a breeze. When I first joined the community I expressed how everyone is so helpful…i shared invites to the community and was asked what makes us different my responses were "we are a family a safe haven for all crafters no matter the cutting machine and best thing…no question is a bad question and someone will always have an option to resolve your issues. There is a wealth of knowledge and experience in our community!