Hola @Lluvia_Tirado , bienvenida a la comumidad. No te preocupes por no poder escribir en inglés. Puede ser que pronto el foro tenga alguna herramienta de traducción automática, pero mientras puedes usar un traductor en línea o ChatGPT.
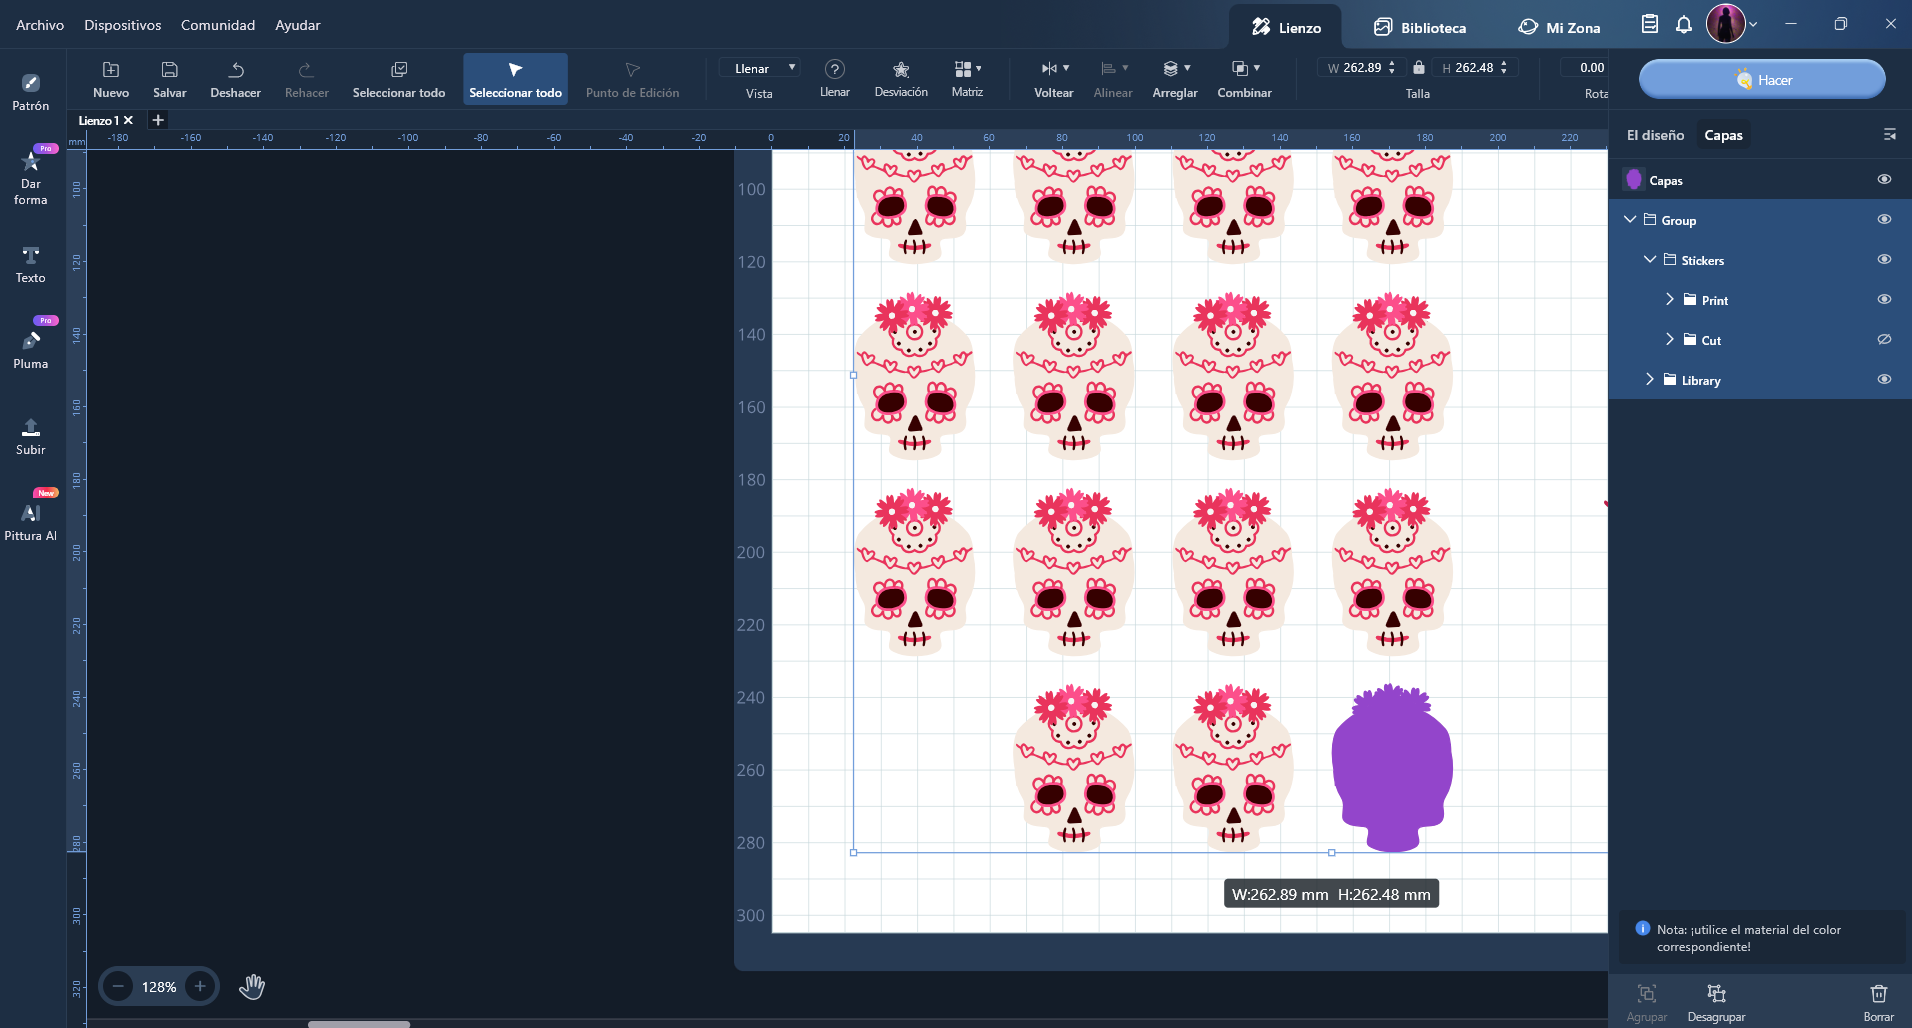
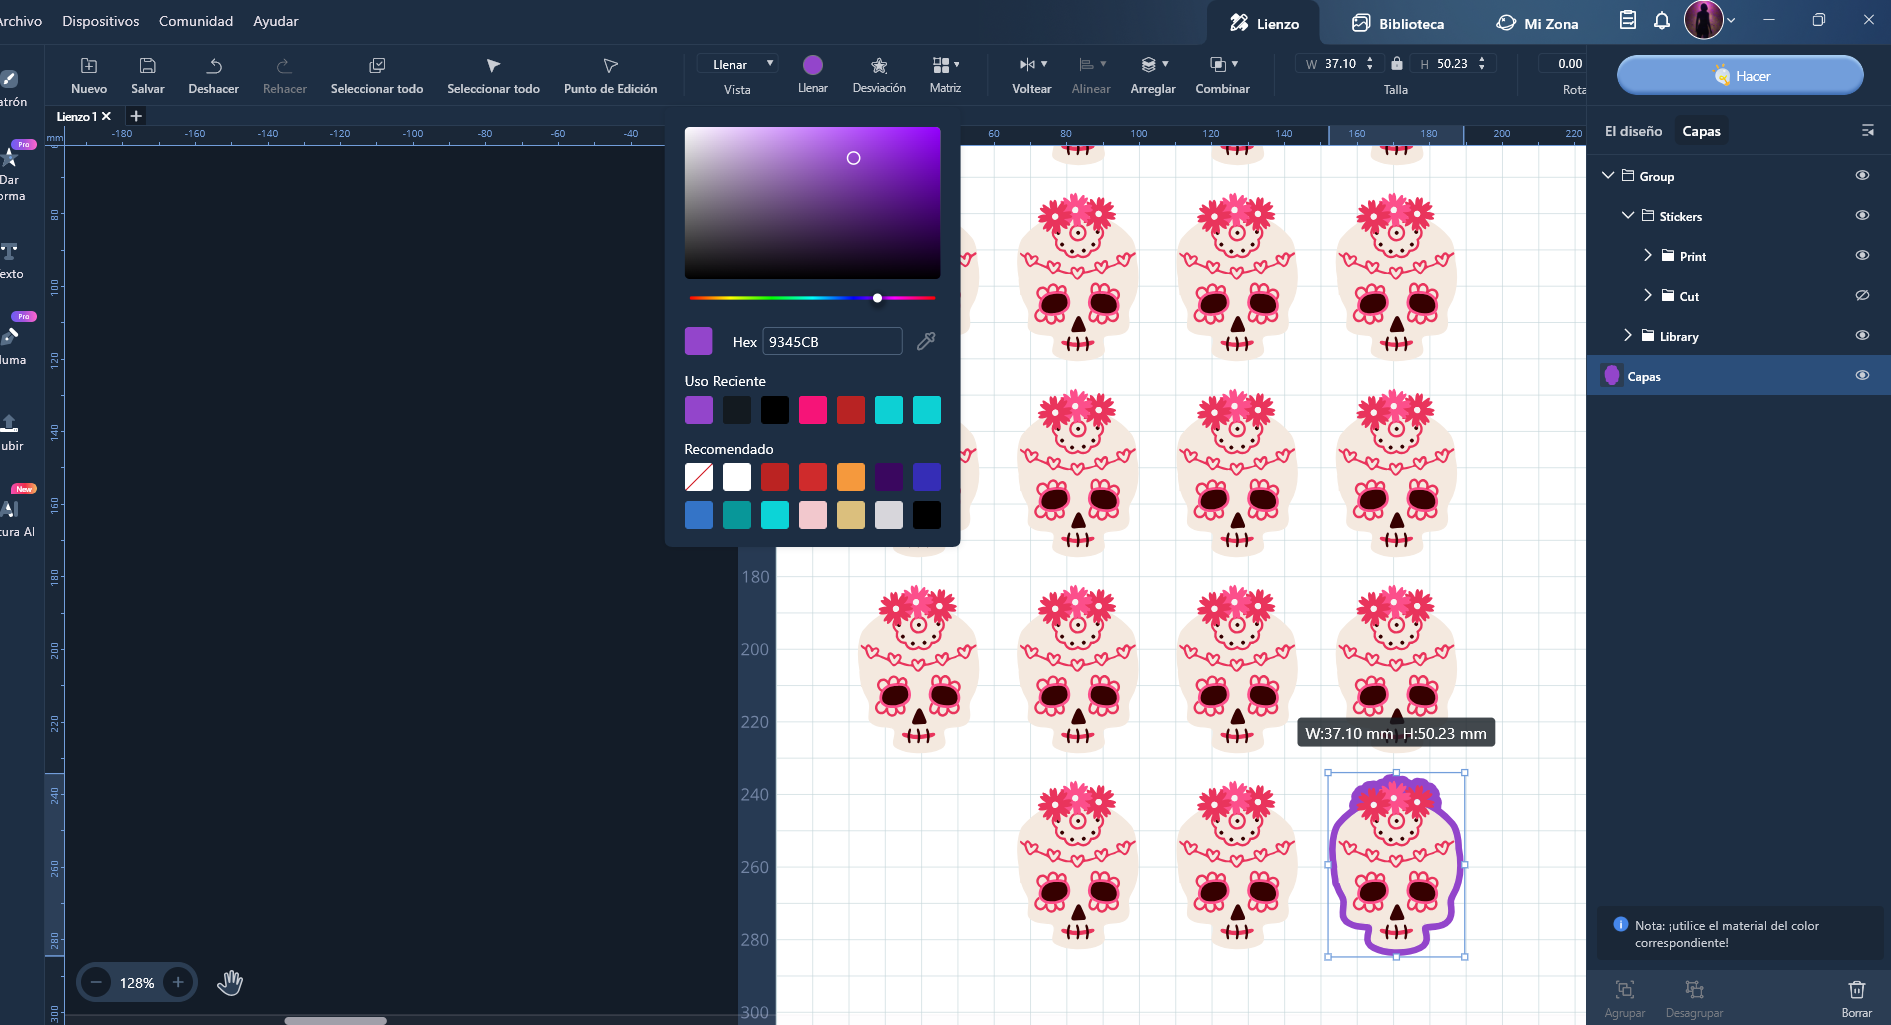
Necesitas hacer una forma con la figura que quieres cortar y darle un color que no tenga ninguna otra. Por ejemplo, en este proyecto, preparé la forma que ves en azul para usarla como línea de corte
Puedes ver este proyecto aquí:
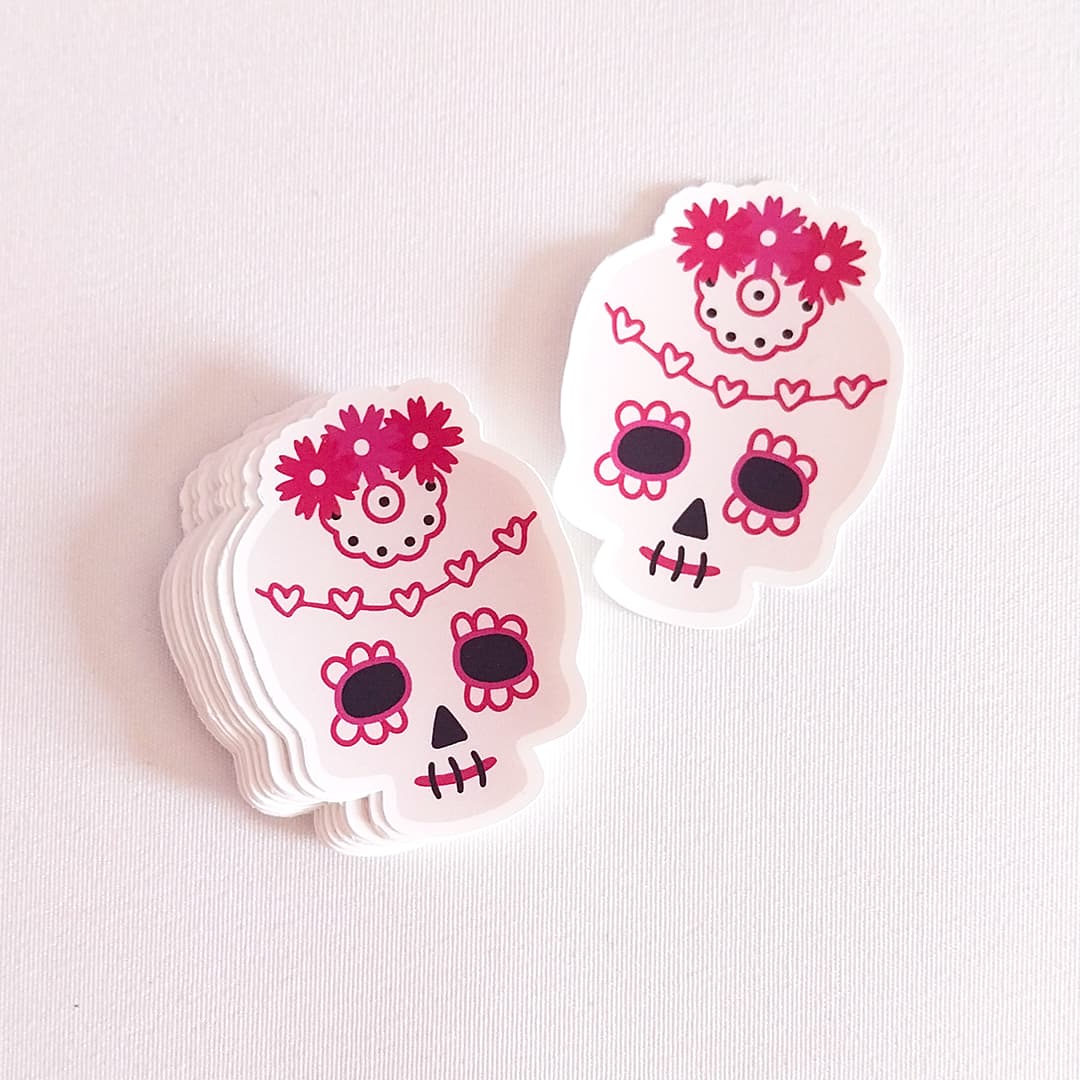
DIY Project Sharing | Cool Catrina Skull Stickers
Si te preguntas cómo se prepara esa forma, hay dos maneras:
- Seleccionas toda la calavera en este caso, la duplicas, seleccionas la copia y usas la herramienta Combinar > Unir y le das un color que no use la ilustración, para después poder pedir que te corte solo esa forma. Tienes que colocar esa forma debajo de la original, para que no imprima morado.
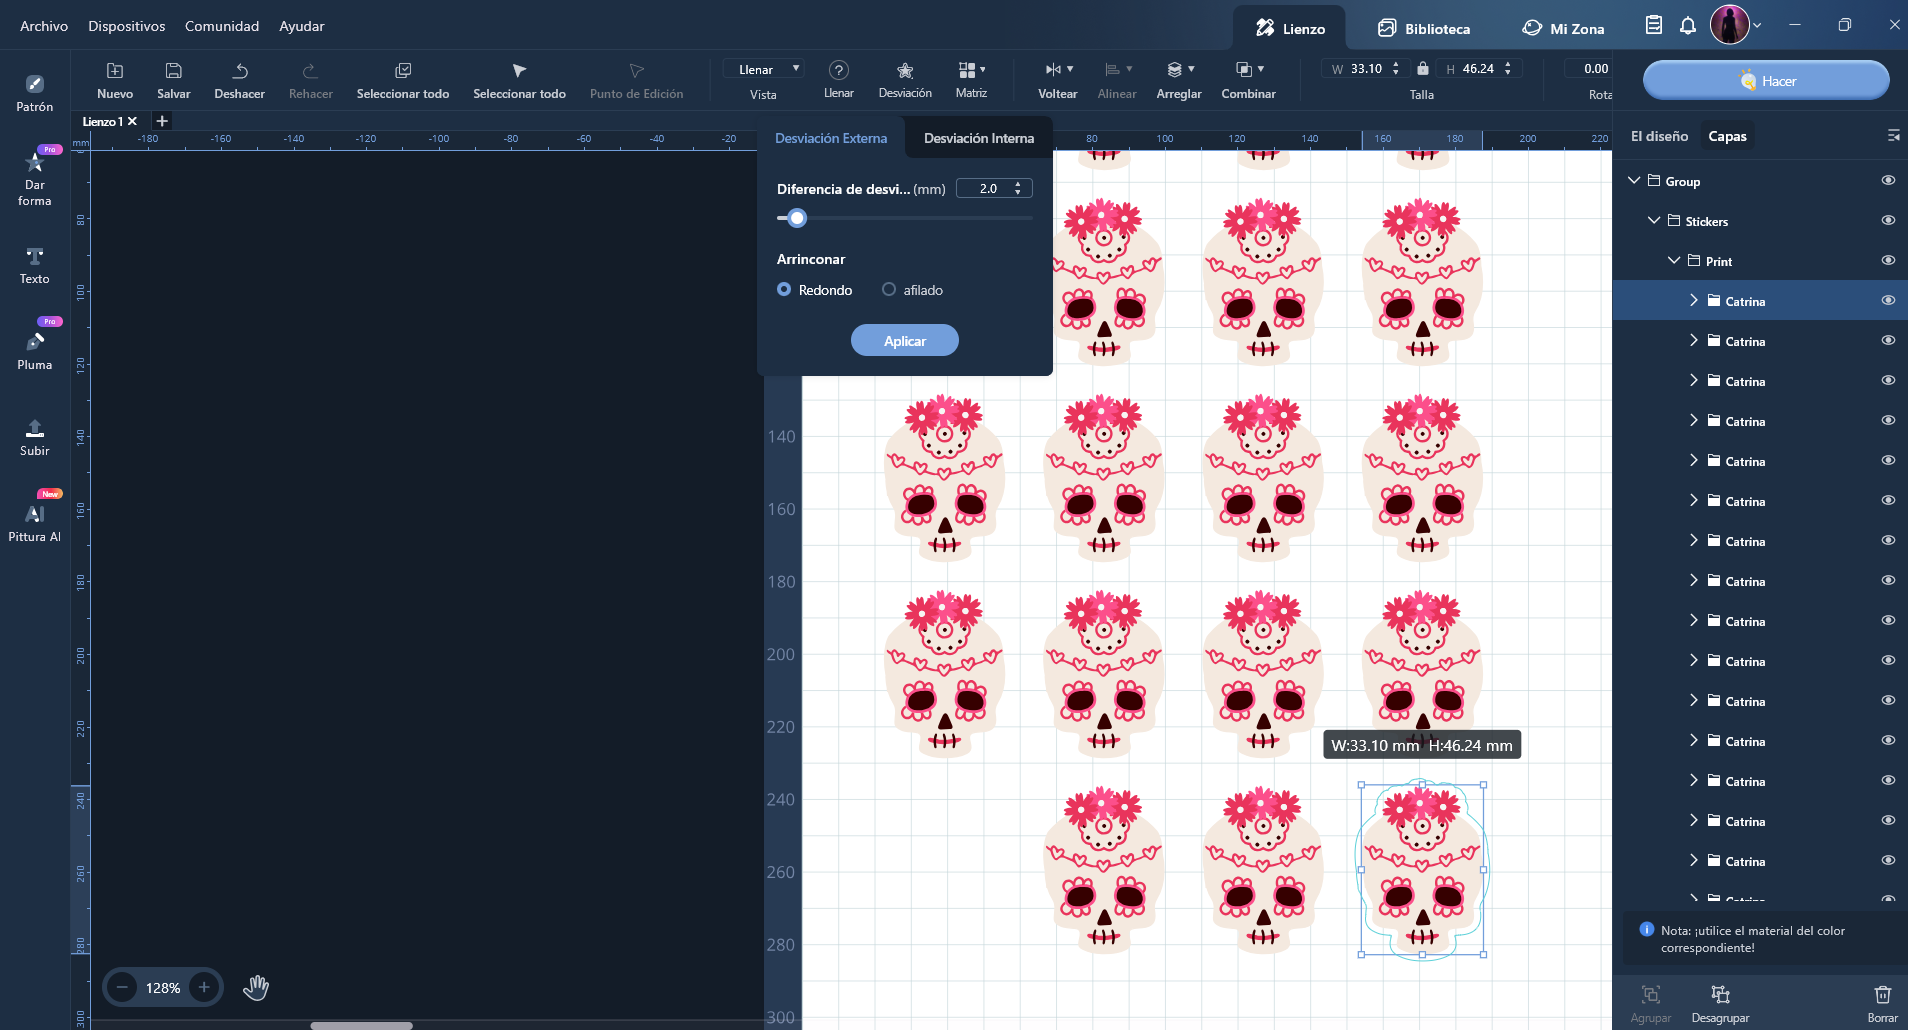
- Seleccionas toda la calavera y en este caso no la duplicas, directamente usar la herramienta Desviación > Desviación externa y seleccionas cuánto quieres engrosar la imagen (en este caso 2mm) > Aplicar. De ese modo vas a dejar un margen alrededor del diseño, se va a cortar con un contorno grueso del color del papel o del color que le des a esa forma. Esta es la manera más fácil si lo que quieres es hacer pegatinas, por ejemplo.
De nuevo tienes que colocar esa forma por debajo de la original y darle un color que la ilustración no use. Recuerda ocultarlo antes de imprimir si quieres el reborde en blanco (color del papel).
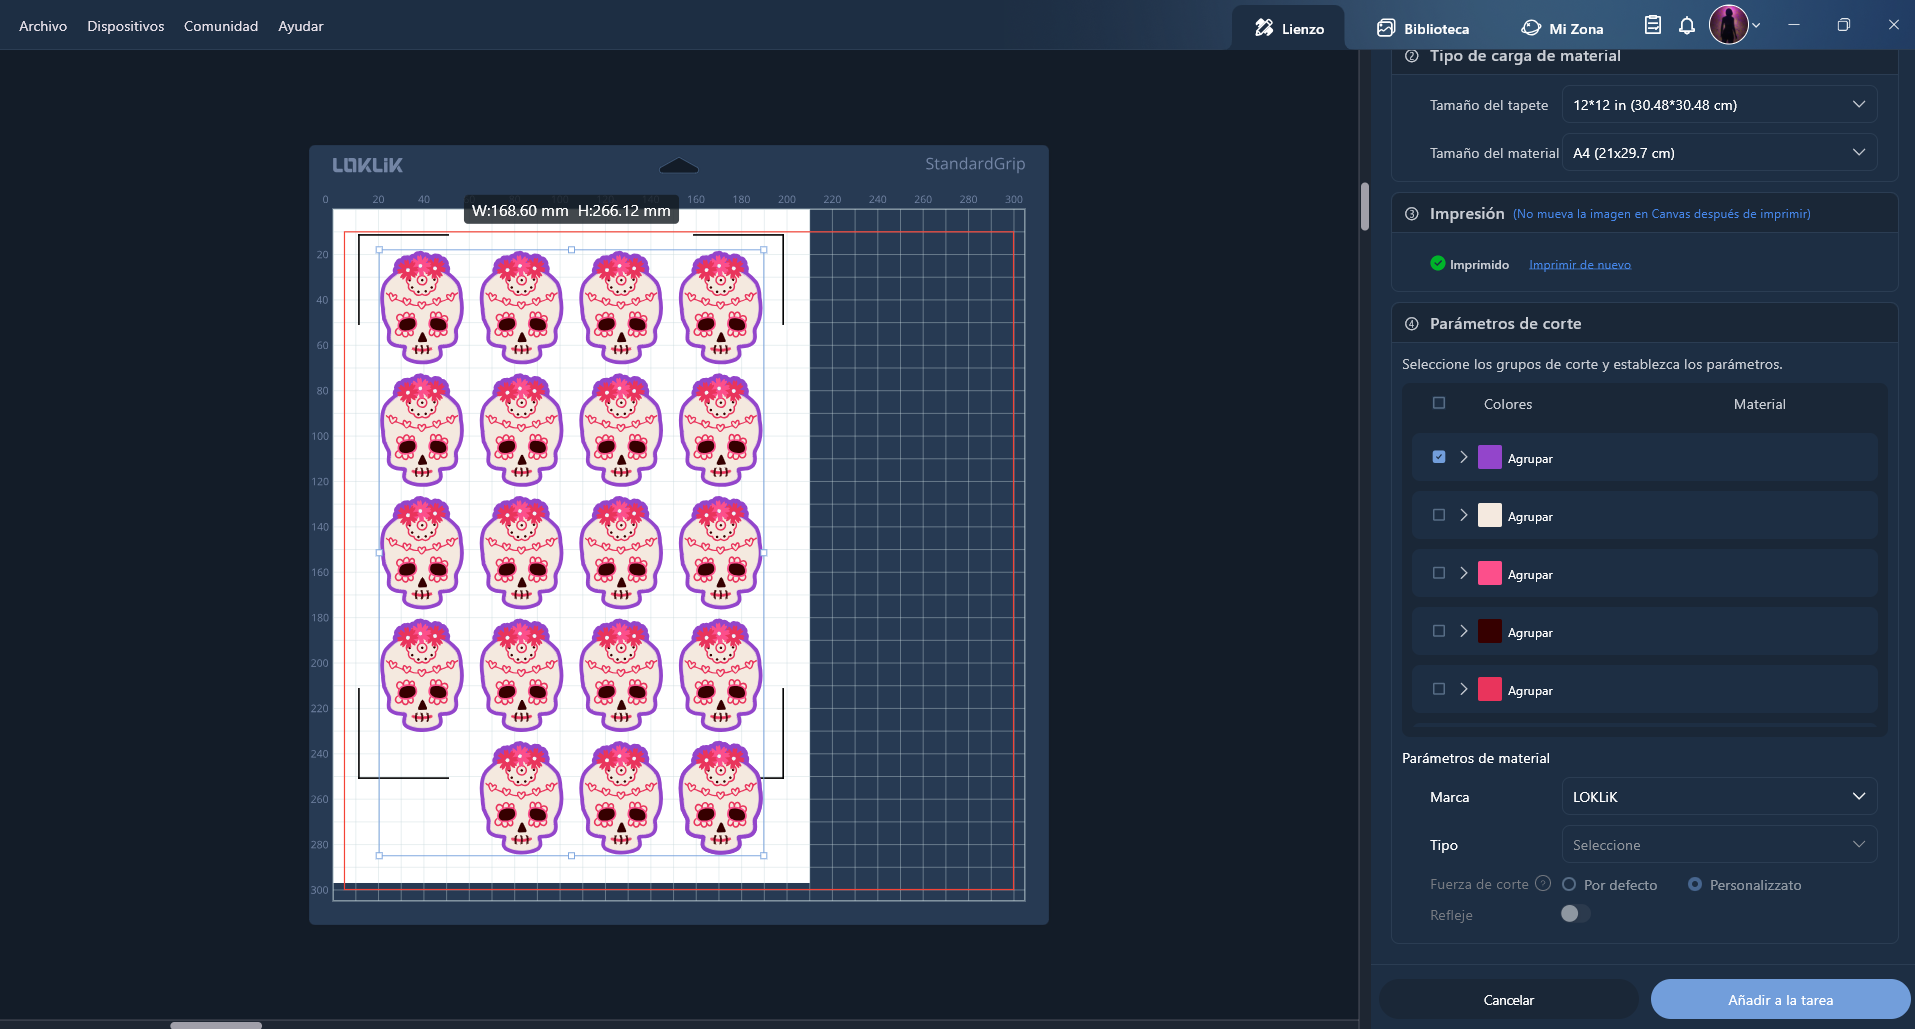
De cualquiera de estas formas, seleccionas el morado como color a recortar y el plotter no cortará el resto de las formas:
Otros miembros te darán más consejos, puedes traducir lo que te dicen con un traductor, como te decía. También hay muchos video tutoriales paso a paso en la comunidad y en Youtube en los que puedes activar los subtítulos automáticos en español.
Mira, yo ahora voy a pedir a ChatGPT que me traduzca todo esto a inglés para que el resto de la comunidad sepa lo que estoy diciendo:

Hi @Lluvia_Tirado, welcome to the community! Don’t worry about not being able to write in English. The forum might soon have an automatic translation tool, but in the meantime, you can use an online translator or ChatGPT.
You need to create a shape with the figure you want to cut and give it a color that no other part of the design uses. For example, in this project, I prepared the shape you see in blue to use it as the cutting line.
(image)
You can see this project here:
(link)
(image)
If you’re wondering how to prepare that shape, there are two ways:
- Select the whole skull (in this case), duplicate it, select the copy and use the Combine > Merge tool. Then assign a color that the illustration doesn’t use, so you can ask the plotter to cut just that shape. You have to place that shape below the original so it won’t print purple.
(image)
- Select the whole skull, and in this case, don’t duplicate it. Just use the Offset > Outer Offset tool and choose how much you want to expand the shape (in this case, 2mm) > Apply. This way, you’ll leave a margin around the design, and it will be cut with a thick outline in the color of the paper or any color you assign to that shape. This is the easiest method if you want to make stickers, for example.
(image)
Again, you must place that shape underneath the original and assign it a color that the illustration doesn’t use. Remember hiding it before printing if you want it white (paper colour).
(image)
Using either of these methods, you then select the purple as the cut color and the plotter won’t cut the other parts:
(image)
Other members will give you more tips—like I said, you can translate what they tell you using a translator. There are also many step-by-step video tutorials in the community and on YouTube, where you can enable automatic subtitles in Spanish.
Look, I’m going to ask ChatGPT now to translate all of this into English so the rest of the community knows what I’m saying 


 All participants get 50 bonus cheers (redeemable for goods!).
  Mini Awards Store
 5 lucky newbies win $50 material packs (random draw ).
 Extra 30 Cheers for social shares.
 Extra 40 Cheers for new post