Project Overview:
The LOKLiK iEngrave™ is the perfect tool to create a custom wooden circle token. This can be the perfect way to turn a blank wooden circle into a sweet message for your Valentine. Follow thru this tutorial to learn how you can do this and as an added bonus, we are going to be creating a jig. This helps you be more efficient while maintaining accuracy when engraving.


Materials:
- Cutting machine: LOKLiK iEngrave™
- Blank wooden token - available on Amazon and craft stores; I used one that is 3mm in thickness
- Cardstock paper for the jig - I used Kraft Cardstock for this tutorial
- Design: upload your own design or pick from a wide variety from the LOKLik Library
- Template: from LOKLiK Library
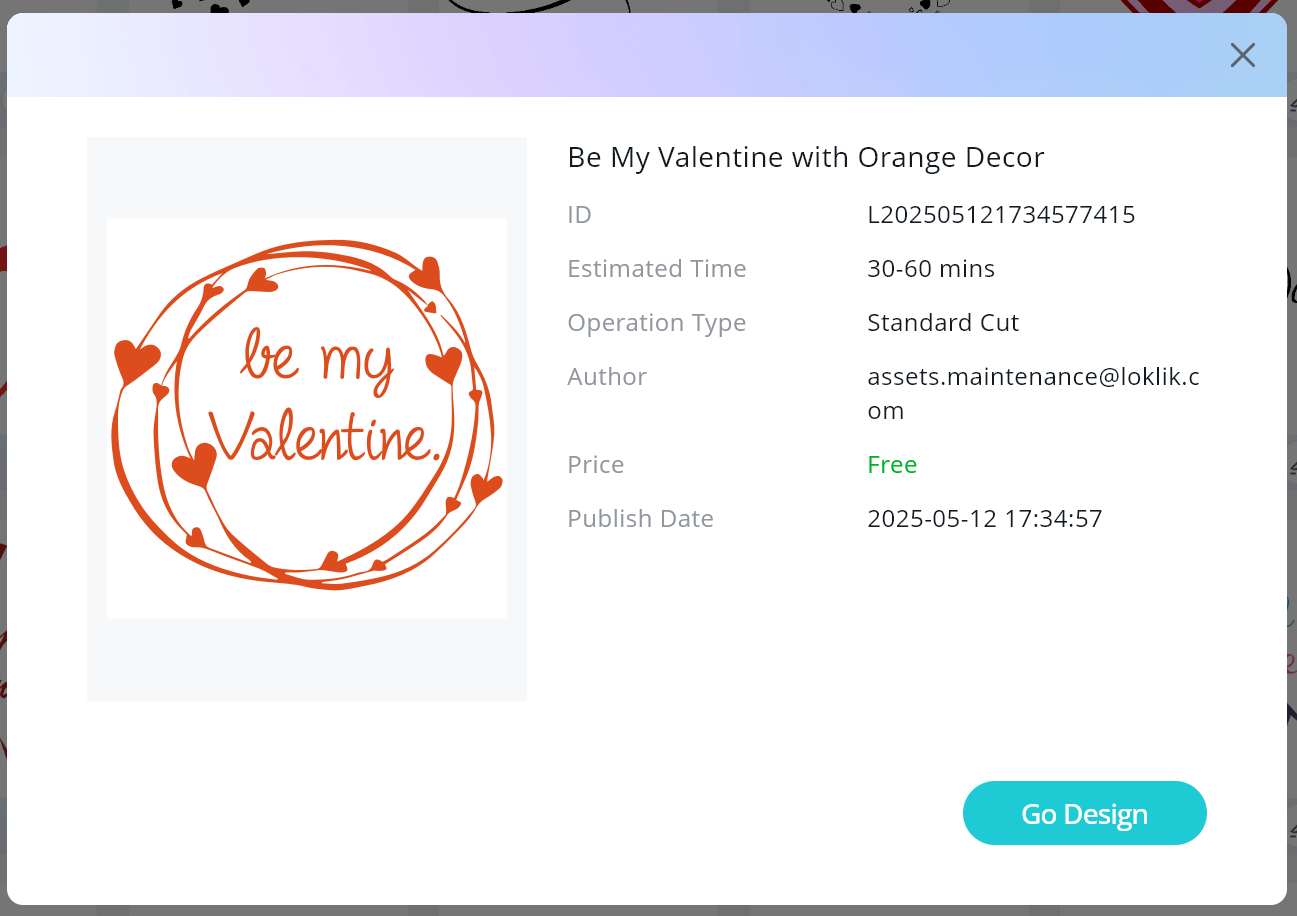
*Be My Valentine with Orange Decor
Design and Cutting Process:
- Using the LOKLiK IdeaStudio Library, search for the template and select the + to add the template to the canvas.
- To create the template or jig for you to place your wooden circle in, we will be using the shape feature and adding a circle.
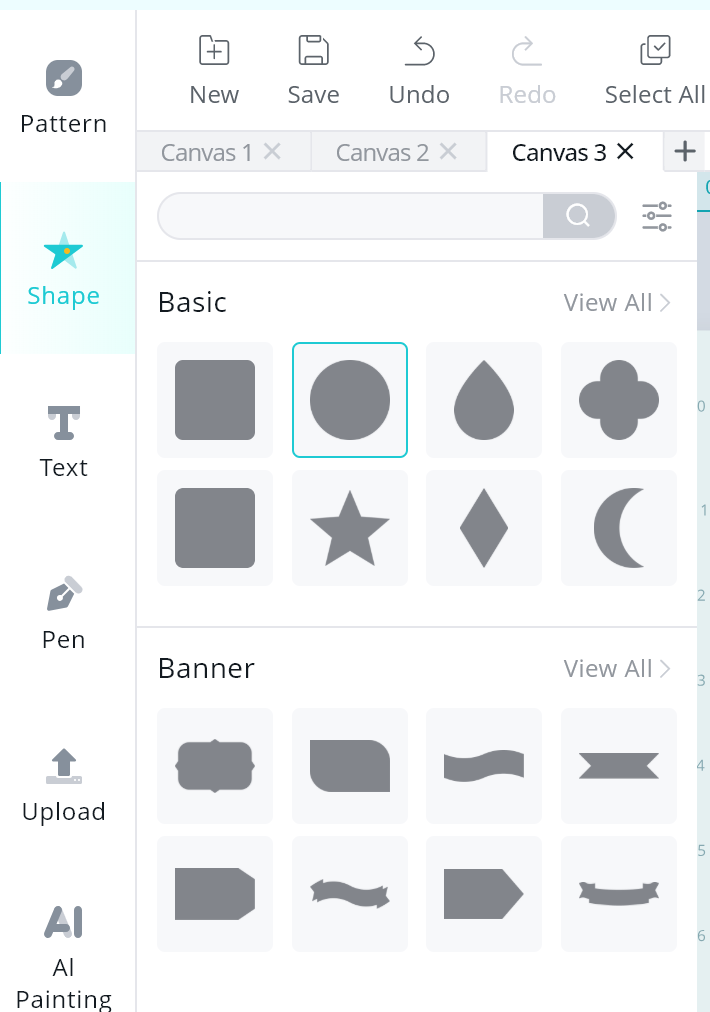
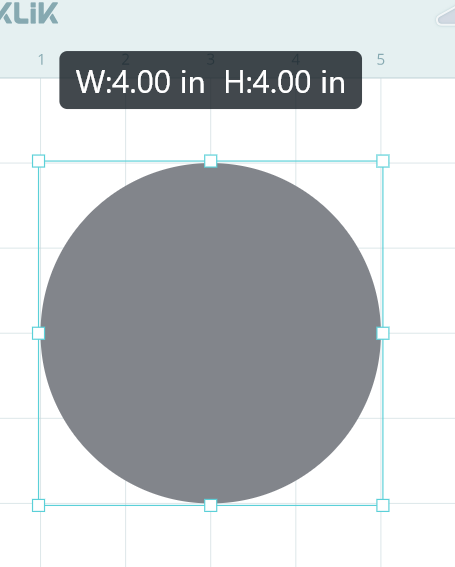
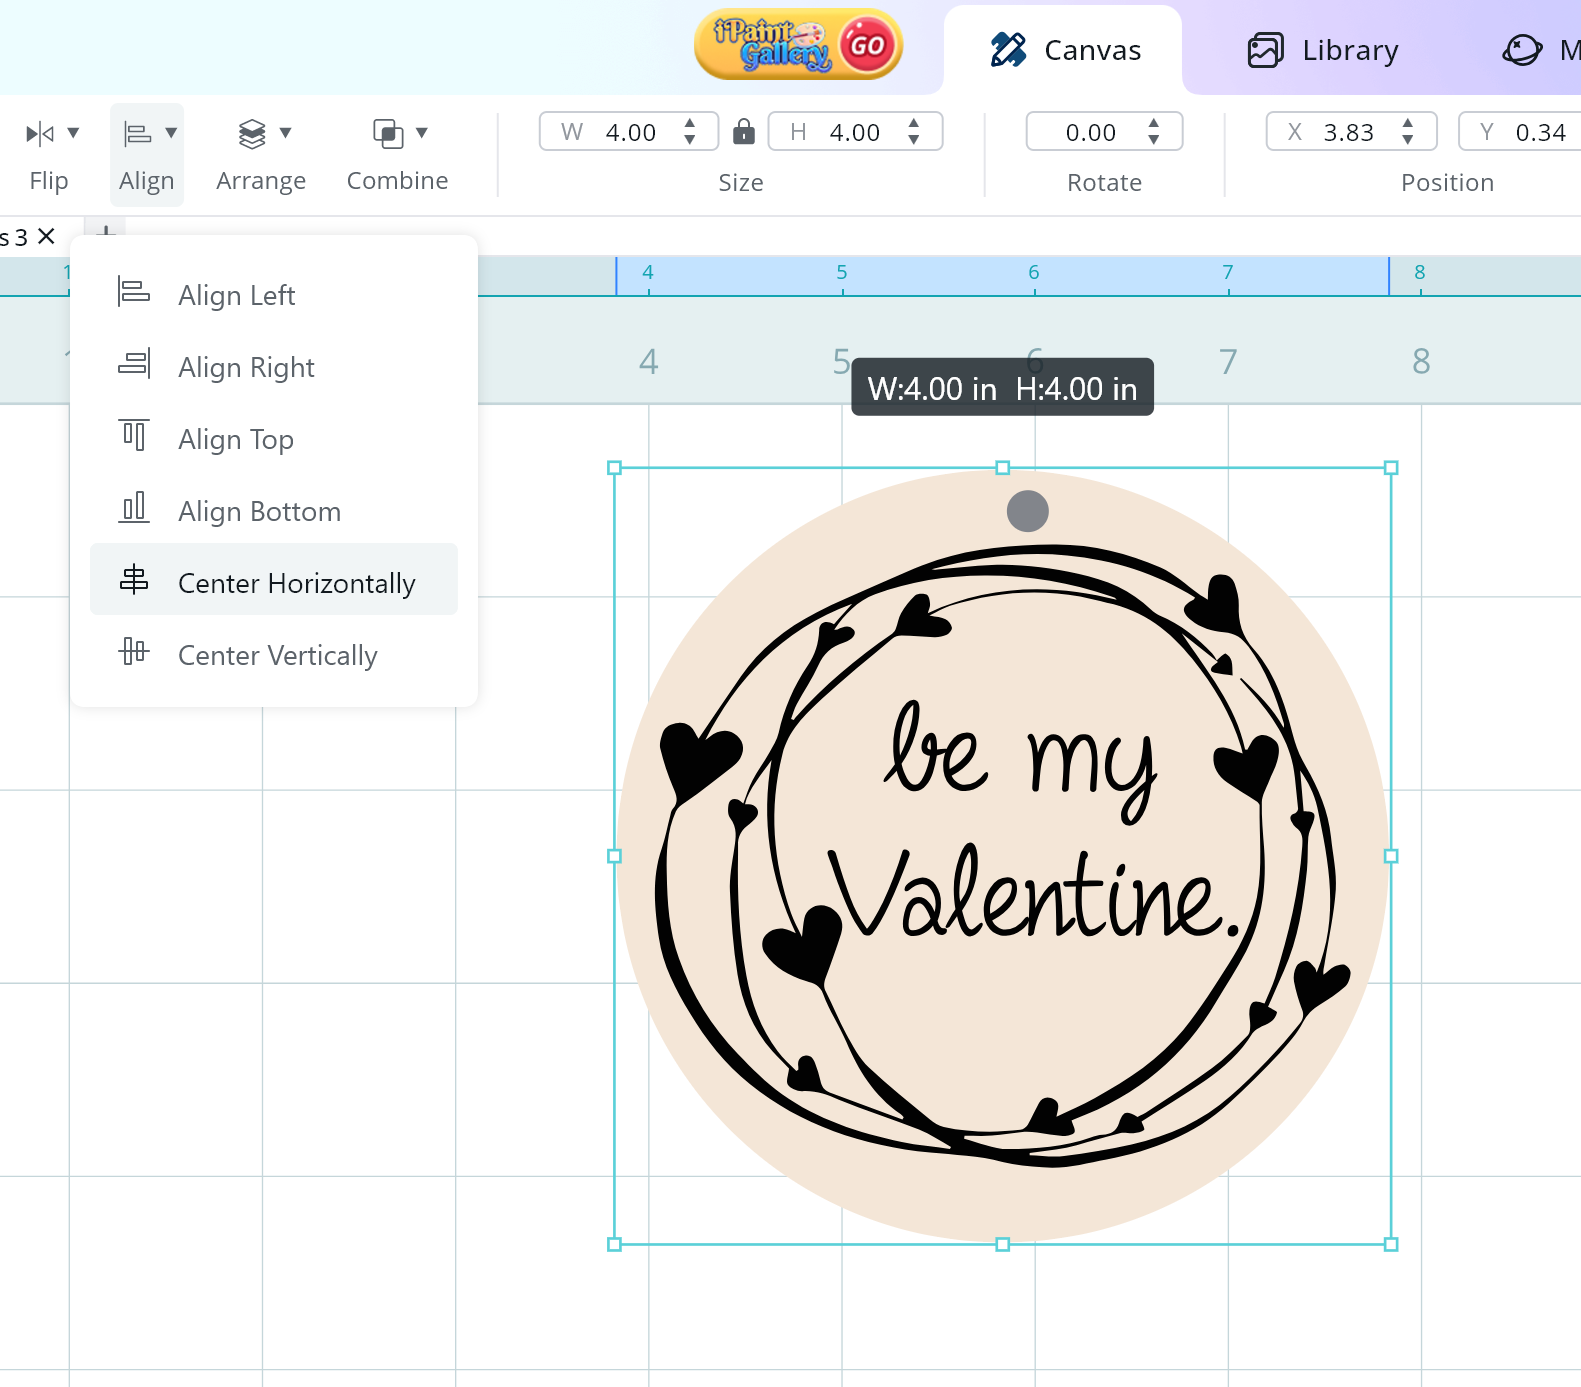
- Resize the circle to match the size of your wooden circle, in this case I was using a 4in circle.
- Resize the “be my valentine” design to fit inside of the wooden circle. Please make sure you have space between the wording and the edge of wooden circle.
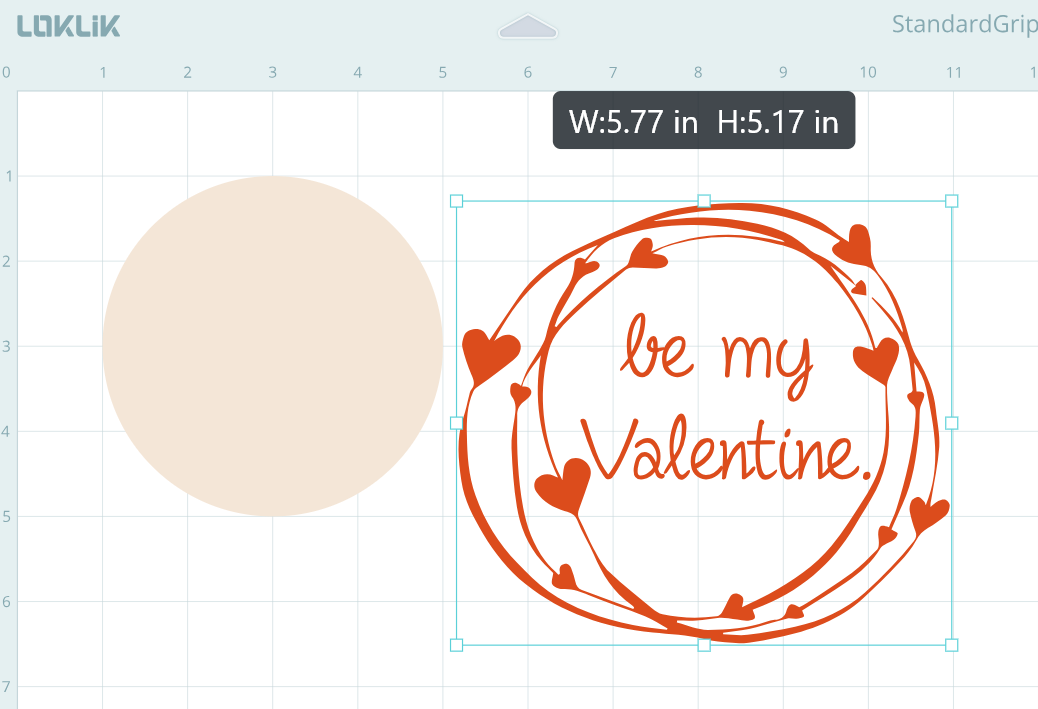
- Make sure the design is centered in the middle of the circle by using the Align Feature. You will need to select the circle and the design at the same time and click on “Center Horizontally” and then do it again and “Center Vertically”.

These next steps are optional but can be done if you would like to add a “hole” in the wooden circle so it can be a keychain or ornament.
- To create a hole to use the wooden circle as a keychain or ornament, we will be using the shape feature and adding a circle.

- Resize the circle to make it fit between the text and edge of the wooden circle.

- Make sure the small circle is centered in the middle of the circle by using the Align Feature. You will need to select the small circle and the big circle at the same time and click on “Center Horizontally”.
NOTE: Since my last iEngrave™ tutorial, IdeaStudio has been updated and now allows you to send tasks directly from your laptop to the iEngrave™. This made the process quicker and easier indeed.
Cutting the Jig and engraving the wooden circle:
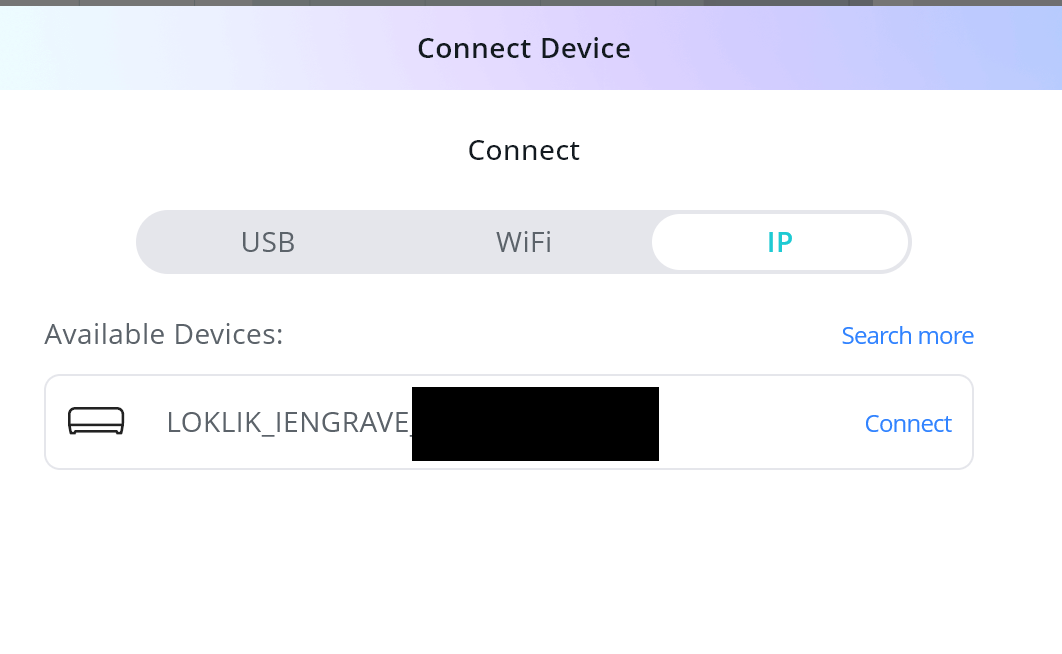
- Follow the prompts on IdeaStudio to connect the device. Select the iEngrave Laser Machine.

- I connect using the IP option and click “connect”.
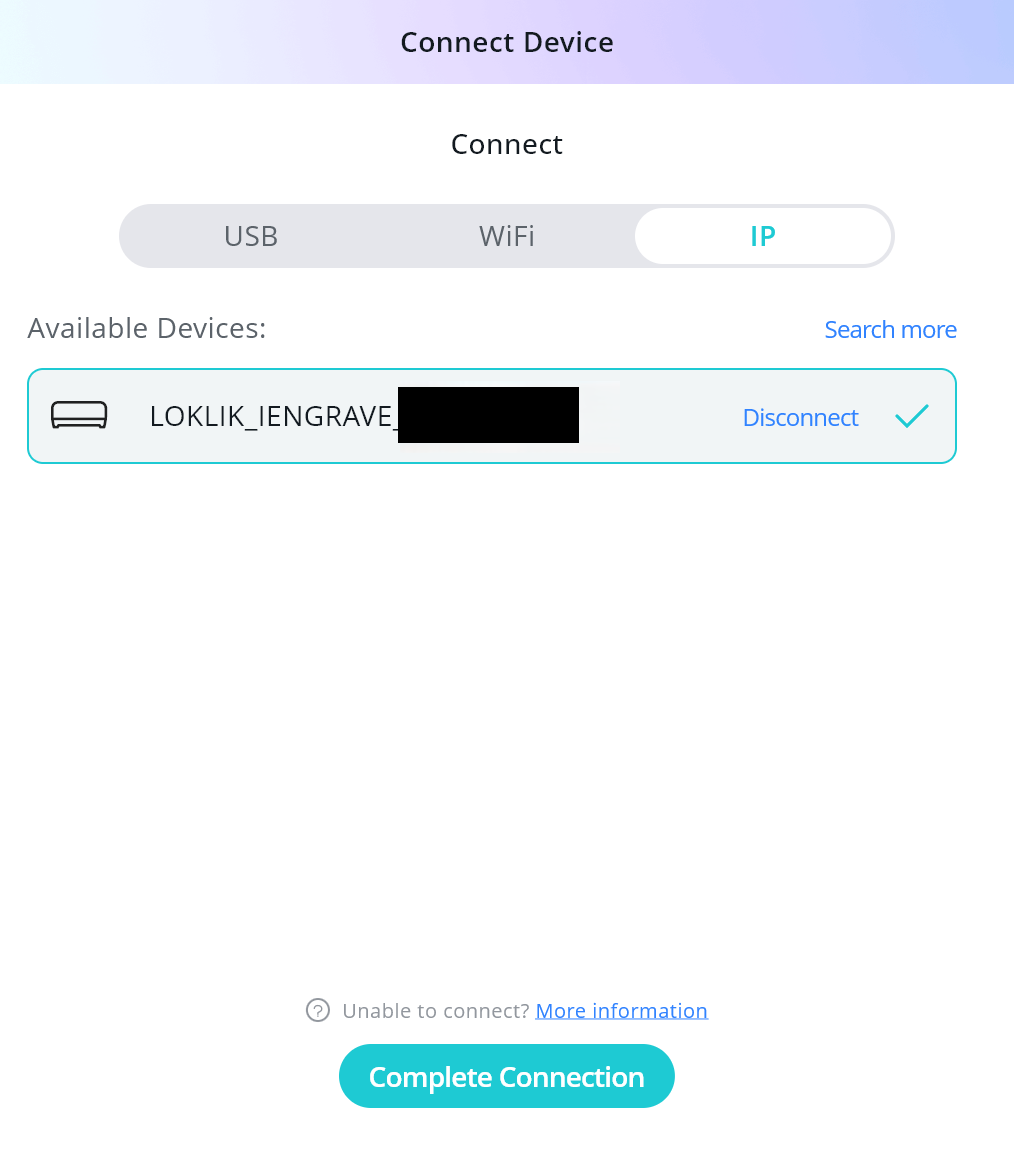
- There will be a checkmark added next to the device and click on “complete connection”.
-
Select the large circle and click on “make”. This will prompt you to enter the engraving settings.
-
Enter the cut settings to match the materials. Below are the settings I used for this tutorial.
Cut Settings - Circle Jig
Material: Kraft Paper 0.1mm
- Mode: Line
- Operation Style: Cut
- Power: 100
- Speed: 3000
- Passes: 1
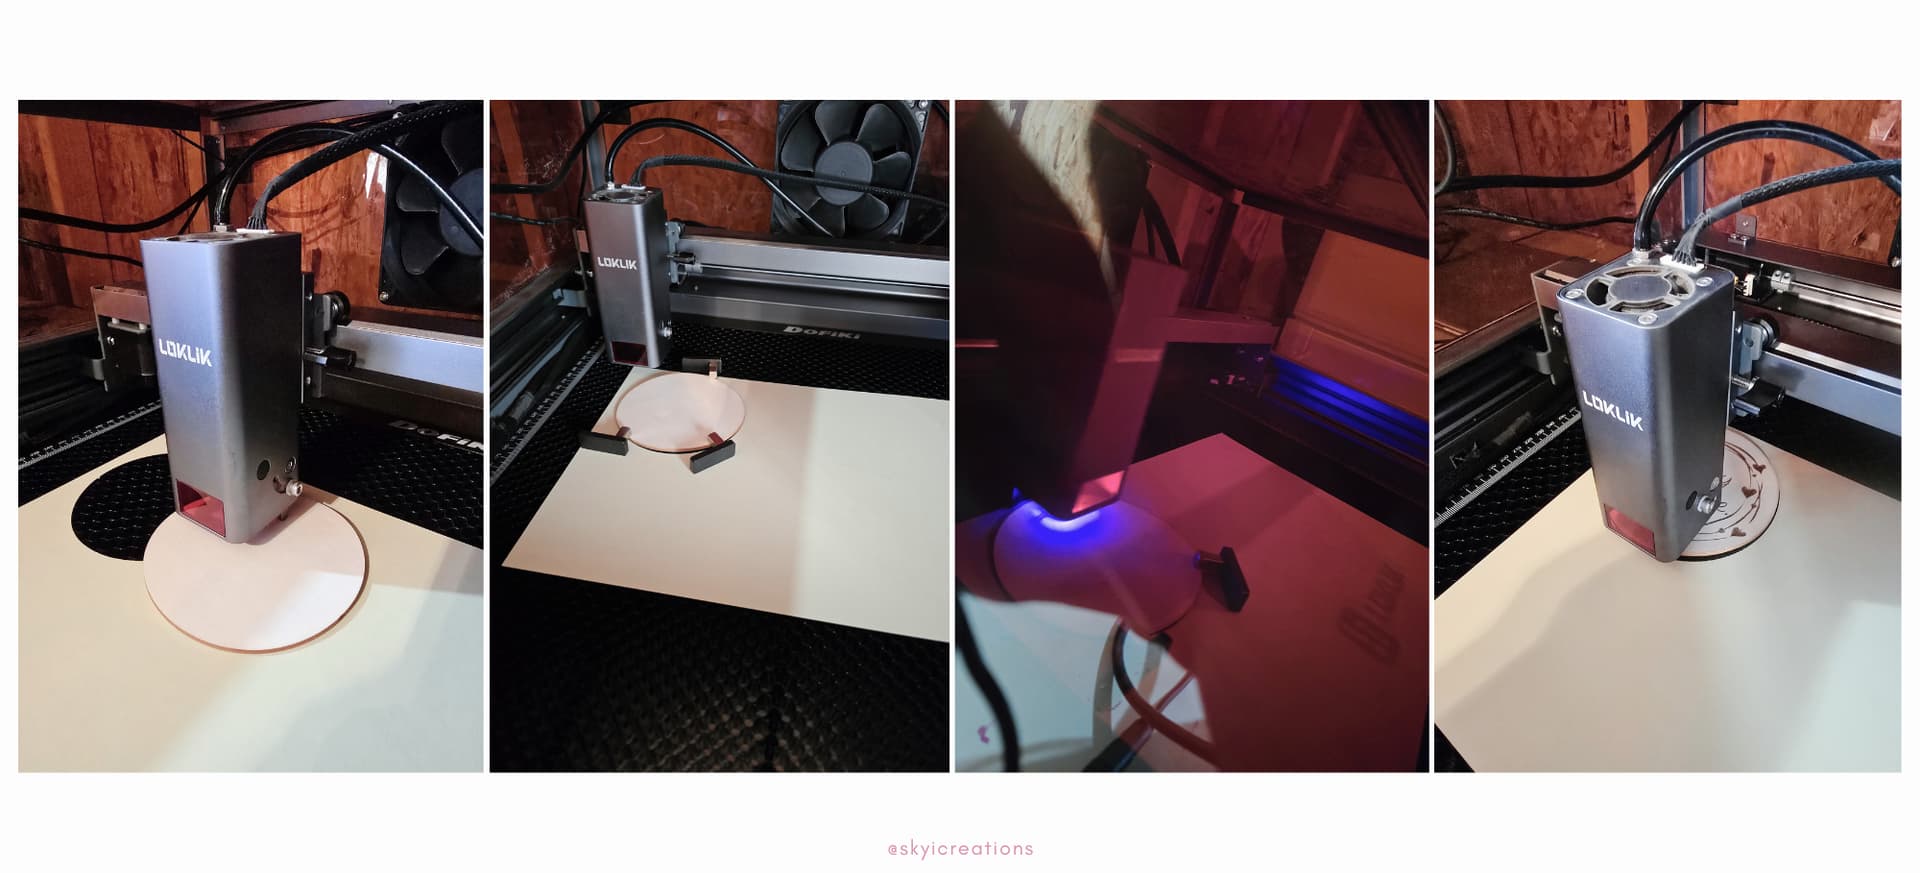
Prior to executing the engrave, make sure you frame the project. After entering the settings, the control panel has a “frame” feature. This is very important to ensure that your material is placed in the correct position.
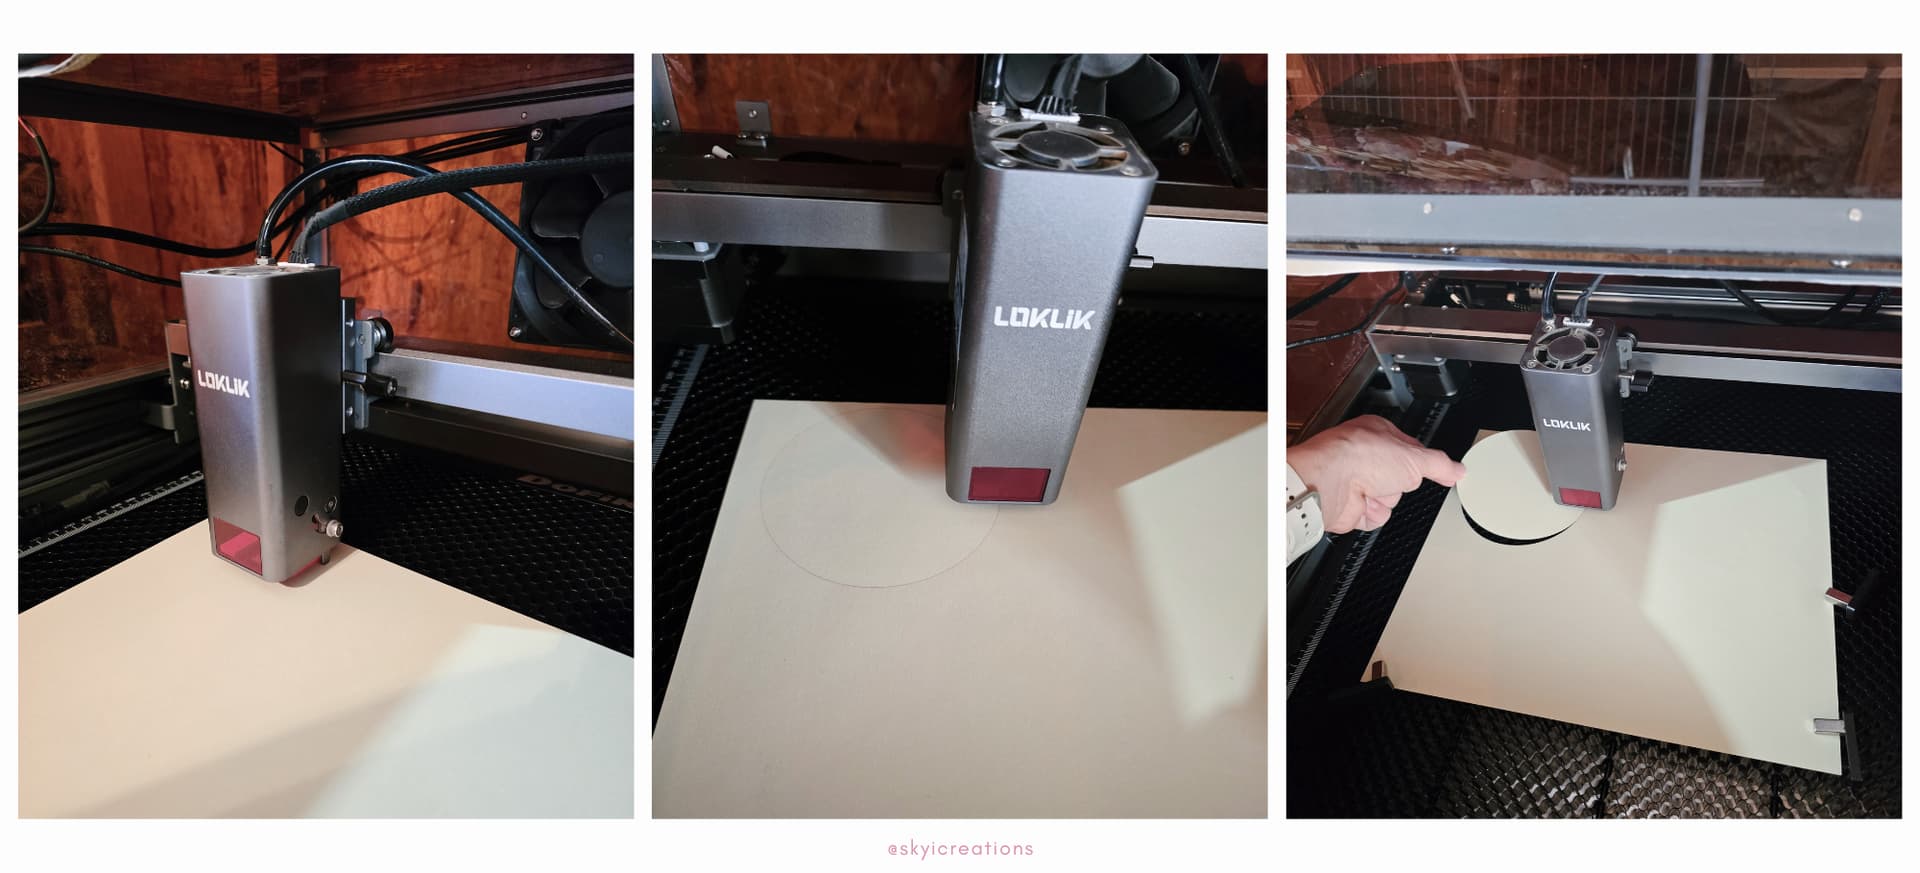
- Place your kraft paper in the laser and using the focal length pin ensure that the lowered pin touches the material. Adjust the laser head as needed and return the pin to its upward position.
- Using the Task List, send the project to cut.
DO NOT MOVE THE DESIGN ON THE CANVAS OR THE KRAFT PAPER AFTER IT CUTS. THIS MUST REMAIN IN THE SAME LOCATION IN ORDER TO ENSURE THAT THE DESIGN IS ENGRAVED WITHIN THE CIRCLE.
Engraving the design
- Place your wooden circle in the laser and using the focal length pin ensure that the lowered pin touches the material. Adjust the laser head as needed and return the pin to its upward position.
- Place the blank wooden circle within the cut circle made on the kraft paper.
- Return to your canvas and select the design and click on “make”. This will prompt you to enter the engraving settings.
- Enter the engrave settings to match the materials. Below are the settings I used for this tutorial.
Engrave Settings - Wooden Circle Design
Material: Bamboo
- Mode: Fill
- Operation Style: Engrave
- Power: 50
- Speed: 5000
- Passes: 1
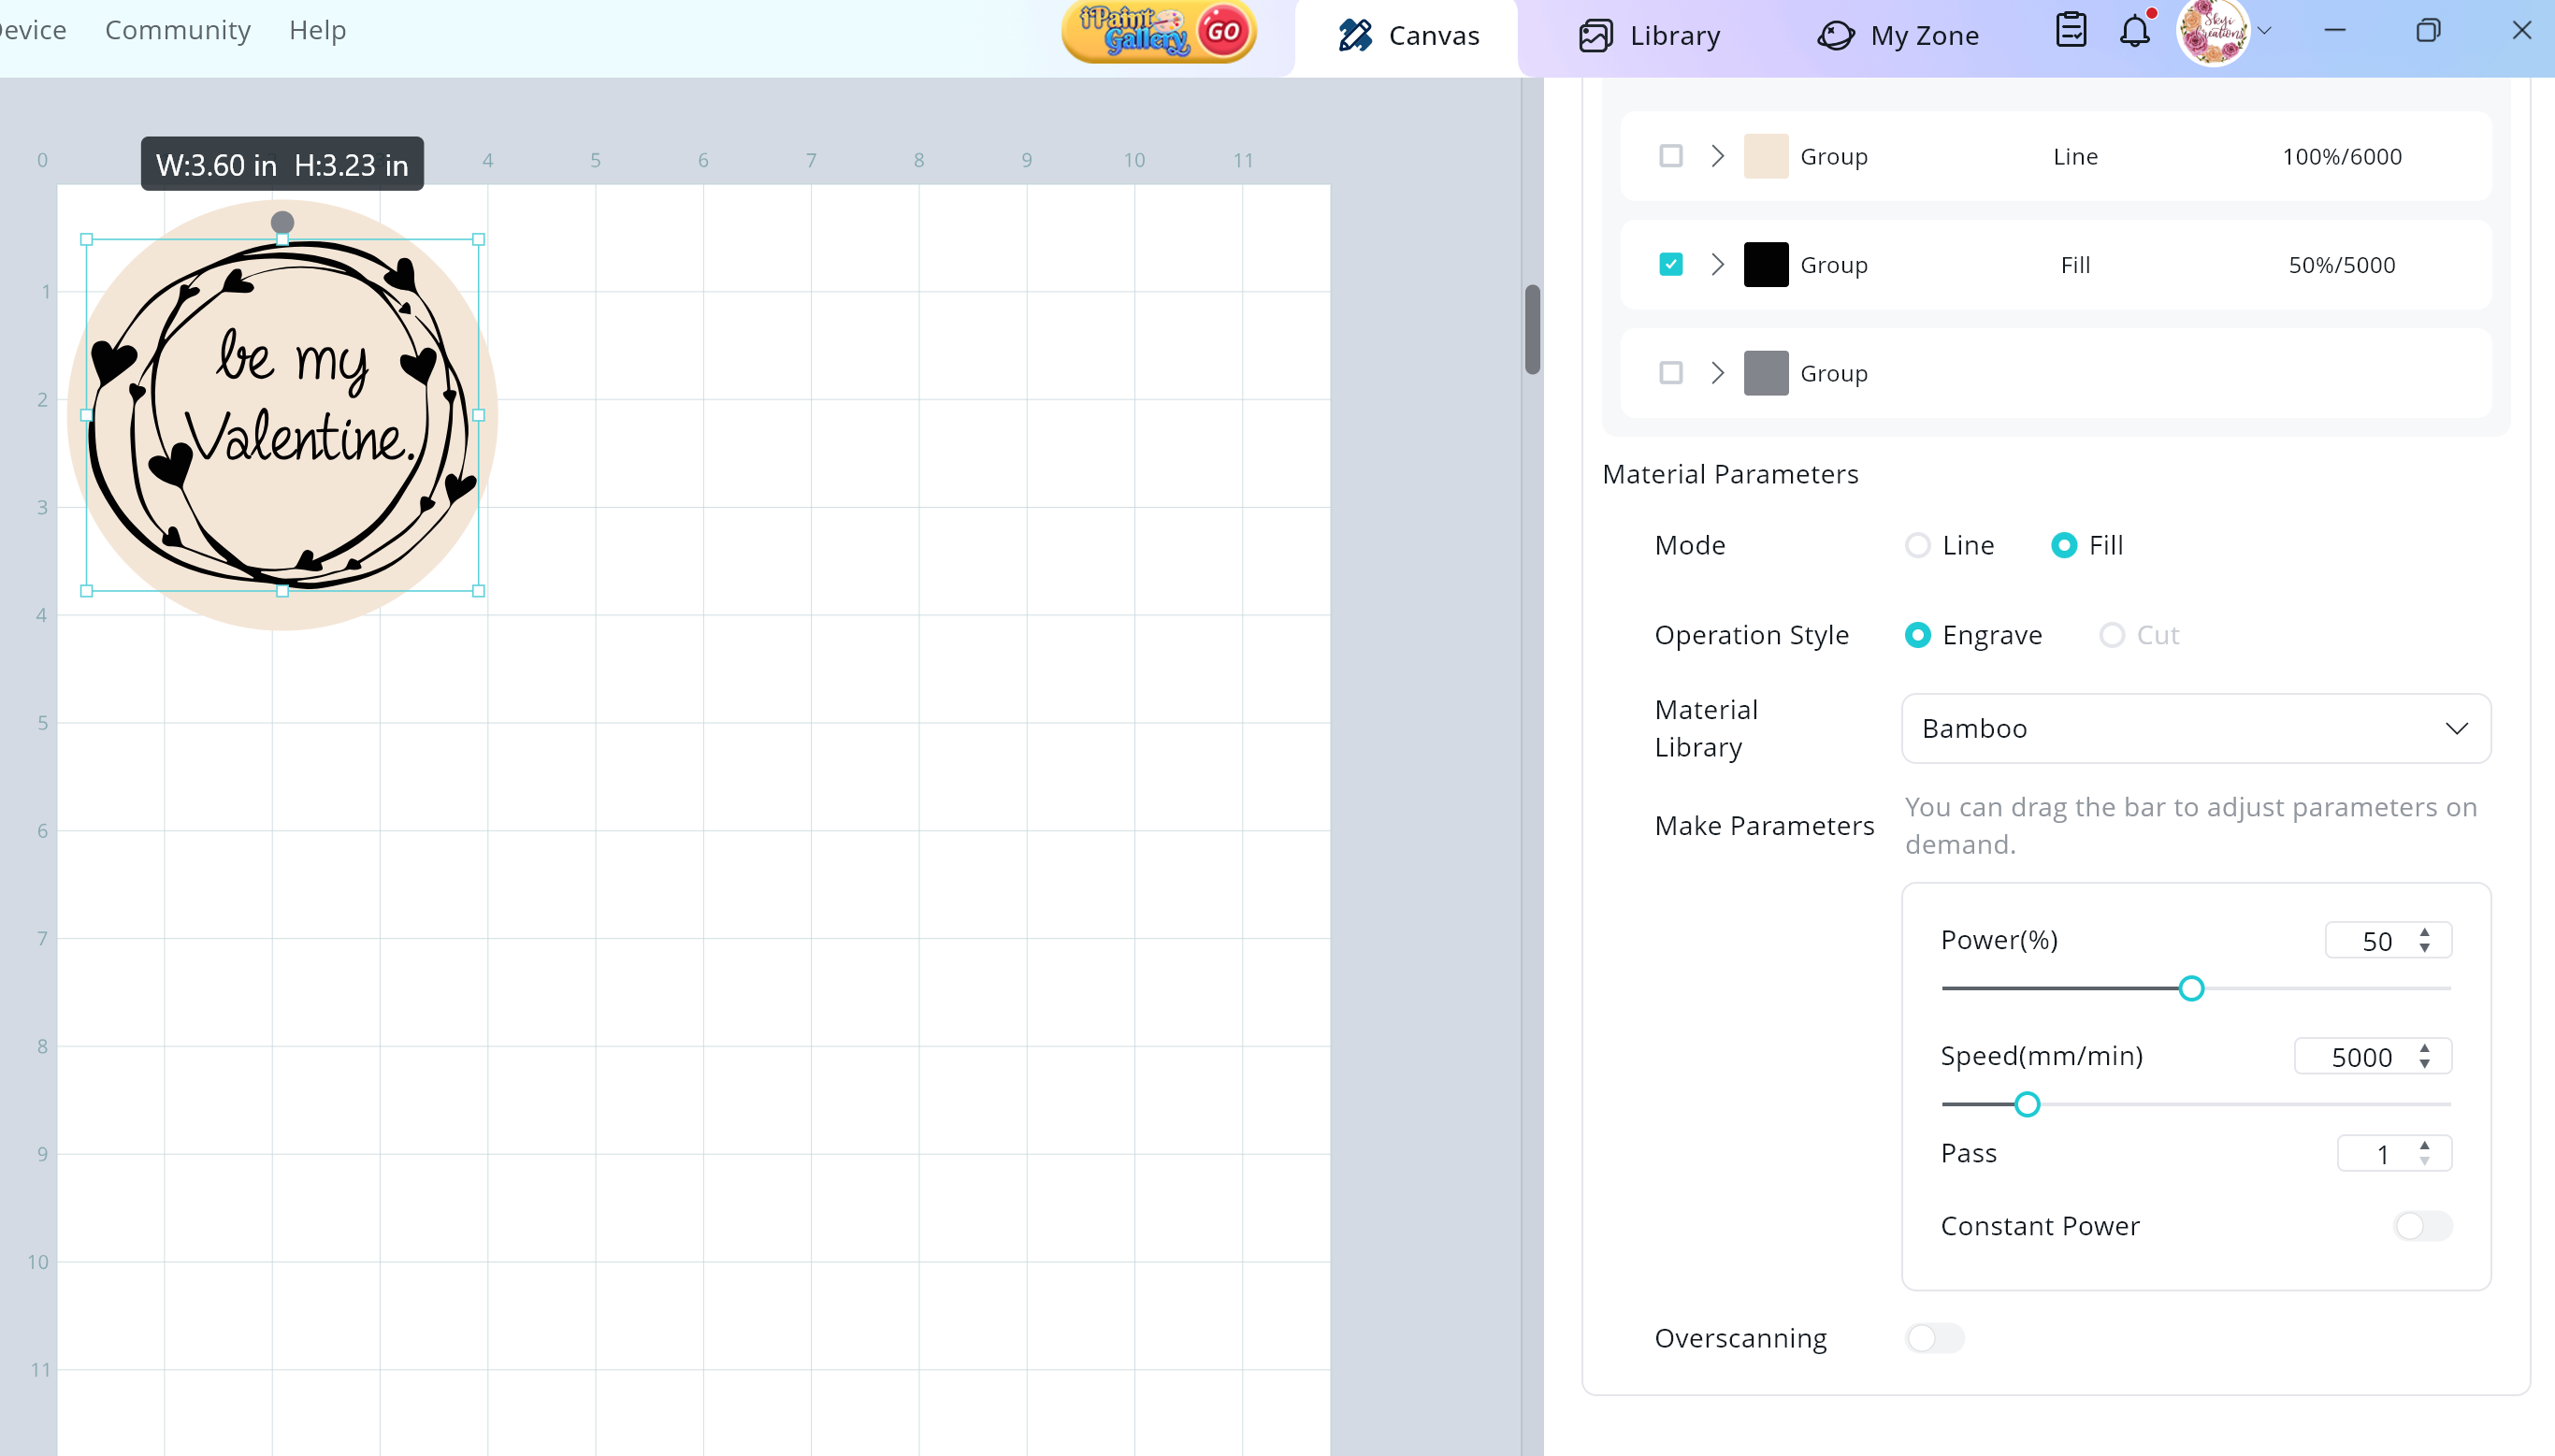
- Using the Task List, send the project to engrave.
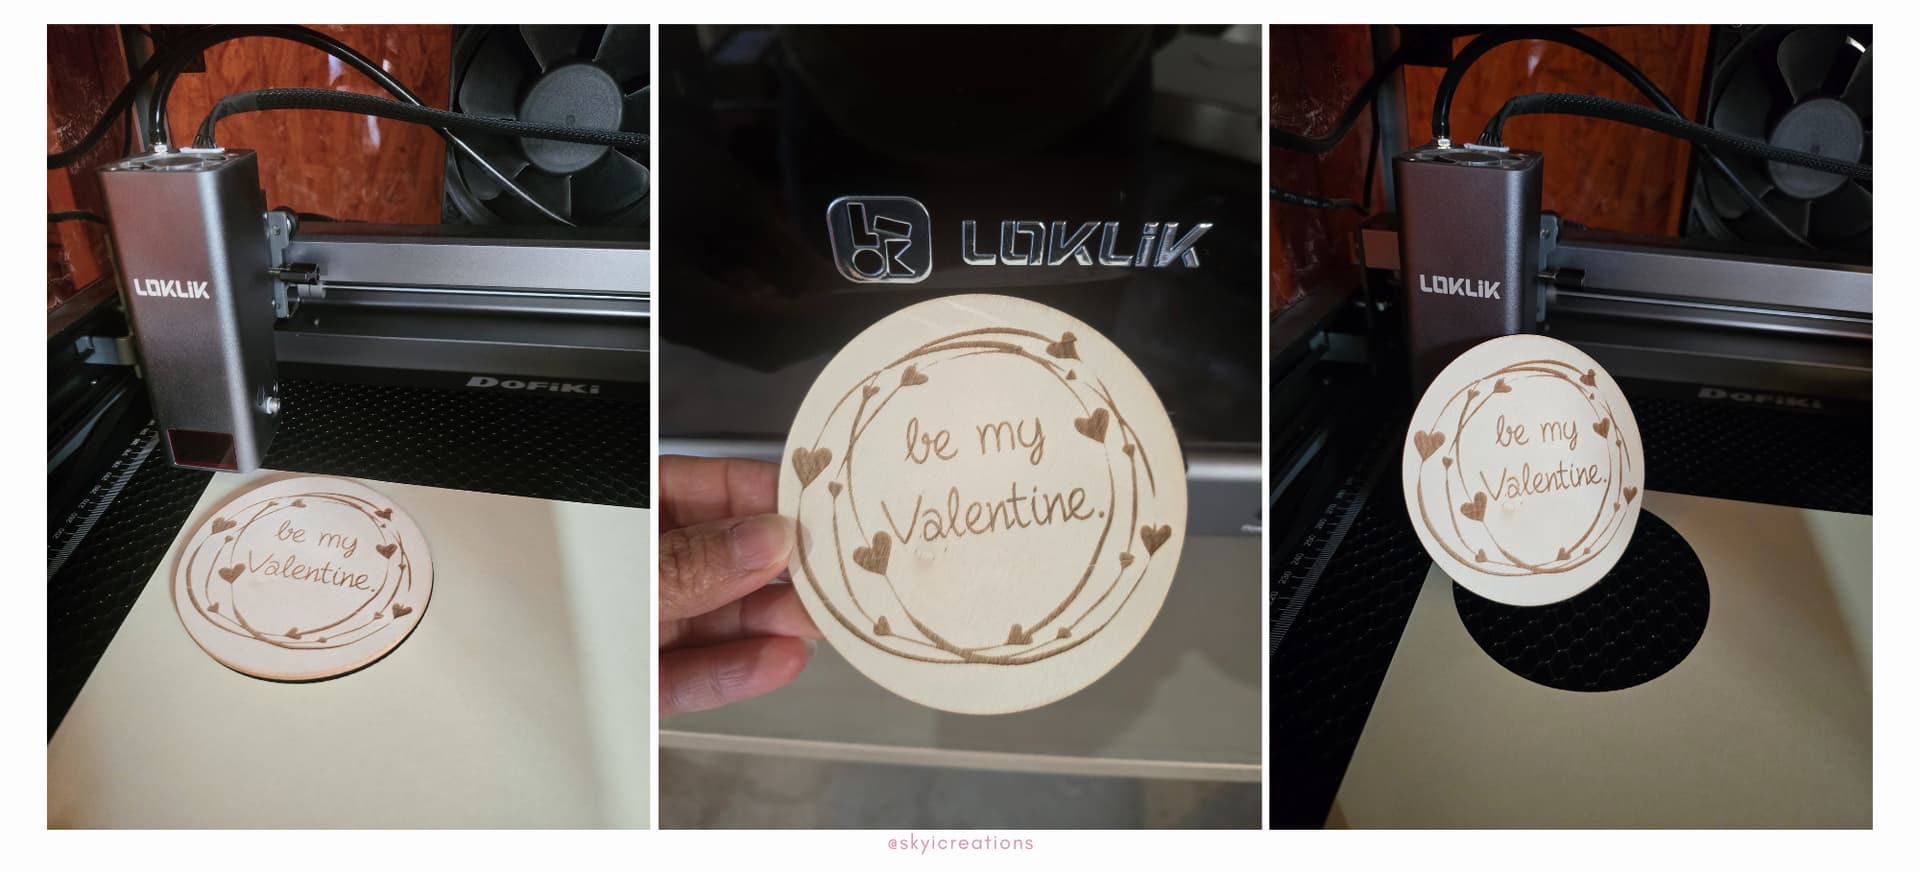
WONDERFUL!!! You have created a personalized wooden circle and now know how to create a jig. Who will you make a wooden circle for?.
