Project Overview:
Don’t worry crafters, I have you covered with ideas for Easter! As a DIY mommy of 4, I love to treat my kiddos to handmade gifts to make the season even more memorable. Join me as we create a paper candy box to fill with their favorite treats. The best part is that all of the designs used are FREE in the LOKLiK IdeaStudio library.


Materials:
- Cutting machine: LOKLiK iCraft
- Sticky mat: LOKLiK standard grip
- Cardstock: 1 - 12in. by 12 in. Bazzill 80lb or equivalent (I used Wisteria for this tutorial), 60 lb or equivalent for the details (1 - 8.5in. by 11in. per color)
- HTVRONT Inkjet Glossy Photo Paper
- Printer - I used the Epson ET-2803
- Templates: from LOKLiK Library
** Free Easter rabbit and letter*
** Easter Egg Pink, Yellow, Blue*
** Free Easter rabbit SVG file*
** Free SVG file for purple candy gift box* - Craft glue and hot glue
- Craft foamies/cubbies
- Coordinating ribbon to close the candy box
Design and Cutting Process:
- Using the LOKLik IdeaStudio Library, search for the templates and select the + to add the template to the canvas.


Now it is time to take these designs and adjust them to meet our needs for this project.
Adjusting the standard cut designs for print-then-cut
- In order to adjust these cut designs and make them usable for print-then-cut, we will be ungrouping them and adding an offset.
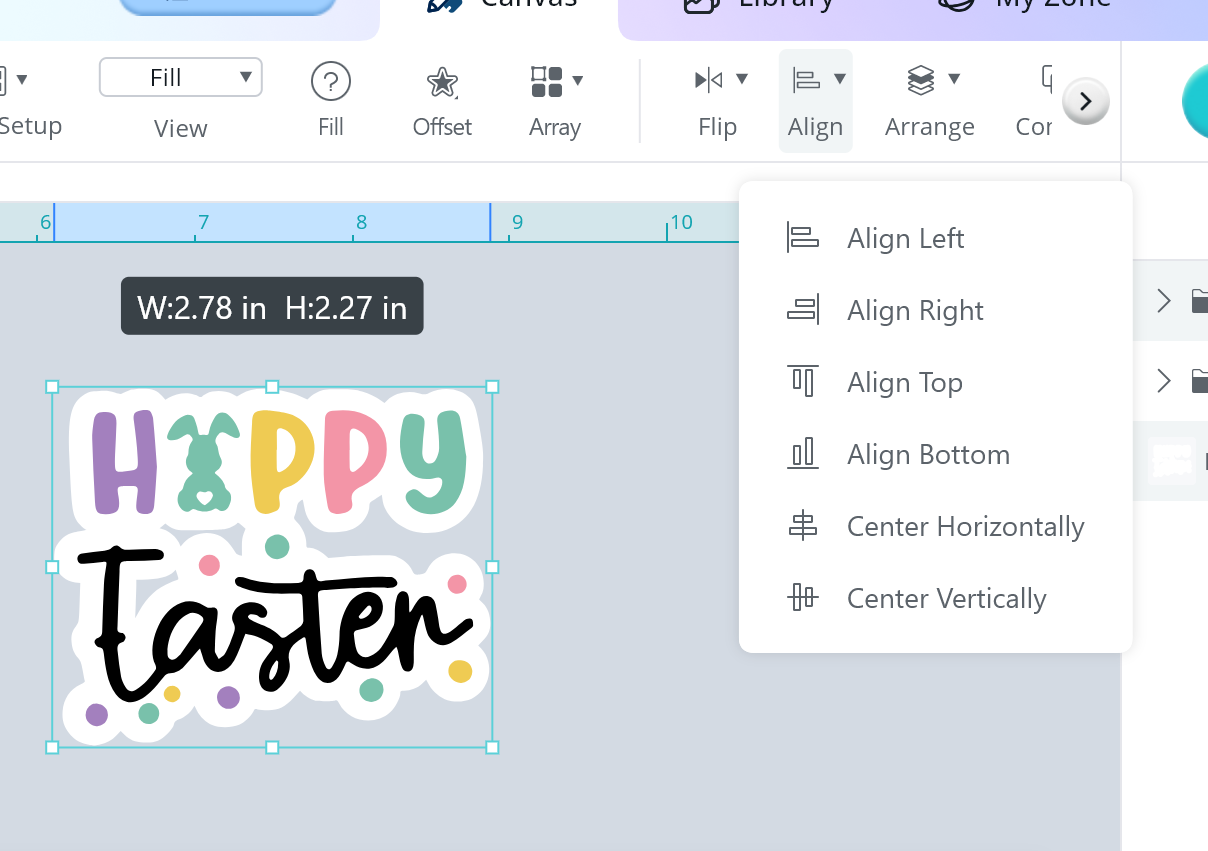
For the Happy Easter text, create an offset of the entire design.
- Click on the “offset” tab and increase the external offset. For this portion, I entered an offset of 10mm.
Before you click apply, increase or decrease the offset amount to find the perfect size of offset you prefer. I chose this offset size to help keep all of the letters and dots as 1 printed piece


- Select the preferred color for your offset using the “fill” button along the top.
By changing the colors as you add shapes and designs, you are able to visualize how your cake topper will look once complete, this step is very helpful to me.
- Align the design and the offset by selecting Center Horizontally and Center Vertically
For the easter bunny design, we will be ungrouping the design and then the bunnies as well so we can use 2 rabbits for the project.


For the easter eggs, we will be creating an offset around the edge of the eggs to use that as cut border instead of each individual color/piece.
- Click on the “offset” tab and increase the external offset. For this portion, I entered an offset of 3mm. Recolor each new offset along the process.


- Click on the “fill” tab and using the dropper icon, hover over the egg to recolor the offset the same color as the original egg.


Complete this step for the other easter eggs (the blue color and pink color).
- For an added layer, created an offset of the “Happy Easter” design. For this project, I created 2 offsets of 5mm (purple and pink) to add additional dimension.


Great job! Now you have the designs ready to resize to best fit your project.
- Place the “Happy Easter” design along with the offsets. the 3 Easter eggs, and 2 of the bunny designs over the box template. This will allow you to resize as needed or preferred.

IMPORTANT TIP: This is the perfect time to tweak and adjust the layout and sizing depending to best achieve the design you prefer.
- Arrange the designs on the canvas to maximize the print area. I like to double stack my printed items to add dimension to the project. As you will see below, I copied/pasted the eggs and bunnies prior to the next step.
- Select the Print-Then-Cut mode and send the images to print.

- You will be prompted the printer preferences for you to update according to your printer/paper requirements.
For this particular project, I used the HTVRONT Inkjet Glossy Photo Paper and the print settings below


IMPORTANT: DO NOT MOVE THE PRINT DESIGNS ON YOUR CANVAS. You already have printed the design and want to ensure that the images on your canvas matches your printed paper.
- On your canvas, create a “0” offset of the designs.
- One by one, select the printed designs and click on the far right layer menu to make that item “not seen”

- Select the “0” offset items and send it to make.
- Continue the process under the Print-Then-Cut mode, select “printed”
- Select the correct group on the settings and update the cutting parameters
- Load your printed paper on the cutting mat and send it to cut.


** Material Type: Cardstock Paper (180g/97lb)
**Force: 7.5
**Speed: 5
**Passes: 2
Remember that the original designs were made to cut each color separately, this will allow you to print all the colors and only cut the exterior edge.
- Select the remainder of the items to cut. Below are the settings that I used for the project.
65lb Cardstock and HTVRONT Inkjet Glossy Photo Paper Cut Settings
** Material Type: Cardstock Paper (180g/97lb)
**Force: 7.5
**Speed: 5
**Passes: 2
80lb Cardstock Cut Settings
** Material Type: Cardstock Paper (230g/124lb)
**Force: 8.5
**Speed: 5
**Passes: 3
80lb Cardstock Score Settings
** Material Type: Cardstock Paper (180g/97lb)
**Force: 5.5
**Speed: 5
**Passes: 2
Assembling the Candy box
- Begin by assembling the candy box. Use the scoring marks as a guide.
- Place glue on the 2 side flaps and place the long flap over it. Using a ruler or pen to press down on the paper to ensure the glue adheres correctly.
- Place glue on the remaining long flap and close the bottom of the candy box.


- Using a ribbon, “close” the candy box by placing the ribbon thru the hole on the top of the box.
- Tie a bow to secure the box.

- Prepare the printed cutouts for the candy box by adding craft foam between each layer.

- Using the glue gun, glue the 3 easter eggs to the box, the 2 bunny cutouts and the “Happy Easter” design.
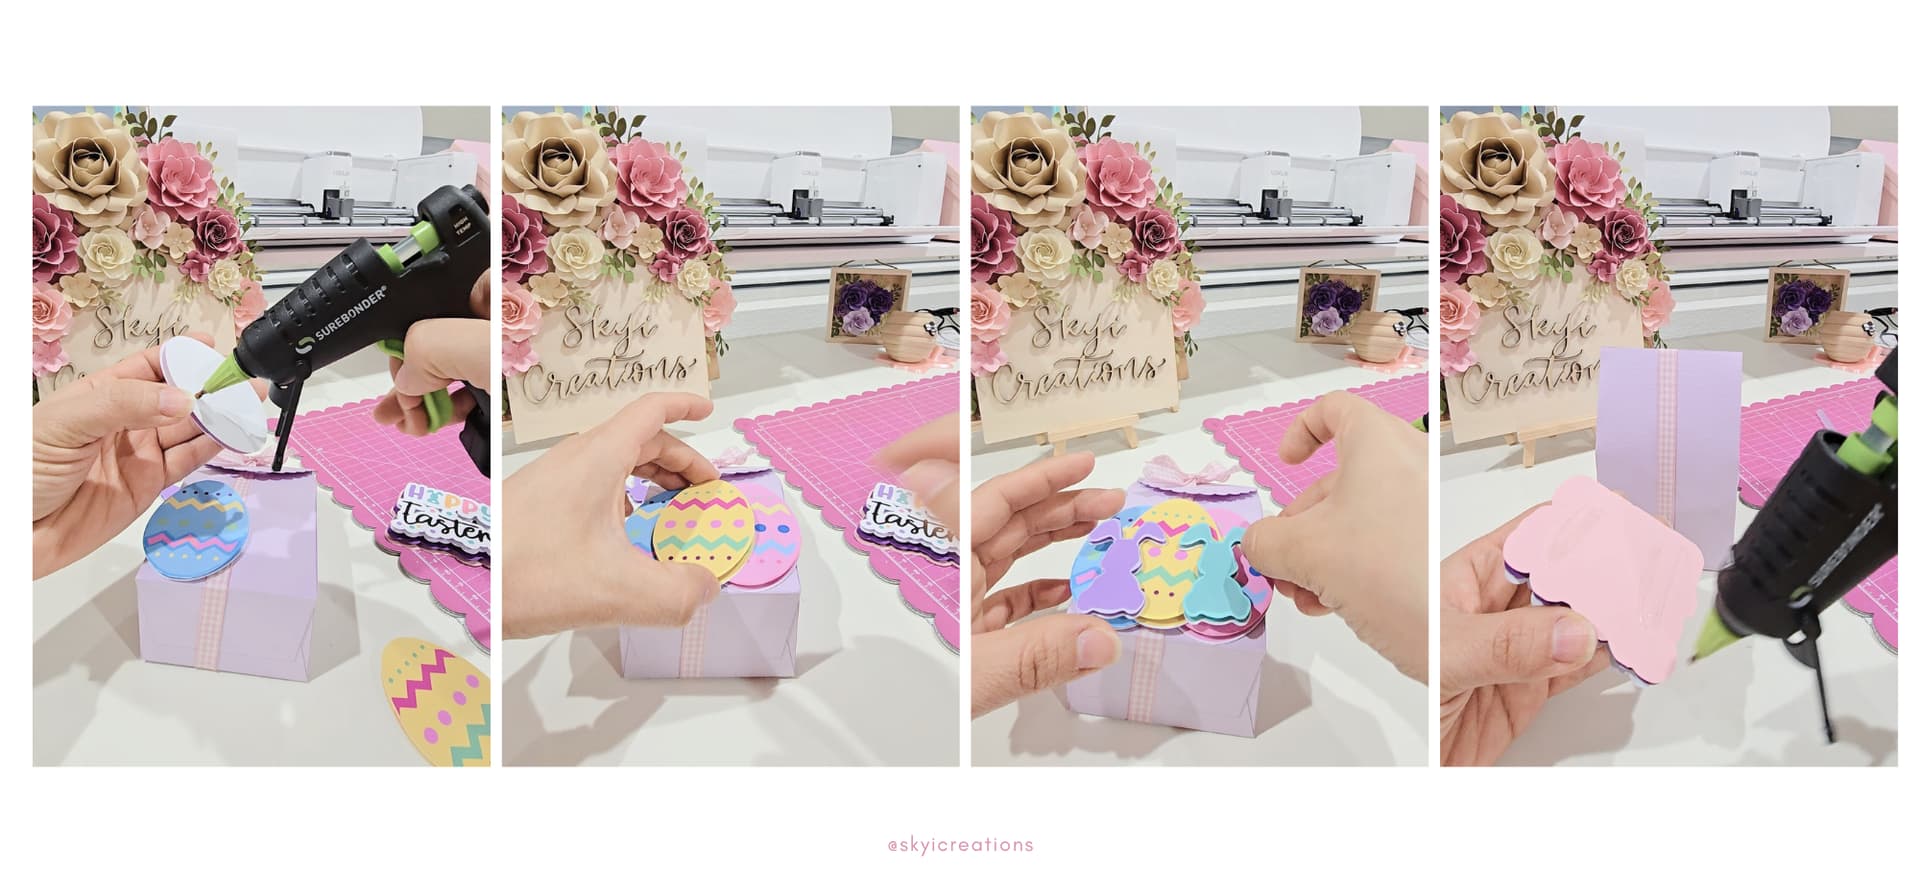
After assembling the box, I realized the “Happy Easter” design was too big for the bow area so I glued it to the back of the box.
WONDERFUL!!! You have a paper candy box. Now to decide what goodies to place inside and to see the awesome reaction from the recipient.