Unfortunately, I don’t have this machine yet but thought I would put @rinsky awesome tutorial video here for you to look at. Maybe it will answer some of your questions. If not, please take some photos of your issues so others can get a clear view of what you are asking.
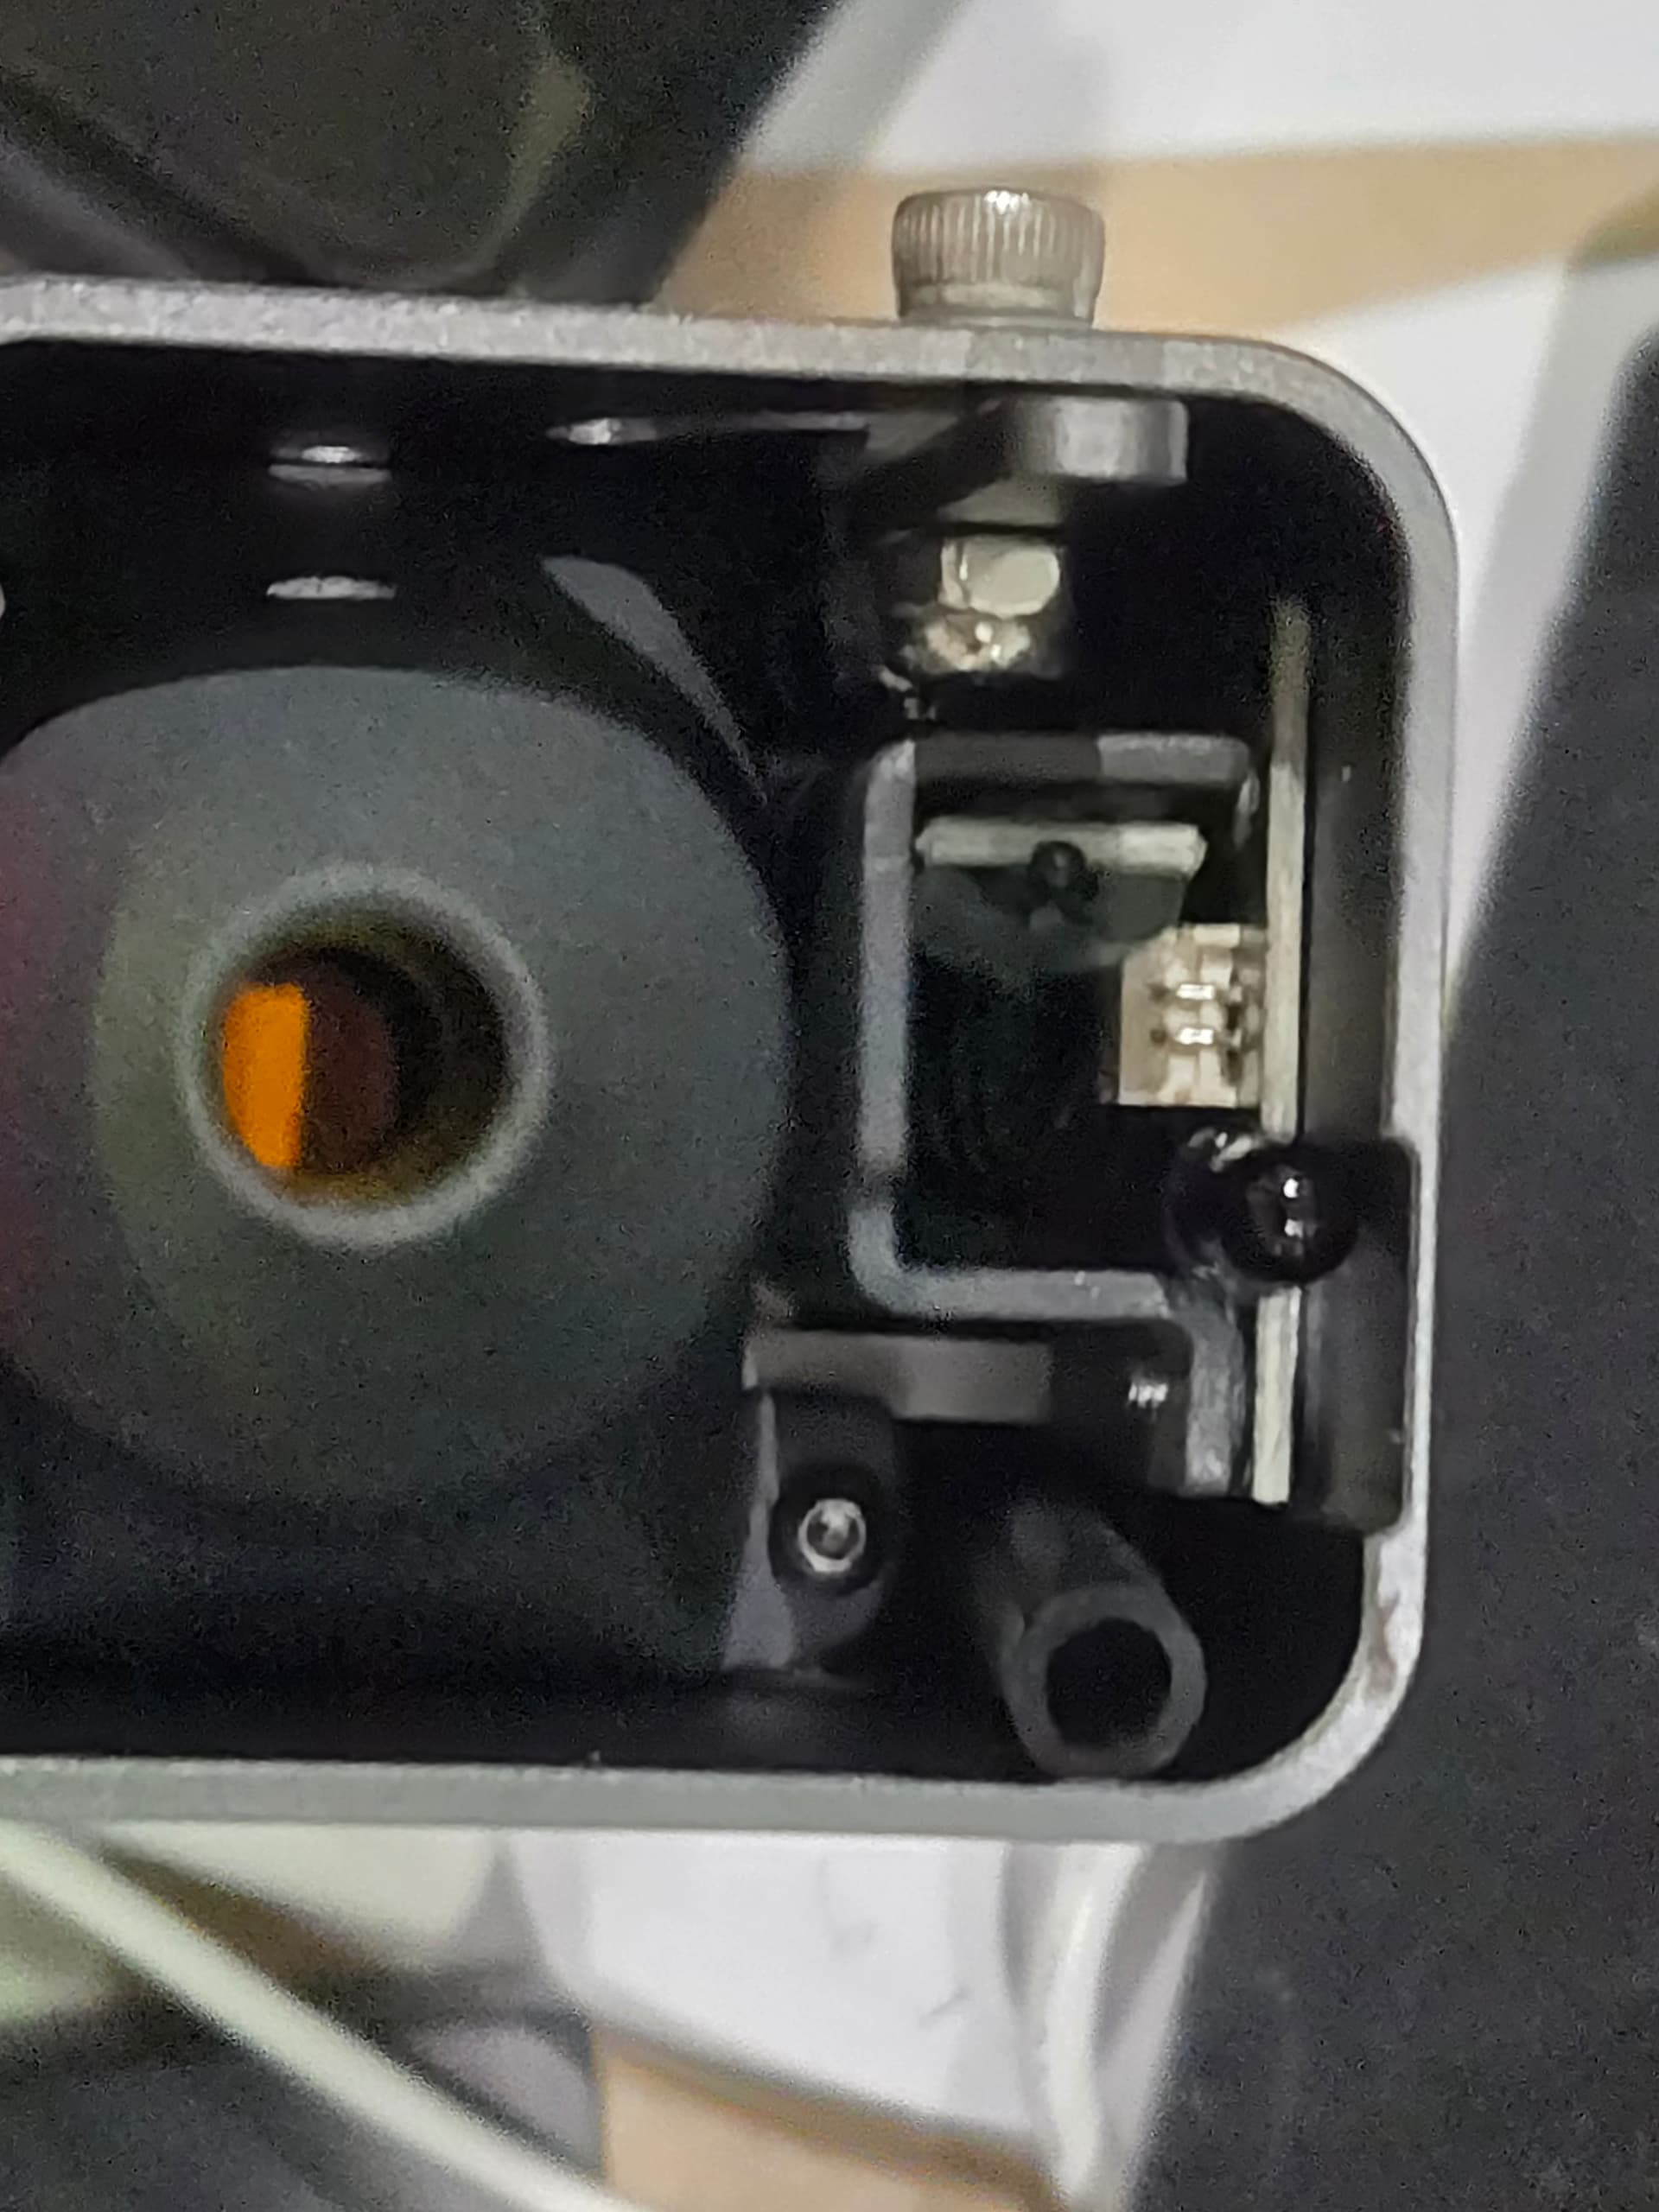
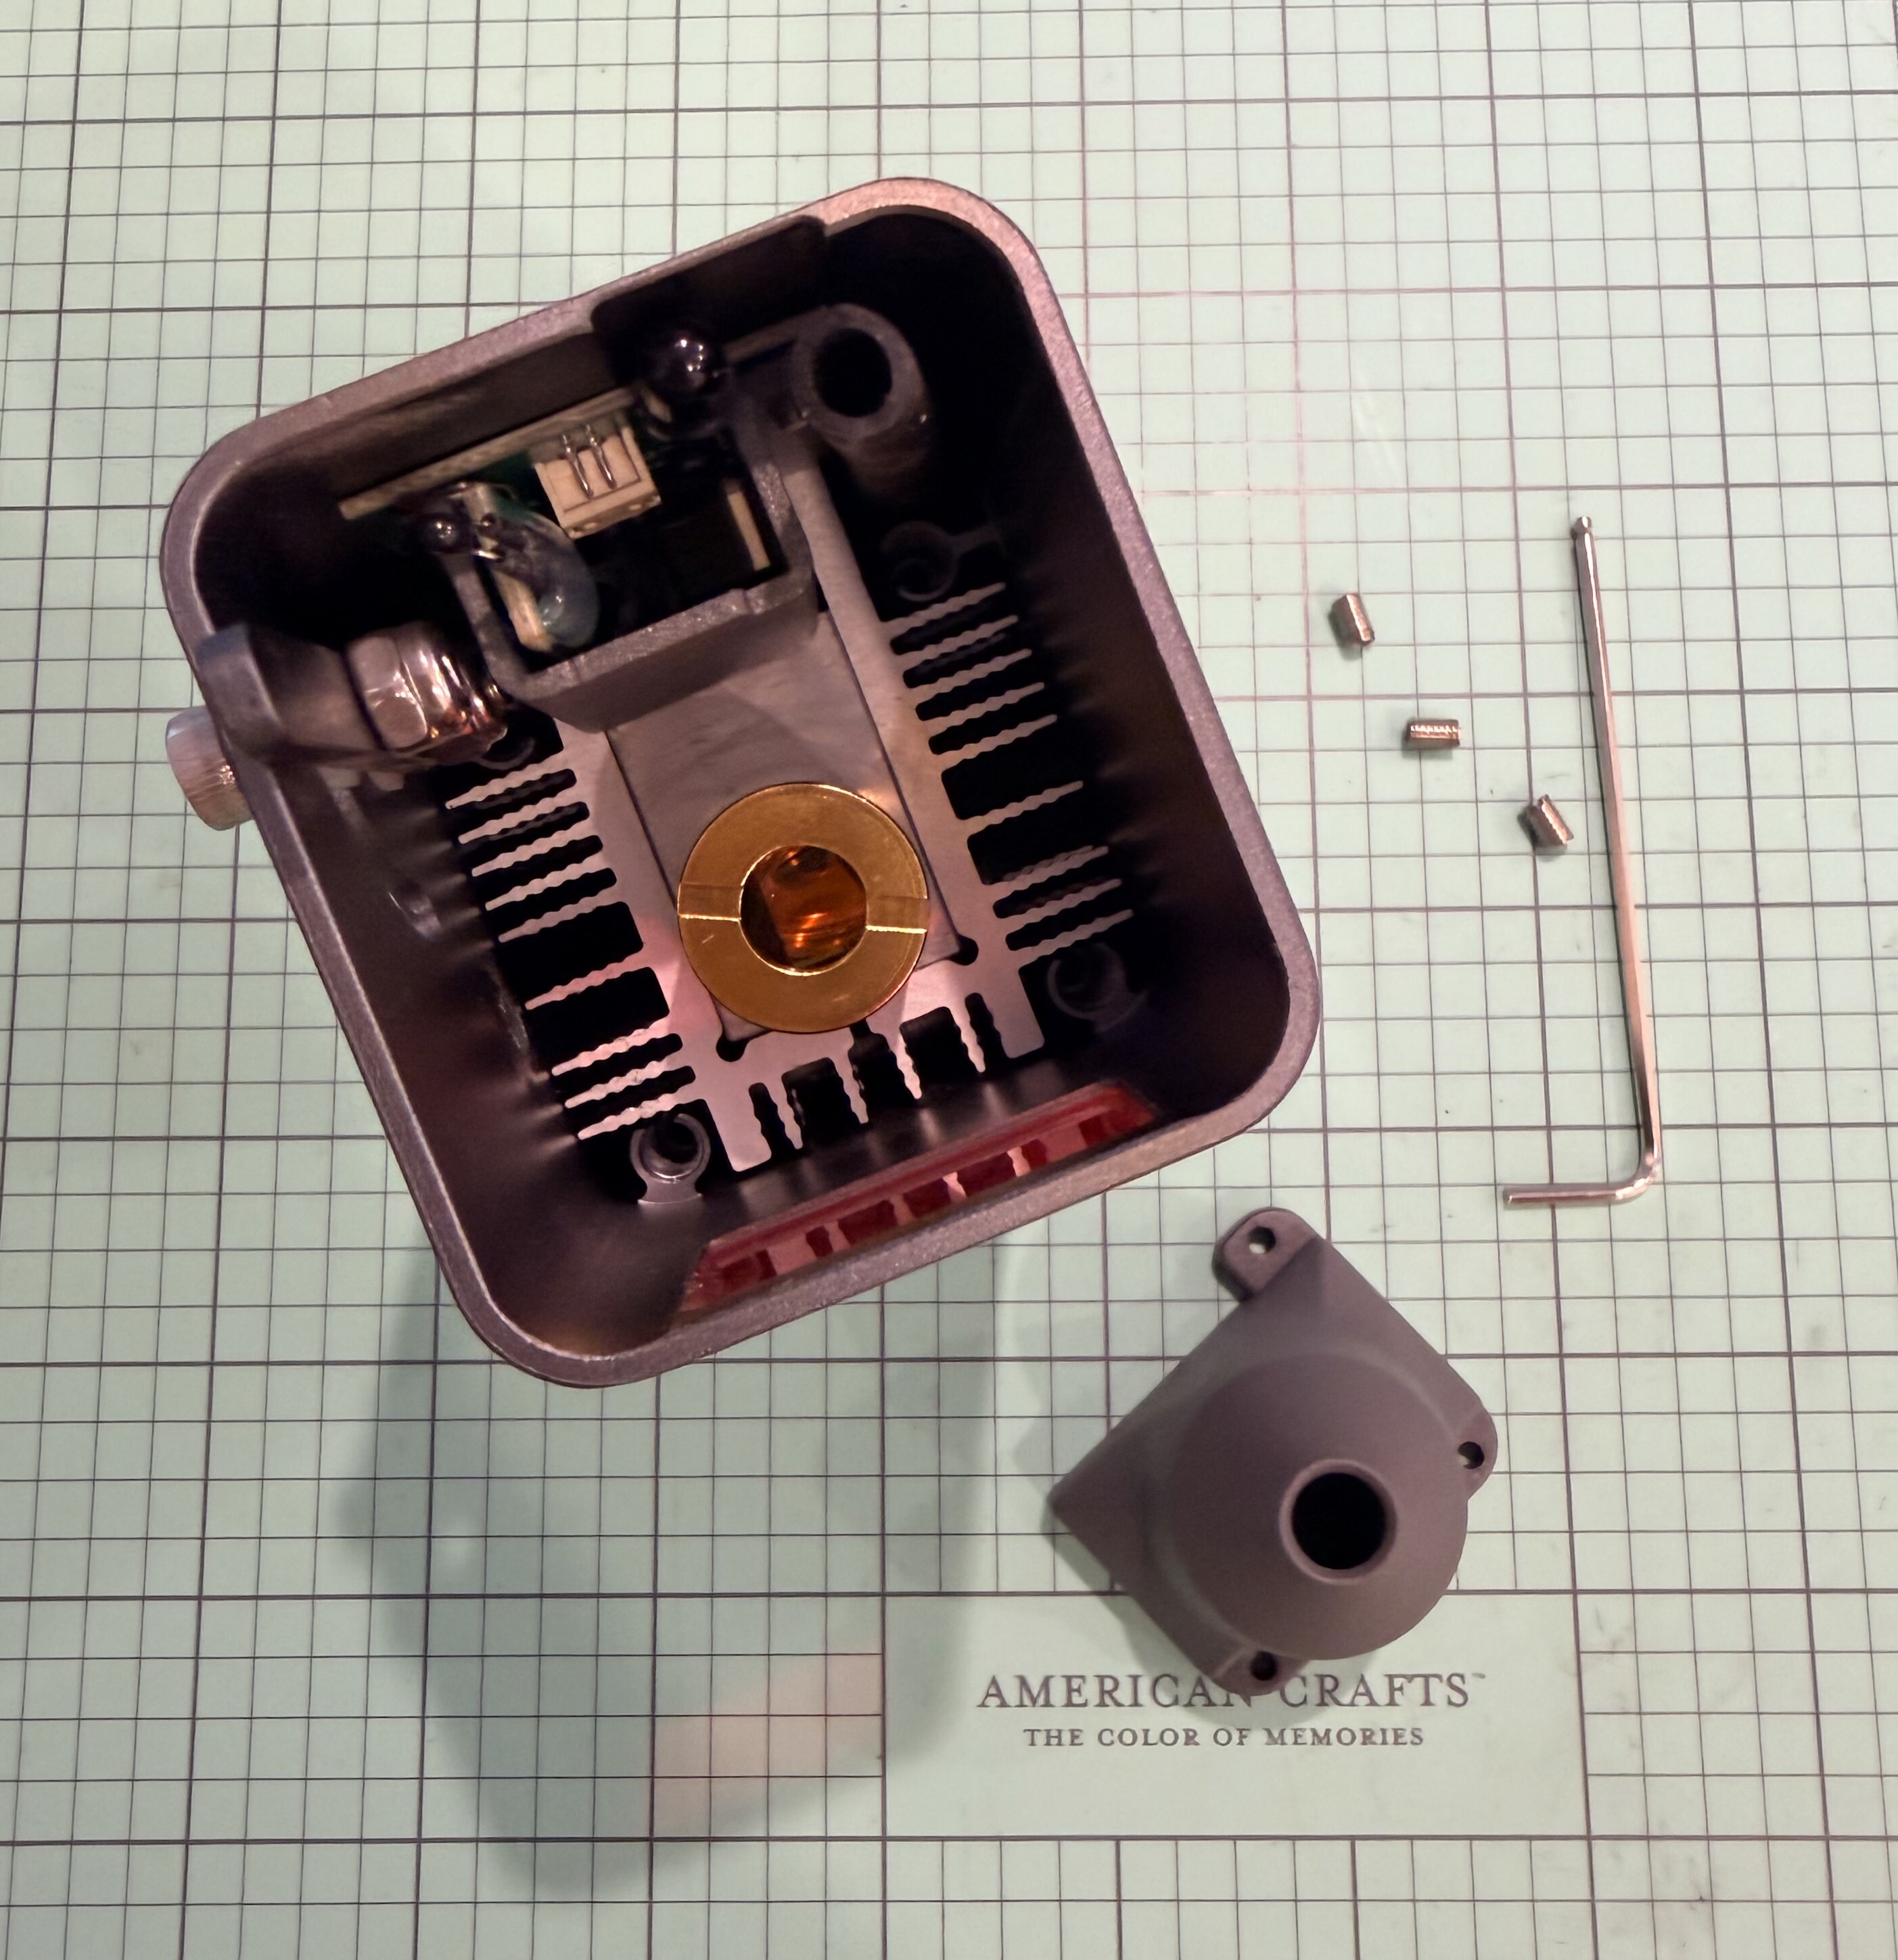
@Dennis_Flynn1, there should have been a specific air assist lens cover in the box with the air assist module. To remove the original, you will pull down the focusing tab so that it is extended outside the laser module. That should help you get access to the three screws that attach the original lens cover so you can remove it. You will use the Allen wrench to remove the three screws and the original lens cover will fall out when you turn the lesser module over. Then attach the air hose that is hanging down in the laser module to the air assist nozzle coming off the smaller lens cover that should have been in the air assist box. Before you drop the air assist lens cover over the lens, lightly loosen the Allen wrench screw on the side to allow the lens cover to drop on easier. Once it is dropped on you will use the hole on the side to tighten down the Allen wrench screw on the air assist lens cover to make sure it is tight and wrong fall off. The plug for the whole should be in the air assist box as well. Then the nozzle on the top of the module will be connected to the air hose coming from the air assist box. Please let me know if you need more help. I could probably pull some pictures together for you.
My iEngrave didn’t come with external accessories either—no air assist or rotary attachment—so I’m in the same boat. I recommend following @Cory_Barger’s guidance closely; they’ve been super helpful with setup tips. Please keep us posted on your progress—I’m rooting for a smooth and successful install!
And thank you @BellethehowtoGuru for the tag! I wish I had more insight to share, but I really appreciate @Cory_Barger stepping in. Your support means a lot to all of us!
Thanks for the response. Did they supply you with the small wrench to remove the nozzle?the smallest one that came with the main unit is to large. Looking at the new nozzle i figured there should be a set screw in the empty hole but there wasn’t and no plug either. Do you know the size of the allen wrench i would need?
Thanks for the information. The air assist came with the hex wrench (unfortunately I don’t have my hex wrench kits at the house currently to be able to tell you the size, but it is small, I know that) that you use to remove the screws from the original lens cover and is the same hex wrench you use to tighten the set screw on the air assist nozzle. The bags in the air assist kit would have included all the parts and tools needed for the removal and installation of the air assist nozzle. If you do not have all the contents, it is possible that a bag was left out. I know the way they package their equipment, that things hide. If it isn’t in there then you would need to reach out to support to have a new kit sent to you. I know from experience that errors can be made. My air assist kit power adapter was for the UK and not the US when I received mine.
I have provided the steps below to do the installation with some pictures that I took. I know you may have done some of these steps, so please feel free to advance to the step you might find helpful if any. Please let me know if you have any other questions, I am happy to help.
Step-by-Step Installation Instructions
Step 1: Power Down and Unplug
Before you begin, turn off the LOKLiK iEngrave and unplug the power cord for safety. Allow a few moments for any static or residual power to discharge.
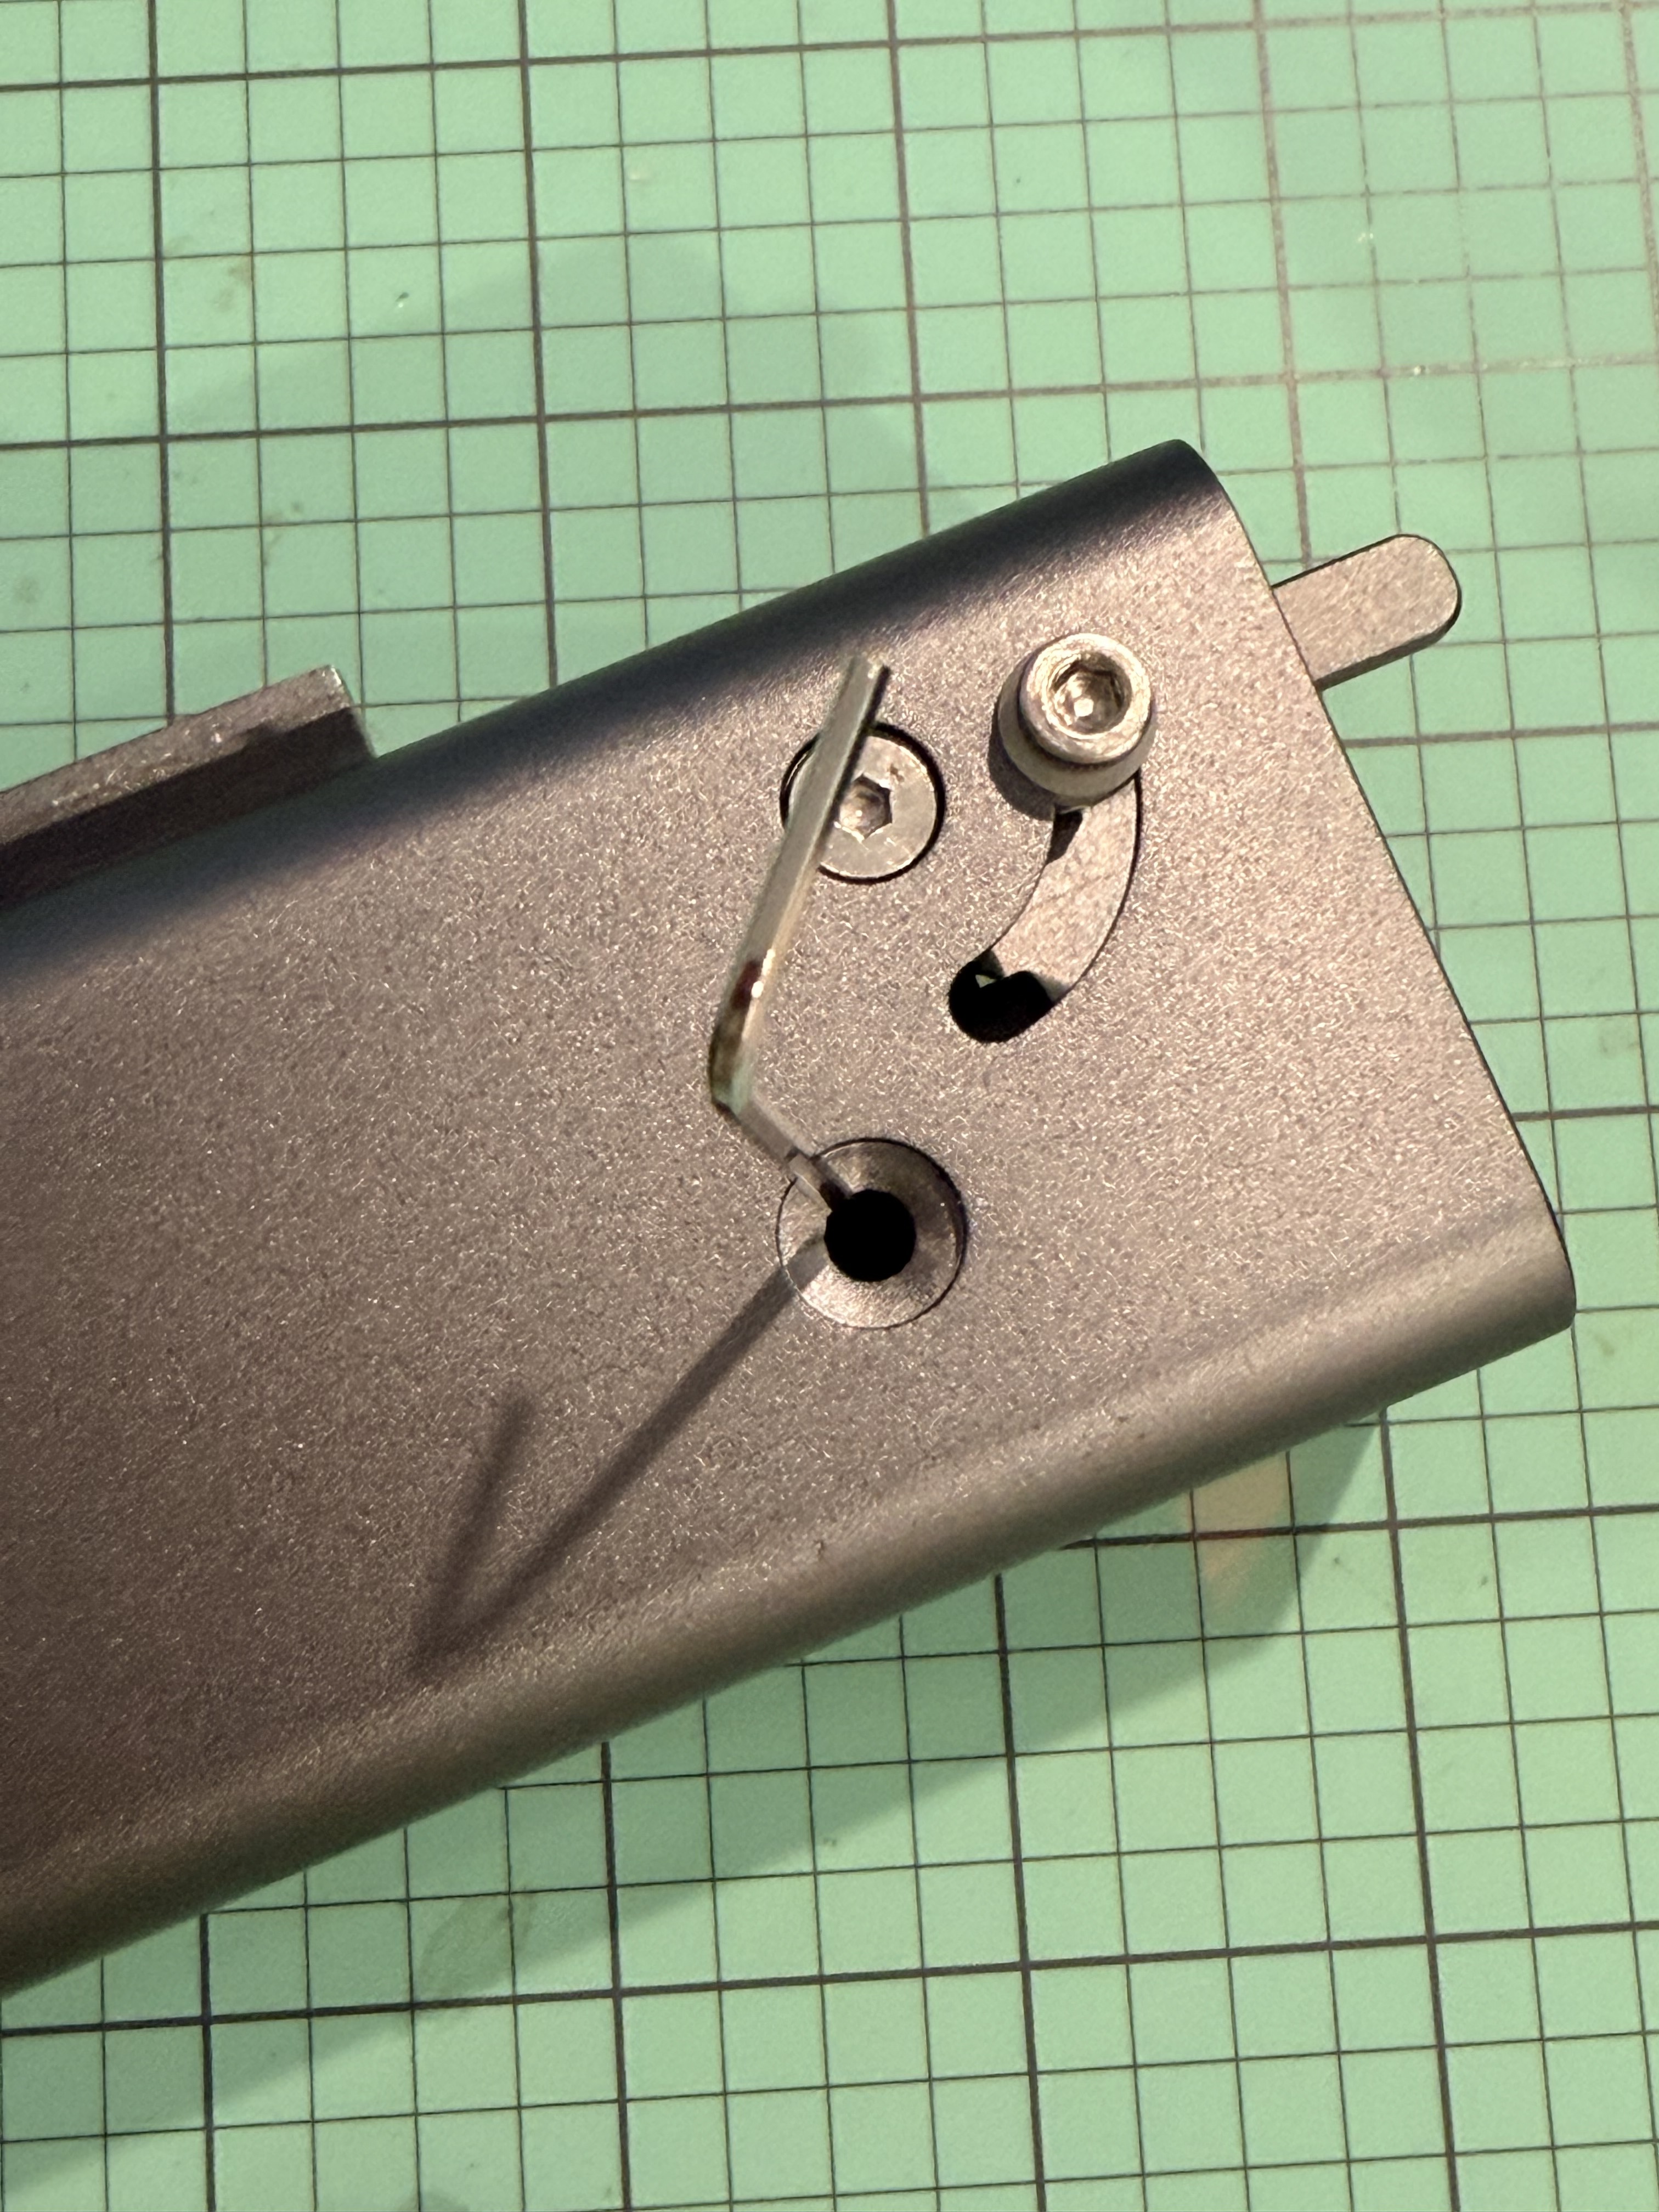
Step 2: Remove the Set Screws
Locate the three small screws on the sides of the original lens cover at the bottom of the laser head.
Use the provided Allen wrench to carefully loosen and remove these screws. (I also removed the actual set screws as well as mine had started to work themselves out in the process of the laser moving and I didn’t want to do any damage.)
Keep them in a safe place, as they are small and easy to lose.
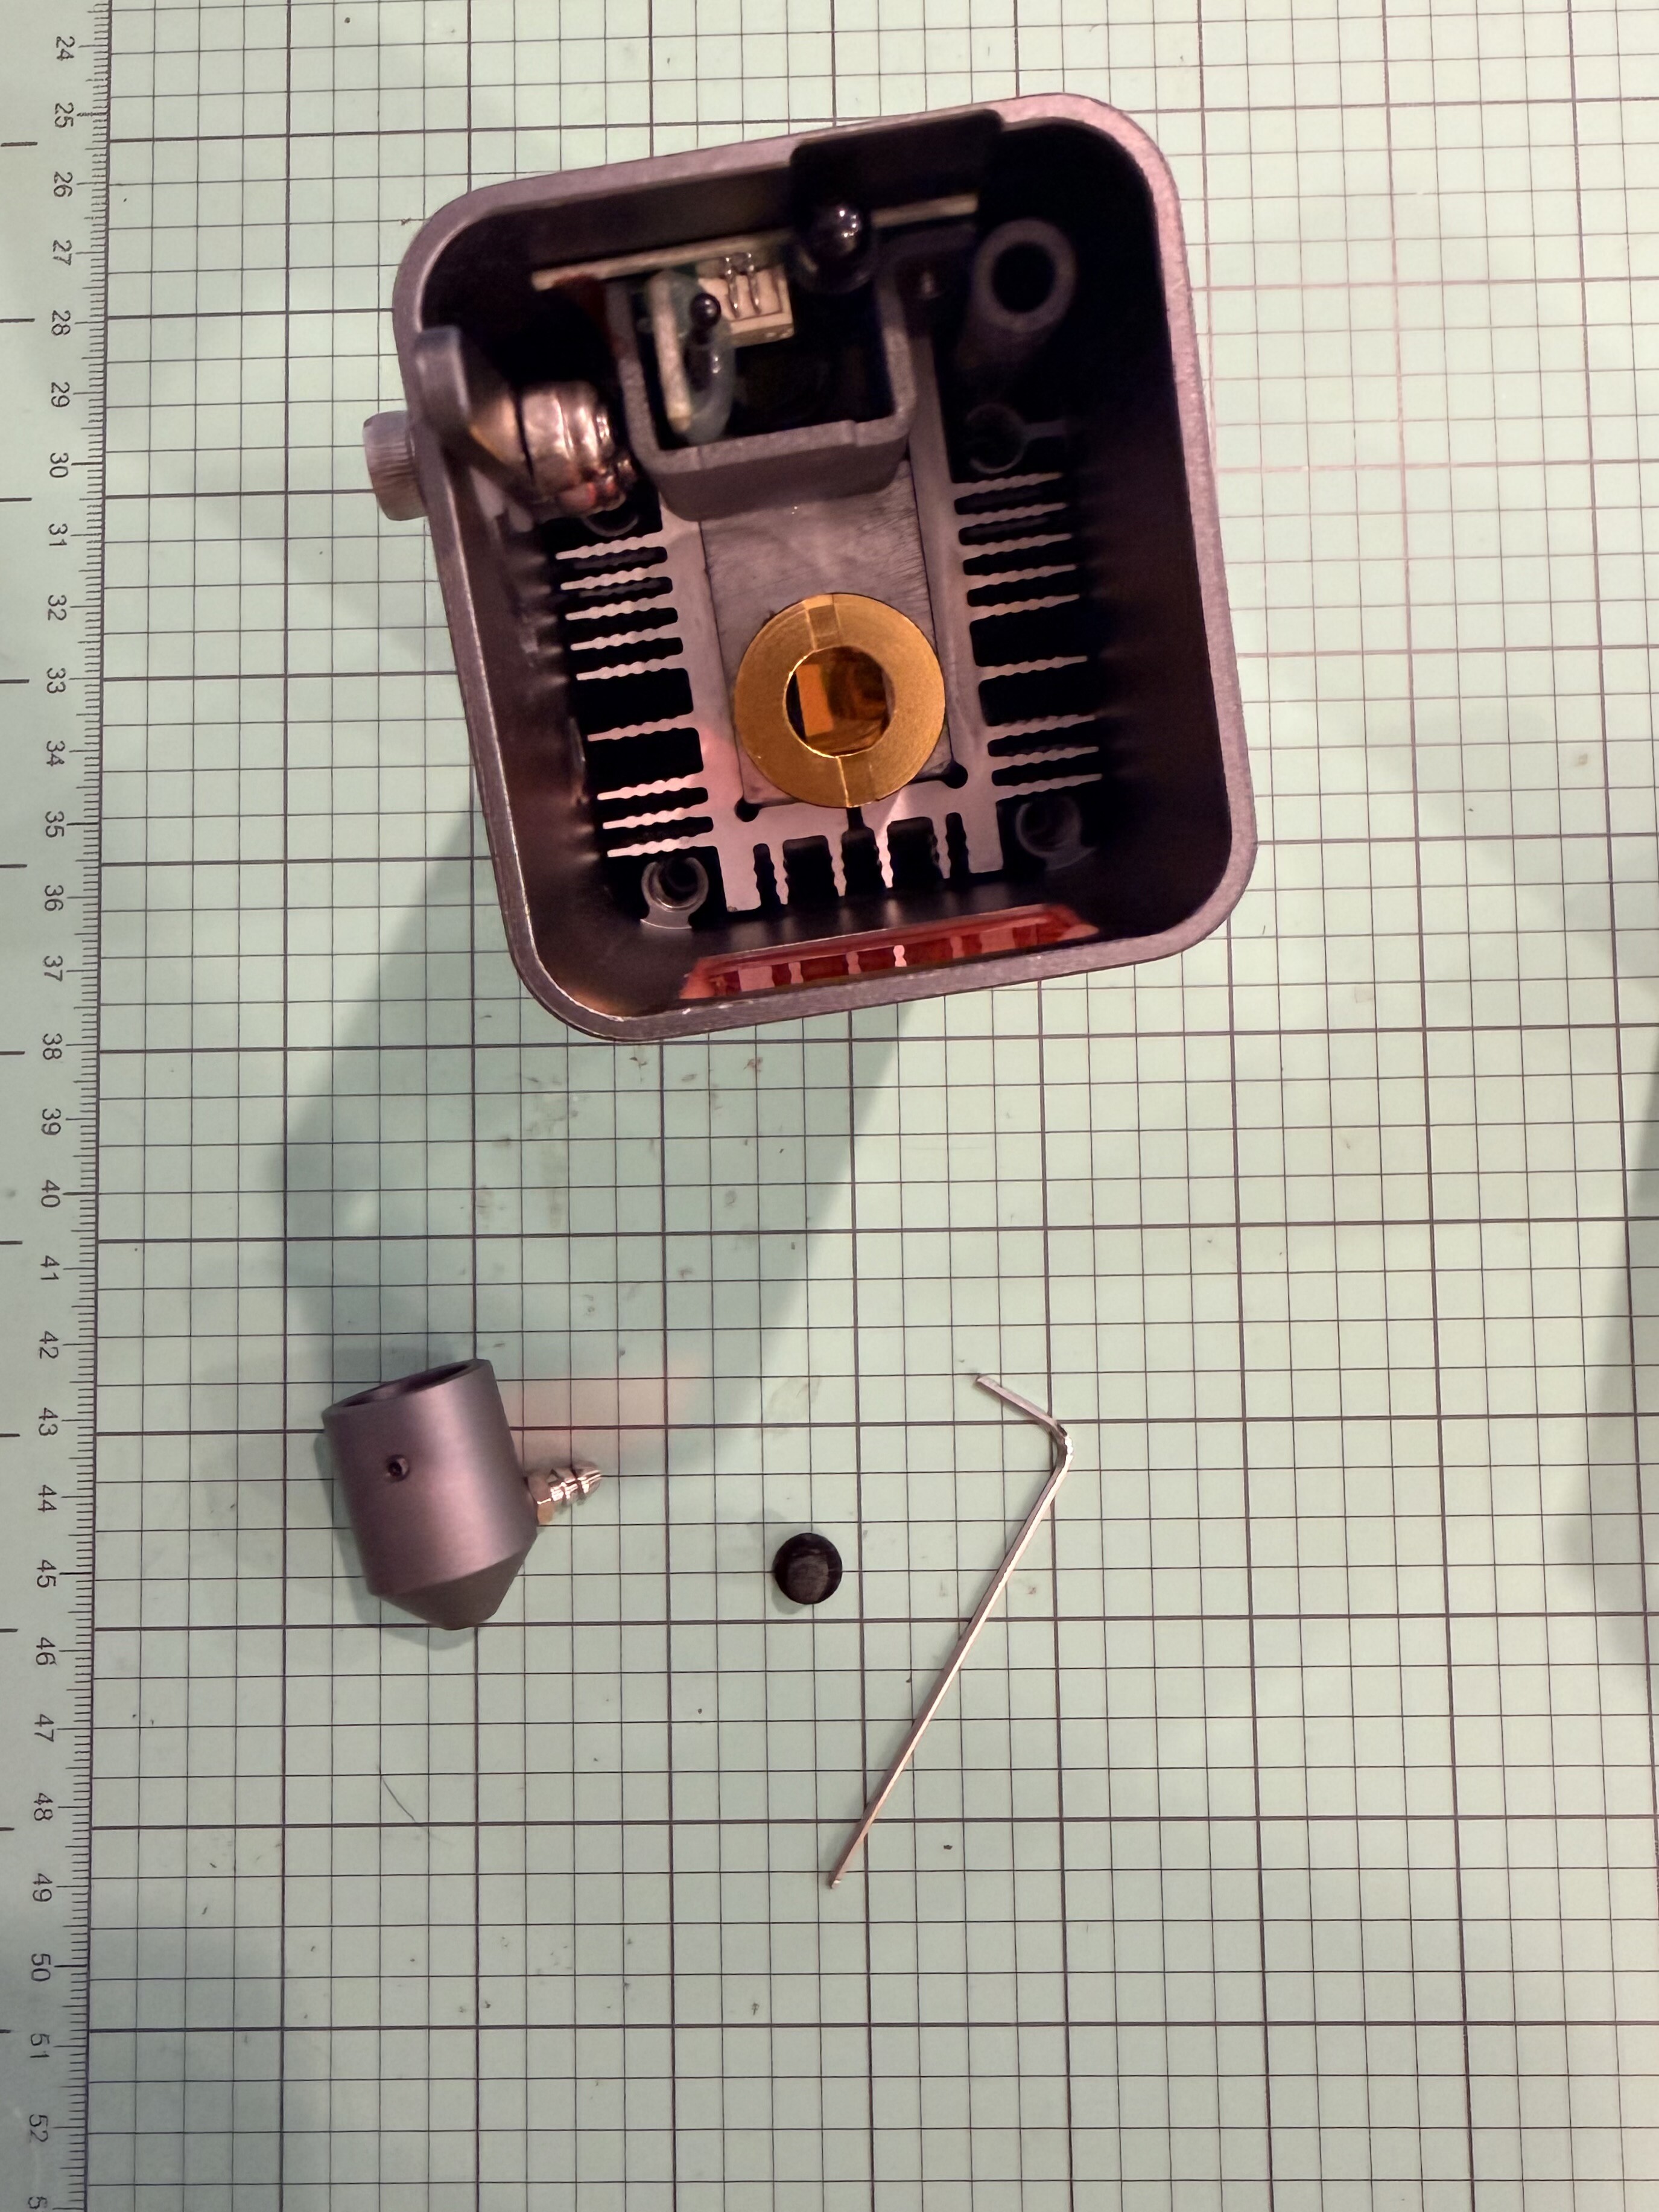
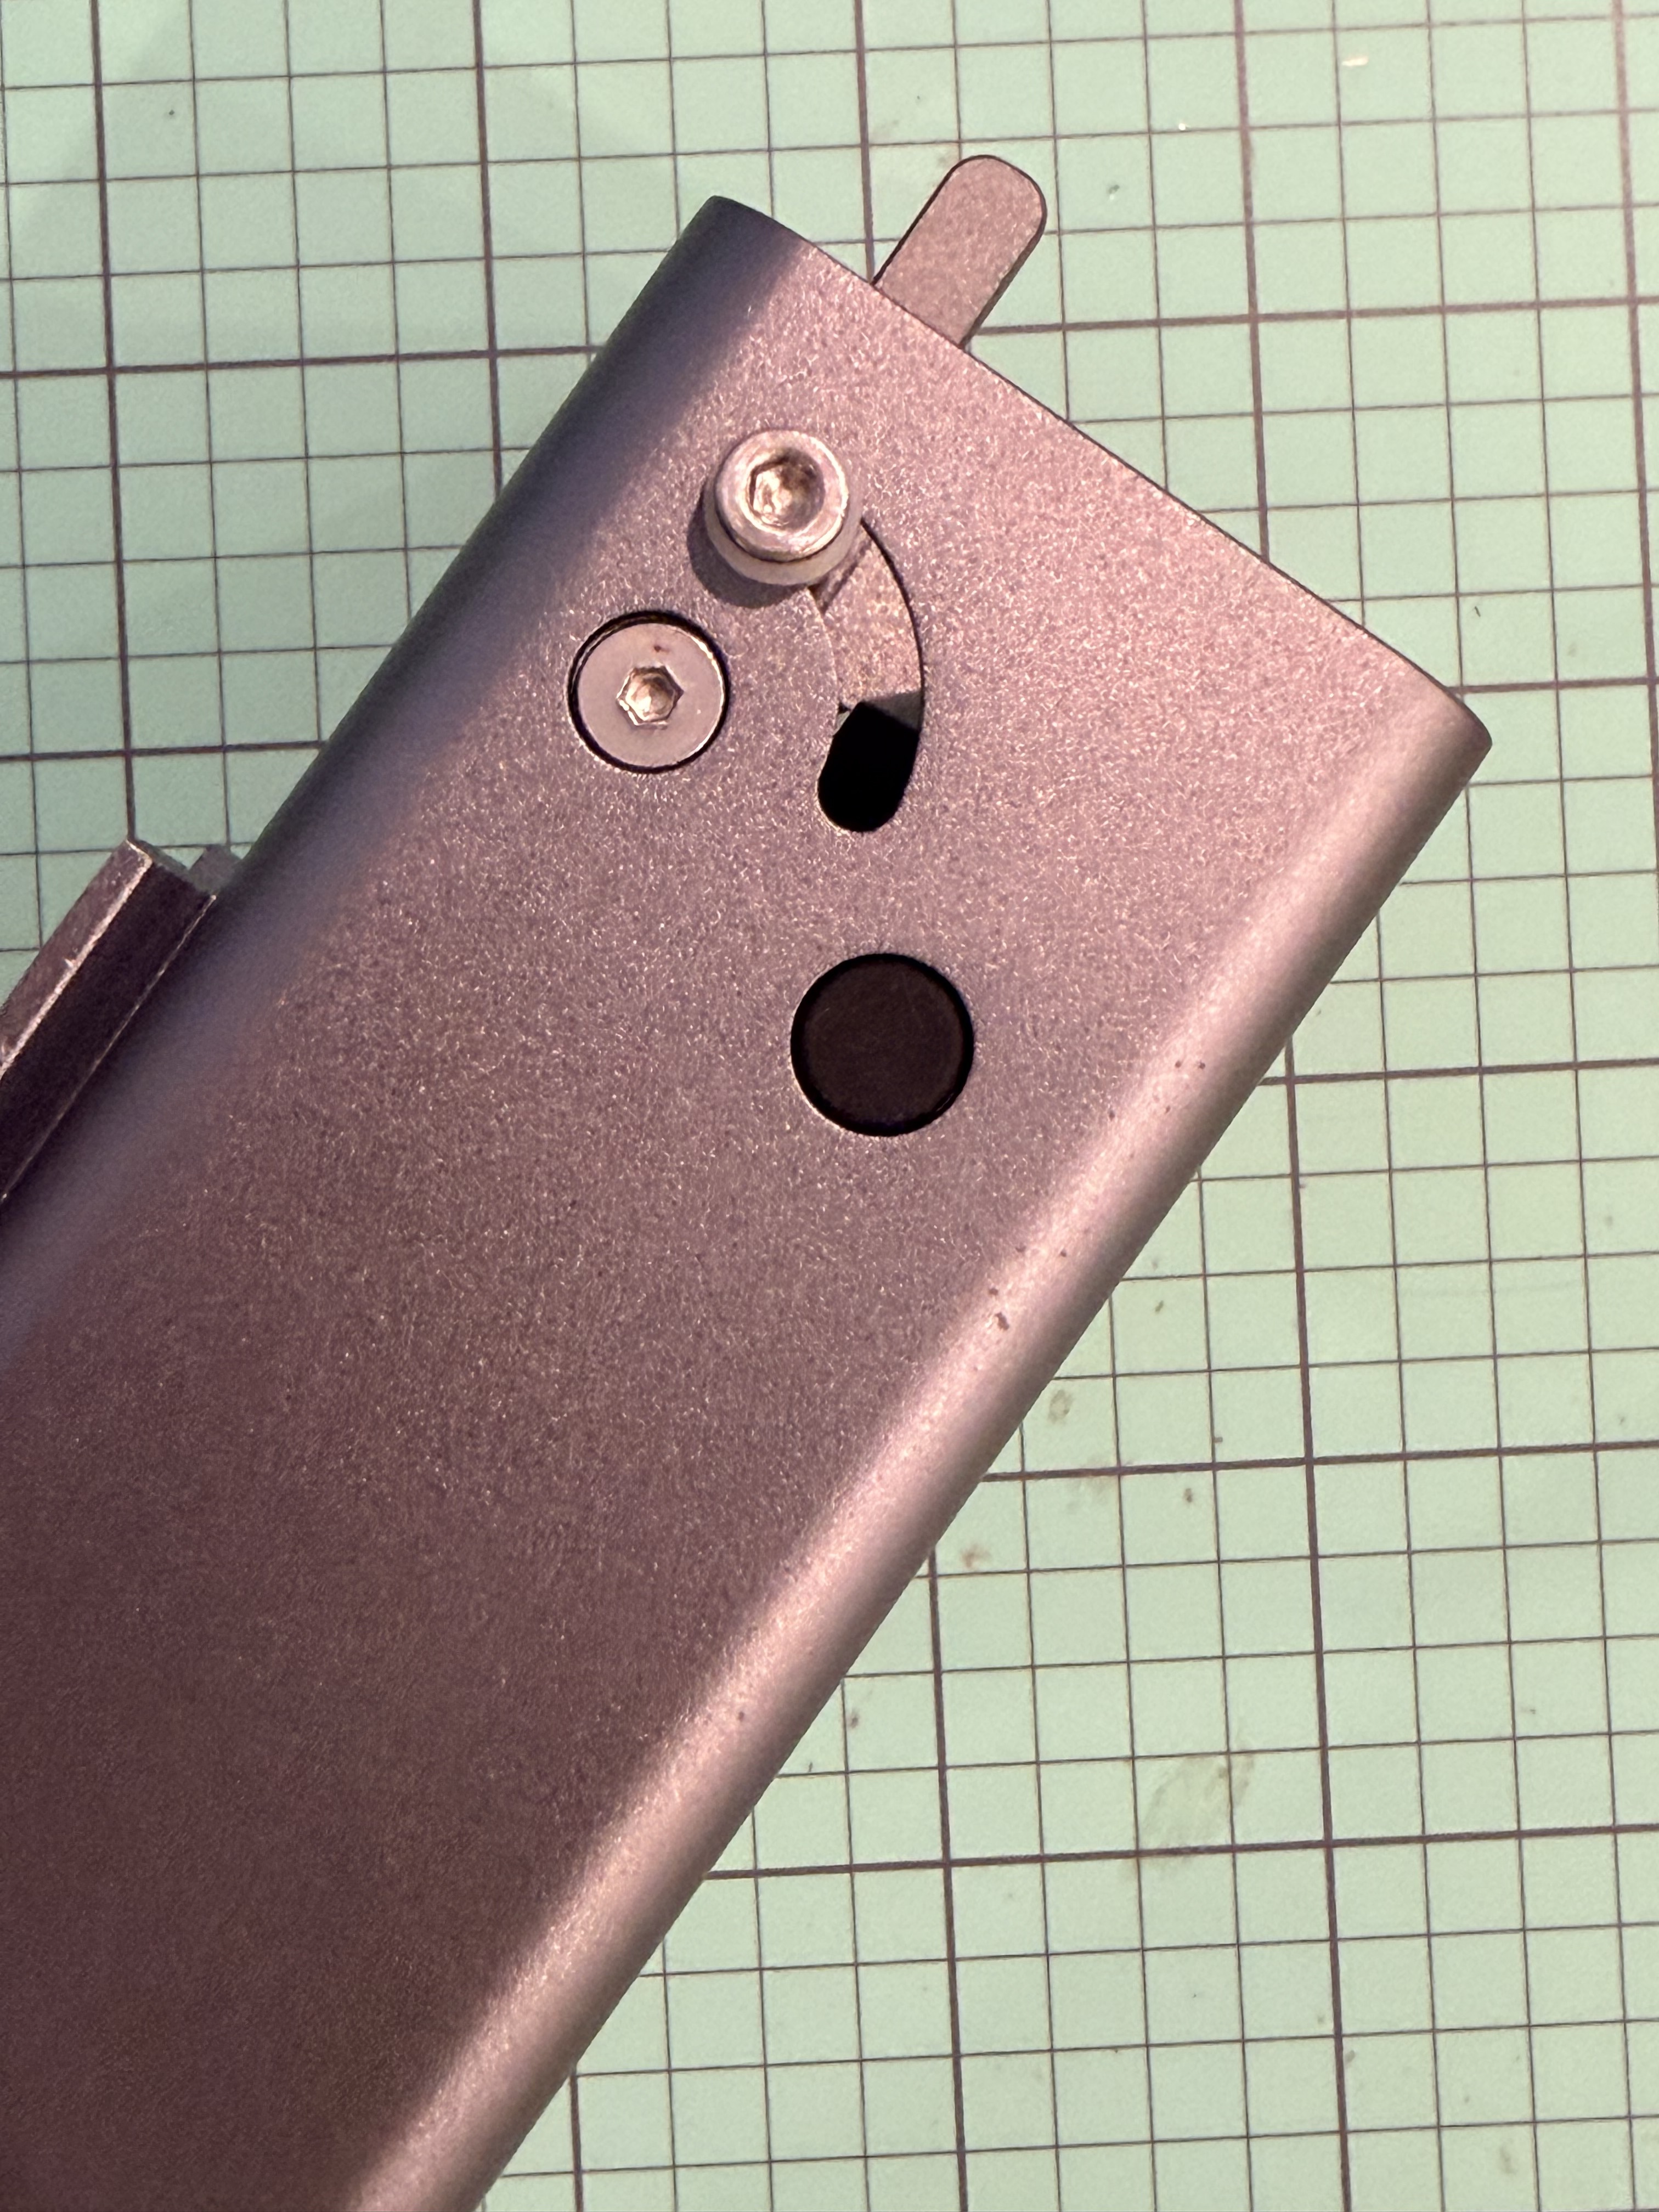
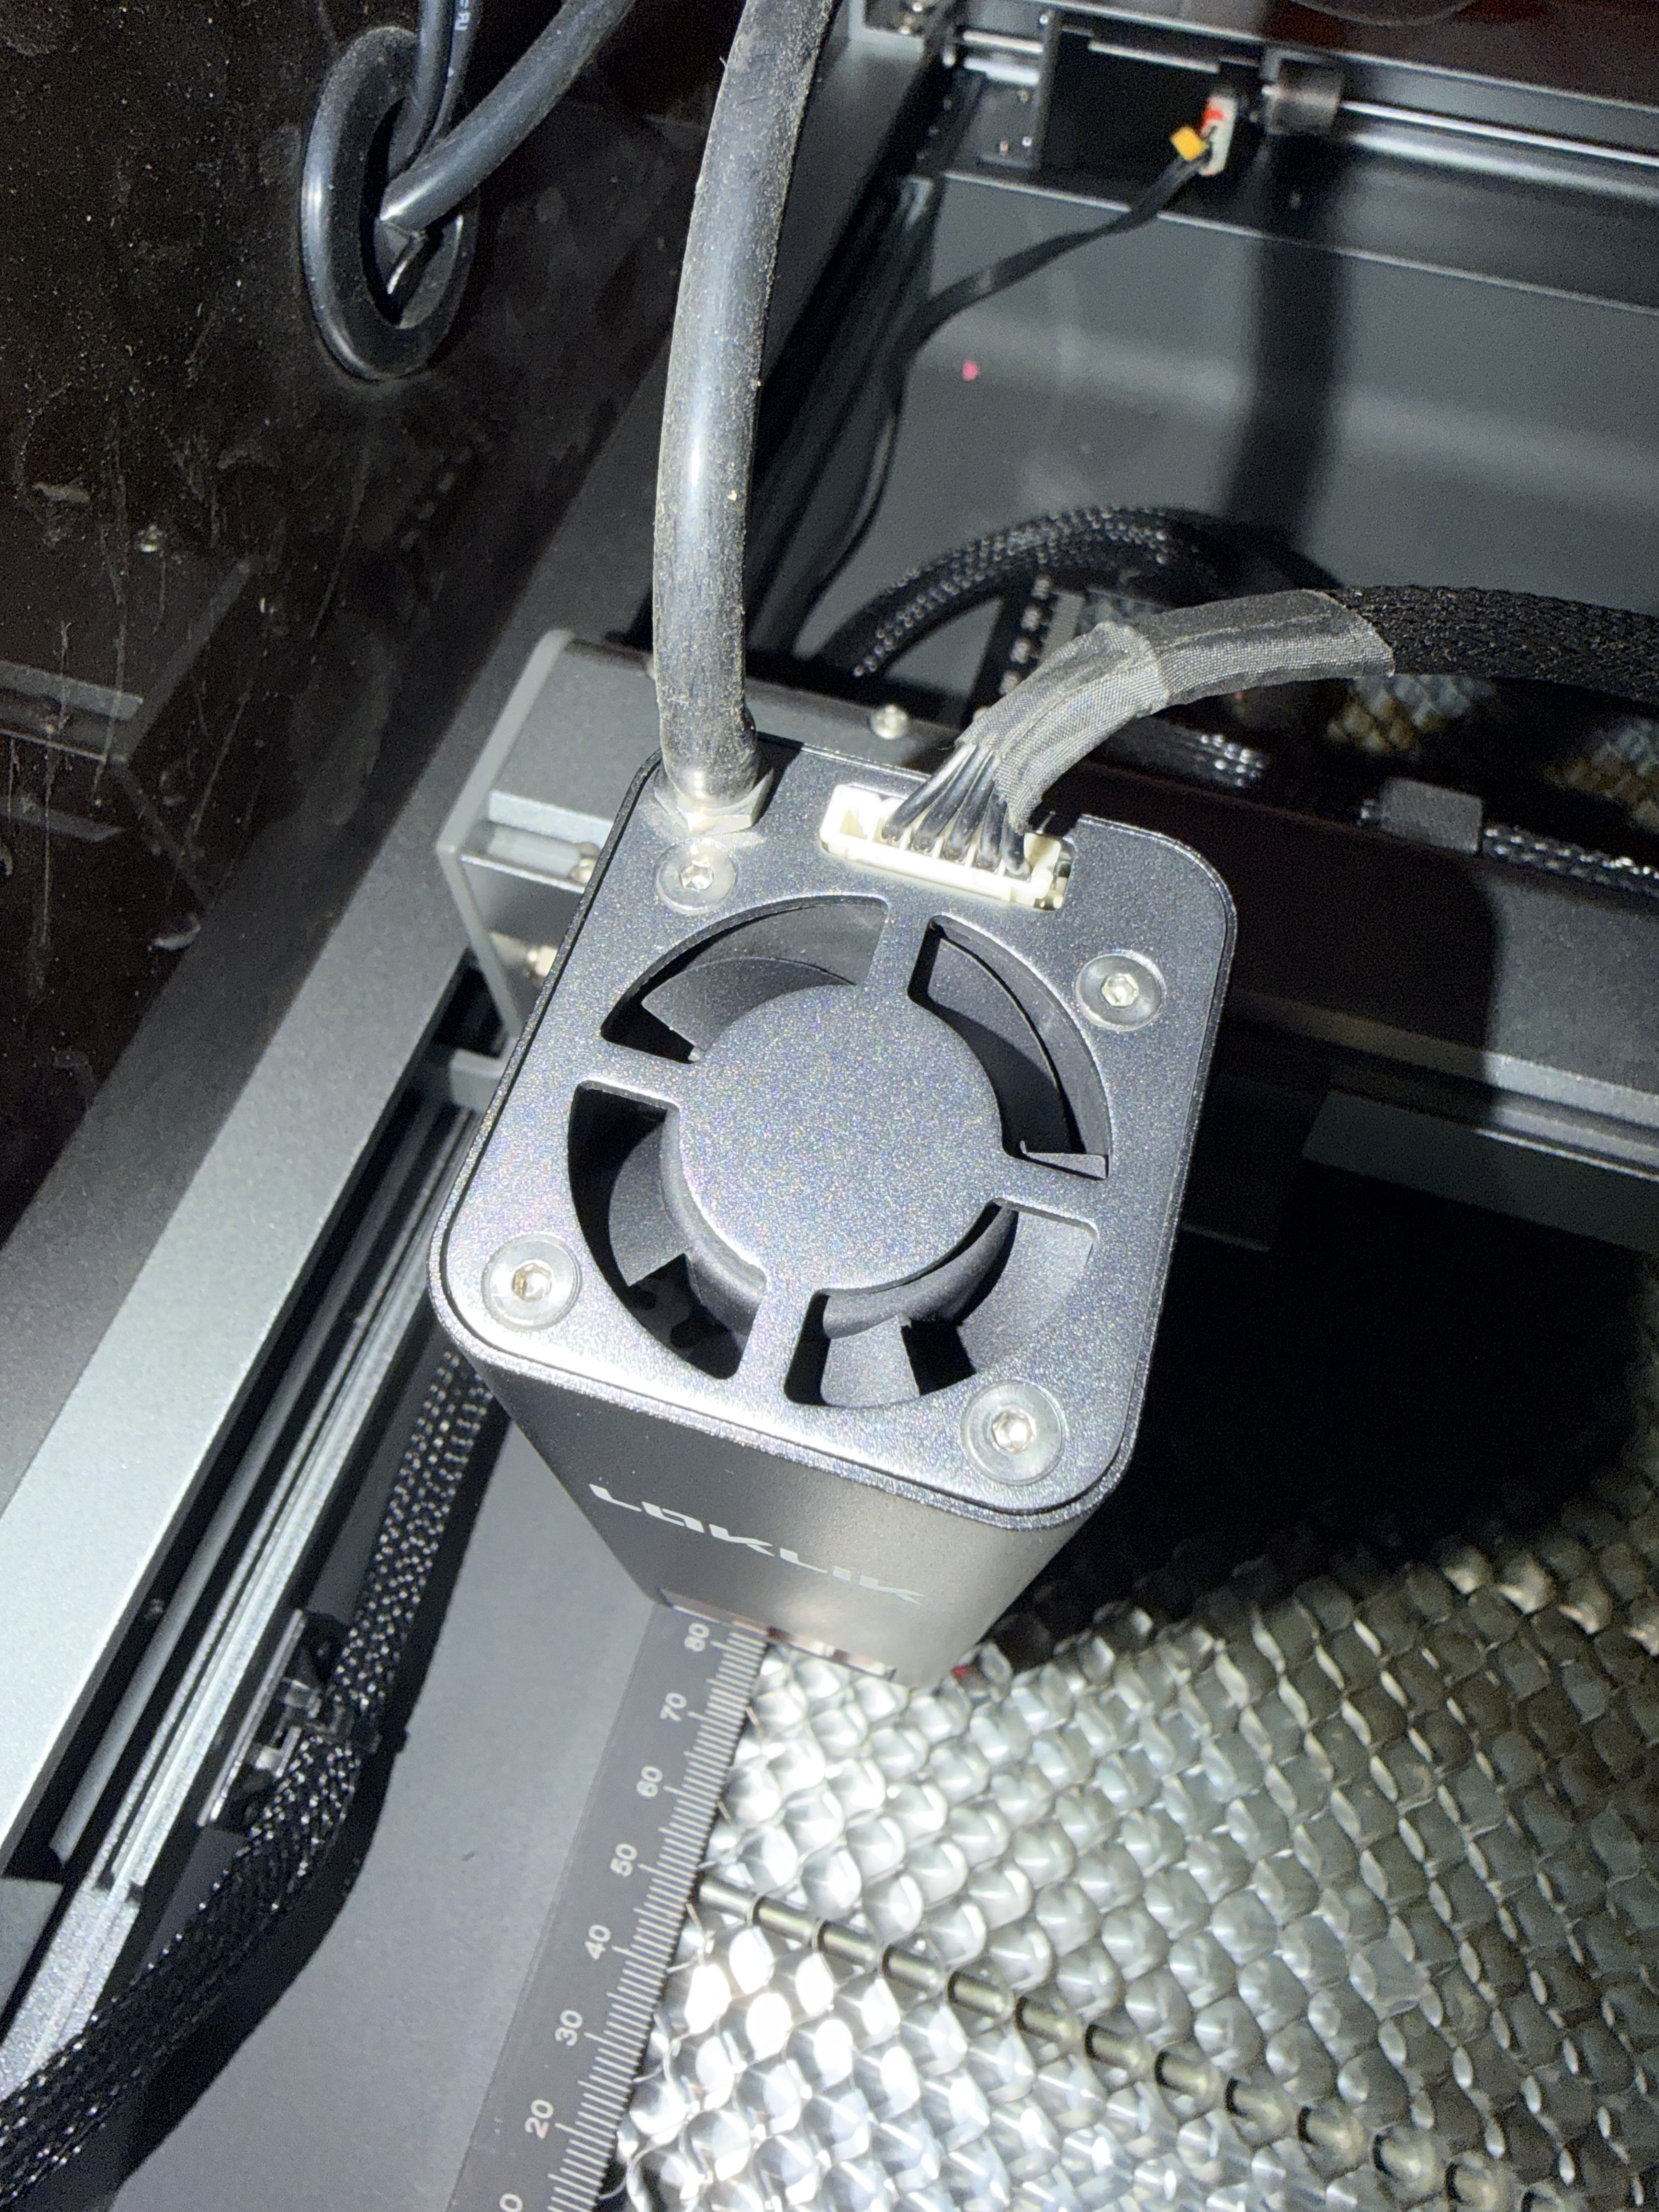
Take your new air assist nozzle assembly and align it with the same mounting position where the lens cover was attached.
The nozzle opening should face straight downward, directly over the laser’s focal point.
Ensure the air inlet port (the small metal tube on the side of the nozzle) faces outward and is accessible for the tubing connection.
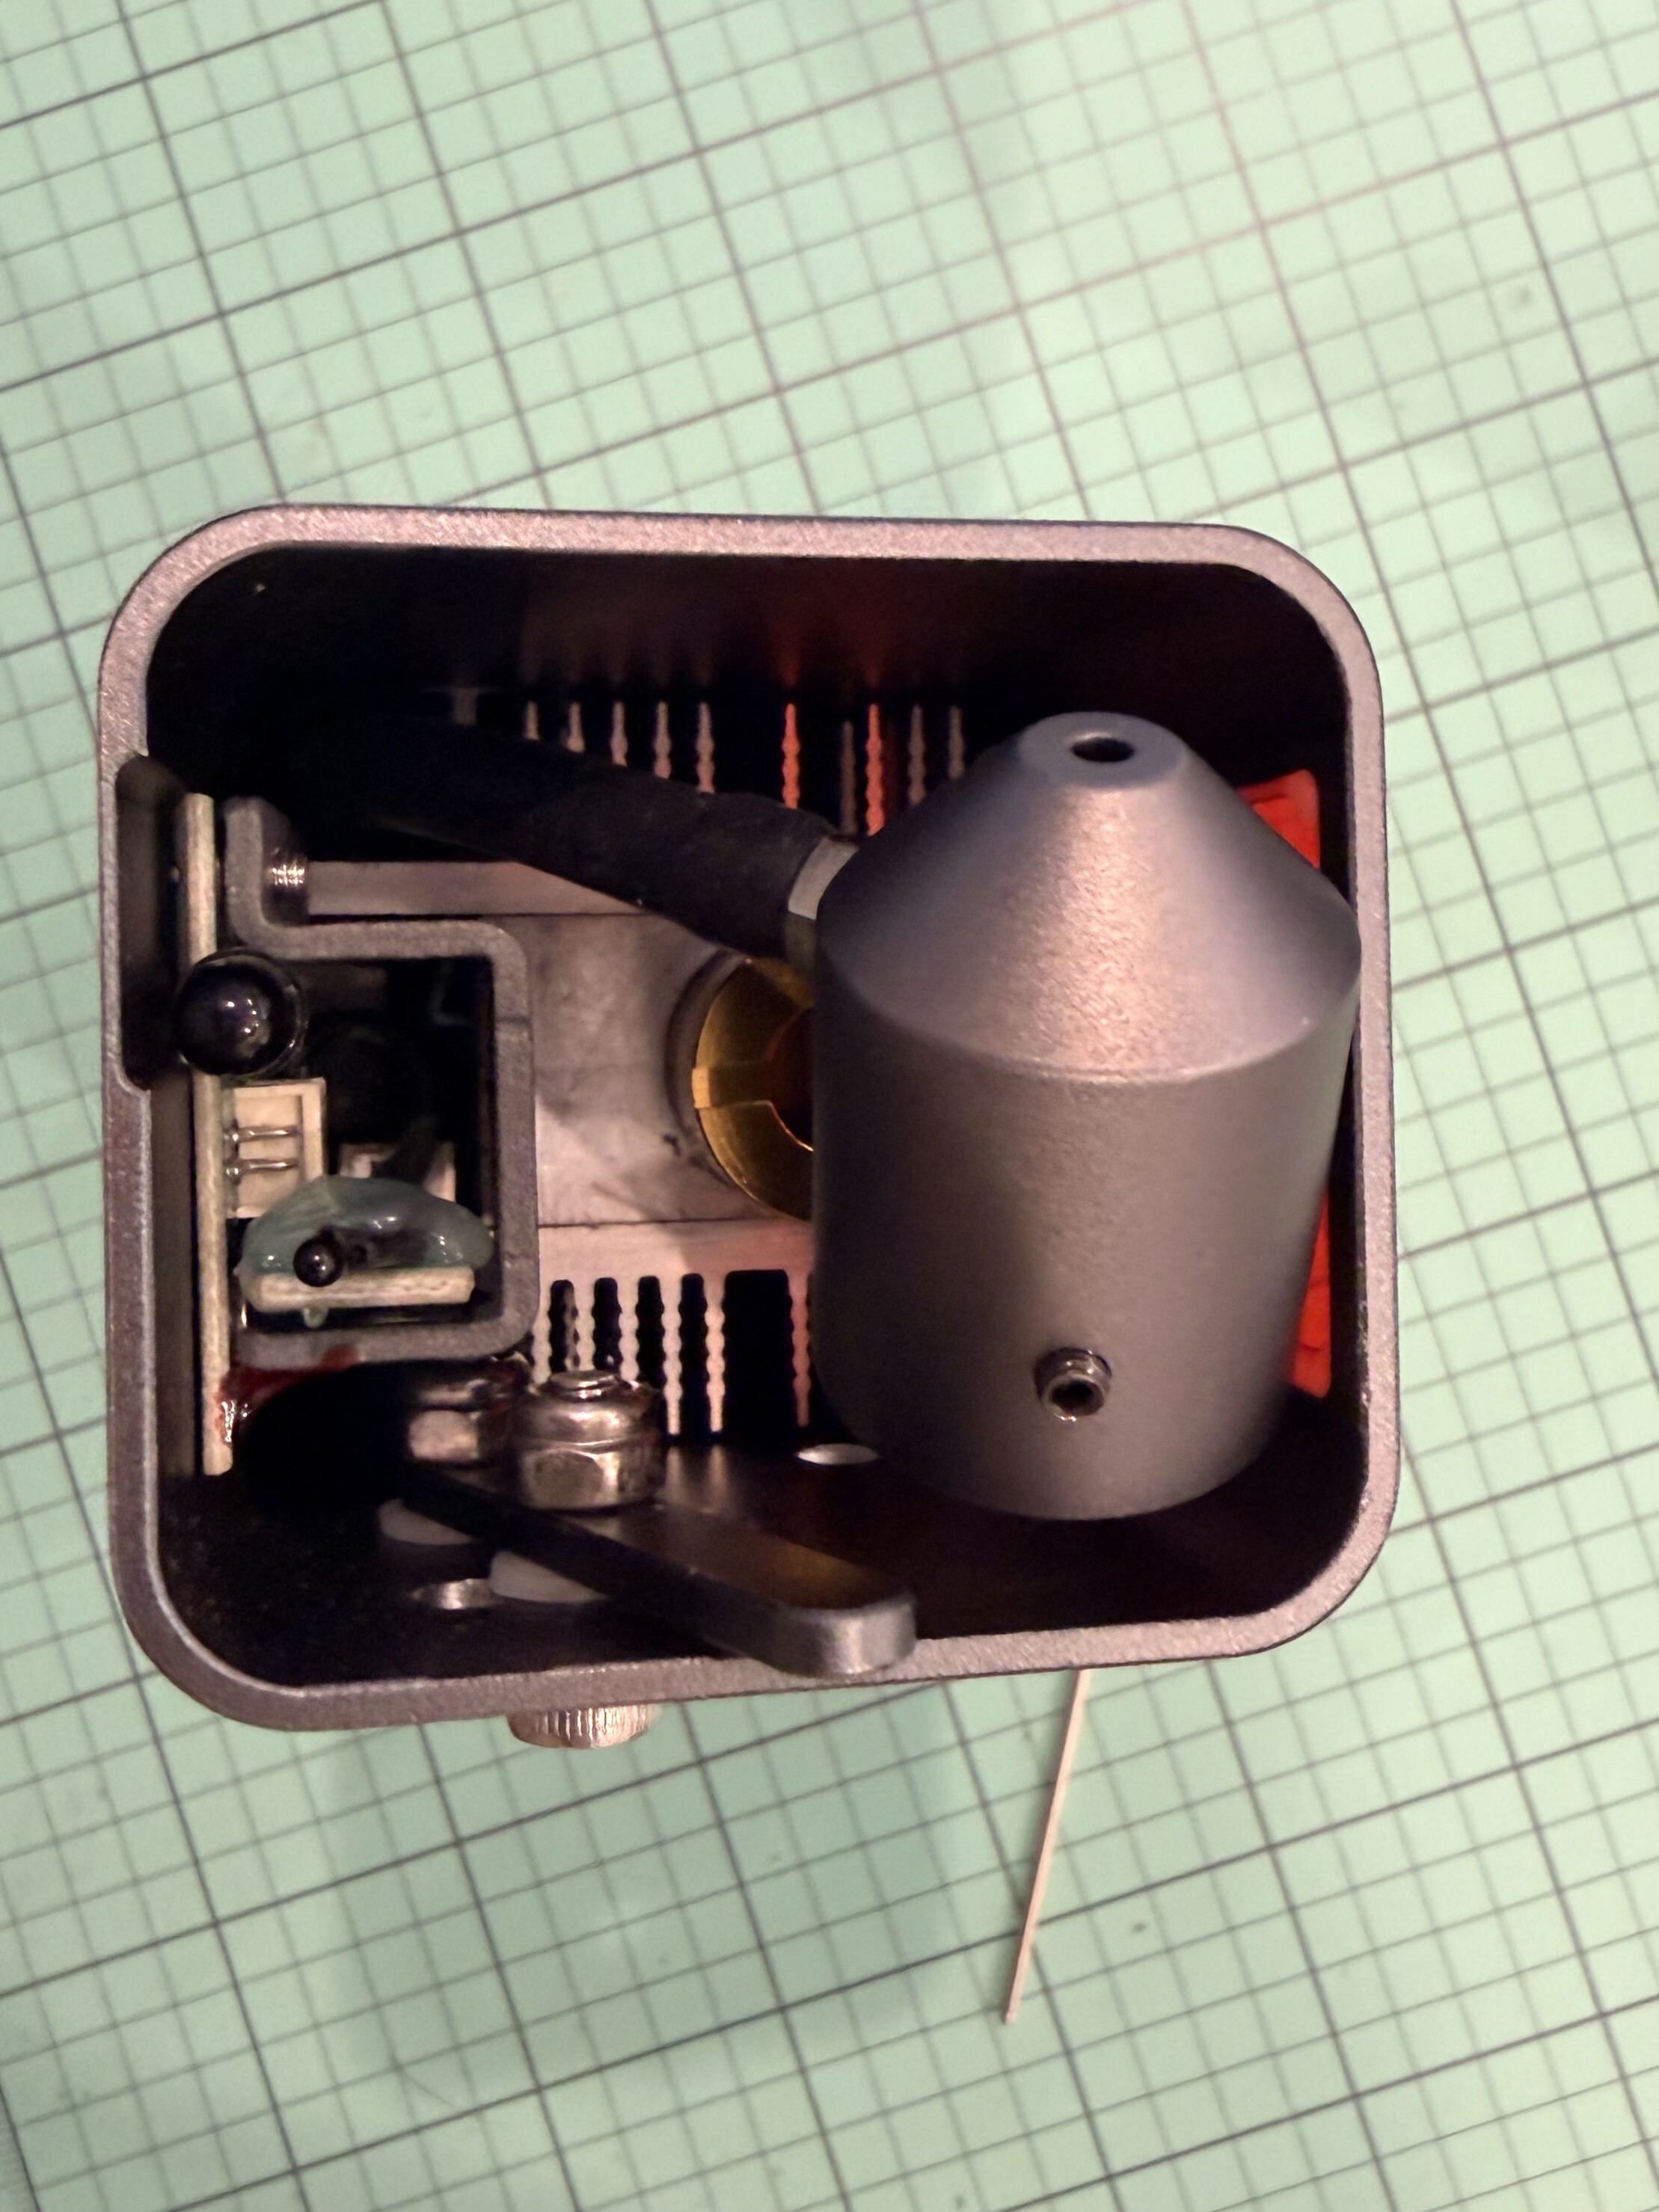
Attach one end of the air tubing to the metal inlet on the air assist nozzle. Push it firmly until it clicks or feels snug. (Doing this step now will help with the headache of doing it after the nozzle is installed.)
Insert the set screw (the new ones provided with the nozzle) into the hole on the side of the nozzle mount. (Mine was installed, but I did loosen it as the air assist nozzle is a tight fit.)
Tighten it evenly and gently using the Allen wrench—just snug enough to hold the nozzle firmly in place without over-tightening.
Double-check that the nozzle is centered and secure.
Insert the plastic plug on the side of the laser head module where the hex wrench went to tighten the set screw.
Thank you for this! We got the all in one package and had no clue with how to set up the air assist and couldn’t find a good video on YouTube. This was perfect!!