Dennis,
Thanks for the information. The air assist came with the hex wrench (unfortunately I don’t have my hex wrench kits at the house currently to be able to tell you the size, but it is small, I know that) that you use to remove the screws from the original lens cover and is the same hex wrench you use to tighten the set screw on the air assist nozzle. The bags in the air assist kit would have included all the parts and tools needed for the removal and installation of the air assist nozzle. If you do not have all the contents, it is possible that a bag was left out. I know the way they package their equipment, that things hide. If it isn’t in there then you would need to reach out to support to have a new kit sent to you. I know from experience that errors can be made. My air assist kit power adapter was for the UK and not the US when I received mine.
I have provided the steps below to do the installation with some pictures that I took. I know you may have done some of these steps, so please feel free to advance to the step you might find helpful if any. Please let me know if you have any other questions, I am happy to help.
Step-by-Step Installation Instructions
Step 1: Power Down and Unplug
Before you begin, turn off the LOKLiK iEngrave and unplug the power cord for safety. Allow a few moments for any static or residual power to discharge.
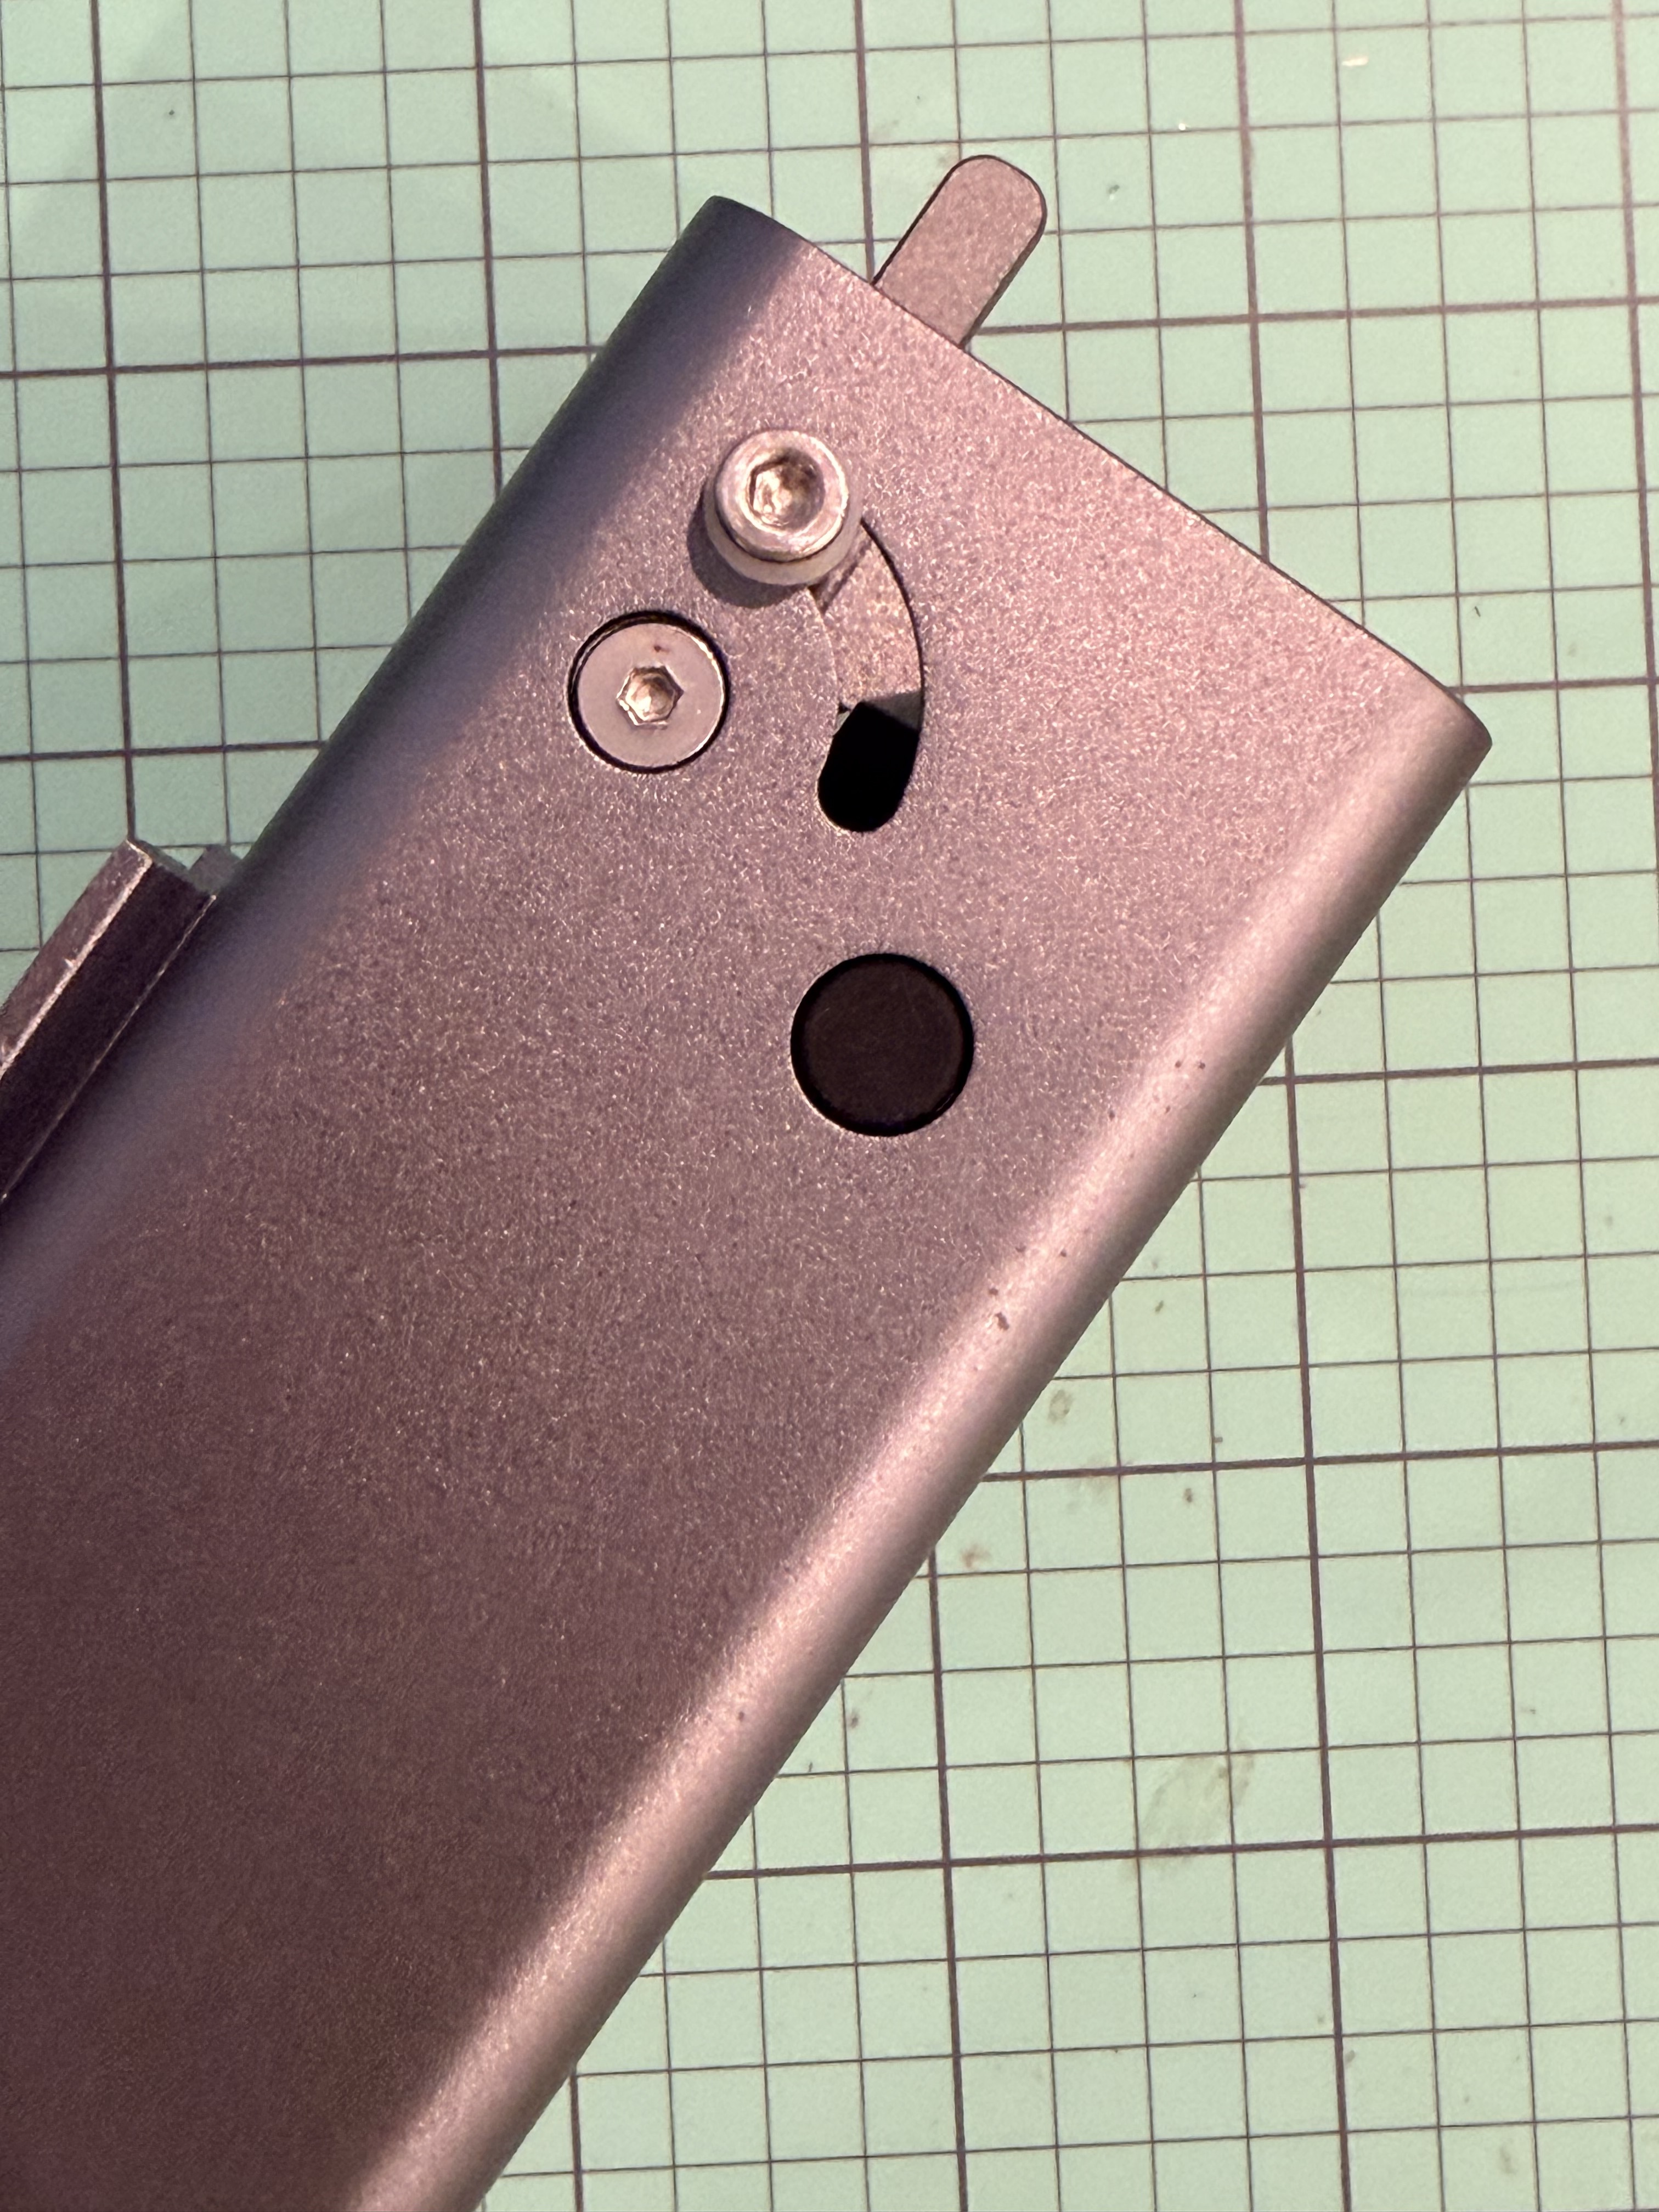
Step 2: Remove the Set Screws
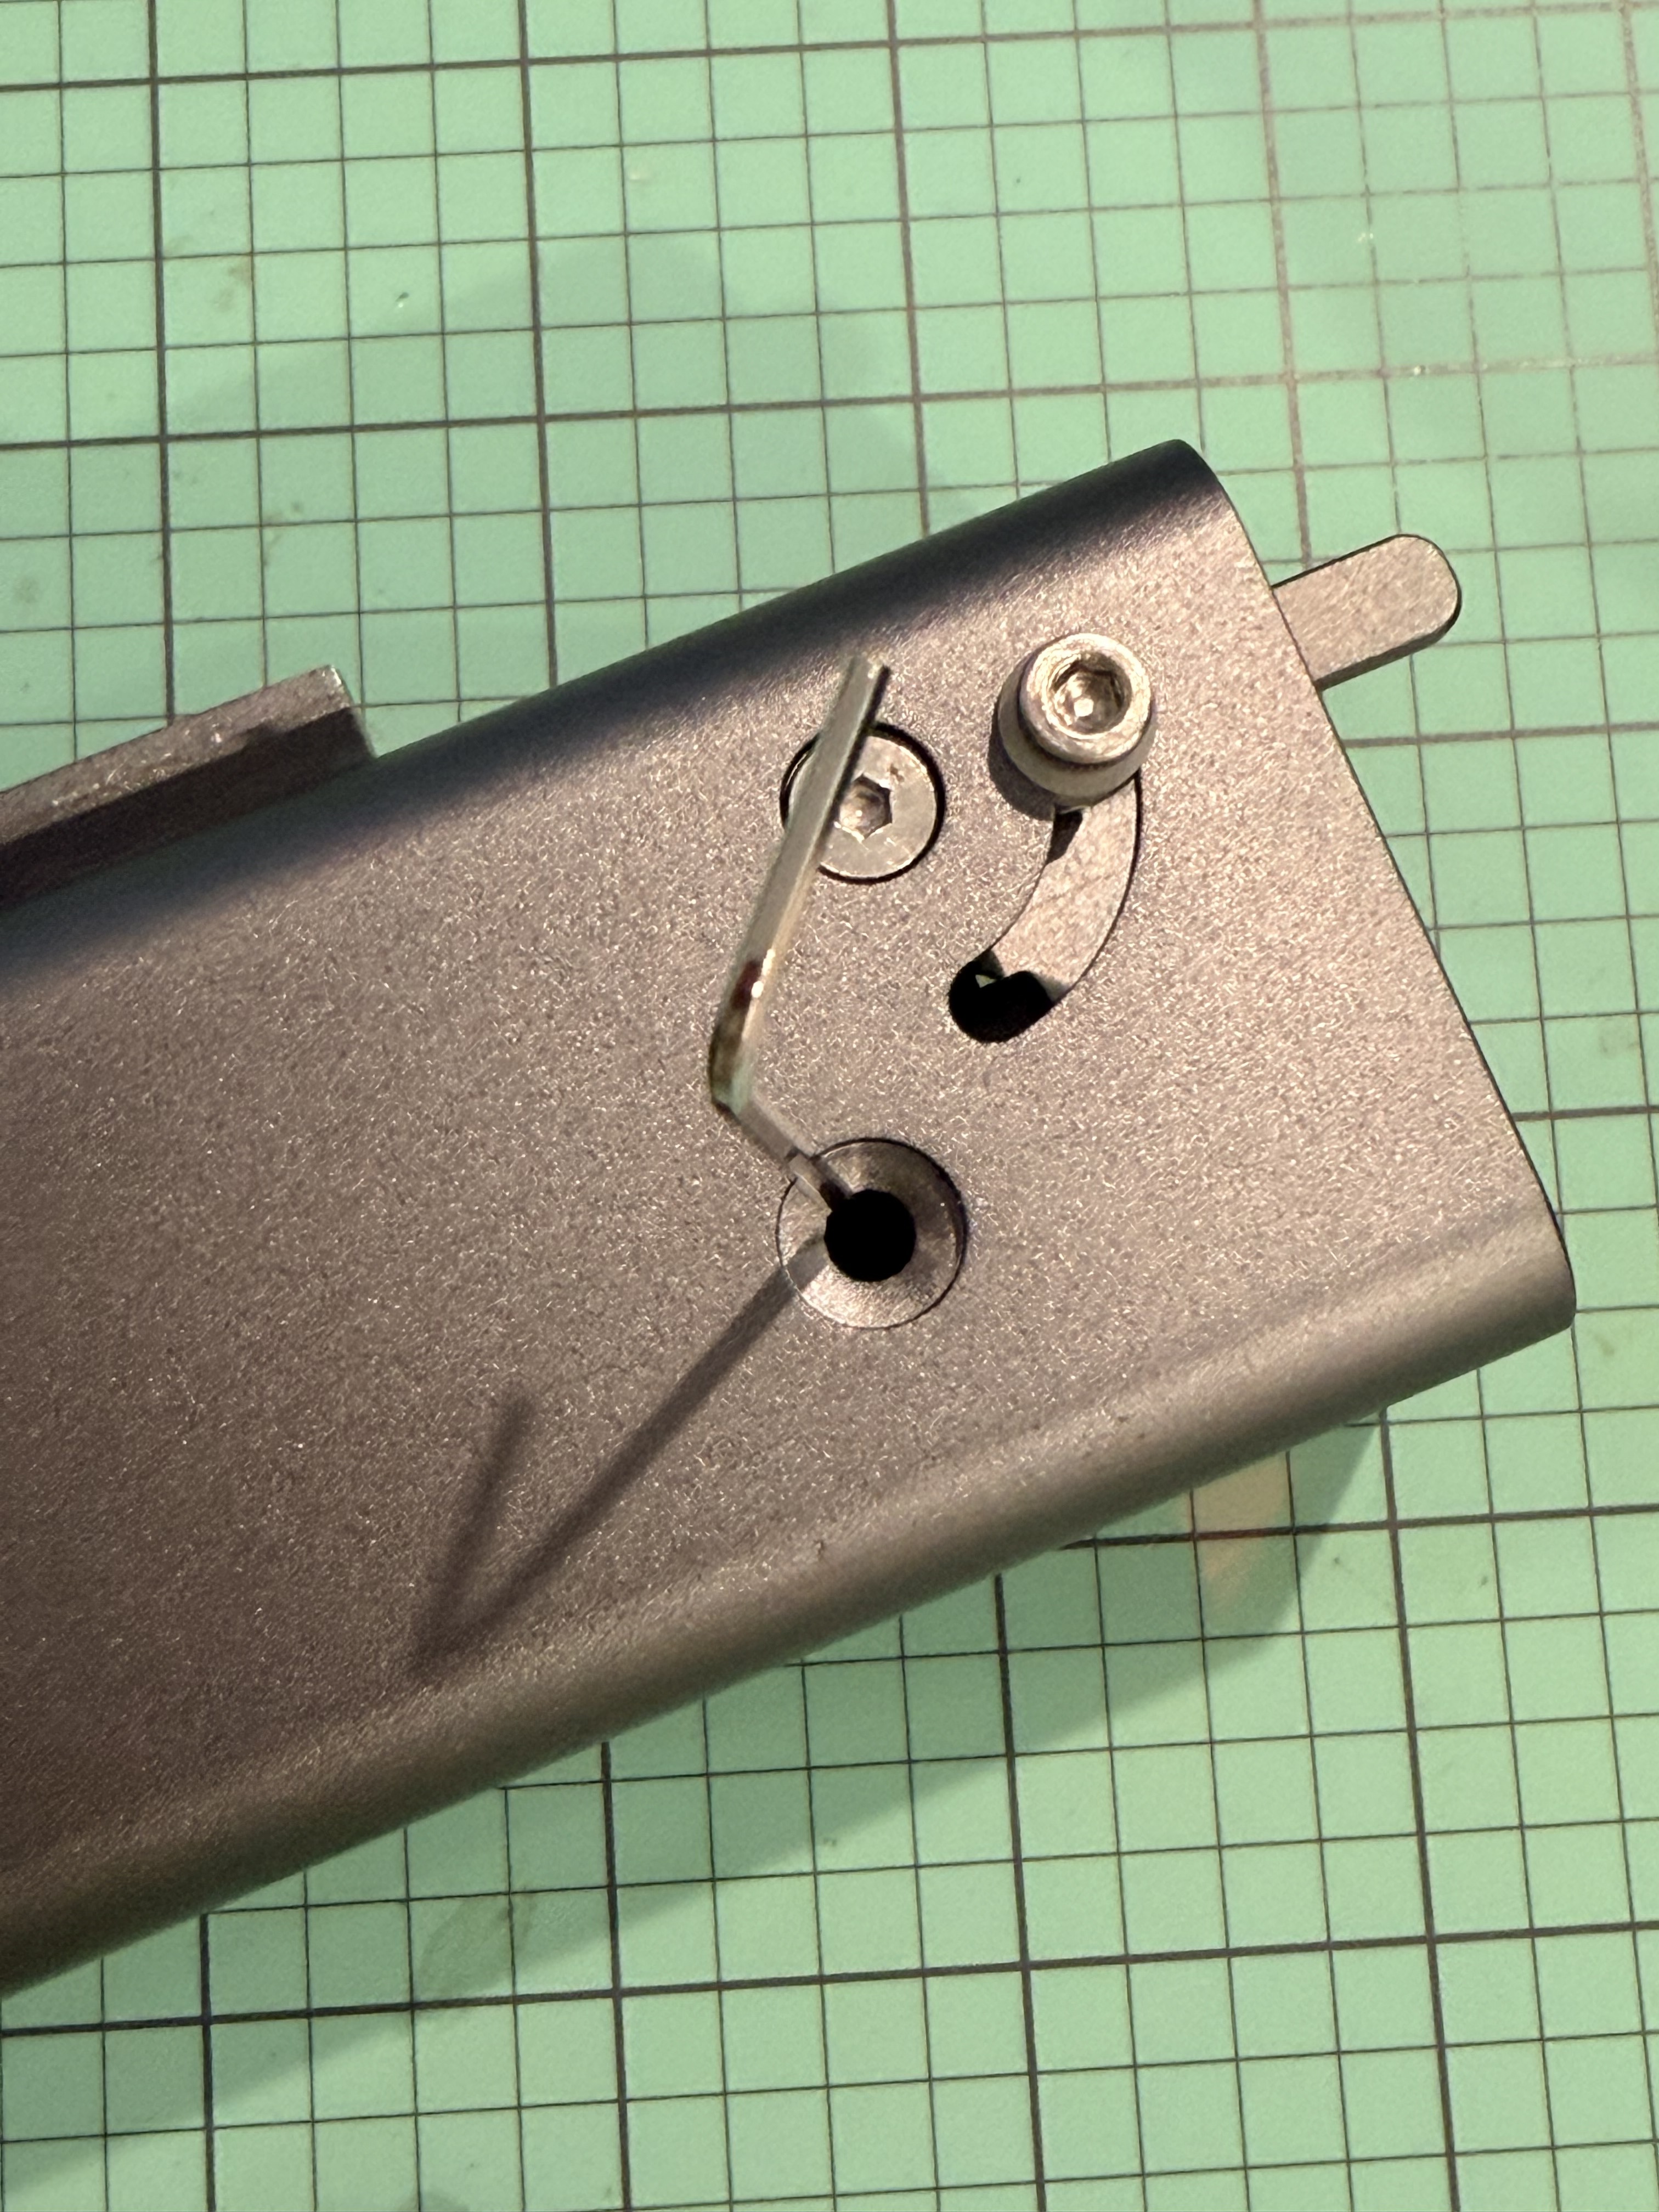
Locate the three small screws on the sides of the original lens cover at the bottom of the laser head.
- Use the provided Allen wrench to carefully loosen and remove these screws. (I also removed the actual set screws as well as mine had started to work themselves out in the process of the laser moving and I didn’t want to do any damage.)
- Keep them in a safe place, as they are small and easy to lose.
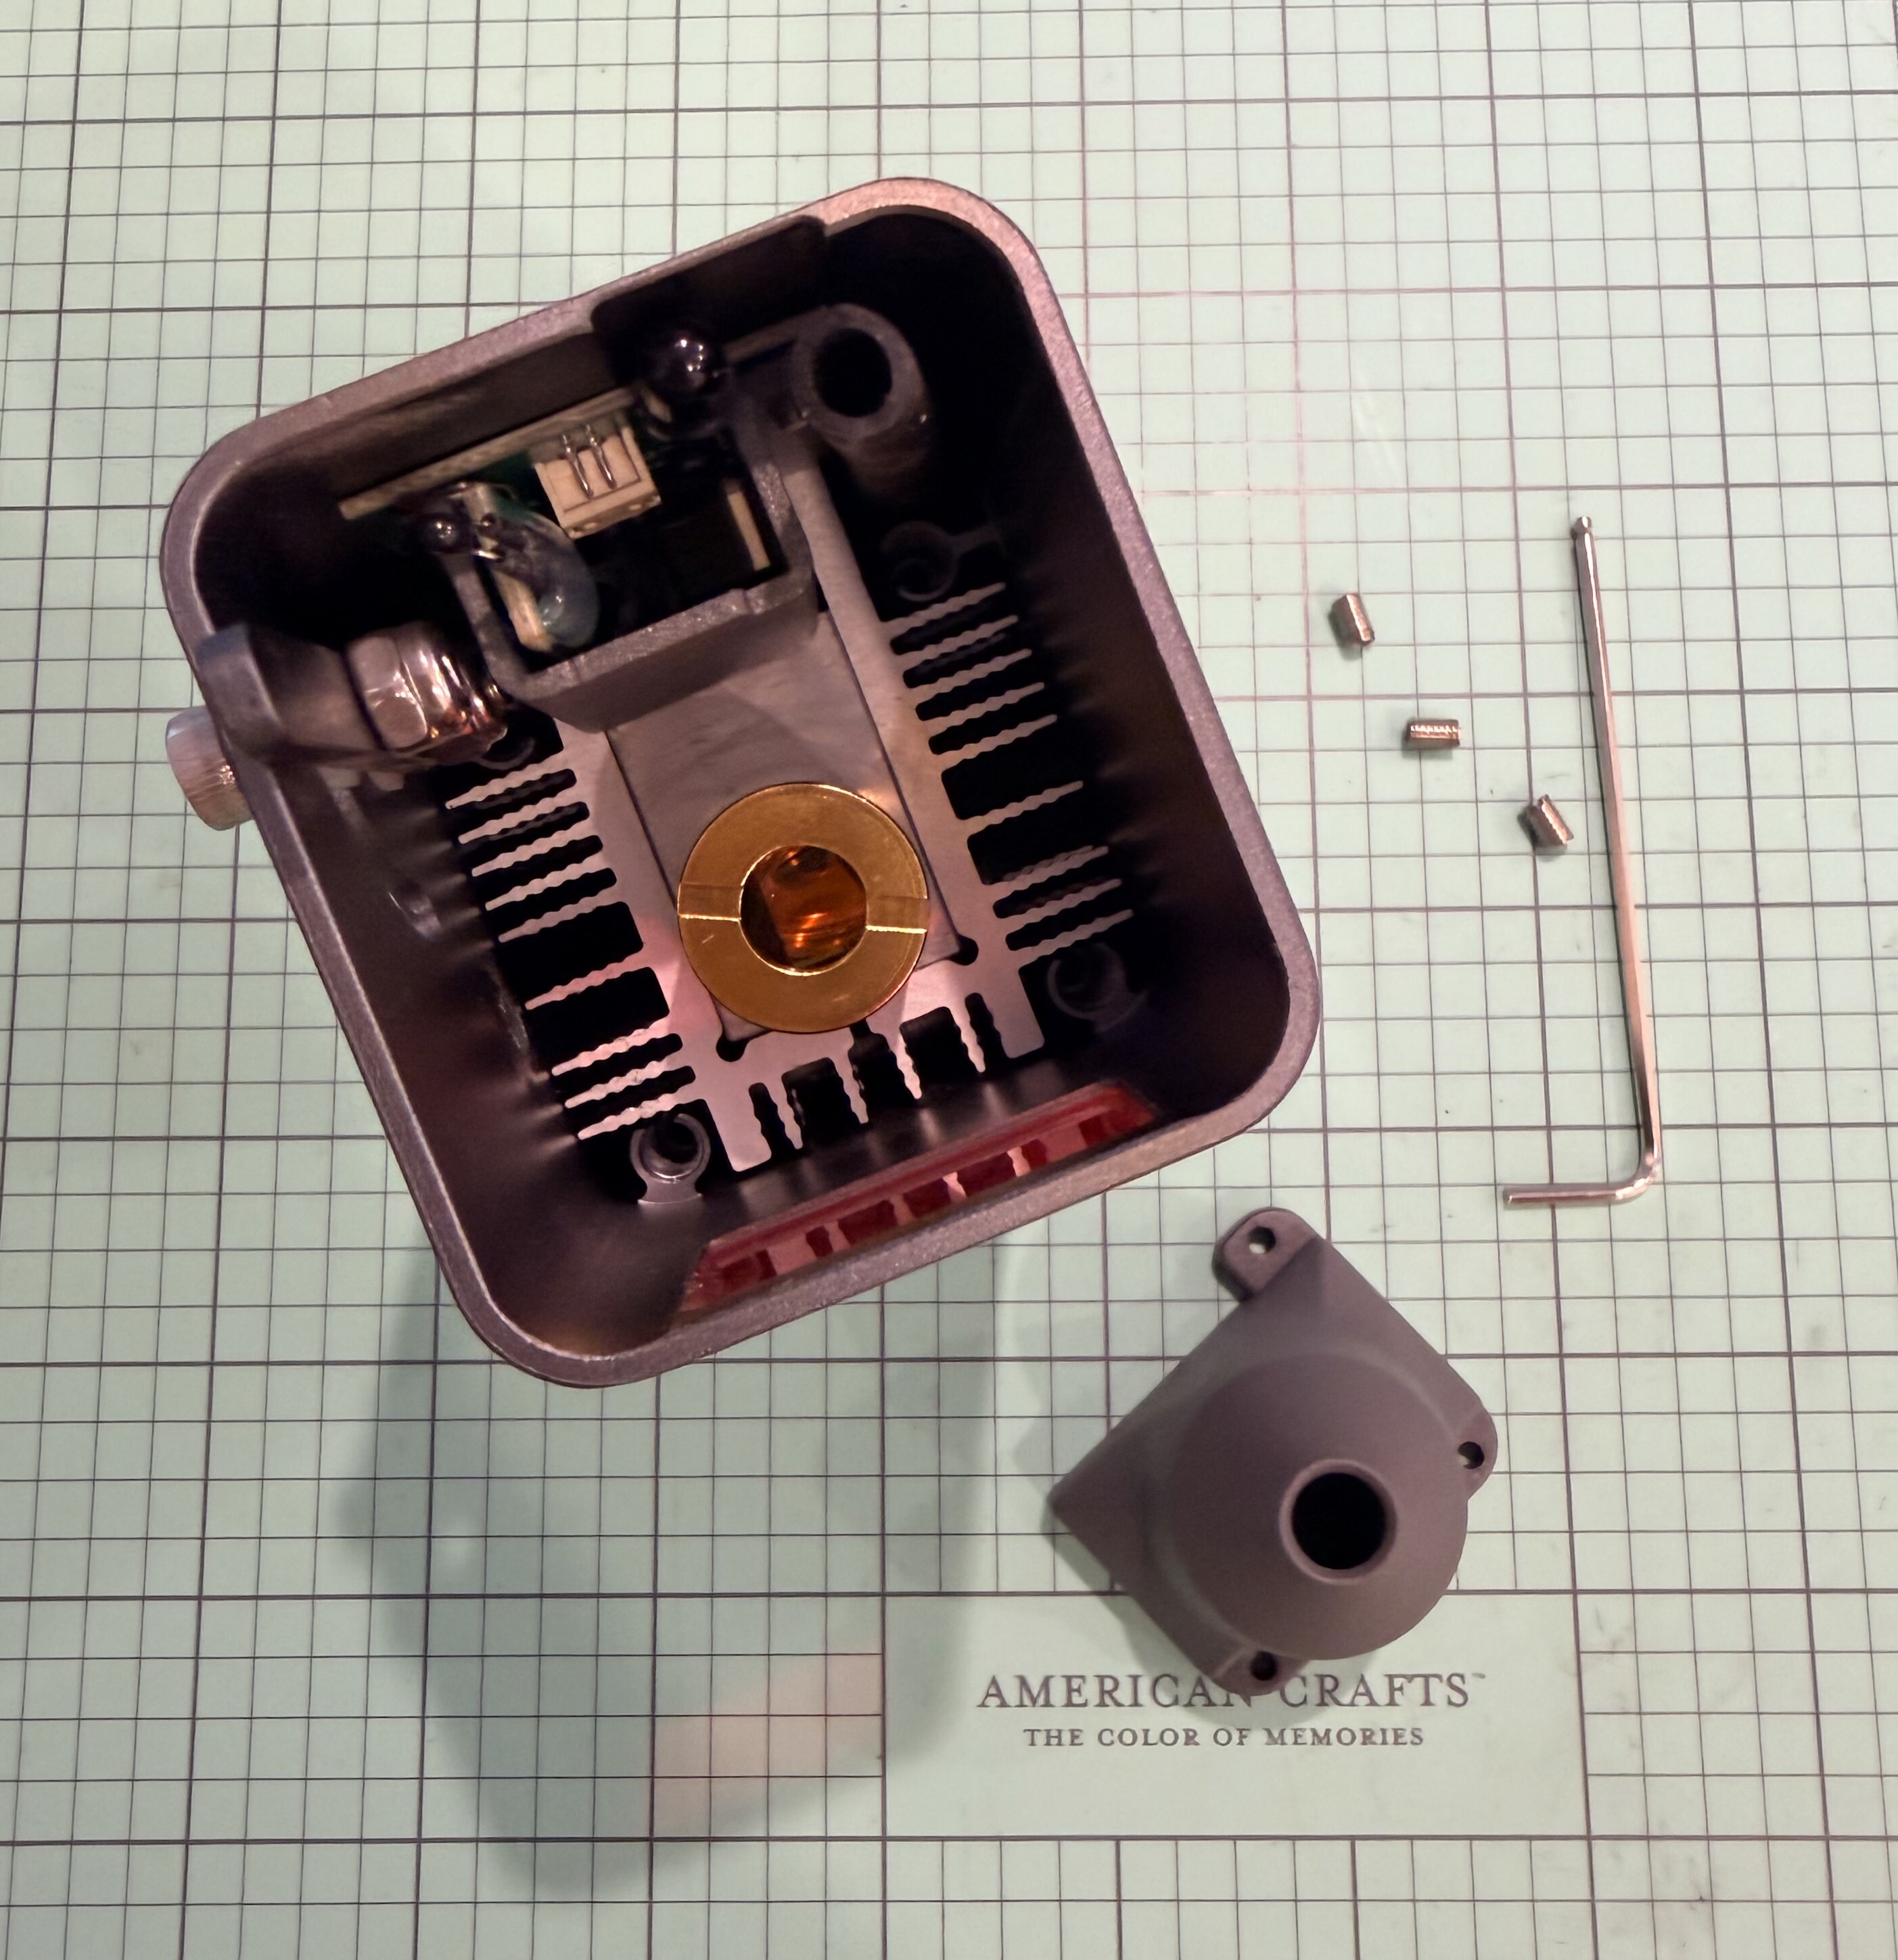
Step 3: Remove the Original Lens Cover
Once the set screws are out, gently slide down the original lens cover to remove it from the laser head.
- Avoid touching the lens itself—if you do, clean it carefully with a lens wipe before reassembling.
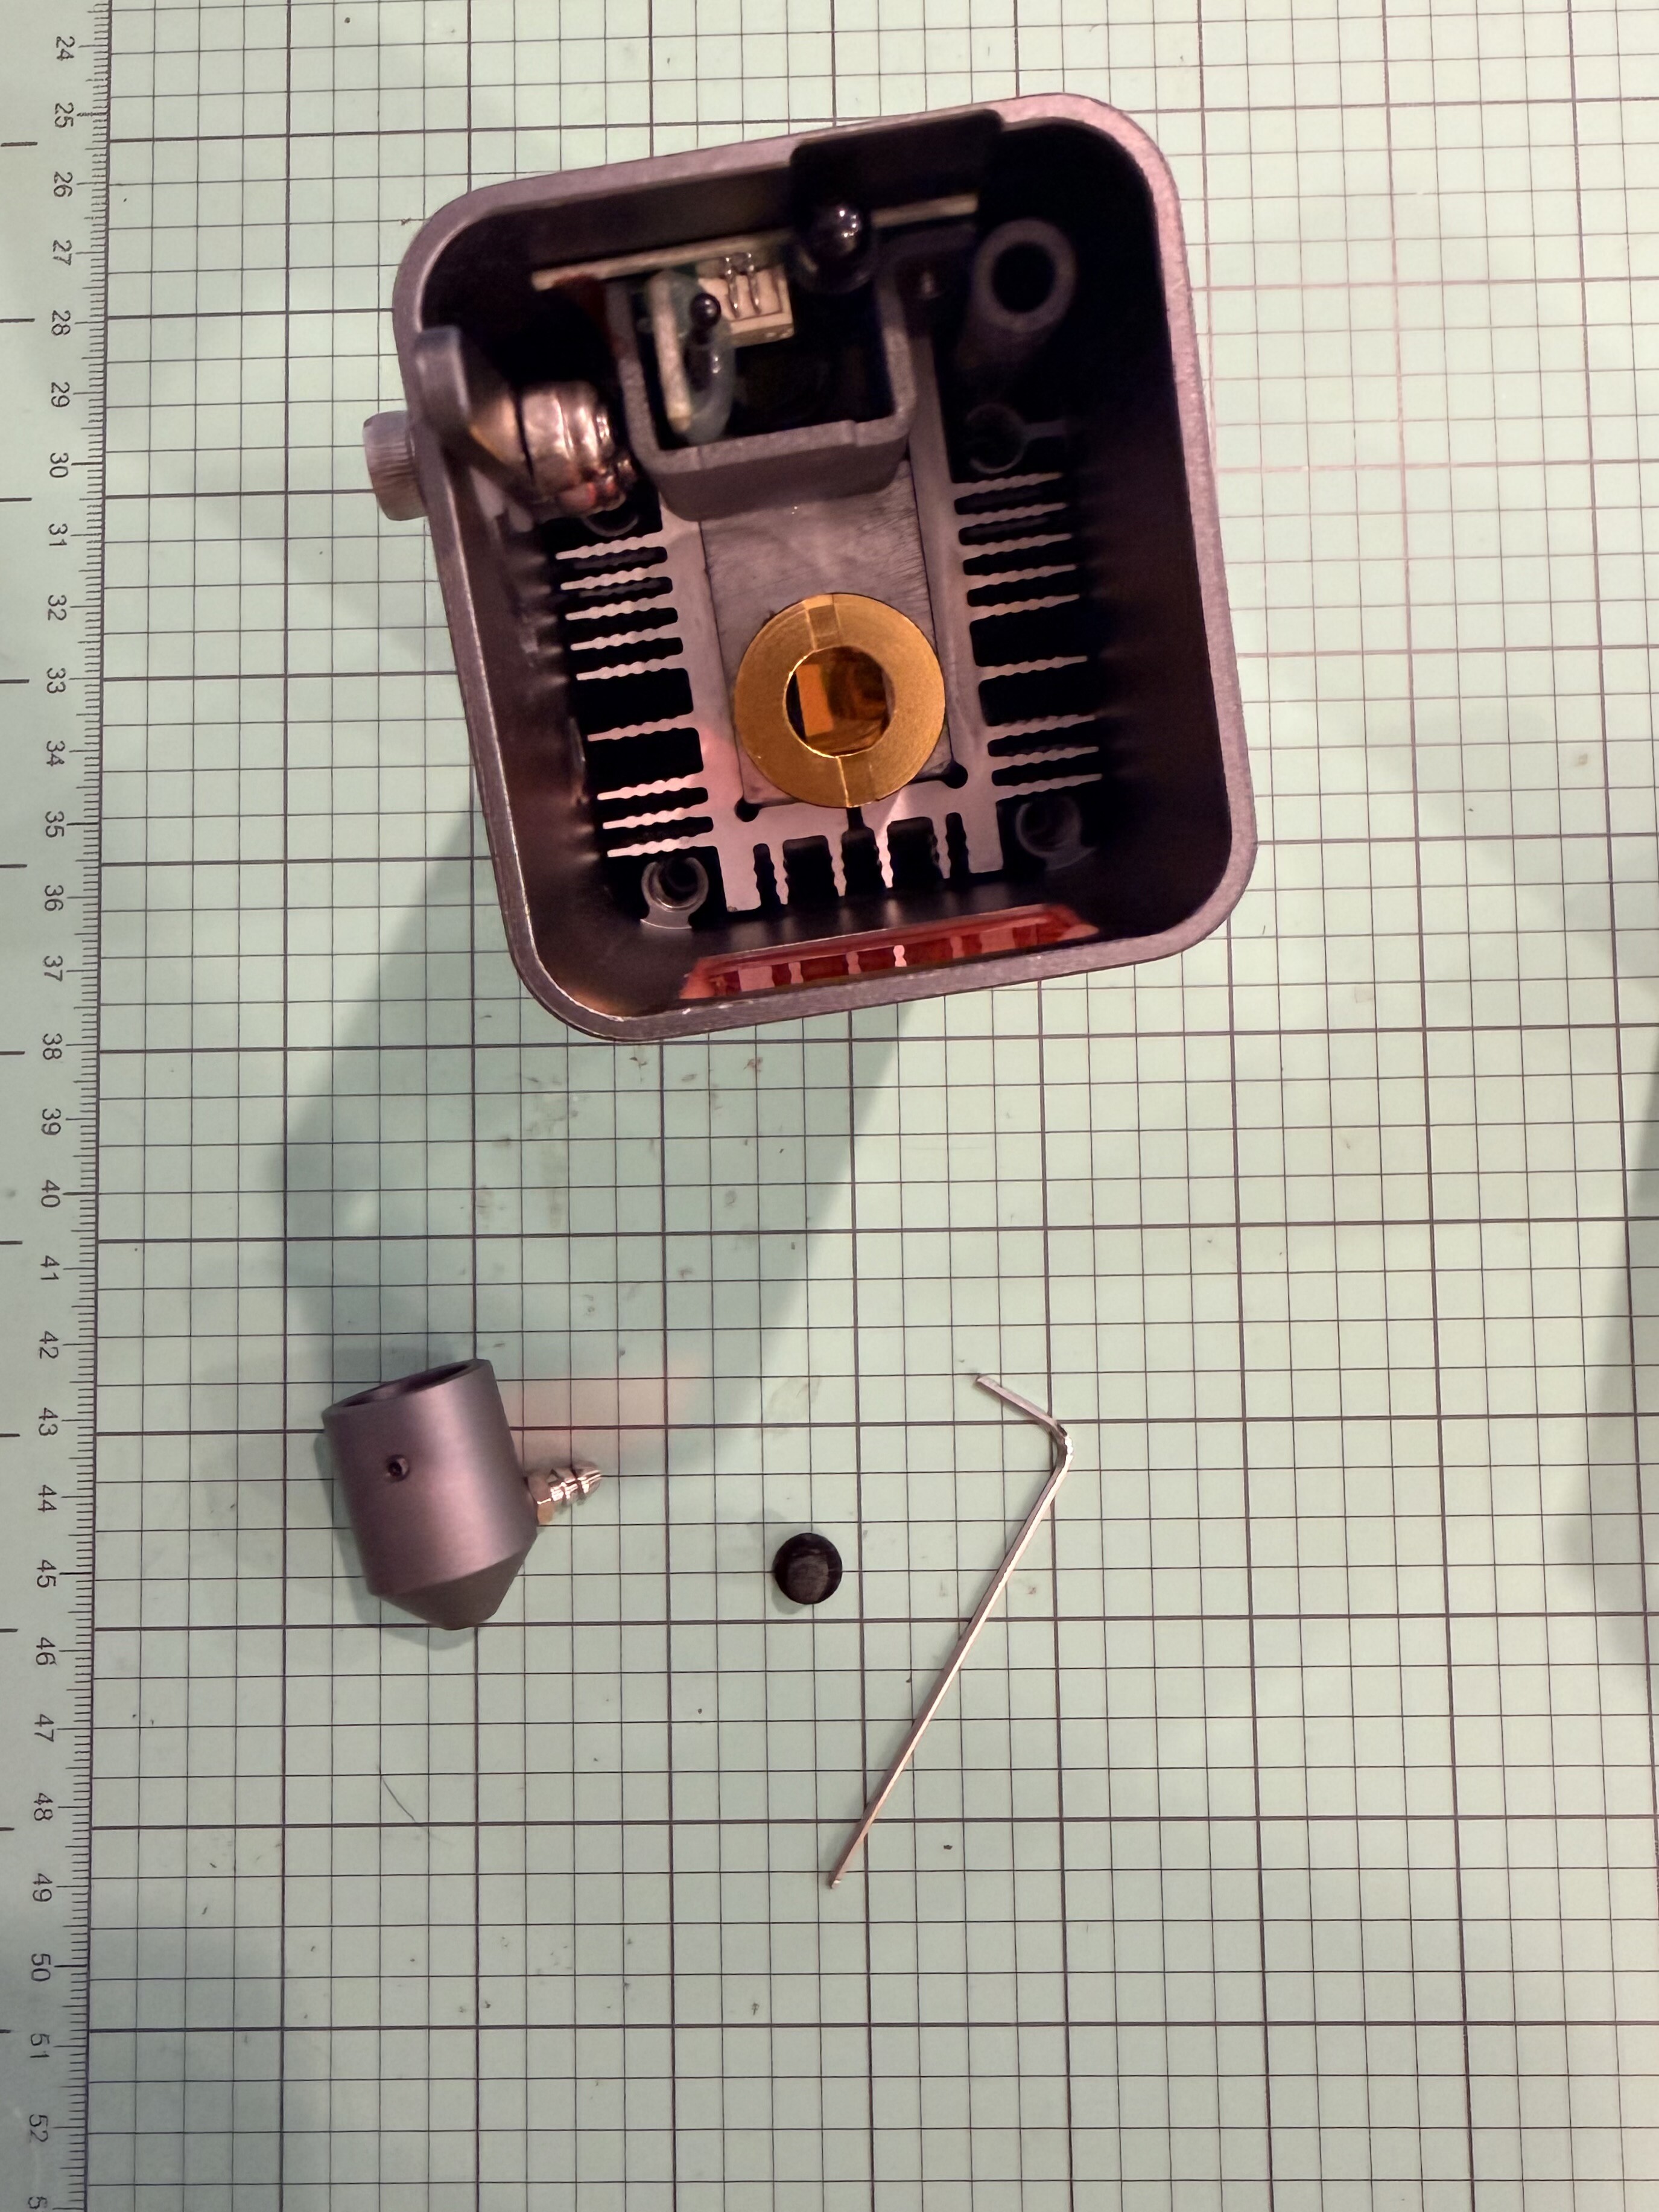
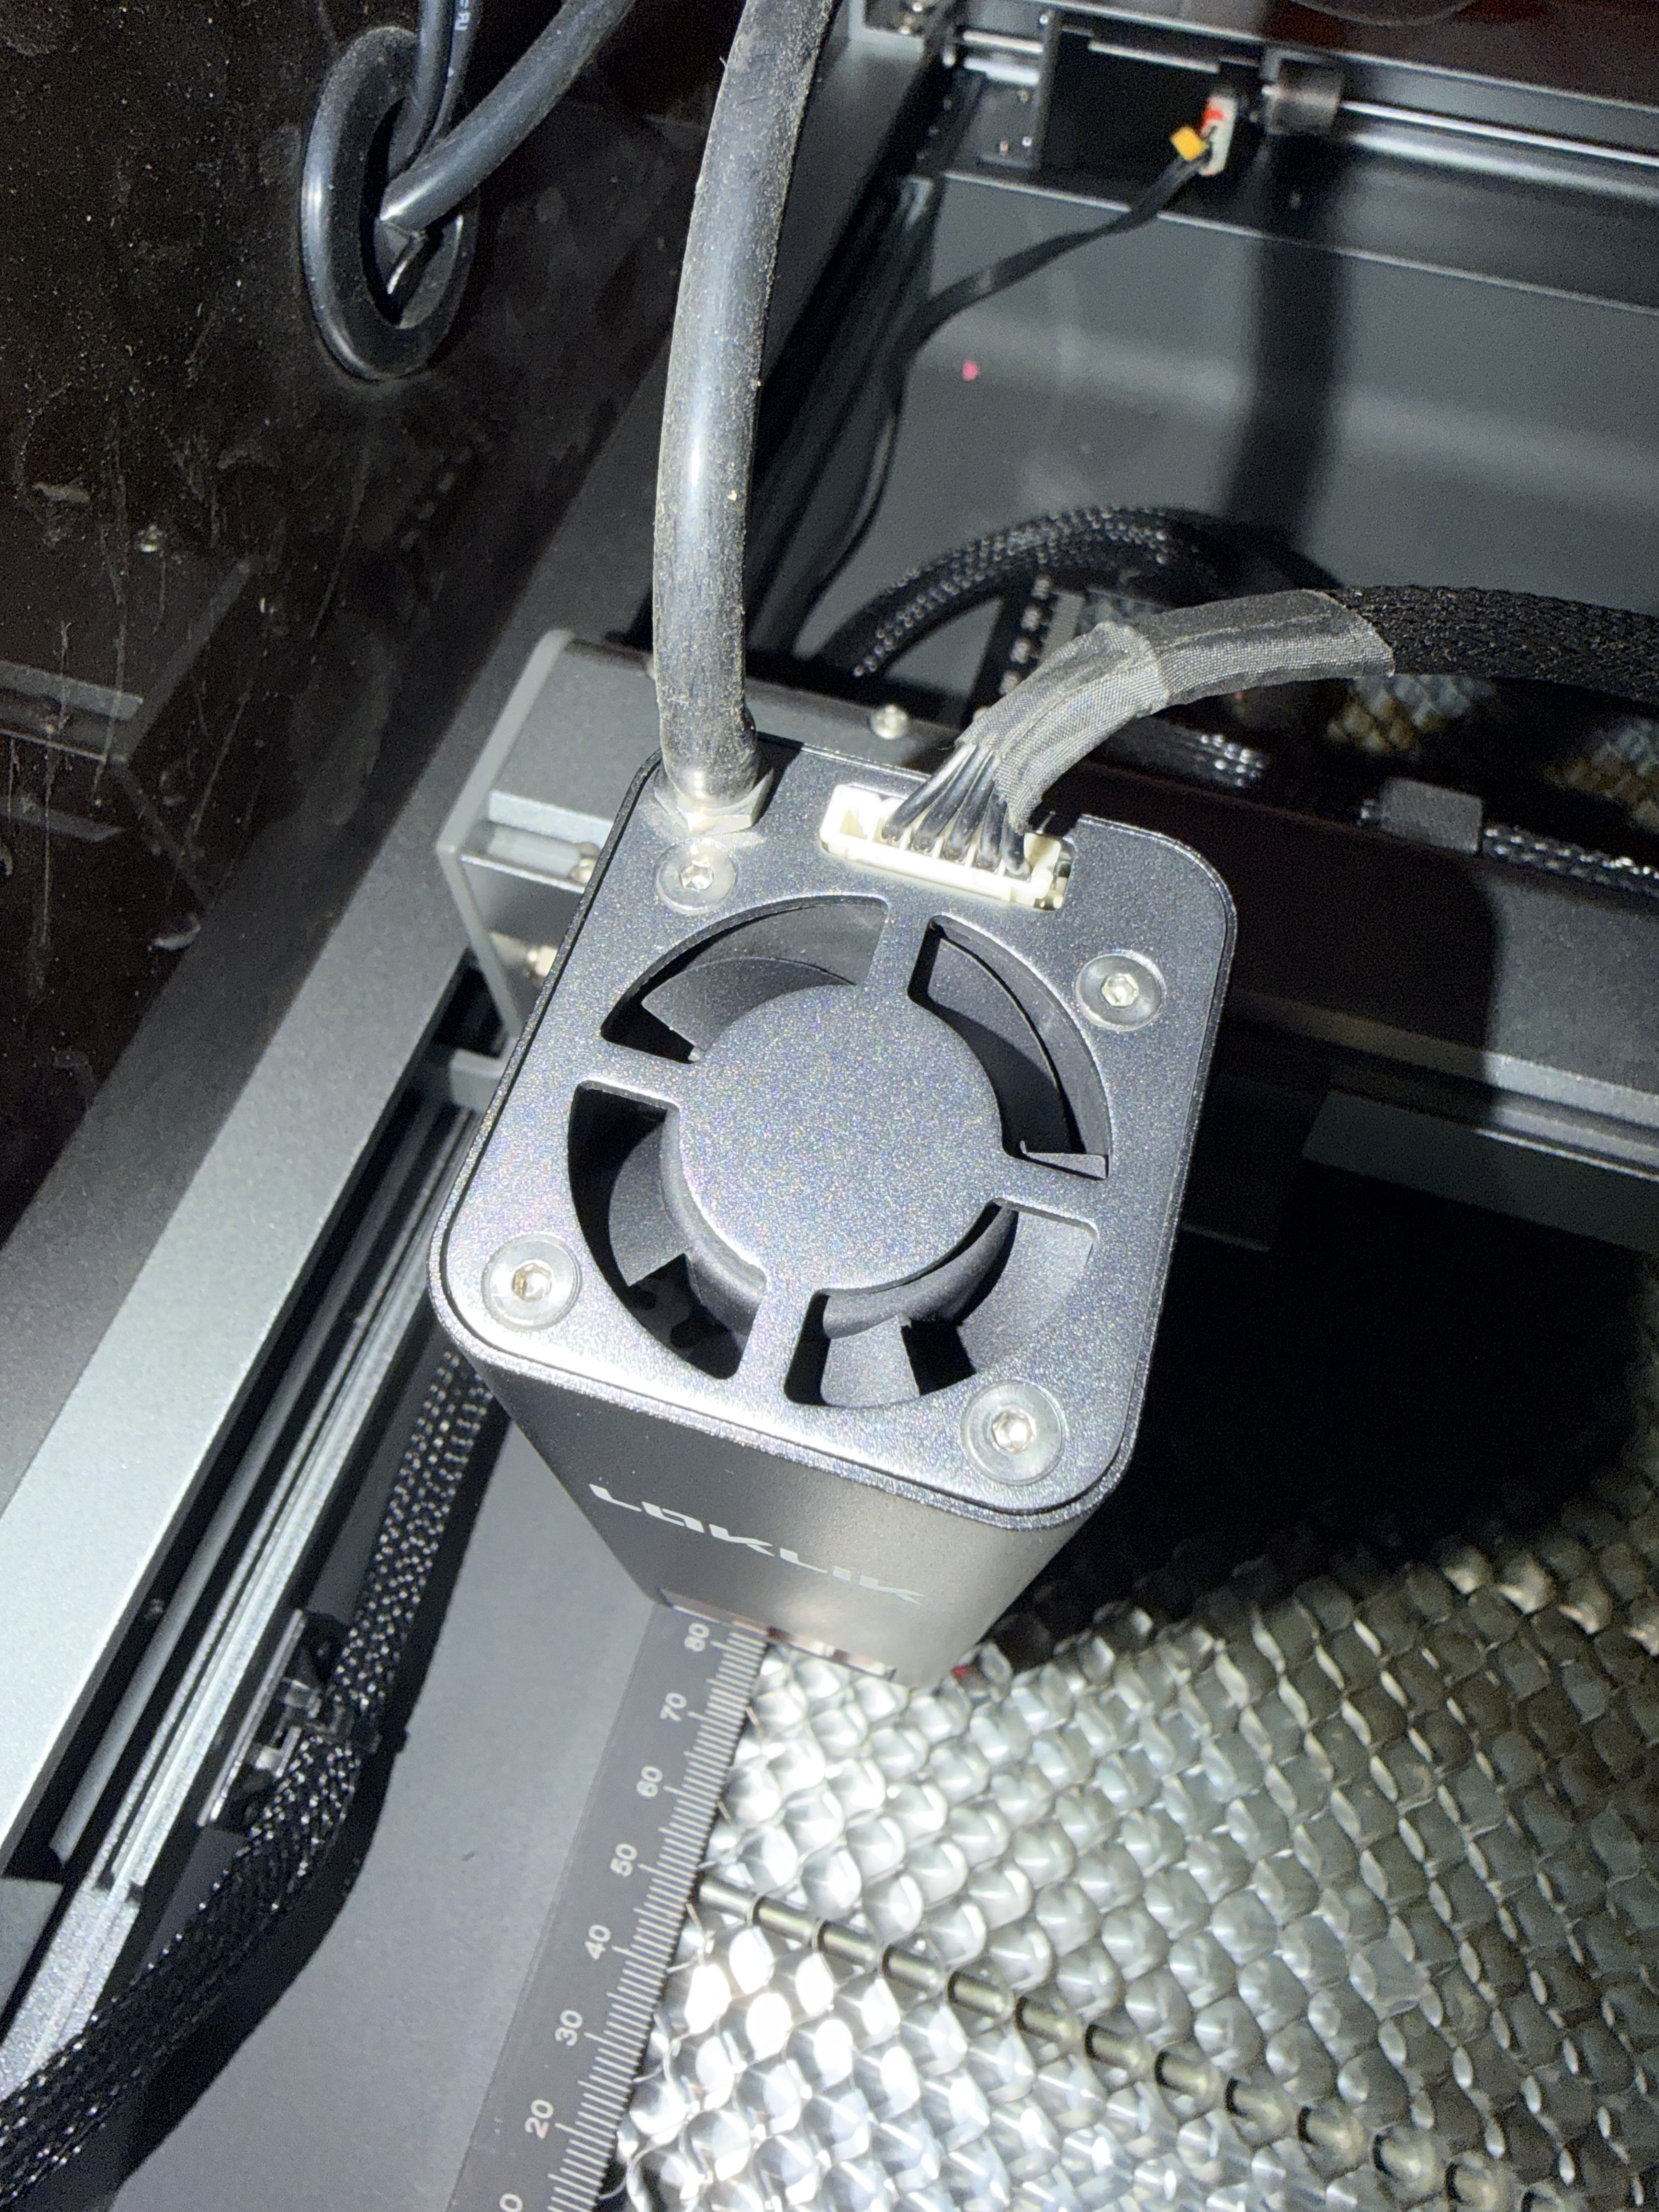
Step 4: Position the Air Assist Nozzle
Take your new air assist nozzle assembly and align it with the same mounting position where the lens cover was attached.
- The nozzle opening should face straight downward, directly over the laser’s focal point.
- Ensure the air inlet port (the small metal tube on the side of the nozzle) faces outward and is accessible for the tubing connection.
- Attach one end of the air tubing to the metal inlet on the air assist nozzle. Push it firmly until it clicks or feels snug. (Doing this step now will help with the headache of doing it after the nozzle is installed.)
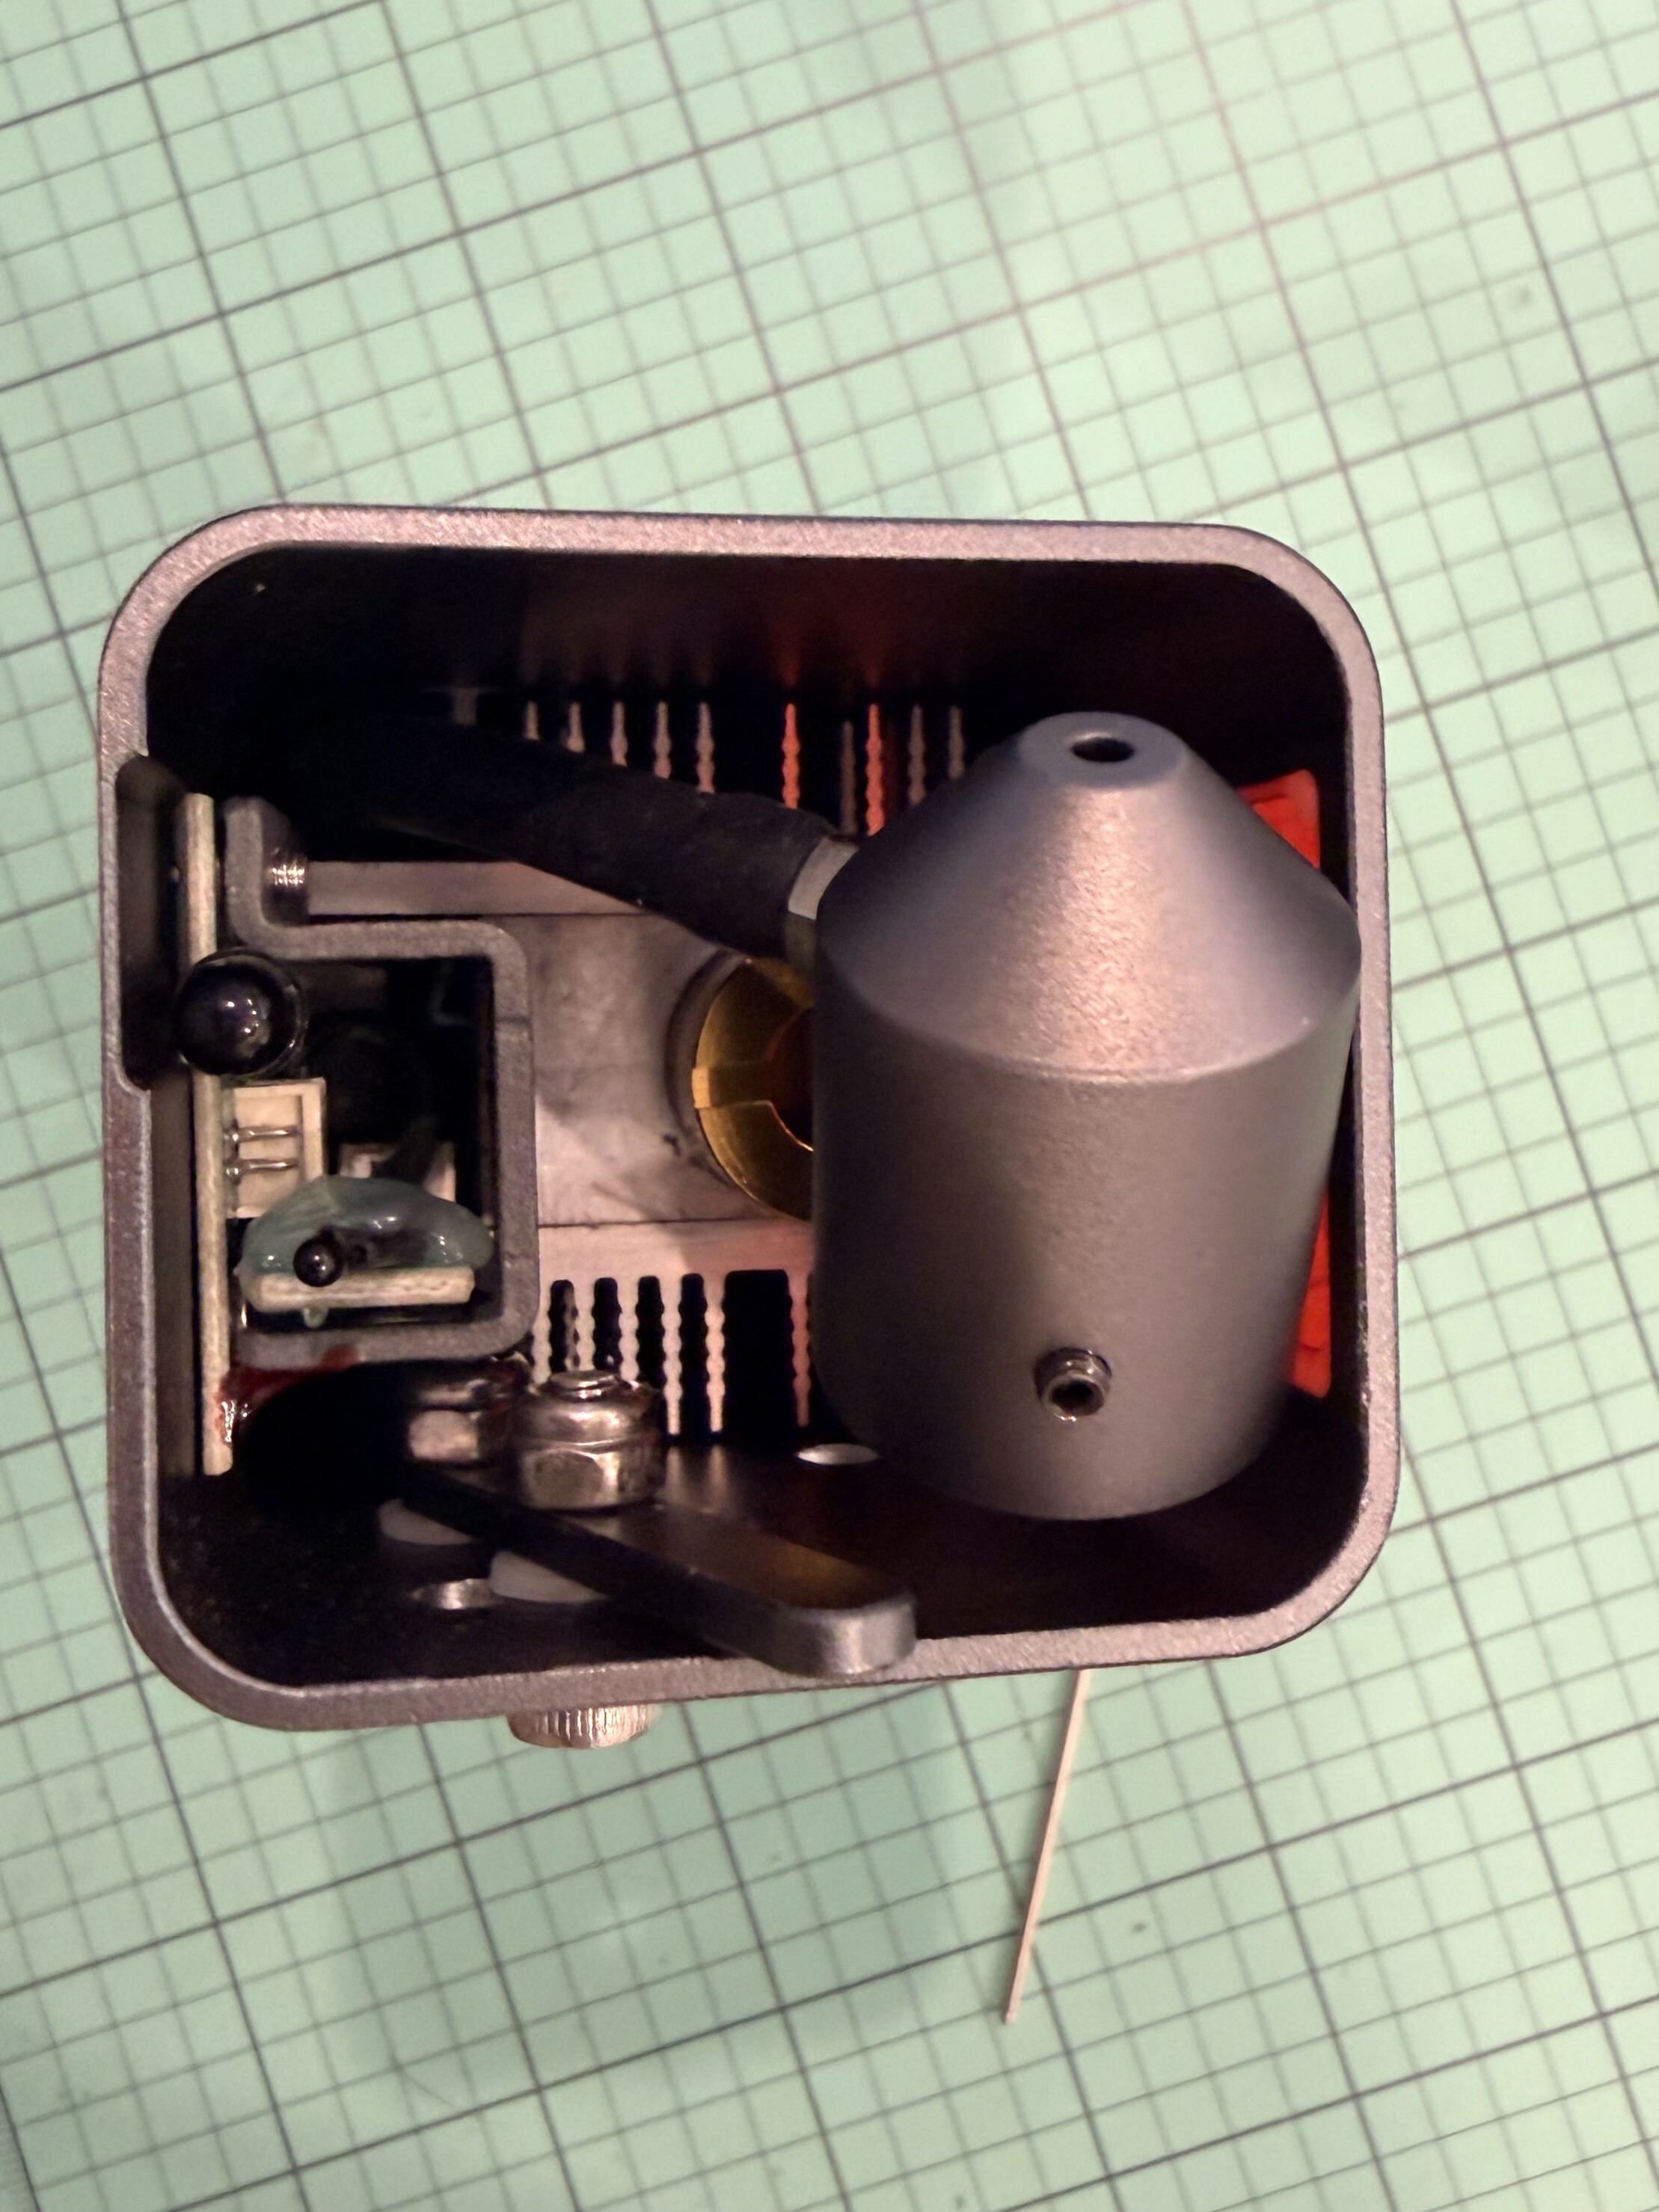
Step 5: Secure the Nozzle
Insert the set screw (the new ones provided with the nozzle) into the hole on the side of the nozzle mount. (Mine was installed, but I did loosen it as the air assist nozzle is a tight fit.)
- Tighten it evenly and gently using the Allen wrench—just snug enough to hold the nozzle firmly in place without over-tightening.
- Double-check that the nozzle is centered and secure.
- Insert the plastic plug on the side of the laser head module where the hex wrench went to tighten the set screw.
Step 6: Connect the Air Tubing
- Route the tubing along the cable management path or with the laser’s wiring bundle to keep it tidy and prevent snagging.
- Connect the other end to your air pump or compressor (depending on your setup).
Step 7: Test the Airflow
Before you resume engraving:
- Power on the air pump.
- Check that air is flowing smoothly through the nozzle and directed toward the laser’s focal point.
- Look for steady airflow, not pulsing or leaking—adjust tubing connections if needed.
Step 8: Test Engraving Performance
Run a small test engraving or cut with air assist on. You should notice:
- Cleaner cuts with less burn or scorch marks.
- Reduced smoke buildup around the laser beam.
- Better consistency in engraving depth and color.
 Final Tips:
- Do not overtighten screws around the lens area.
- Inspect the lens regularly and clean it with proper optics wipes.
- Keep the air tubing clear of moving parts when the laser head travels.
- Adjust the air pressure based on material — lighter for engraving, stronger for cutting.