Getting a new Cutting Machine 2 is very exciting! However, there are some things that I wish I had known before getting mine. So I’d like to pass on the 10 things I wish I’d known when I first got my machine.
1. Firmware Updates Help Everything Run Smoothly
When you first get your Cutting Machine 2 it is important to know you will need to update the firmware to the latest version. In order to update the firmware, you must connect the machine to a PC via the USB cord that is provided with the machine. The mobile app is incapable of updating the firmware. If you primarily use a phone or tablet, you can borrow a computer just for the update. You can install the app and remove it when you’re finished updating. It only takes a few minutes to update the firmware. If you want your machine to run at its highest potential, updating the firmware is a must. Below are the steps for how to update the firmware.
-
Connect the machine to your PC, via the USB cord that is provided.
-
Open the IdeaStudio software.
-
Click the plus (+) sign to Add A New Machine.
-
Select the iCraft Cutting Machine from the list of devices.
-
Click USB when it asks how you want to connect.
-
The software will then search for your device.
-
Click Connect by your machine, then click Next, then Done. You will then be connected.
Once the machine is connected
-
Select the Device Settings option.
-
Click Check For Updates.
-
Choose your device from the Connect Device list.
-
Click Download, then Update.
Wait a few seconds, and you will see the updating bar begin to fill. It takes about a minute to complete.
Afterwards, the device will say it’s disconnected. At this point you will need to turn on the machine again. Once turned back on, the Firmware Version will read as the latest version.
When you’re finished updating the firmware, you may unplug the machine from the PC, and connect via Bluetooth on any device on which you have the IdeaStudio application installed.
For connecting with Bluetooth, you may need to make sure your device has a Bluetooth driver installed. Both my laptop and desktop PCs’ Bluetooth drivers were outdated and removed, which kept me from connecting my devices via Bluetooth. What resolved this issue was me buying a 5.4 USB Bluetooth dongle, and it works perfectly.
2. Keep the Lid Open When Connecting
One day, I connected my machine and heard a BANG! My app read something along the lines of X-axis failure. Please restart.
I turned off my machine, but I wondered, What was that all about? Some time later, it happened again! BANG! Axis error. I had absolutely no idea what was causing this error. Until one day, I finally realized, it only happens when the lid of my machine is closed. Upon further inspection, I noticed the hinge on the lid was keeping the blade component from reaching the little slot that’s on the left side of the machine.
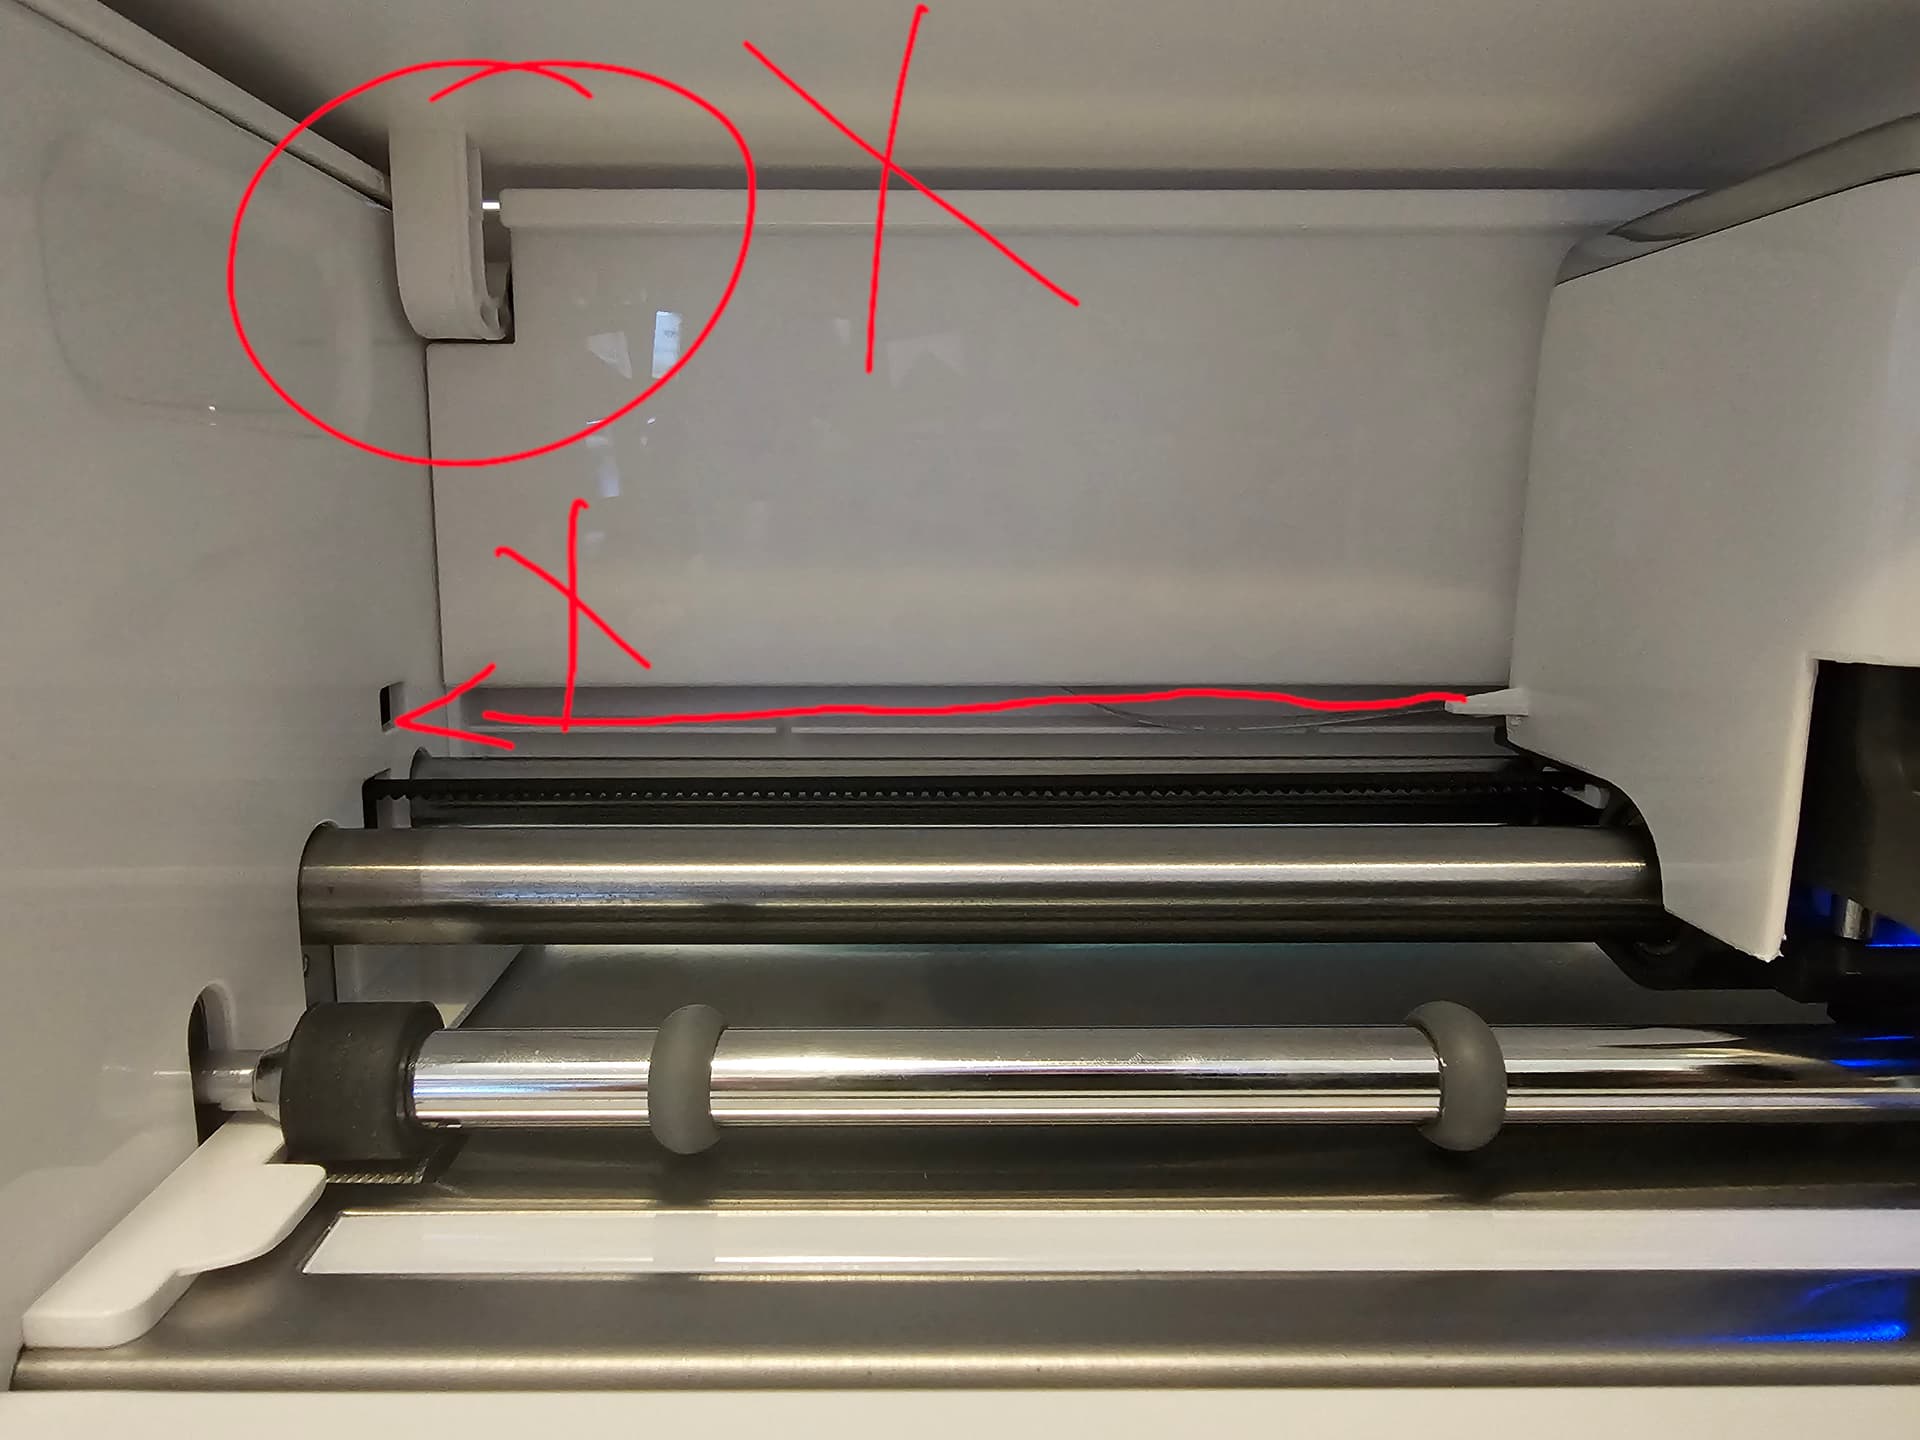
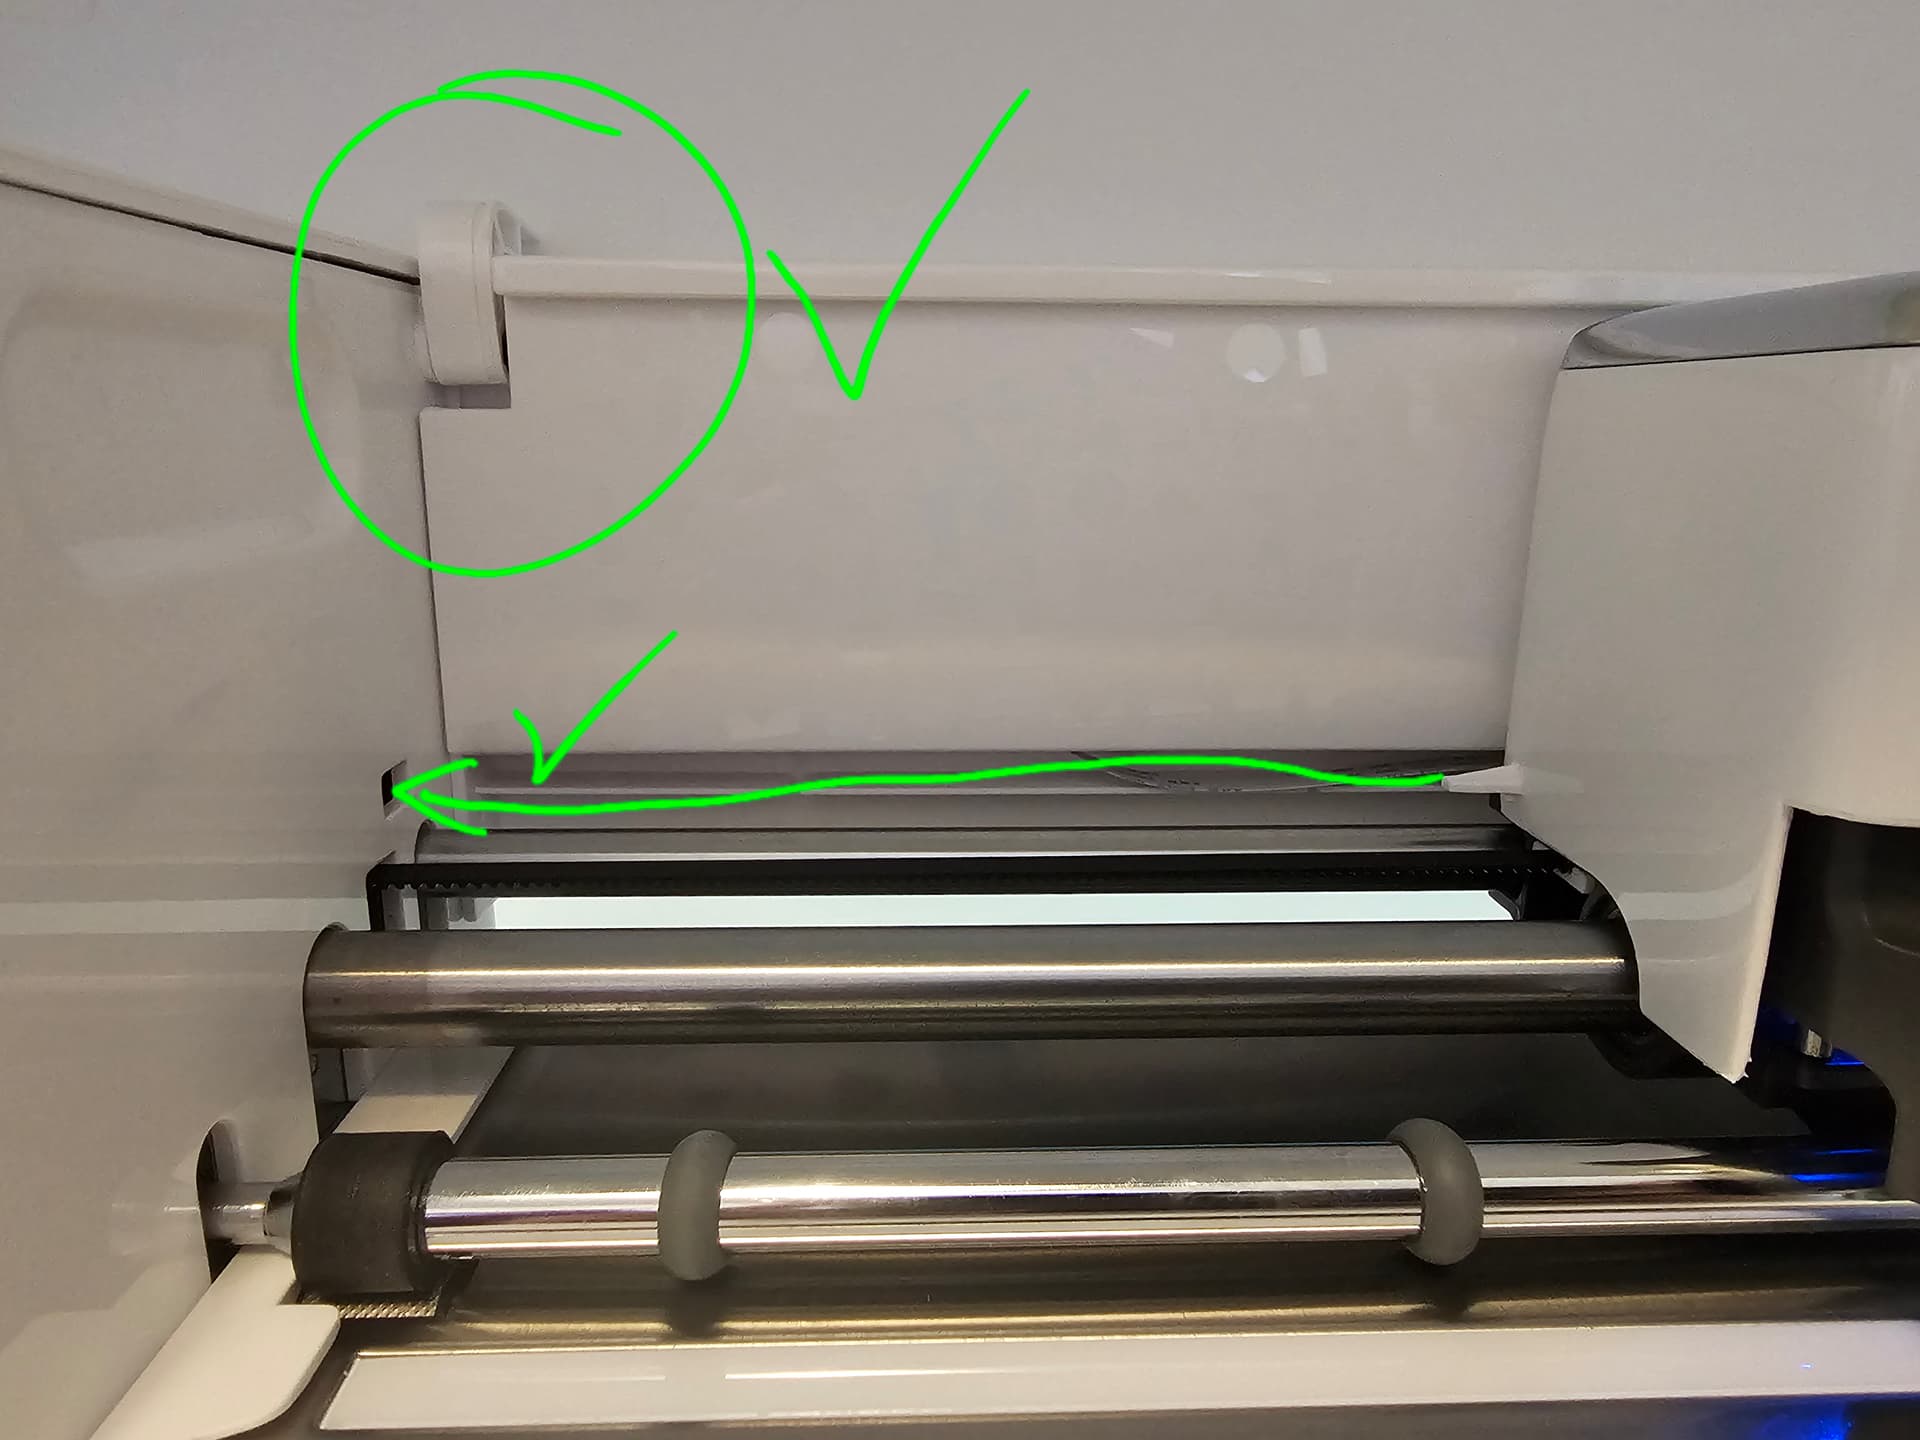
There’s a prong on the left side of the component that must enter into the slot. This is to make sure everything is aligned properly. When the lid is closed, the hinge blocks the component from entering the alignment slot. Keeping the lid open ensures the blade carriage aligns correctly every time.
If you run into this issue, it’s ok, just turn the machine off and back on, everything will work perfectly fine.
3. Know Which Materials the Cutting Machine 2 Handles Best
A lot of beginners assume all cutting machines can handle thin wood because other brands advertise it. The Cutting Machine 2 simply isn’t built for it — the blade system and pressure levels aren’t designed for basswood, balsa, or even thin veneer sheets.
Why it matters:
Knowing this upfront saves you from buying materials the machine can’t use. The Cutting Machine 2 shines with:
- Vinyl
- Cardstock
- Acetate
- Faux leather
- Bonded fabric
- Shrink plastic sheets
- PVC template
- EVA foam board
- Magnetic sheets
Wood isn’t one of the materials this machine is designed for, so you’ll get much better results with the materials listed above.
Loklik has intentionally reserved wood‑cutting for their iEngrave machine, which uses a laser system designed to burn, score, and engrave materials like basswood and balsa with precision. By keeping wood‑focused tasks on the iEngrave and everyday cutting tasks on the Cutting Machine 2, each machine can excel at what it was built for and give you the best possible results within its intended material range.
4. Tape Gives You Cleaner Results on Thicker Materials
My faux leather kept lifting on the edges, even on a StrongGrip mat — and that’s when I learned how much the Cutting Machine 2 rollers can tug on thicker materials. As the mat feeds back and forth, even a tiny bit of lift can shift your cut or cause the blade to catch.
Adding painter’s tape to all four sides keeps everything locked down so the rollers can’t pull or drag the material. It also helps prevent curled corners, raised edges, and those little spots where the blade snags instead of gliding. A few pieces of tape make a huge difference in getting cleaner cuts and a smoother feed, especially with materials that naturally want to flex or lift.
5. Take a Little Time to Explore the Software
Before buying my Loklik cutting machine, I watched video after video of people using other machines and creating on a different software. In my mind, I thought that the Loklik software would probably work the exact same as the other brand’s software. I quickly learned that Loklik’s software works very differently — in a good way.
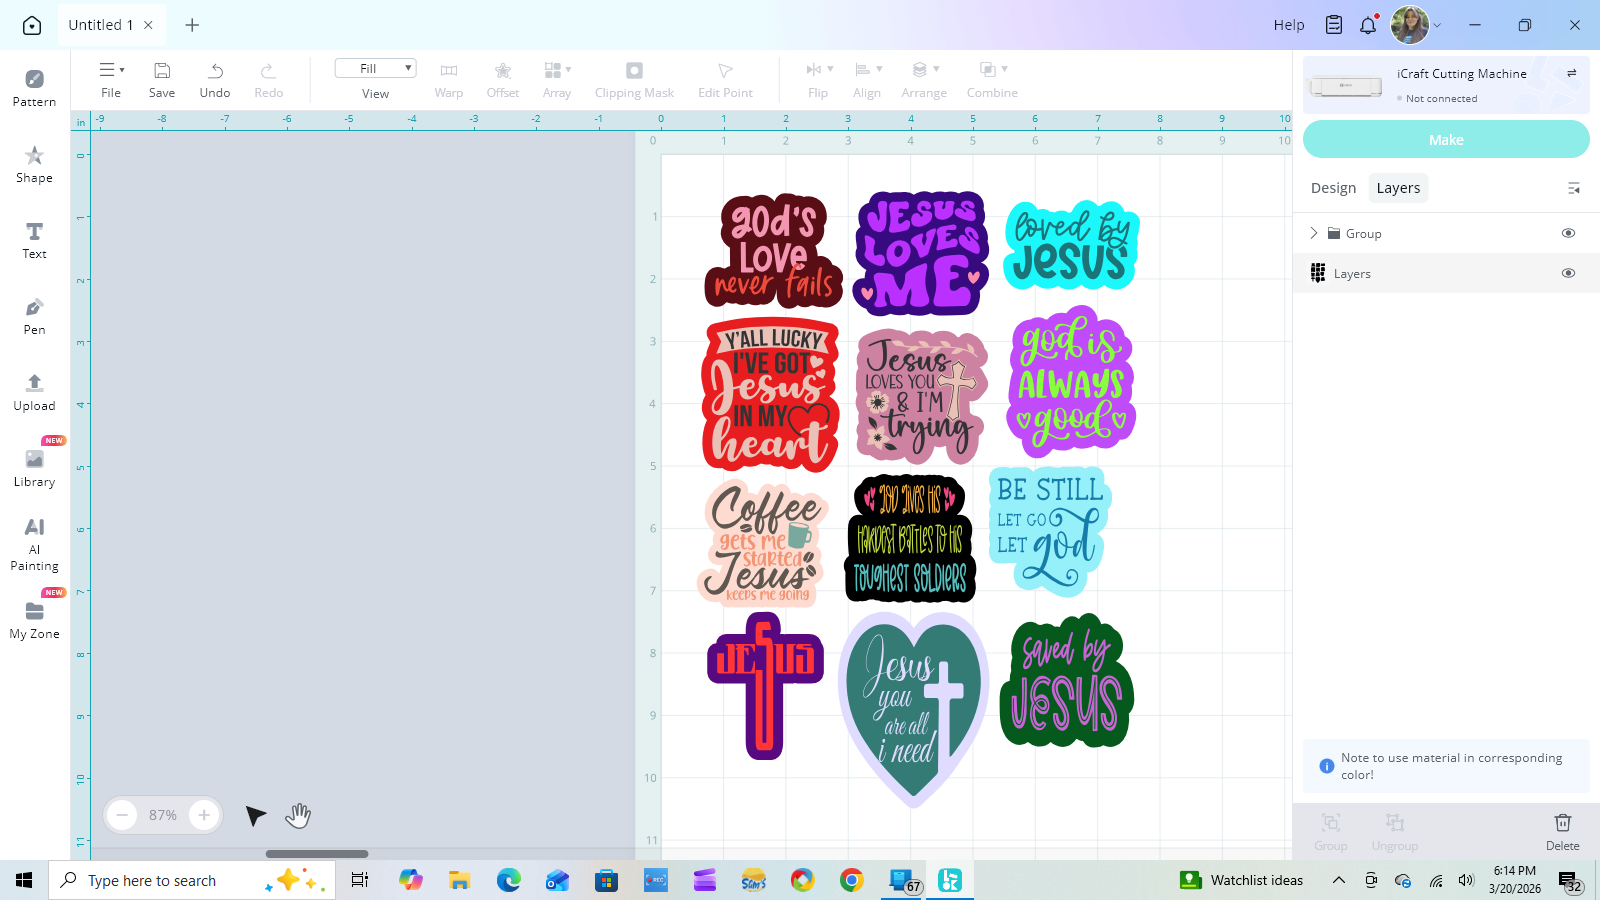
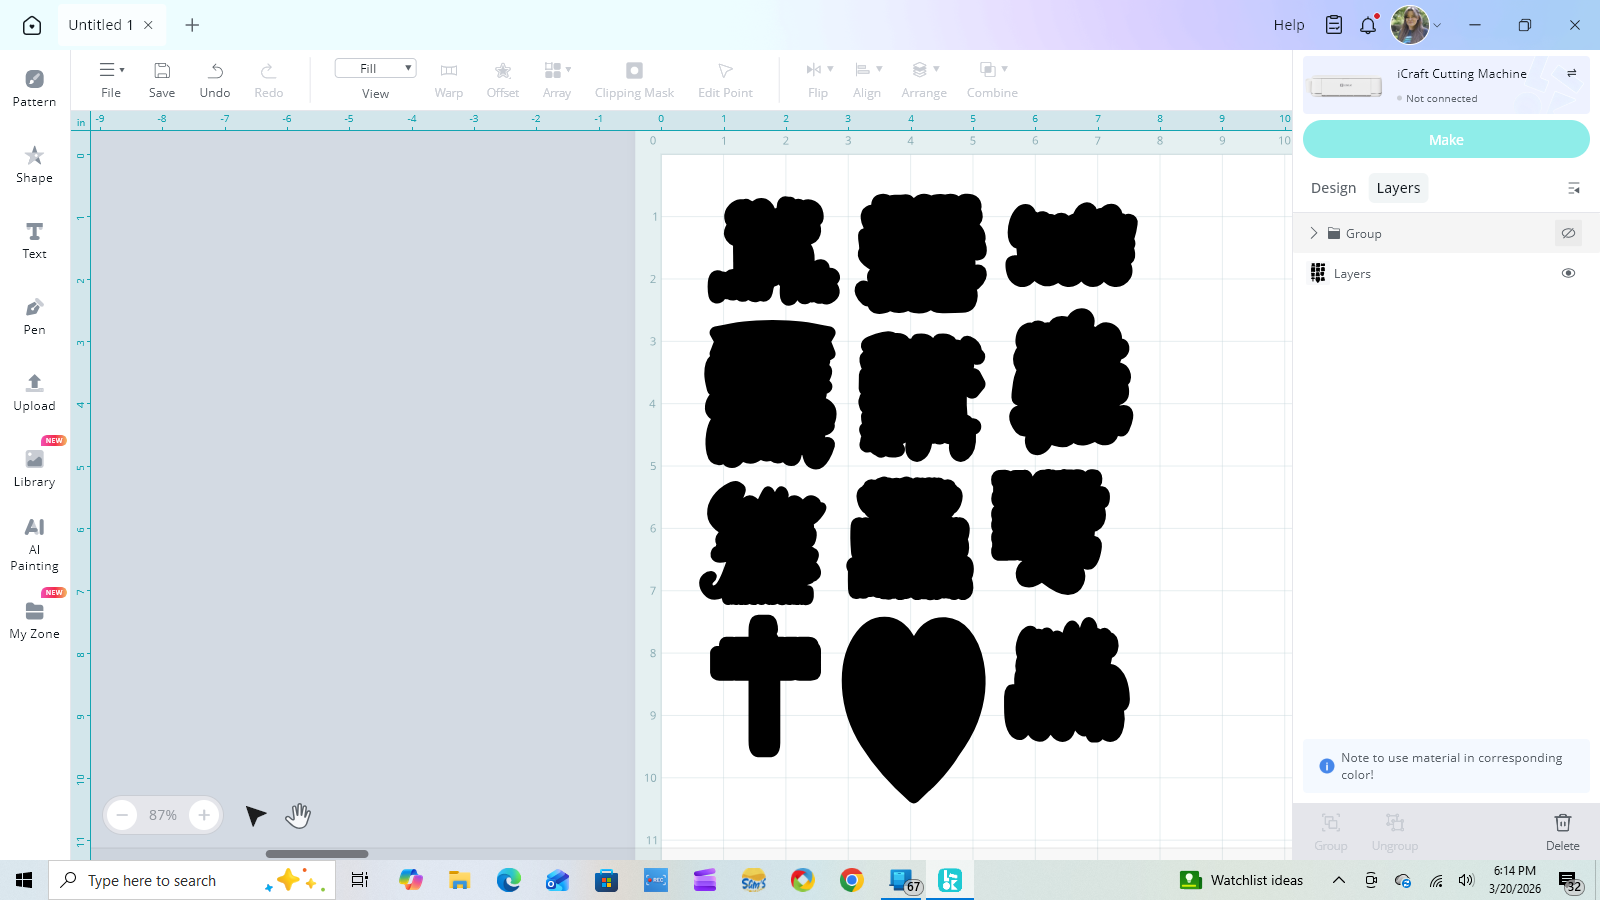
Not all design software is created equal. Loklik works in layers. Whereas the other brand, just throws all of your design layers on different color mats and expects you to just make it as they’ve laid it out for you. Loklik’s IdeaStudio software allows you to be in control of every layer, every cut, and every setting. To me, this is the best way to have it. It may be a little more work, but at least you know exactly what’s happening with each cut, since you’re the one setting all of the parameters — from where it sits on the real mat to the force that’s to be used all the way up to which task you want to start and end with when making. I love that you have a task list that makes every operation clear, and you get to choose which operation to start.
While it was definitely a learning curve, I ended up loving the IdeaStudio way more than the other software, and wish more design software programs — like Inkscape, Affinity, etc. — were more like the IdeaStudio software.
6. Clean Mats and Blades Make a Night‑and‑Day Difference
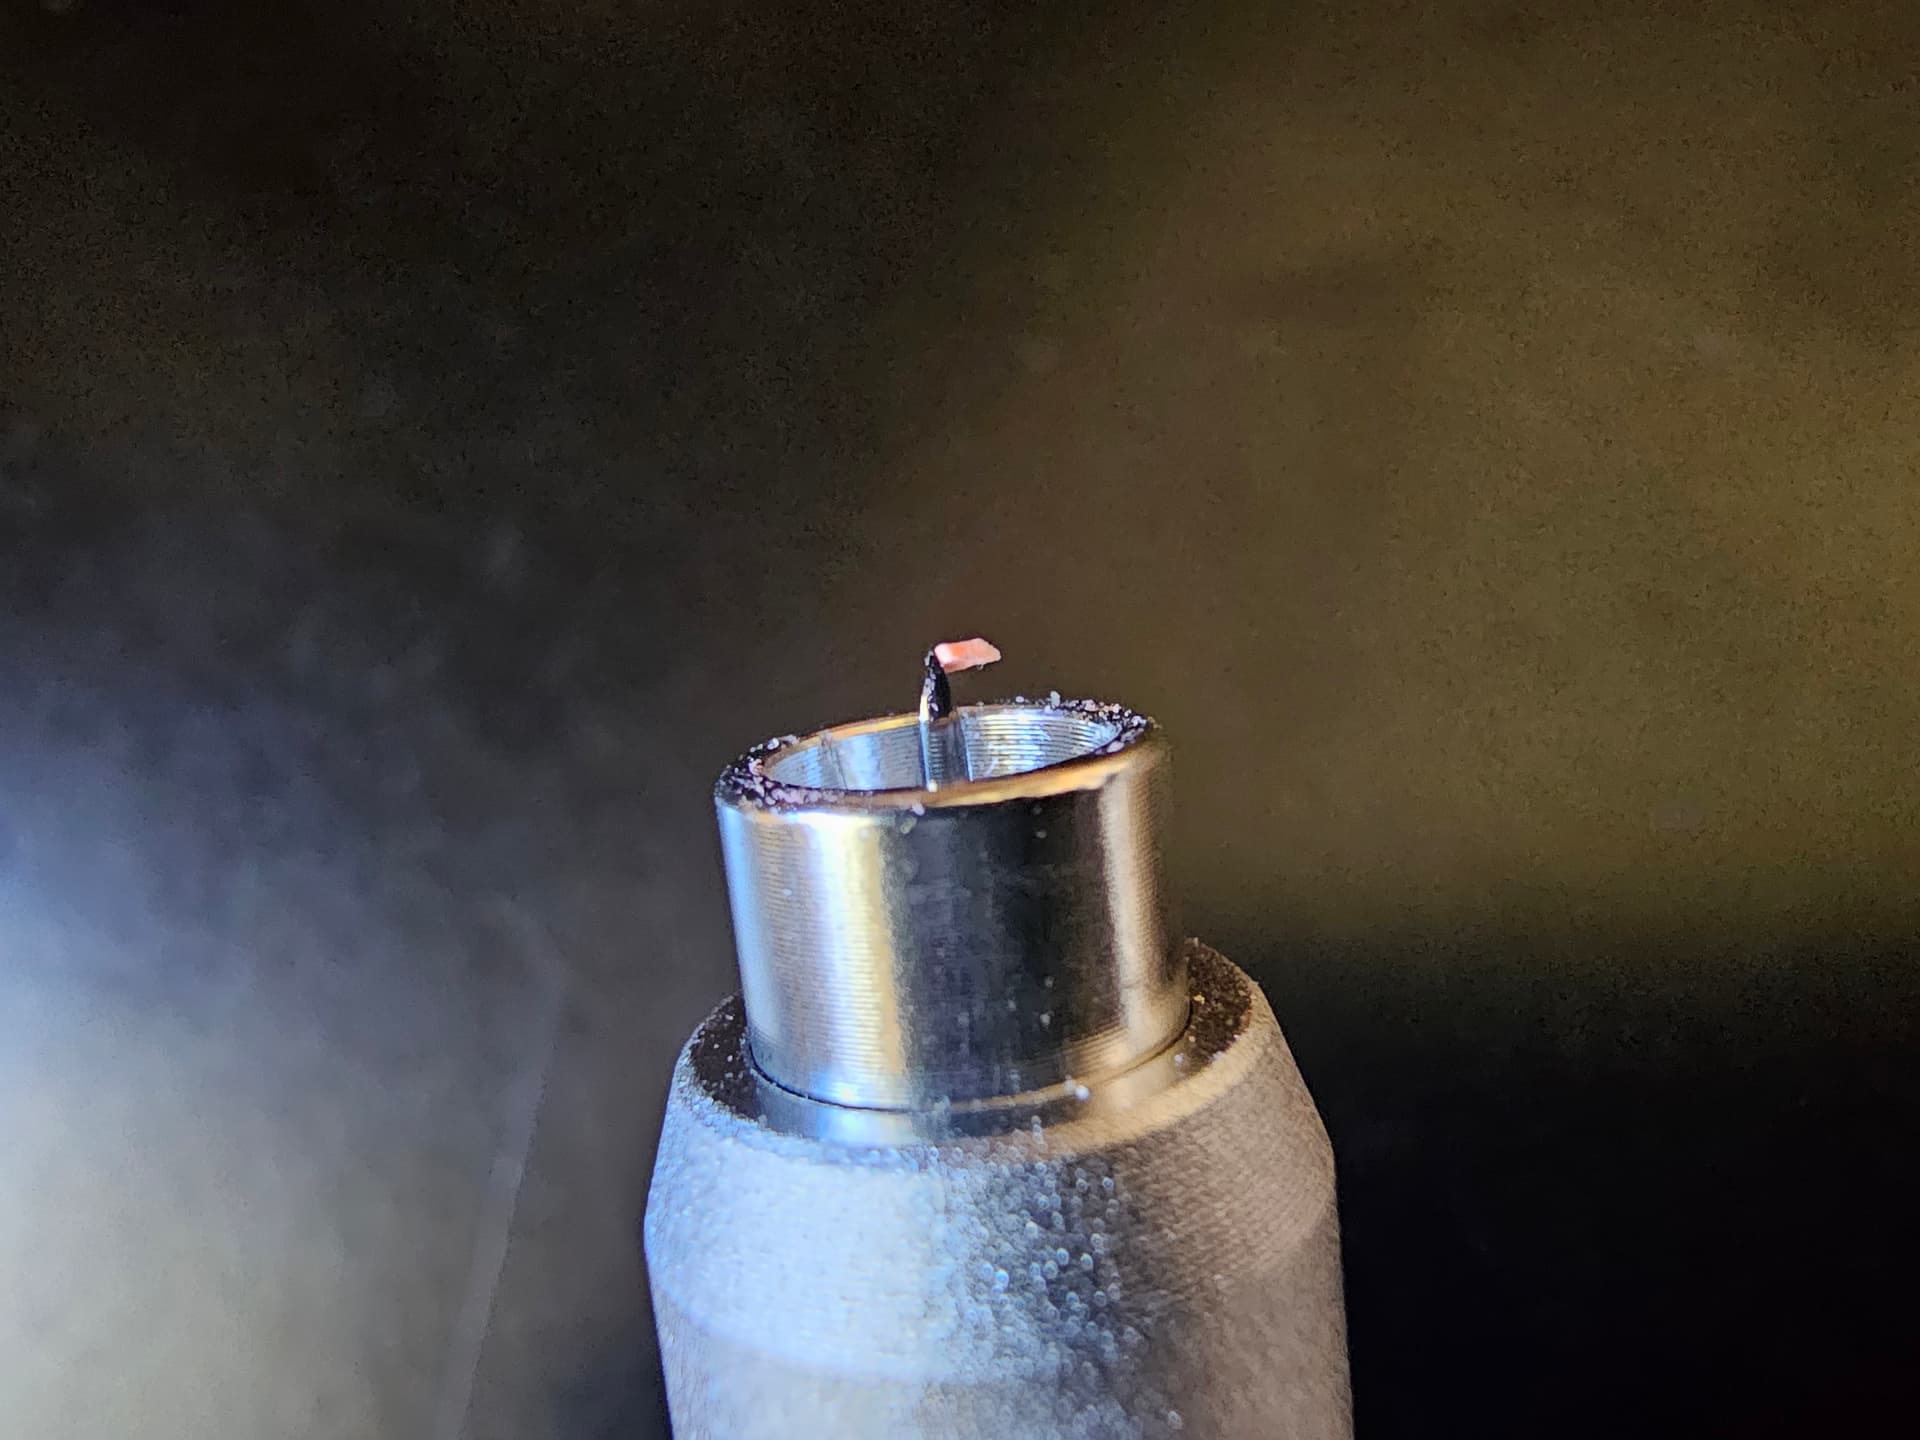
There have been times when I blamed the machine for tearing my cardstock… until I realized my blade tip had a tiny piece of paper stuck to it.
Why it matters:
A dirty blade = fuzzy cuts
A dusty mat = sliding materials
A quick wipe fixes 90% of “machine problems.”
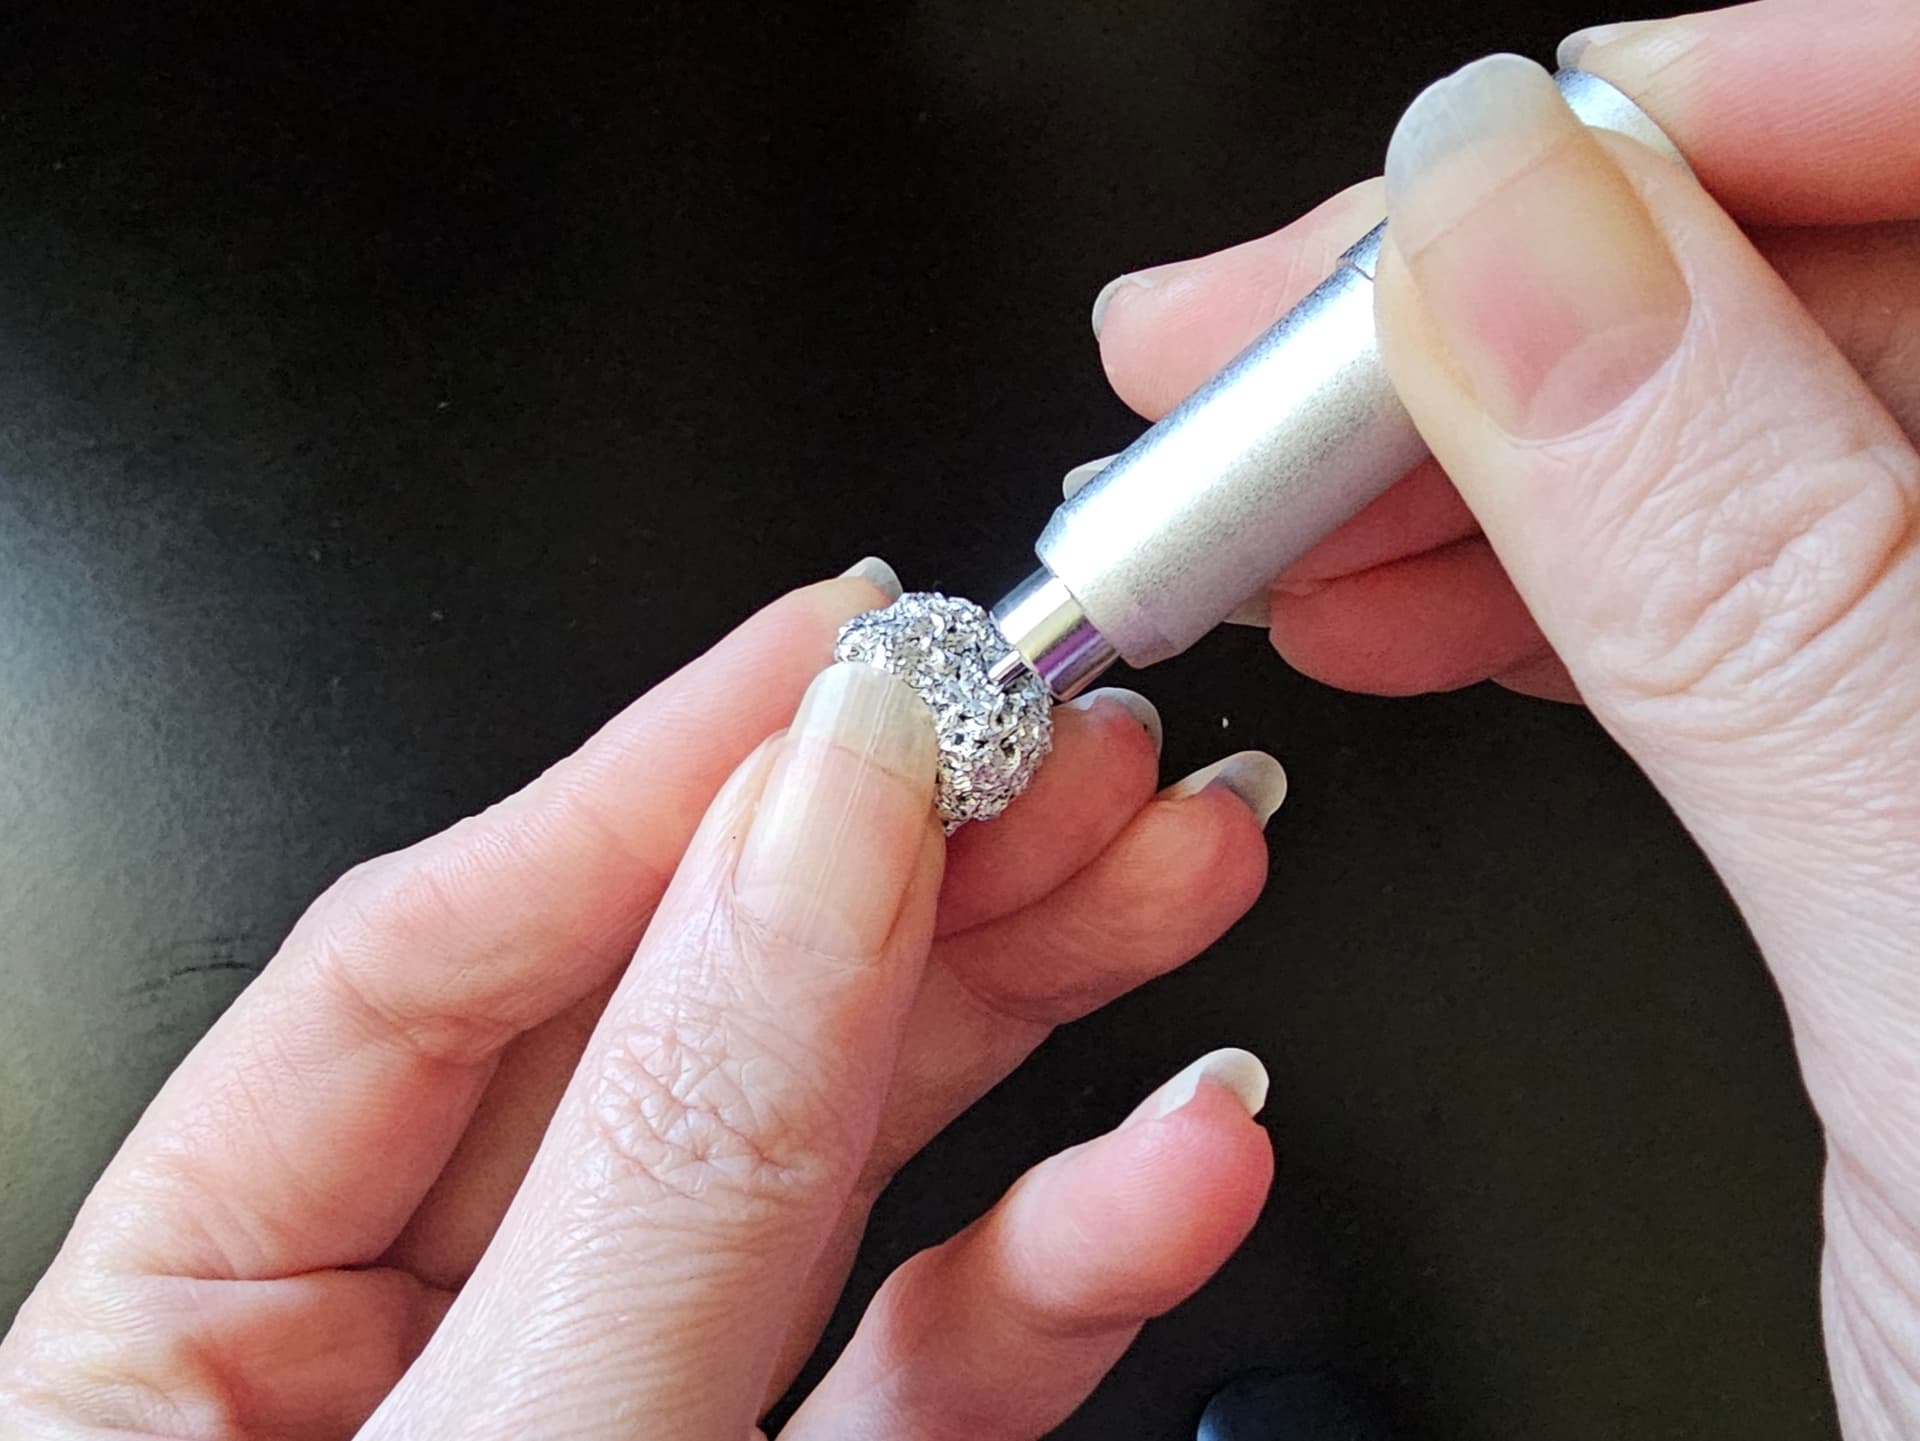
I like to clean my blades with a ball of aluminum foil after each cut. Just poke the blade into the rolled up ball of foil a few times to remove any stuck on debris. And don’t forget your mats: removing loose fibers, scraps, and dust helps the material grip properly so the machine can cut cleanly without shifting. For a deeper look at mat care, you can read my full guide, How to Clean Your Cutting Mats — it walks you through everything.
A few seconds of maintenance saves you from a lot of frustration and wasted materials.
7. Start with a Simple, Useful Tool Setup
When you’re first getting started, it’s easy to feel like you need every mat, every blade, and every accessory right away. The good news is that you can begin creating confidently with just a small set of essentials, and then build your collection as you discover what you enjoy making most.
A great starter setup includes:
- Light Grip Mat (for paper and cardstock)
- StandardGrip Mat (for vinyl)
- StrongGrip Mat (for faux leather and thicker materials)
- Masking or painter’s tape
- Weeding tool
- Scraper
- An extra blade
These basics cover the majority of beginner projects and give you plenty of room to explore. As you spend more time with your machine, you’ll naturally figure out which additional tools, blades, or specialty mats fit your style — and you can add them whenever you’re ready.
8. A Few Tweaks Can Improve Print‑Then‑Cut Results
When trying to do a print then cut with the Cutting Machine 2, it’s important to have the correct settings on your printer. If you don’t have the proper settings, your machine will not be able to read the registration marks. Be sure to set Scaling to None and turn off Borderless Printing.
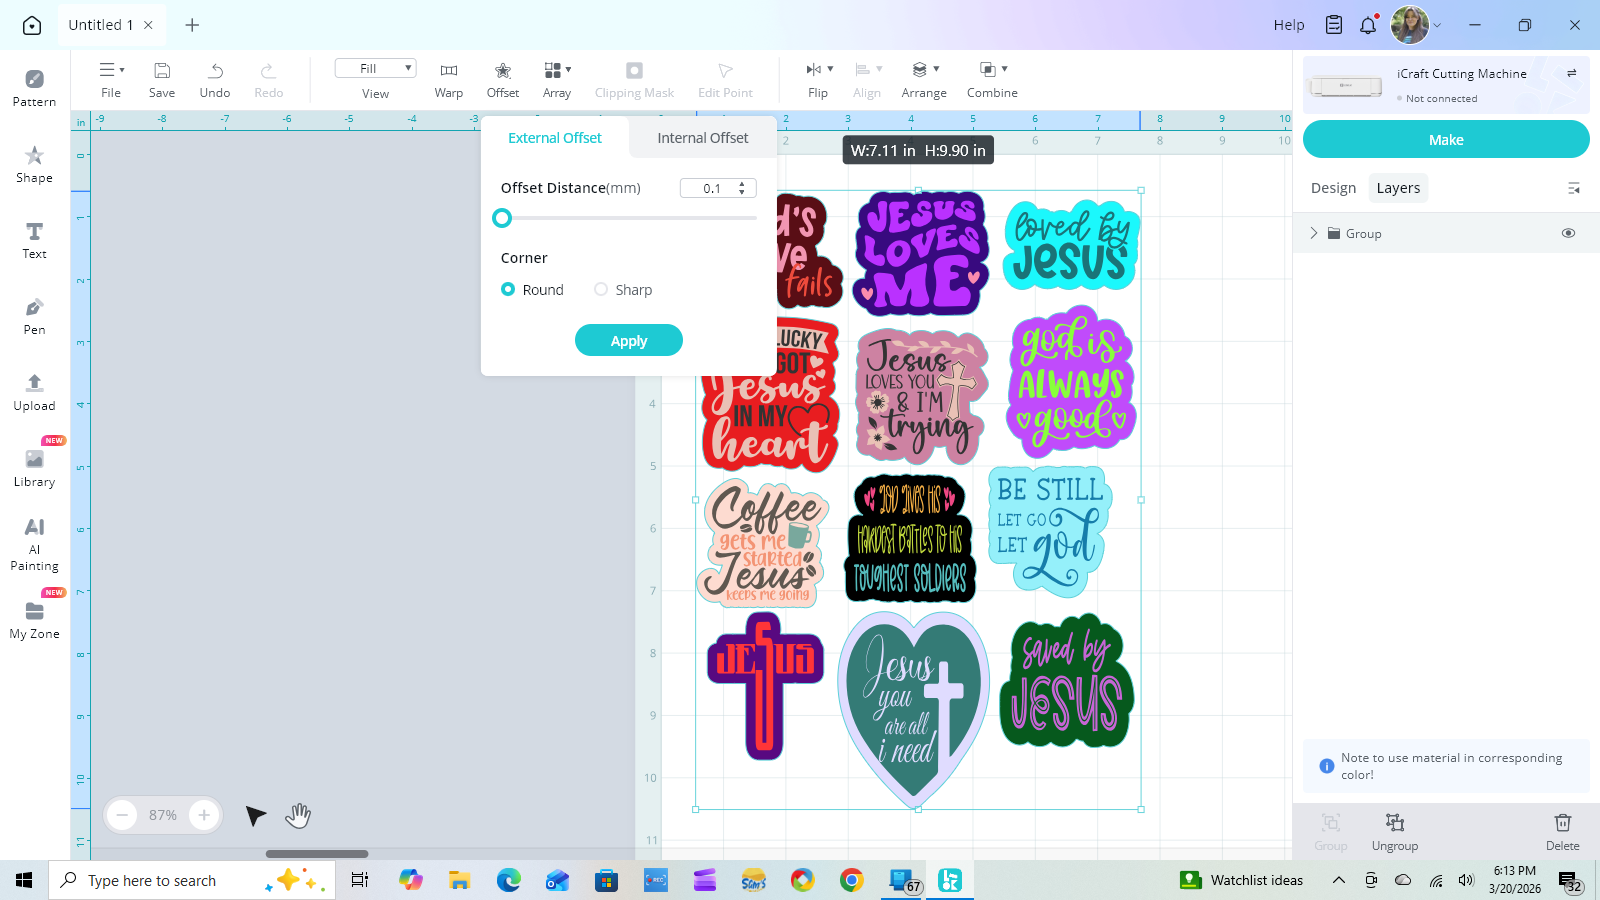
When performing the Print Then Cut, I’ve found it’s best to just use the Offset function in the top tool bar rather than choosing Print Then Cut in the Image Matting panel.
For more information on this technique, you can check out my How to Achieve a Perfect Print Then Cut with Your iCraft Guide.
9. Test Cuts Help You Get Perfect Results Faster
The first time I tried a new faux leather sheet, I trusted the default setting… and the blade barely scratched the surface. One tiny test cut would’ve saved me from wasting half a sheet.
Why it matters:
Every brand, thickness, and finish behaves differently. A 10‑second test cut prevents a 10‑minute meltdown.
A test cut takes seconds, but it can save you from wasting an entire sheet of material. Even if two materials look identical, they can cut completely differently — especially faux leather, glitter vinyl, and anything textured. The Cutting Machine 2 is consistent, but materials aren’t.
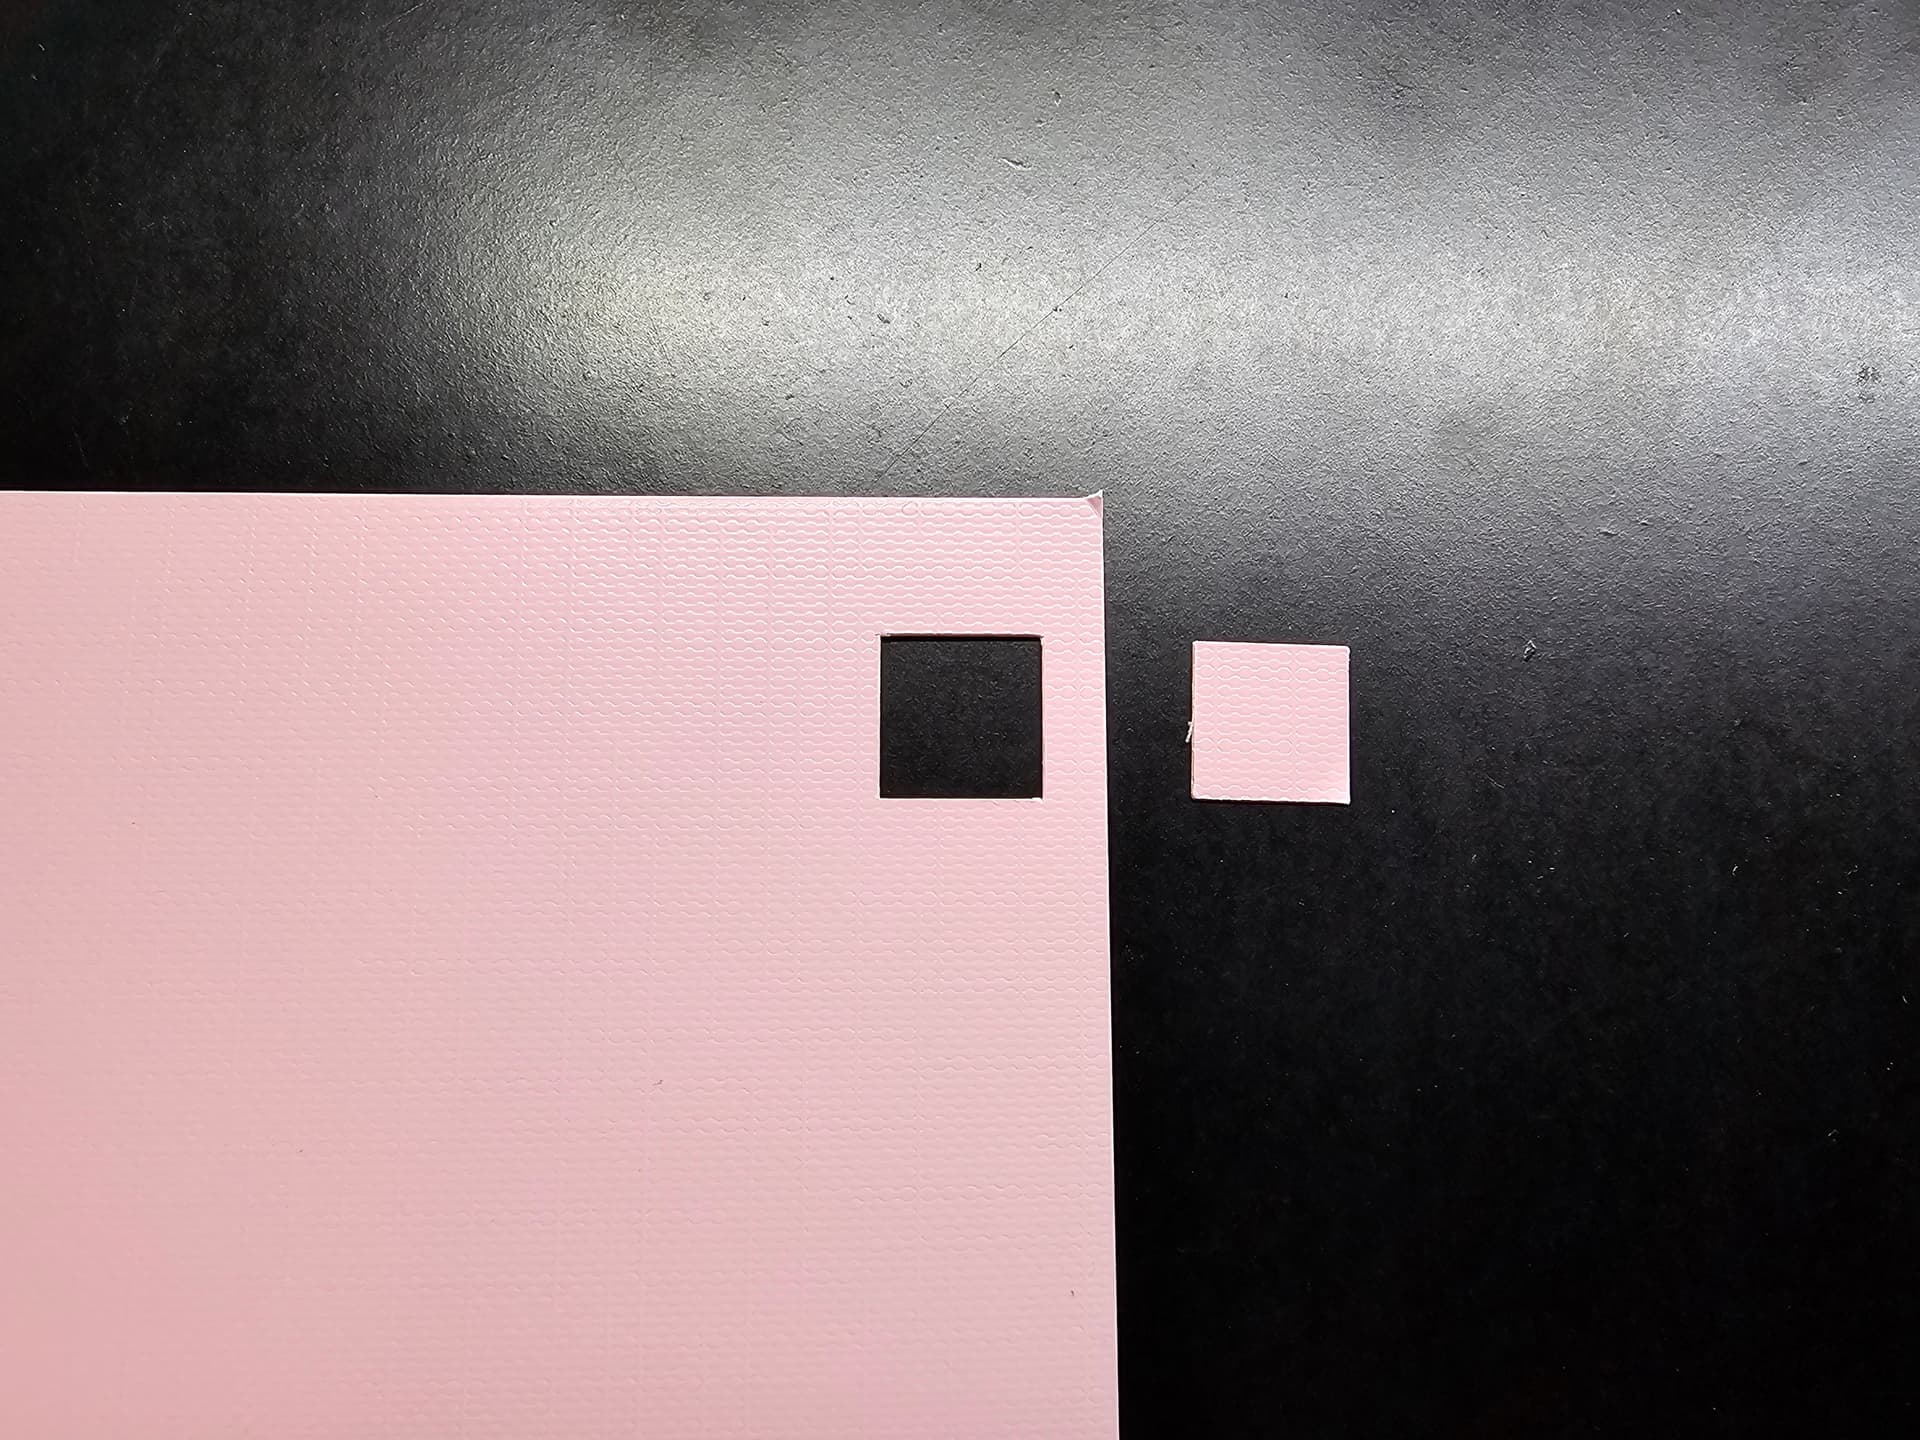
A quick test cut tells you instantly whether your blade, pressure, and passes are right before you commit to the full design. If the tiny shape weeds cleanly, you’re good. If it tugs, tears, or doesn’t cut through, adjust your settings now instead of discovering the problem halfway through your project.
Bottom line:
If it’s a new material, a new brand, a new blade, or a mat that feels different, do a test cut. It’s the fastest way to avoid frustration and protect your supplies.
10. Regular Cleaning Keeps Your Machine Performing at Its Best
Keeping your machine clean is one of the easiest ways to prevent cutting issues before they start. The most important part to maintain is the rubber rollers — they’re what grip and feed your mat, and if they get dusty or sticky, your cuts will shift or drag.
To clean them, use warm water with a tiny drop of mild dish soap on a soft cloth. Rotate the rollers by pressing the load button several times while placing the damp cloth onto each roller to wipe away dust, adhesive, or paper fibers. Avoid alcohol or harsh cleaners — they can dry out the rubber and eventually cause cracking.
You should also check the blade area for tiny bits of paper or vinyl. Just remove the blade housing and look for debris around the blade tip. If you see anything stuck to it, wipe it gently with a dry cloth. No water, no alcohol — just a clean wipe.
You can also use the aluminum‑foil trick I mentioned earlier. This helps knock off tiny bits of debris without risking fibers or lint getting stuck to the blade. However, if I’m in a rush or don’t have any aluminum foil, I’ll just give it a quick wipe with my shirt.
A quick wipe-down of the rollers, blade area, and machine exterior keeps everything running smoothly and helps your cutting machine last longer.
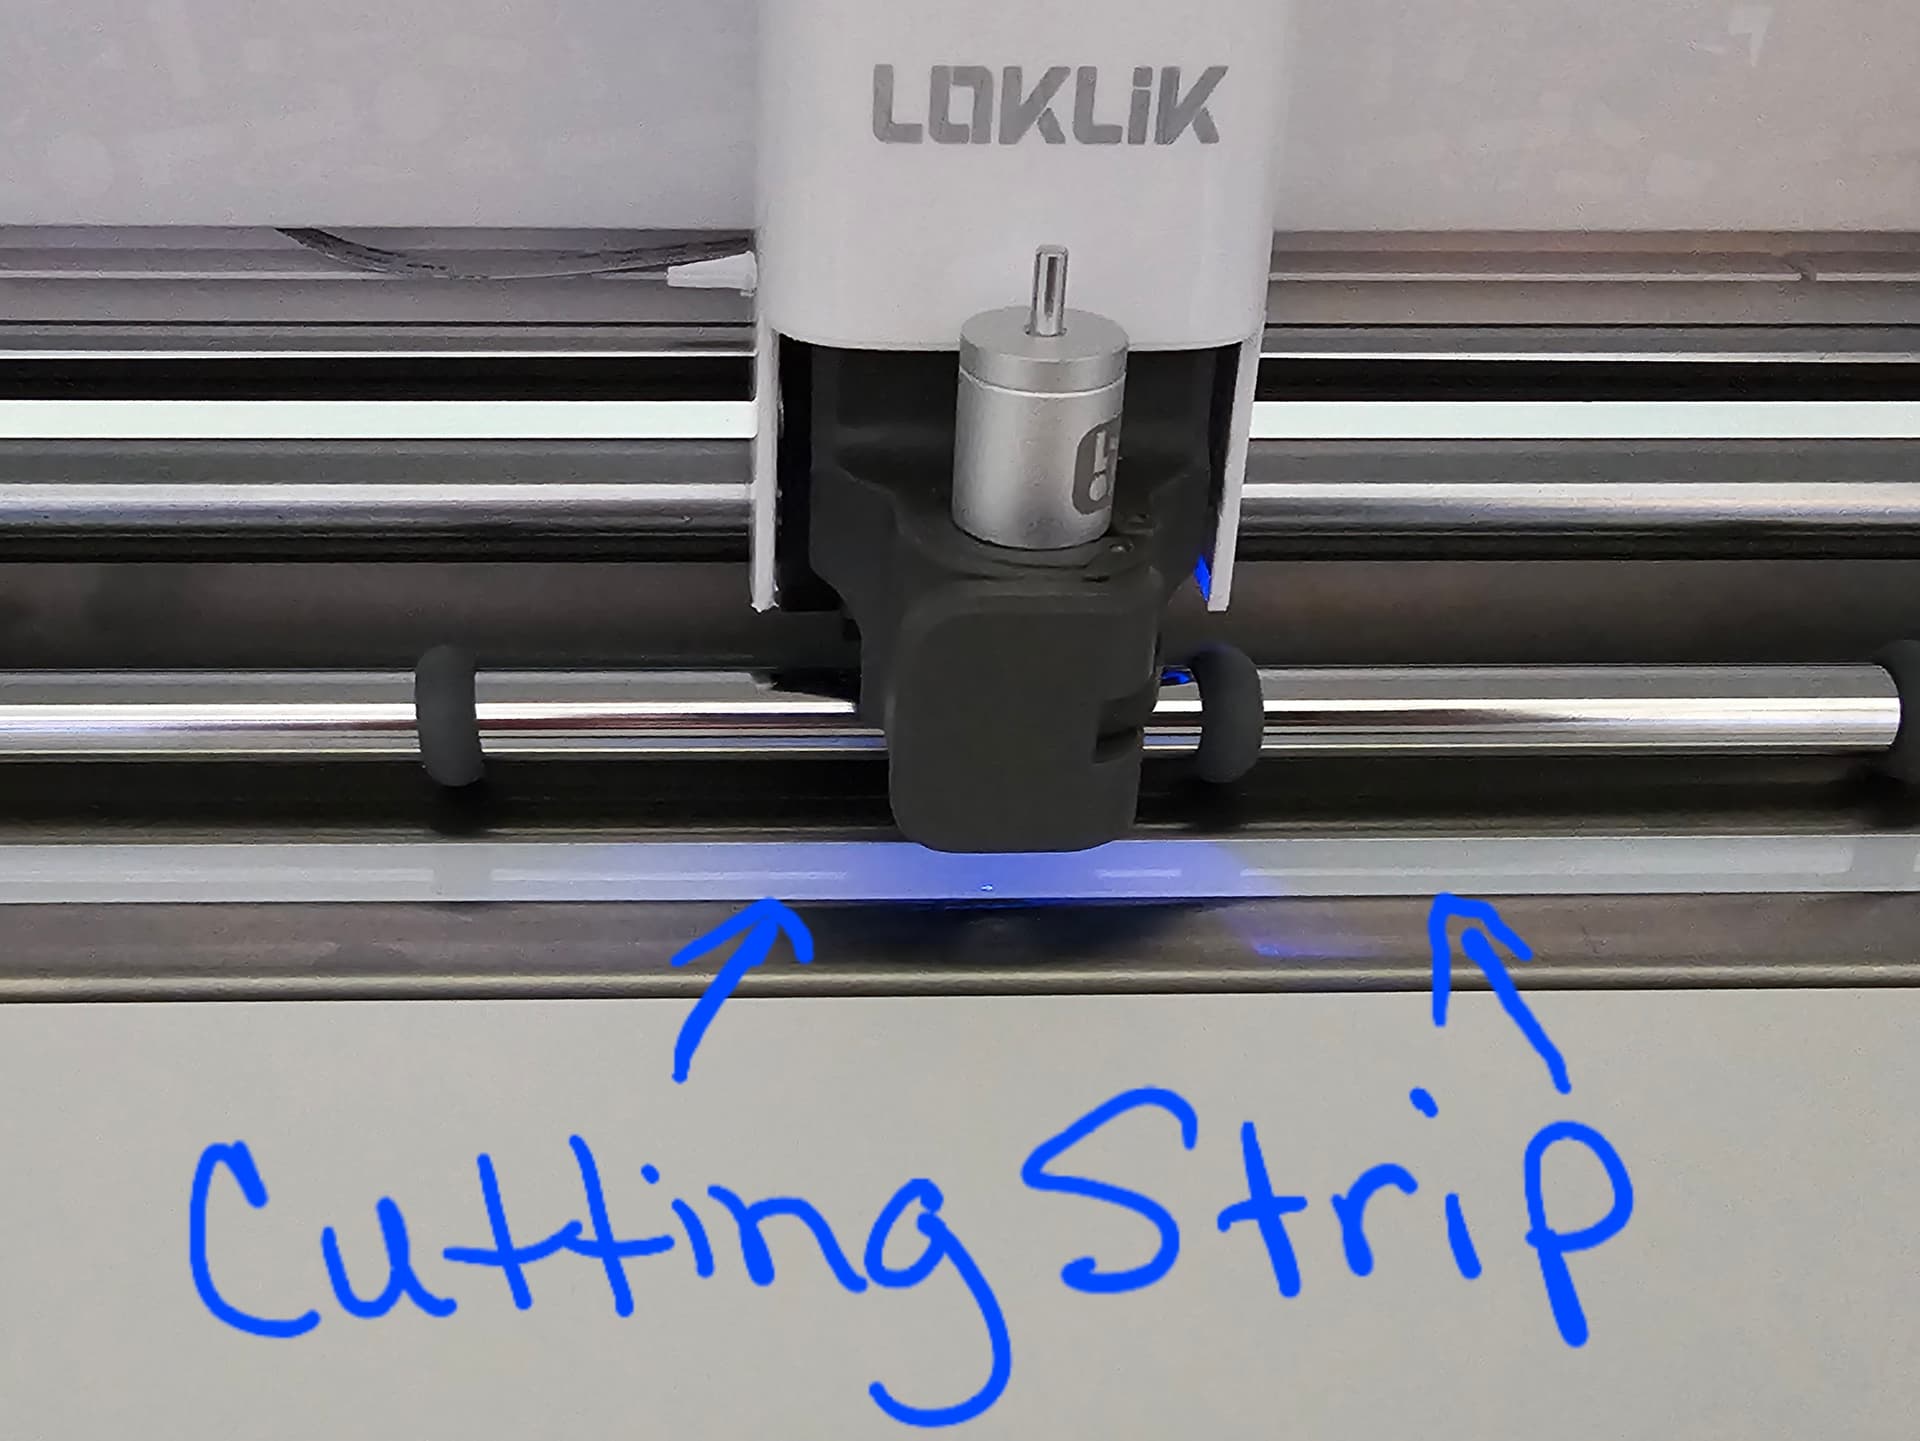
Bonus Tip: Understanding the Cutting Strip Helps You Troubleshoot Smarter
Right under the blade carriage, you’ll see a thin, soft strip that runs the length of the machine. This is called the cutting strip or cutting bar, and it’s one of the most important (and most overlooked) parts of the Cutting Machine 2. Its job is simple but essential: it gives the blade a cushioned surface to press into so your cuts stay clean, consistent, and precise. Without it, the blade would hit hard plastic or metal and dull almost instantly.
Over time, tiny bits of paper, vinyl slivers, and adhesive crumbs can collect on the cutting strip. A dirty strip can cause drag marks, incomplete cuts, or little snags in detailed designs. To keep it in good shape, gently wipe it with a dry, lint‑free cloth and remove any stuck debris with tweezers. Avoid liquids, alcohol, or scraping tools — the strip is soft, and harsh cleaning can damage it.
A quick, gentle wipe every so often keeps your cuts crisp and helps your machine perform at its best.
Final Thoughts
Every machine has its quirks, but once you know what to expect, you can work with confidence instead of frustration. These tips aren’t just “nice to know” — they’re the things that help you avoid wasted materials, understand your machine’s personality, and get results you’re proud of. Give yourself time, stay curious, and you’ll be amazed at how quickly everything clicks.
Stay tuned for the next installment of this series, where I’ll dive into more advanced techniques, material behavior, and how different blades perform across a variety of projects.
Part 2: 10+ Advanced Things to Know When Starting with the Loklik Cutting Machine 2