SOFTWARE USED: IS Desktop Version
MACHINE USED:
LOKLiK iEngrave Cover Machine
MACHINE SETTINGS:
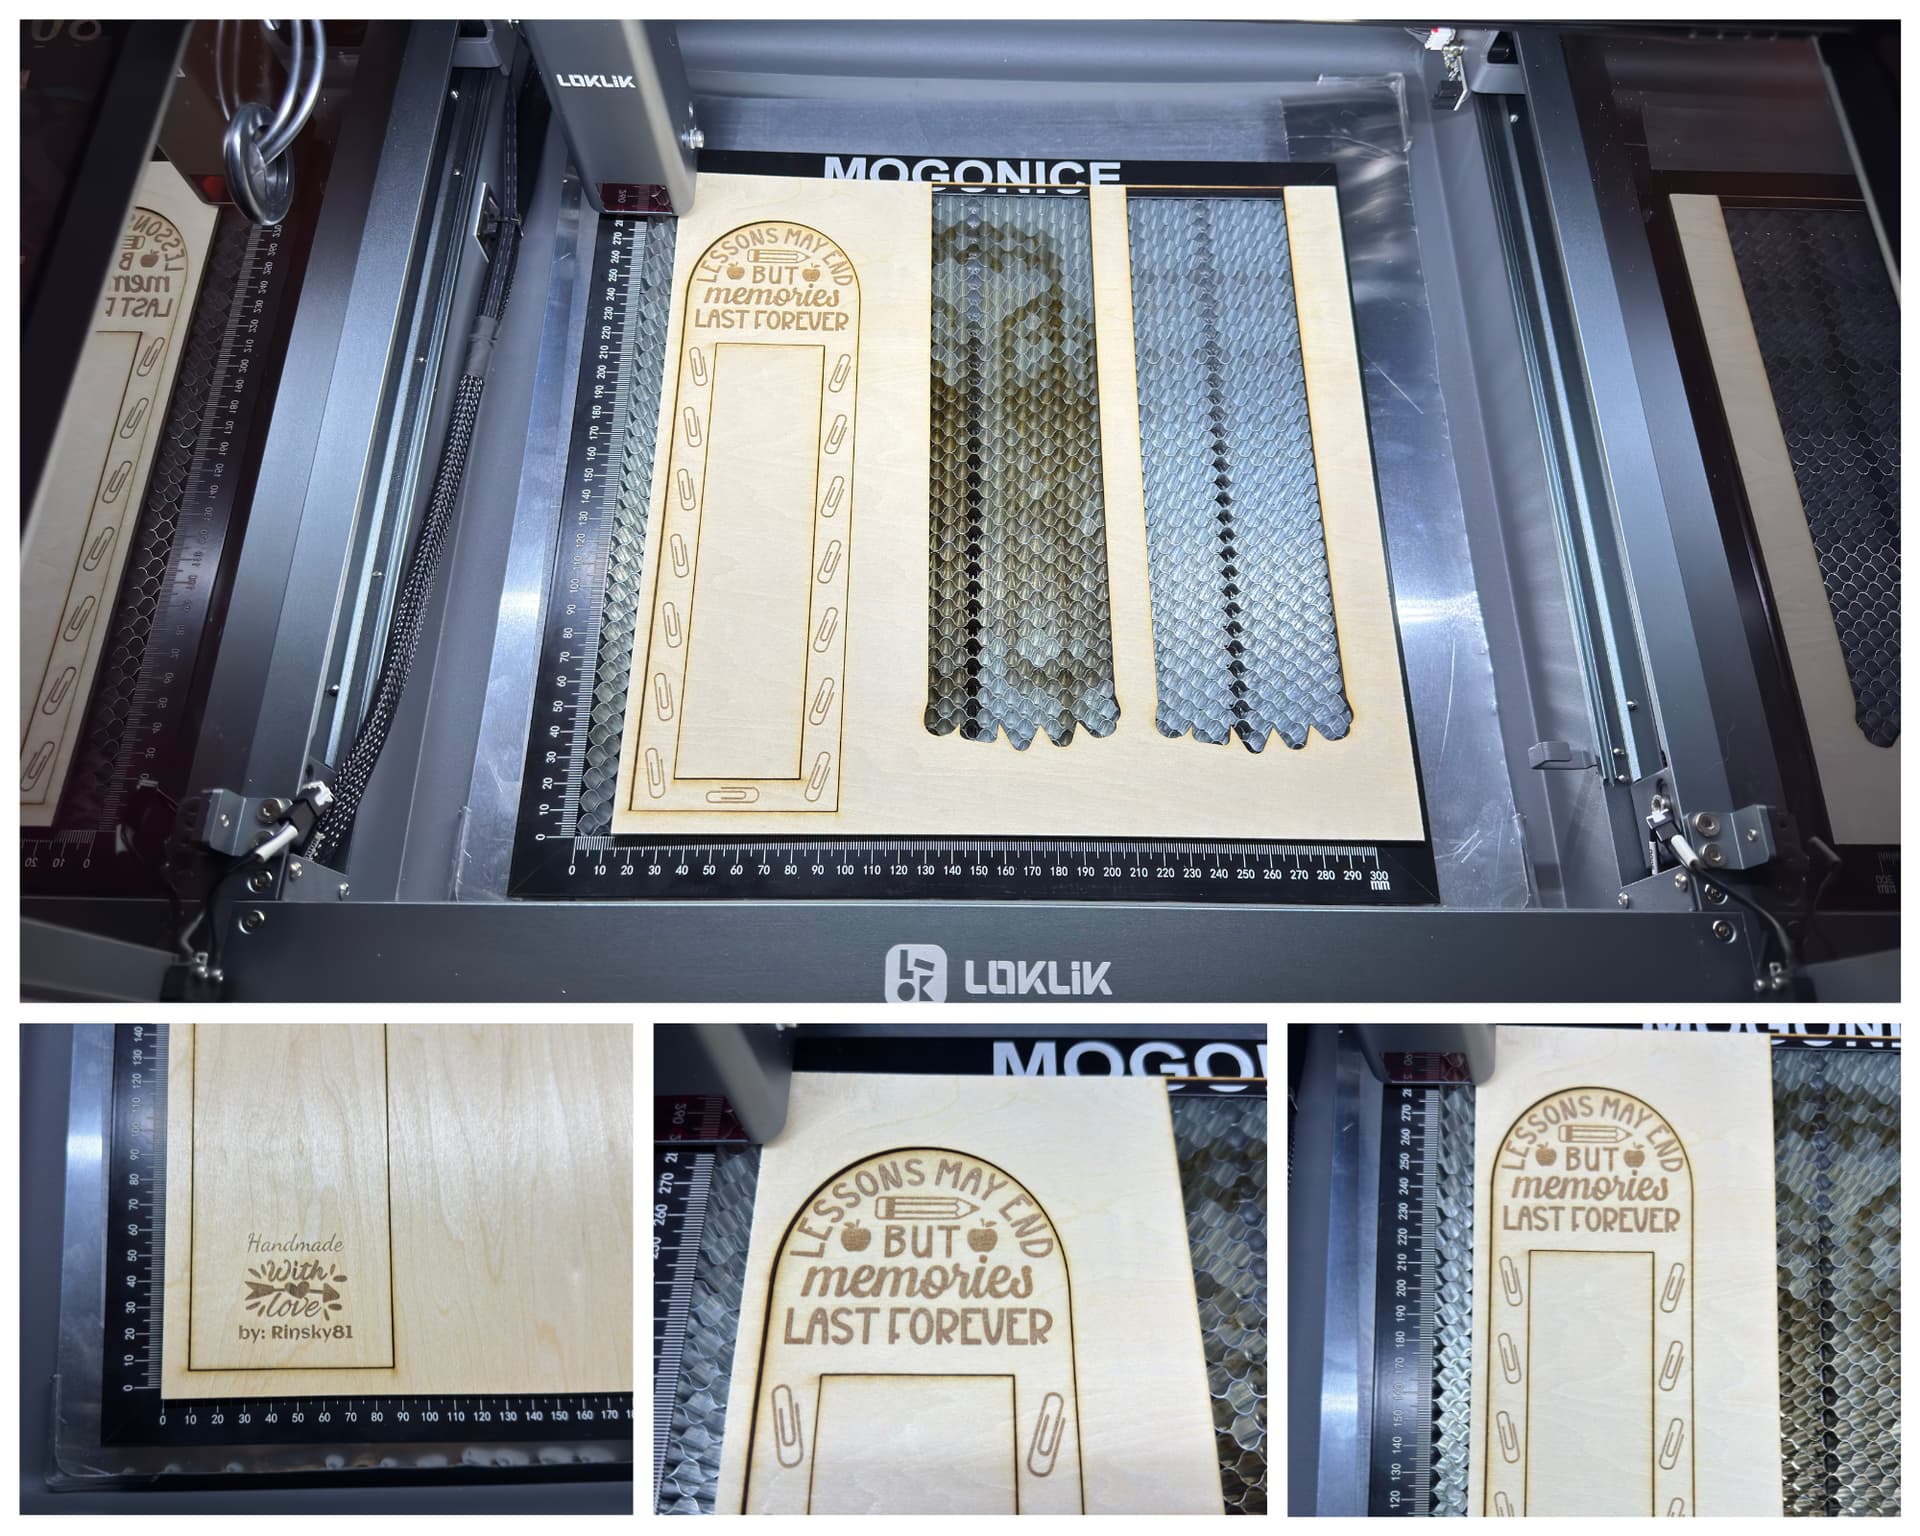
Design A: Lessons May End
1 – Engraving the Design (Front Panel)
Engraving Mode: Flat
Operation Style: Engrave
Mode Style: Fill
Material: 3mm basswood
Power: 75%
Speed: 7500 mm/min
Passes: 1
Time: 21 minutes & 20 seconds
2 – Cutting the 3mm basswood
Operation Style: Cut
Mode Style: Line
Material: 3mm basswood
Power: 100%
Speed: 230mm/min
Passes: 1
Time: 5 minutes and 8 seconds
3 – Engraving Customized/ Personalized Design and Cutting (Back Panel)
With the same setting parameters above, time spent was 2 minutes and 36 seconds for engraving and 2 minutes and 58 seconds for cutting the back panel.
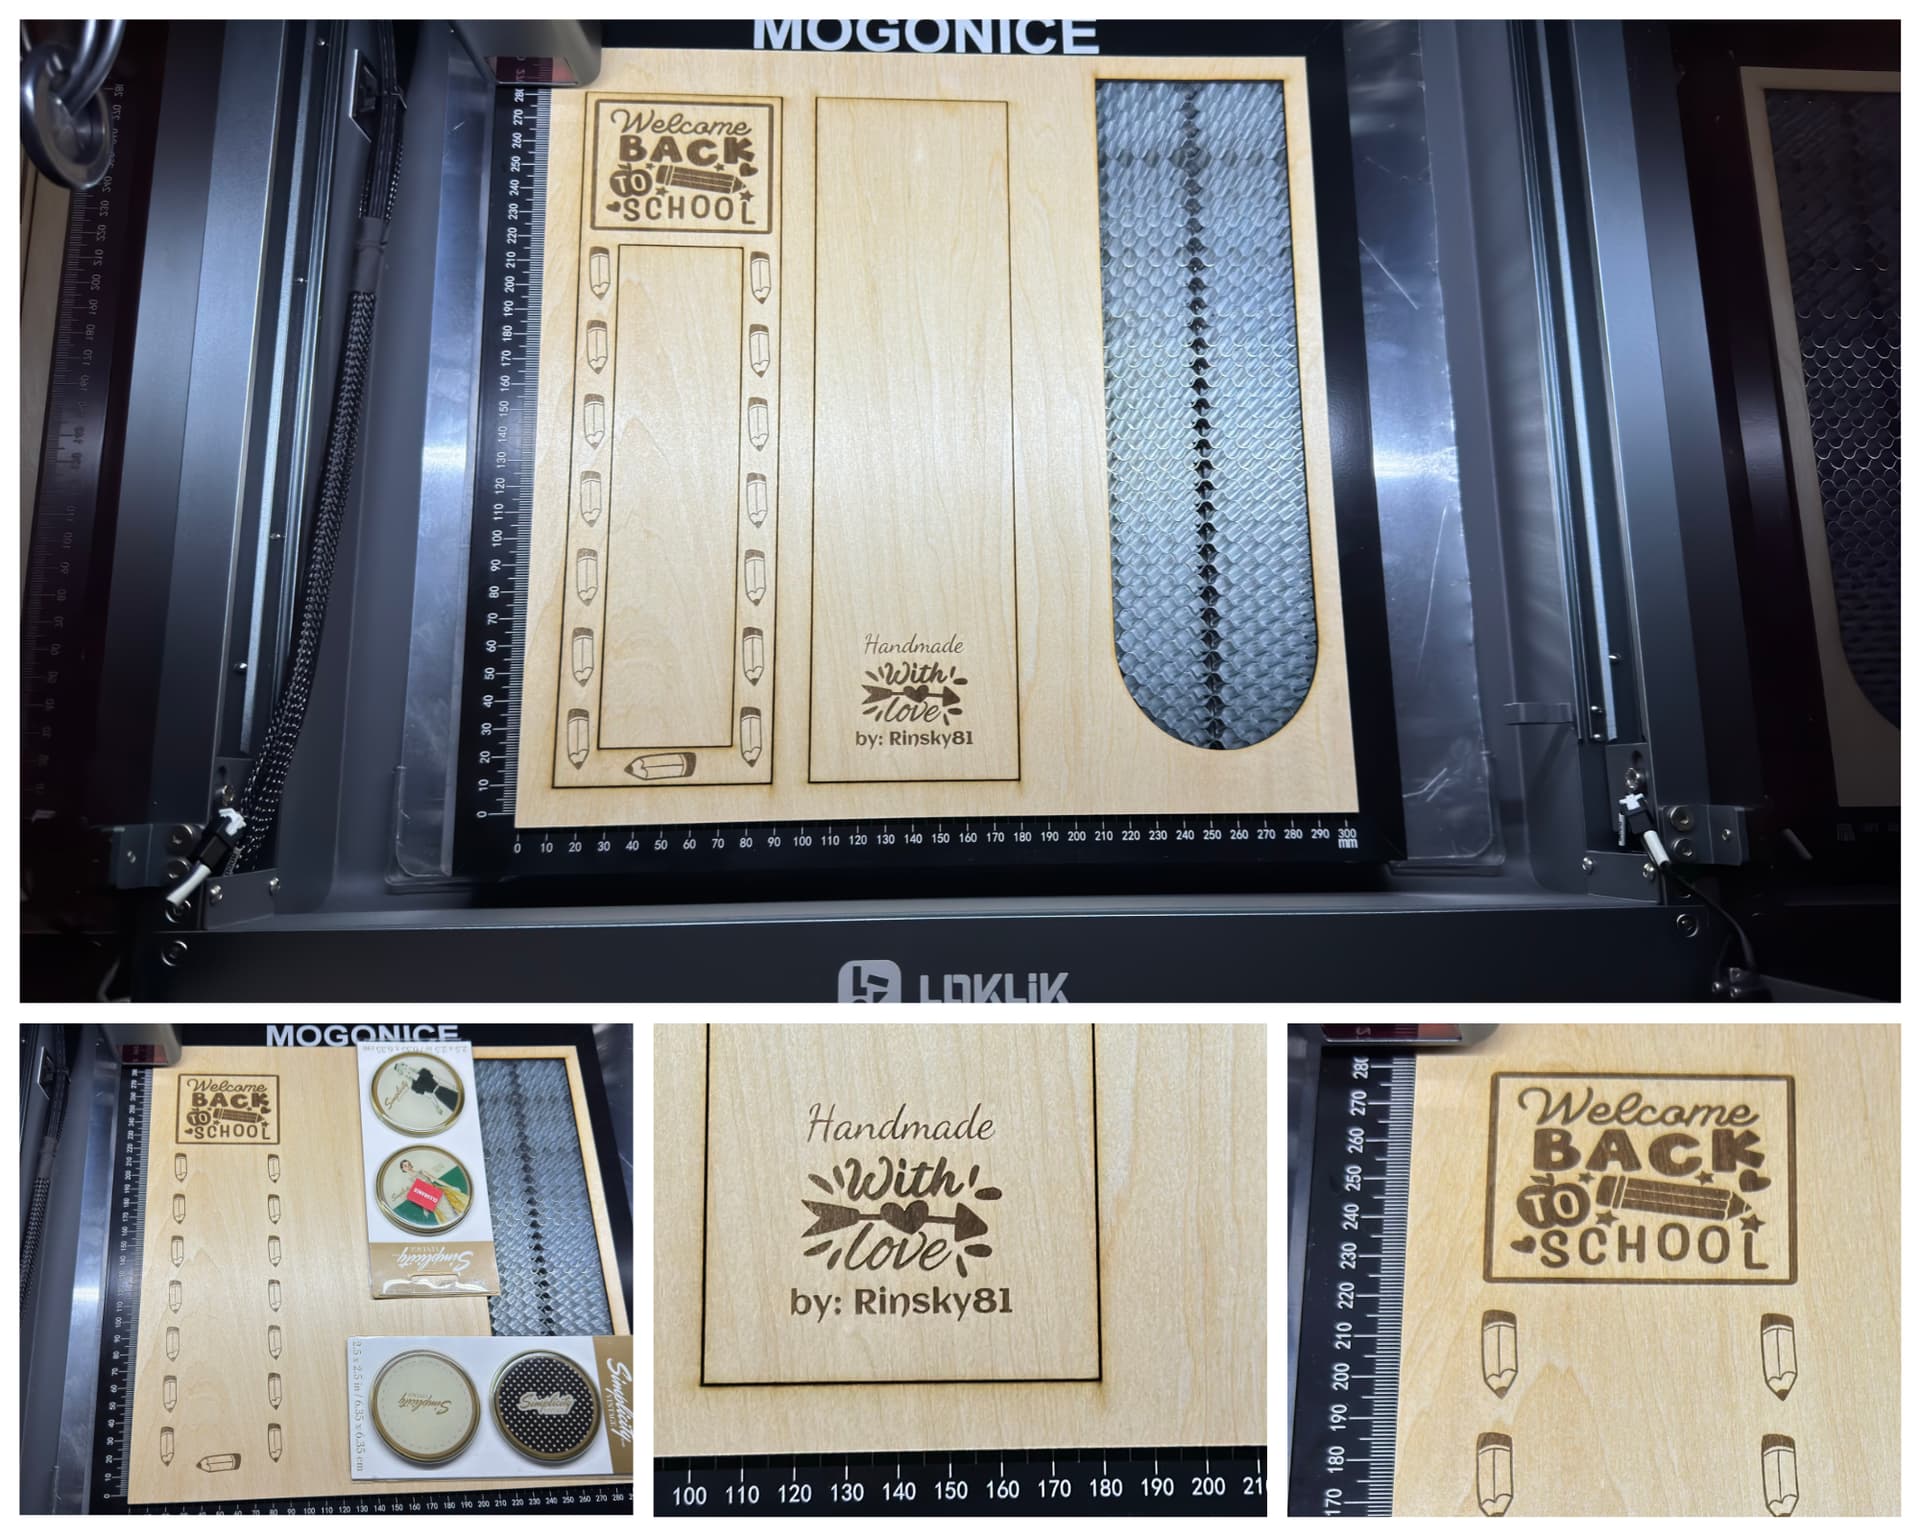
Design B: Welcome Back to School
1 – Engraving Design (Front Panel)
Engraving Mode: Flat
Operation Style: Engrave
Mode Style: Fill
Material: 3mm basswood
Power: 75%
Speed: 7500 mm/min
Passes: 1
Time: 24 minutes & 36 seconds
2 – Cutting the 3mm basswood
Operation Style: Cut
Mode Style: Line
Material: 3mm basswood
Power: 100%
Speed: 230mm/min
Passes: 1
Time: 5 minutes and 8 seconds
3 – Engraving Customized/ Personalized Design and Cutting (Back Panel)
With the same setting parameters above, time spent was 2 minutes and 36 seconds for engraving and 3 minutes and 9 seconds for cutting the back panel.
MATERIALS USED:
🩷 3mm basswood
🩷 Craft Glue
🩷 pencils
🩷 scissors
🩷 ribbons
🩷 Paper weights
Finished Size: 3.03 " x 10.69"
Design: All my design were from Ideastudio Library and from Judy Sanqunetti.
TIPS: DO NOT move any elements within a grouped design once you’re happy with the layout. Instead, use the hide/unhide feature on individual elements or the entire group to prevent accidental shifts within your template.
This is critical because the IS software cannot distinguish between engraving and cutting functions. Unlike LightBurn, which allows you to assign color codes for specific tasks—such as engrave, cut, or score—IS treats all grouped elements uniformly.
DIRECTIONS:
Designing your own pencil holder templates
STEP 1 - Upload your back-to-school designs. All of mine came from the IS Library, and I created a pencil holder template that fits six pencils perfectly. We’ll start with Design A.
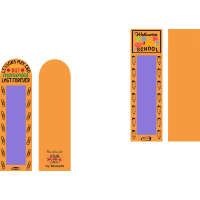
I won’t be doing a full tutorial on how to make the template—it’s just a simple rectangle and half-circle merged together. Super easy! I’ll share the template with you all so it’s totally stress-free. ![]()
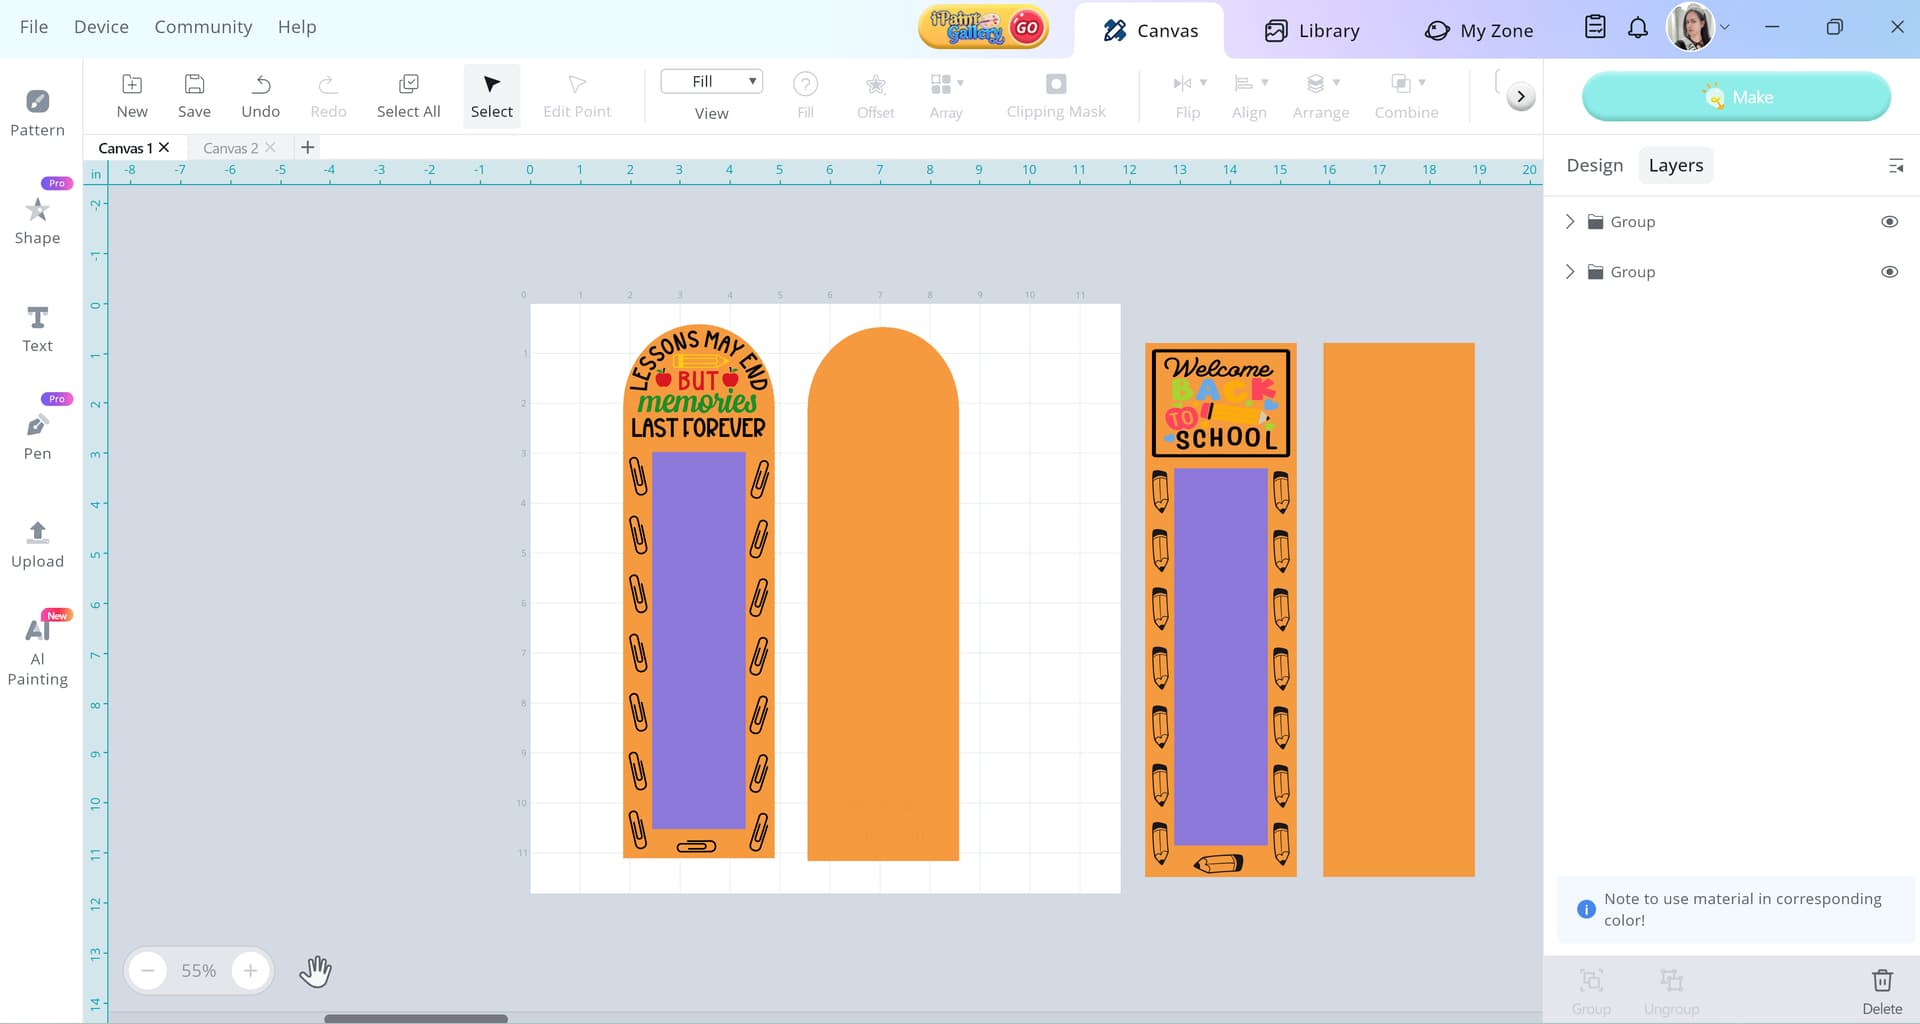
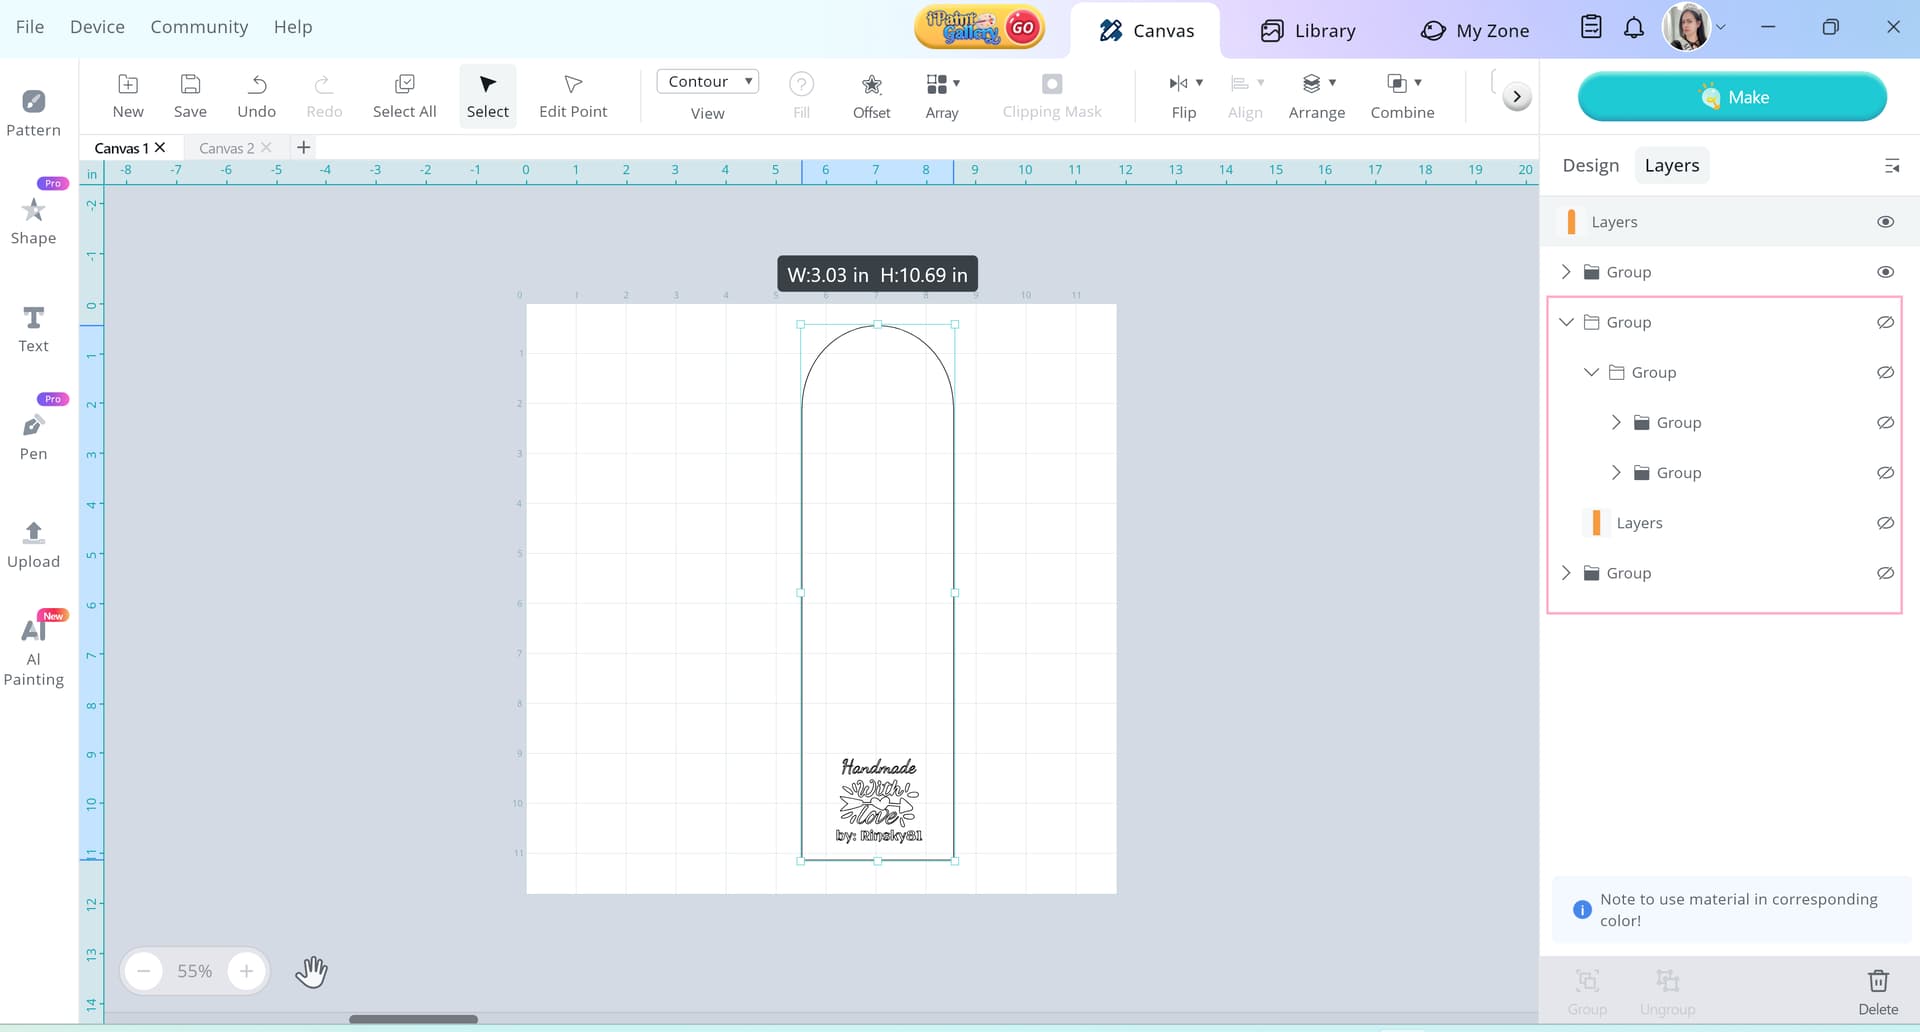
STEP 2 - Hide the second design at the right side by clicking the “hide” button. Then, at the first design hide the back panel by clicking the “hide” button as show below:
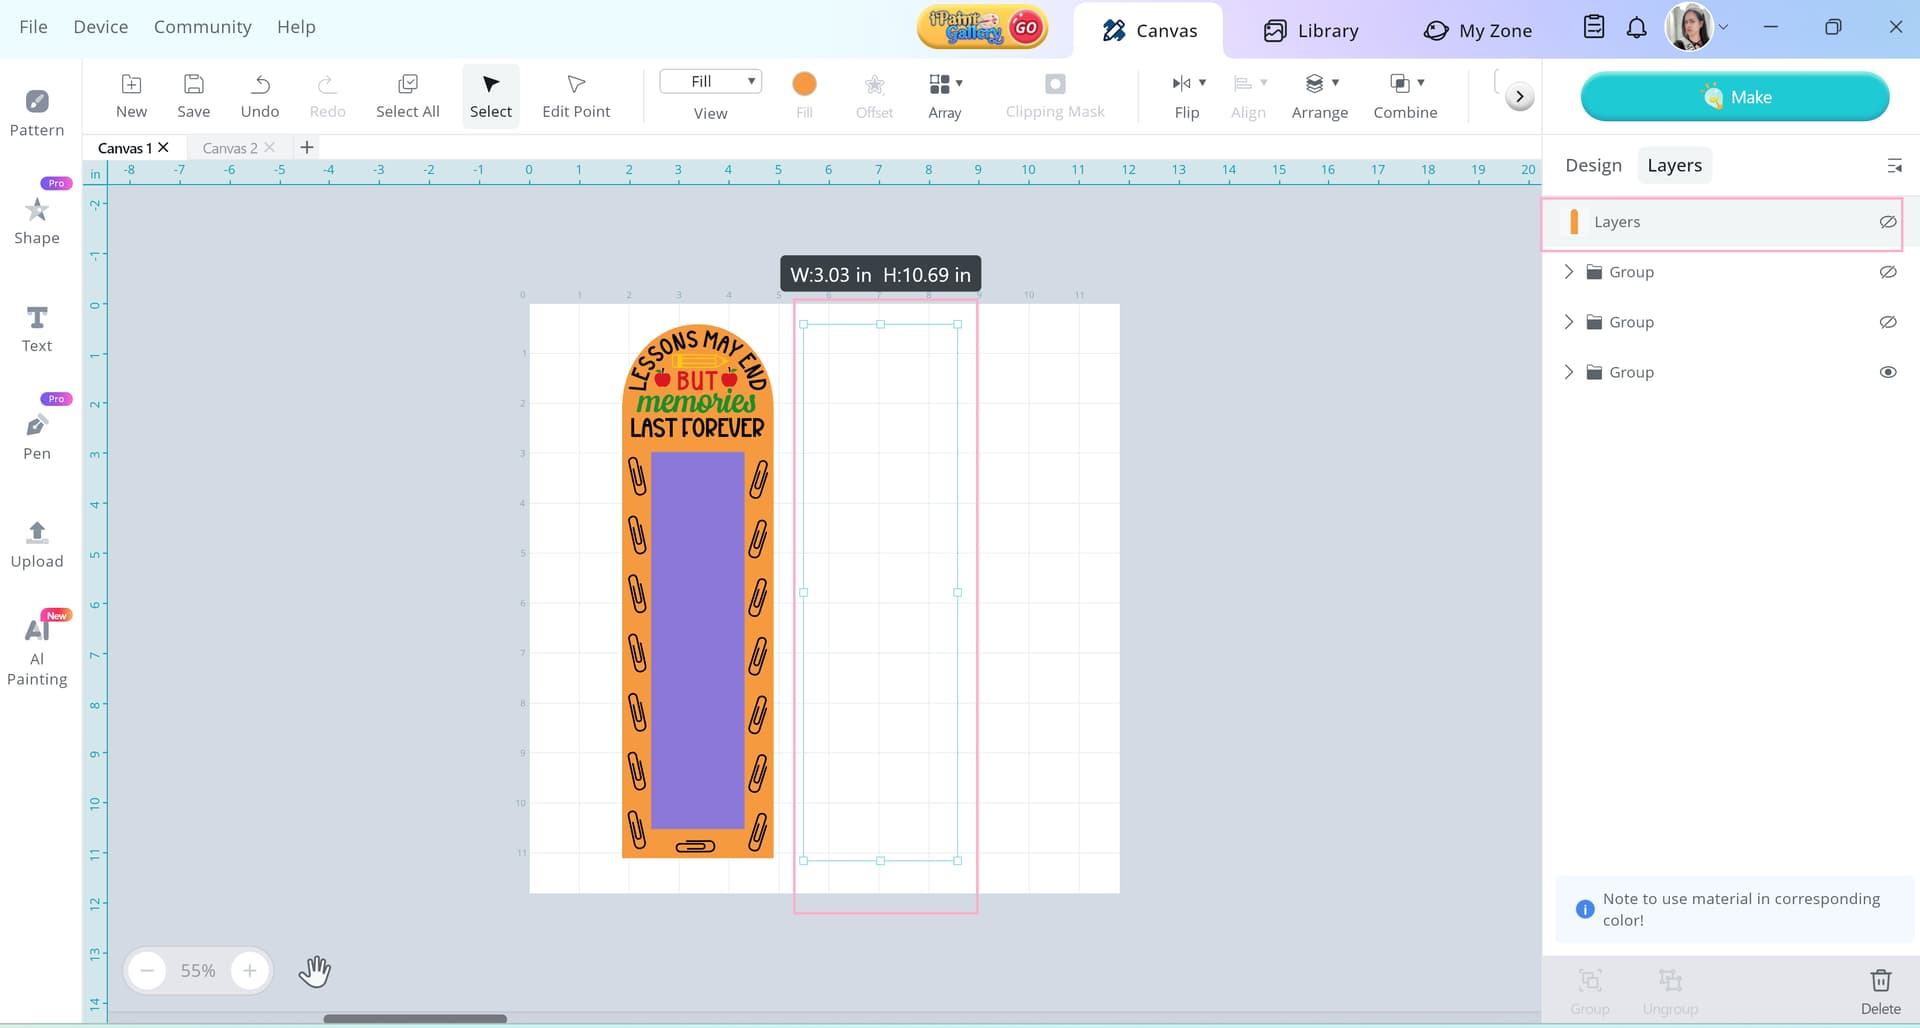
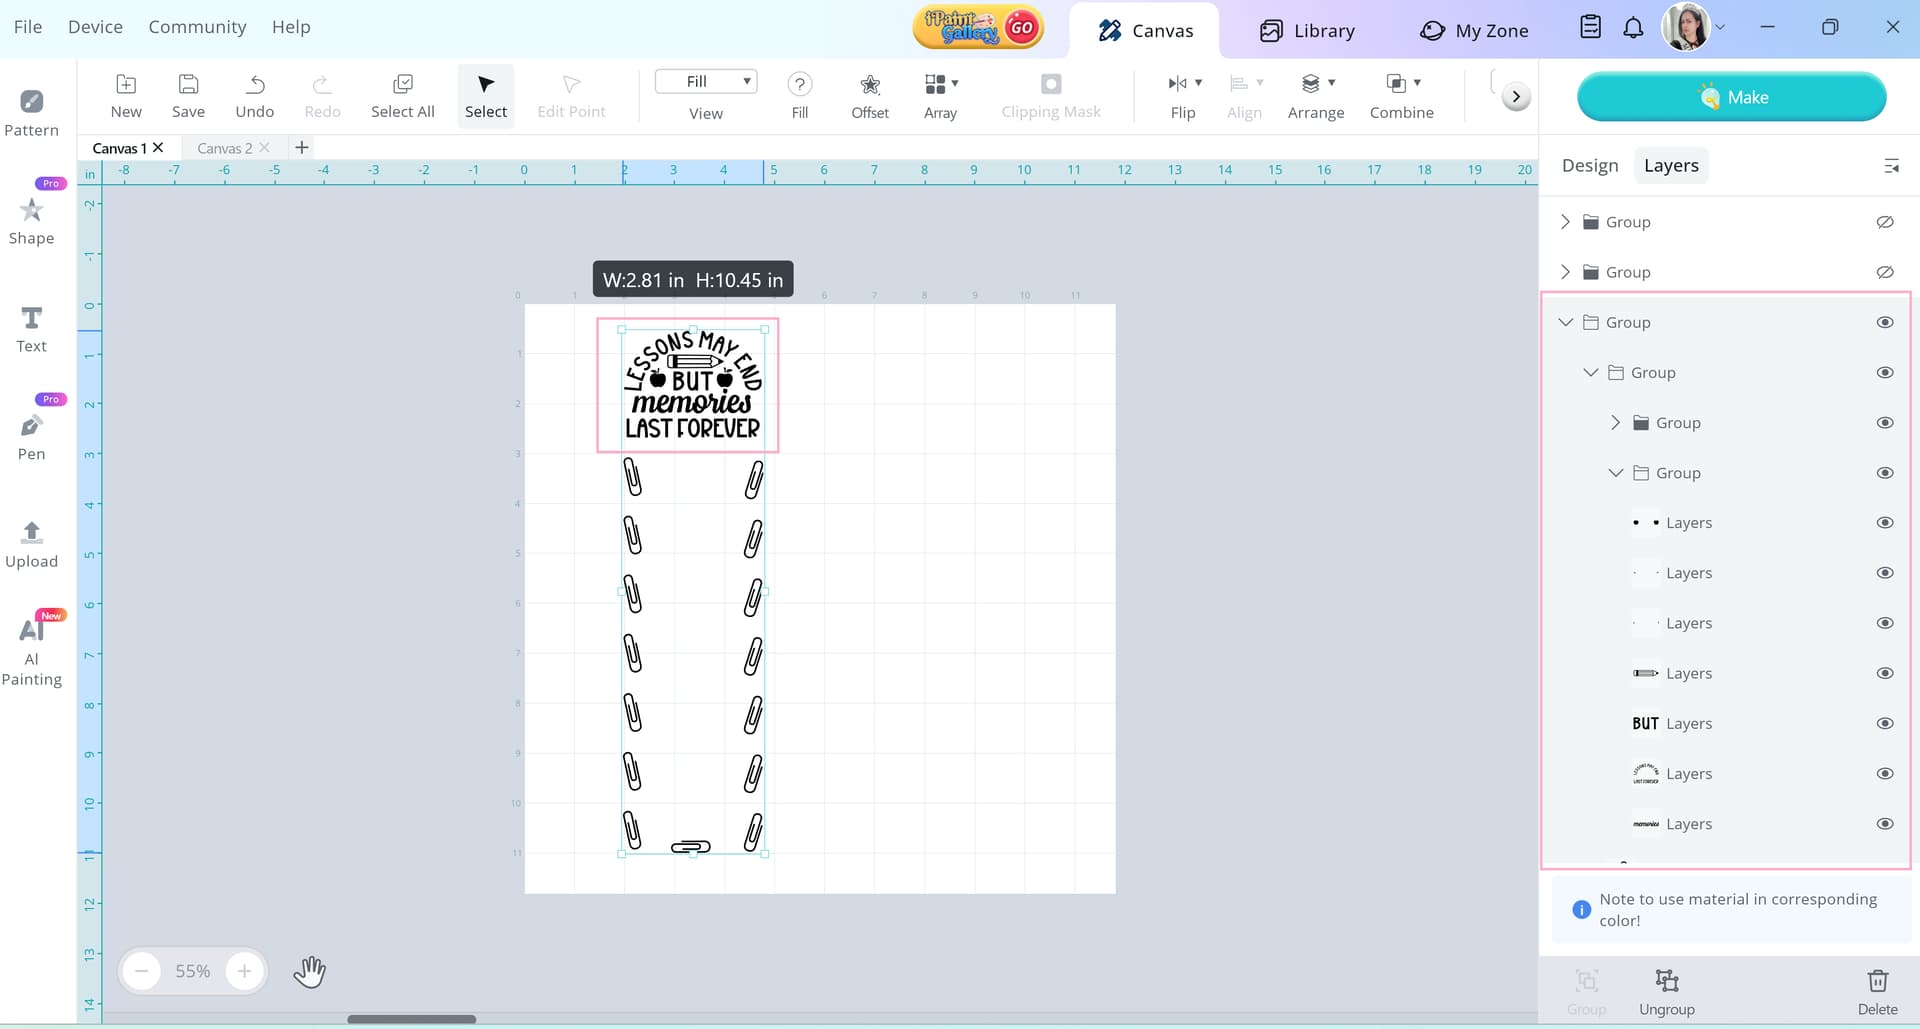
STEP 3 - Hide the front panel layer (cut file layer) then change all the colors to black and group them as one. This step is so important to ensure consistent depth and color during engraving. (I actually forgot to do this in my design—so you’ll see the difference in the final outcome!)
Once that’s done, hit the Make button and follow all the recommended settings for engraving 3mm basswood. NOTE: Make sure you are connected to your iEngrave through USB cable if you are using IS desktop version.
TIP: Always frame your working area so you know exactly where your design will be engraved. Also, use magnets to keep the wood from shifting.
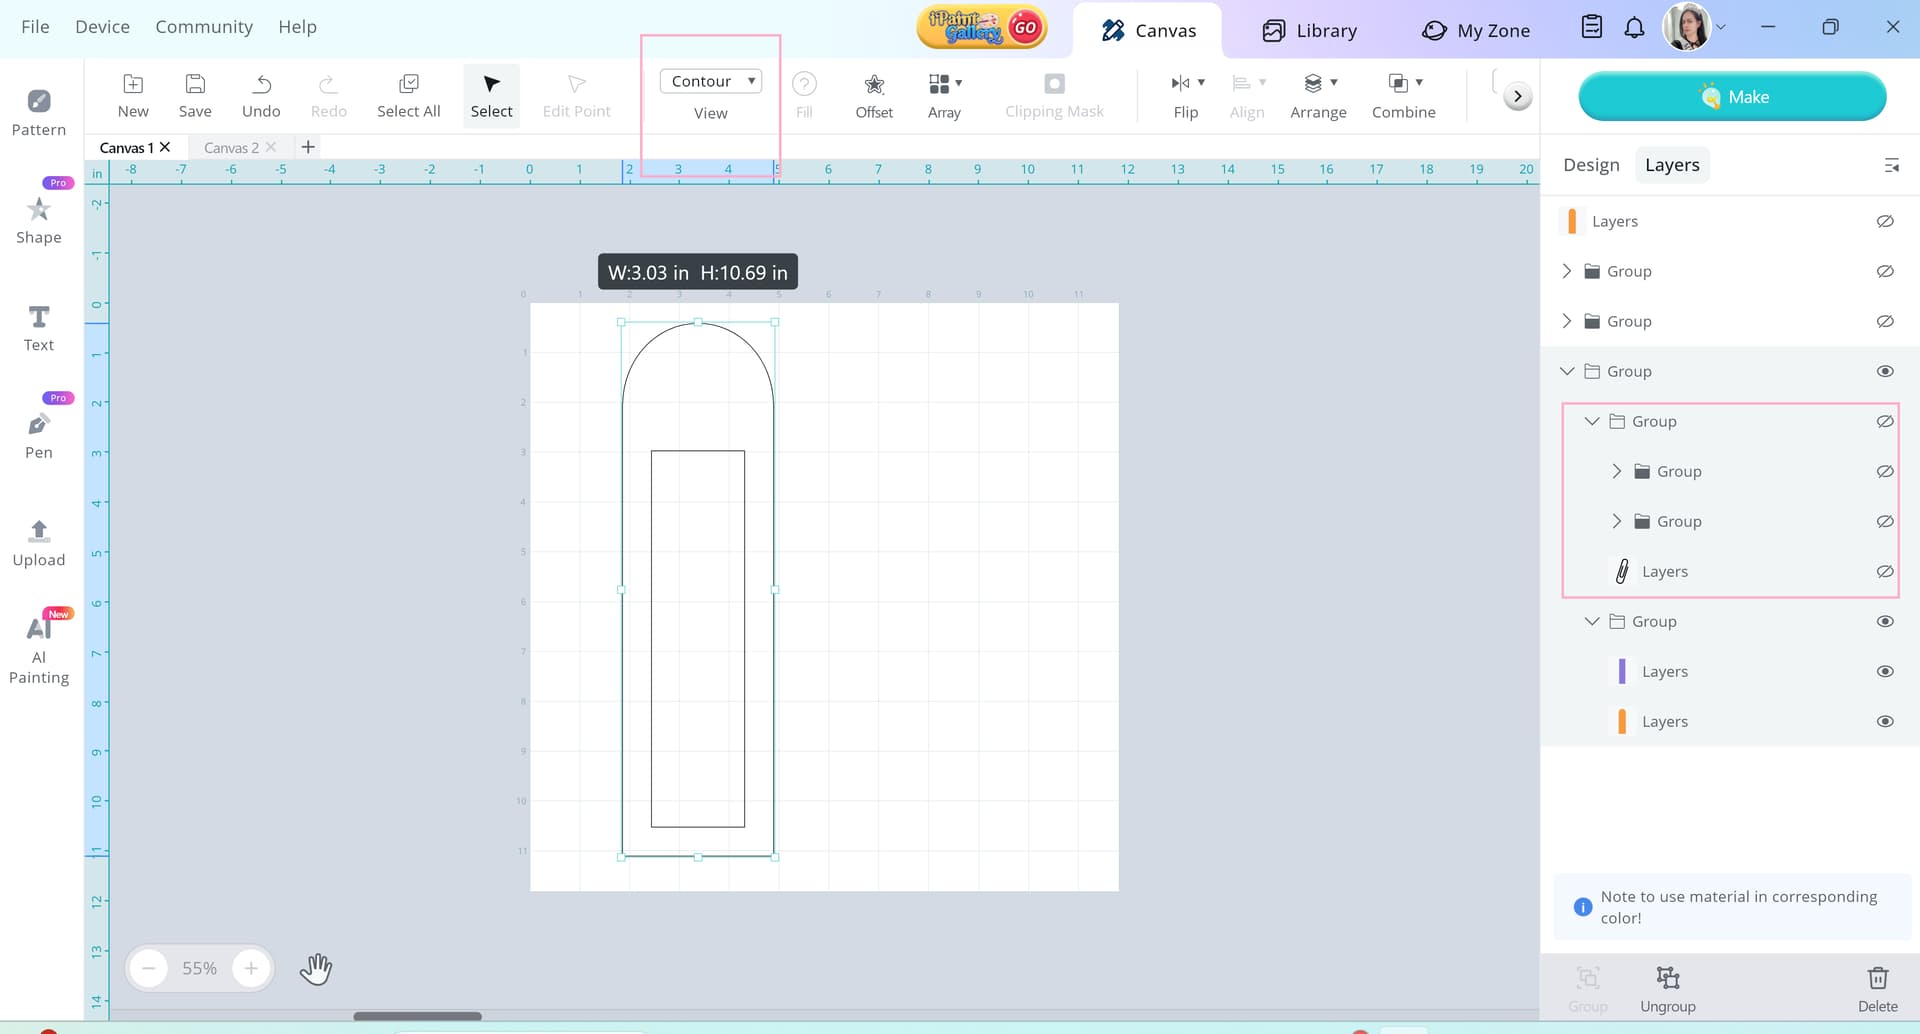
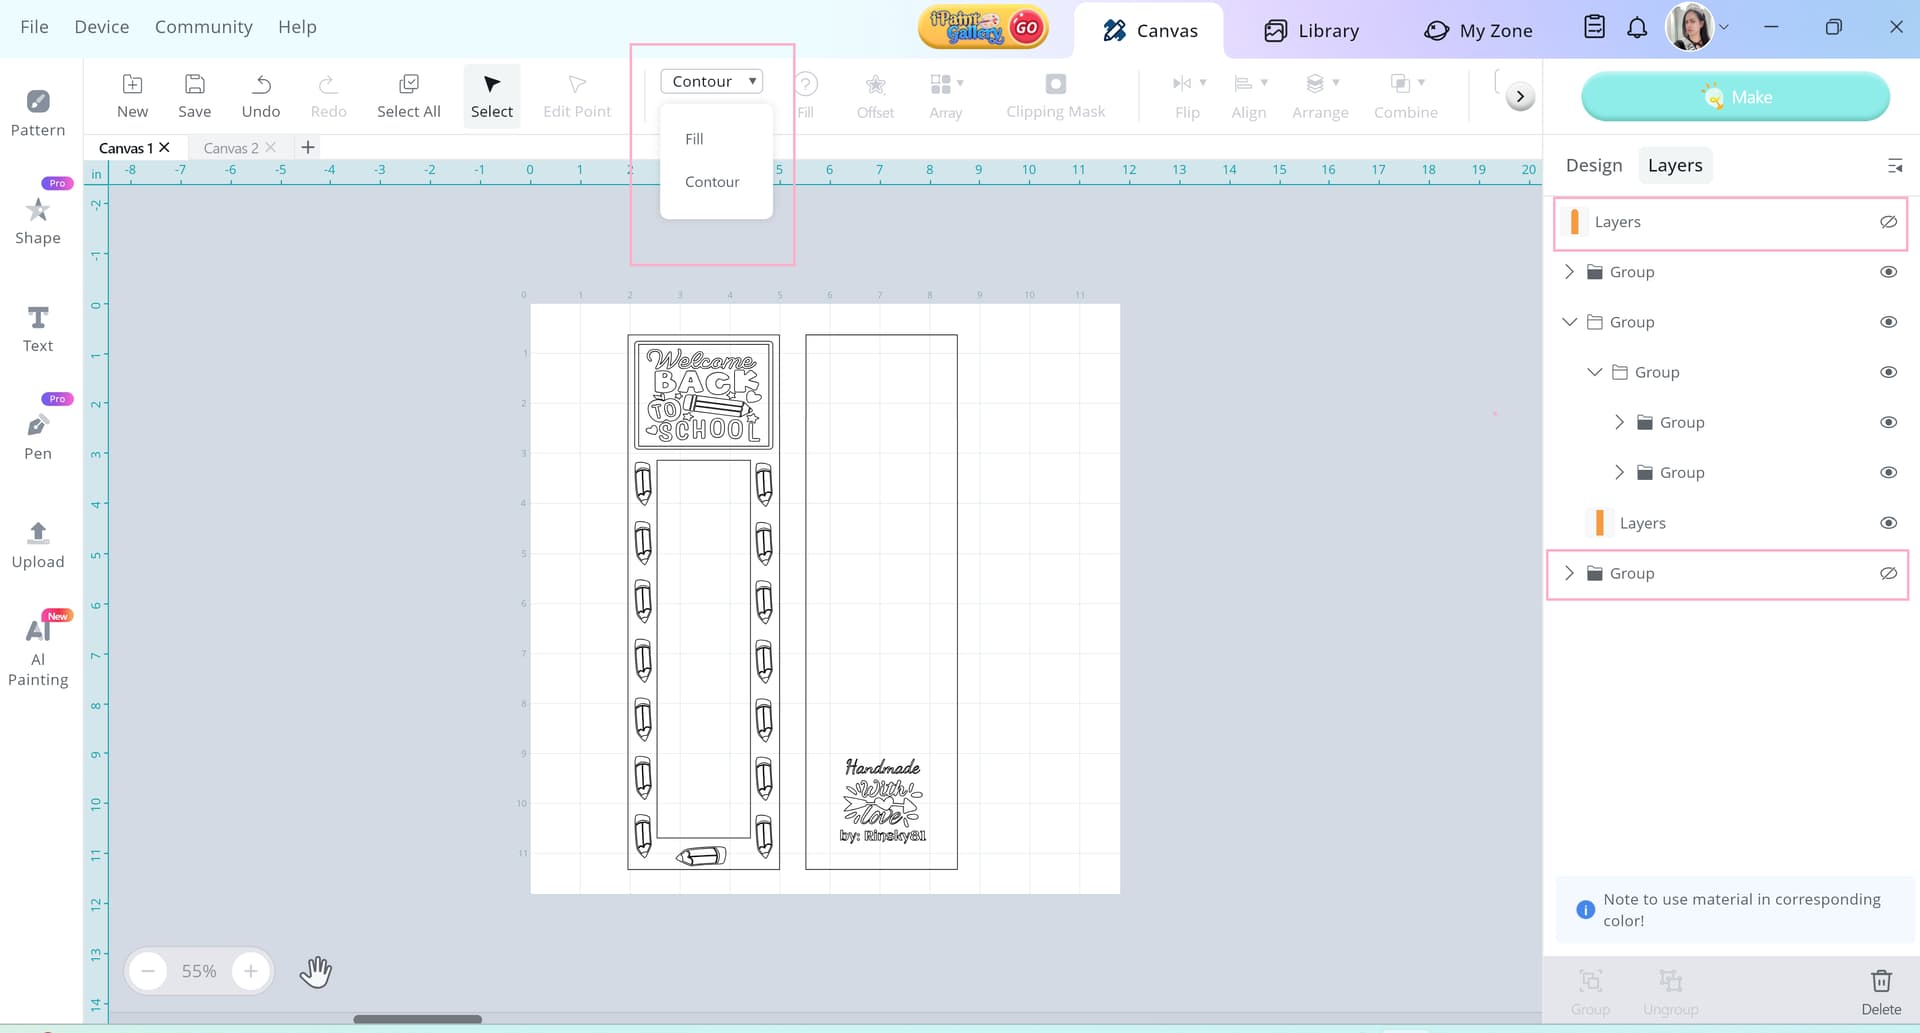
STEP 4 - After engraving, hide the design and bring out the layer for cutting. Click the Contour button to view the template—this step is very important to check if there are any hidden designs behind the layer that could interfere with a clean cut.
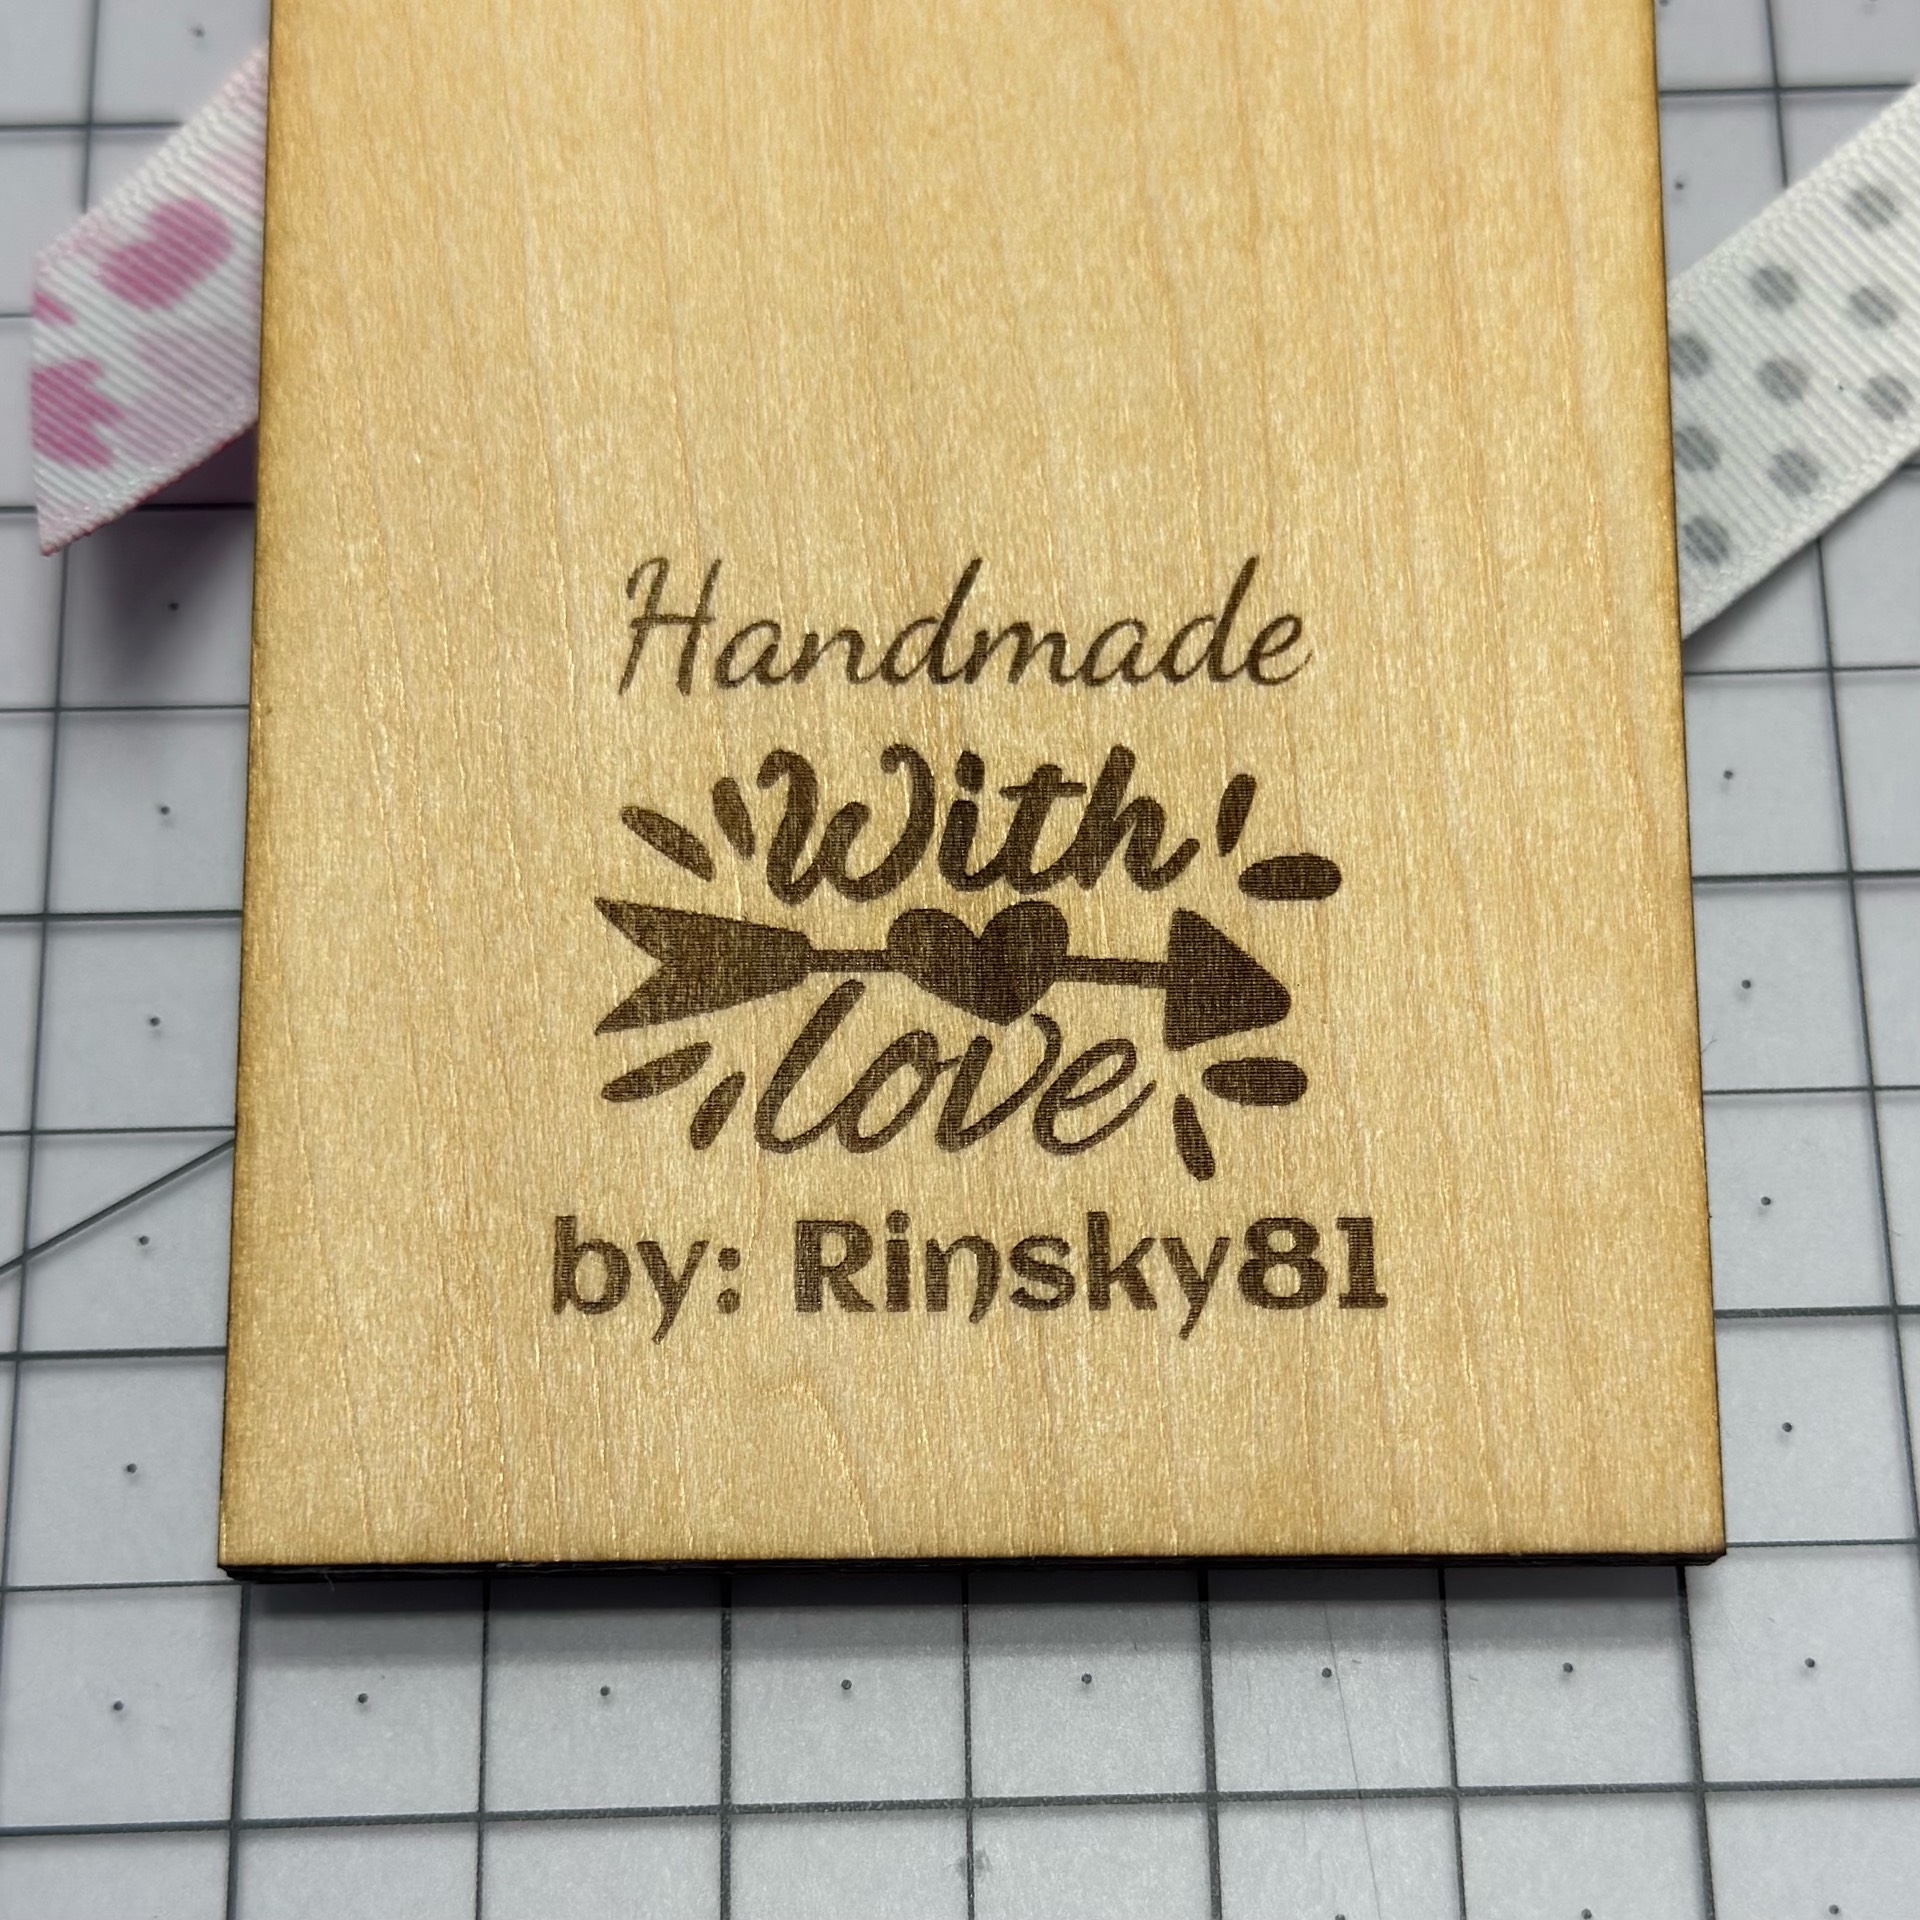
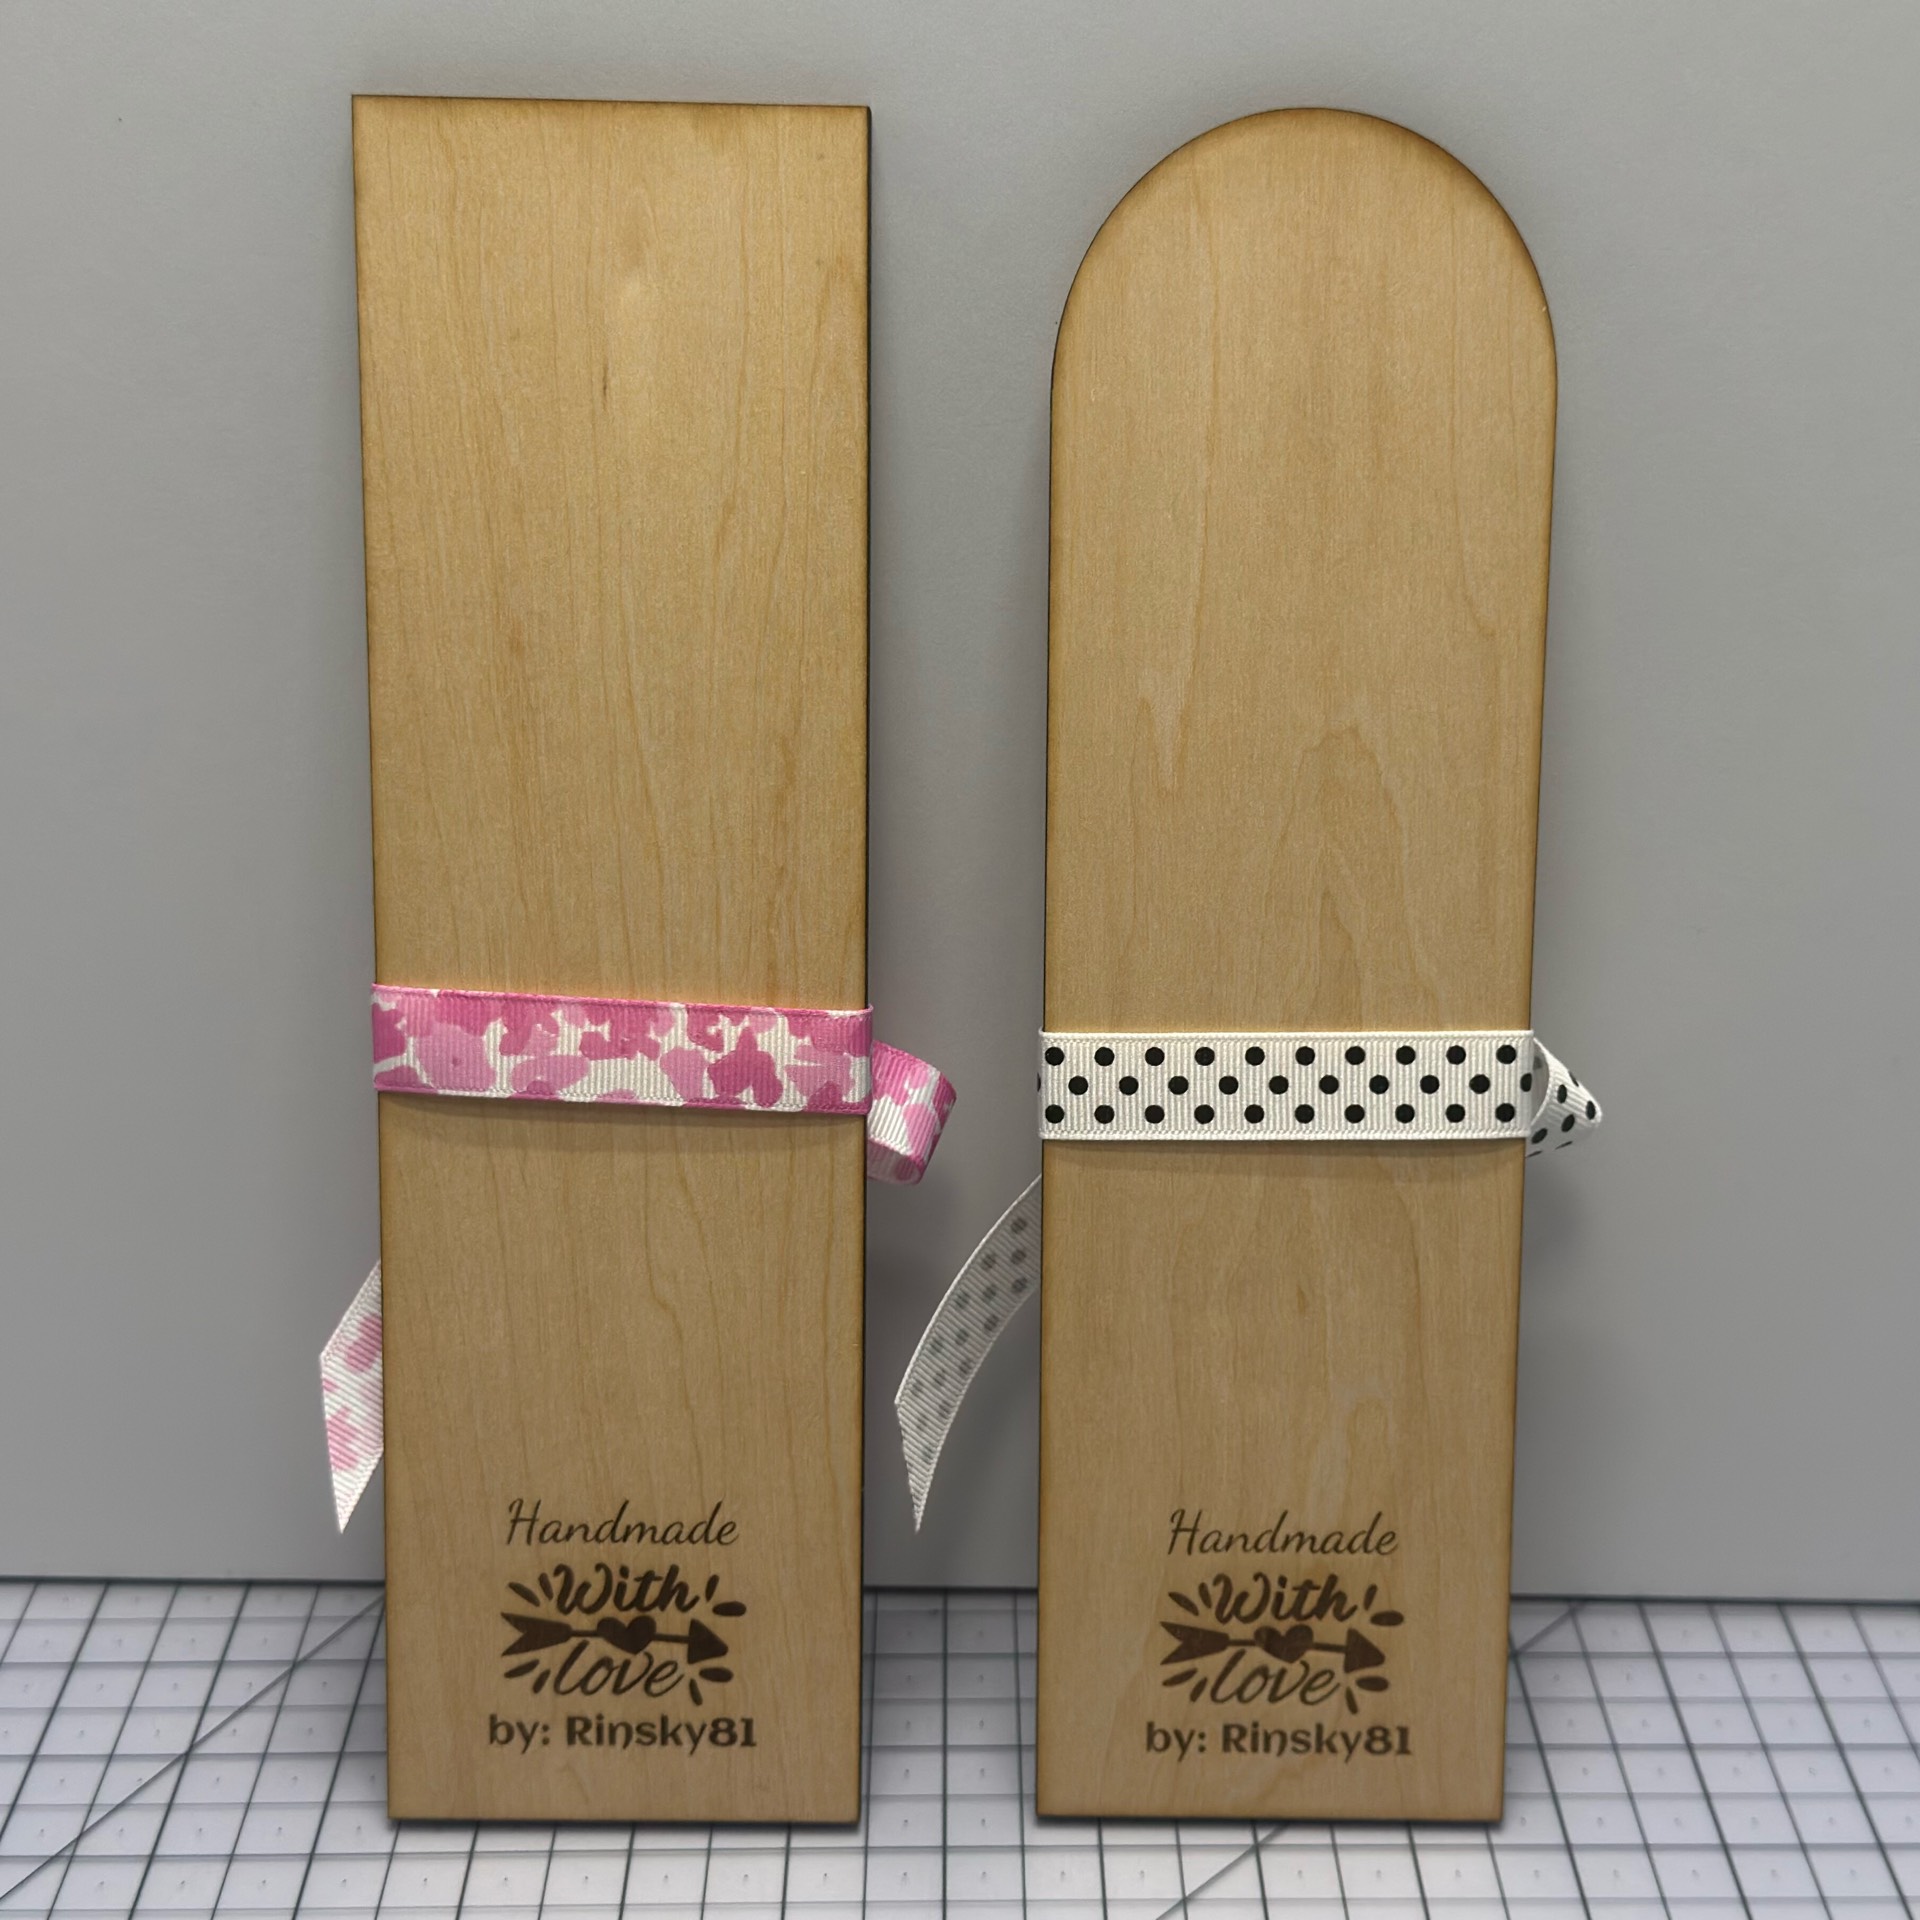
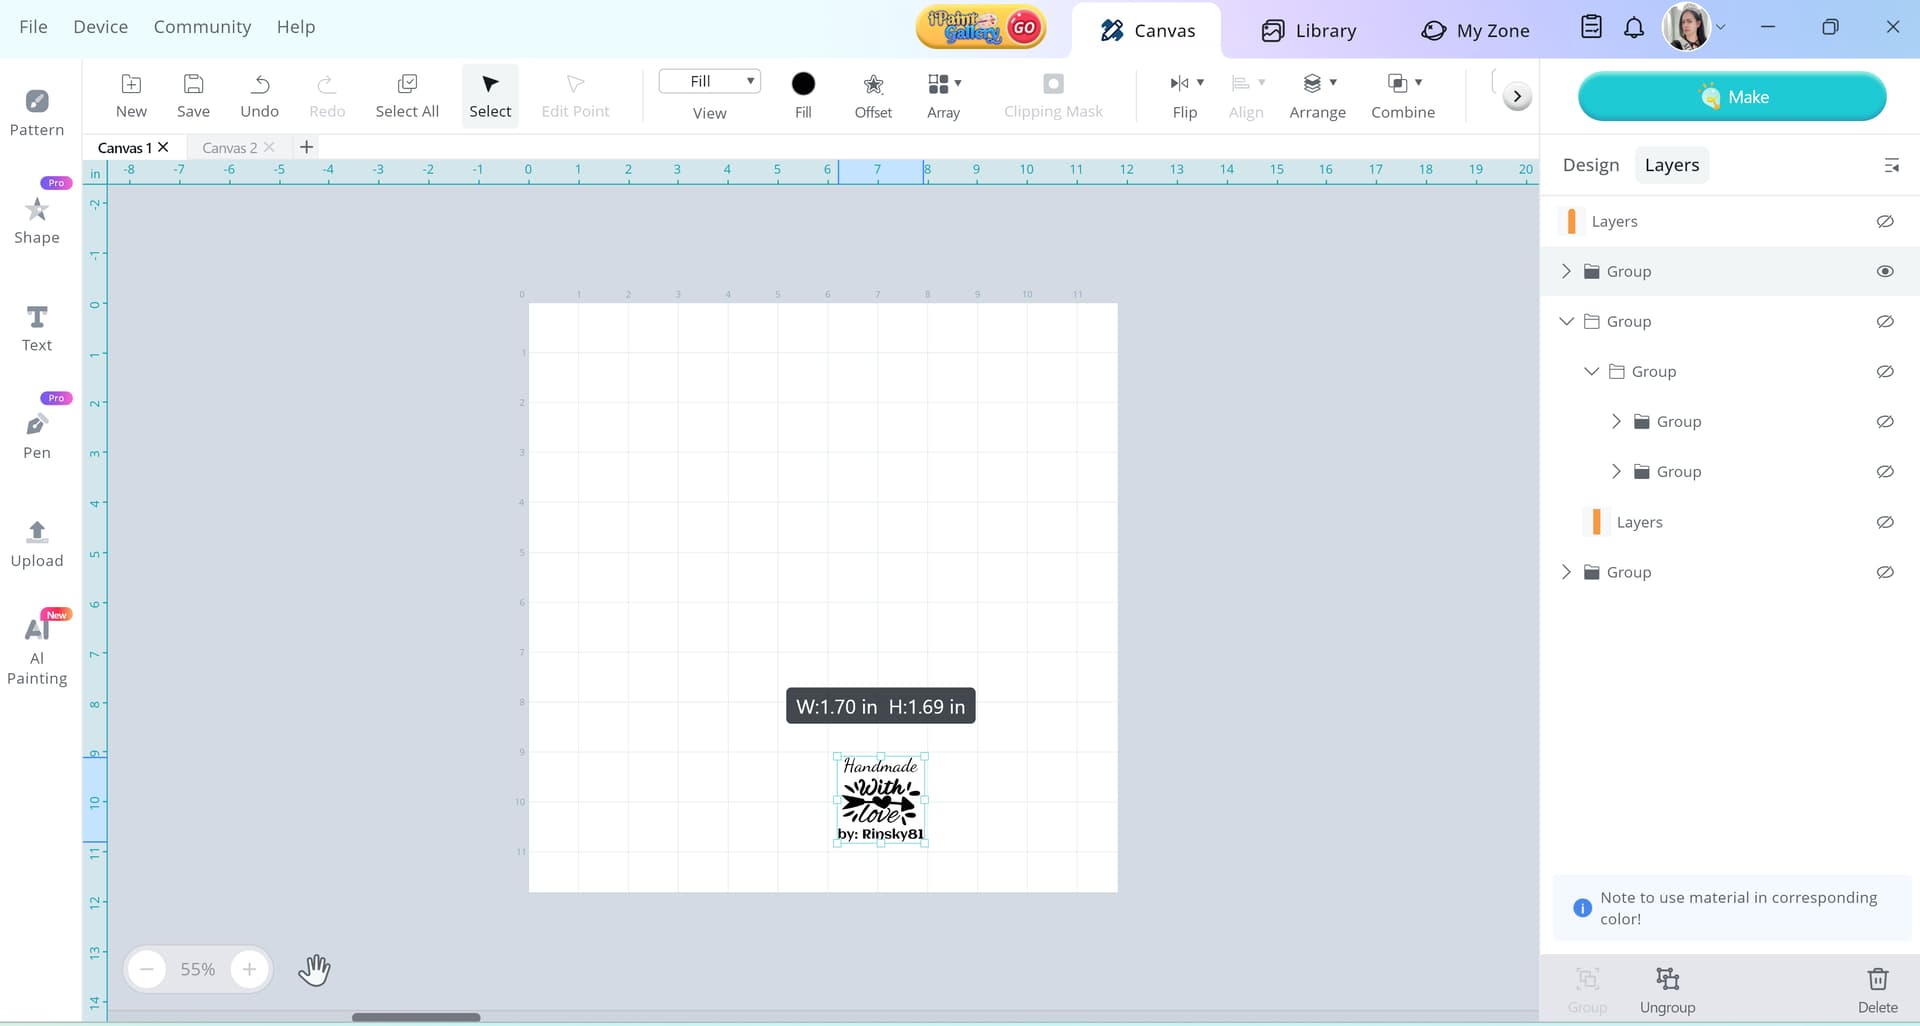
STEP 5 - After engraving and cutting are complete, hide the front panel and bring out the back panel with your customized/personalized name engraved on it, as shown below. Once again, select the image and change all the colors to black—this step is super important for consistent engraving depth and color. (I actually forgot to do this in my design A, so you’ll notice the difference in the final result!)
Then, hit the Make button and follow the recommended engraving settings listed above.
STEP 6 - Without moving anything in the canvas, bring out the back panel template and hide the design. Hit the make button and set all the parameters for cutting 3mm basswood.
STEP 7 - Engraving and cutting Design B. Hide the first Design templates and bring out the Design B and move it to the canvas. Follow the Steps from 2-6.
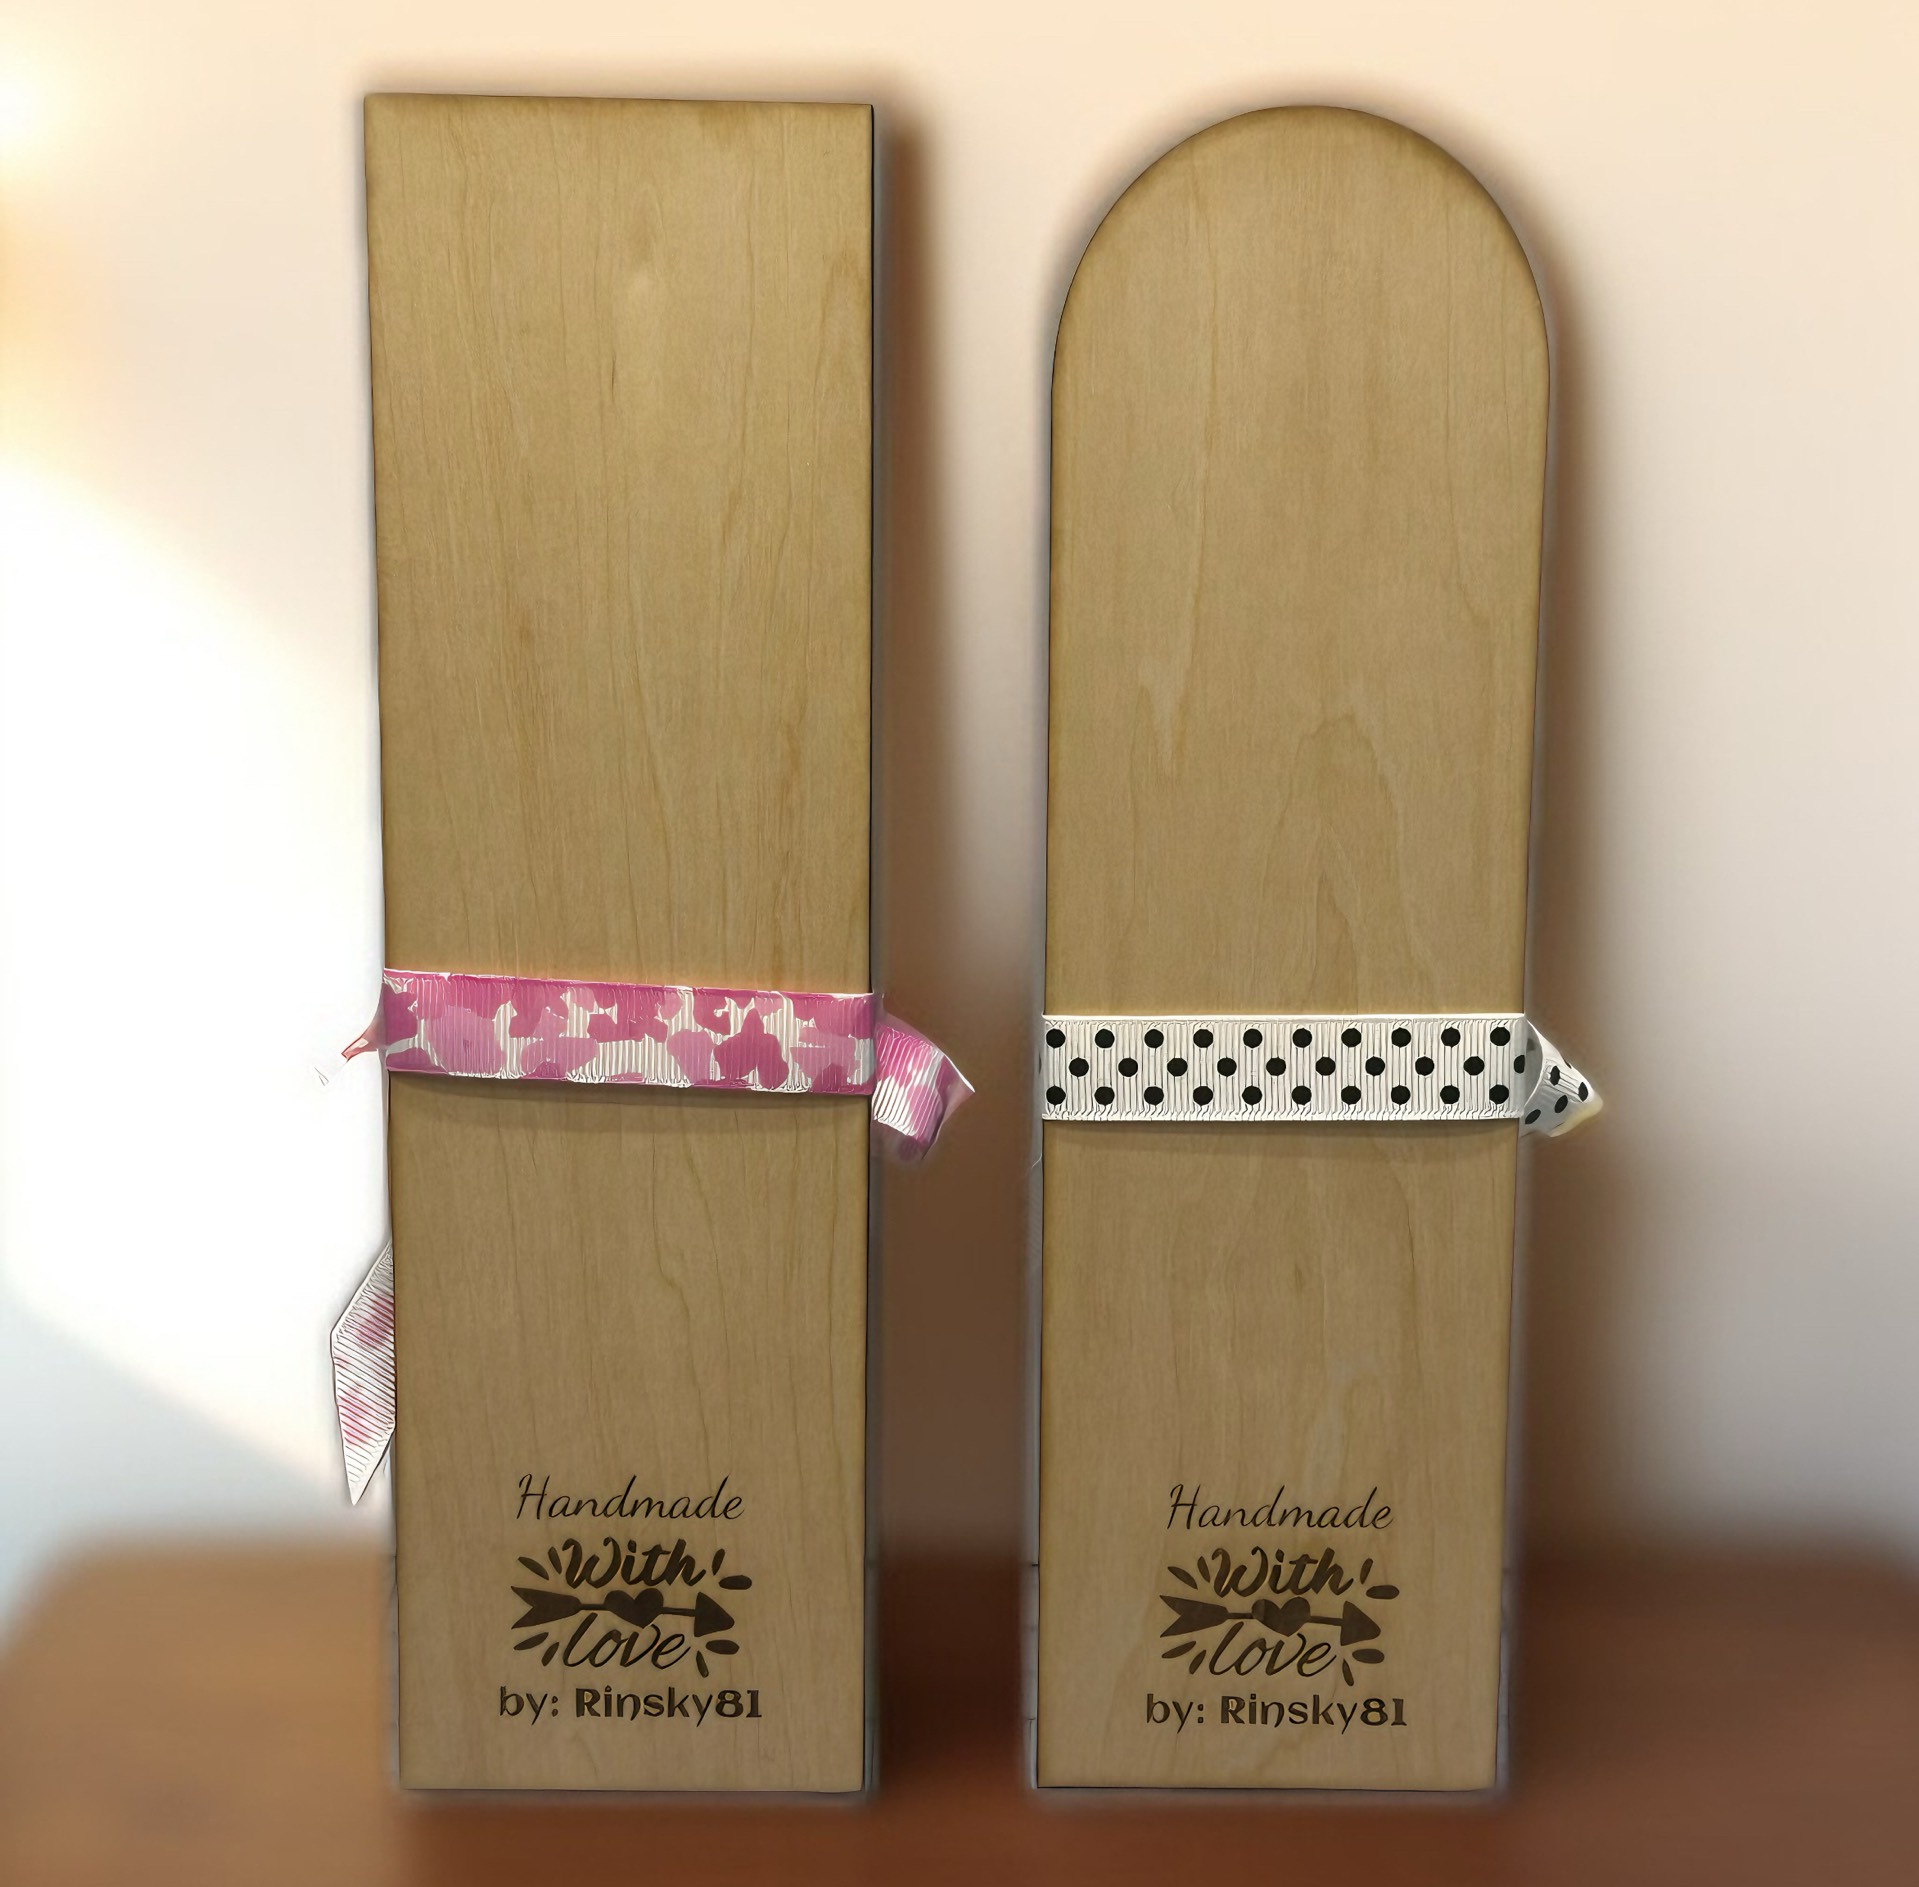
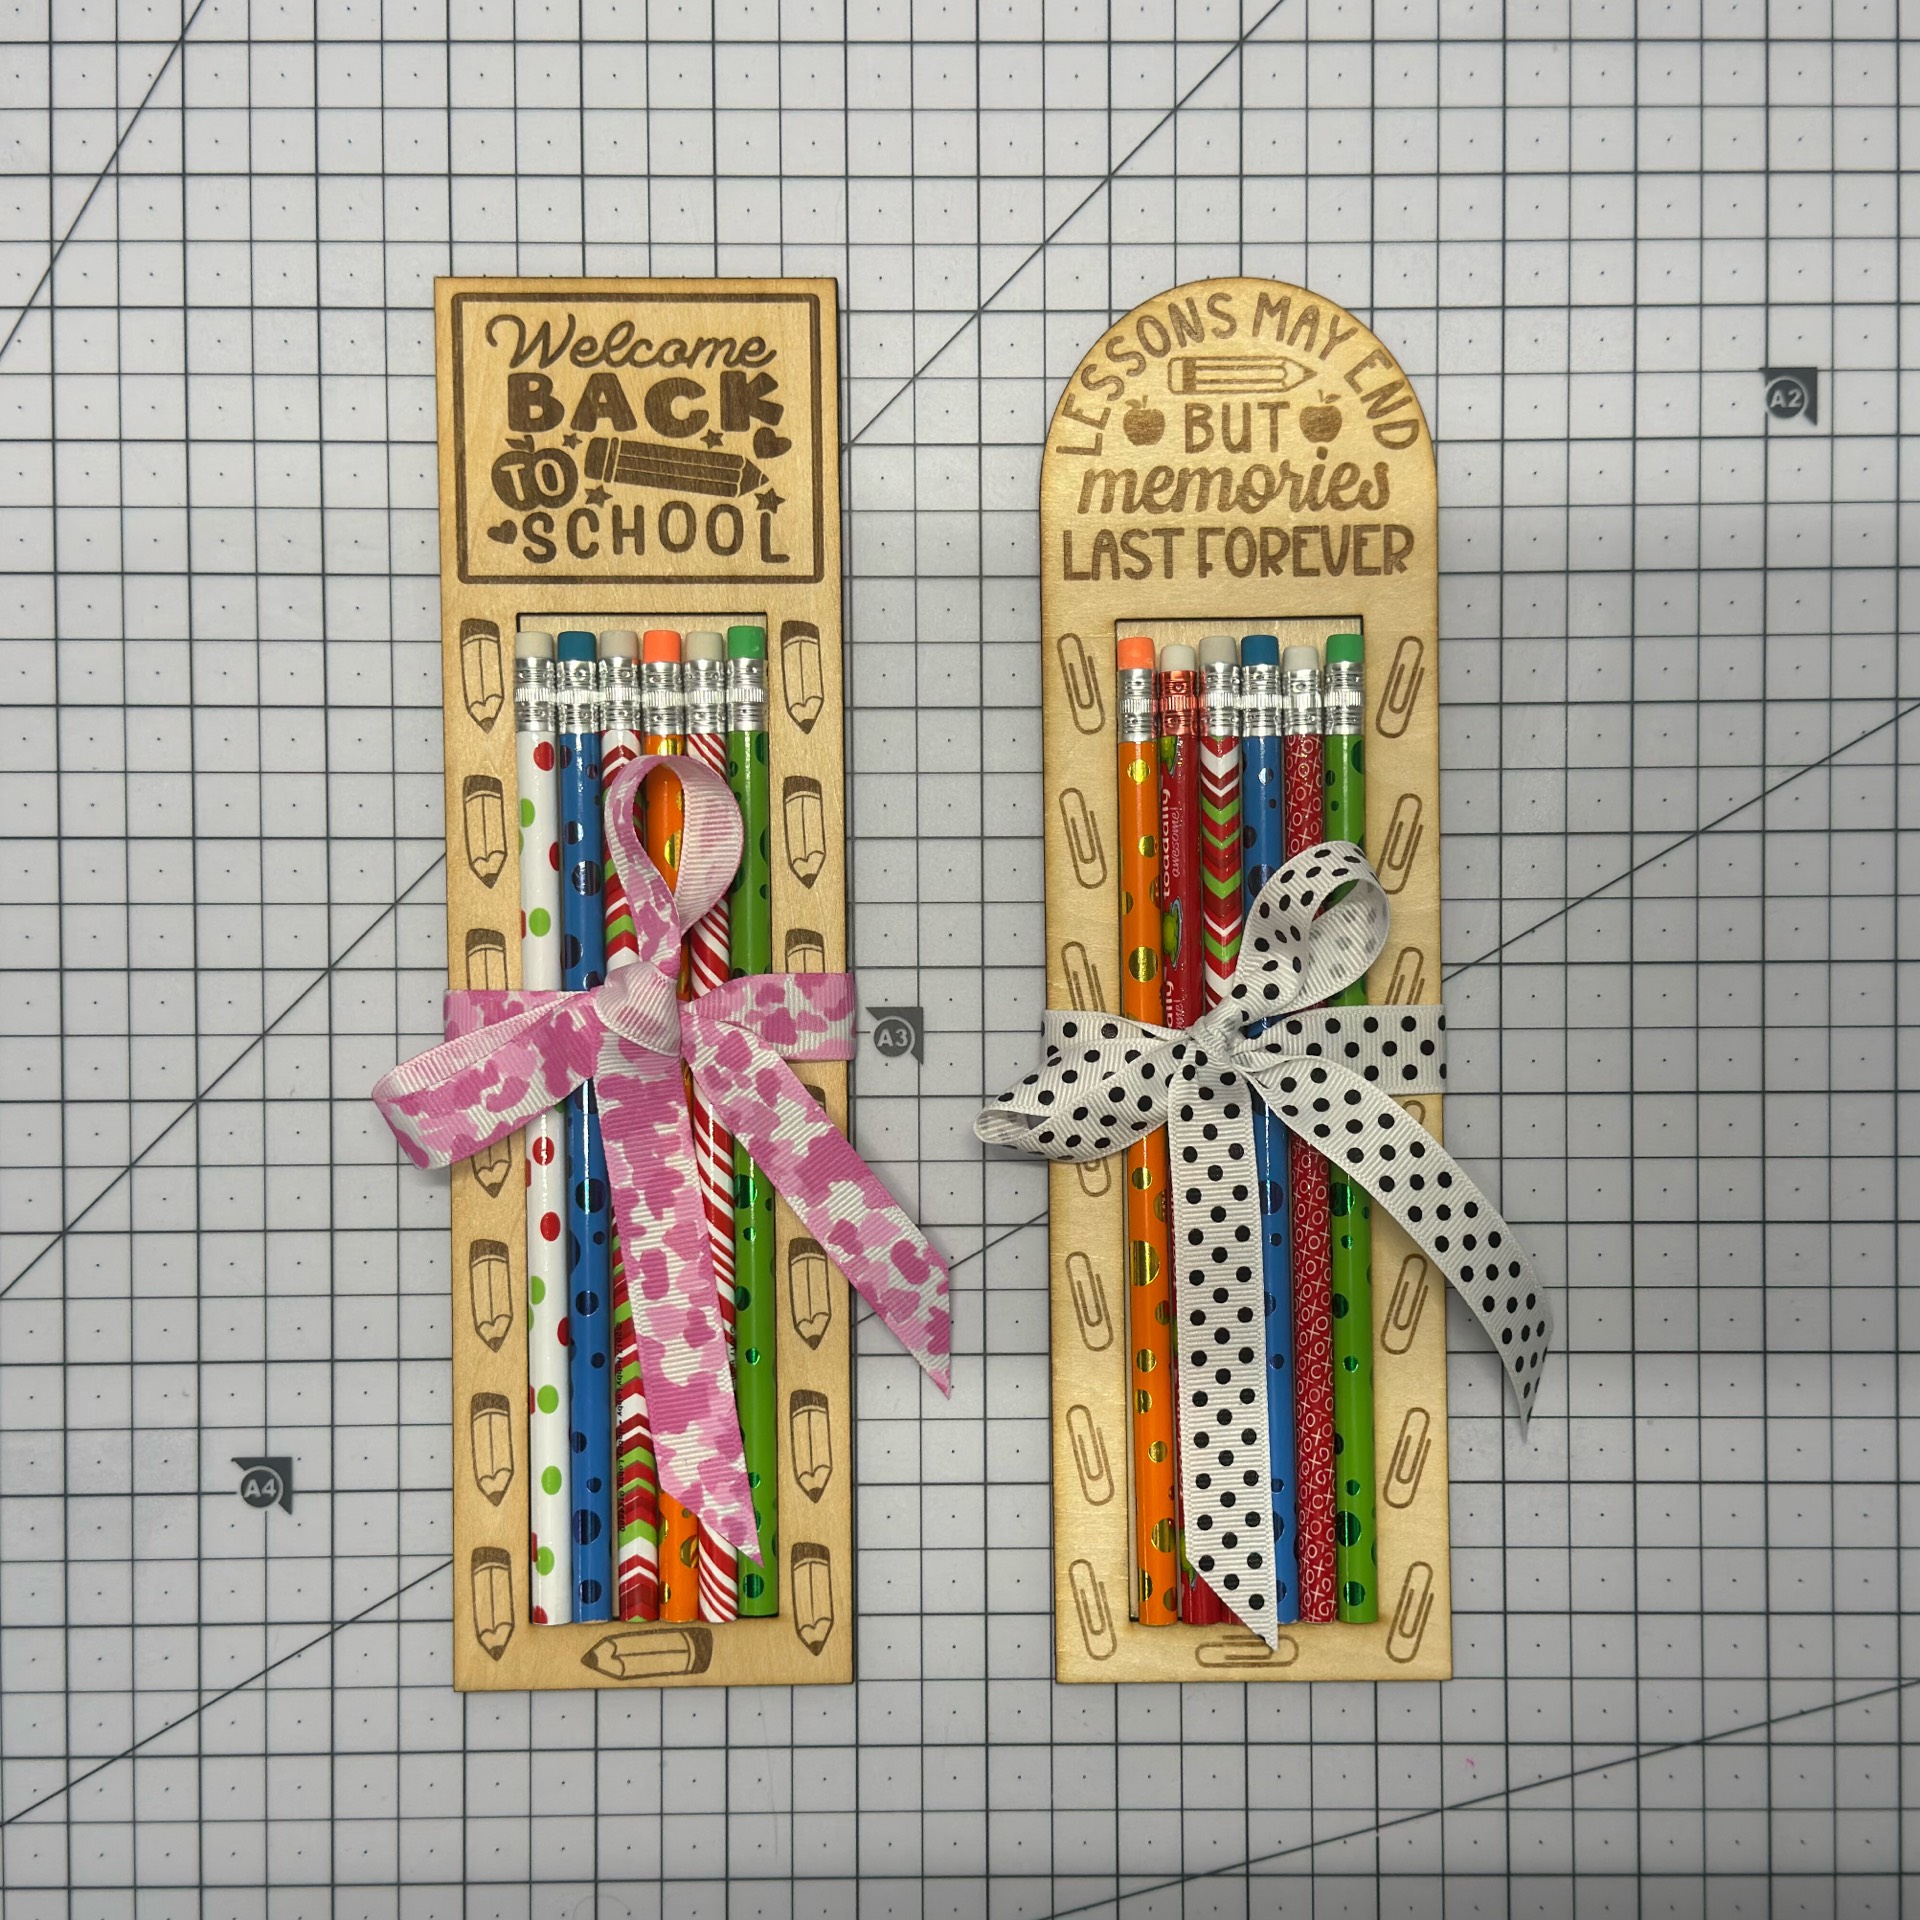
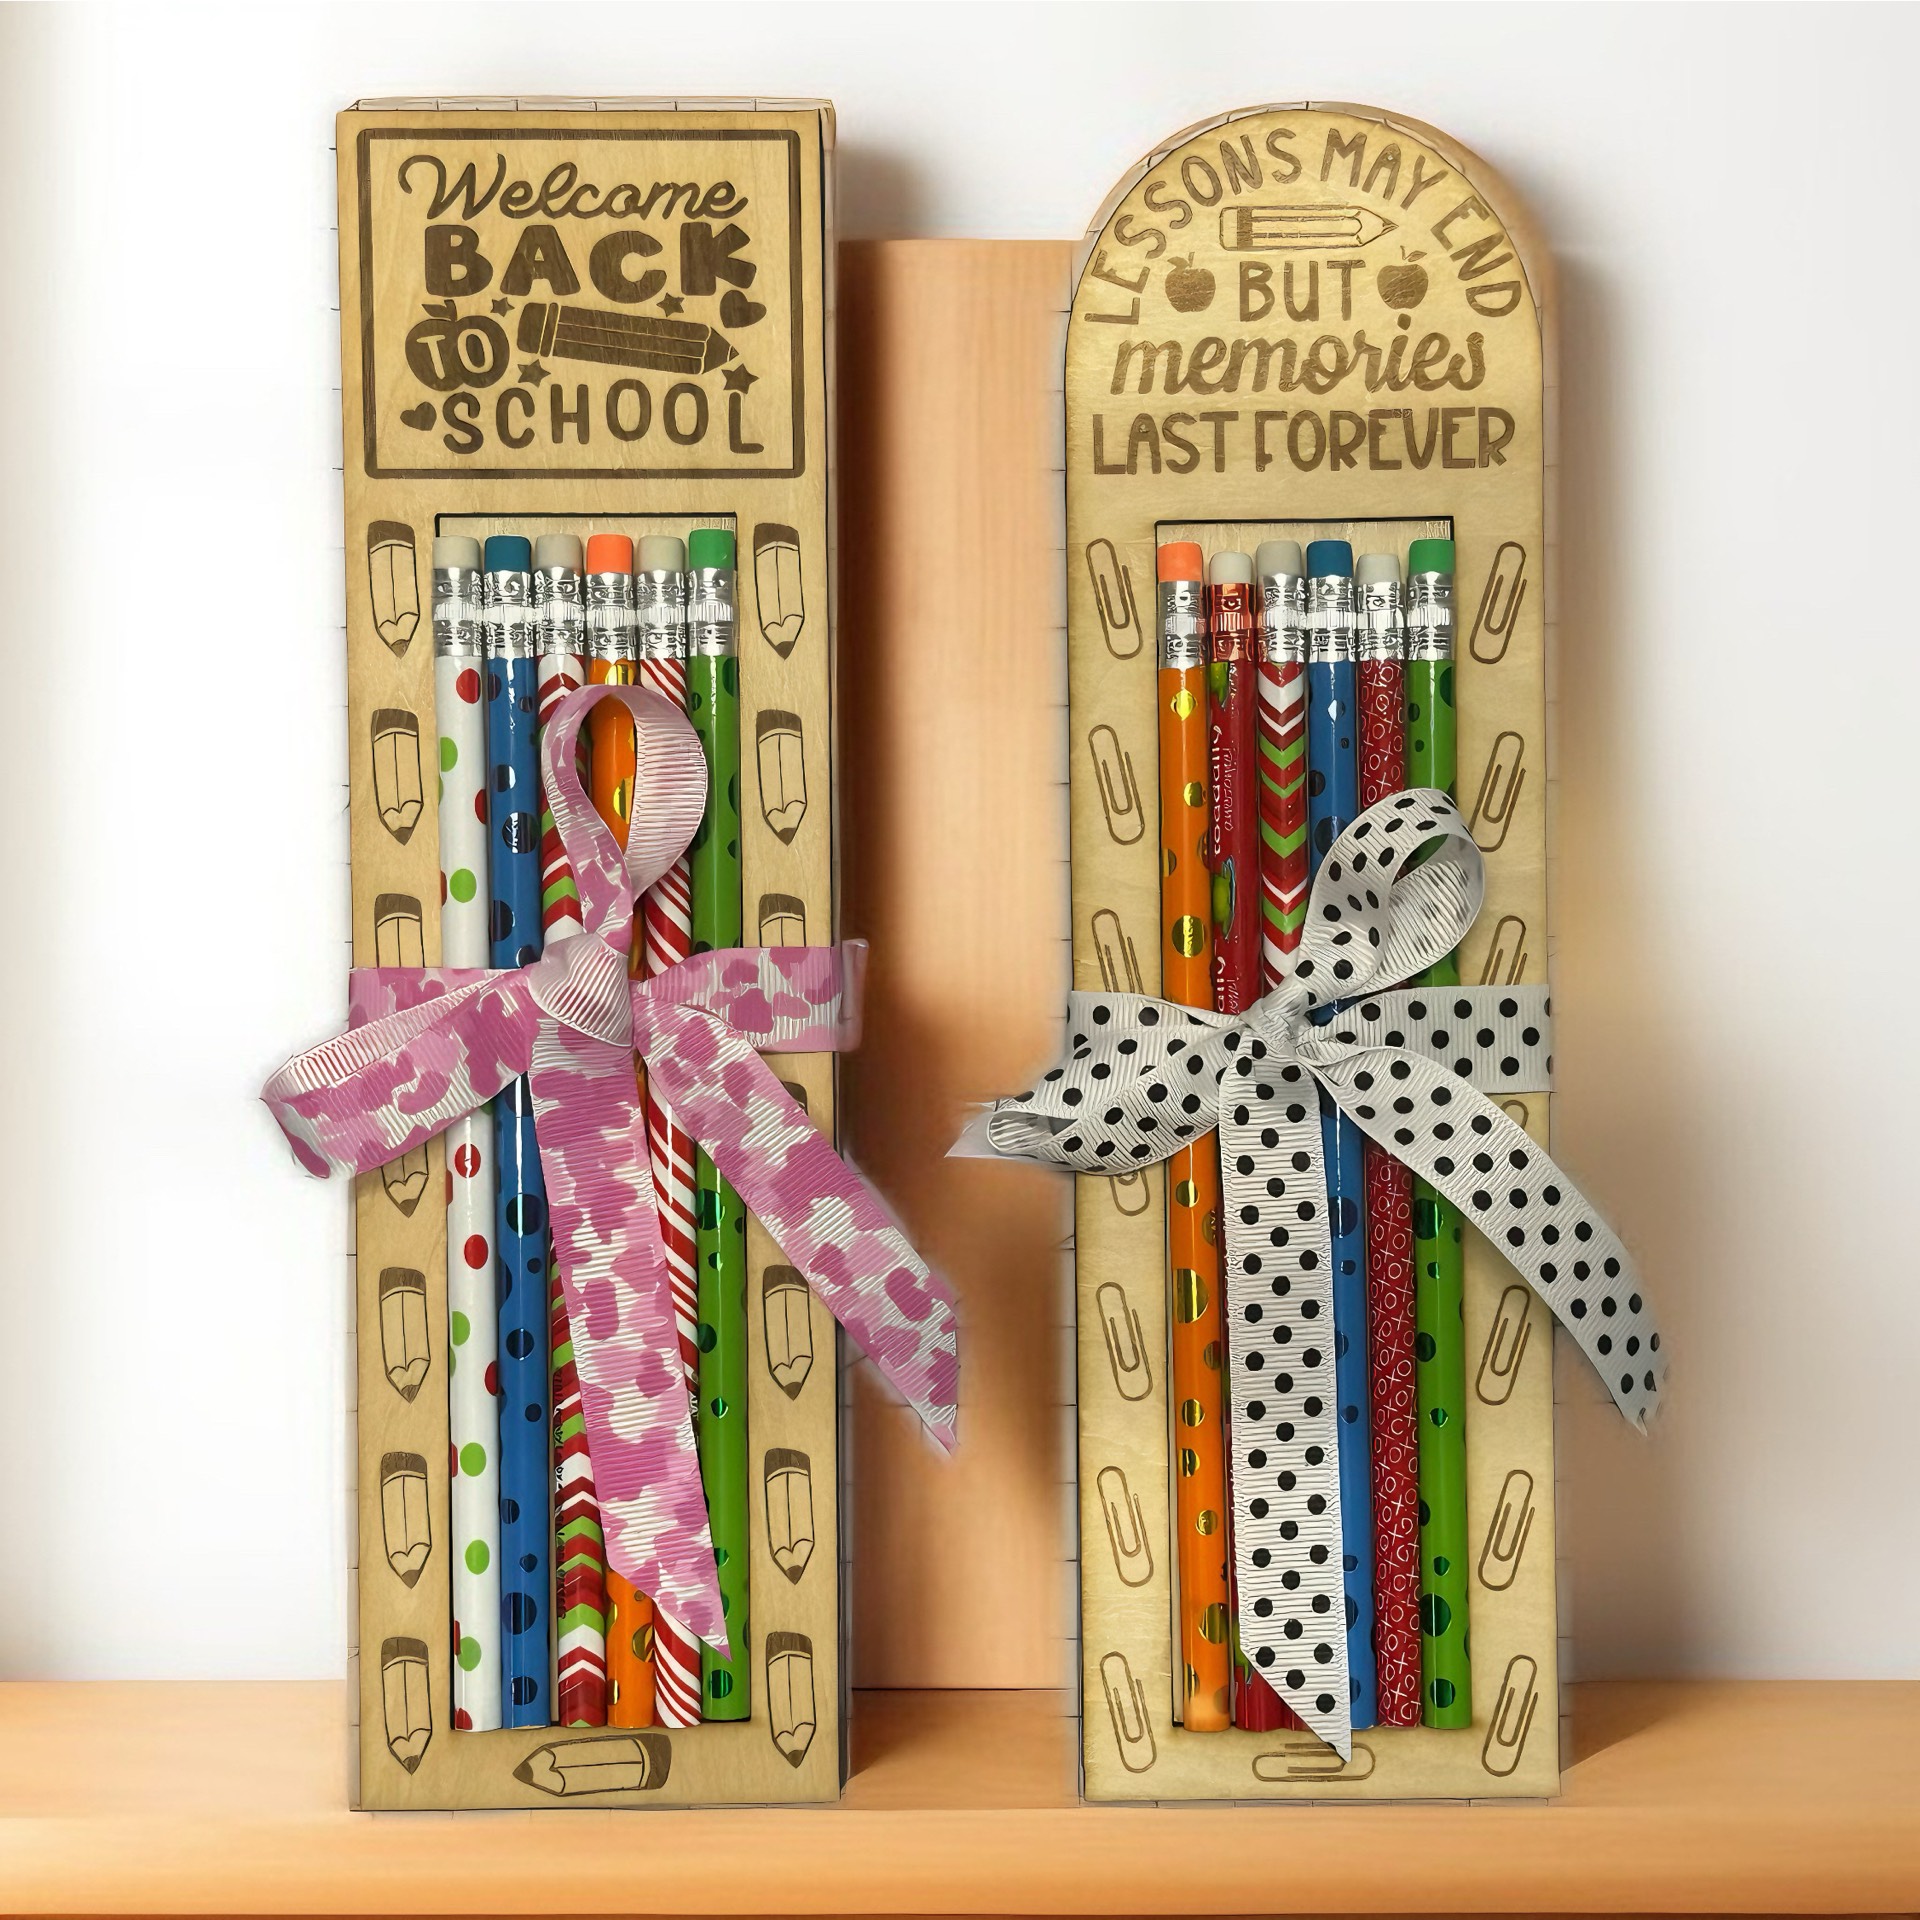
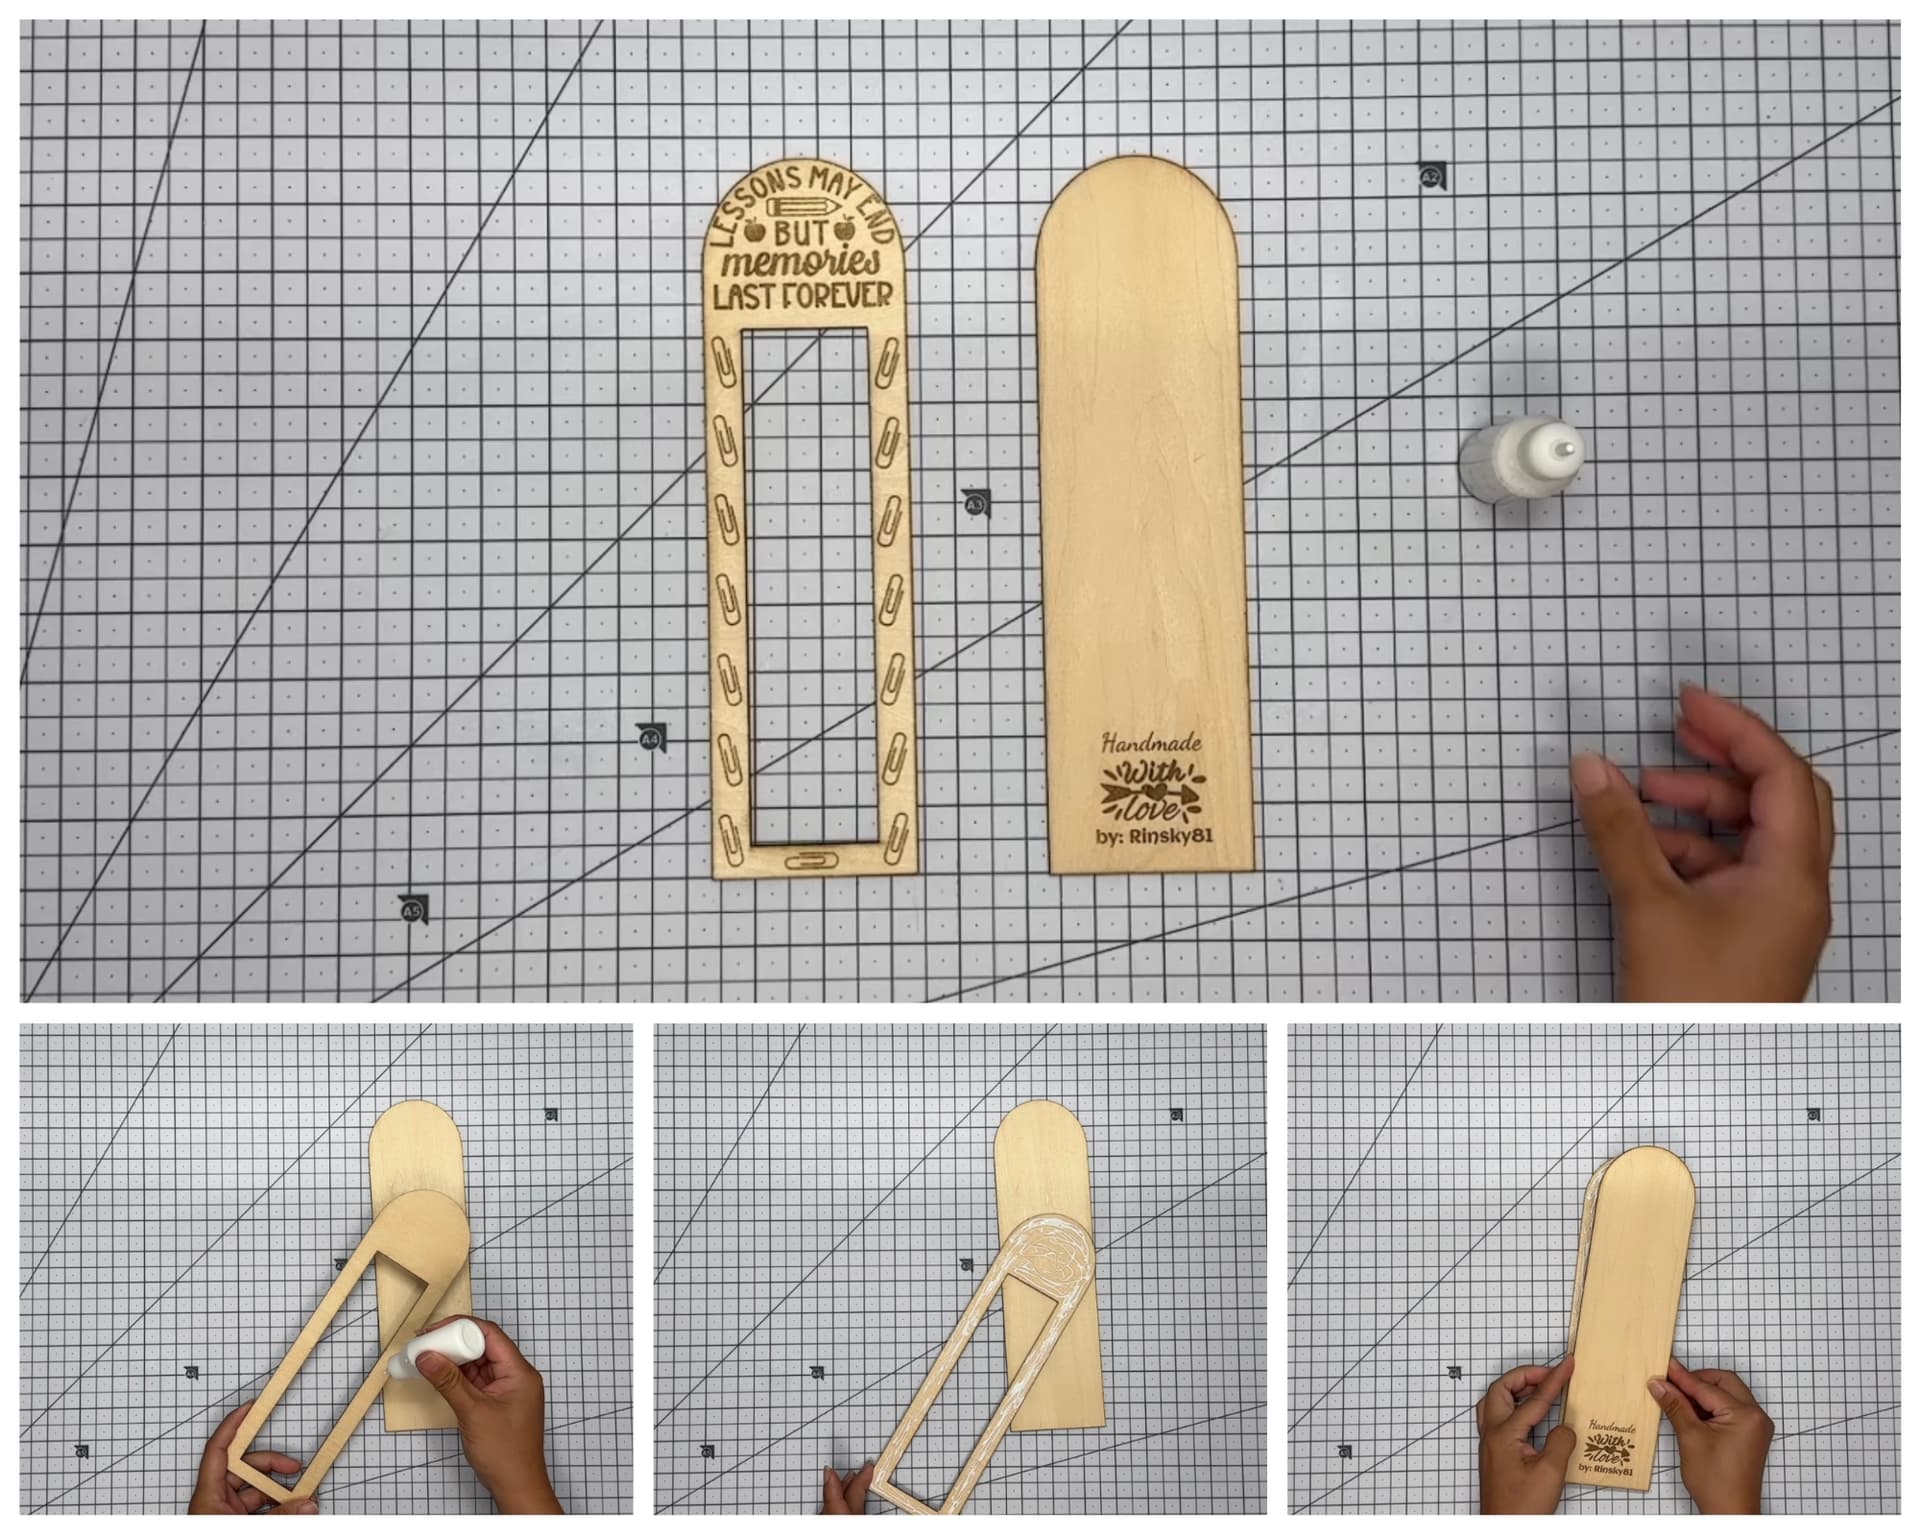
Here are the pencil holder panels looks like after engraving and cutting.
ASSEMBLING THE PANELS:
STEP 1 - Grab your front panel and run a generous amount of glue at the back and glue the back panel together. Carefully align the two panels and set them aside. Do the same for the Design B.
TIP: Put a heavy hardbound book on top of it overnight to make sure the panels are glued together.
STEP 2 - A few days later ![]() , bring all your colorful pencils on hand, cute ribbons, and scissors to decorate the pencil holders as shown below:
, bring all your colorful pencils on hand, cute ribbons, and scissors to decorate the pencil holders as shown below:
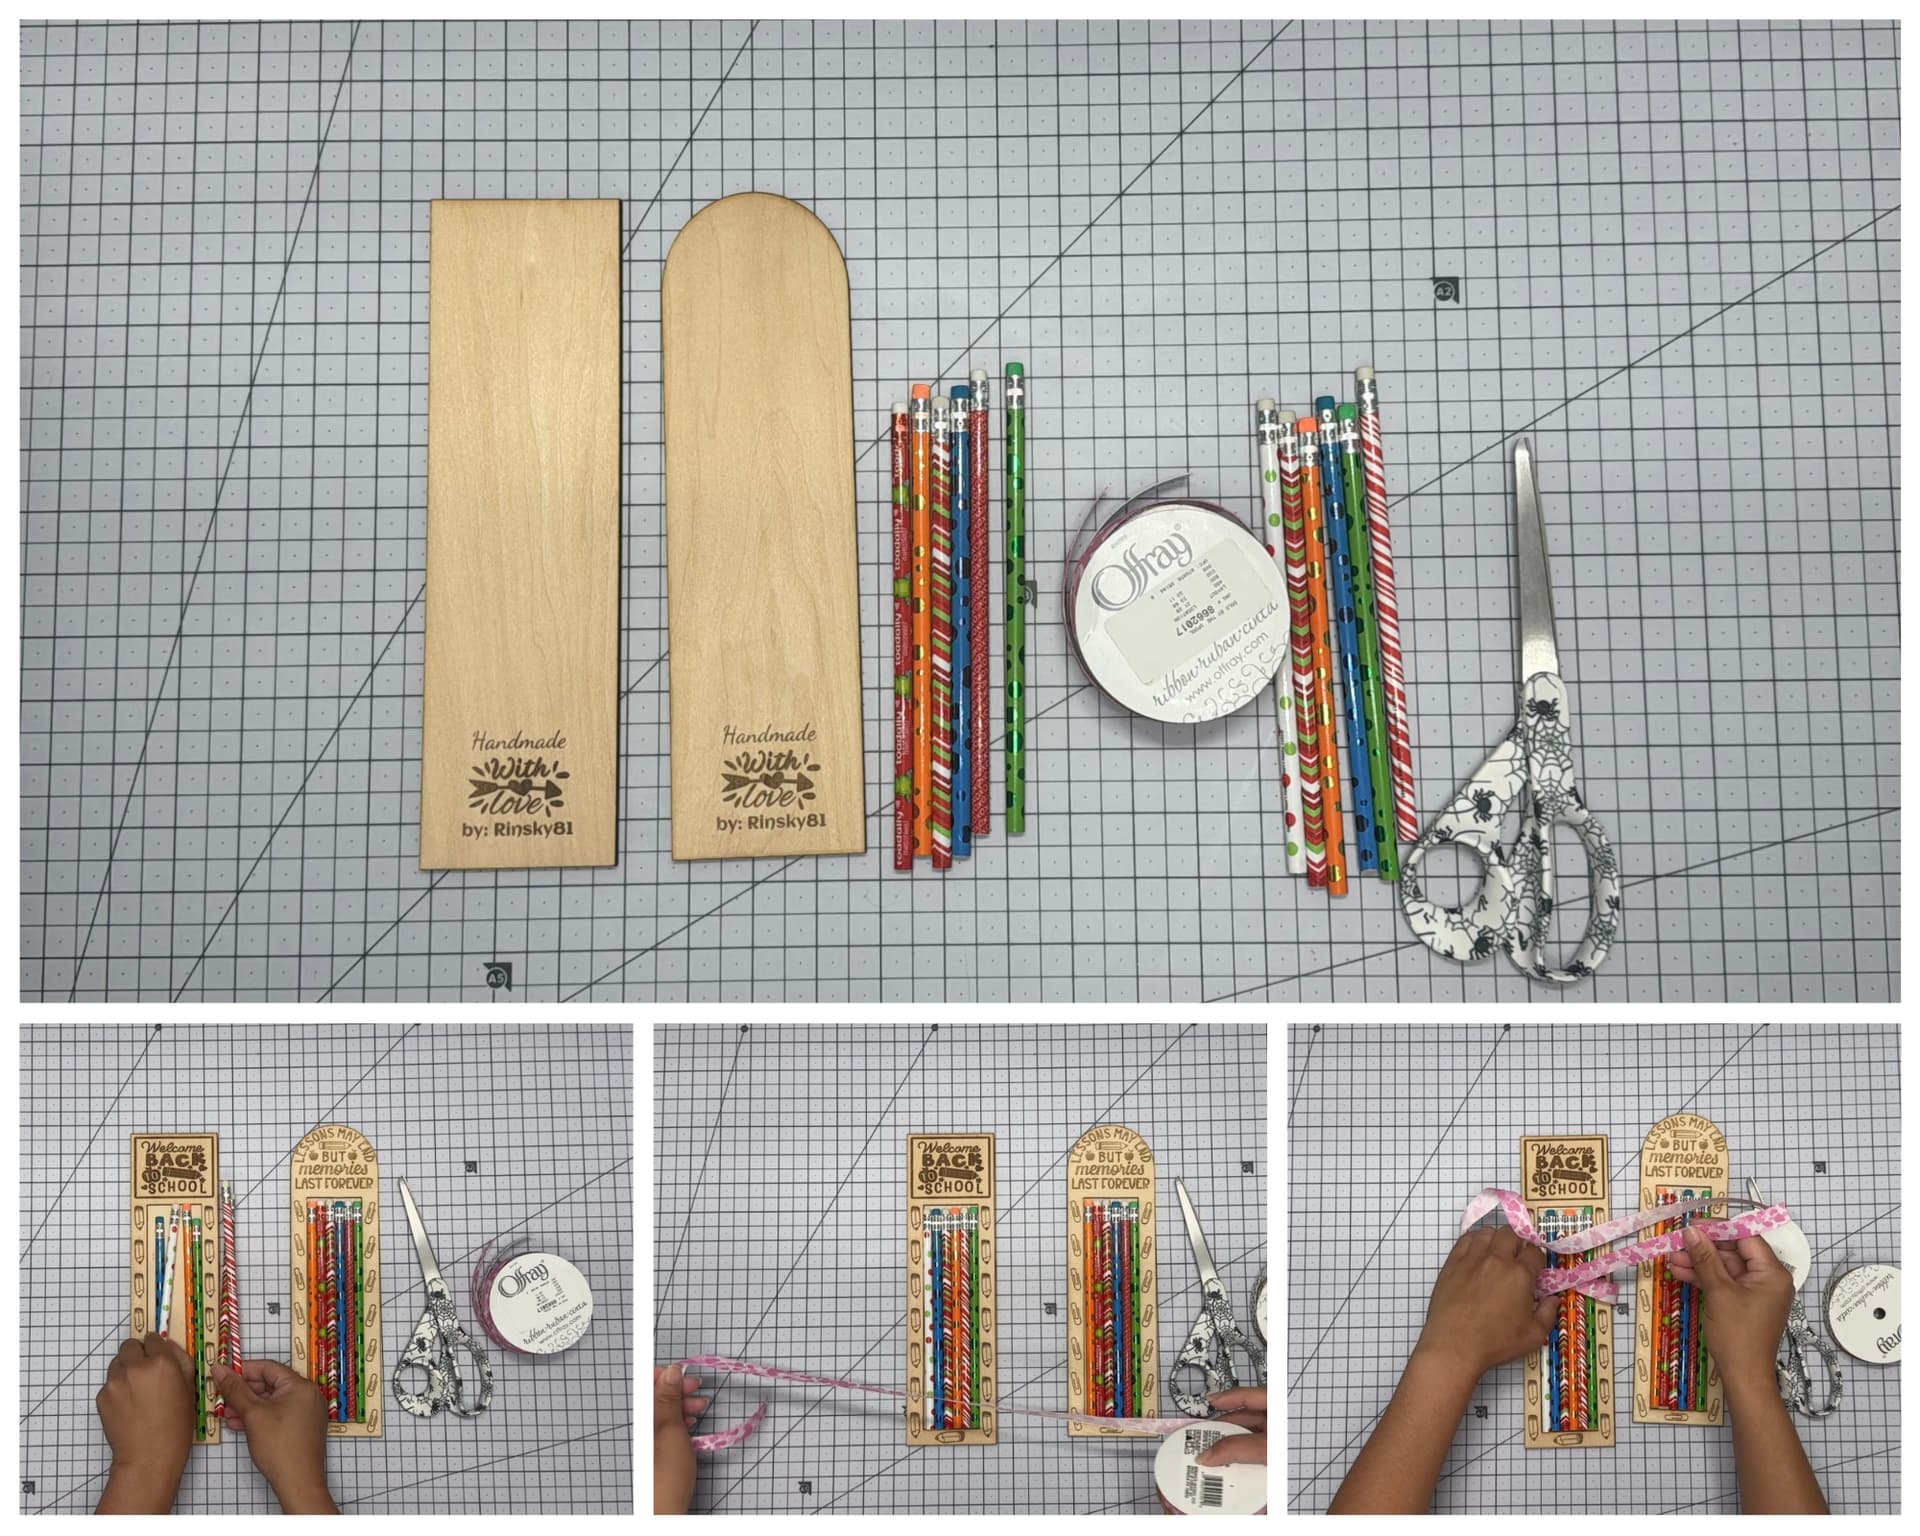
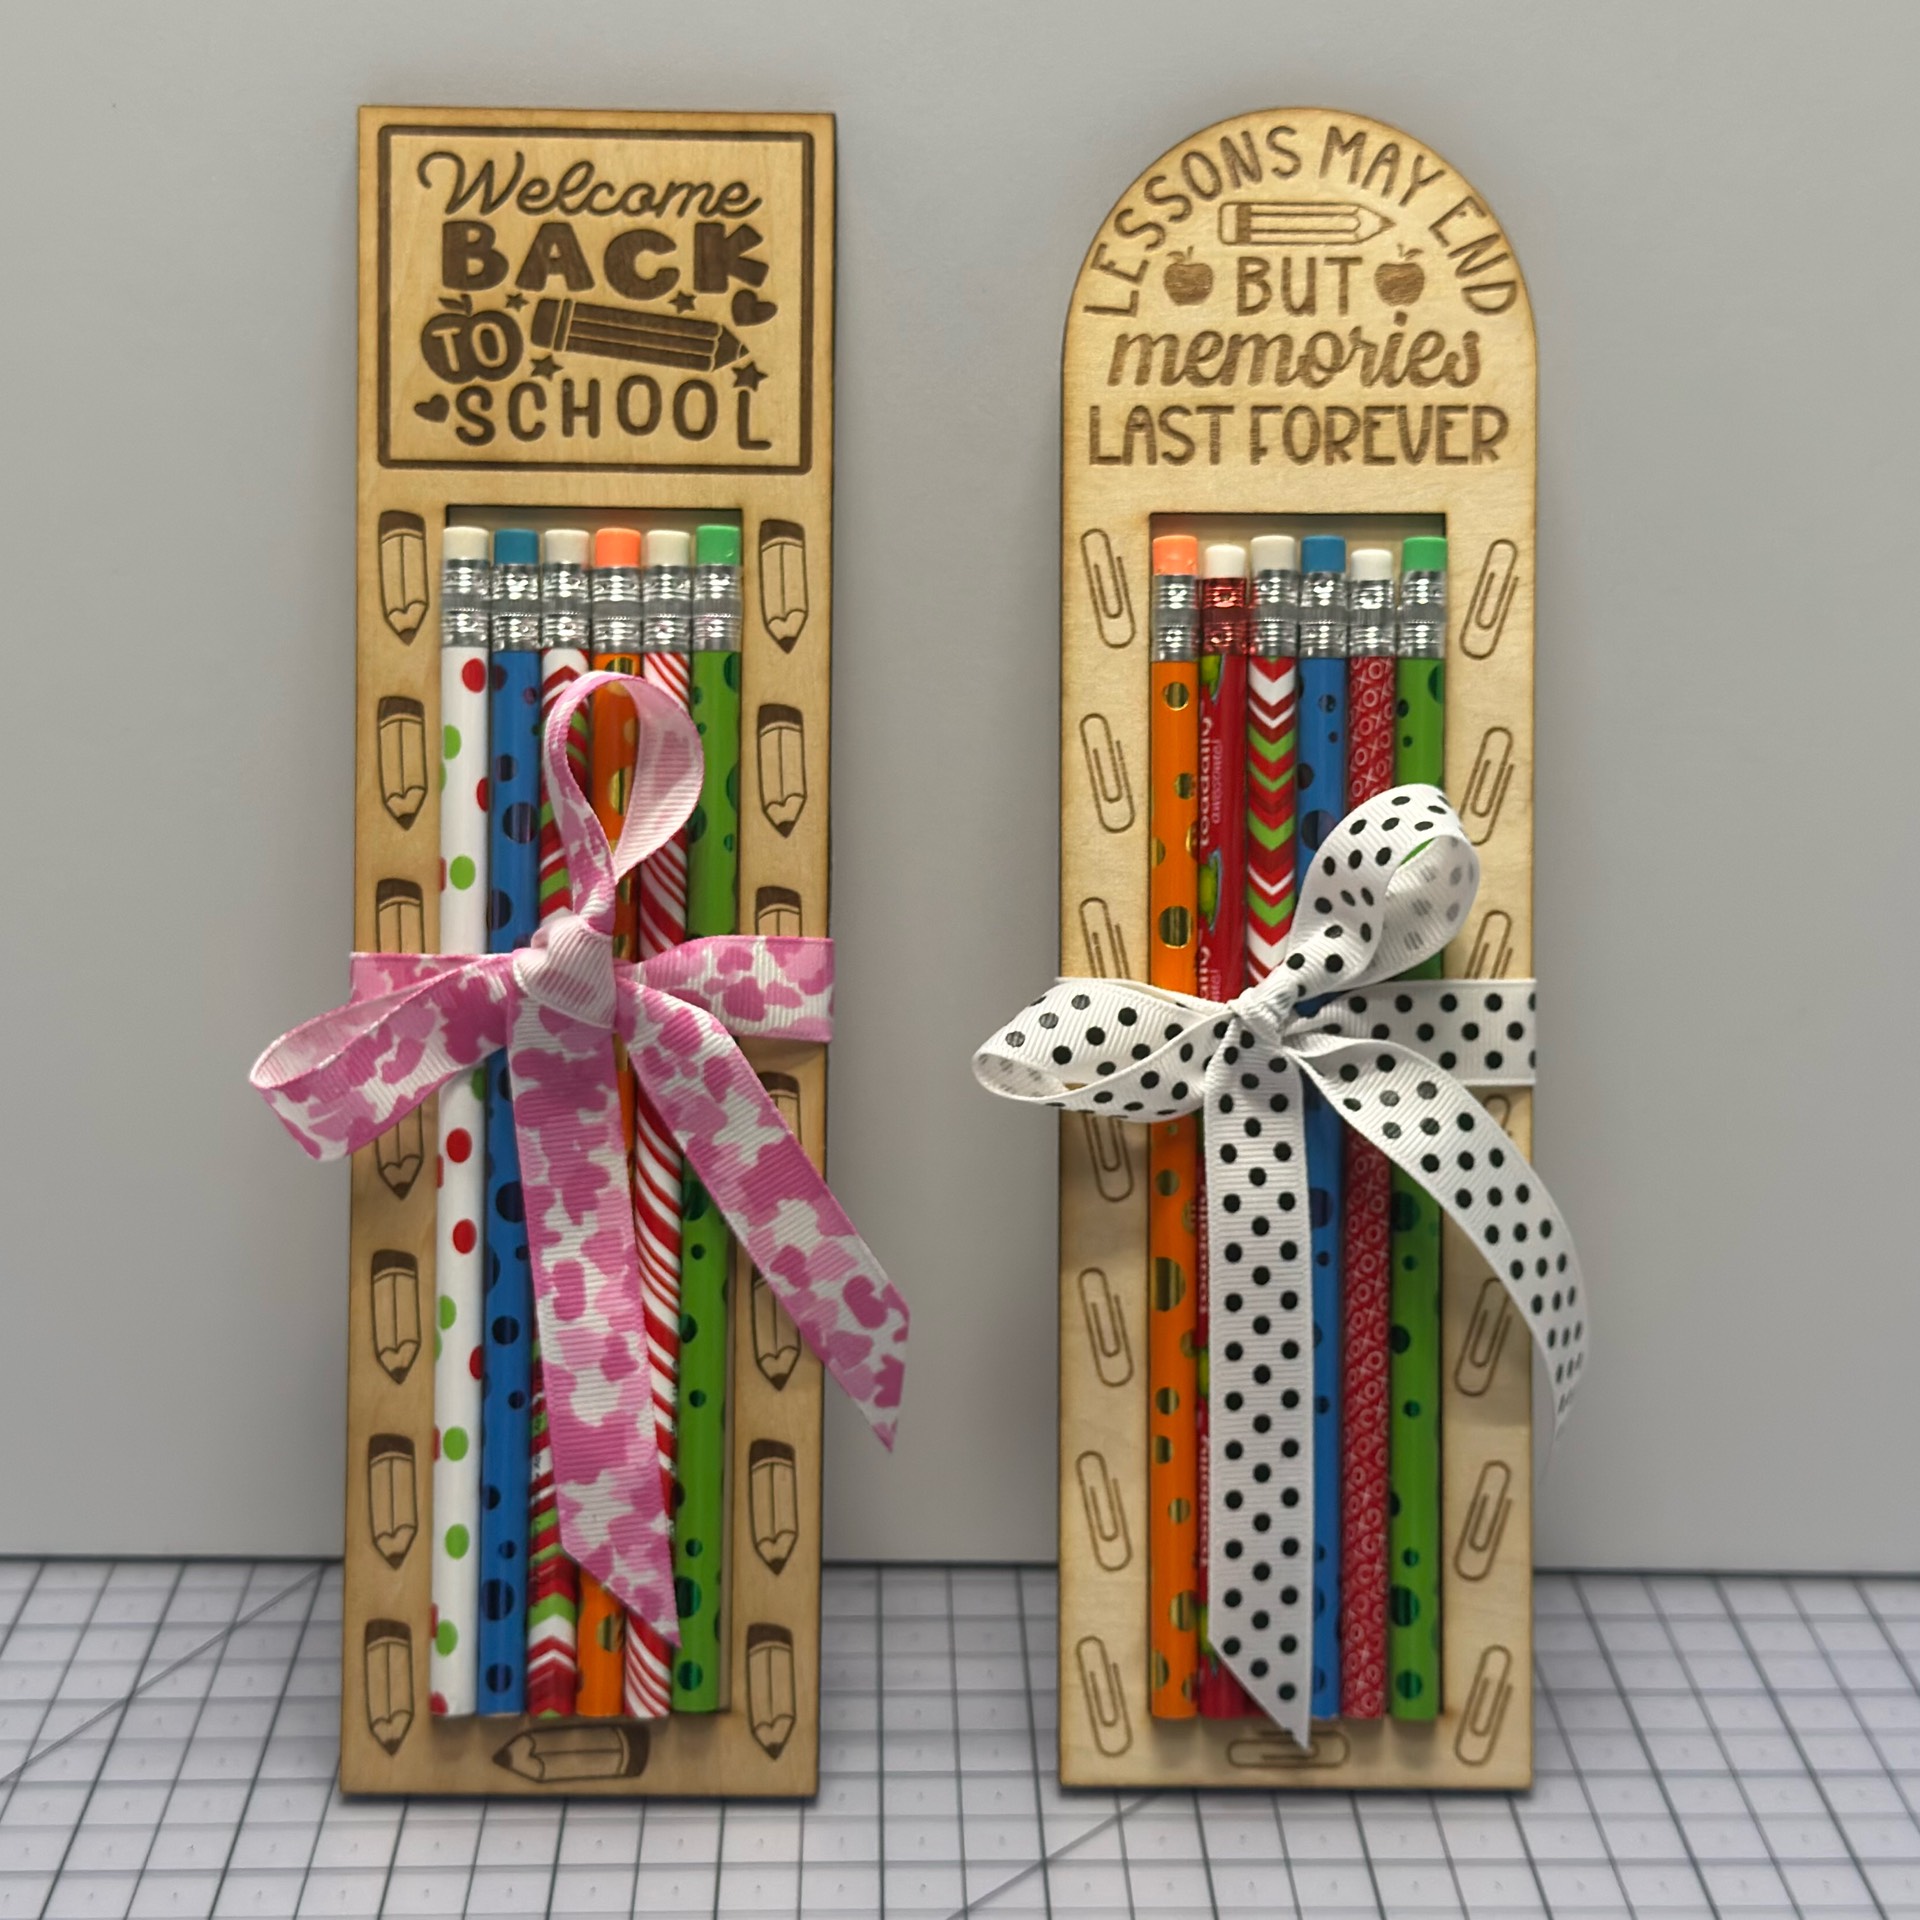
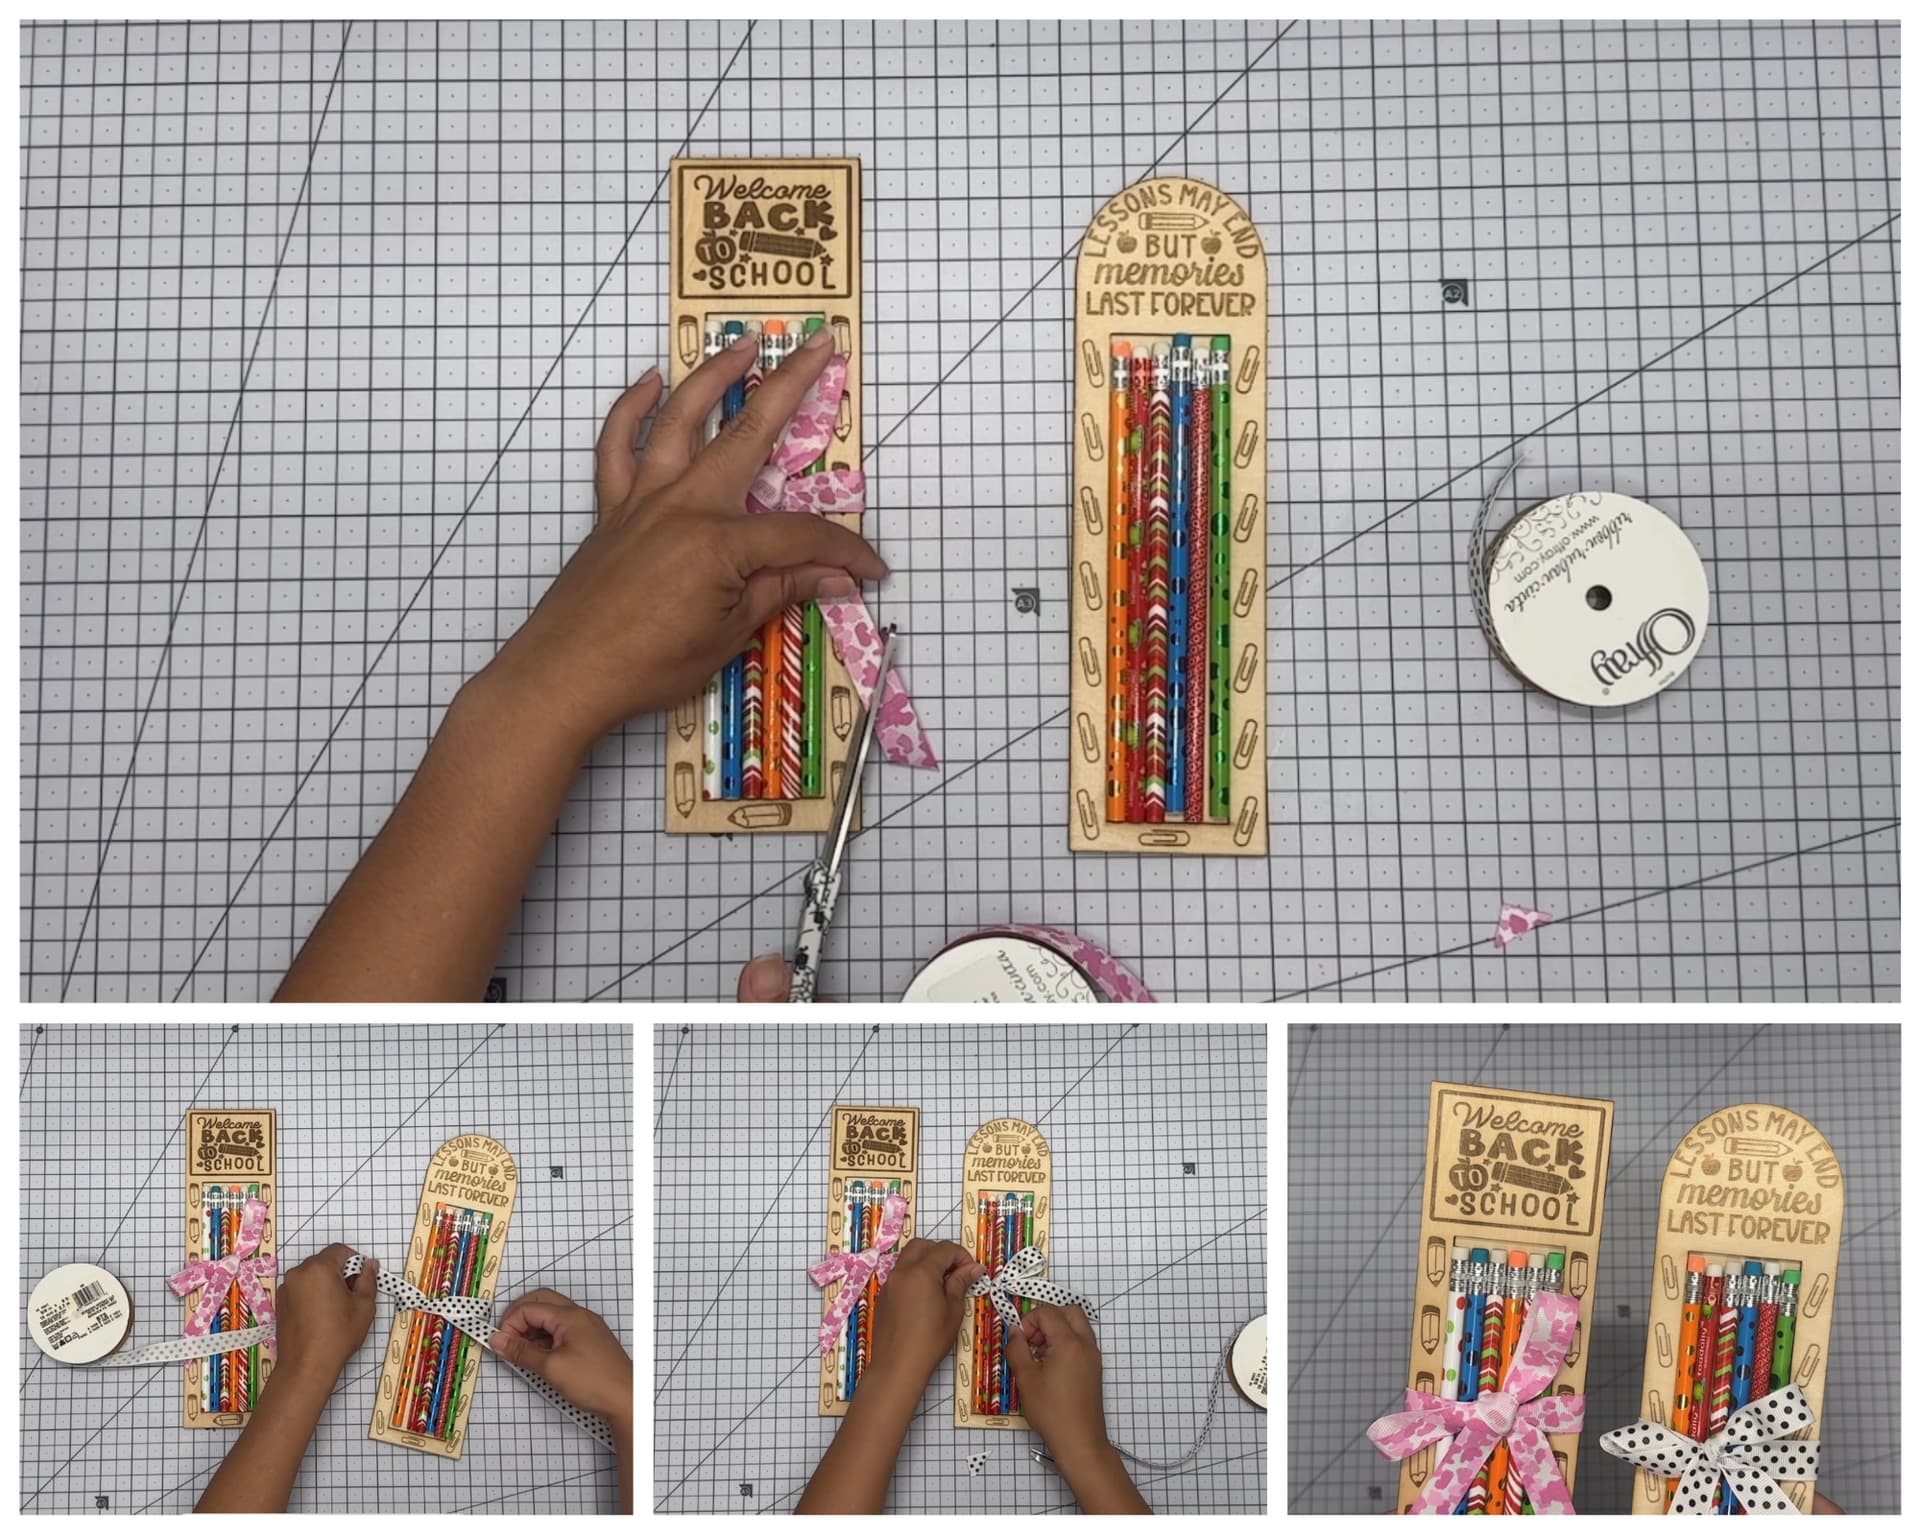
STEP 3 - Trim the edges of the ribbons and decorate it as you wish! You can add name tags to the ribbon as a gift to your kids, friends, and/or teachers.
STEP 4 - Show it off and enjoy my FREE Templates!
A great way to start the first day of school by giving these beautiful pencil holders that are handmade with love by YOU!