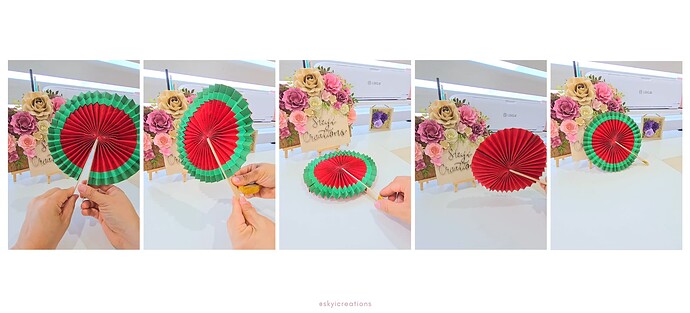
Project Overview:
As the summer is in full swing, how are you keeping cool? Let’s get crafting and make this watermelon paper fan to help with the heat.
Materials:
- Cutting machine: LOKLiK iCraft
- Sticky mat: LOKLiK standard grip
- LOKLiK drawing pen and adapter
- Cardstock: 60 lb or equivalent
- Craft glue and hot glue
- wooden popsicle sticks (2 per fan)
- washi tape or craft tape
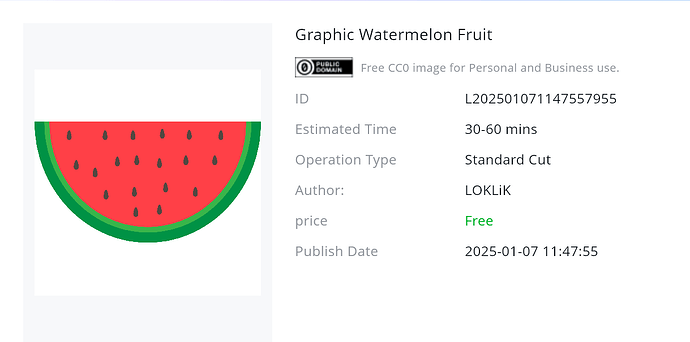
- Templates: from LOKLiK Library
*Free Graphic Watermelon Fruit
Design and Cutting Process:
-
Using the LOKLiK IdeaStudio Library, search for the template and select the + to add the template to the canvas.
-
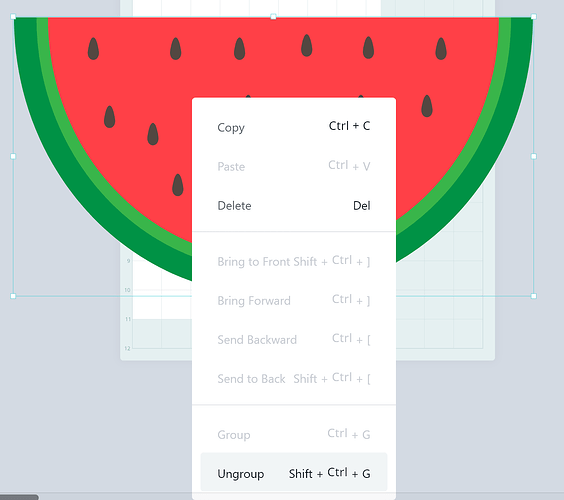
Ungroup the SVG design to allow us to pick and choice the components we will be using. For this project we are only using the watermelon seeds and place them to the side of the canvas.
-
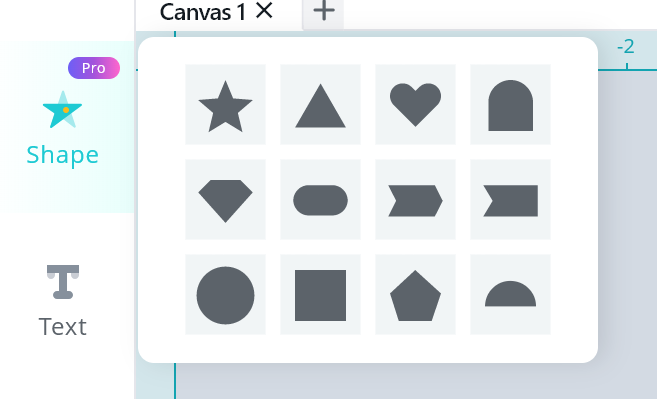
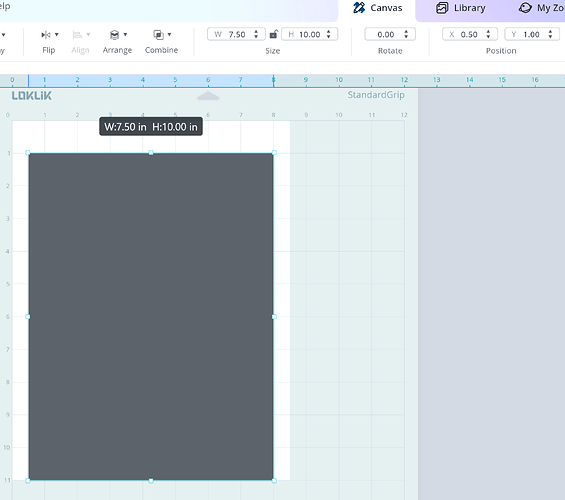
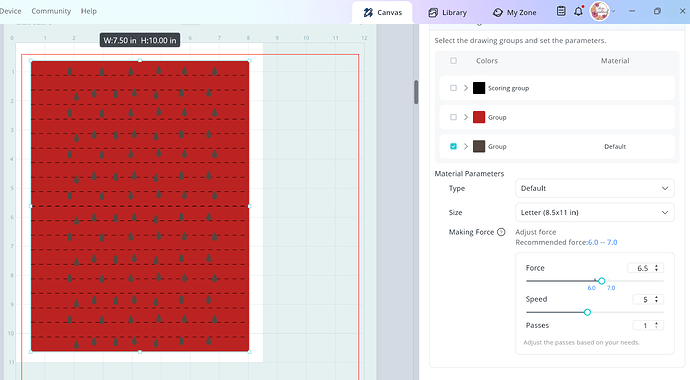
Using the shape feature, add a rectangle to fit the paper size you are using. For this project, I unlocked the size for the square and created a rectangle measuring 7.5in by 10in.
-
Position the rectangle on a position of x:.5 and y:1, this will help so you can place the following scoring lines correctly.
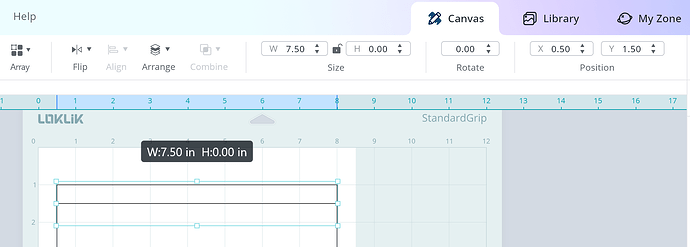
- Add score lines using the pattern feature and selecting the dashed line option instead of a solid line.
- I use the “Position” toolbar on the top menu to help guide me to ensure that they are place in the exact right spot.
Position Setting
X: .5, Y: 1.5
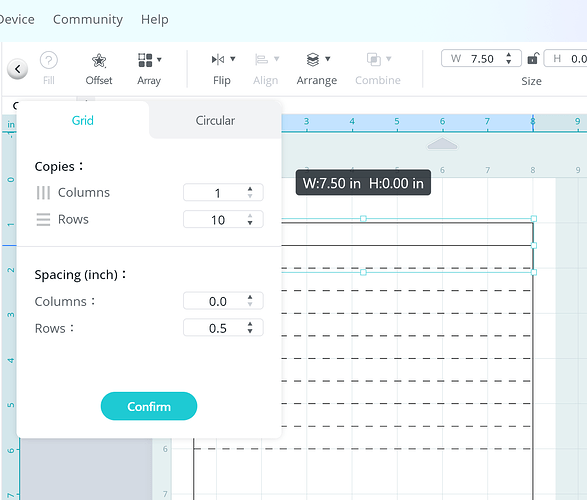
- Select the score line you have created and we will be duplicating the line using the Array feature.
- You will enter Columns: 1, Rows: 10, Spacing Rows: .5. Then click on “confirm”. This will create duplicates of the original score line.
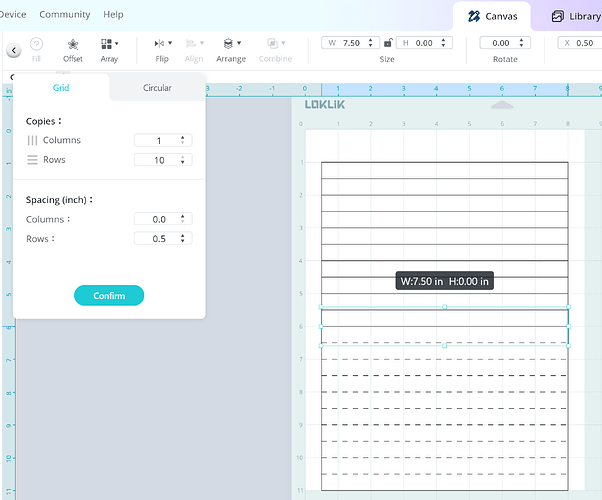
- As the software has a limited on the number of copies, you will need to repeat the previous step.
- Select the score line on the bottom, and repeat. Columns: 1, Rows: 10, Spacing Rows: .5. Then click on “confirm”.
-
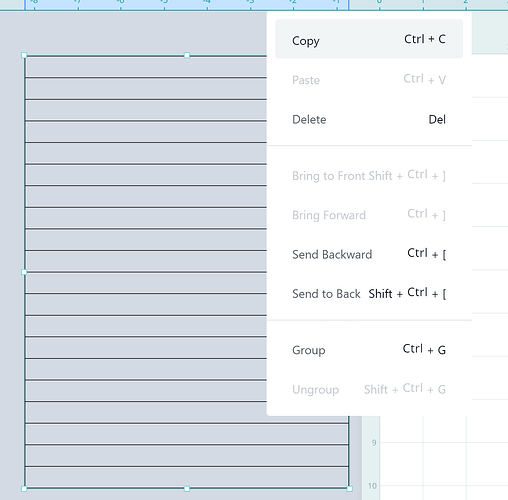
Copy and Paste the rectangle with all the score lines. This will be used later as the base of the paper fan and allow us to create the decorative details. You will need 2 copies of the large rectangle/score marks per paper fan.
-
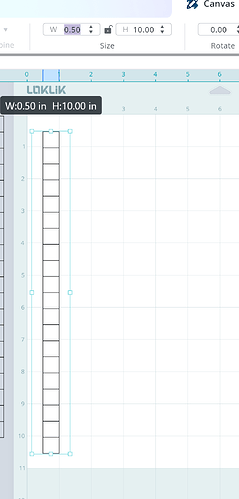
Using the copy of the rectangle/score lines, select the entire rectangle/score line and resize it using the side node buttons. It will measure .5in wide by 10in tall.
-
You will need a total of 8 thin rectangles per paper fan (4 dark green, 4 medium green).
-
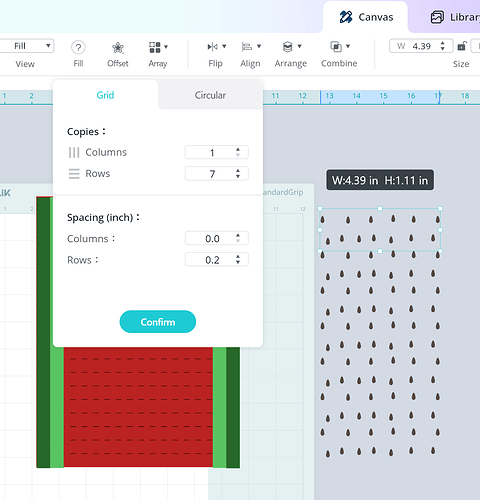
We will now be working on the decorative seed for the paper fan. I deleted the bottom seeds on the design in order to allow me to use the Array feature to duplicate it.
-
You will enter Columns: 1, Rows: 5, Spacing Rows: .2. Then click on “confirm”.
-
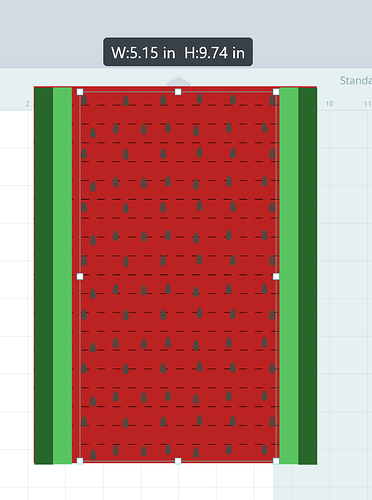
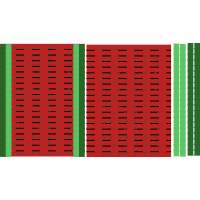
You now have all the components made for paper fan, here is a preview of all the components.
-
Send the components to cut/score/draw, below are the settings used for this tutorial.
Cut Settings
Material Type: Cardstock Paper (180g/97lb)
- Force: 7.5
- Speed: 5
- Passes: 2
Score Settings
Material Type: Cardstock Paper (180g/97lb)
- Force: 5.5
- Speed: 5
- Passes: 2
Draw Settings
Material Type: Cardstock Paper (180g/97lb)
- Force: 6.5
- Speed: 5
- Passes: 1
Assembling the Watermelon Paper Fan:
-
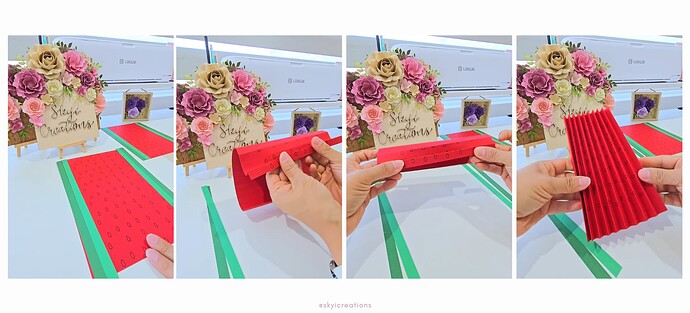
Slightly crease the cardstock along the score lines creating an accordion fold.
-
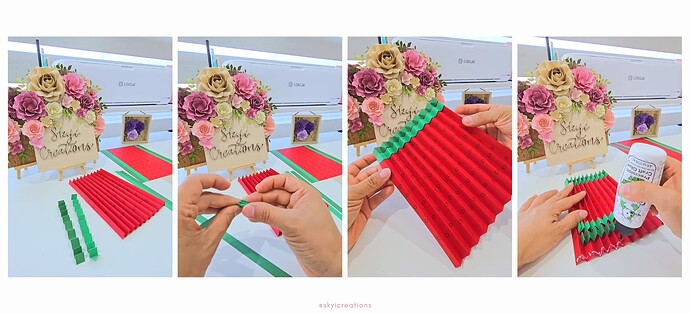
Continue to crease the green strips creating an accordion fold.
-
Glue the 2 green strips along each edge of the red cardstock with the darkest green strip to the outside edge.
-
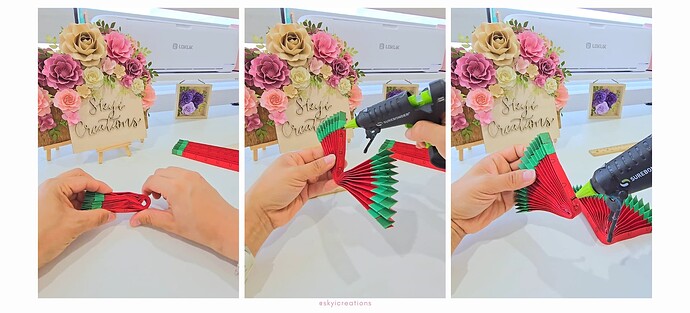
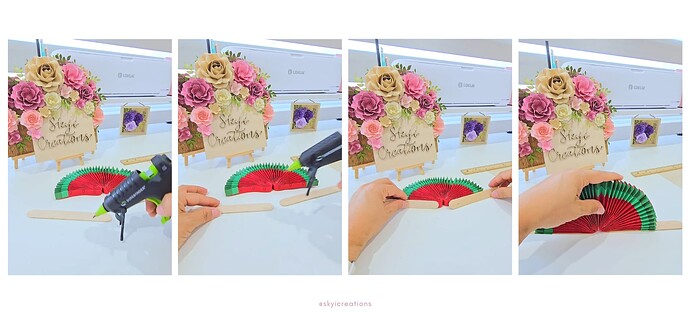
Fold the rectangle in half as shown below, and glue the folded accordion using hot glue.
-
Repeat the same for the other rectangular accordion and attach it to the side of the first accordion.
-
Place a wooden popsicle stick onto each edge of the accordion fan using hot glue.
-
Make sure you don’t glue the stick too close to the center to allow you to fold the sticks together.
-
Use washi tape or craft tape to open the fan and temporary combine both sticks. You can hot glue the sticks together if you prefer to have it stay in that permanent shape.
**WONDERFUL!!! You have created a handheld paper fan for your next hot summer day. What fruit would you create?
