Hi Fam!
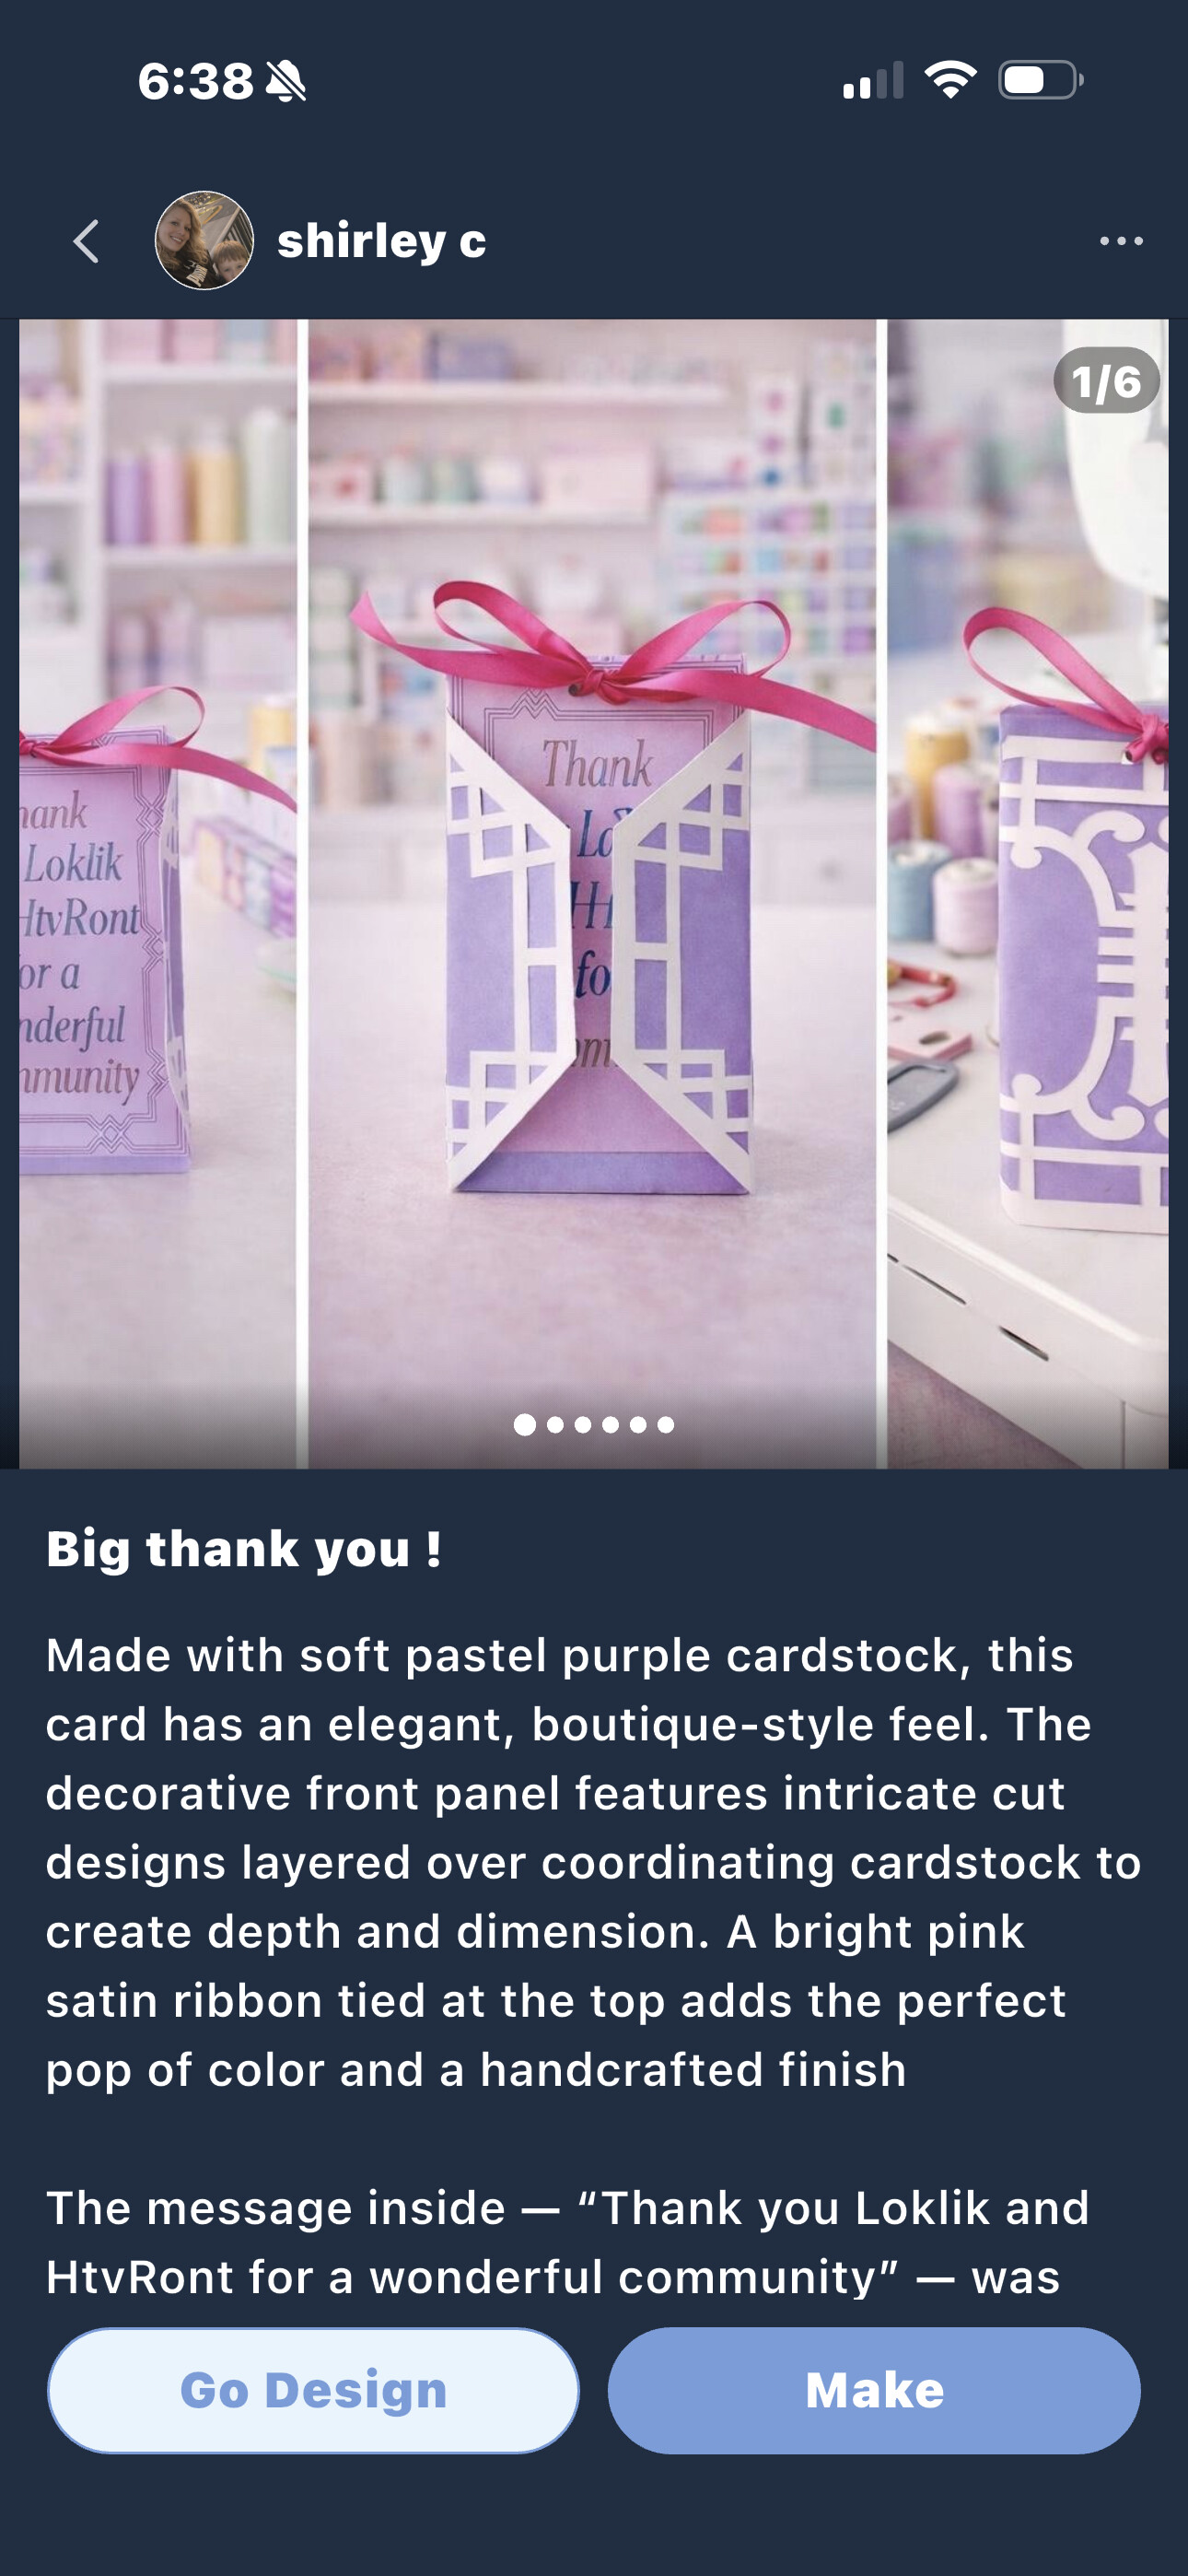
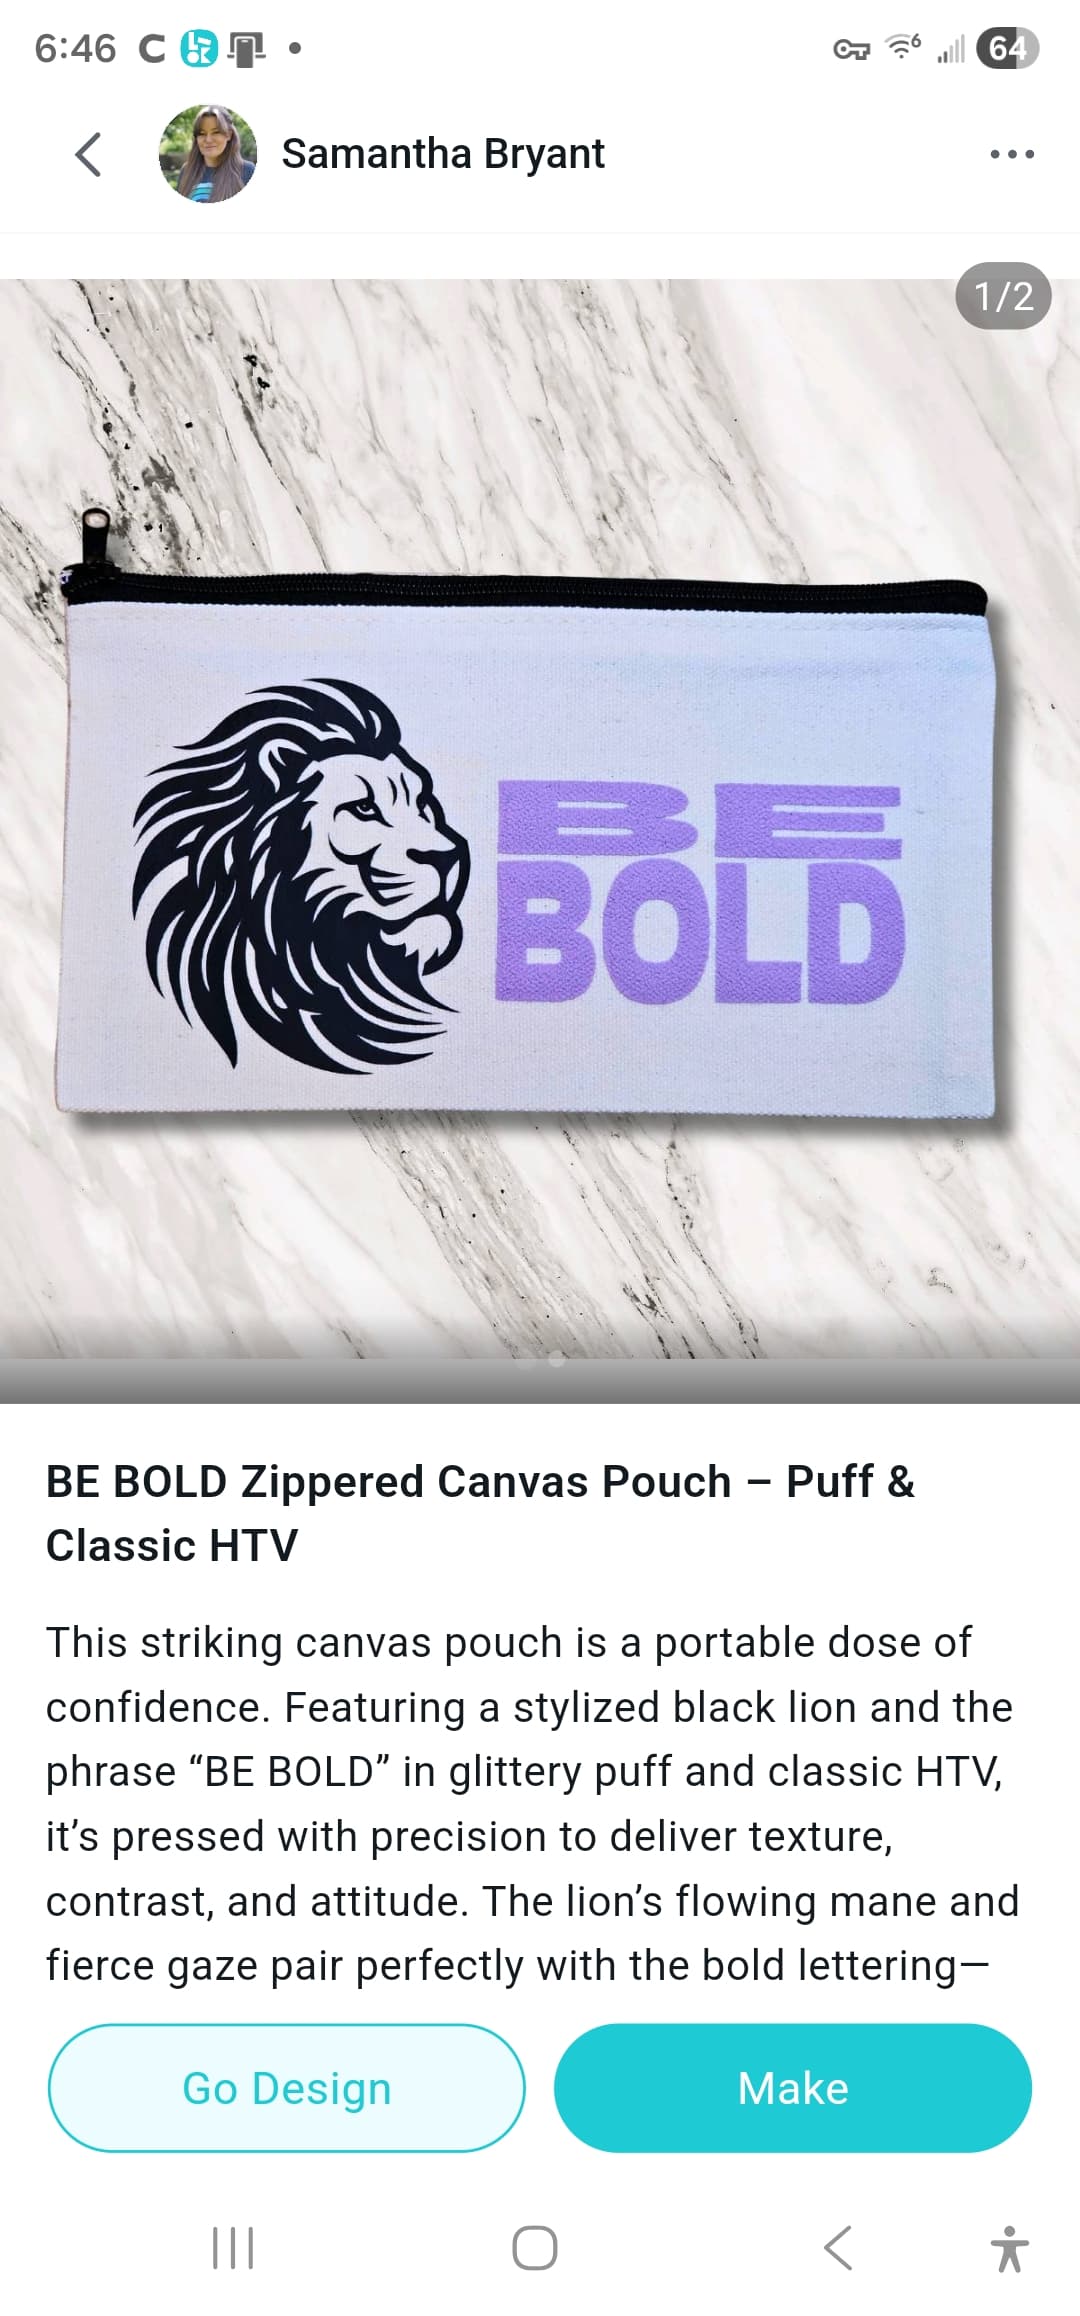
Have you ever finished a DIY project you absolutely loved, shared it in the Project Zone…and then realized the cover photo didn’t quite do it justice?
Maybe the lighting was a little dark, the project was slightly off-center, or the photo just didn’t capture how beautiful the handmade piece looks in real life. It happens to all of us! Sometimes an amazing project only needs a small cover upgrade to truly stand out.
And honestly, when project covers look clearer and more polished, it helps everyone in the community, people can discover inspiration faster, appreciate the details of your work, and get excited to try the project themselves.
So I thought: why not turn this into a fun little community challenge?
We’re inviting everyone to give their projects a quick cover glow-up in the IdeaStudio, so your creations can shine the way they deserve in the Project Zone. ![]()
 What Is the “Cover Glow-Up Challenge”?
This event invites all creators to refresh or optimize the cover images of their existing or upcoming projects.
Why are we doing this?
Because a good cover image doesn’t just help the community—it also helps you:
-
 Showcase your work better – Your handmade piece becomes the true star.
 -
 Get more visibility – Clear, attractive covers catch attention faster.
 -
 Inspire more makers – Your project becomes easier for others to discover and learn from.
 -
 Build your creator portfolio – Your projects look more professional and polished.
Think of it as giving your projects a mini photoshoot makeover!
And of course… we’ve prepared some points rewards and a special lucky prize to celebrate everyone who joins.
 Cover Image Tips (Simple But Powerful)
To help your projects look their best in the Project Zone, here are a few quick guidelines:
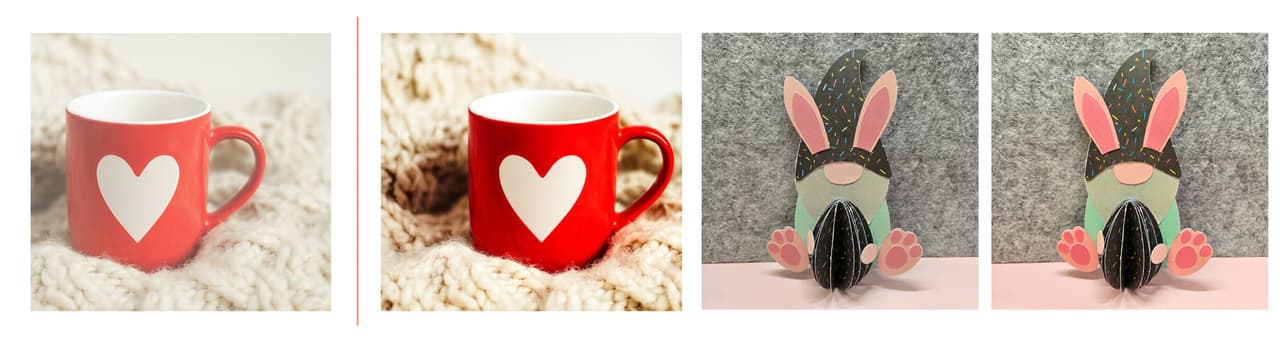
![]() Recommended ratio: 1:1 (Square) Square images display best in the Project Zone layout.
Recommended ratio: 1:1 (Square) Square images display best in the Project Zone layout.
![]() Keep the handmade project centered The finished DIY piece should be placed in the middle of the frame.
Keep the handmade project centered The finished DIY piece should be placed in the middle of the frame.
![]() Leave some breathing space Avoid cropping too tightly—leave some blank space around the project so it looks clean and balanced.
Leave some breathing space Avoid cropping too tightly—leave some blank space around the project so it looks clean and balanced.
![]() Use soft lighting and natural colors Make sure the photo is:
Use soft lighting and natural colors Make sure the photo is:
-
Bright enough
-
Clear and sharp
-
With soft, natural lighting
![]() Make the project the main character The handmade piece should be clearly visible and easy to recognize.
Make the project the main character The handmade piece should be clearly visible and easy to recognize.
![]() In short: Centered project + clean background + good lighting = perfect cover.
In short: Centered project + clean background + good lighting = perfect cover.
For more details, see here:
① 📸 Quick Tip for Better Project Covers!
② Project Sharing |📸How do I create a quality photo of my project?
 Two Ways to Participate
Choose whichever is easier for you!
Option 1 — DIY Cover Upgrade
-
Edit or retake your project cover image following the tips above.
-
Update and republish the project with the improved cover.(Just update it in the software)

Option 2 — Let Us Help!
If you’re unsure how to adjust your cover:
-
Send your cover image to @elena (community admin)
-
Our team will help optimize the cover for you
-
We’ll send the polished version back
-
You can upload it as your project cover
We’re happy to help your work look its best! ![]()
How to Earn Rewards
After updating your project cover:
-
Post the project link or screenshot in the comments of this post
-
For every improved project cover you submit:
![]() 10 cheers per project
10 cheers per project
The more projects you improve, the more cheers you earn!
Example:
-
Fix 1 project → 10 cheers
-
Fix 3 projects → 30 cheers
-
Fix 5 projects → 50 cheers
There’s no limit, upgrade as many covers as you like.
 Special Lucky Draw
To thank everyone for helping improve the Project Zone:
![]() We will randomly select 1 lucky participant from all valid entries.
We will randomly select 1 lucky participant from all valid entries.
Prize: ![]() $50 Gift Card
$50 Gift Card
Your participation helps make the community better for everyone—and we’d love to reward that spirit.
 Ready for a Cover Glow-Up?
Take a look at your past projects. Maybe one of them just needs a better cover photo to truly shine.
Upgrade it, share it in the comments, and start collecting your points!
We can’t wait to see your refreshed projects lighting up the HTVRONT | LOKLiK Project Zone. ![]()