Project Overview:
With February here, let’s prep for a month full of love filled projects as Valentine’s is almost near. We are kicking off the Valentine inspired tutorials with this lovely Hello February cake topper. Not only is this cake topper an eye-catching project, but the entire project was also created using elements from the LOKLiK IdeaStudio library and the project SVG is available on the library for you to make your very own.


Material:
- Cutting machine: LOKLiK iCraft
- Sticky mat: LOKLiK standard grip
- Cardstock (65lb or equivalent), I used the Michael’s Recollection red, white, and 2 shades of pink.
- Permanent vinyl: black vinyl
- Template: from LOKLiK Library
*frame heart about
*free white circle and black lace SVG for t-shirt
*Hello February Valentine’s Day
*Hello Valentine
*Pink Arrow with Red Hearts - Craft glue and hot glue
- Craft foamies/cubbies
- Cake topper stick (I used a paper straw to match the color/theme)
Design and Cutting Process:
- Using the LOKLik IdeaStudio Library, search for the 5 templates and select the + to add the template to the canvas.


Now it is time to take these simple bases and transform them into a layered cake topper. For this tutorial I will be using pinks, red, white, and black but you are able to use any color combination you would like.
Creating the Cake Topper Components:
- Start by ungrouping the following design to allow us to use the portion needed for the topper.
- Right click on the design and select ungroup.

- By ungrouping the design, you will have the following components. We will only be using the scalloped circle and the middle circle. The thin rim will not be used and it can be deleted.

- Now using the frame heart design, we will be adding the heart border to the medium circle.
- Place the frame heart design over the medium circle.
- Using the Align feature, we are going to make sure the frame is centered to the circle. Select “Center Horizontally” and “Center Vertically”.

-
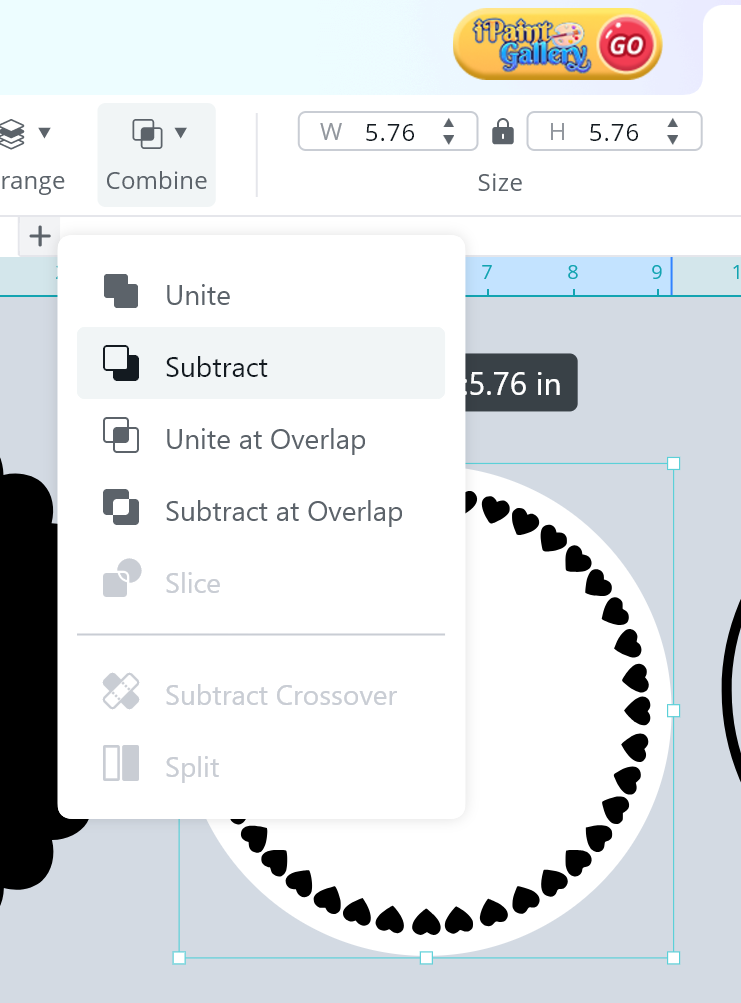
Using the Combine feature, we are going to make the hearts part of the circle. This helps us crafter add dimension and small designs without having to glue dozens of mini hearts individually.
Crafters Note: As an experienced crafter, your eyes will thank you for this step -
Select the “Subtract” option and you will have a circle with a heart frame cut out.
-
Let’s continue by adding layers to the text of the cake topper.
-
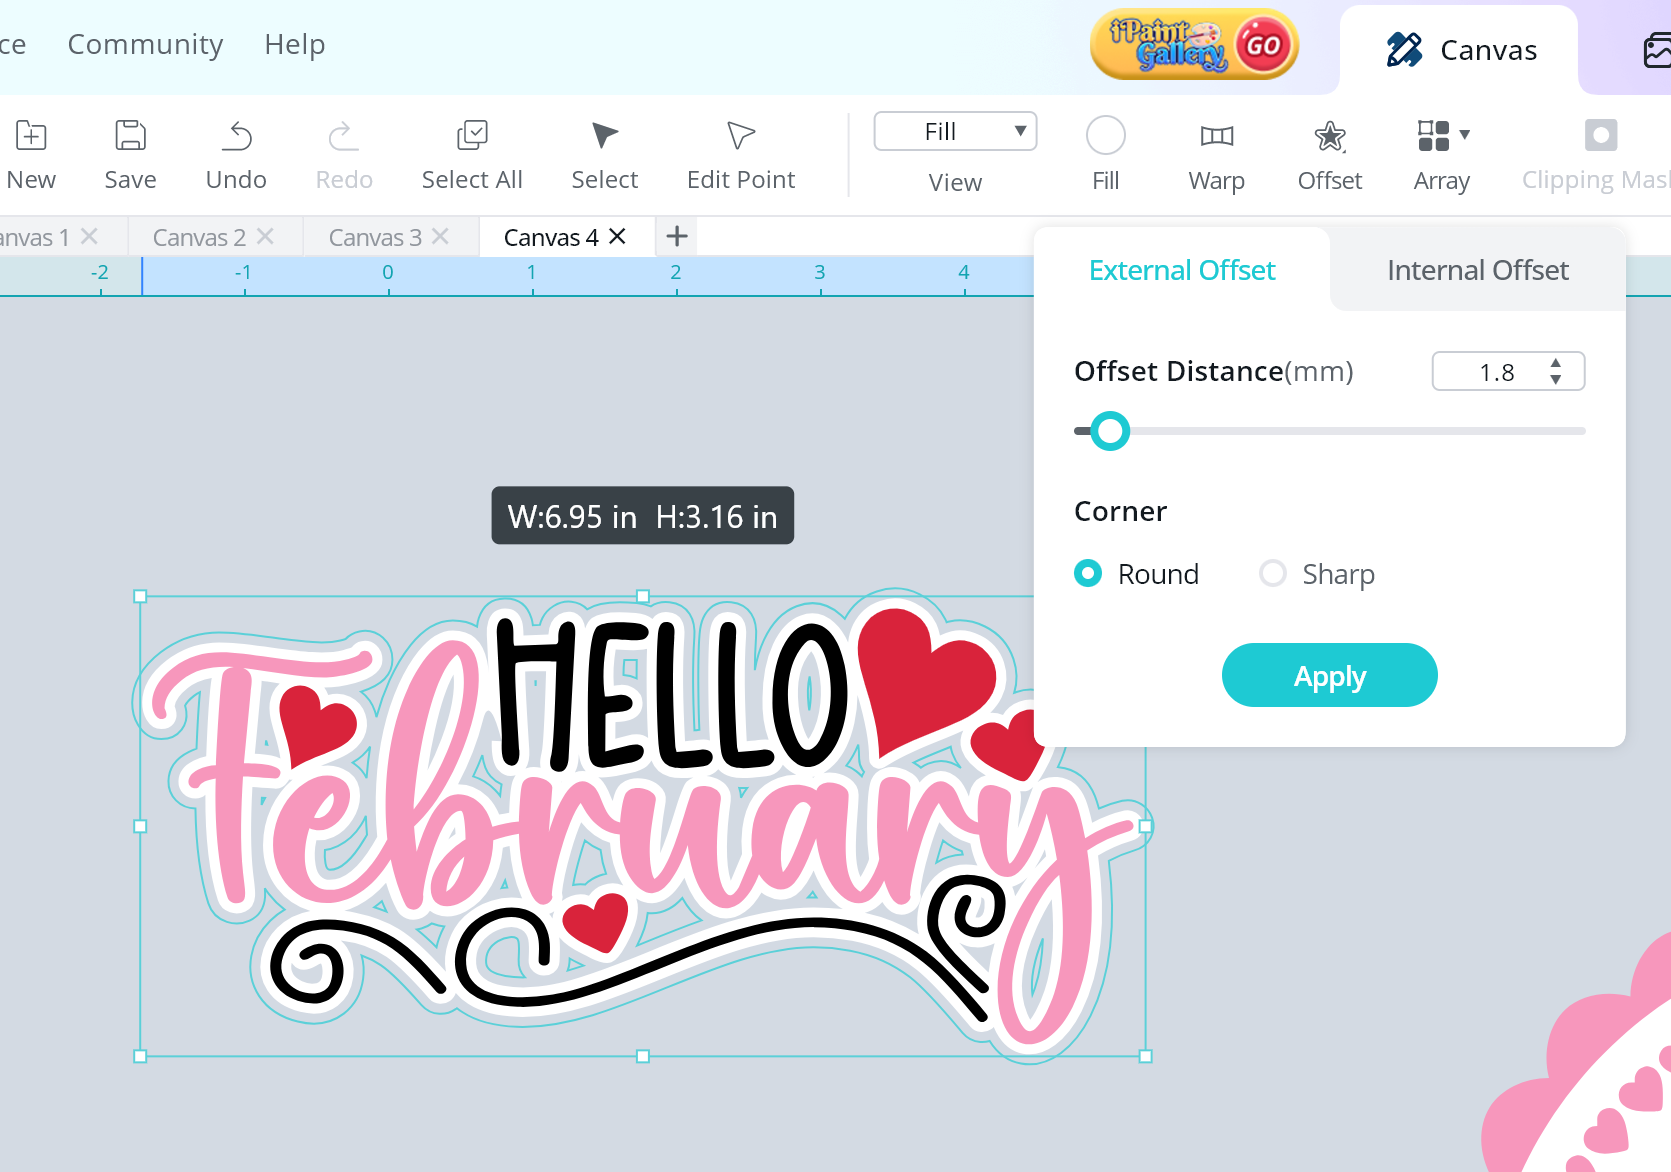
Using the Offset Feature, select an “external offset” and enter 1.8mm and a round corner for the offset. Click on Apply.
-
This will be the white offset around the entire lettering design.


- Repeat the step again to create another offset. Using the Offset Feature, select an “external offset” and enter 1.8mm and a round corner for the offset. Click on Apply.

- We will continue to add dimension and layering to the cake topper by adding offsets to the arrow design.
- Using the Offset Feature, select an “external offset” and enter 1.8mm and a round corner for the offset. Click on Apply.

-
Repeat the step again to create another offset. Using the Offset Feature, select an “external offset” and enter 1.8mm and a round corner for the offset. Click on Apply.
-
I wanted to add more layers to the heart portion and created an internal offset. Using the Offset Feature, select an “internal offset” and enter 1.0mm and a round corner for the offset. Click on Apply.
-
Now to add the final small touches to the cake topper, using another design from IdeaStudio.
-
This design includes text we will not be using, right click the design and select “Ungroup”
-
Then select the heart and using the Combine feature, select “split”.
-
You will have a double heart design remaining. Resize the double heart design to .69in wide.
-
Now is the best part of designing a cake topper, placing the components, rotating them as you prefer to create the perfect design.


IMPORTANT TIP: When creating layered cake toppers, make an offset of the entire cake topper (once you place all of its pieces where they belong). This will help guide you on where to place the items when you assemble the cake topper.


Great job! You have designed a layered cake topper using free designs!
- Send all of your layers to make, below are the cut settings that have worked well with my iCraft.
** Material Type: Cardstock Paper (180g/97lb)
**Force: 7.7
**Speed: 5
**Passes: 2
** Material Type: Matte Metallic Permanent Vinyl
**Force: 6.4
**Speed: 3
**Passes: 2
Assembling the Cake Topper
- Now that we have all of the cake topper component, let’s assemble the cake topper.
CRAFTER TIP: To help keep your project organized, I use a plastic bin to keep all of the cutouts together.
- I start the assembly process by placing the cake topper components how they will be glued/placed. In other words, I am doing a “dry fit” on the cake topper before gluing. This helps be more efficient and ensure I don’t have any pieces missing while assembling.

- Begin by placing the white heart circle on the pink scalloped circle. I used craft foam to add dimension.
- Glue the thinner pieces of the arrow component and use craft foam to layer the hearts.
- Use craft foam to assemble the red offset to the black offset.

- Add the lettering to the white offset using craft glue.

- To help with the thin lettering, I cut the “Hello” and little swirls using permanent vinyl. This helps you have clean cuts and easier placing the letter to the offset.
- Use craft foam to add the white layer to the red lettering layer.

- Using the large offset of the entire cake topper and glue your cake topper stick to the center of the base. Make sure you leave enough of the stick on the bottom to insert into the cake. Set the base to the side.
- Add craft foam, I used “taller” craft foam for this step as the straw stick was thick, around the cake topper stick and place the pink circle using the red offset layer as a guide.

- Add the arrow component as well as the lettering component to the topper.

- Finish the topper by gluing the final small double hearts.

WONDERFUL!!! You have made a cake topper full of dimension and layers.
