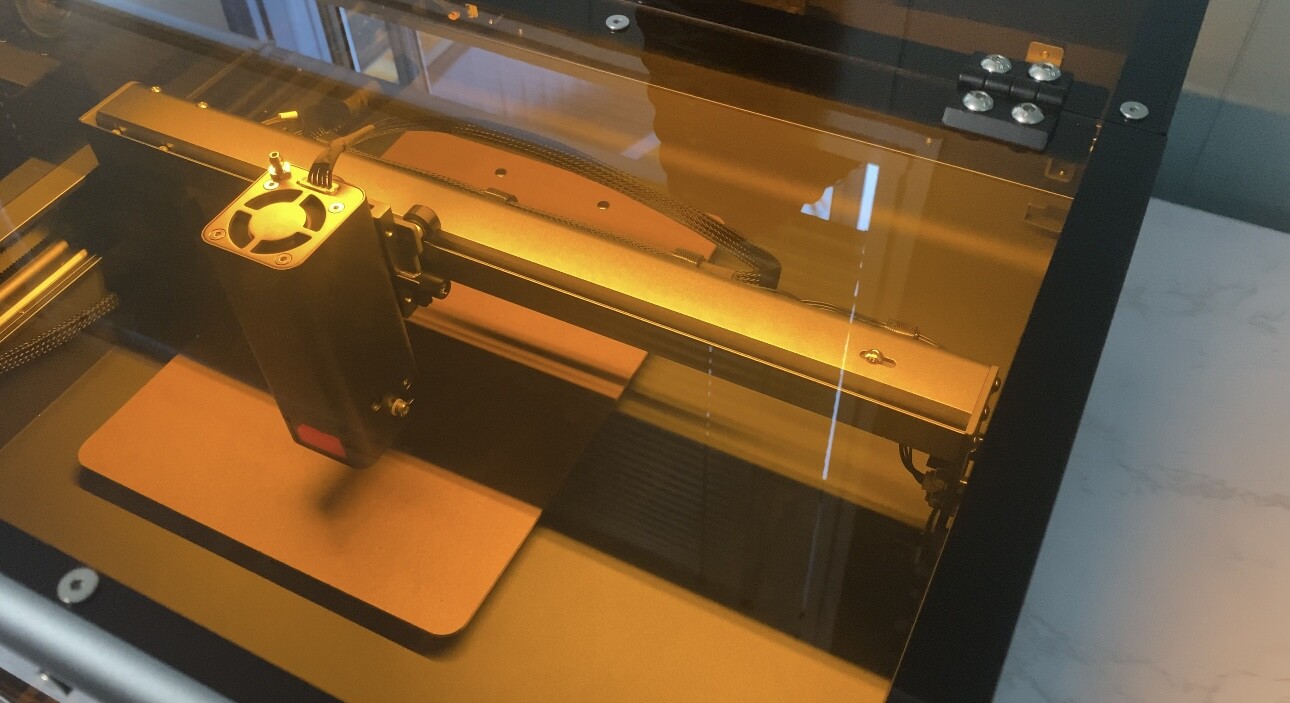
Hello Beautiful People and Fellow Crafters! Now, we are heading to Part 2 which is Engraving & Cutting, Safety & Operation Feel, and my Overall thoughts. The iEngrave is a10W diode laser with 0.02mm precision and speeds up to 30,000mm/min. It cuts and engraves over 300 materials — wood, leather, slate, coated metals, acrylic (non-transparent), and more. So, let’s go ahead and let’s do some tests run, fired up this machine and put this at work! (NOTE: I utilized the mobile LOKLiK IdeaStudio app to command the machine for all my tests).
![]() Engraving & Cutting Performance
Engraving & Cutting Performance
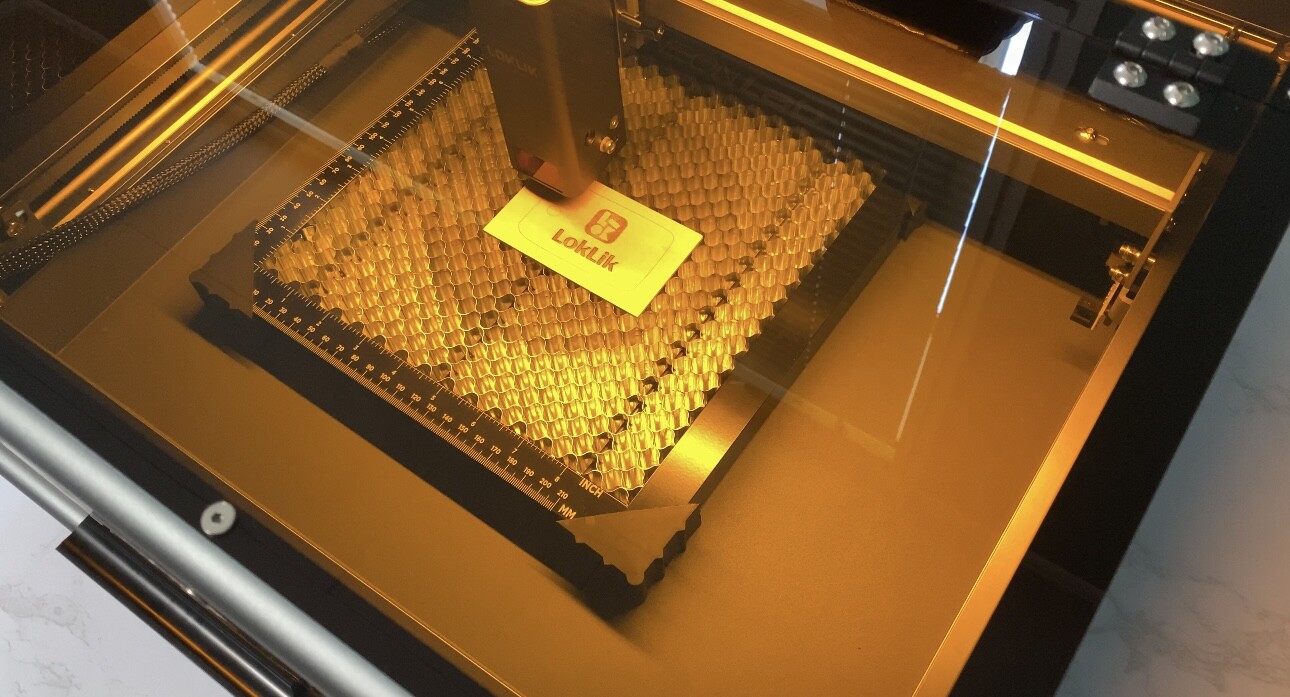
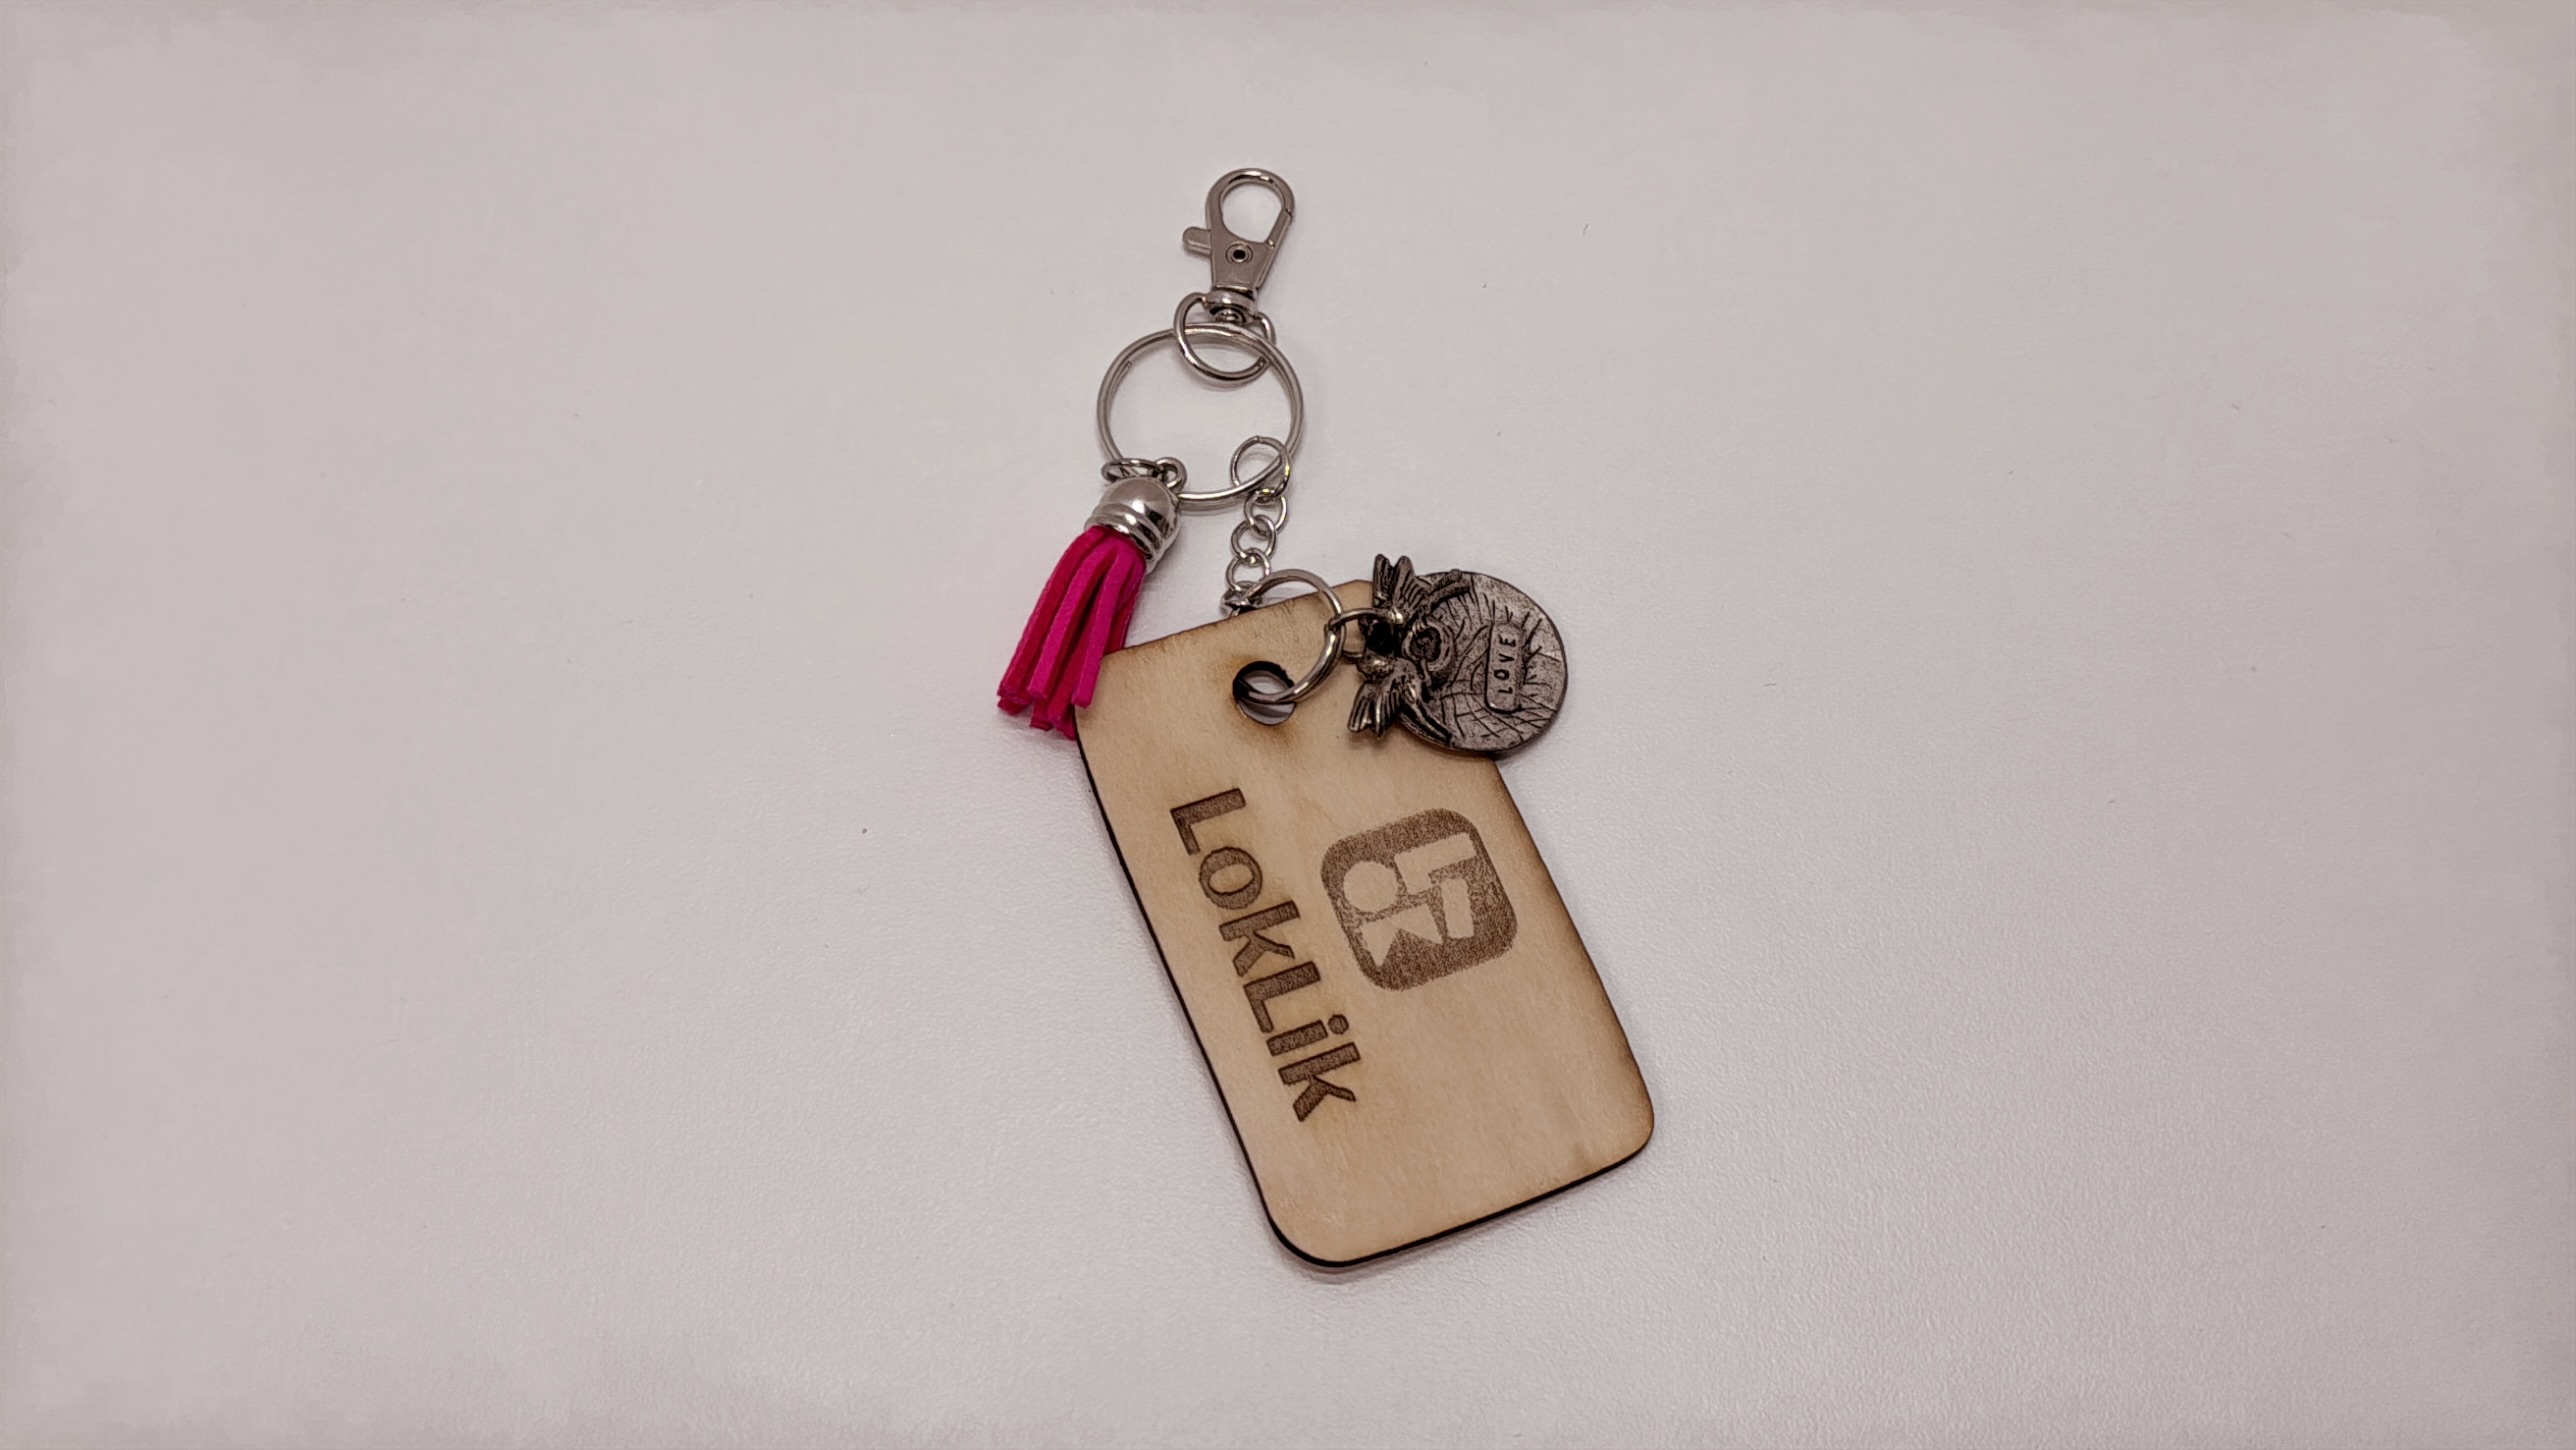
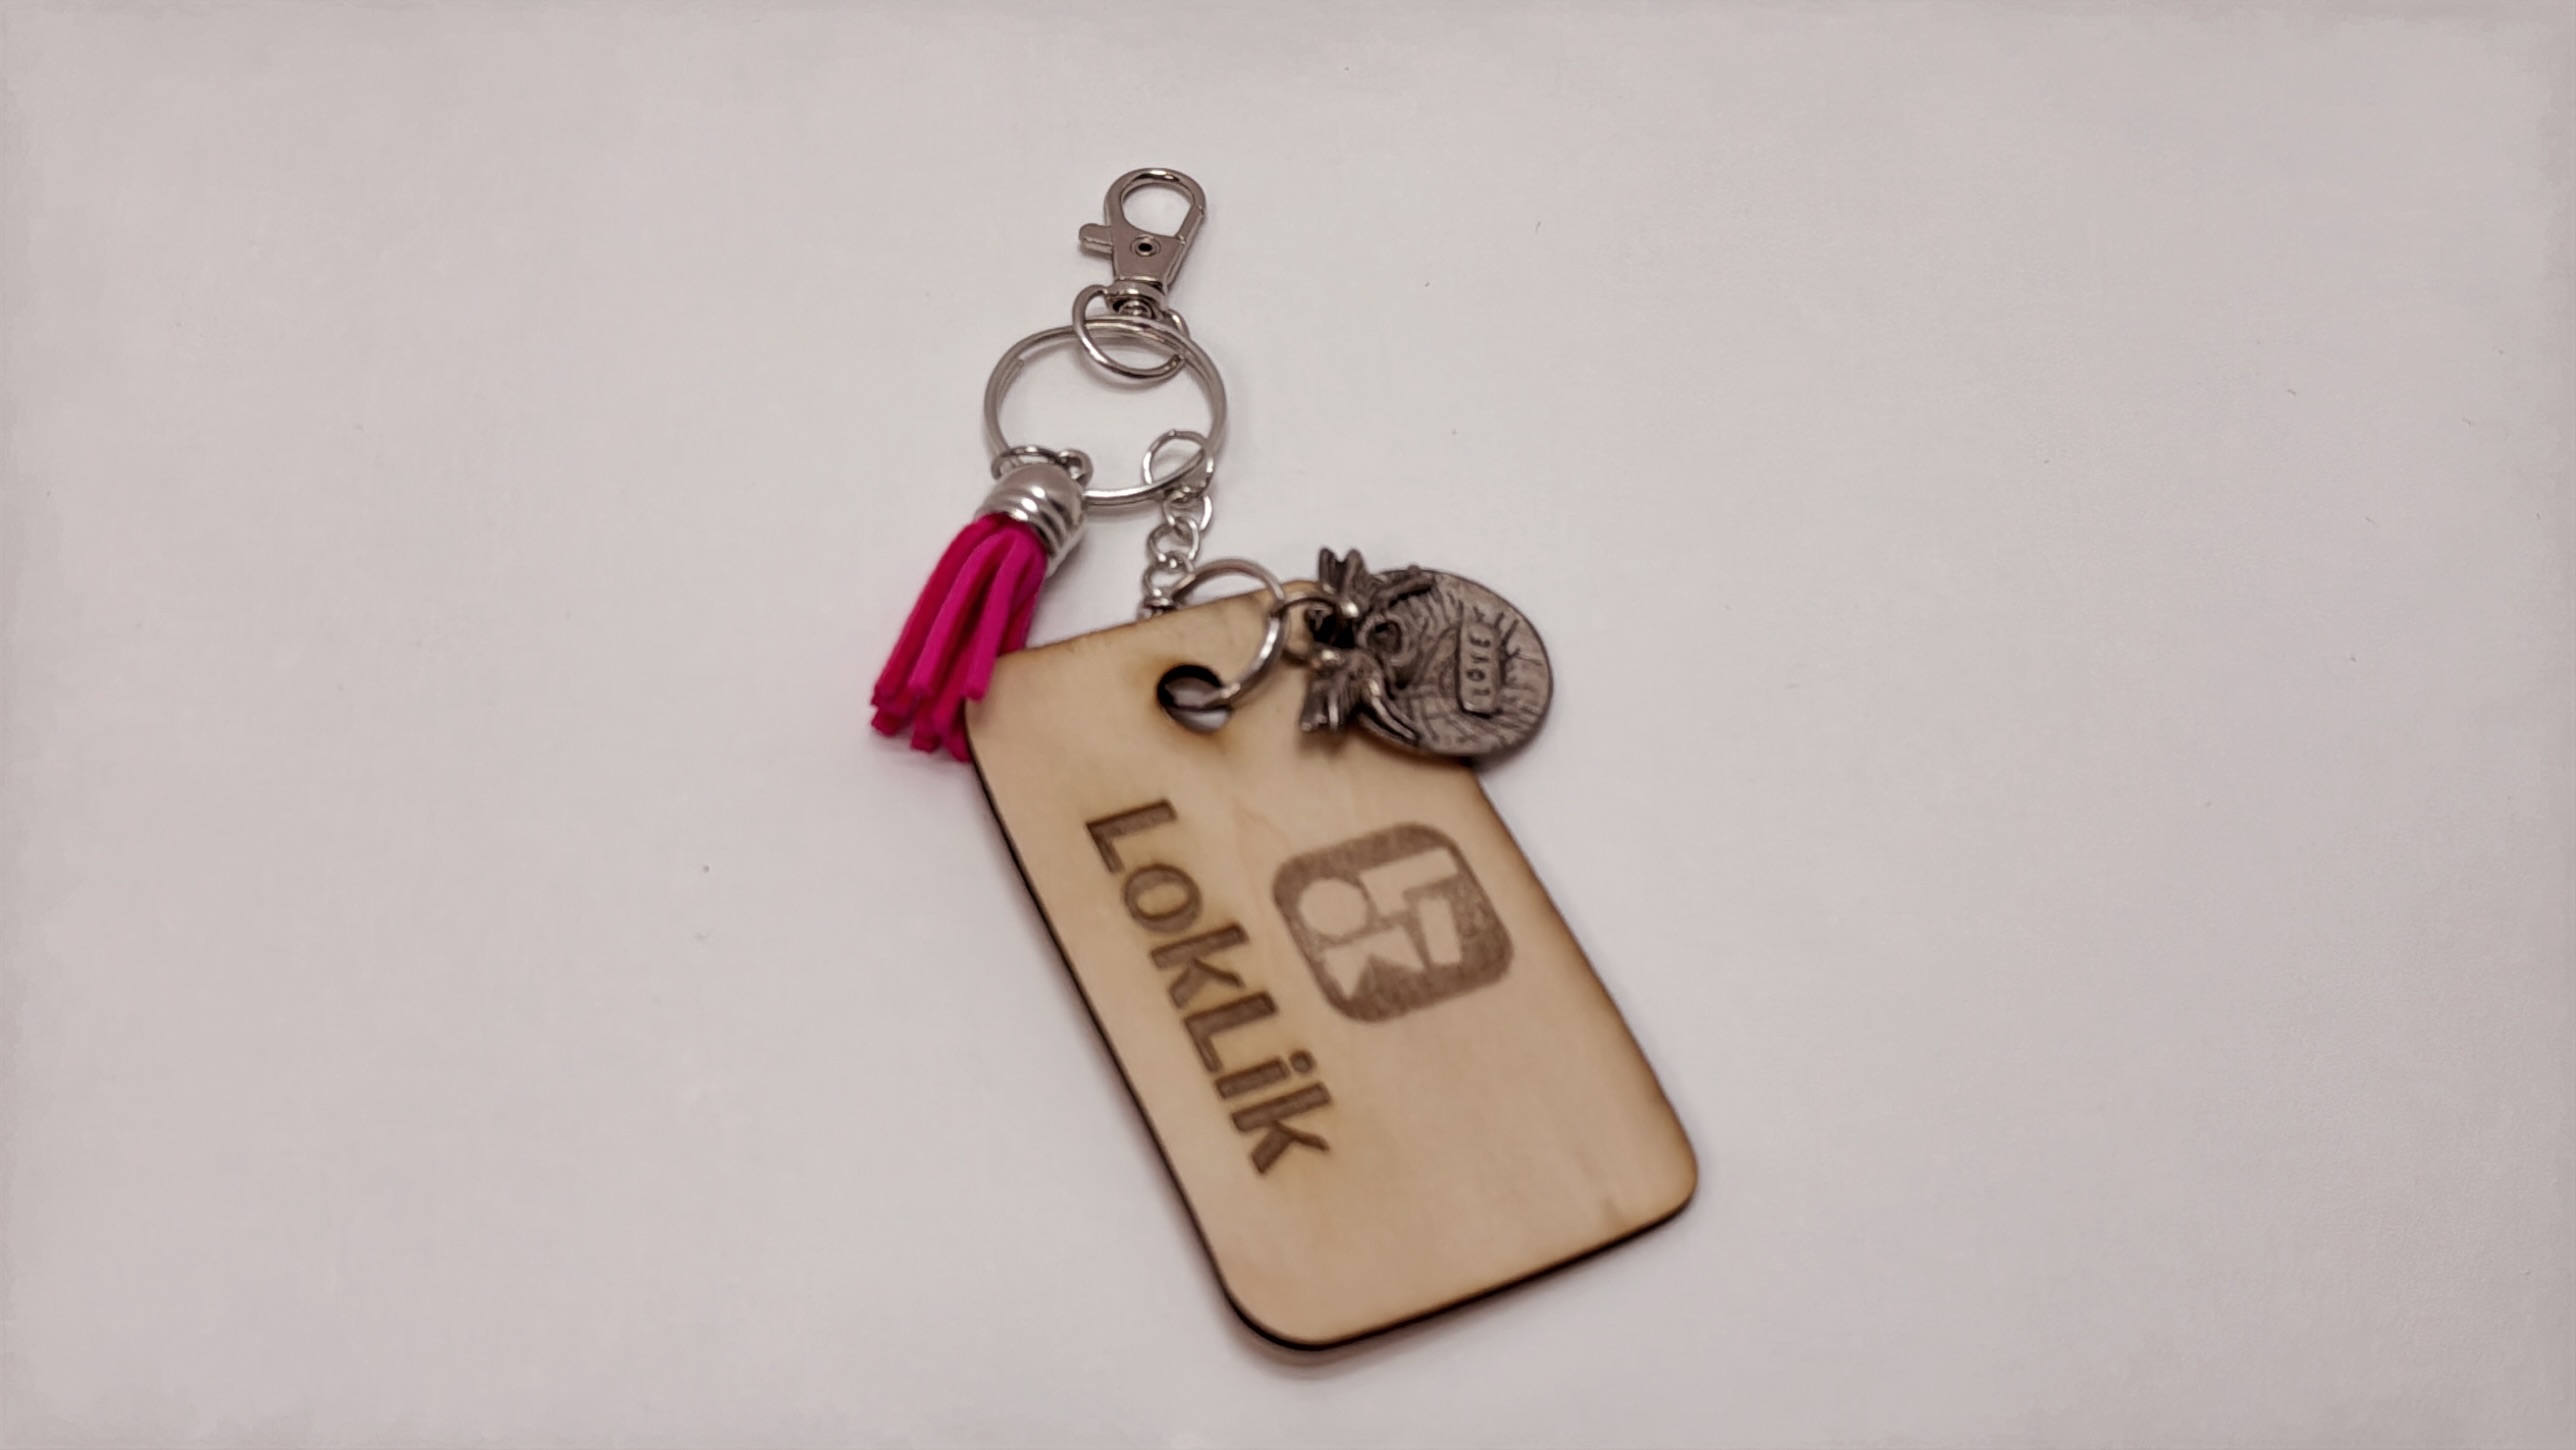
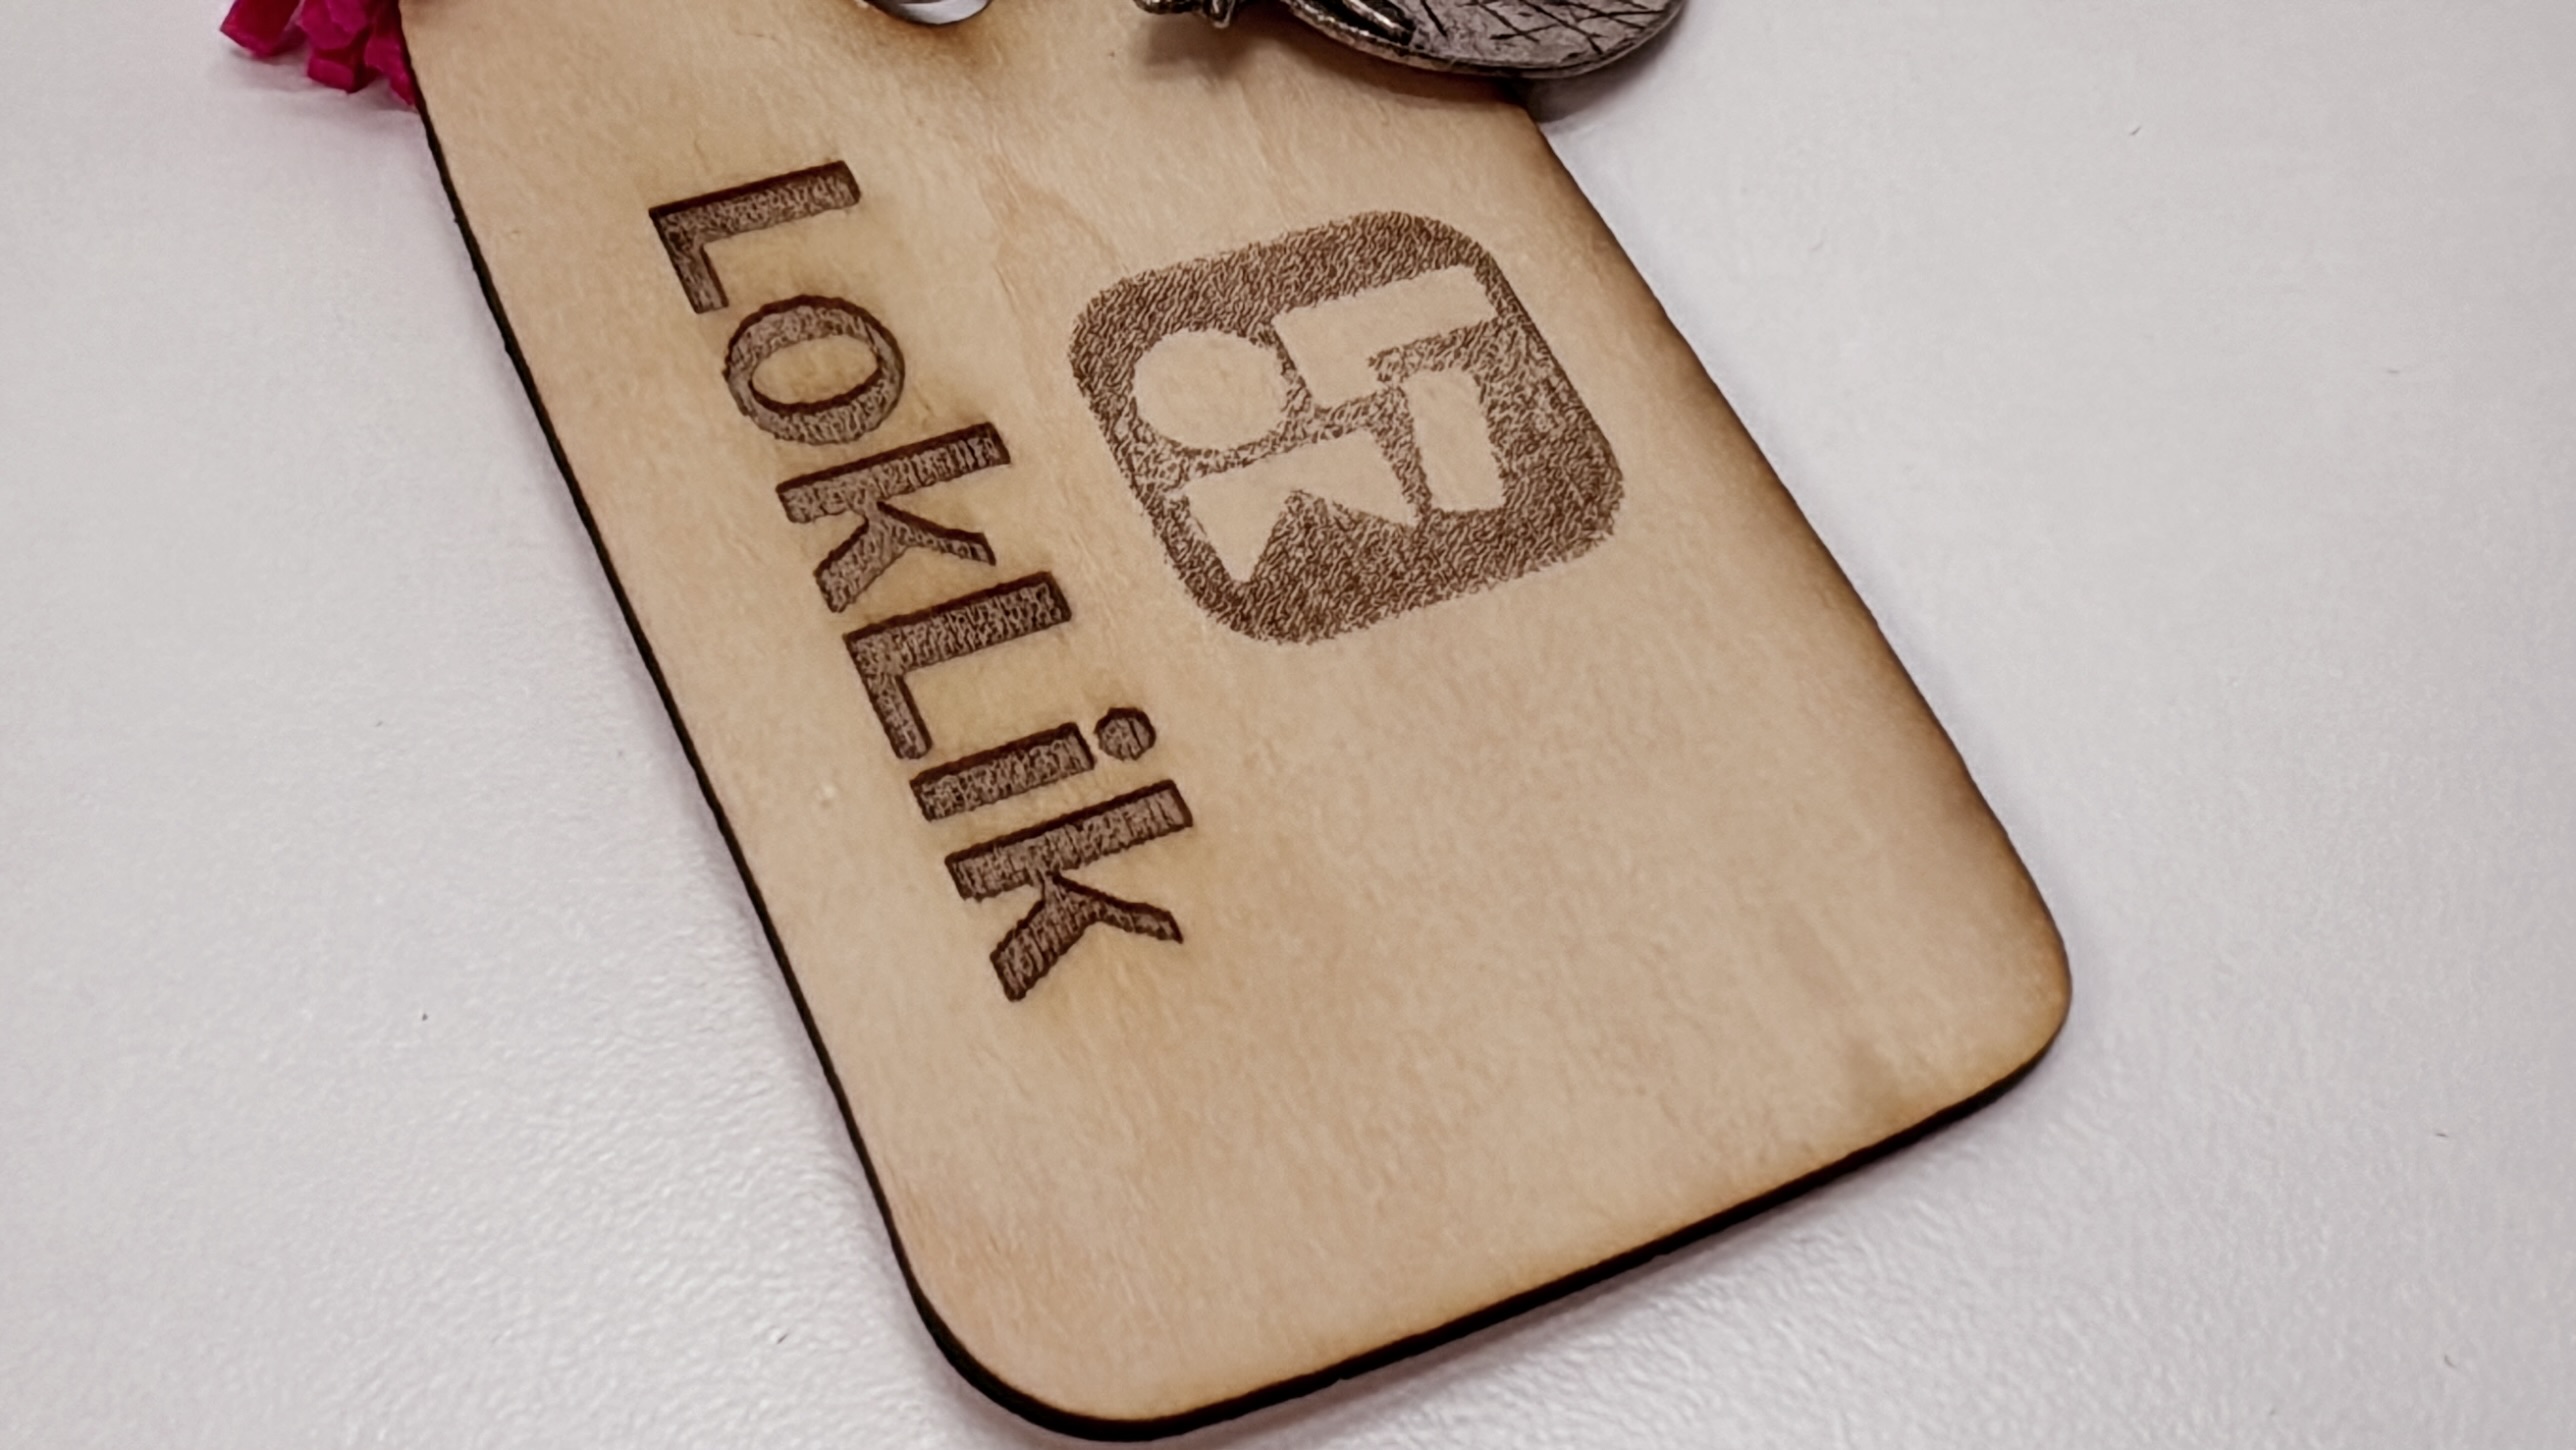
For my first engraving and cutting, I used 3.95" x 2.35" of 2mm bass wood that came with the machine. I downloaded LOKLik logo and add the default Loklik text.
Step 1: Engraving the logo and text. I used a power of 80% and a speed of 7018 mm/min for 1 pass for logo and same power and speed used for LOKLik text with 2 passes. It took 3 minutes & 37 seconds to engrave both logo and text.
TIPS: Always frame your material first before engraving or cutting. In that way, you know where exactly your design is going to cut or engrave. Also, DO NOT forget to manually adjust both laser module height and your laser’s focal pin by lowering it down almost touching the surface of your material as shown below:
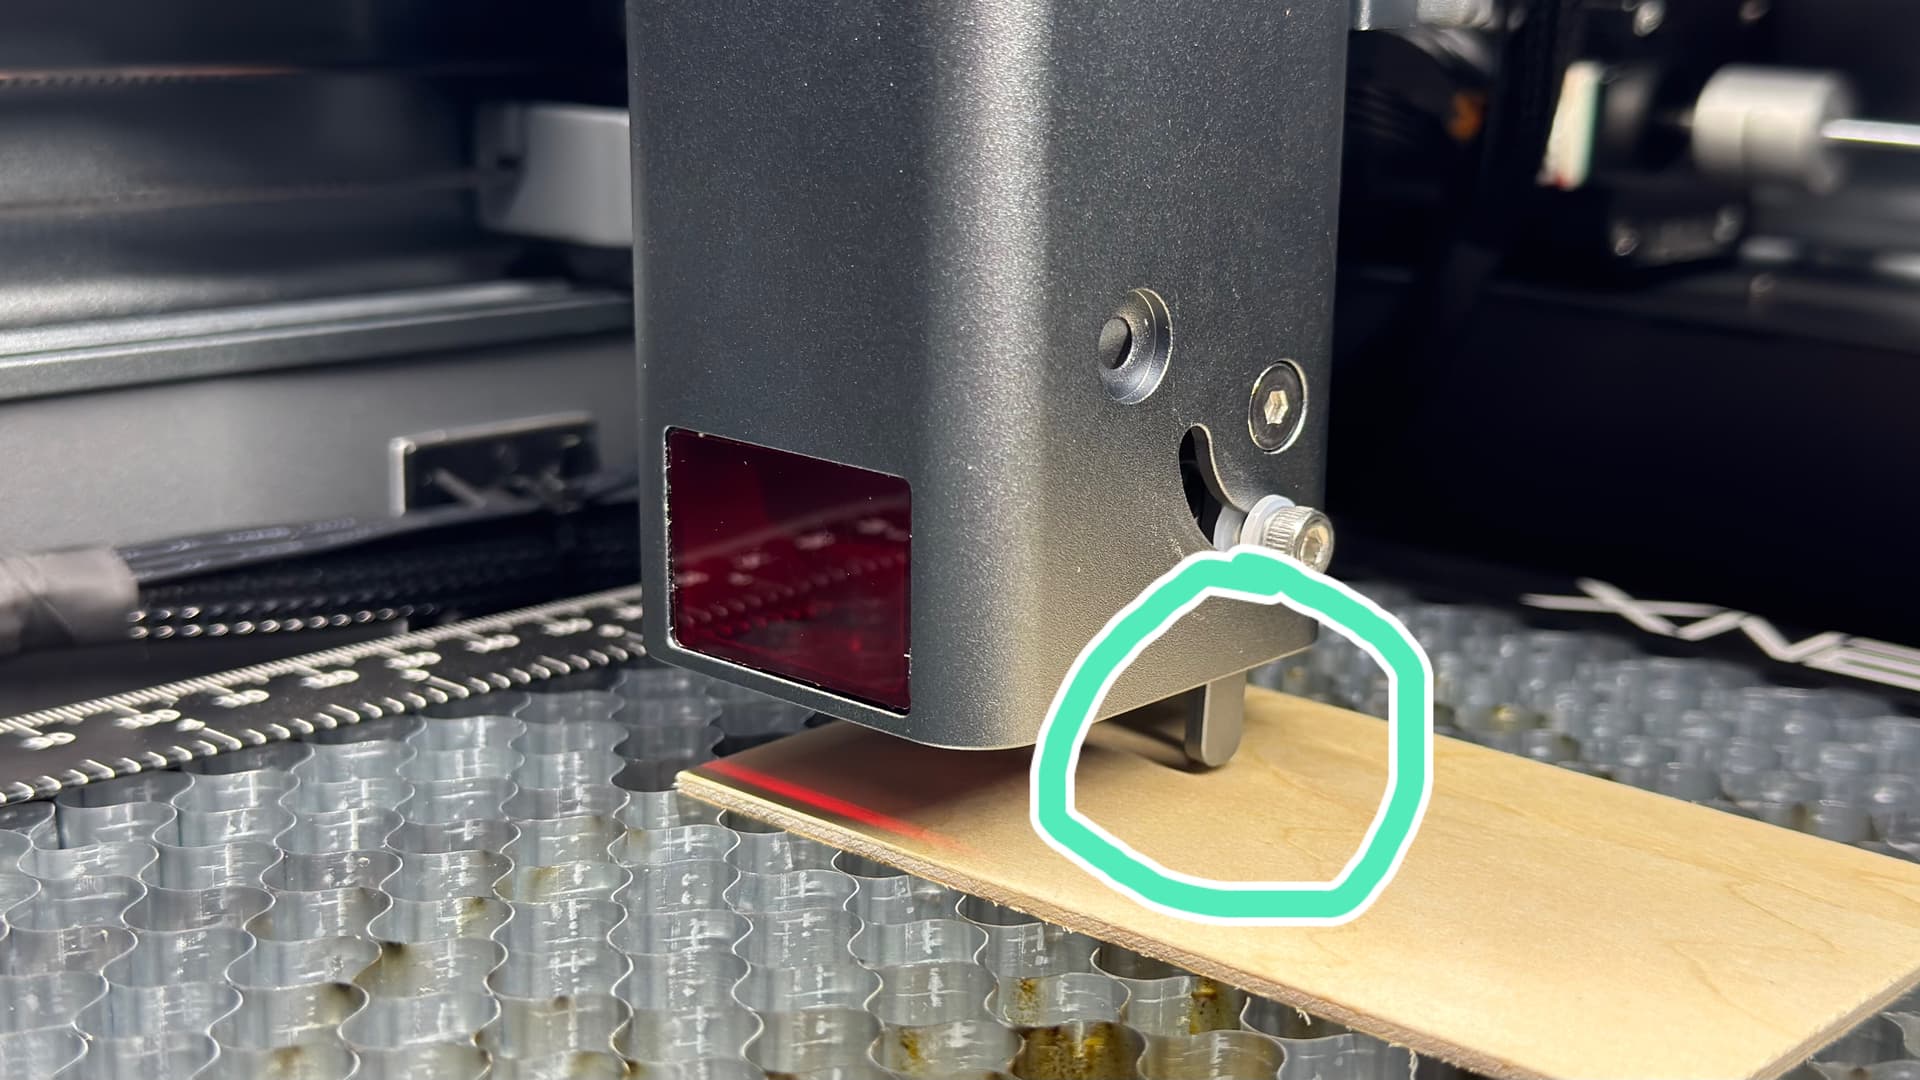
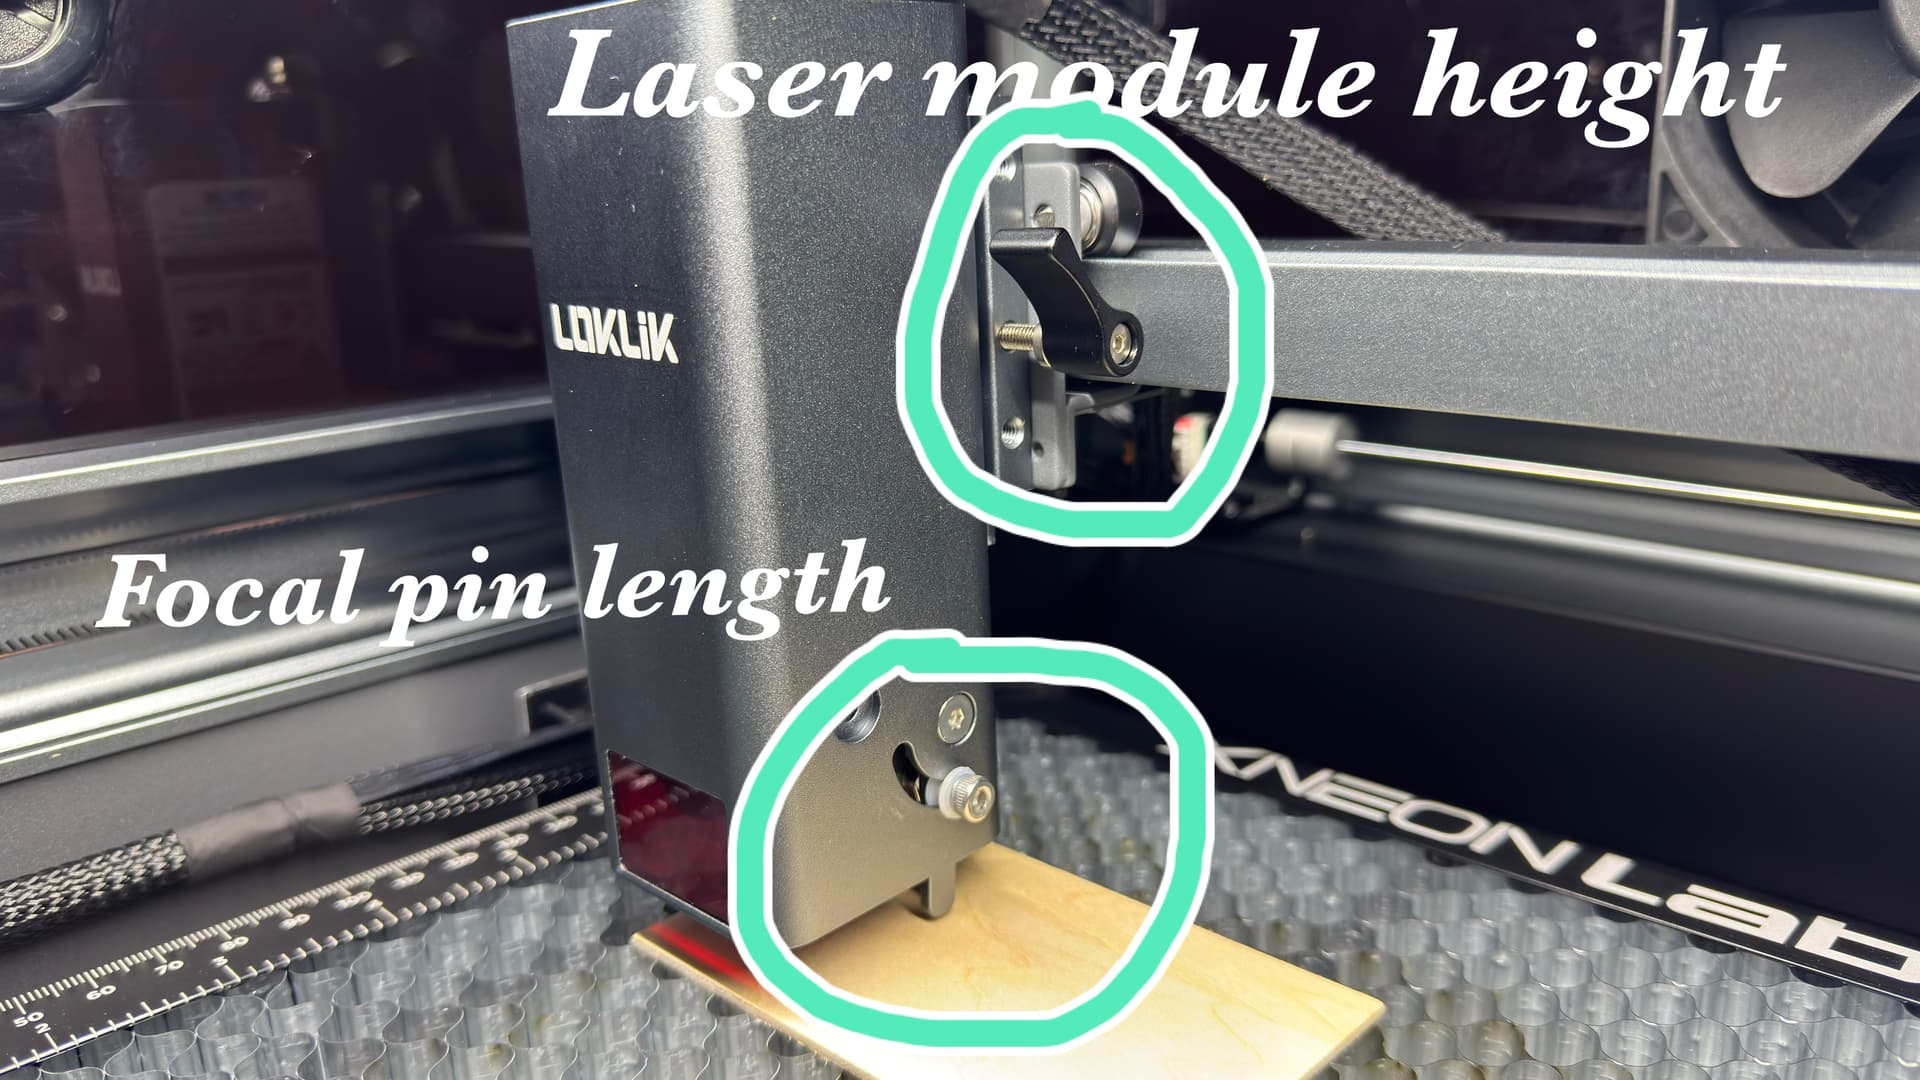
NOTE: DO NOT forget to put back the focal pin before start framing, engraving or cutting.
Step 2: Cutting the wood. I used 100% power, a speed of 300 mm/min with1 pass for only 54 seconds.
NOTE: The iEngrave Cover Machine didn’t come with a honeycomb. I have my own and this is what I used to protect the bottom tray of the machine when cutting materials like wood.
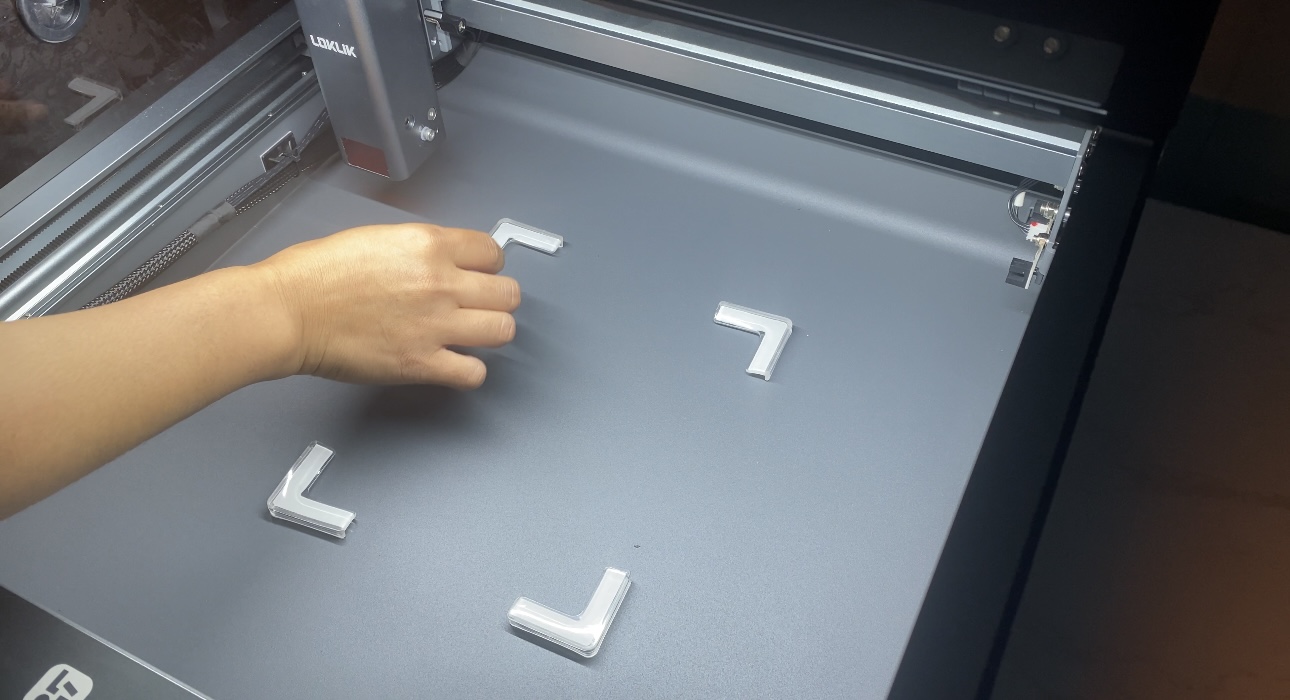
Now, let’s take a look of my final product. I made a LOKLiK keychain by adding some hardware.
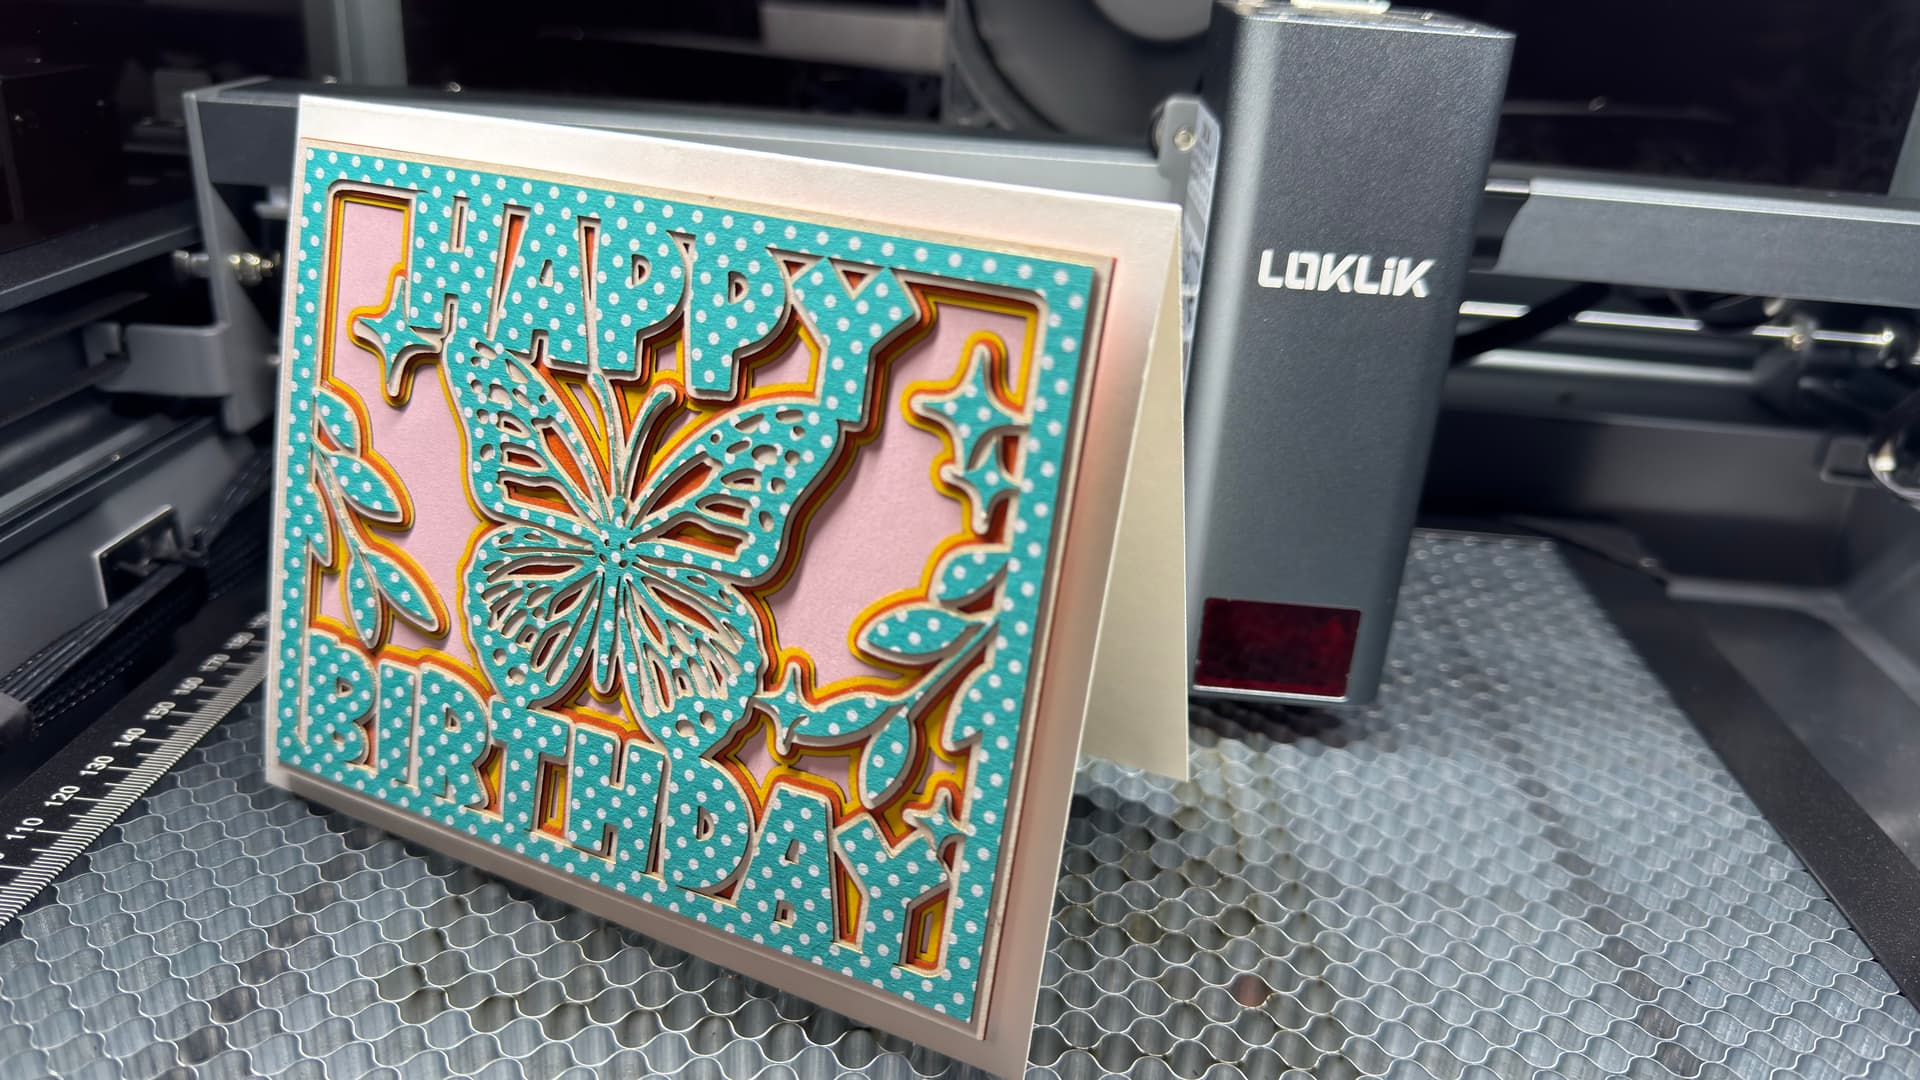
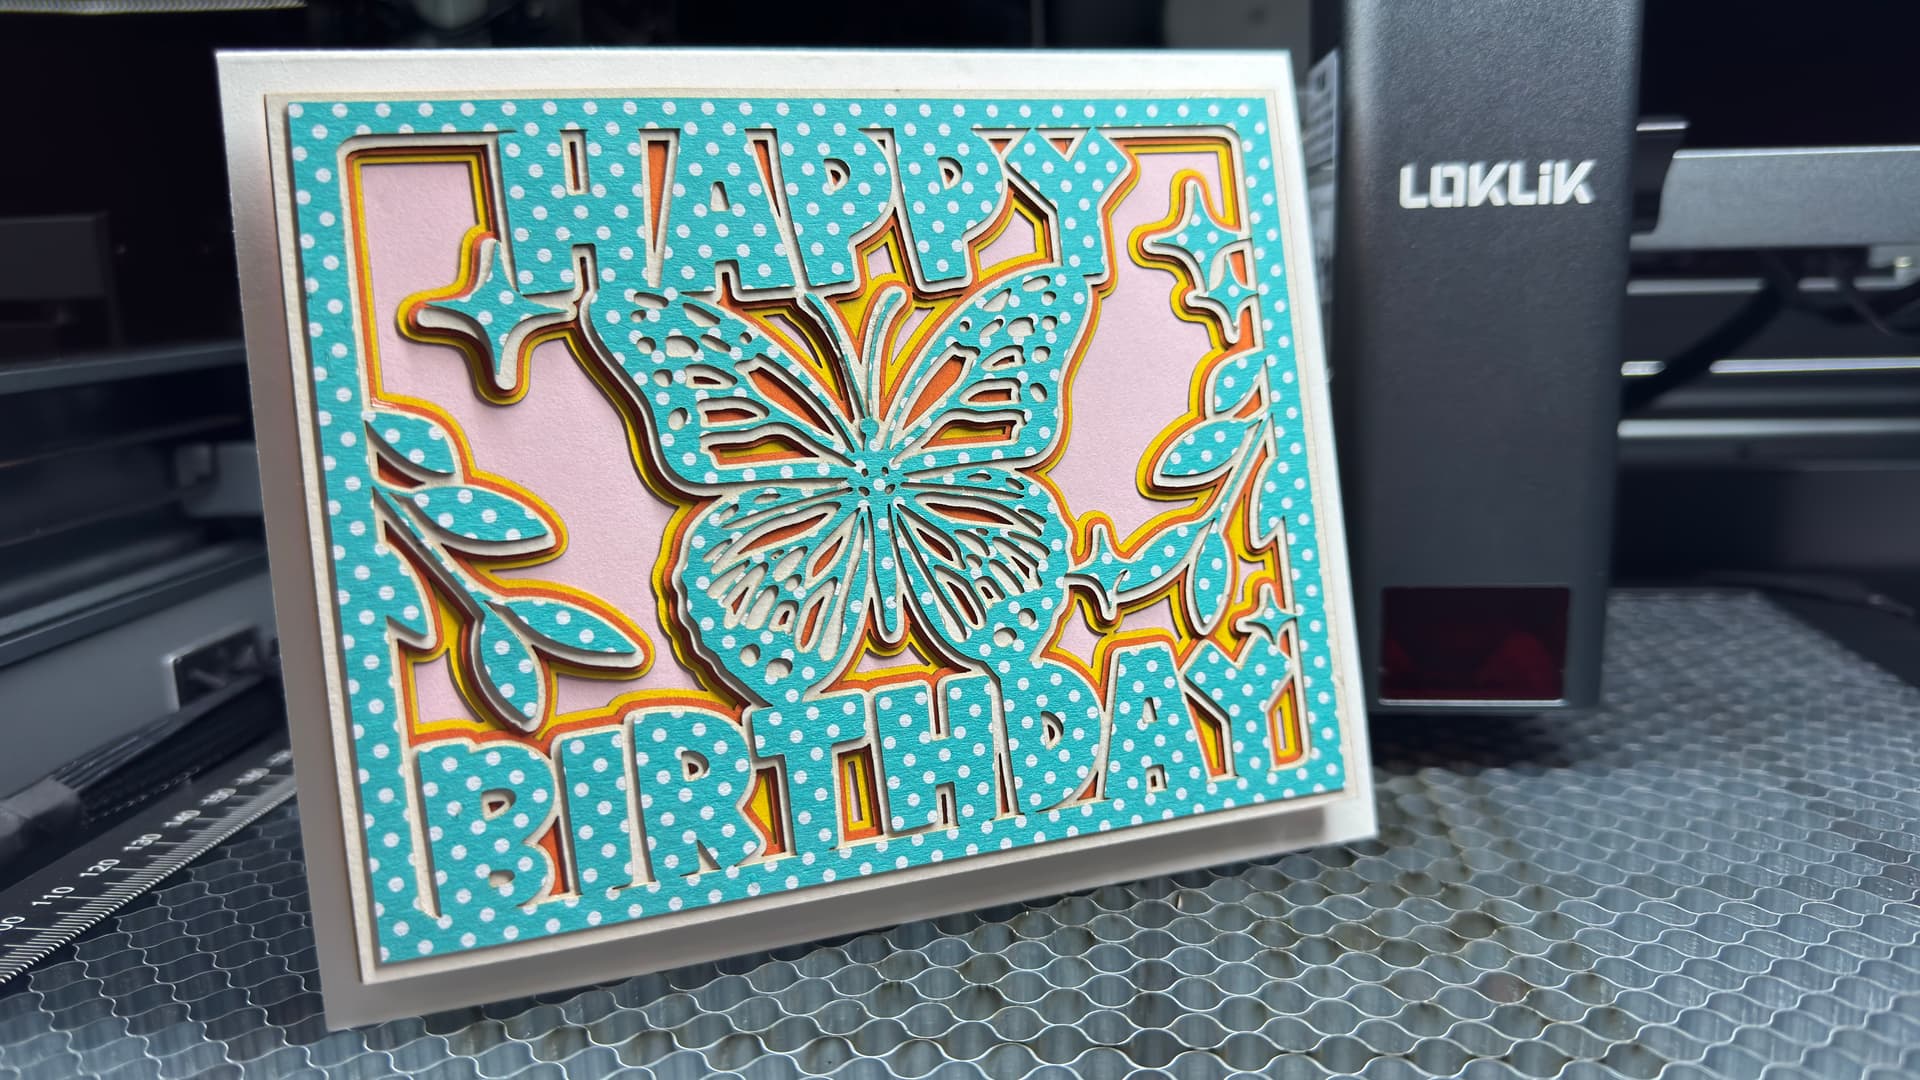
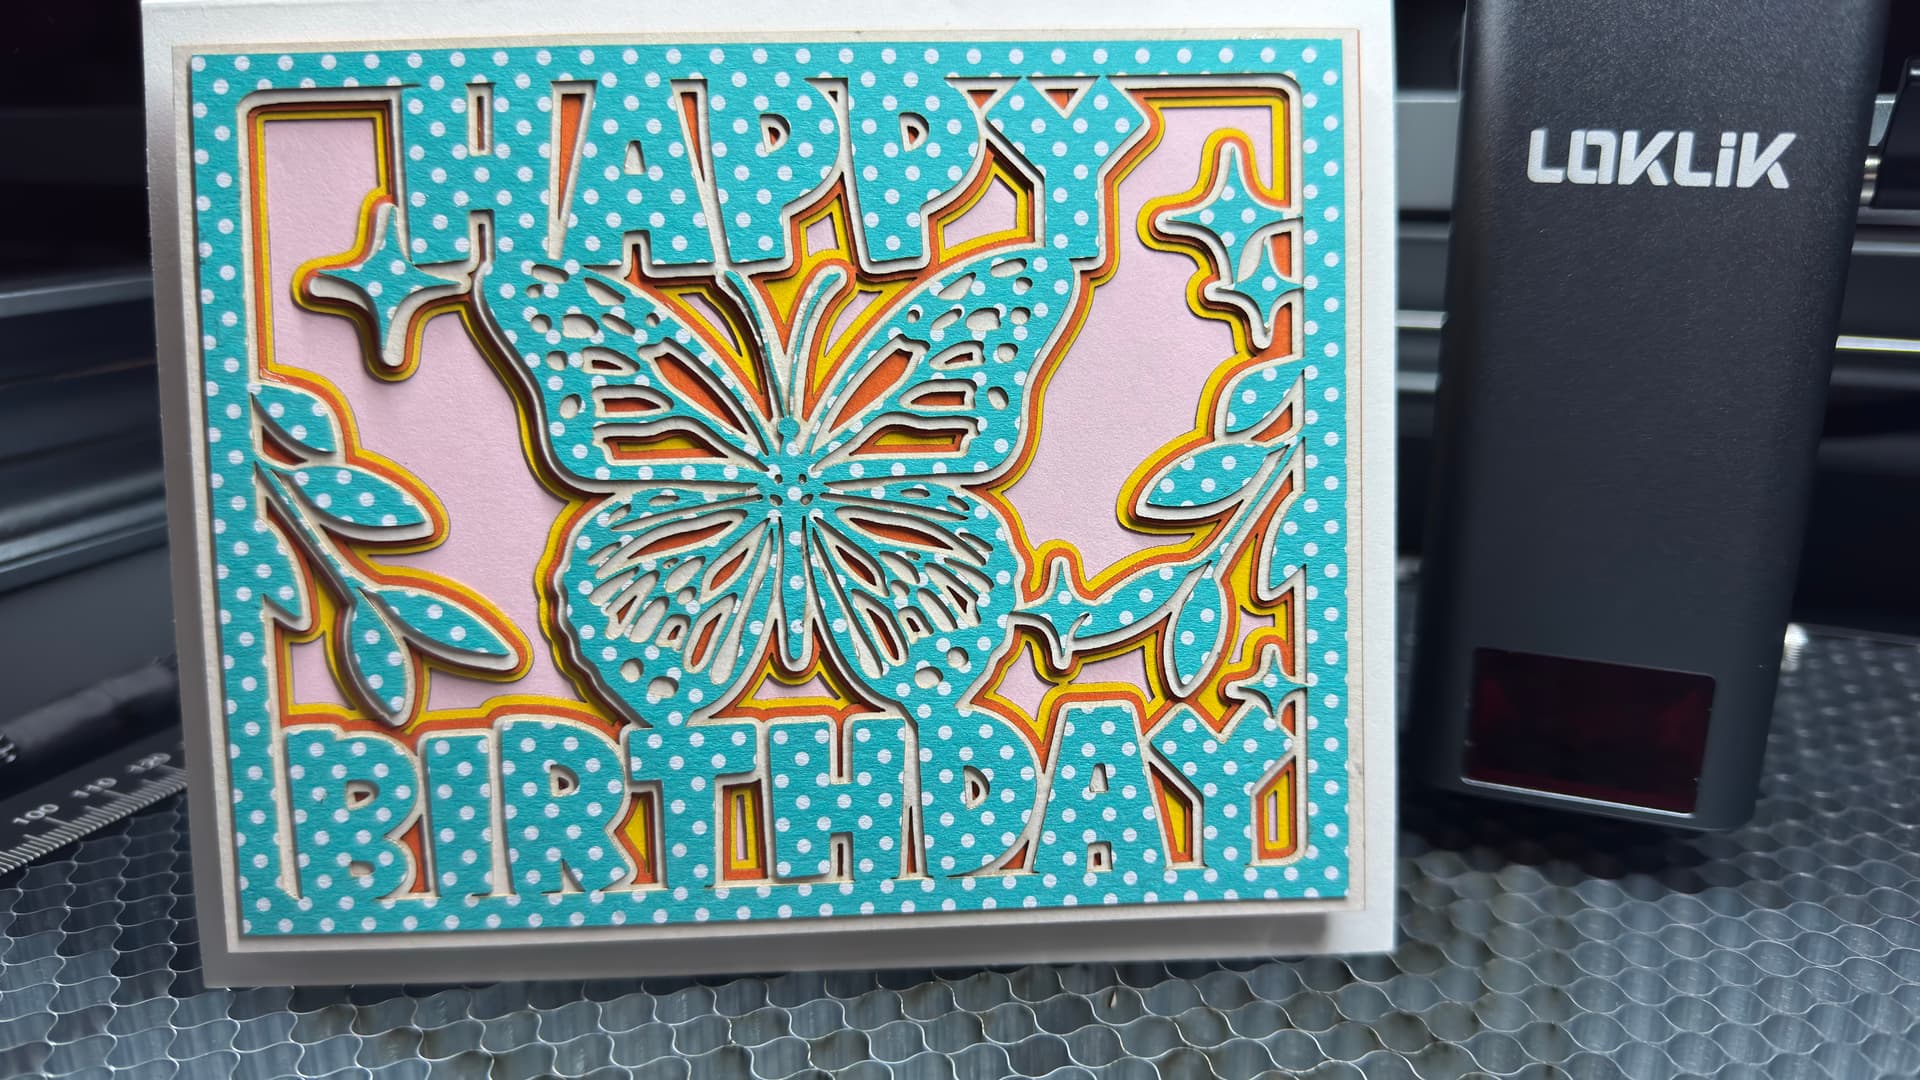
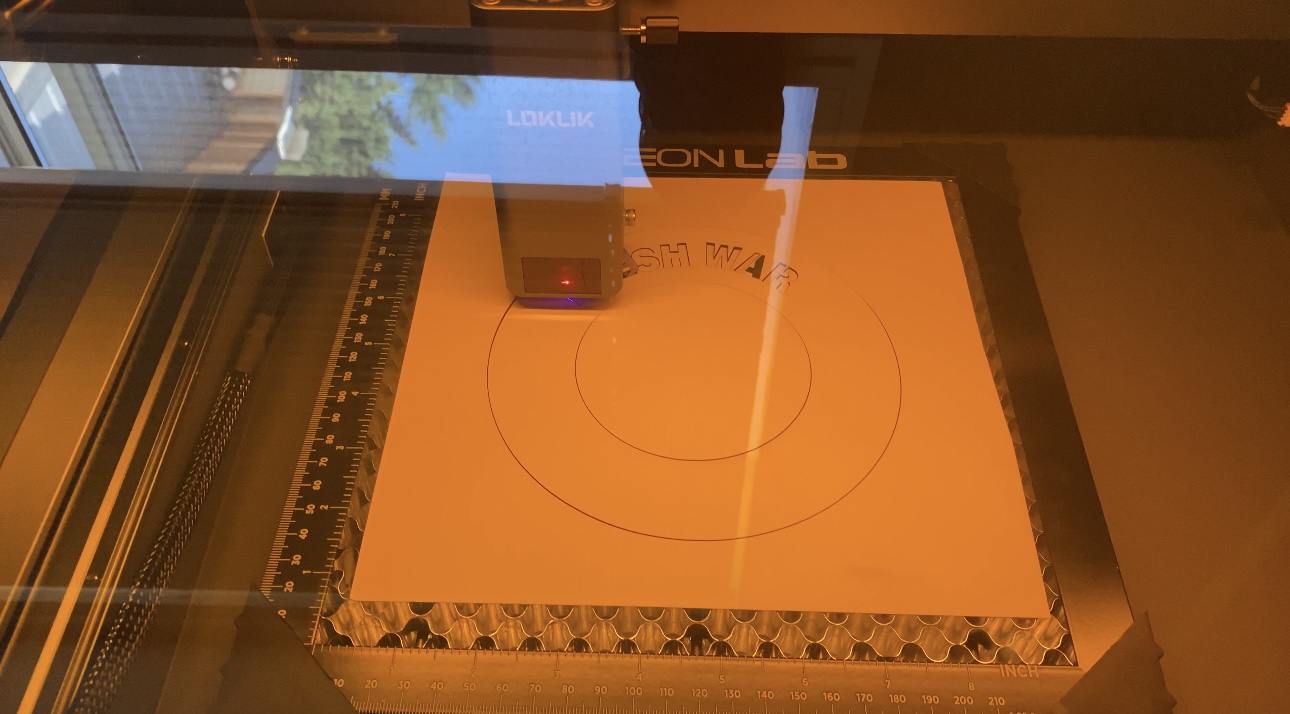
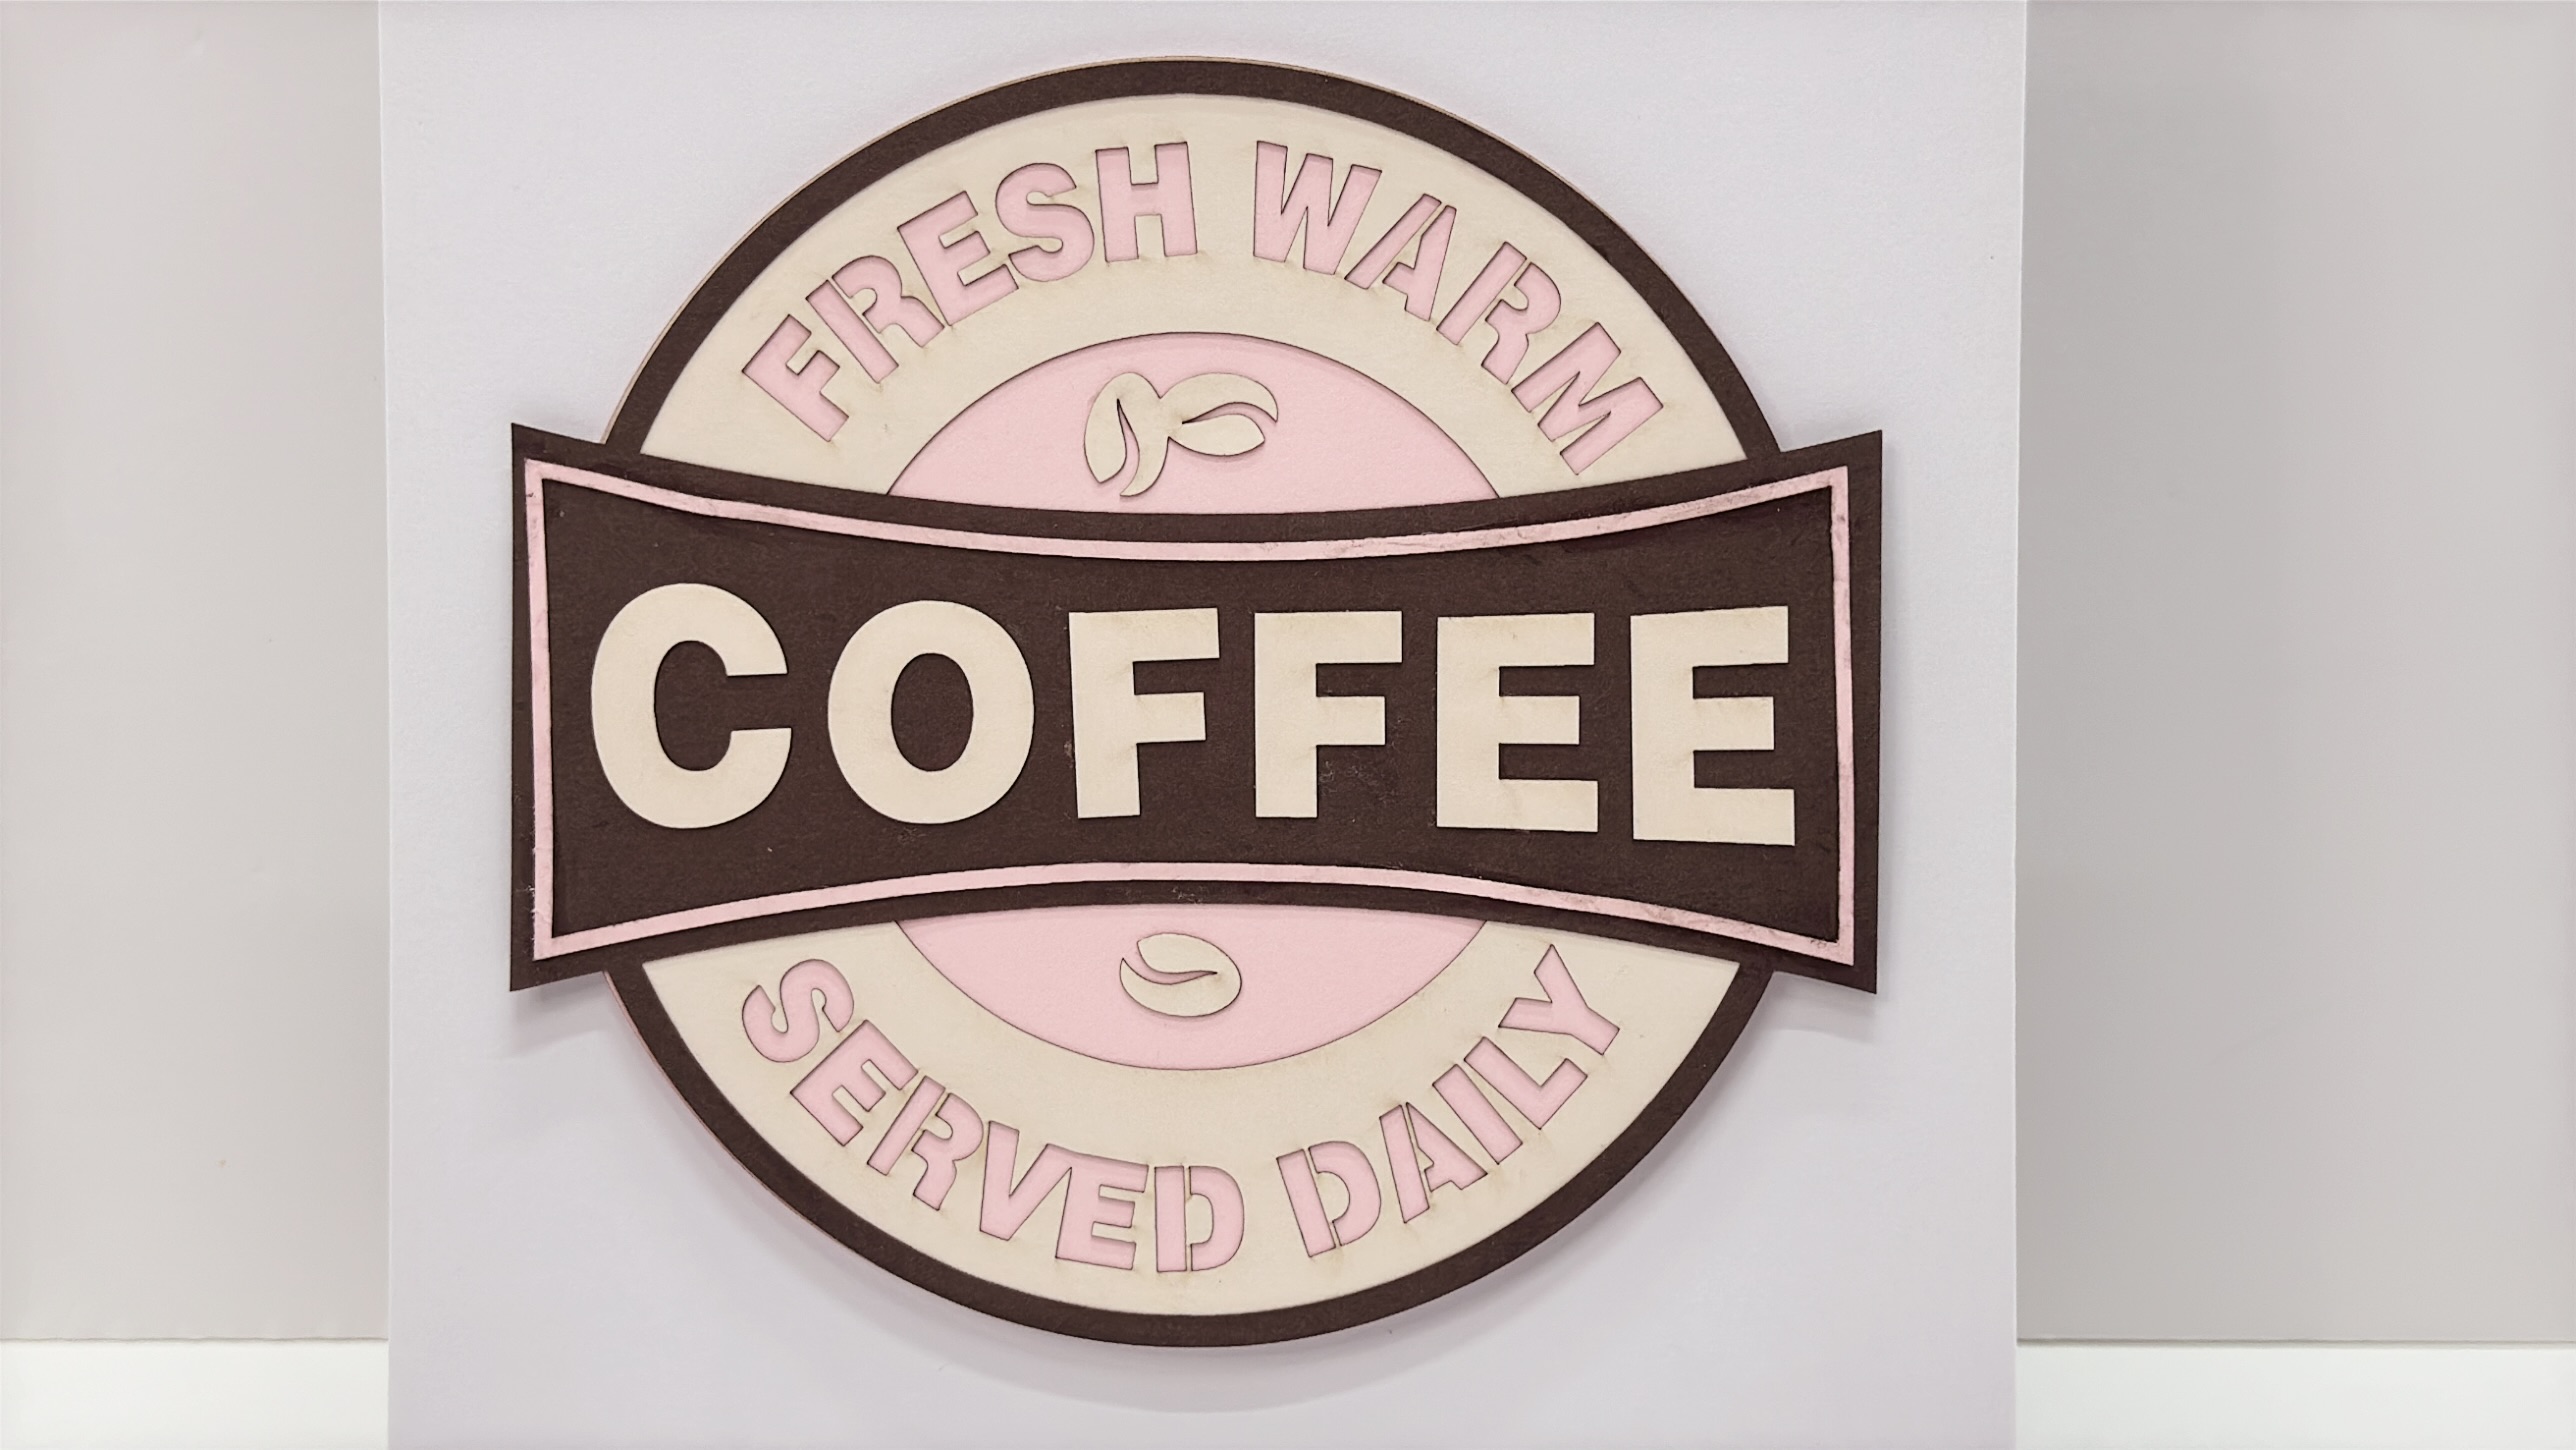
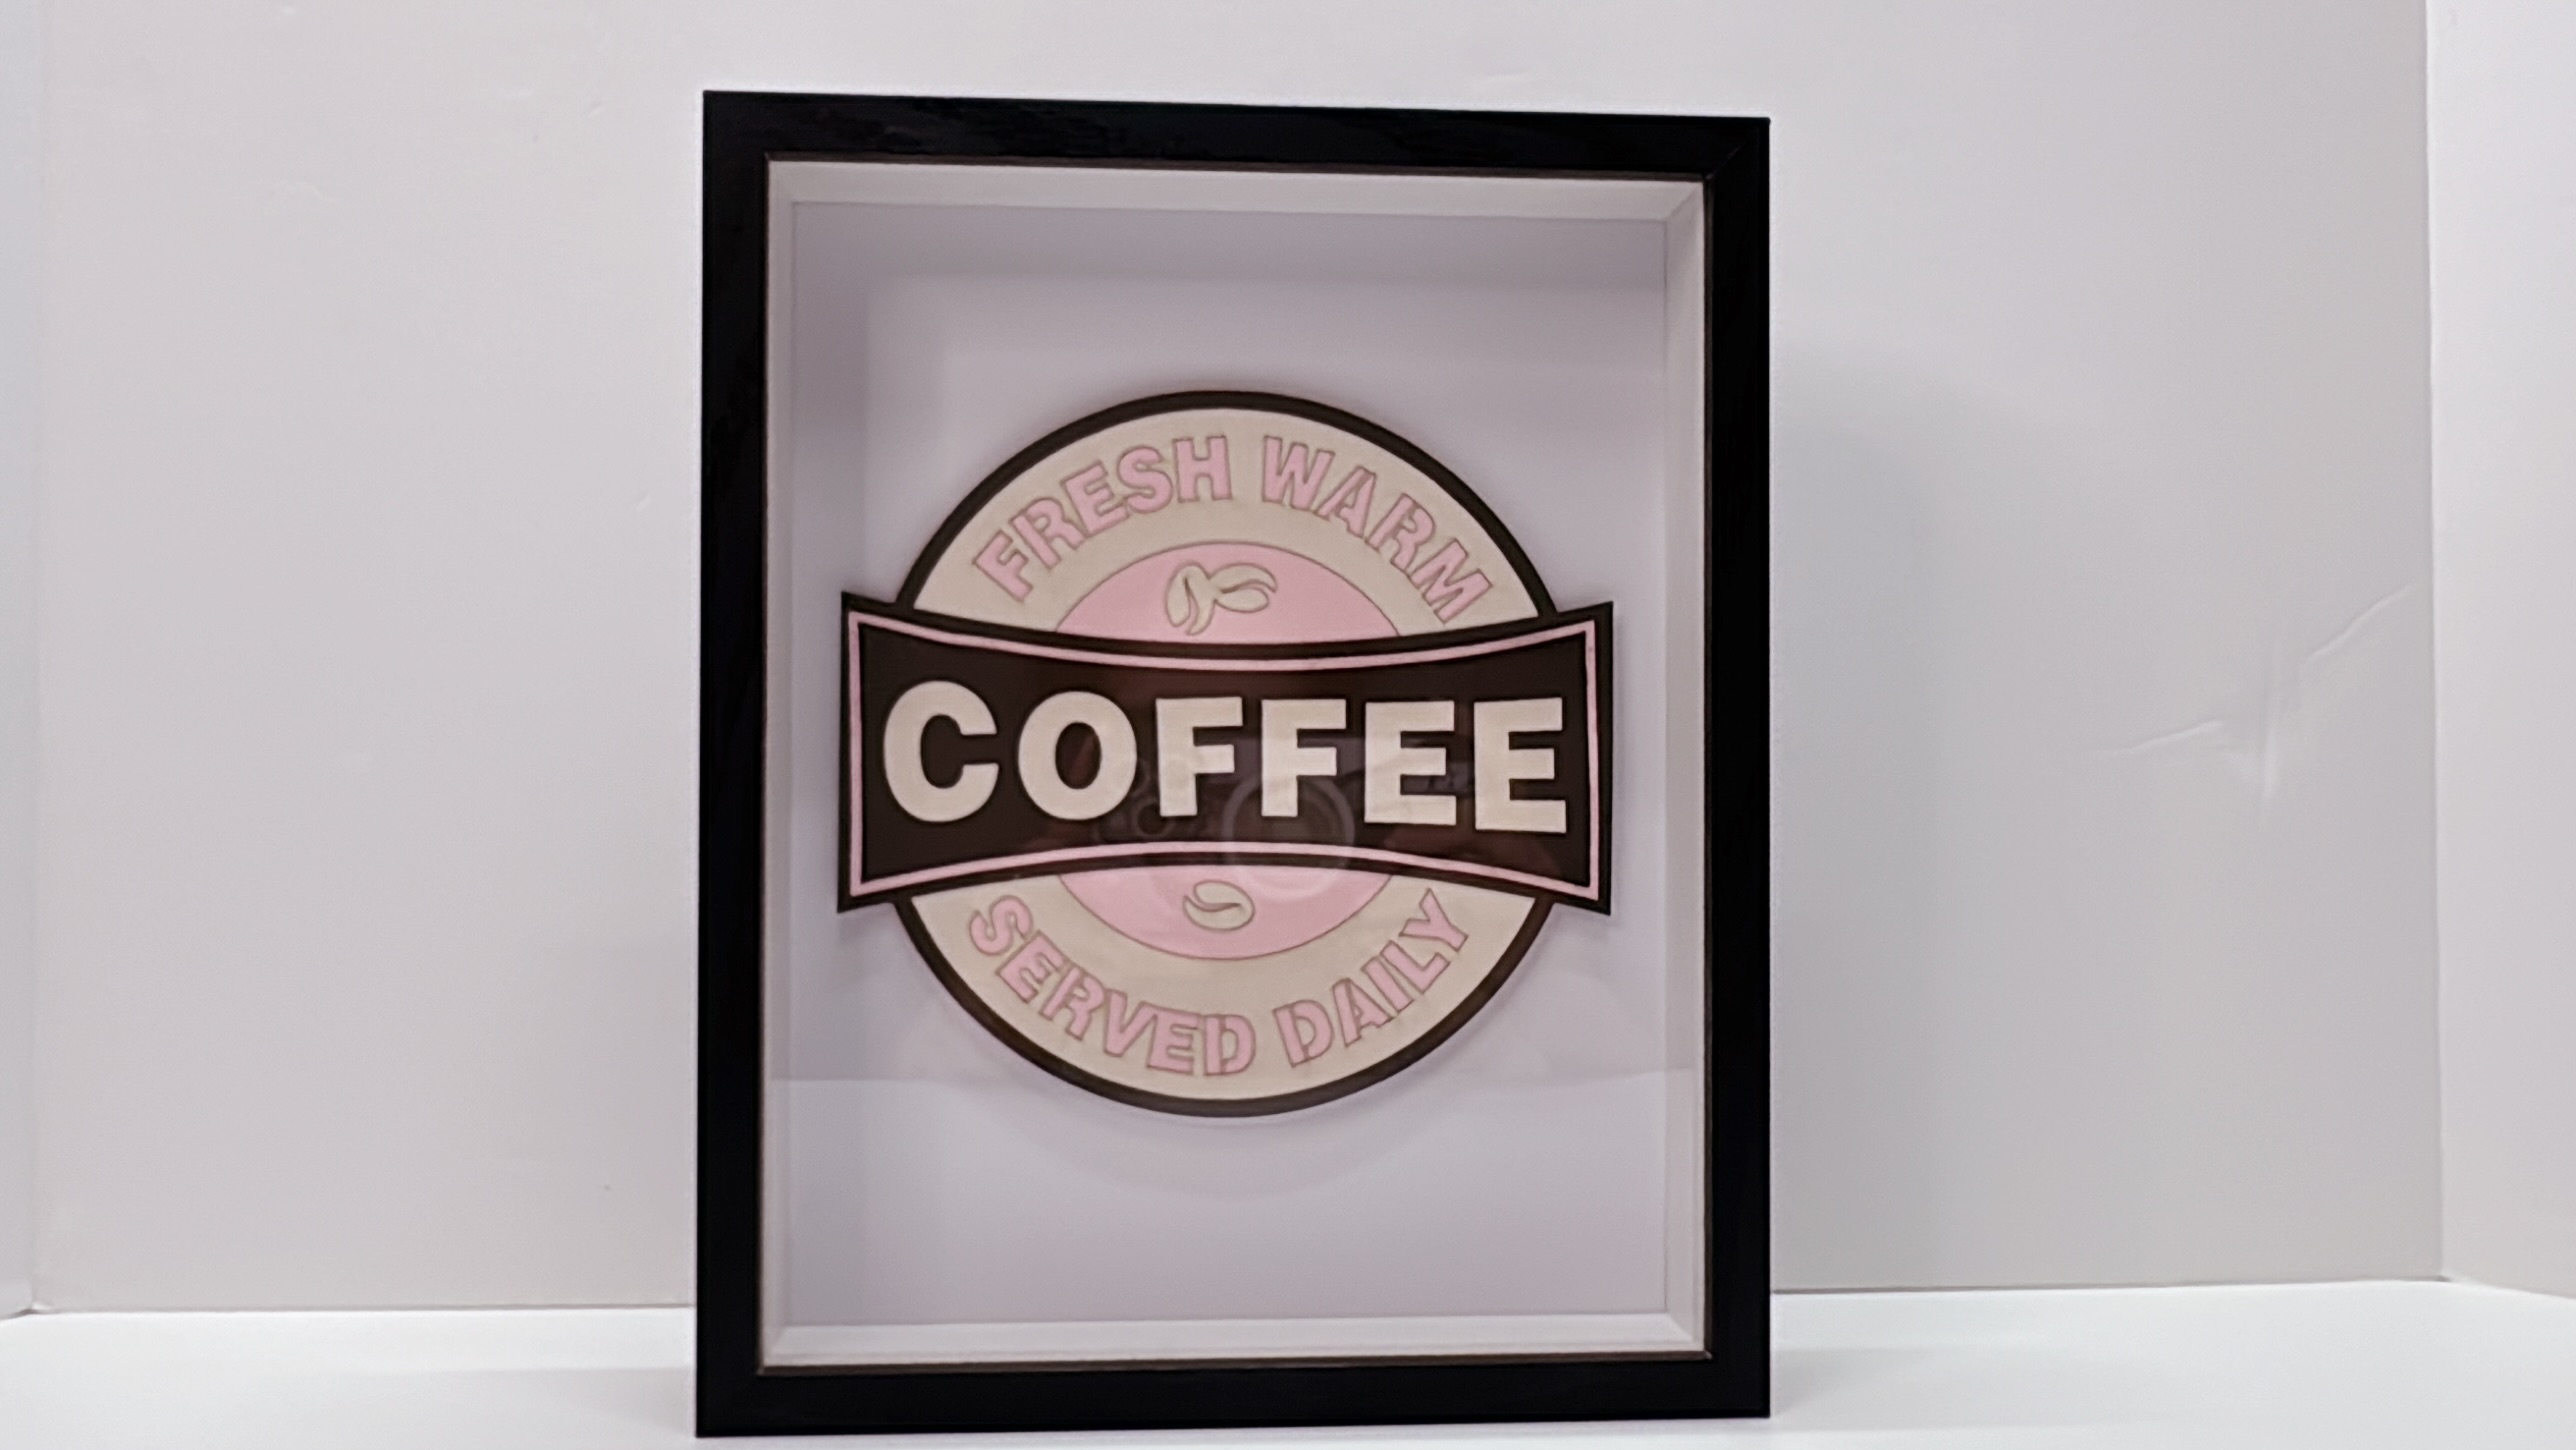
Now, let us cut some cardstocks. I want to challenge myself if I can cut it without burning them! ![]() This time I uploaded my own design to the IdeaStudio. The Loklik mobile app didn’t have a default setting for cardstock, so I used the kraft paper settings and adjust all the parameters accordingly and did some tests run. Finally, I found the right settings and used 2 different cardstocks for this project. Using a 92 # wt., I found out 1300 mm/min works great for me and 1122 mm/min for a 110 # wt. and both powers were set to 100%. It took me to cut approximately 4 minutes or so.
This time I uploaded my own design to the IdeaStudio. The Loklik mobile app didn’t have a default setting for cardstock, so I used the kraft paper settings and adjust all the parameters accordingly and did some tests run. Finally, I found the right settings and used 2 different cardstocks for this project. Using a 92 # wt., I found out 1300 mm/min works great for me and 1122 mm/min for a 110 # wt. and both powers were set to 100%. It took me to cut approximately 4 minutes or so.
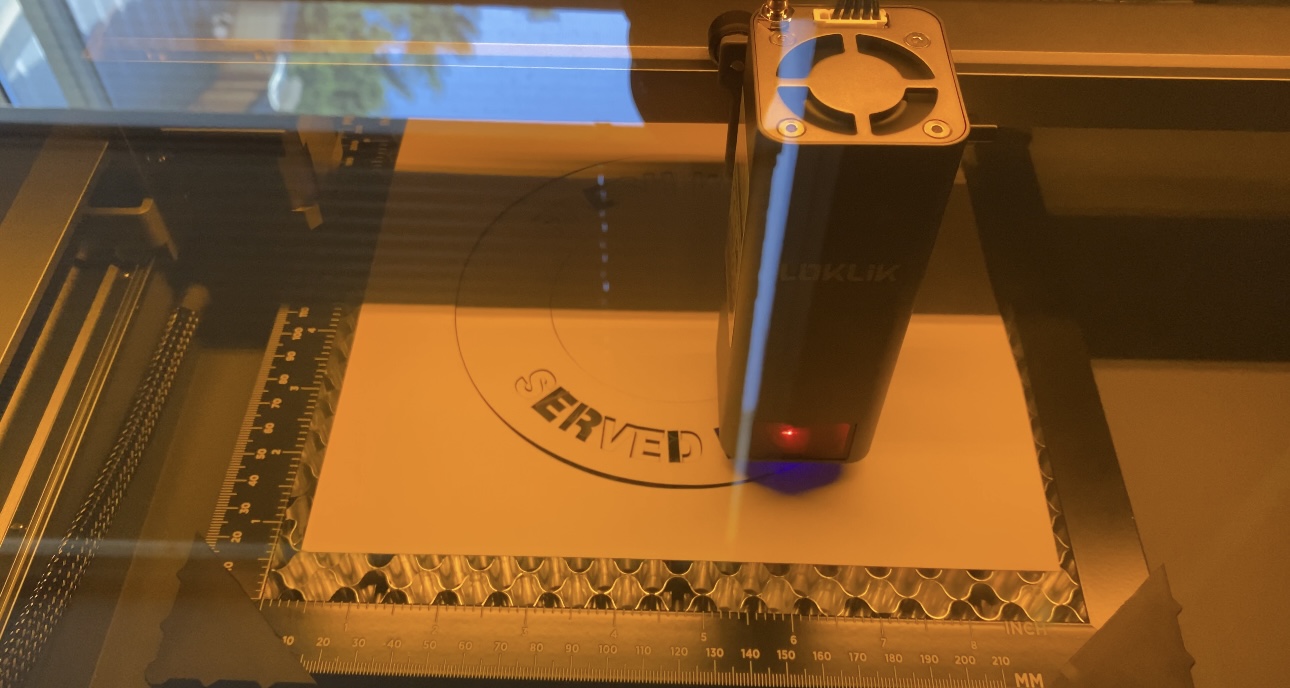
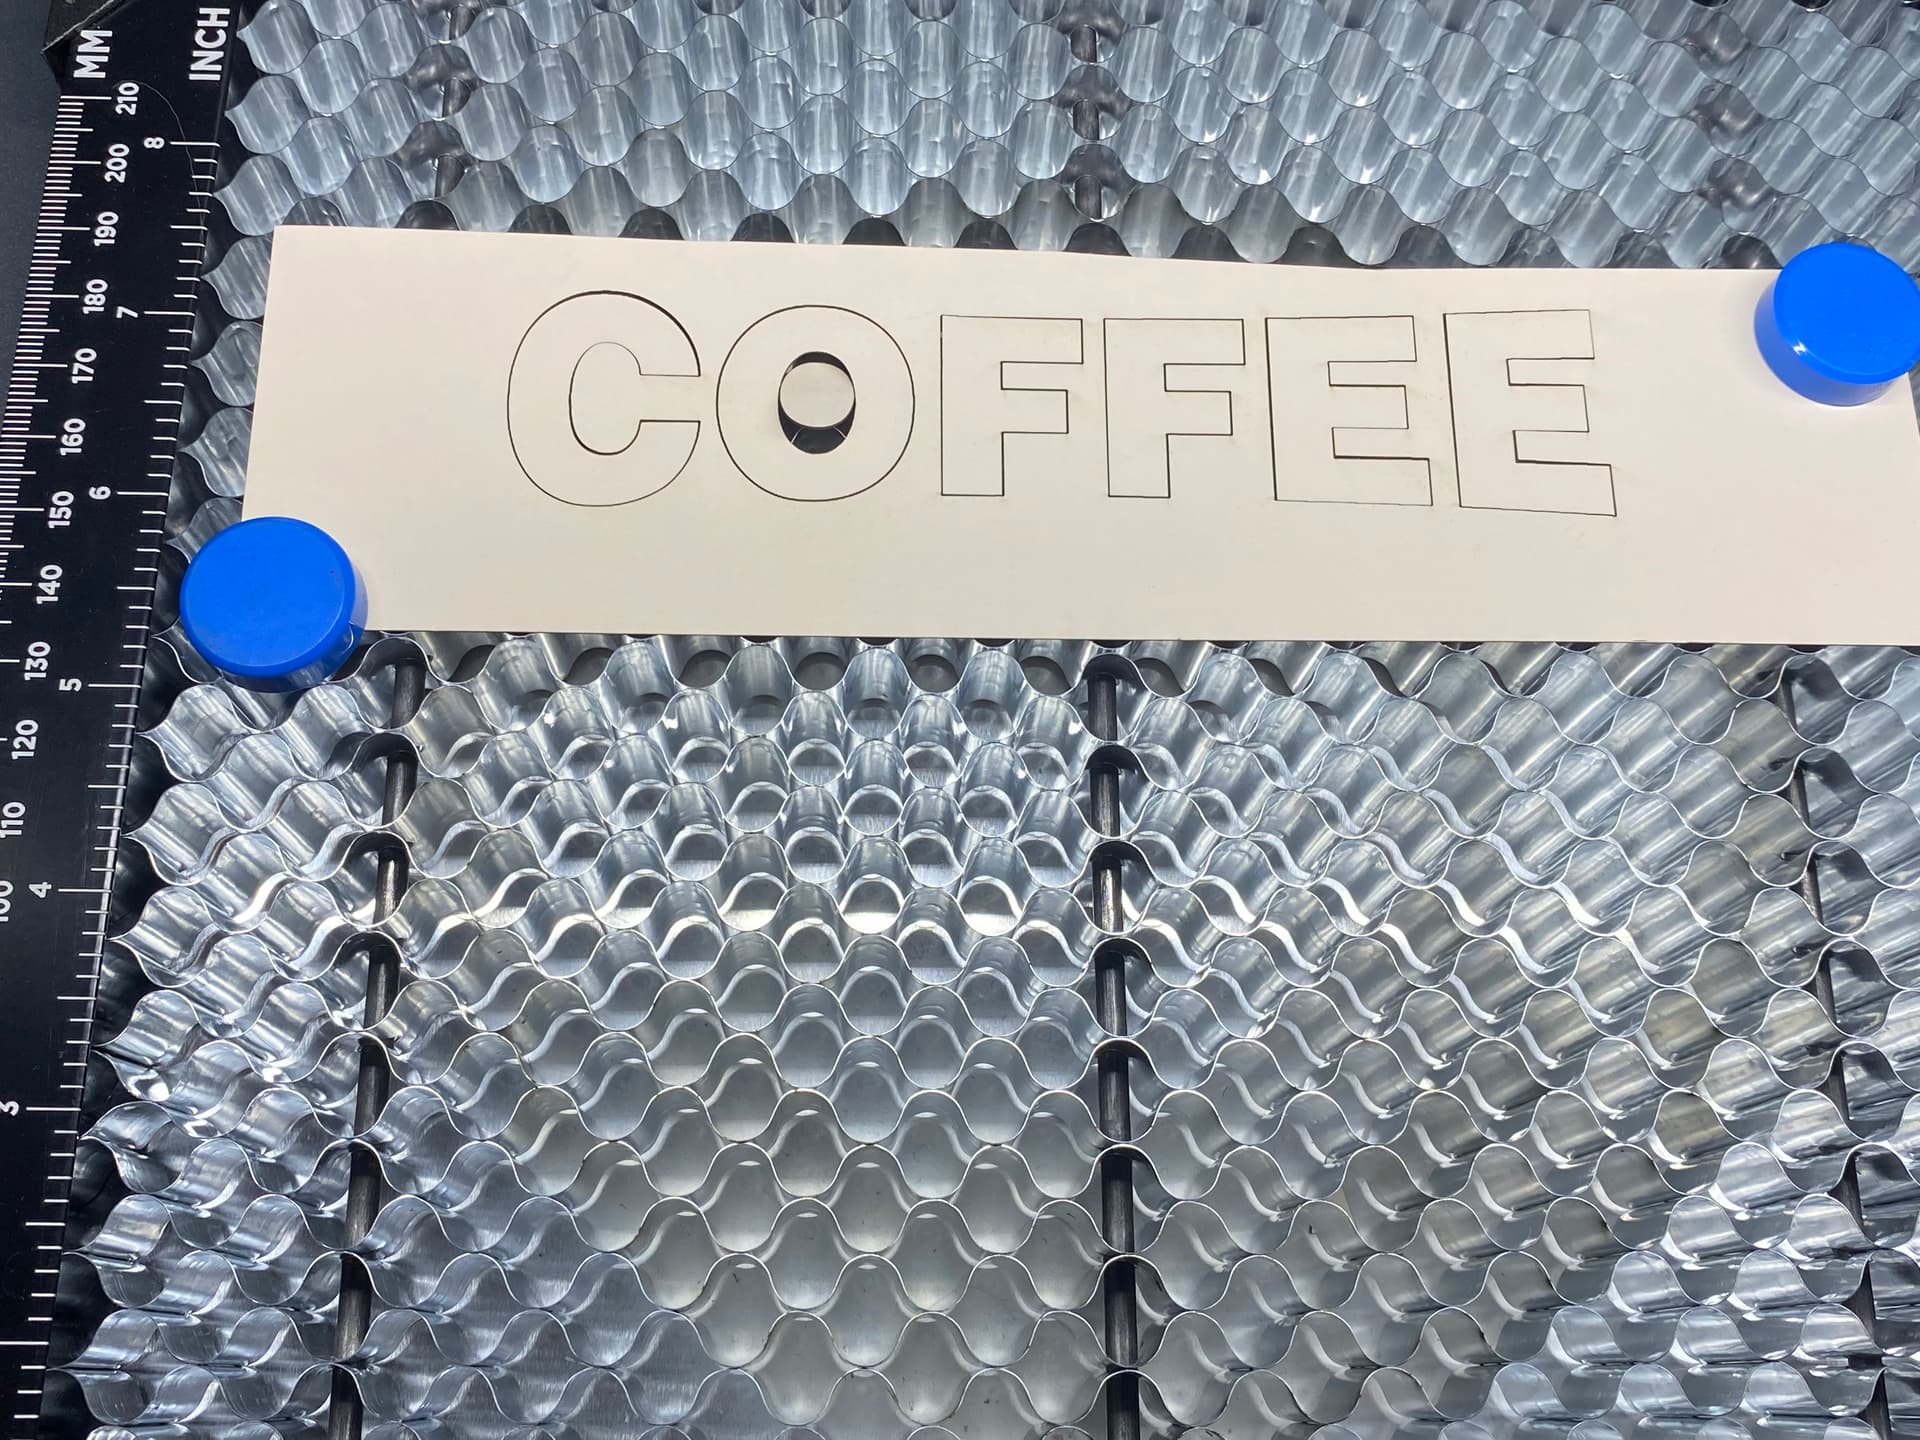
TIP: When cutting cardstocks, I recommend using magnets to hold them in place 'coz there’s a tendency to curl or moved when the machine is doing its cut.
Finished Size: Cut file is approximately 6.5" circle with an 8" x 8" shadow frame box.
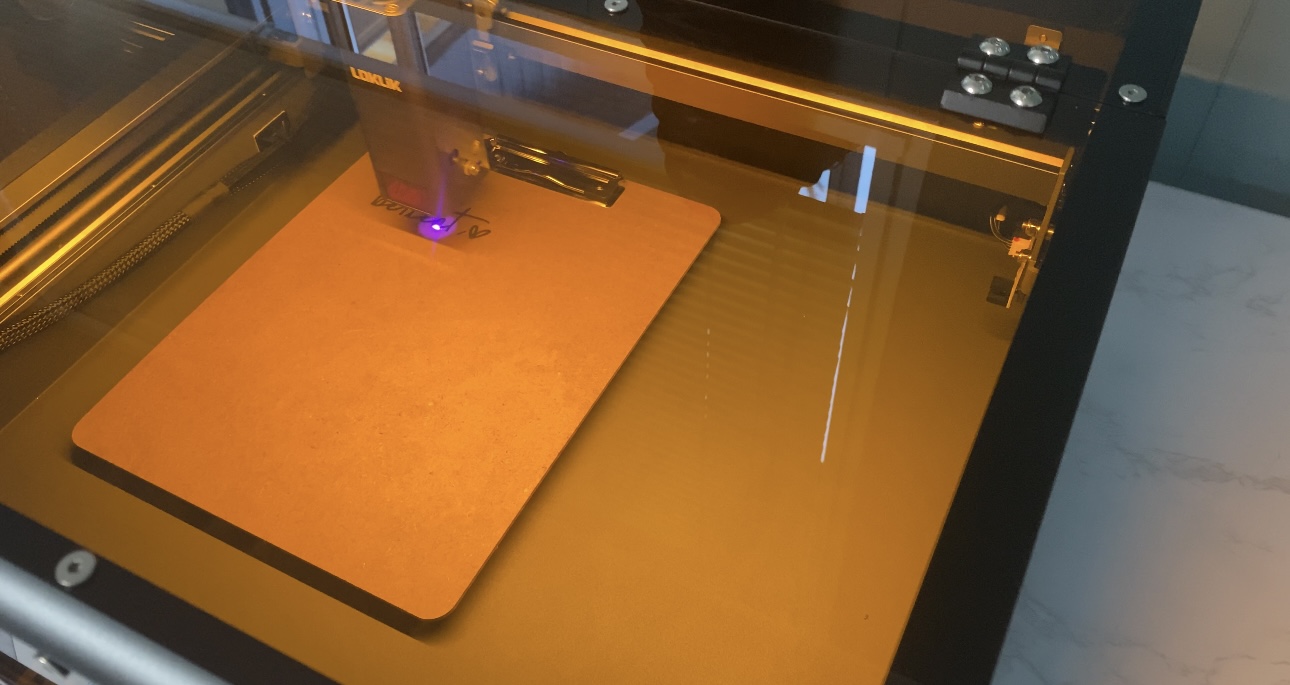
Moving on, let’s do some engraving projects. This time I have an extra clipboard laying around and thought about engraving it. Again, I uploaded my design and used 75% power, a speed of 7500 mm/min and a total time of 13 minutes and 4 seconds to engrave the front and back.
TIP: I used risers to level my clipboard since there was a metal hardware attached to it.
I’ve noticed that I forgot to adjust the laser module from my clipboard after I took out the honeycomb from my last test. But guess what? I was surprised of the outcome! ![]()
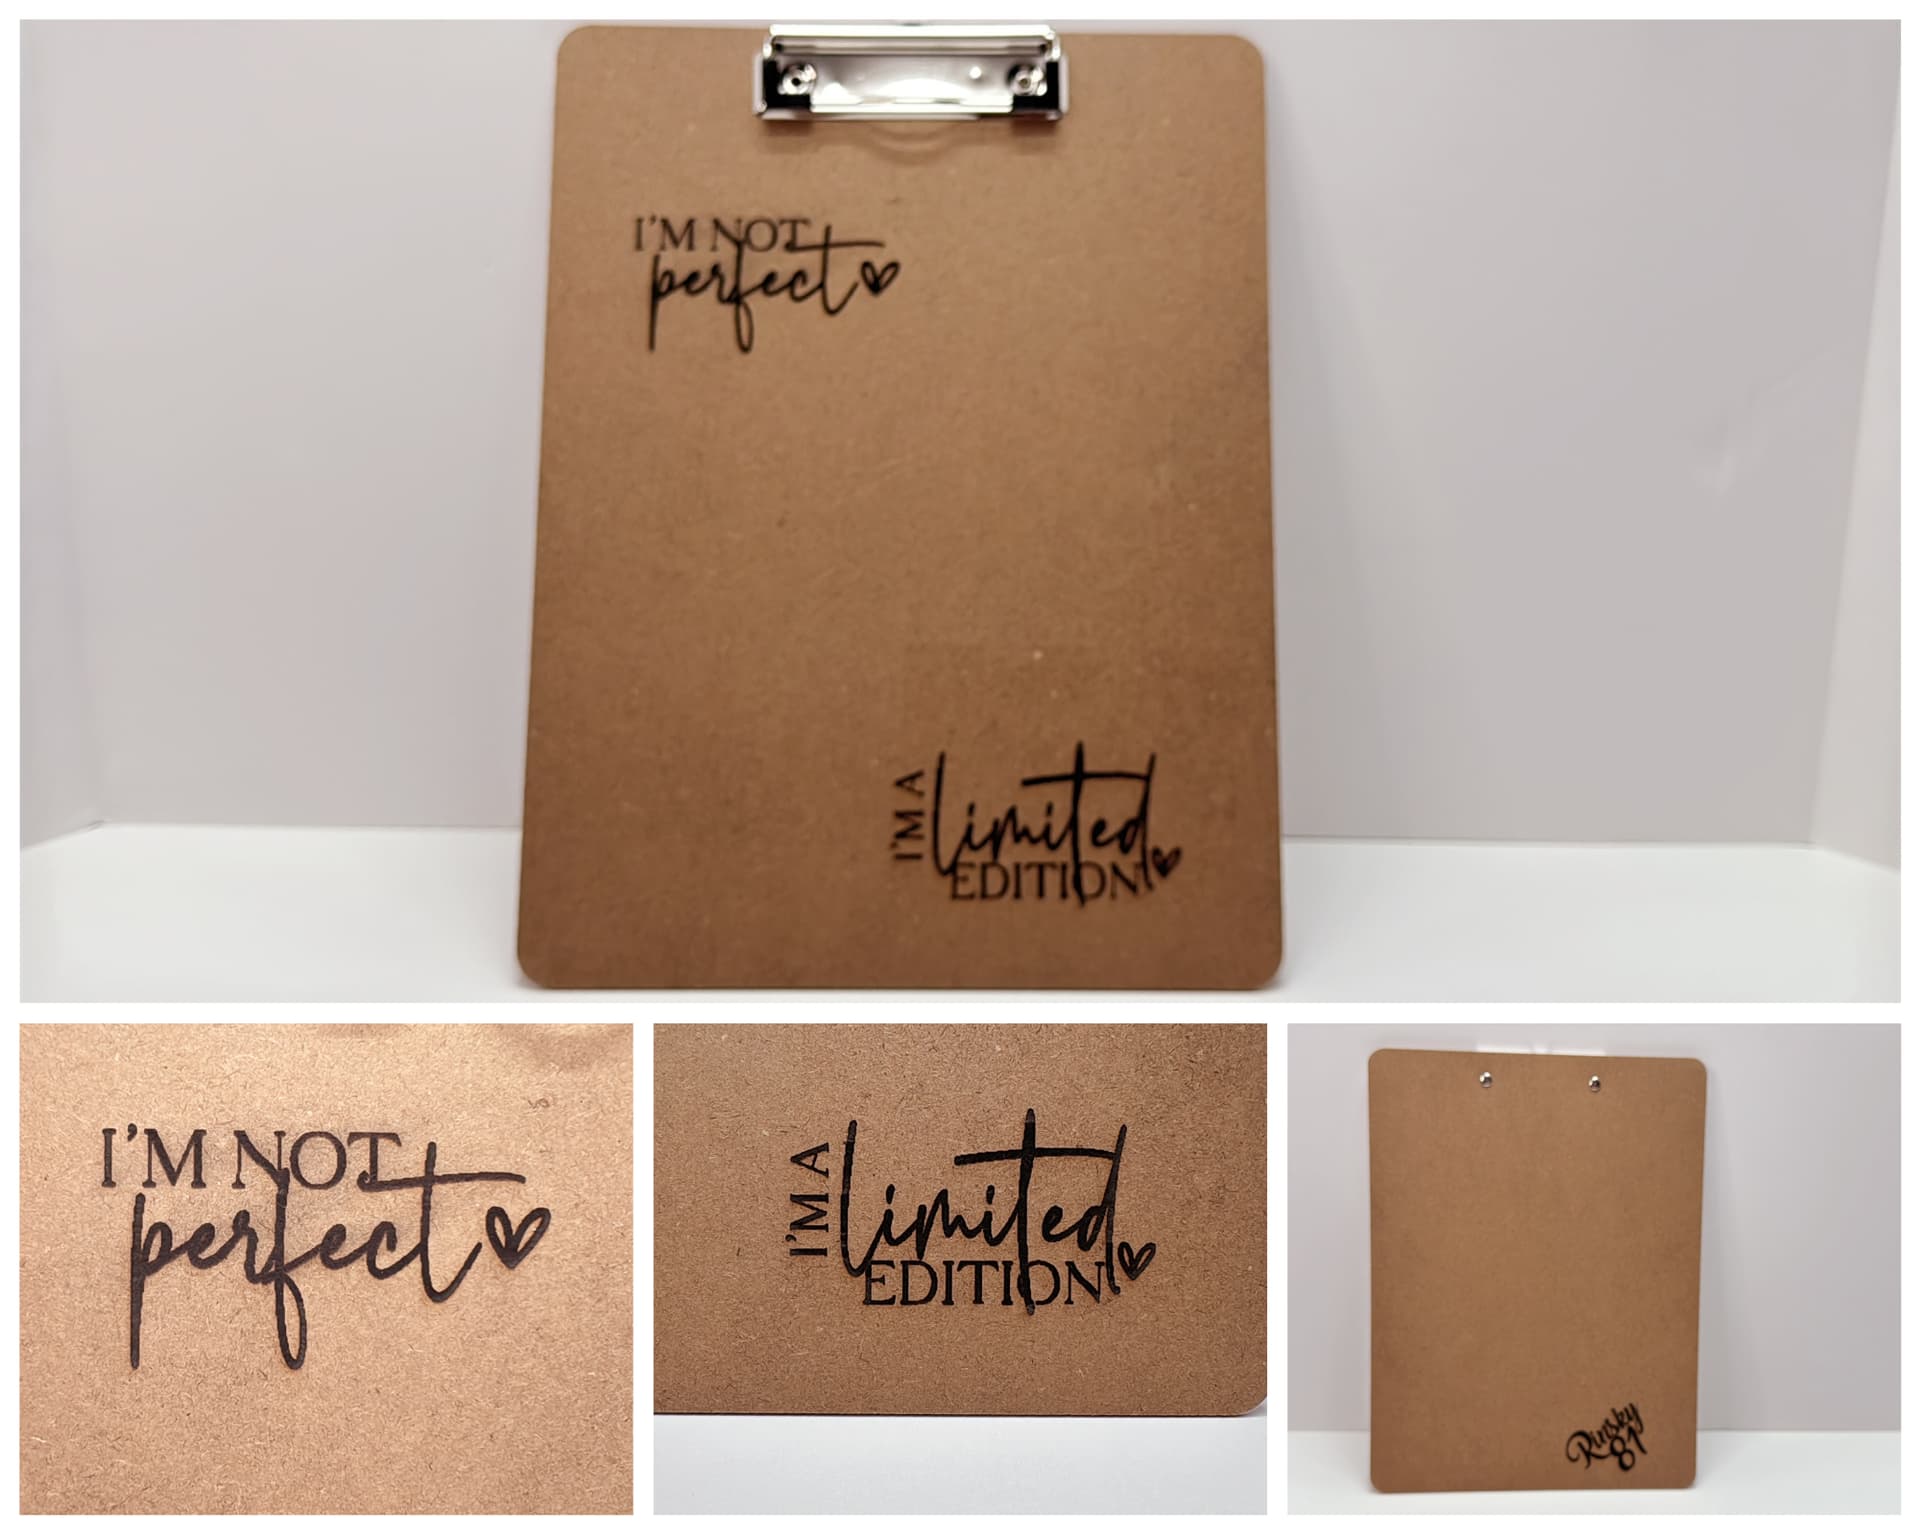
Now, take a look at the outcome! I am very satisfied for my mistakes earlier and glad I discovered these settings for clipboard. I measured the distance/depth (24.5mm or 0.96") between the laser module and the clipboard. Also, the “quote” was so fitting in my case! ![]()
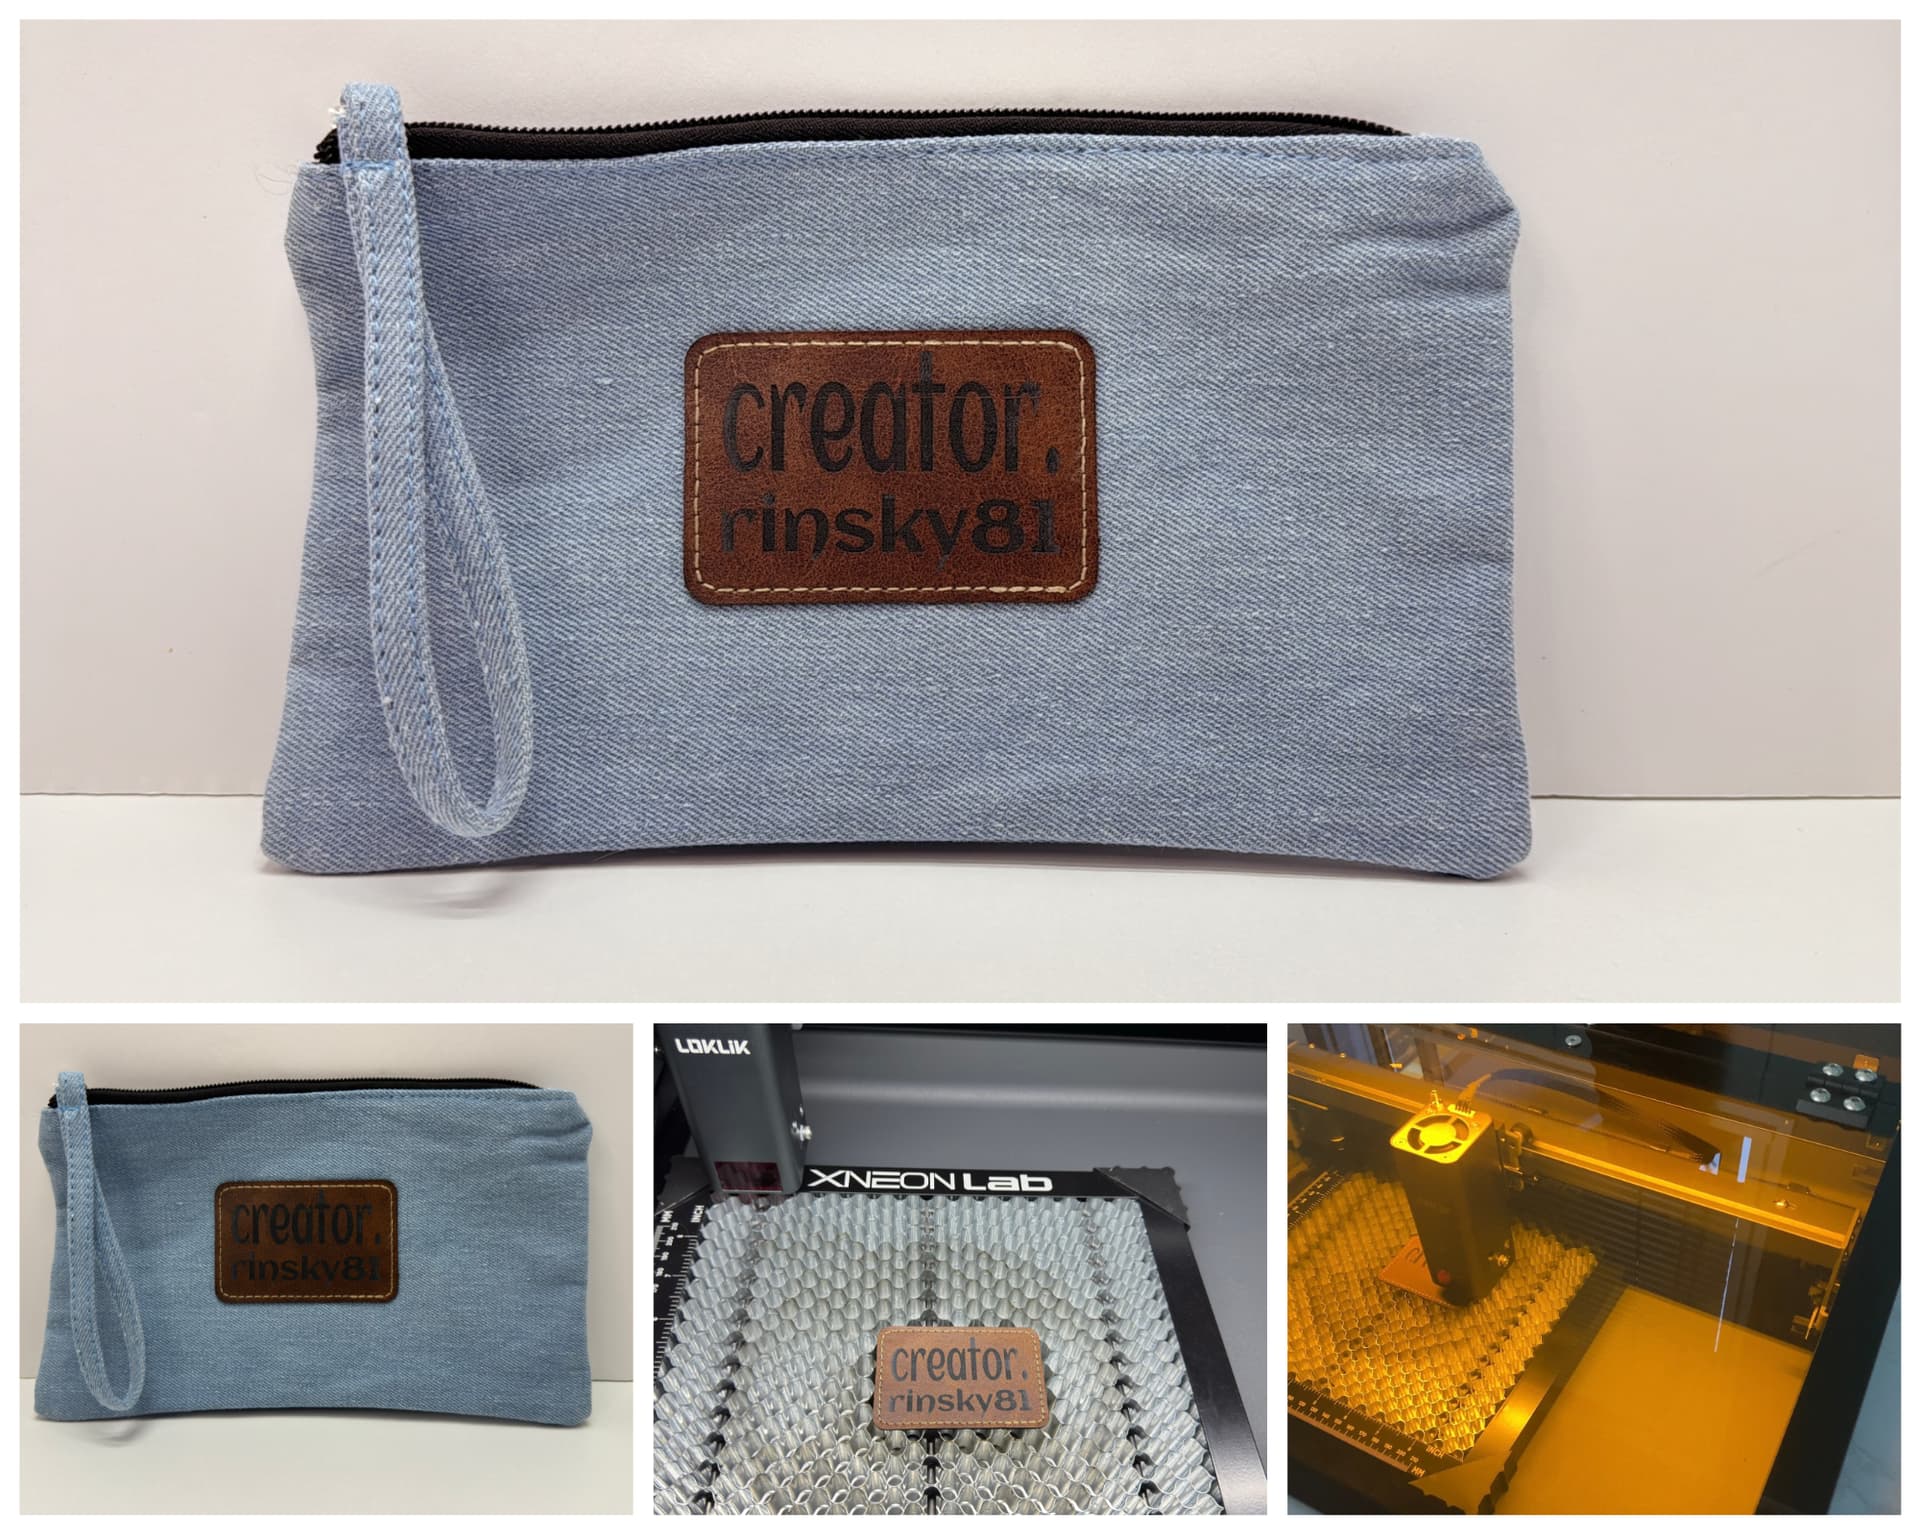
Another engraving project using leather hat patches. Again, I used the IdeaStudio to add text with my personalized name in it. I used the default settings for leather of 40% power with a speed of 8000 mm/min. Total time was 3 minutes and 5 seconds.
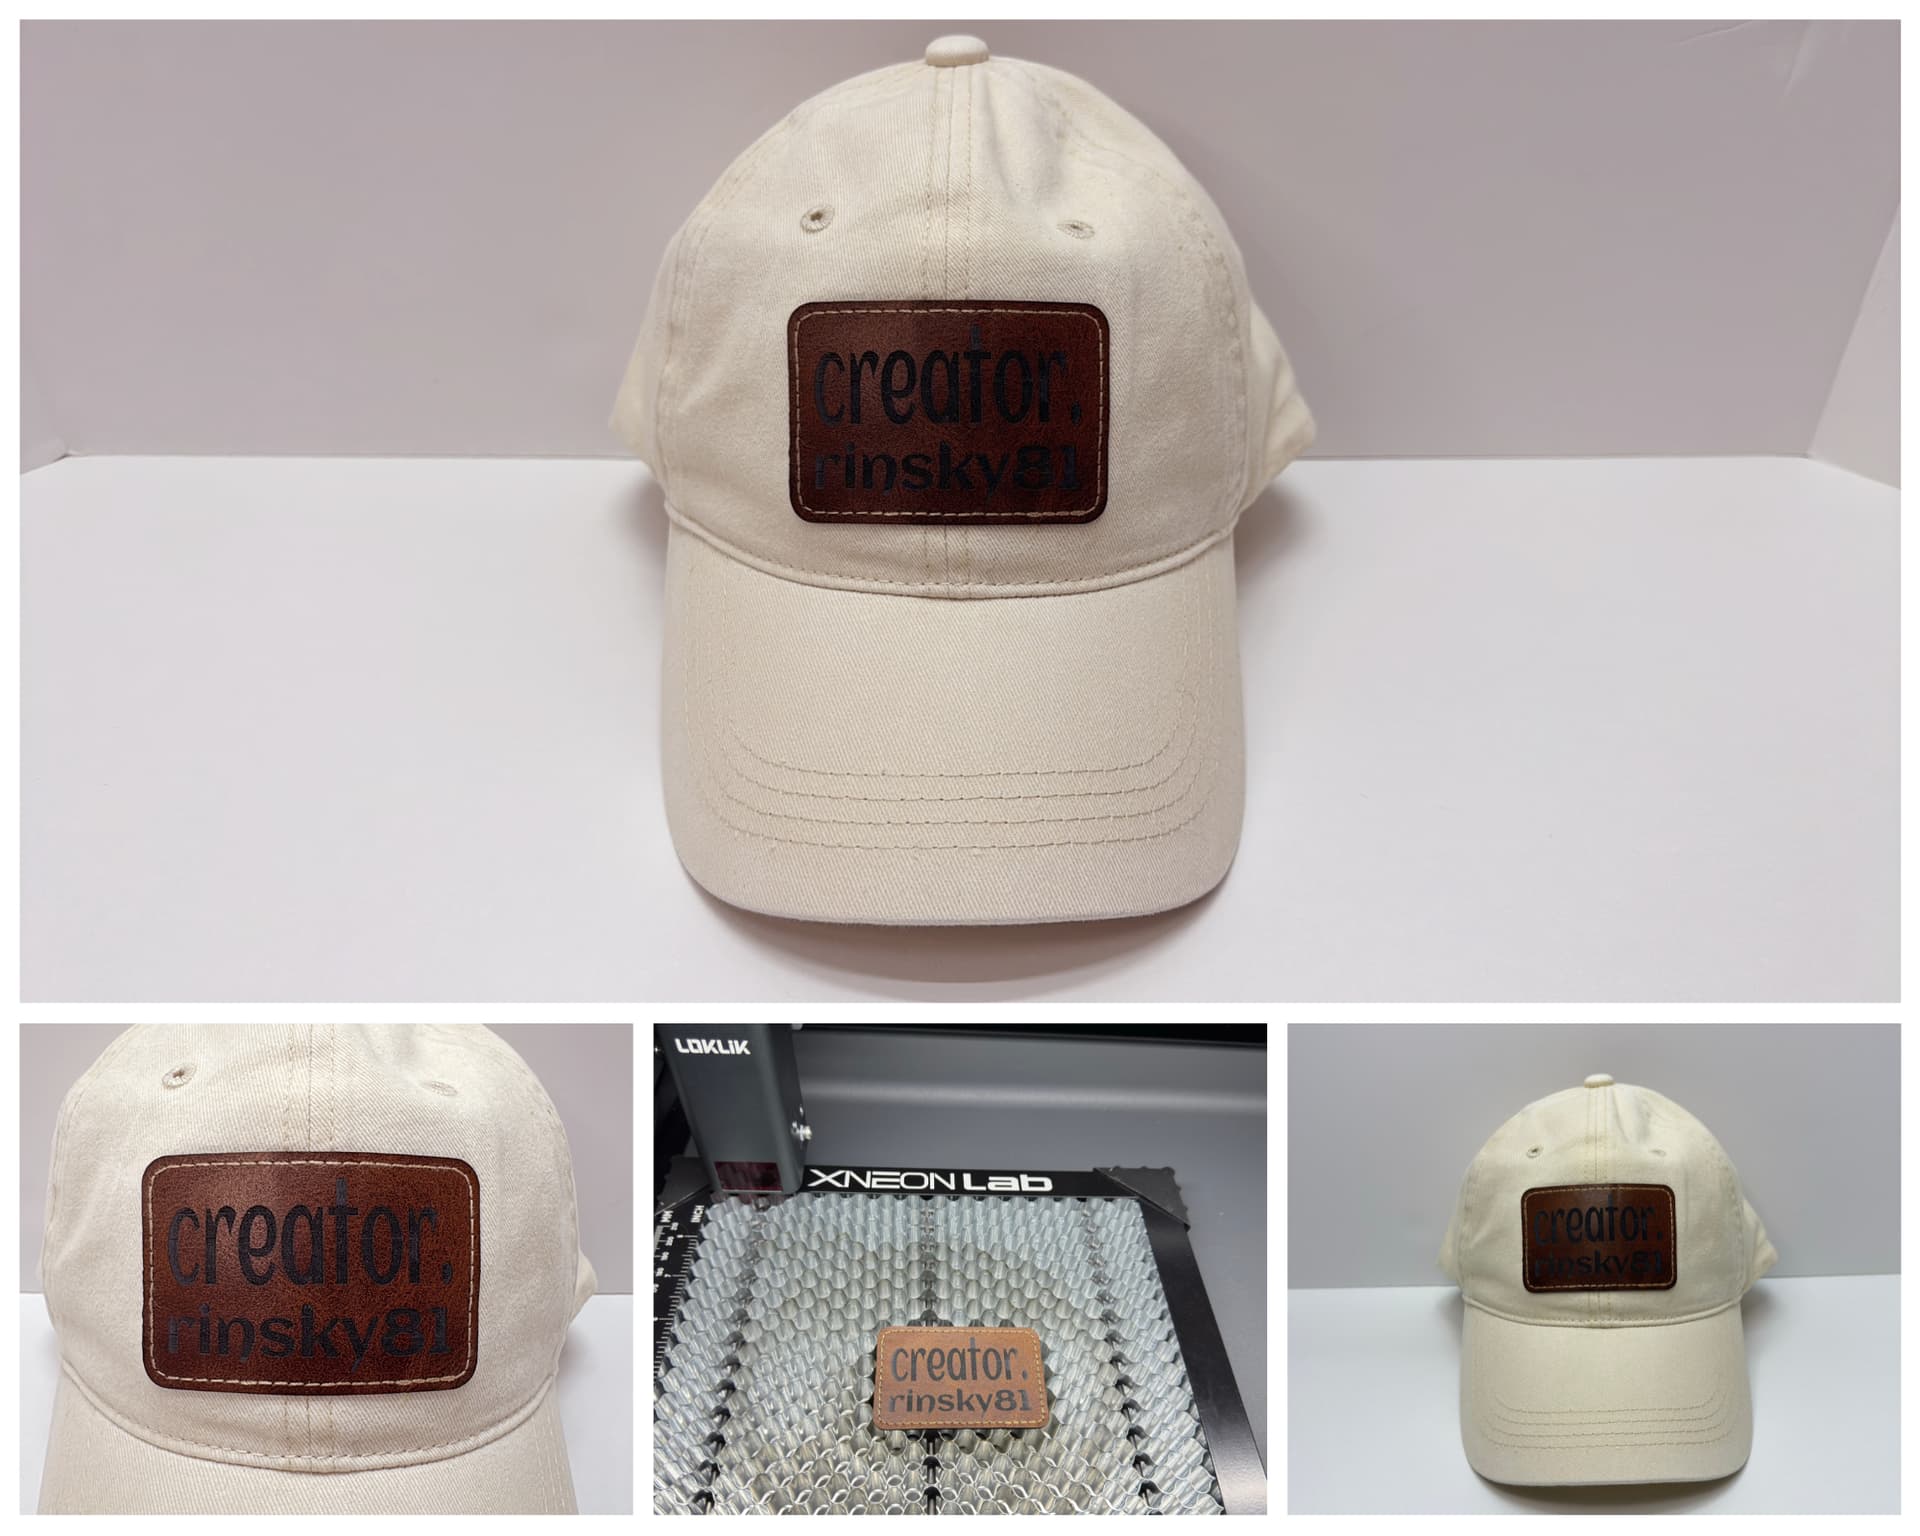
I loved how it turned out so and I made an extra patch for my clutch purse. ![]()
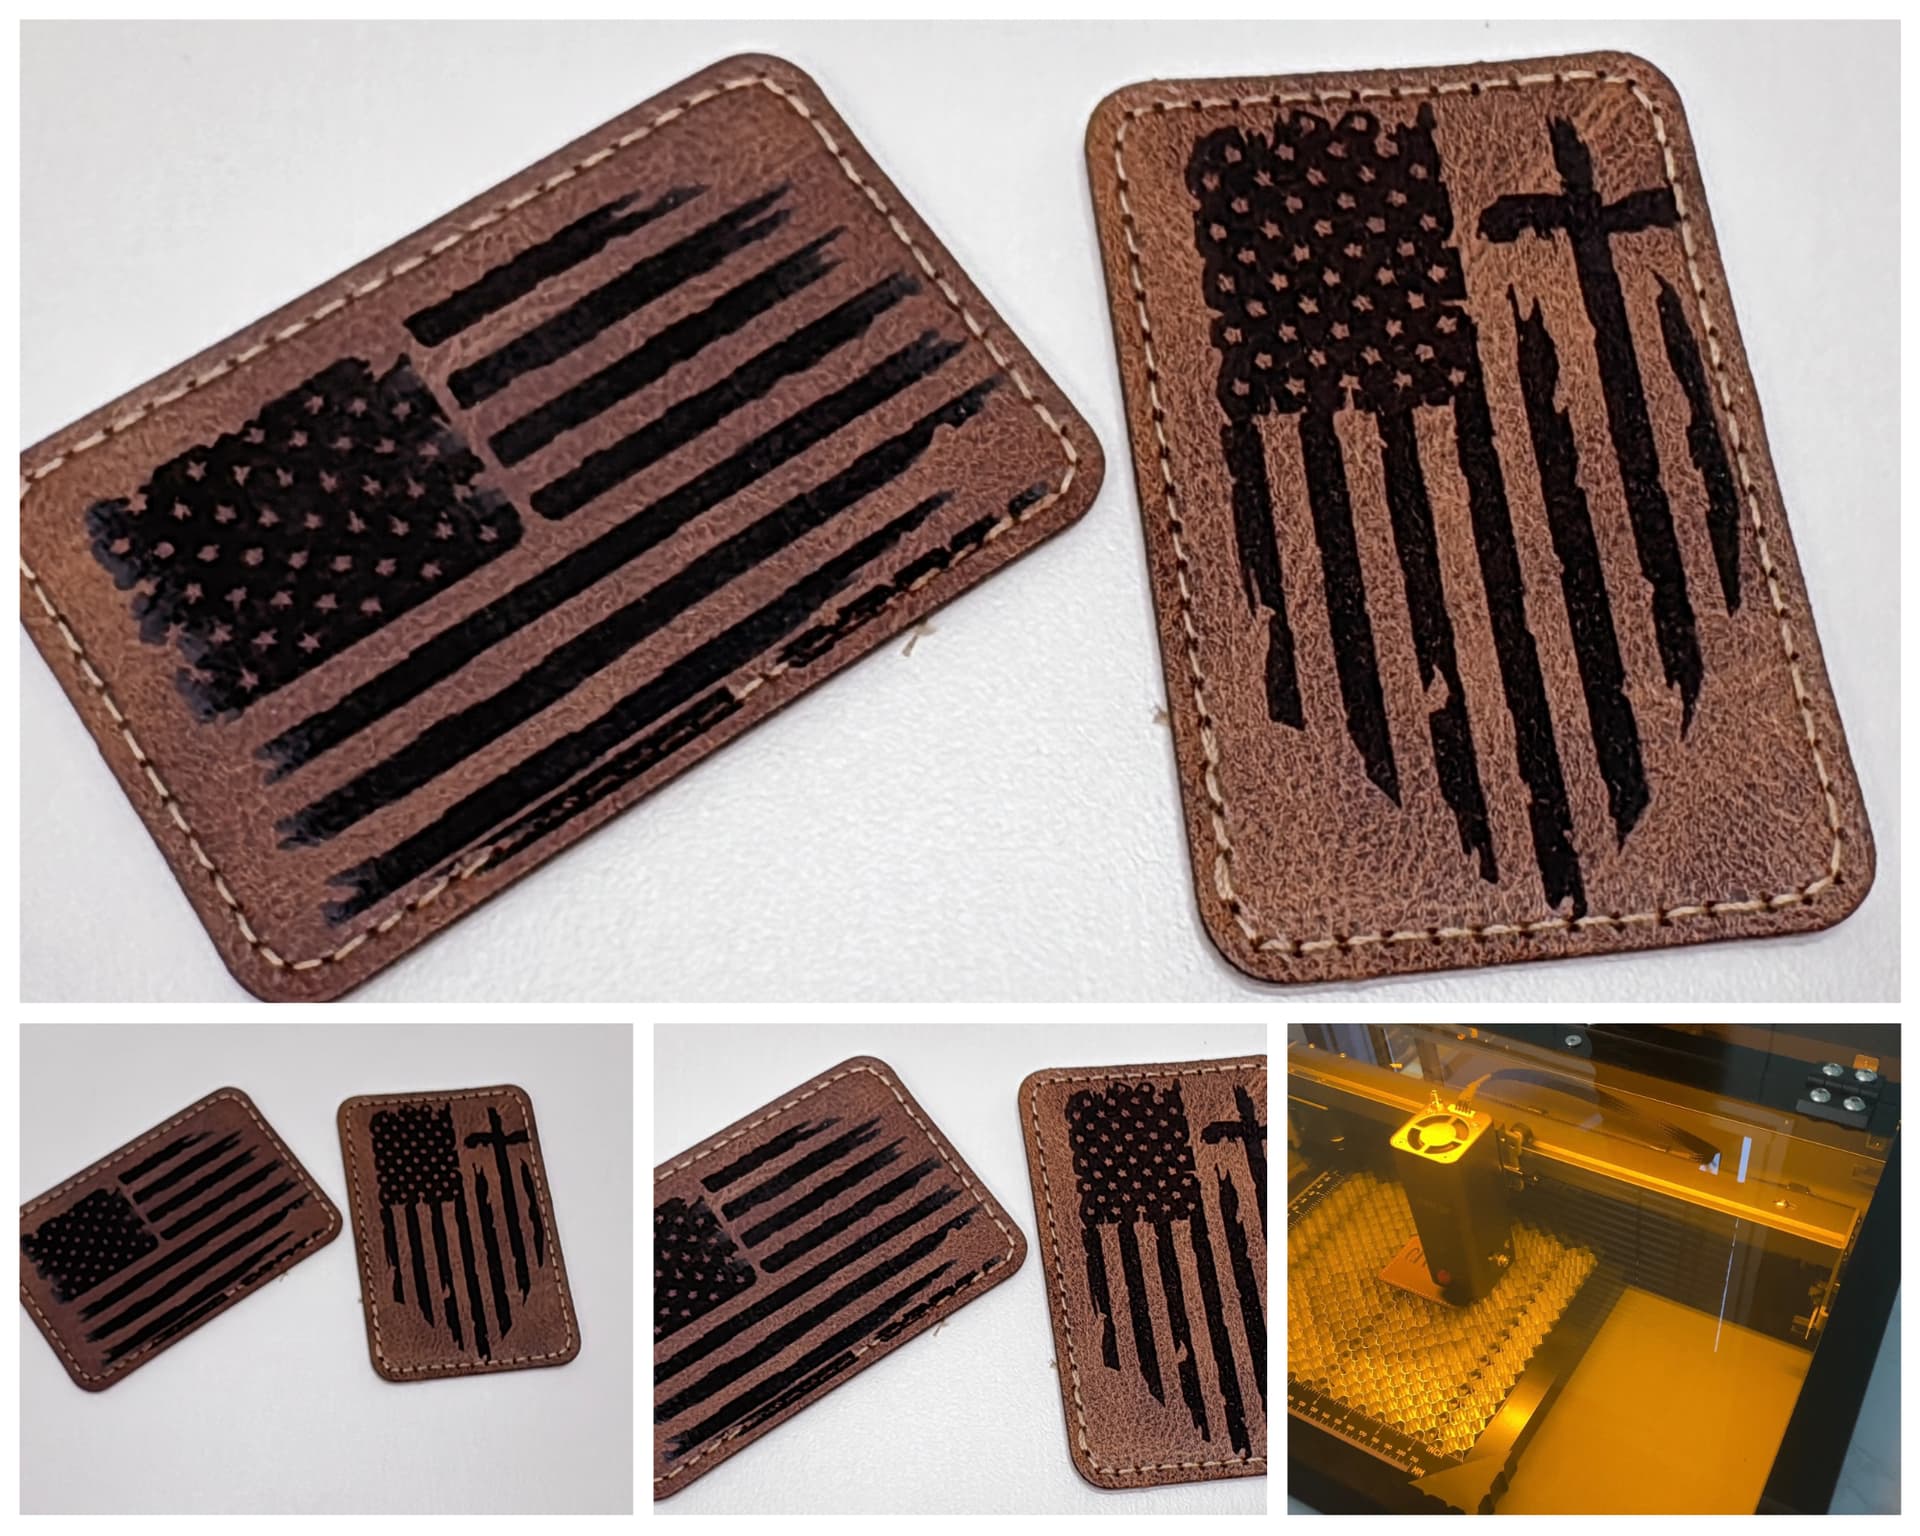
Another sample of engraving an American flag on a leather patch I made below. The details were there. Another test that needs to be adjusted based on the size of the design in order to fit inside the patch. I didn’t complain at all, but I loved it even more! It wasn’t perfect for some, but for me it was a “limited edition” and one of a kind. ![]()
![]()
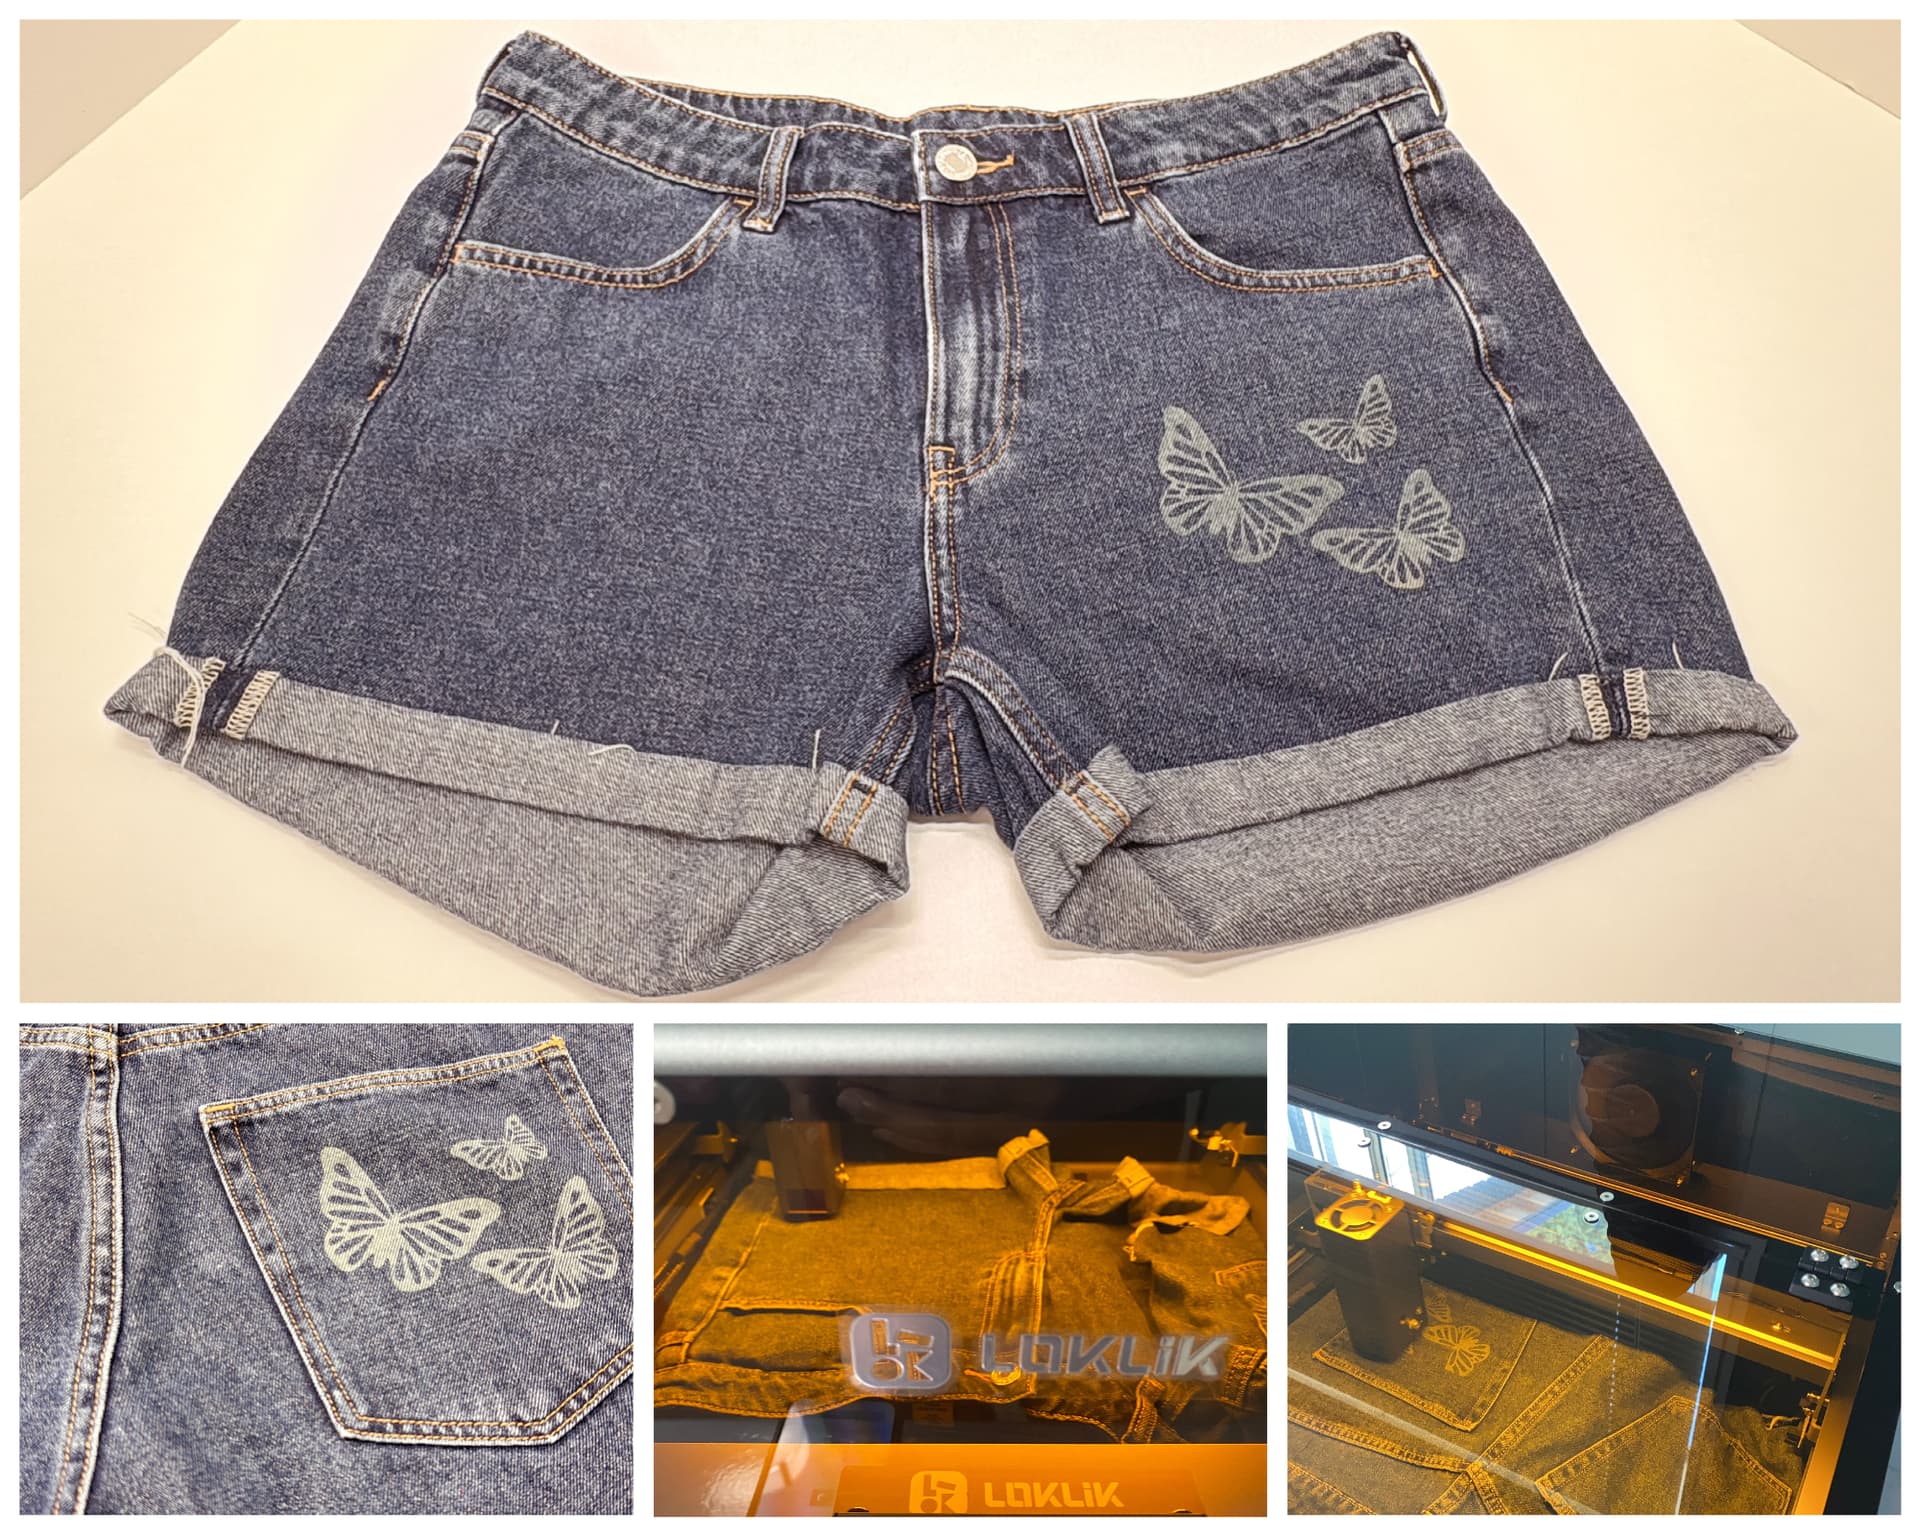
Last, but not the least is engraving on Denim shorts. I am so excited about this 'coz I haven’t seen anyone yet doing it. So, I decided to try and upload a butterfly design from IdeaStudio library. (NOTE: I rotated my design at 180 degrees for the placement of my shorts. Also, correct placement of this Denim is recommended in order the X-axis bar move freely and not touching the laser module by the waistband area when engraving the design.)

Finished product below. I used a Denim default setting of 60% power with a speed of 8000 mm/min and a total engraving time of 10 minutes and 2 seconds for both front and back.
![]() Safety & Operation Feel
Safety & Operation Feel
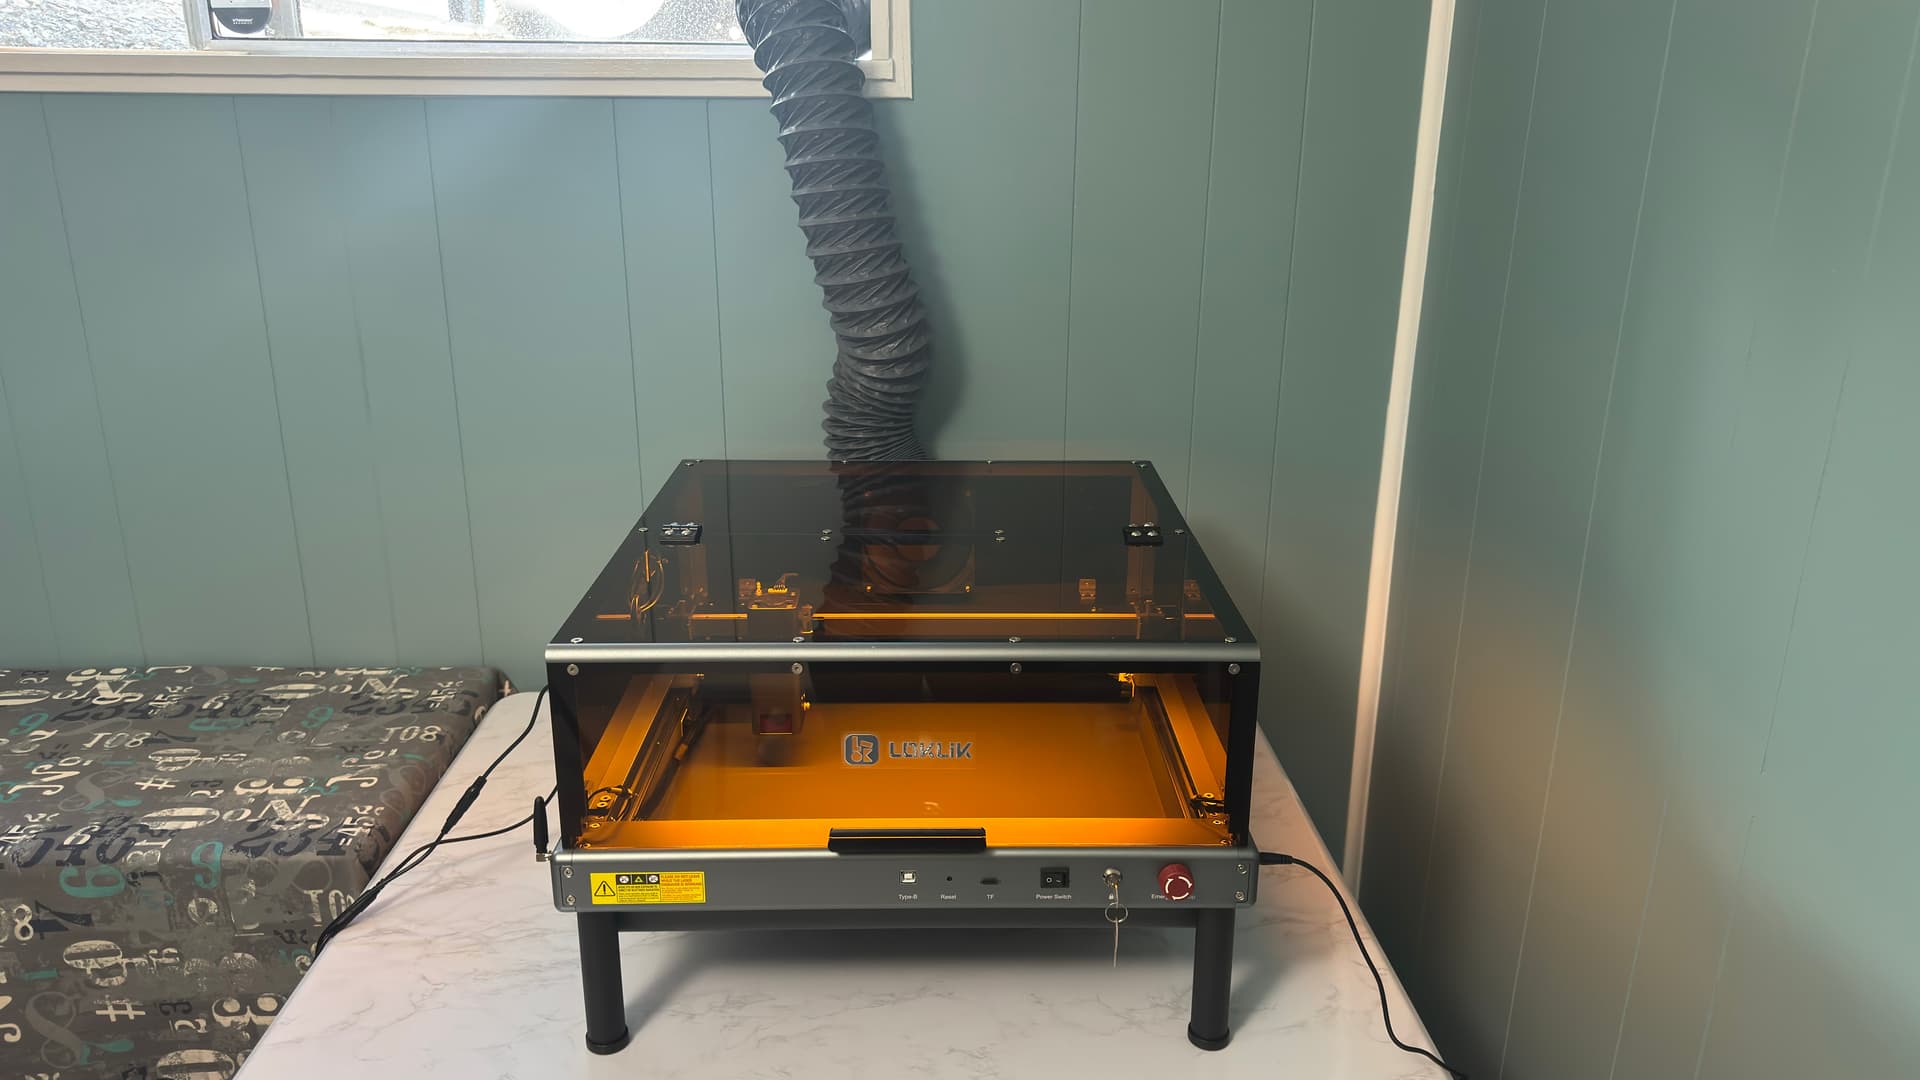
- Safety Features : Fire, tilt, and overheat sensors; emergency stop button; safety lock. The Cover Edition meets Class 1 safety standards. I’ve noticed a little bit of smoke and smell specially when engraving and cutting wood ONLY when I opened the cover once the project is done. It didn’t bother me but still I hooked up the hose and put it outside my window. In addition to that, when you lift the cover up during engraving process the machine will stop, and it will continue its job when you closed the door back.
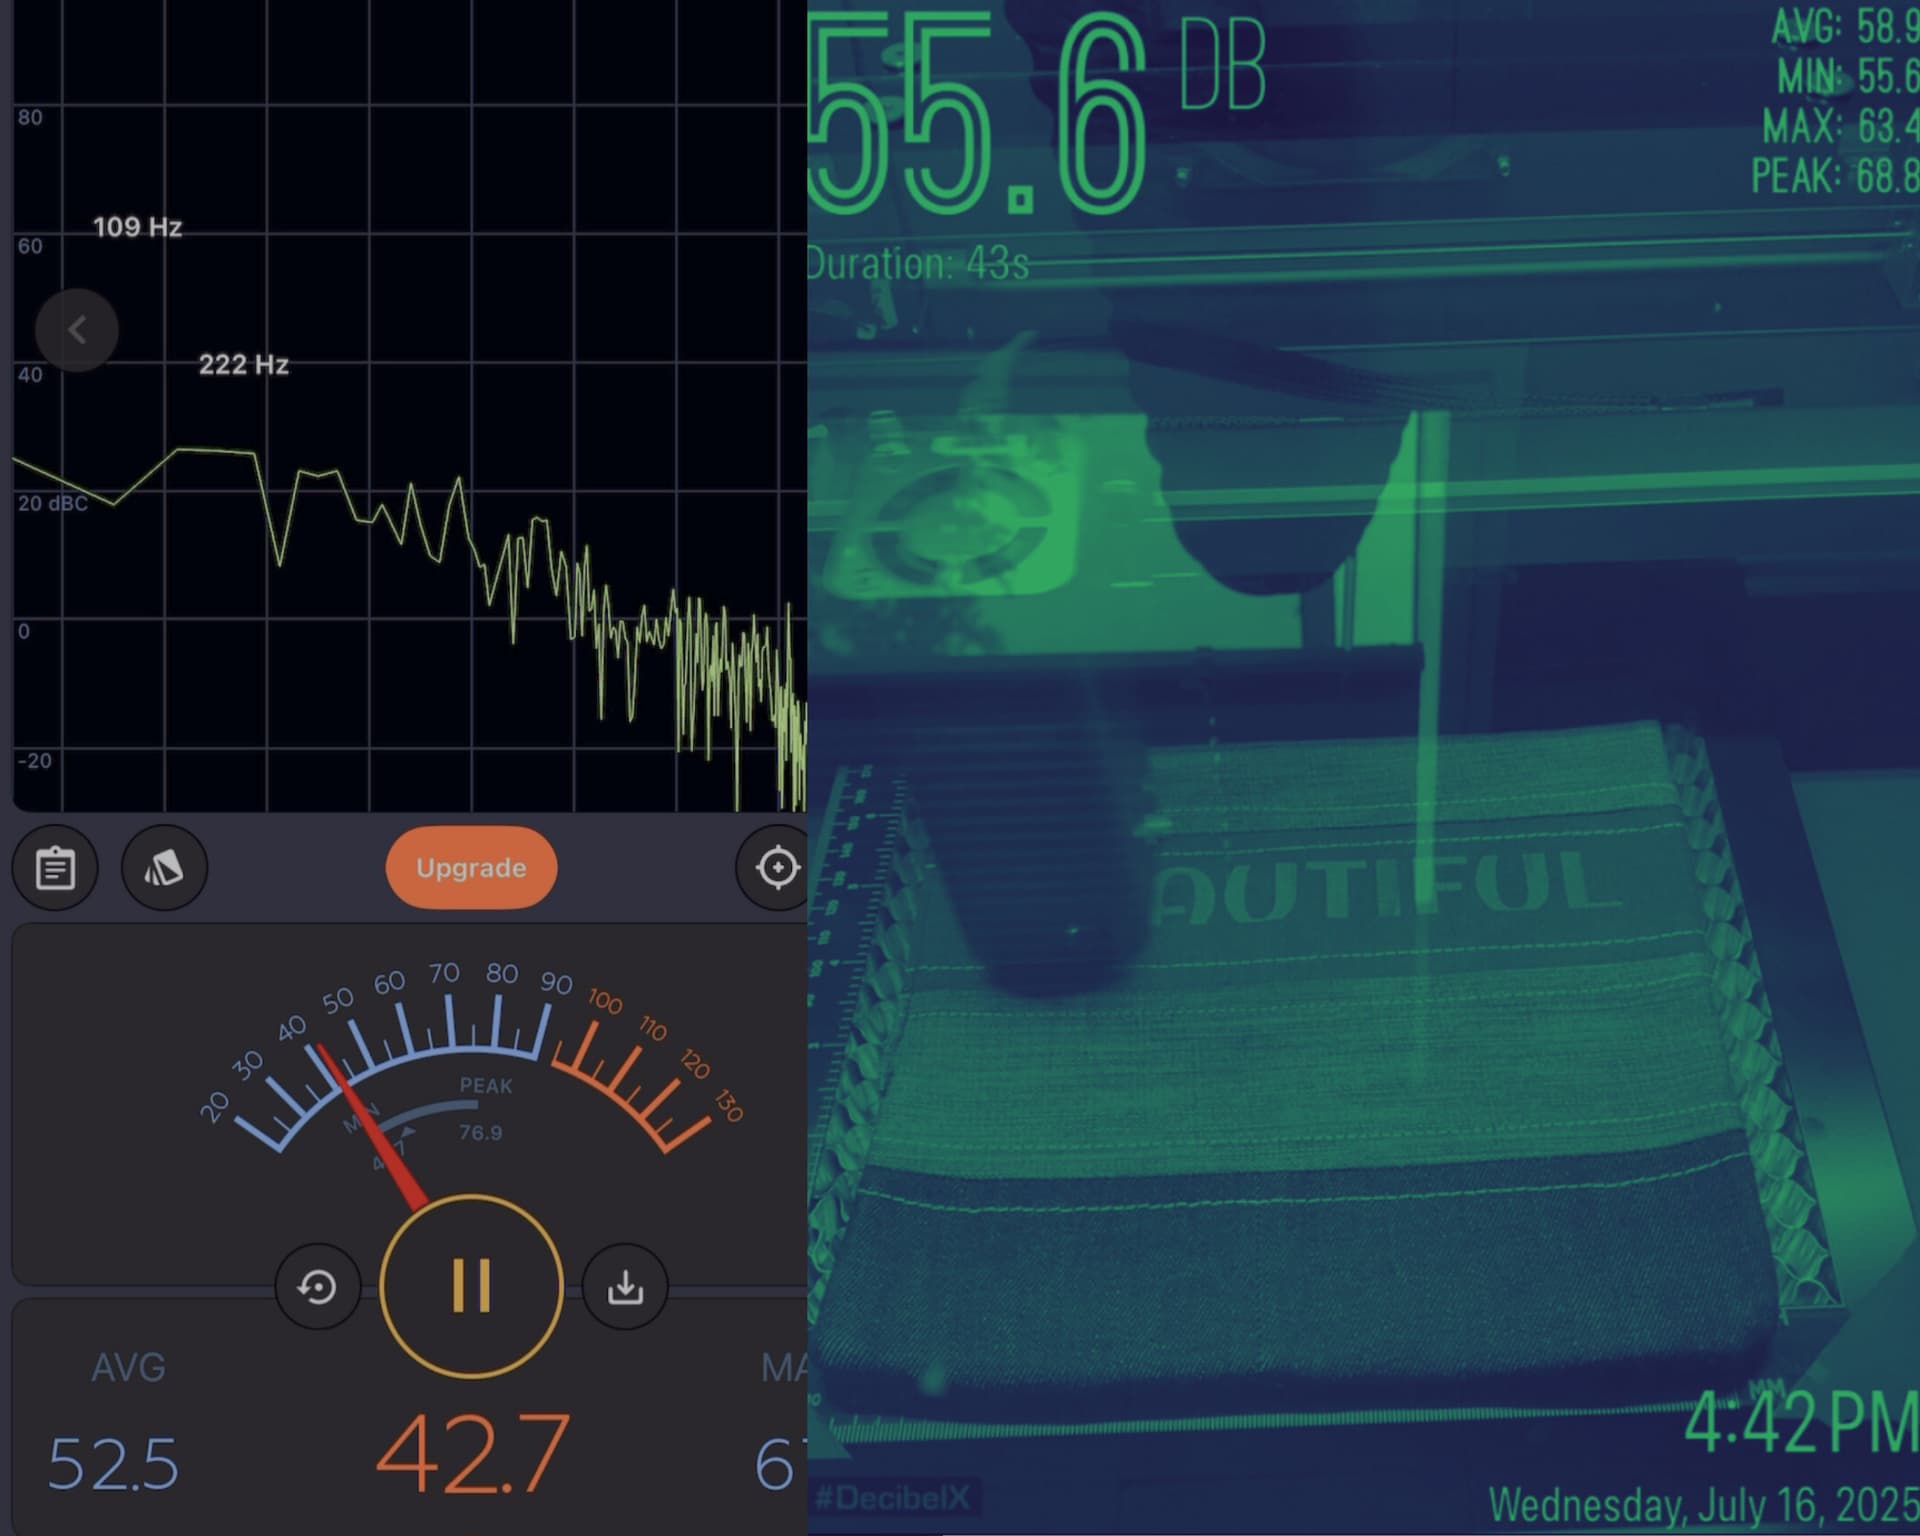
- Noise Level : Surprisingly quiet! I tested it out myself and I got a decibel average reading between 42-44 dB on idle or with just the fan running. On the other hand, I got a reading of 64dB (max) (please see below) during engraving text on denim. I can say my cat meows louder than the iEngrave machine.

![]() Design & Look
Design & Look
-
Aesthetic : Sleek, desk-friendly design with rounded edges and tea-colored acrylic panels for softer light filtering. Fit perfectly in my corner area nearby my window.
-
Build Quality : All-metal frame with sealed circuit board to prevent dust damage. Aluminum base plate included for safety compliance. Also, I like the versatility of this machine with removable bottom tray for bigger projects with depth. This is a great design option to use additional accessory such as rotary attachment for engraving tumblers/bottles/glass/wine glass and the like.
TIPS:
![]() Precision & Setup
Precision & Setup
-
Focus Block Use : Always use the focus block correctly — its bottom should touch the material surface. For thicker materials, lower the laser head an extra 3mm after focusing. (NOTE: I didn’t used the focus block when engraving my clipboard, yet I am very pleased with the outcome in this accidental mistake of mine.
 )
) -
Stable Movement : Slide the X-axis bar and laser module gently to check for smooth motion. Tighten belts, pulleys, and eccentric nuts if needed to avoid wobble.
![]() Maintenance & Cleaning
Maintenance & Cleaning
-
Lens Care : If cuts look faded, clean the protective lens with a lint-free cloth and 99% isopropyl alcohol. A dirty lens reduces power output.
-
Ventilation : Use the included pipe or enclosure to vent fumes safely. The built-in fan activates automatically during jobs.
![]() Workflow Enhancers
Workflow Enhancers
-
Air Assist : Optional but highly recommended for deeper cuts and cleaner edges — especially on wood and acrylic. It improves cut quality but isn’t essential for light jobs (I didn’t find its usage that time when I did my test runs).
-
Honeycomb Base : Elevates materials for best results and prevents tray damage. If you don’t have one, use metal bars or ceramic tiles as a DIY lift.
-
Magnets/clips : Helps the material to set in place when engraving or cutting. It is a must if your machine is equipped with air assist.
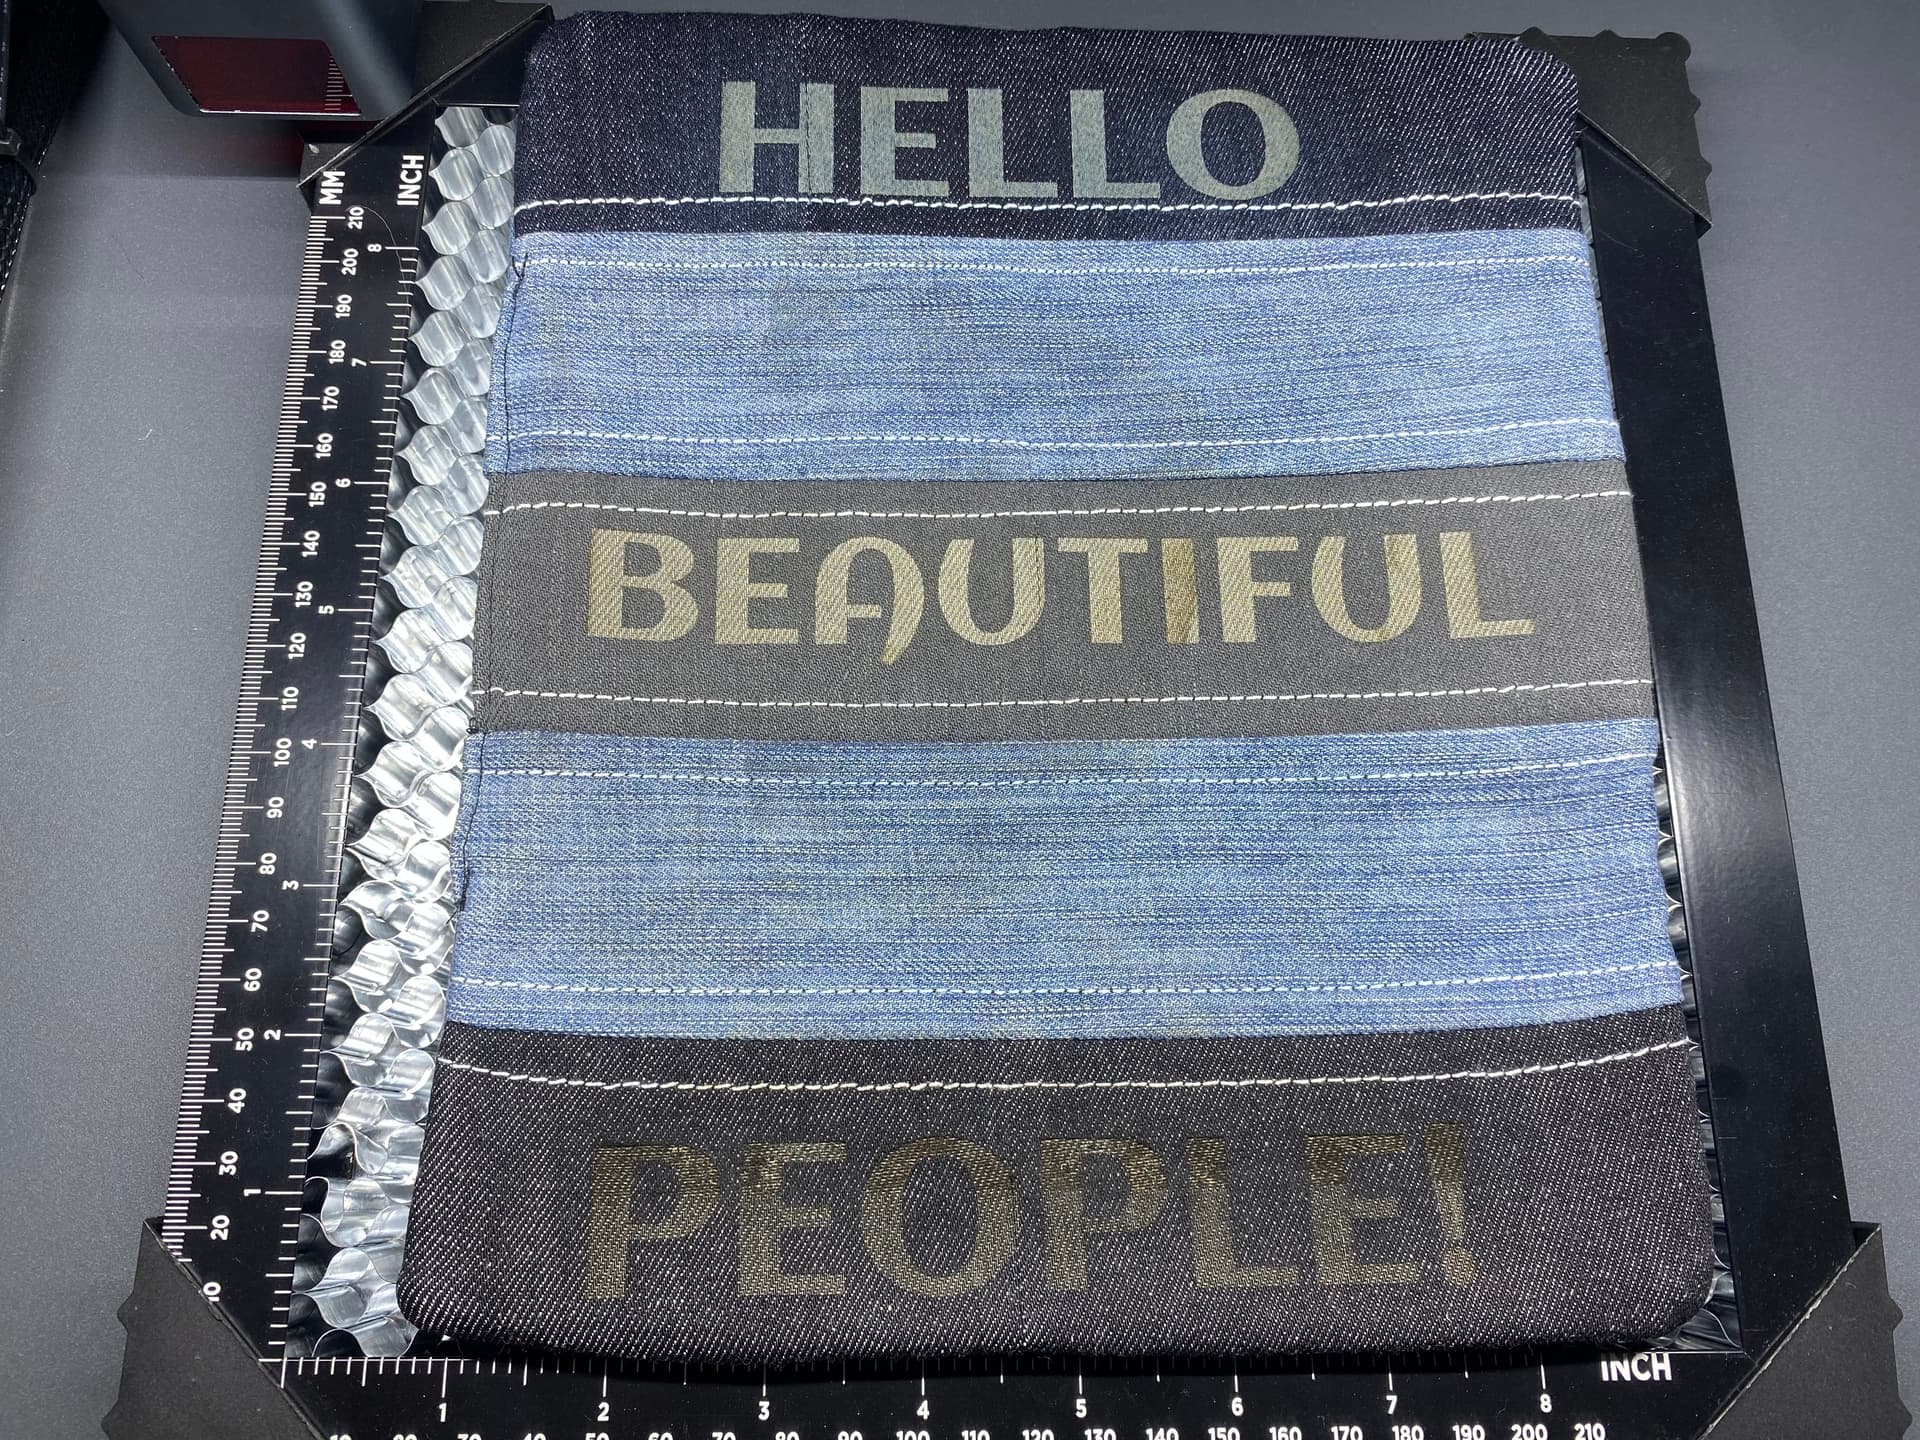
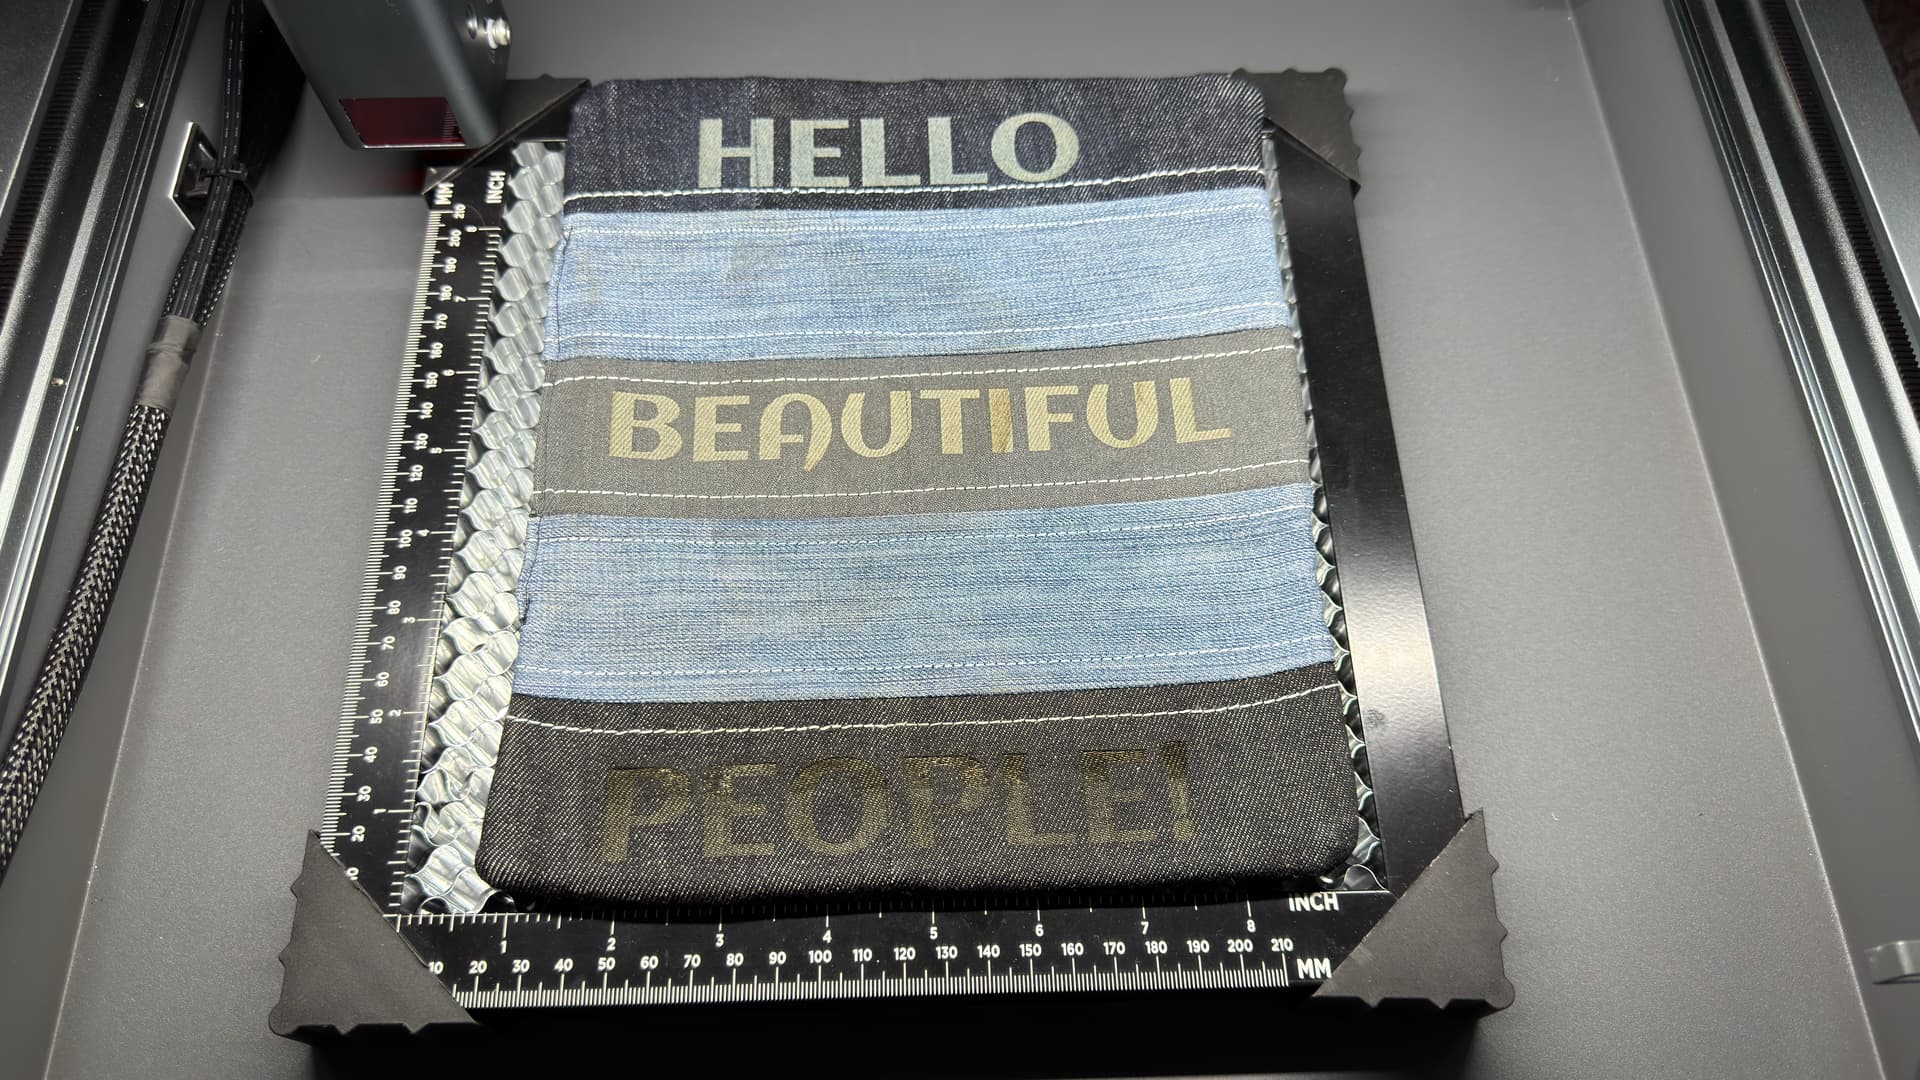
ADDITIONAL TIP: For engraving on Denims, I highly recommended to follow the settings provided by the LOKLiK app otherwise, it will burn. I made a mistake towards the end of my engraving and accidentally clicked pass twice where it should be only 1 pass! The reason why I want to engrave onto this hot pad was to show the intensity of the engraving feature using different shades of Denim. The words “HELLO” & “BEAUTIFUL” were done 1 pass each and the word, “PEOPLE!” was done 2 passes. Below was the result:
![]() Overall Thoughts
Overall Thoughts
The LOKLiK iEngrave Machine is a beginner friendly. Also, this machine is suited for Creative Crafters, Tech Tinkerers, Community Leaders, Efficiency-Driven Makers, and Safety-Conscious DIYers.
- Pros :
- Excellent value for beginners and small businesses
- Quiet operation and strong safety features
- Versatile material compatibility
- Clean cuts and detailed engravings with minimal passes
- Cons :
- No built-in camera for visual alignment
- Requires manual elevation for materials (honeycomb or slab recommended)
I am very satisfied at the outcomes for both engraving and cutting performance. I love the clarity of engraving and the clean & precise cut performed by this machine. Also, I am very excited and looking forward for the IdeaStudio desktop version that will be available soon!
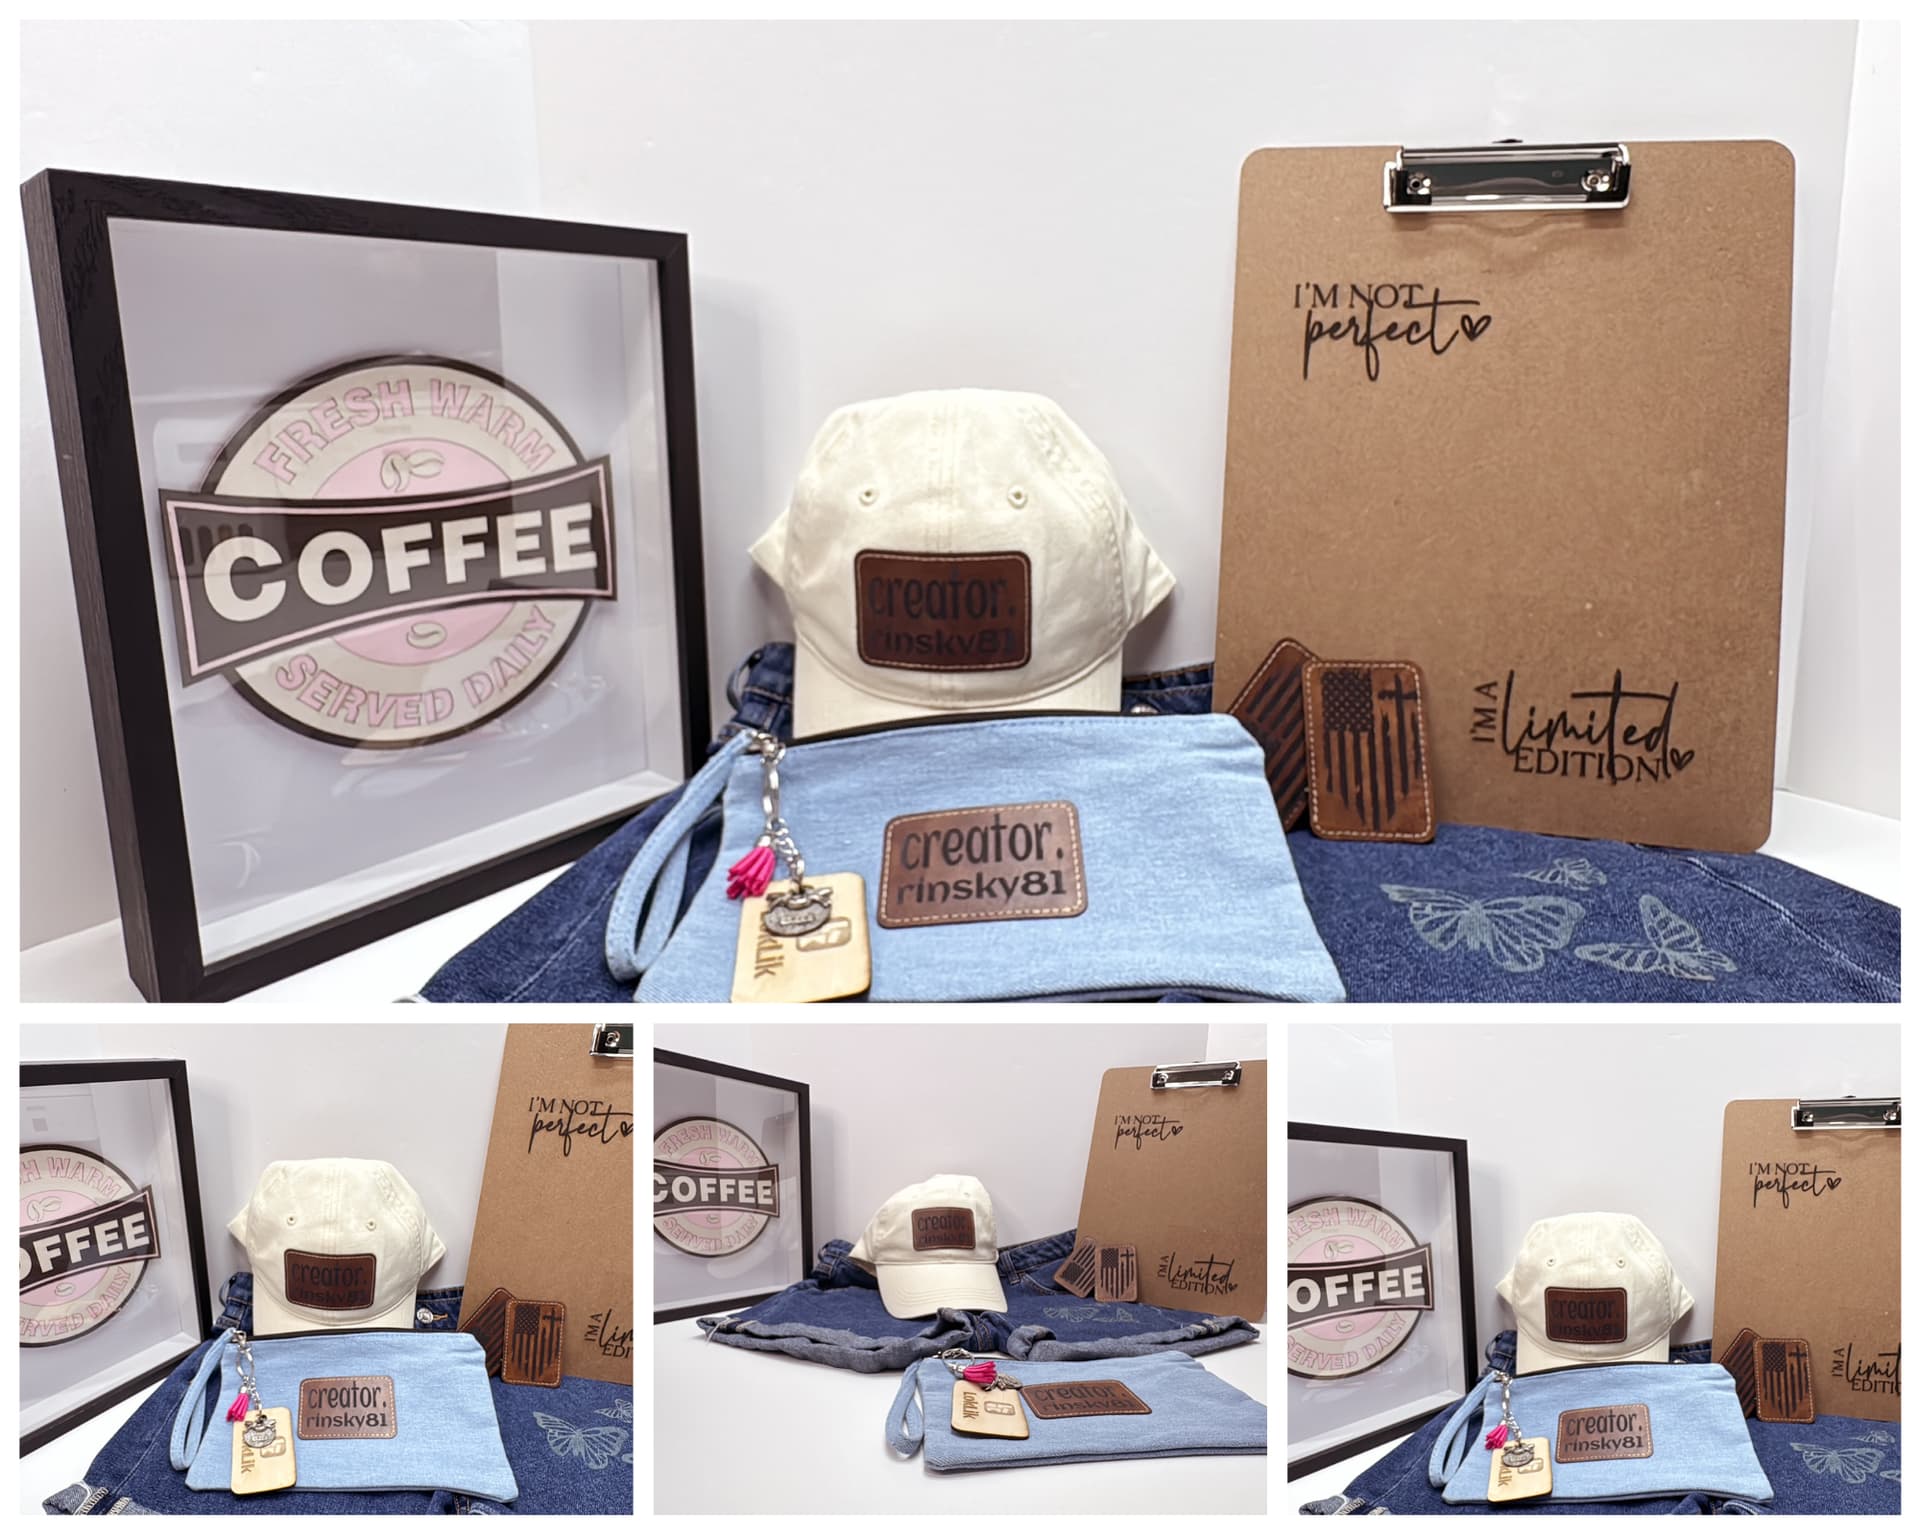
Here are my first ever products from LOKLiK iEngrave Cover Machine! ![]()
![]() Imagine what else you can do with this awesome machine! This is a great addition to your craft room and to a small business. Give it a try and you won’t regret it!
Imagine what else you can do with this awesome machine! This is a great addition to your craft room and to a small business. Give it a try and you won’t regret it! ![]() I am looking forward to do more projects and test different materials with my iEngrave Cover Machine! Please watch out my YouTube Channel Tutorial that covers this review.
I am looking forward to do more projects and test different materials with my iEngrave Cover Machine! Please watch out my YouTube Channel Tutorial that covers this review.
From unboxing to final cutting/engraving, the LOKLiK iEngrave delivers a quiet, powerful, home and beginner-friendly experience with creative freedom in every cut.
-Rinsky
Moderator/Hands-On Program Reviewer for LOKLiK iEngrave Cover Machine
If you missed my Part 1, here’s the link below:
Here’s is my YouTube Video Tutorial link below: